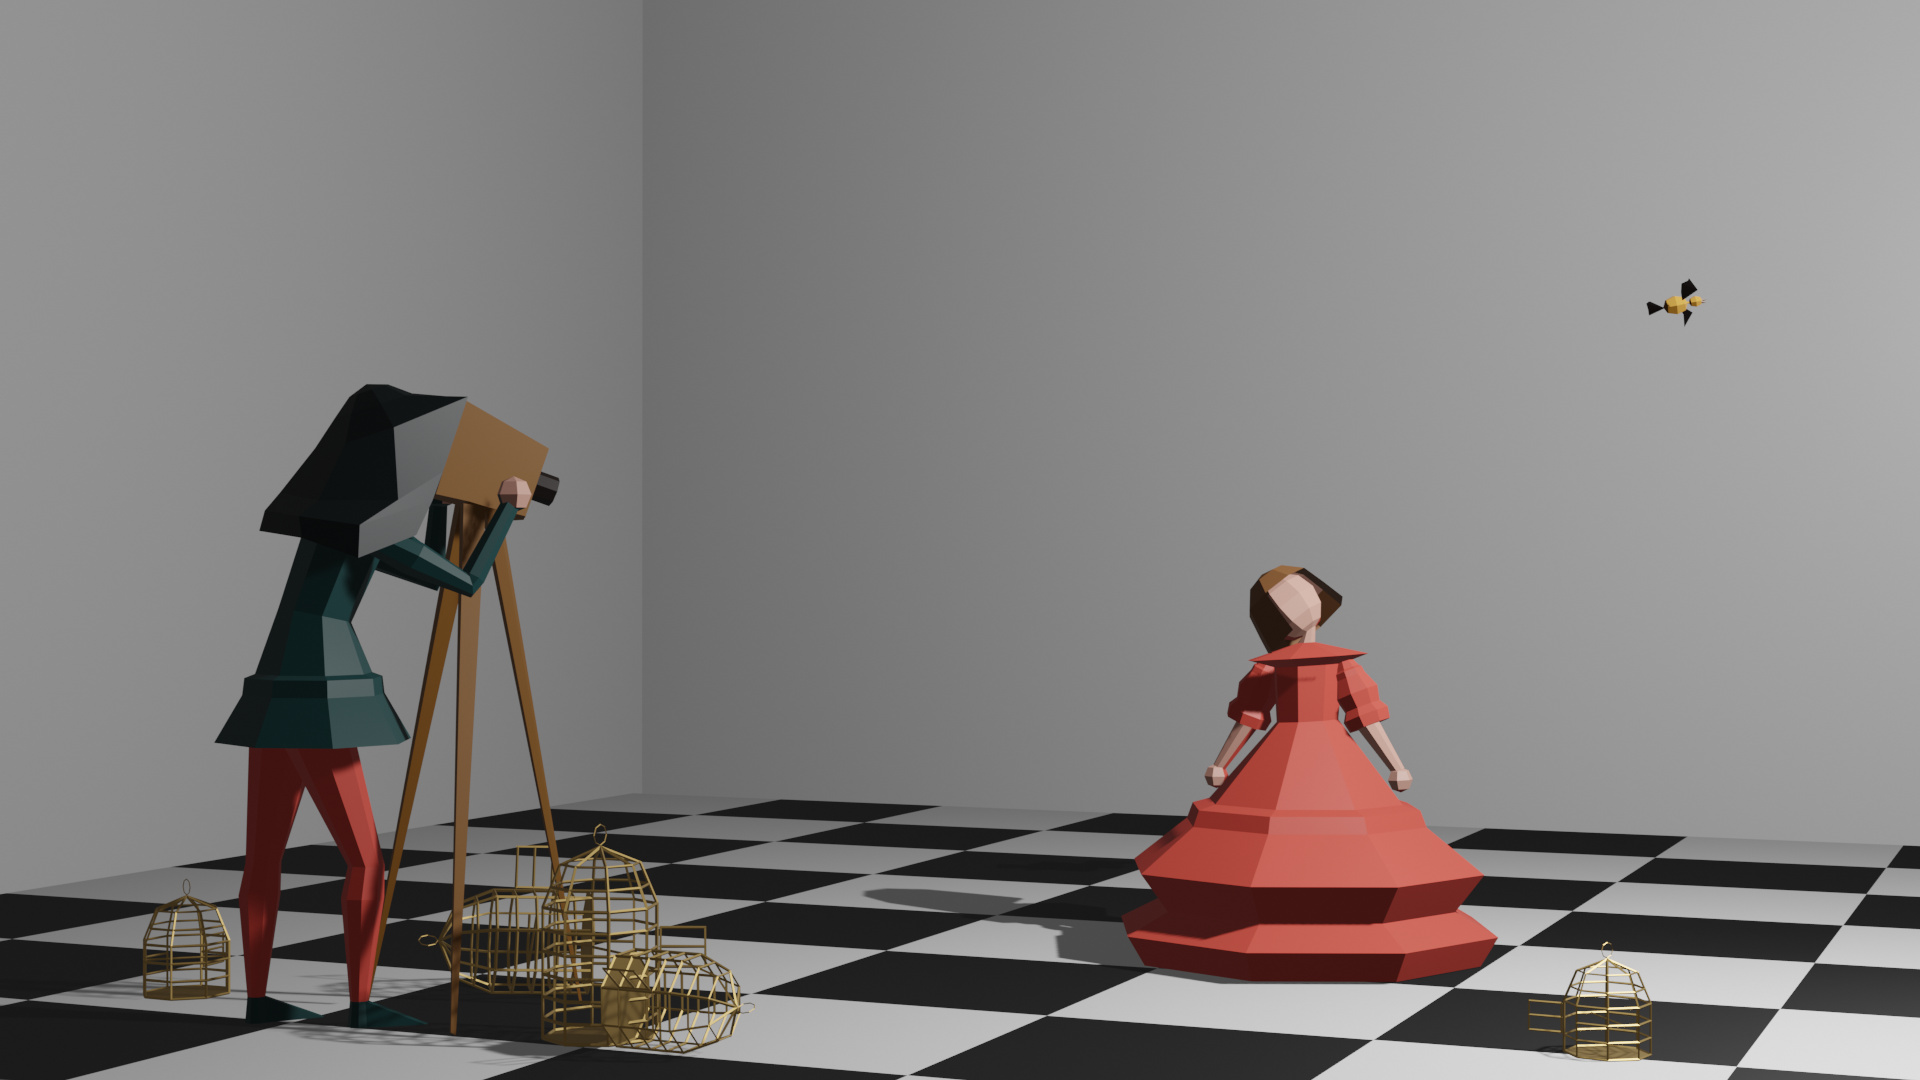
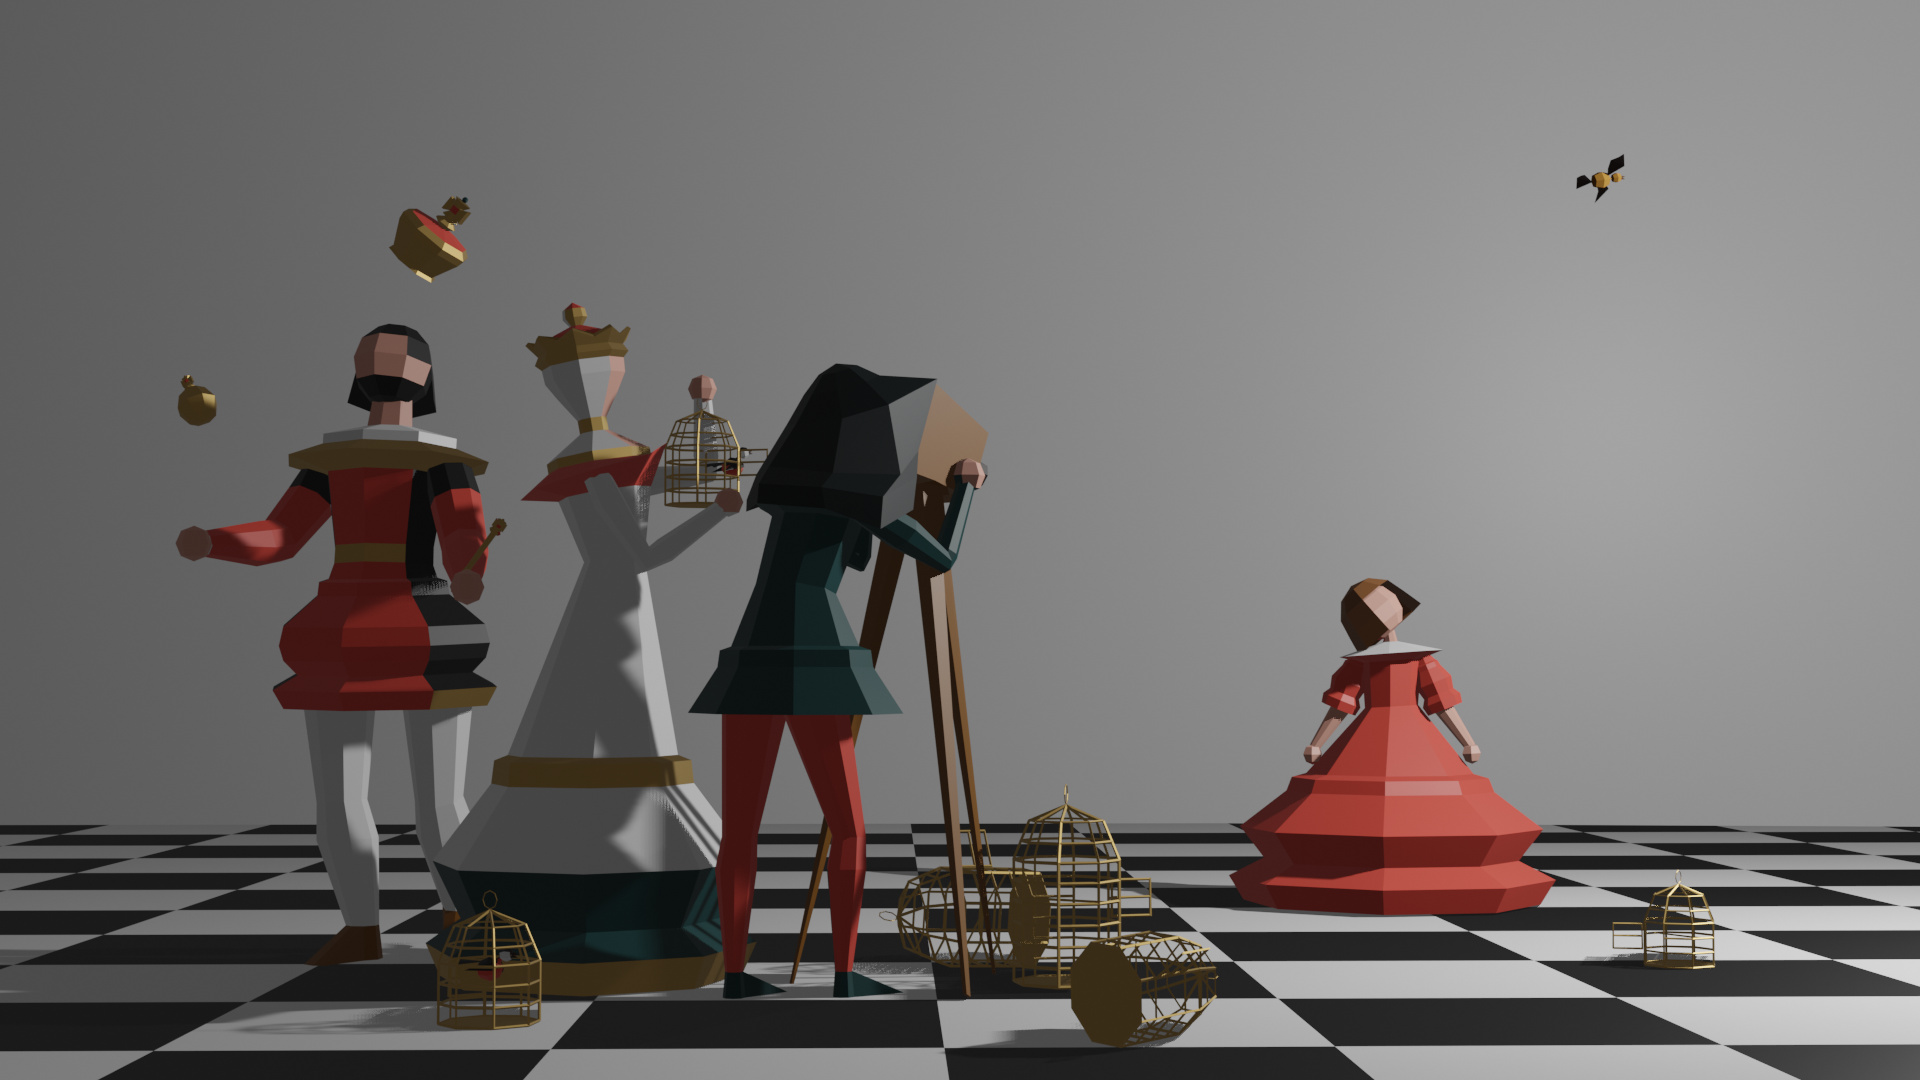
The Blender Collab: Week 22 Themed Gallery (“One more shot”)
Don’t be afraid to join, a lot of us are beginners. This is all to practice, to have fun, to learn and get together.
Rules are simple. 1 subject, 1 entry, 1 week.
You create whatever object or scene or whatever you can think of that has something to do with the subject . It can be as simple or complicated as you want, all entries are welcome! Post your picture here in this thread.
This week’s topic is the “One more shot”!
Lemme explain theme a bit, we have to model things which we once failed to do so, or quit in the middle or messed up the results and give it a shot again with the best of our ability . You can also some premade work with some upgrades , but you have to list the upgrades .
The deadline is 2020-05-31T18:30:00Z → 2020-06-07T18:30:00Z
Focus on the over-all scene composition before detailing
Use a mix of image and procedural textures
Use the Sapling add-on, or something similar to make the trees
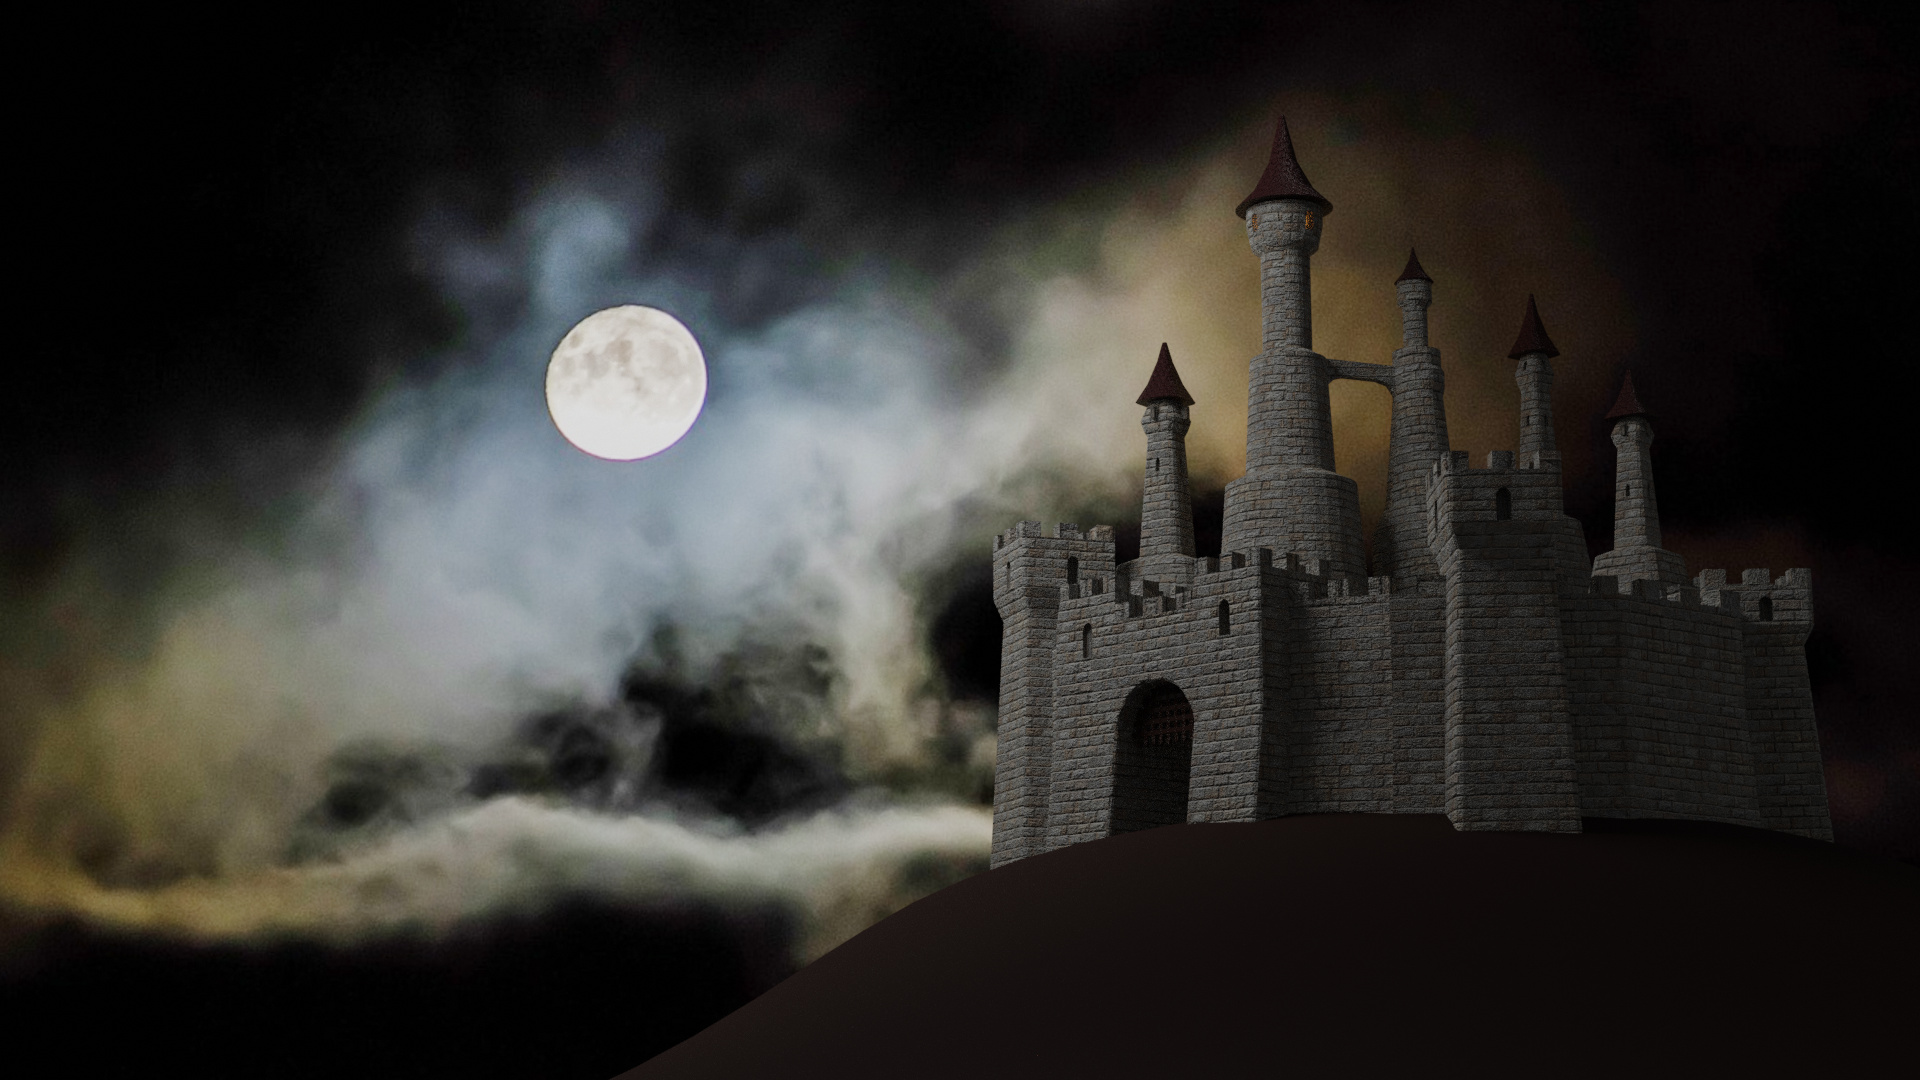
Try to make the moon be the primary light source (or fake it so it looks like that)
Artistically my goal is to make it seem spooky, but also make you feel invited/compelled to enter. Not sure if I can pull that off but I’m going to try. I’m open to suggestions and feedback as always.
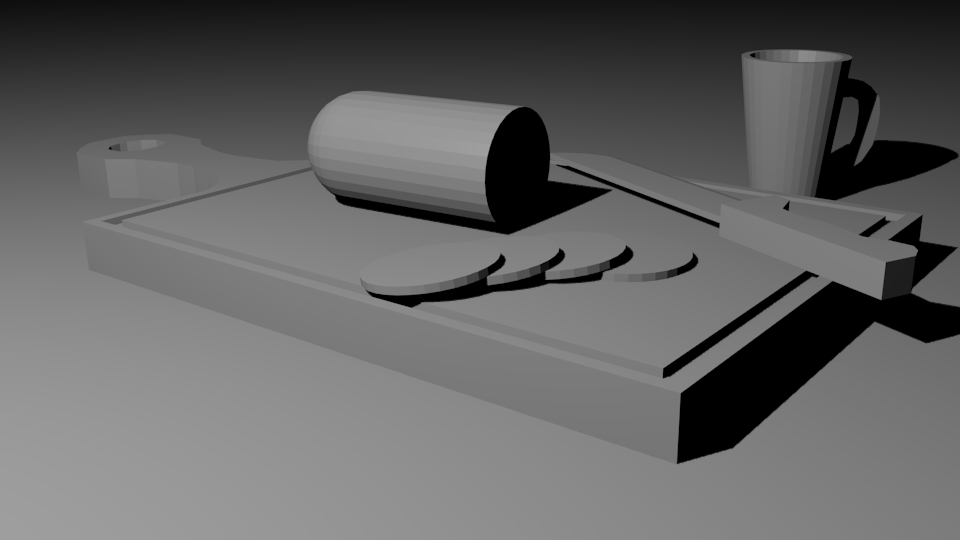
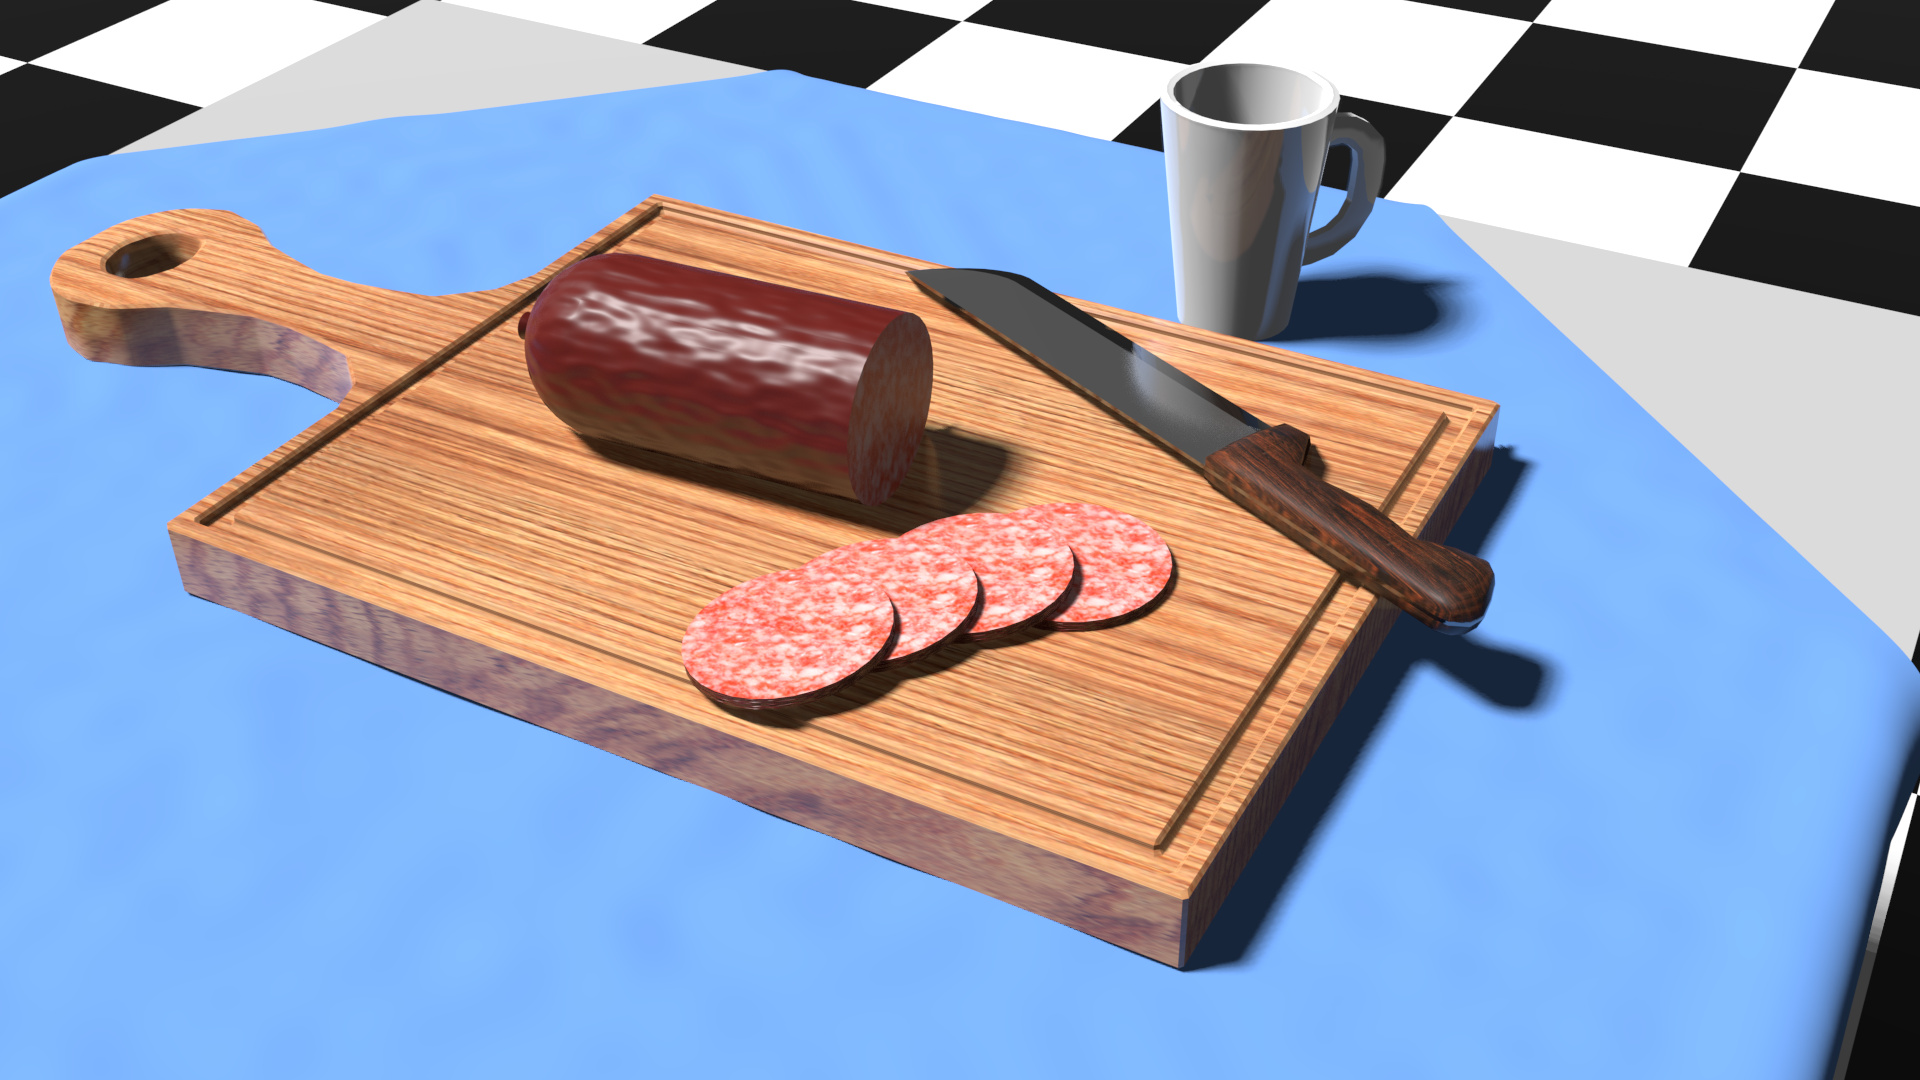
To redo it, most of the work done was painting, lighting, texturing and a bit of remodeling.
Knife
-Applied a wood texture to the handle.
-Remodeled the handle to add some details and to make it look more round and realistic.
-Set the blade and the side of the blade to different roughness to make it reflect light differently.
Salame
-Applied a meaty texture to the inner part of the salame.
-Had to come up with something for the outside part, as a simple texture would not work, so here is the solution I came up with to make it look kind of wrinkled!
Cutting Table
-Applied a wood texture.
-Remodeled the shapes and beveled the edges.
Cup
-Did some remodeling
-Ajusted the roughness to make it glossy
Table/Table Cloth
-As a finnishing touch I made a table and a table cloth to give it more of a breakfast look.
-Had to do some research in orded to make the cloth work as I wanted but I think the results where pretty good!
It was a lot of fun “remastering” this project and I’m pretty happy with how it turned out. I was able to learn new things and fixate some of the things I had already learned in the course. Hope you guys like it!
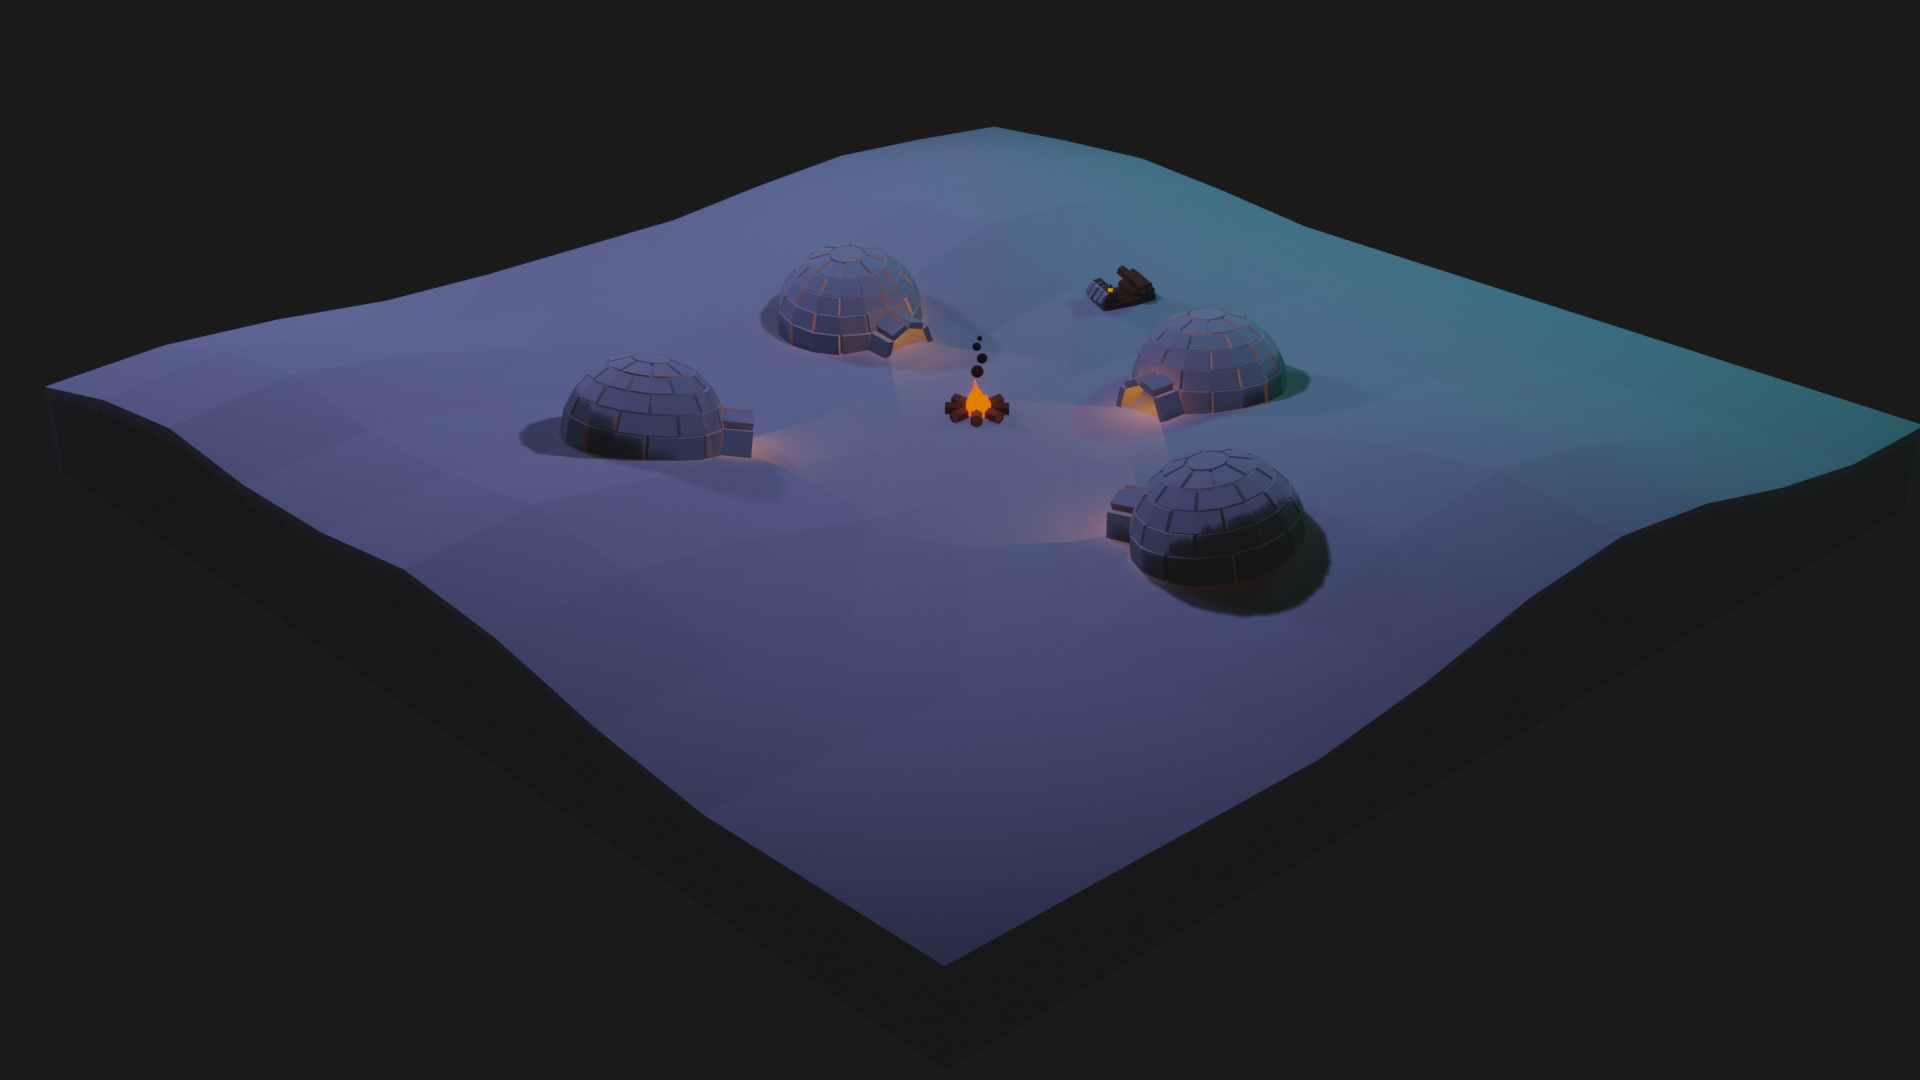
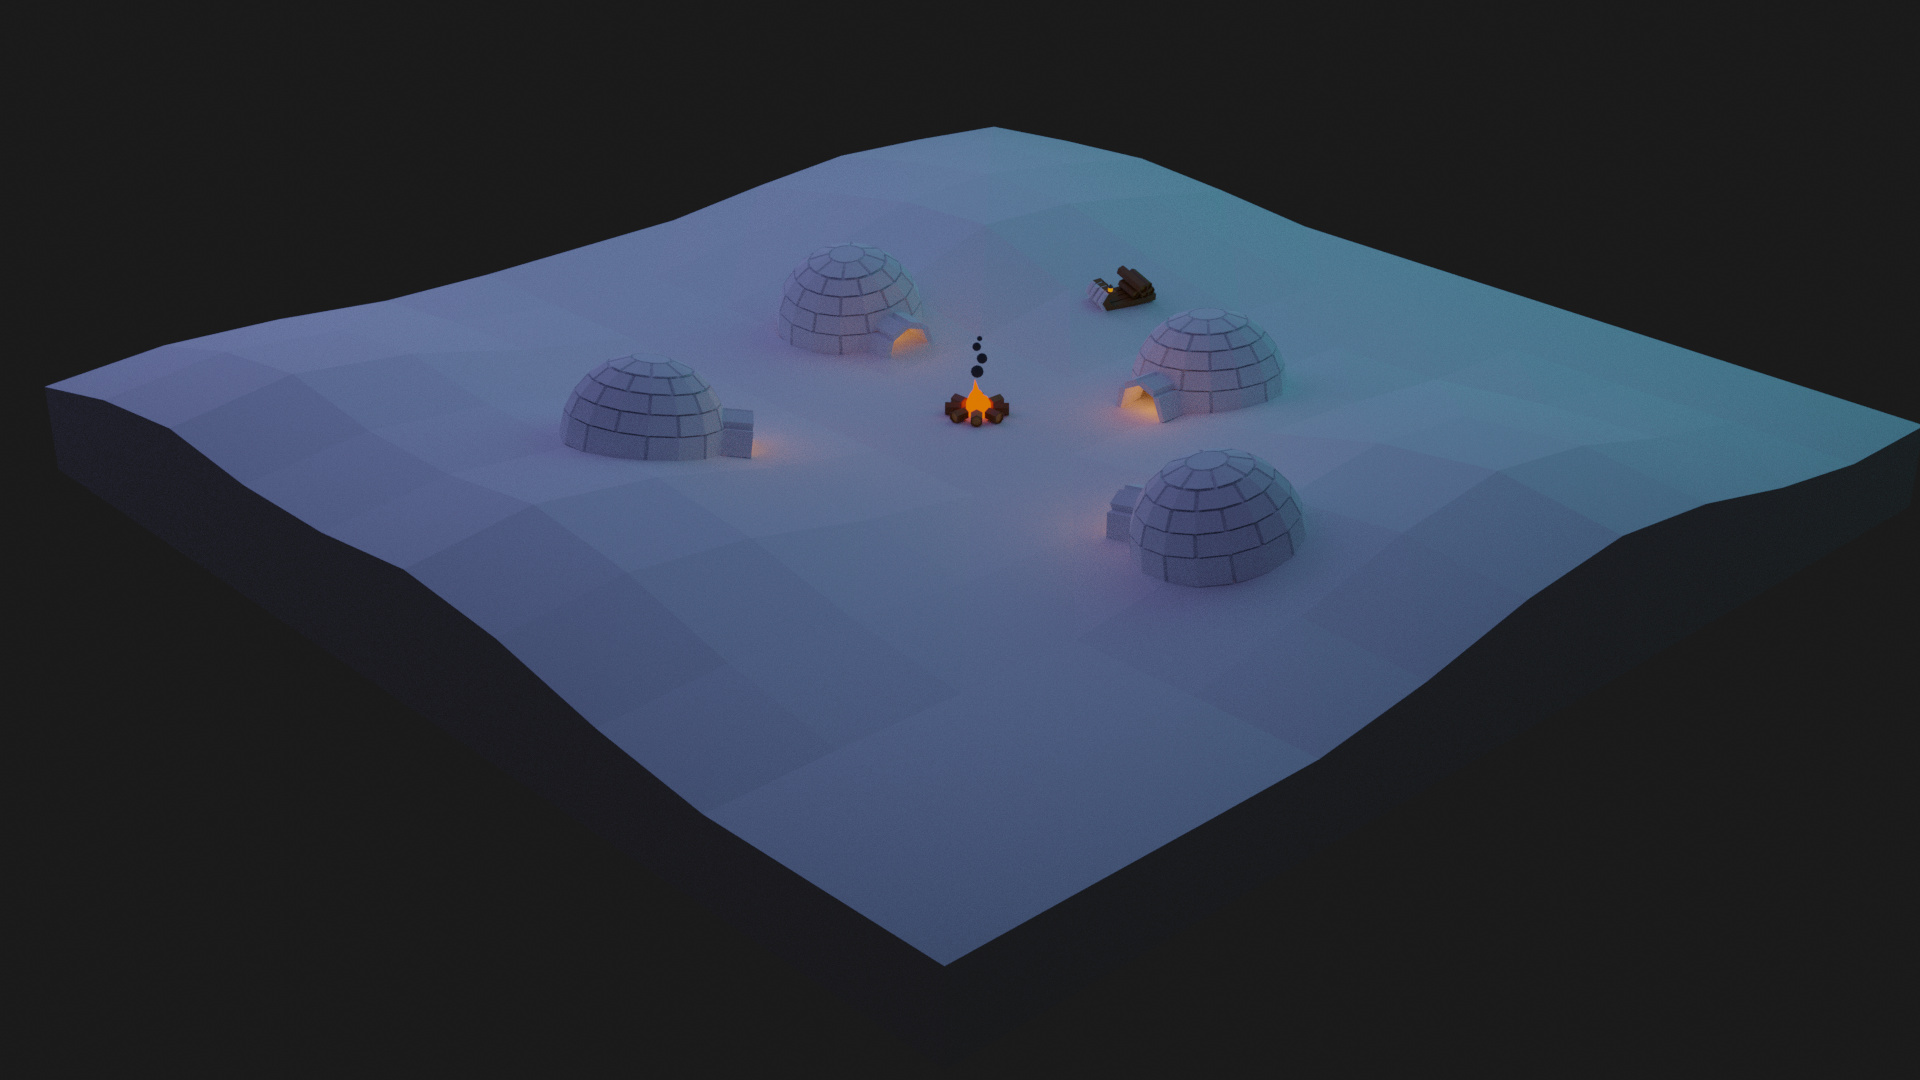
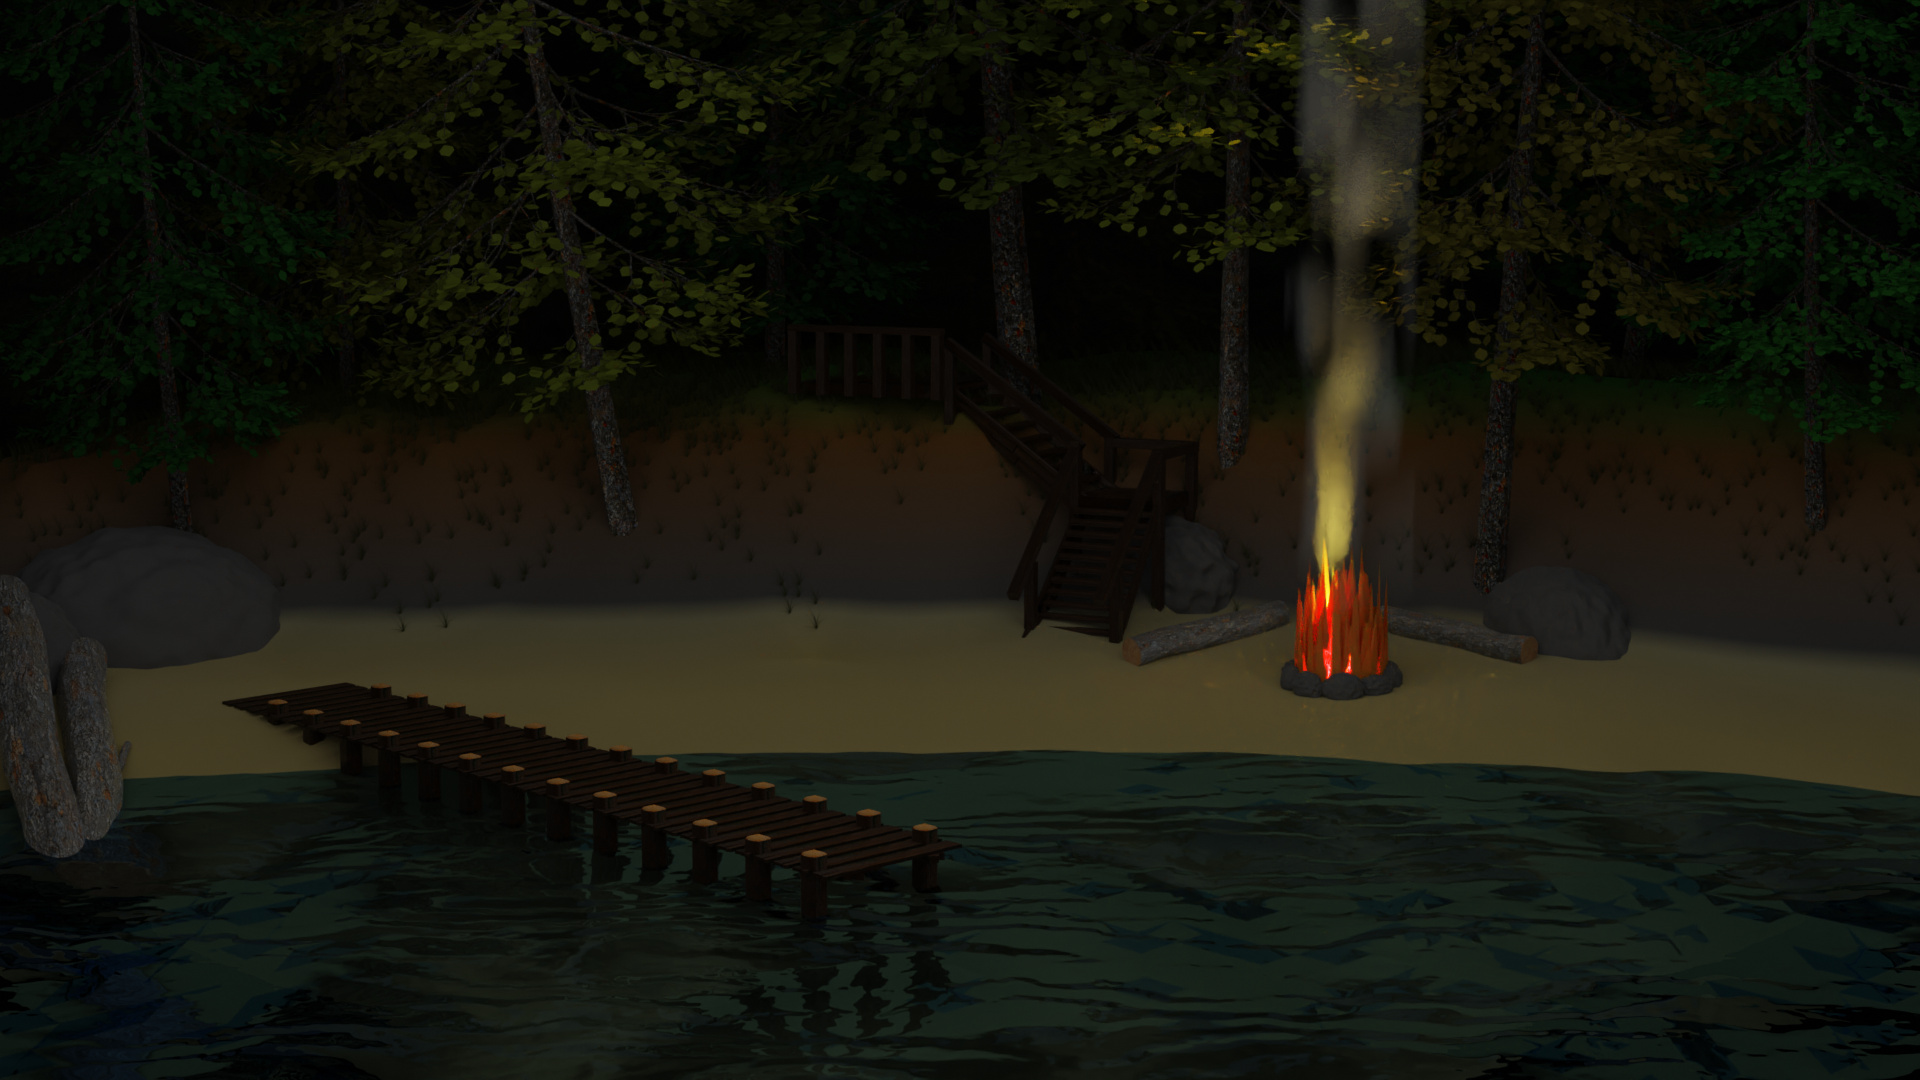
Not sure if this is still open, but I wanted to submit something anyways because this was an interesting theme. I went back and worked on an old scene from the Blender Environments Course. I’ve been really busy lately so I didn’t get a chance to do too much. Mostly fixed the fire, brought the camera out and added some better lighting.
The fire was the main thing for me as this was my first attempt at making fire in blender lol.
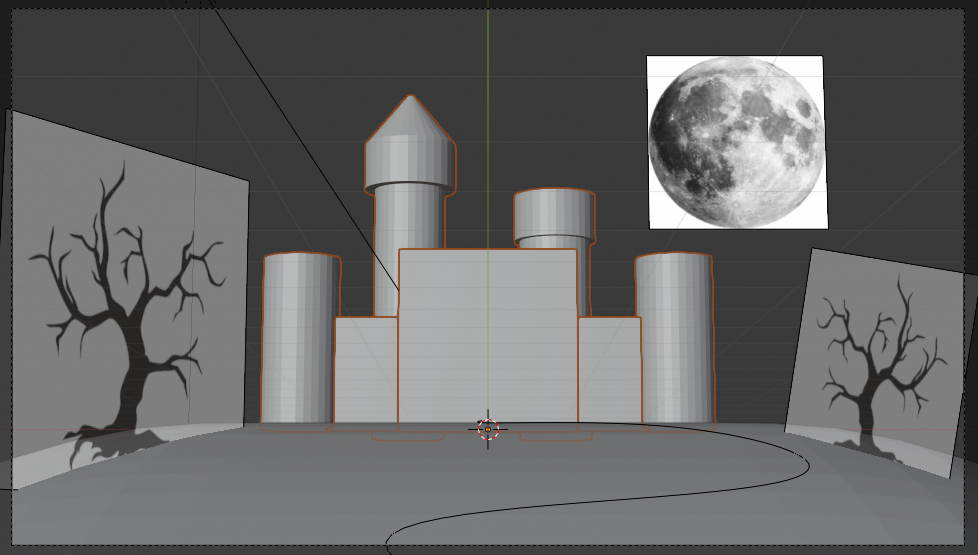
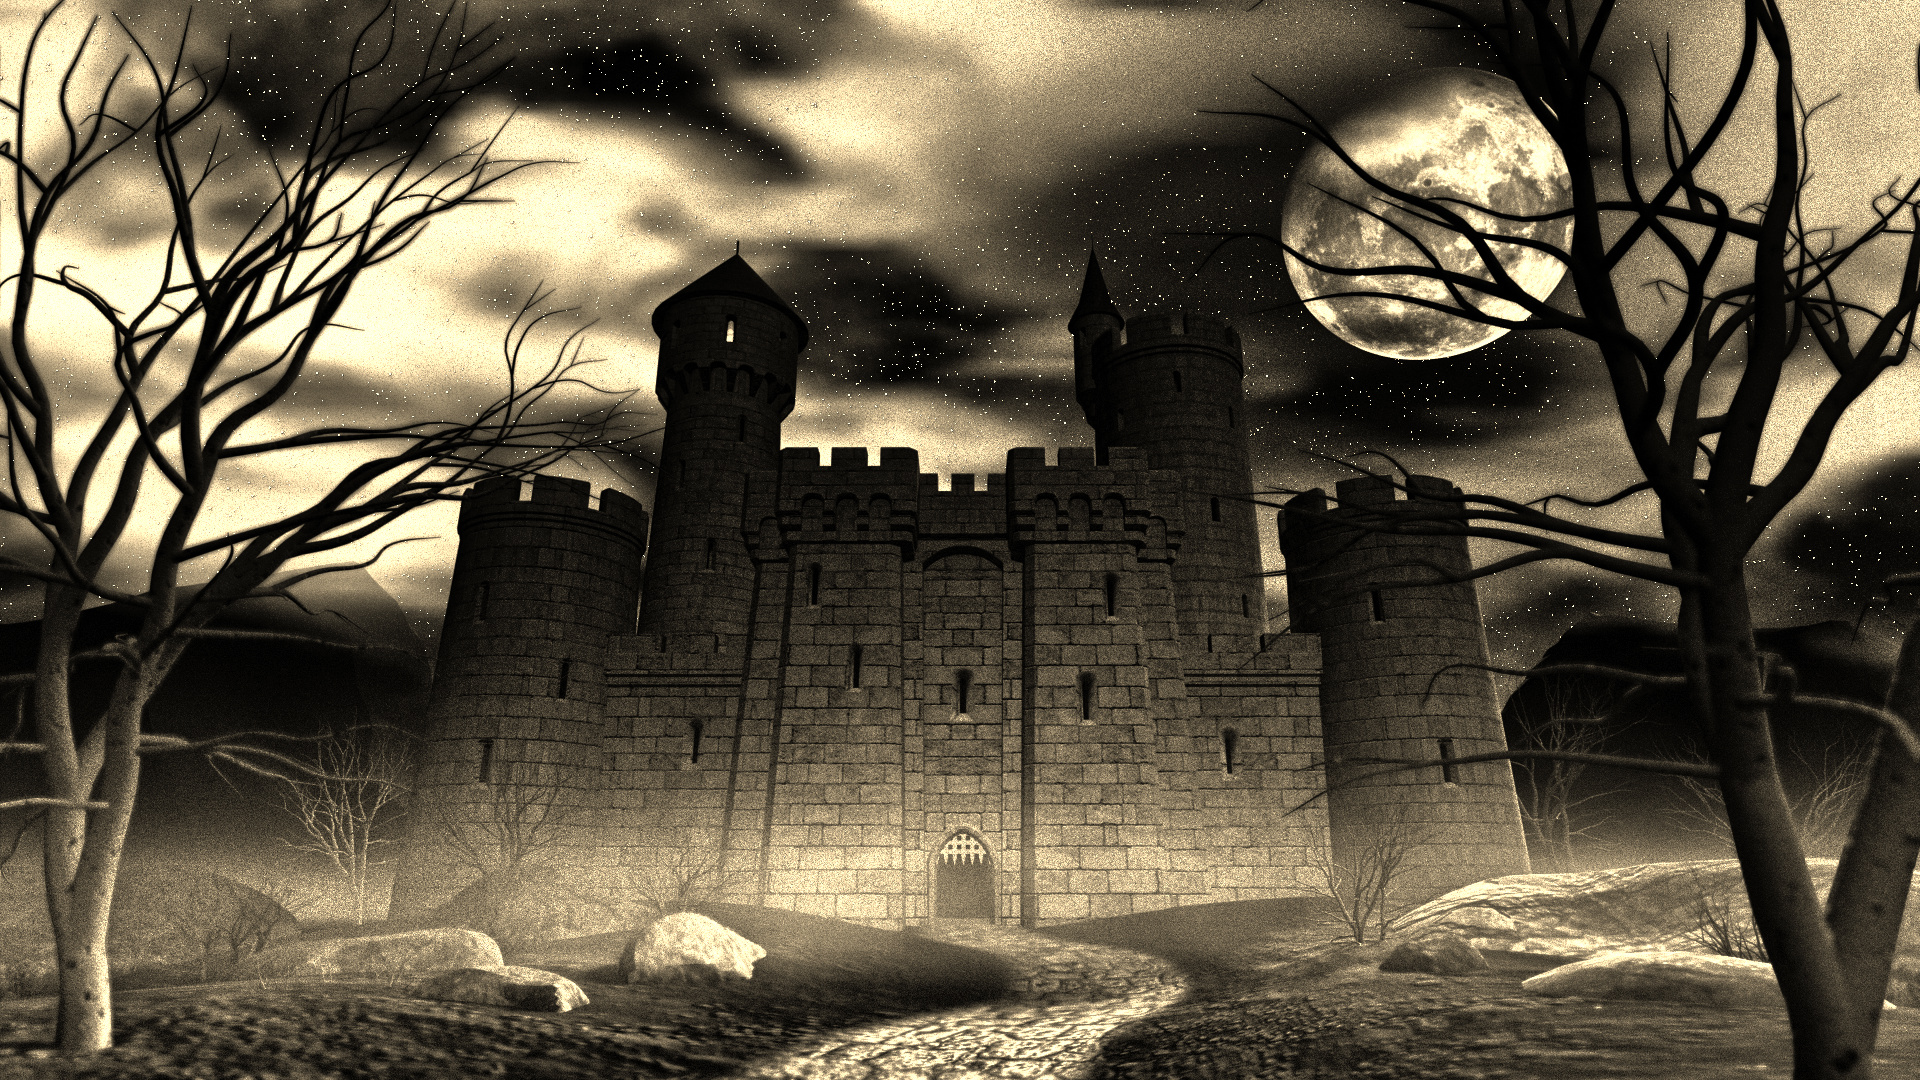
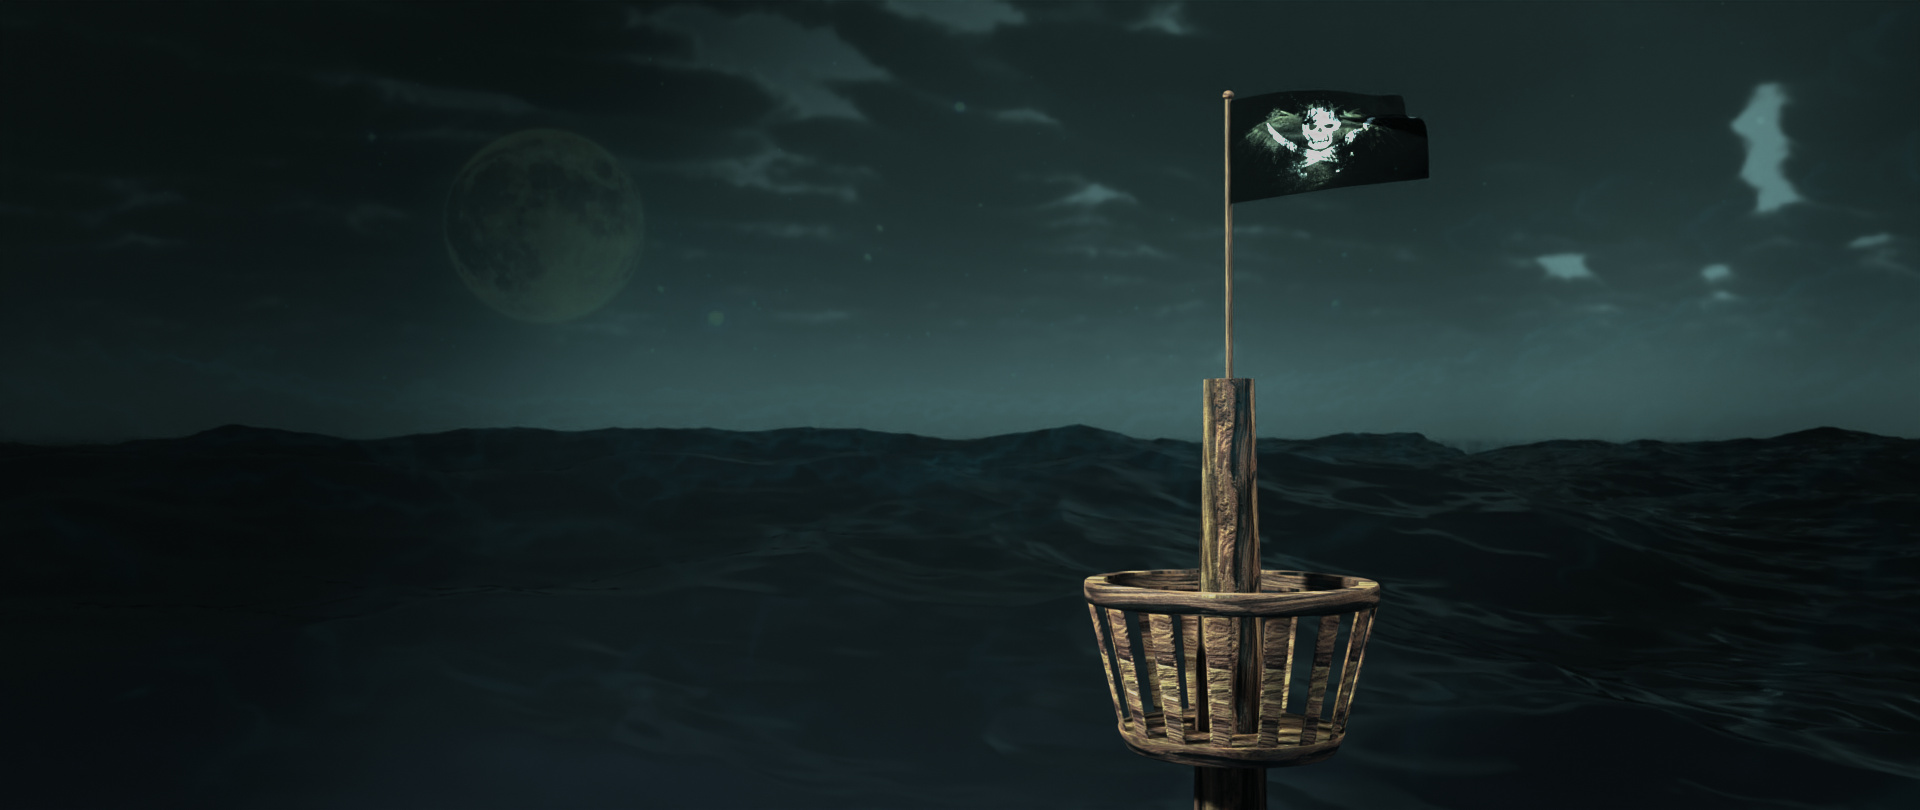
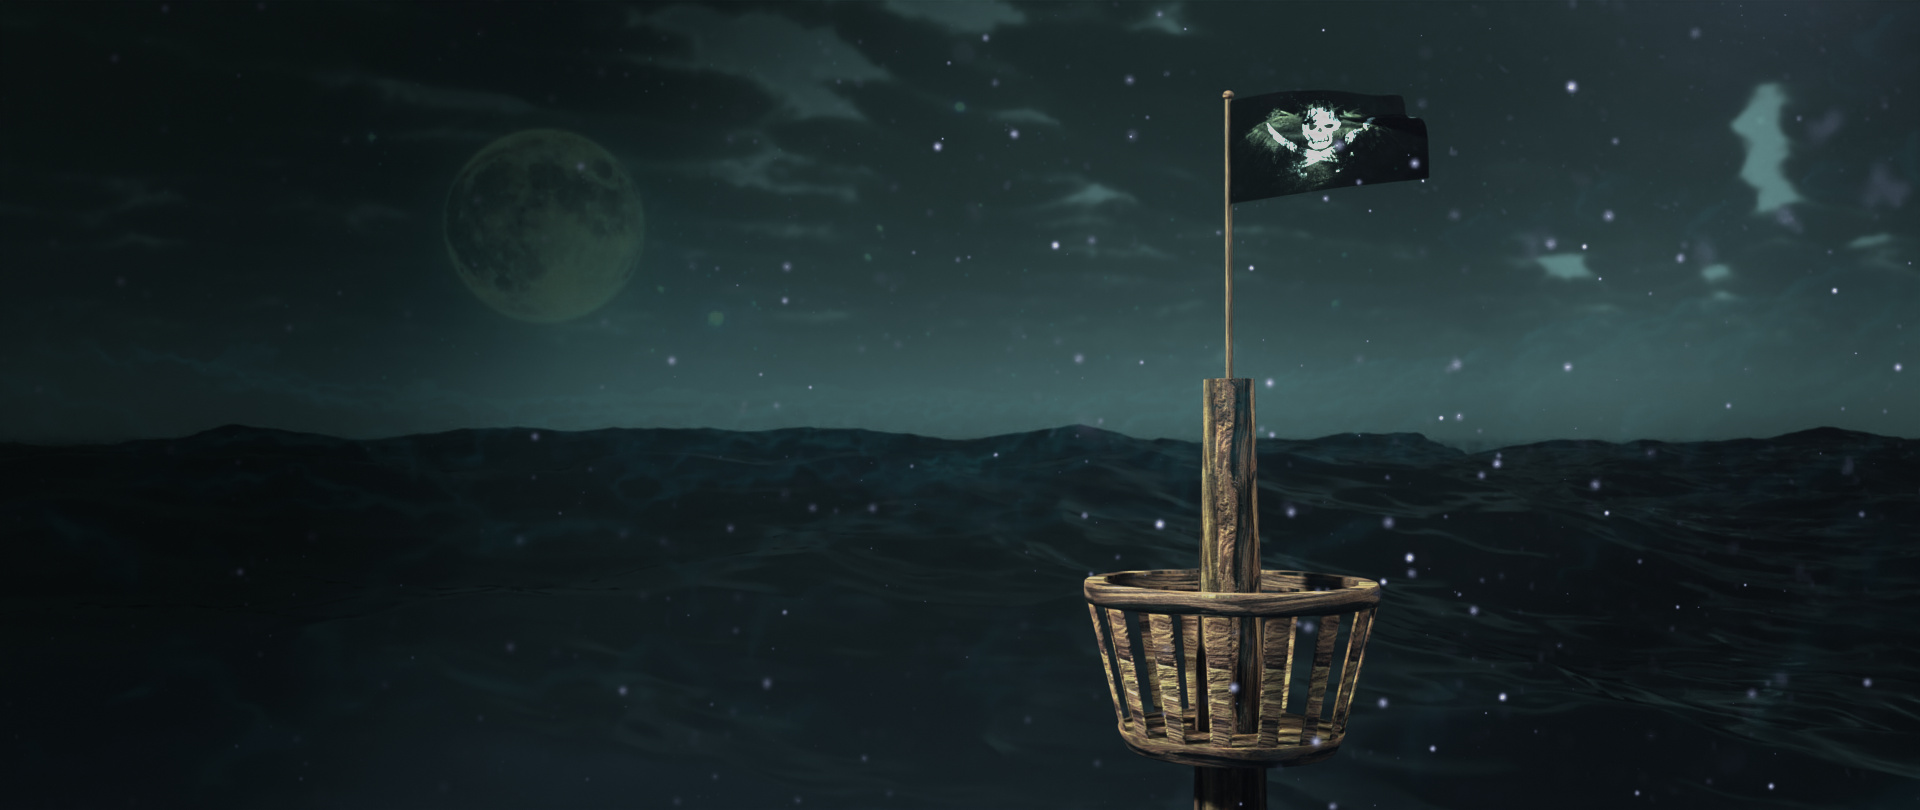
Got really into this one and spent a lot of time on it. (Time tracker addon says 37 hours! Not sure if some of that is AFK time though.) I had a lot of fun though. Only reused asset was the stars, which I made for Space Buddha. The rest is all new.
Hope you guys like it. Feedback welcome. Cheers!
Additional Info
Dirt, path, castle bricks, and rock textures from Textures.com
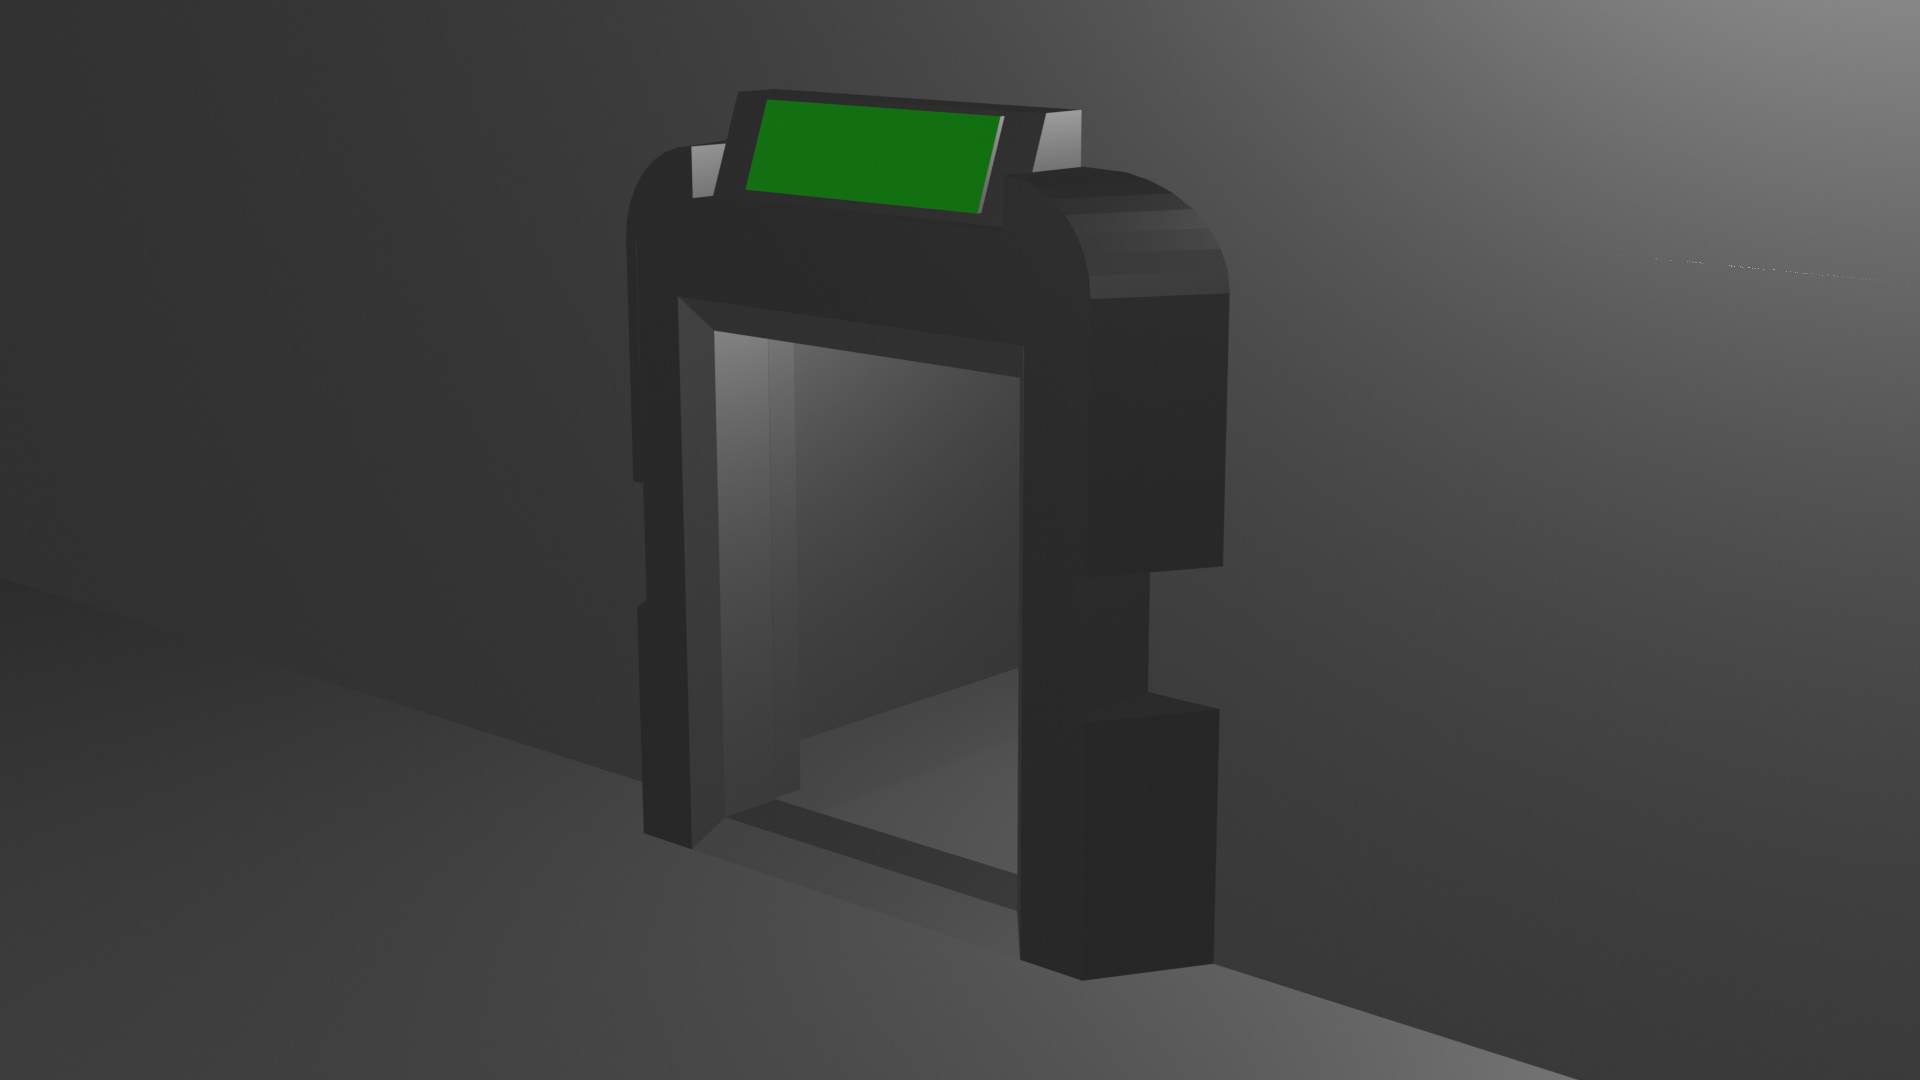
My contribution is a model that I started a month ago, when first introduced to Edit Mode in Section 2 of the Complete Blender Course. I wanted to build this “Sci Fi Vent” that I had found online: [link]
The model was constructed from 7 different objects (one for each side, one for the ramp, etc.). It was a fun little exercise to practice the techniques from the course, but I felt very restricted by my knowledge. Ultimately it felt like I was getting nowhere and so I gave up.
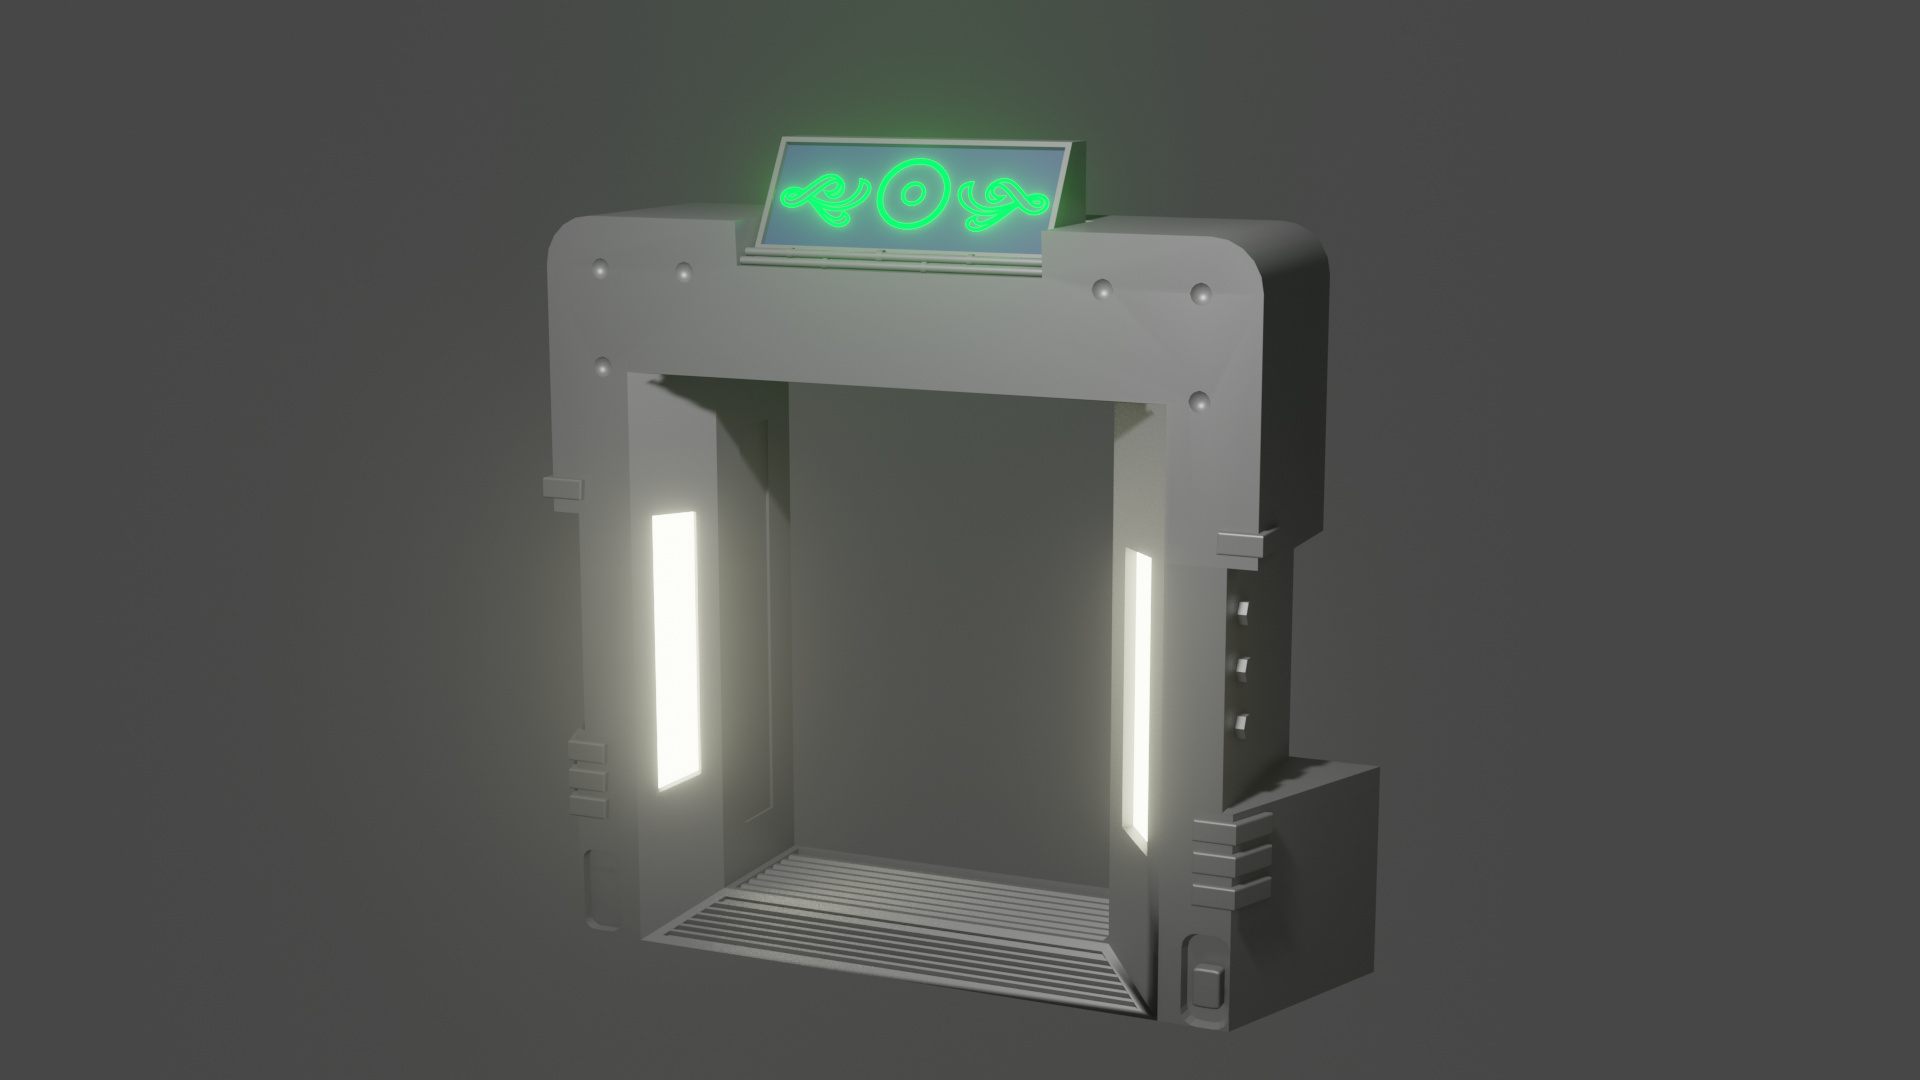
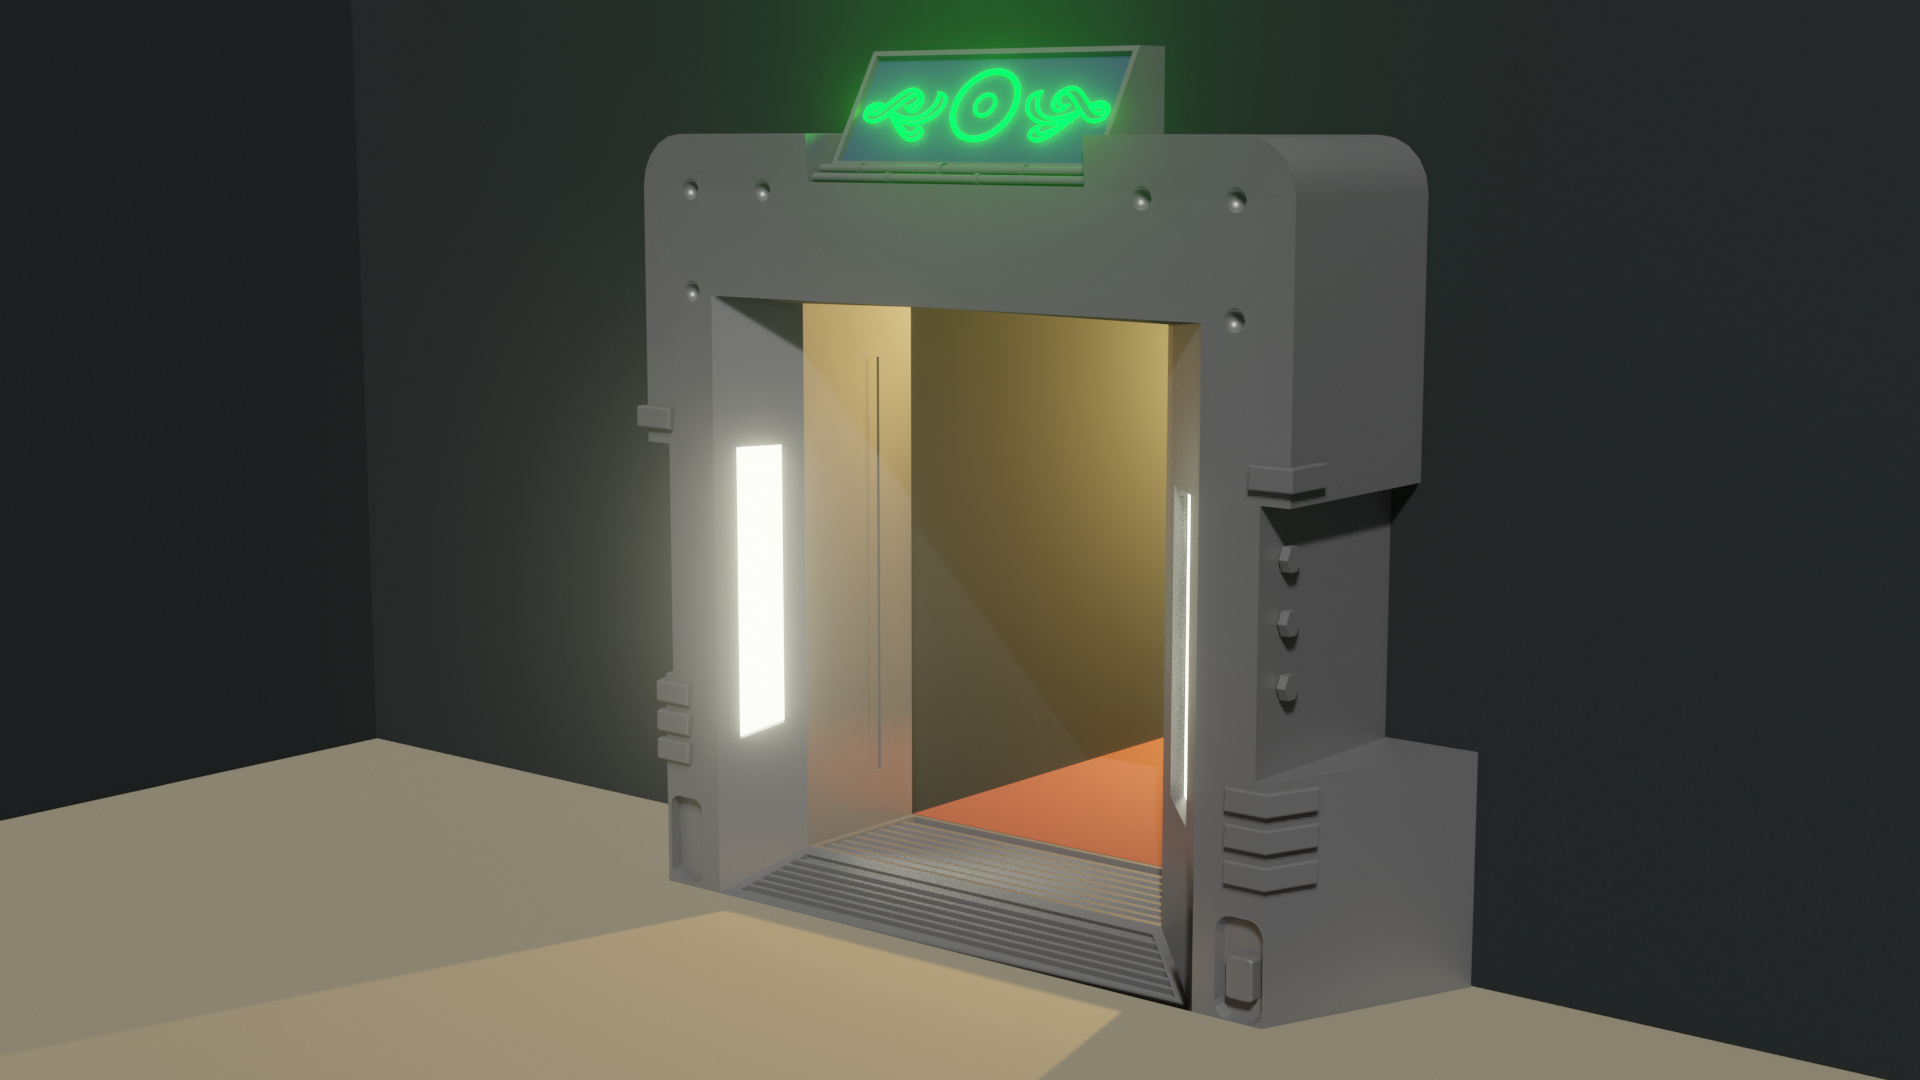
Now that I’m a little further on in the course (Section 4), I decided to start from scratch and constrain myself to a single object. This time I began with a cube, deleted half of it, switch on a Mirror modifier and then worked out from there.
I stuck to a single object (plus one for the text) . It was a lot more challenging but it felt rewarding to see the model come together. E.g. having to work out how to subdivide an irregular face to extrude some details, rather than just slapping on an extra object.
I actually forgot to rename the object from “Cube” until I finished – it was a cool moment to look at this thing and think “huh… that was a cube yesterday”.
Overall I felt that I learned a lot from constraining myself to a single object, and it’s clear that I’ve got a lot more learning to do by continuing to practice. Would love to revisit this once I’ve learned about textures.
Really enjoying seeing everyone’s “one more shot” projects.
I really like this idea of “One more shot”. I didn’t compete this time, due to my Orc in progress.
Maybe, in a couple of months or so, a second “One more shot”?
It show really if people progressed.
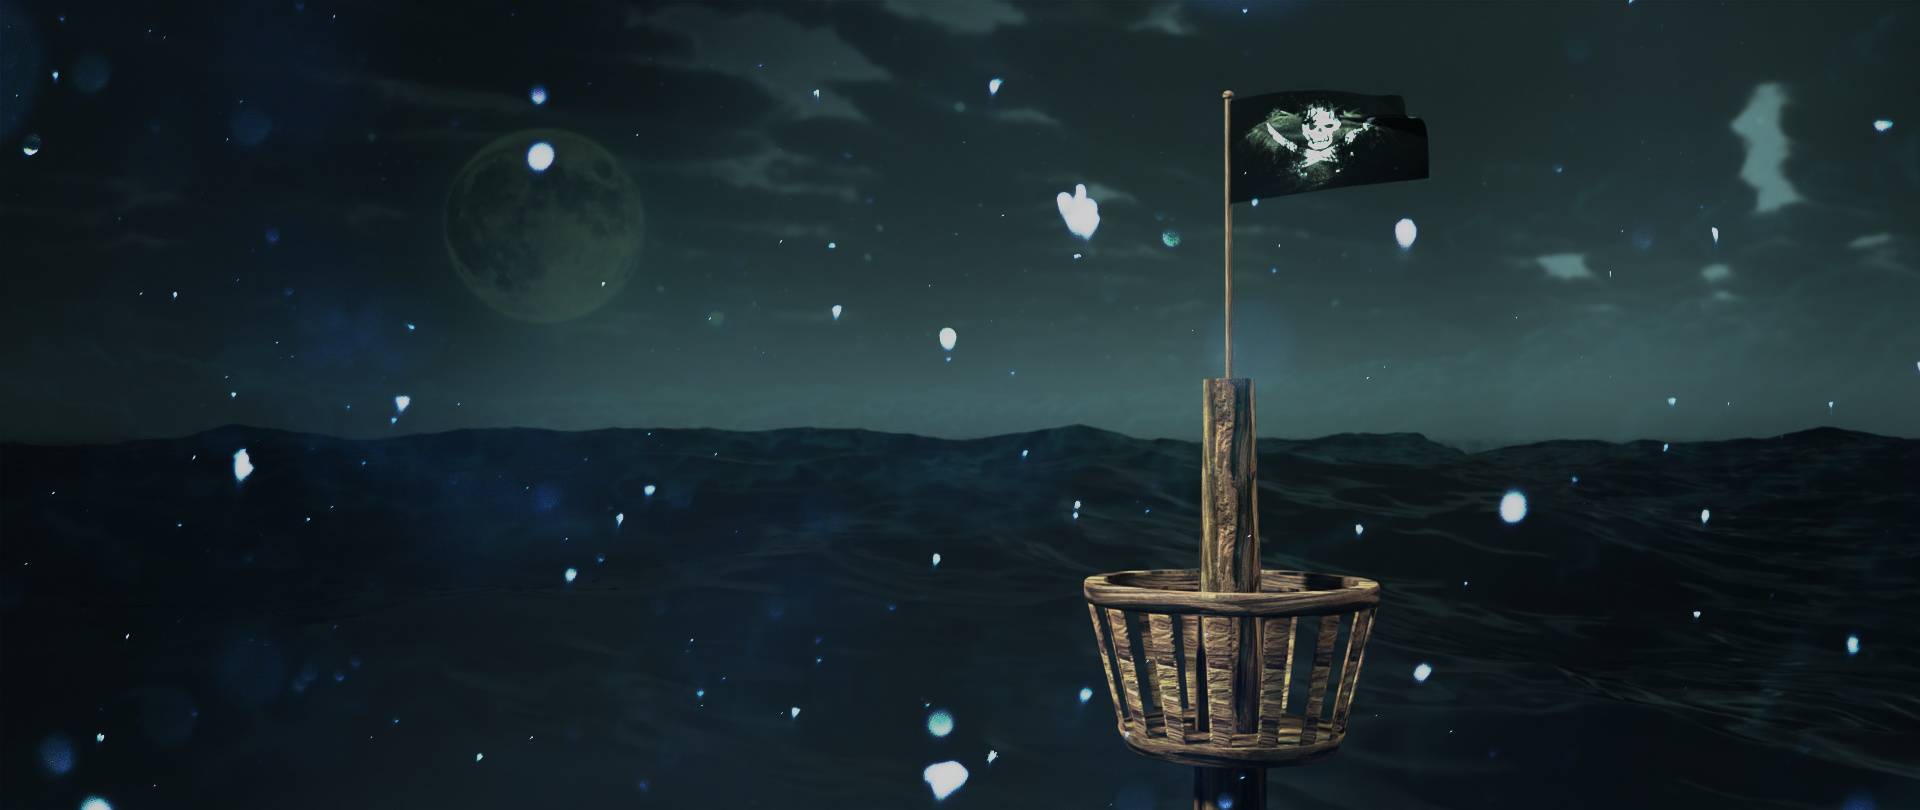
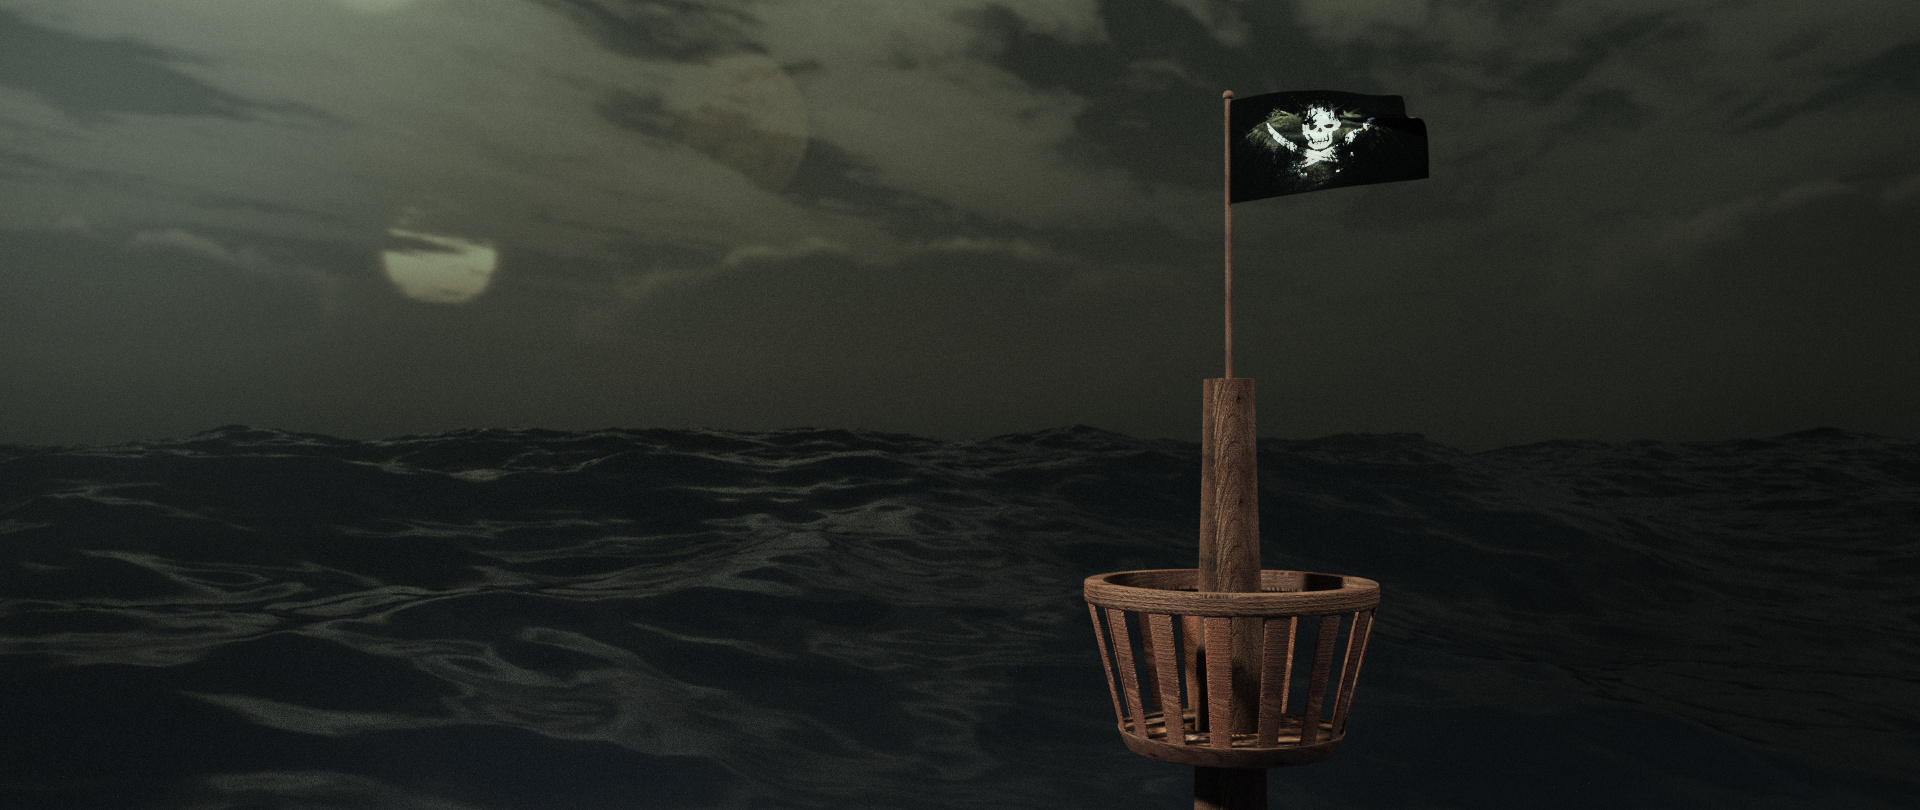
Made the flag by cloth simulations , it was my first successful one , i followed blender guru’s tutorial for this . the Crow’s nest i made using cylinders and applied texture to them .
POst processing is done using blender’s compositor which i found very good .
ALl the projects here are awesome , i was amazed to see them .
Phew, almost didn’t have time this week to do anything. Interesting topic for sure. My choice here isn’t very broad Quickly got this in:
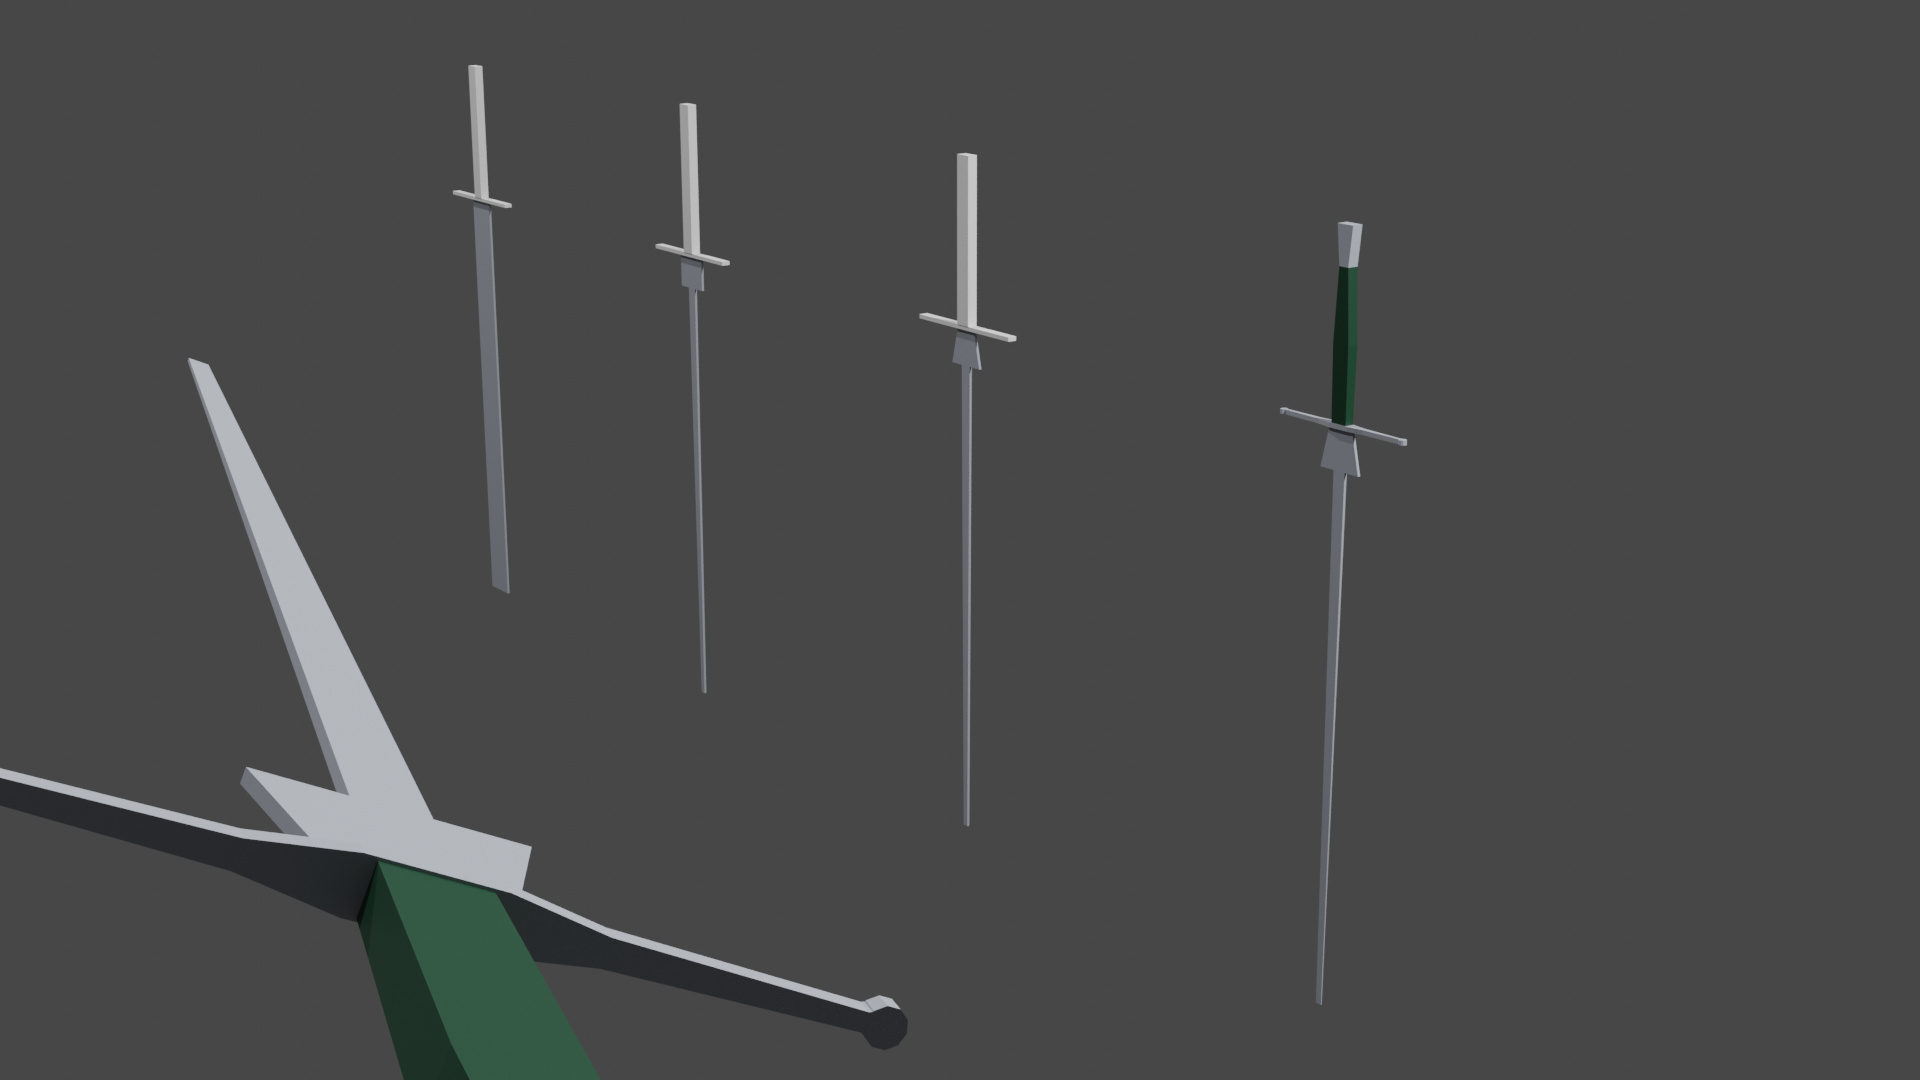
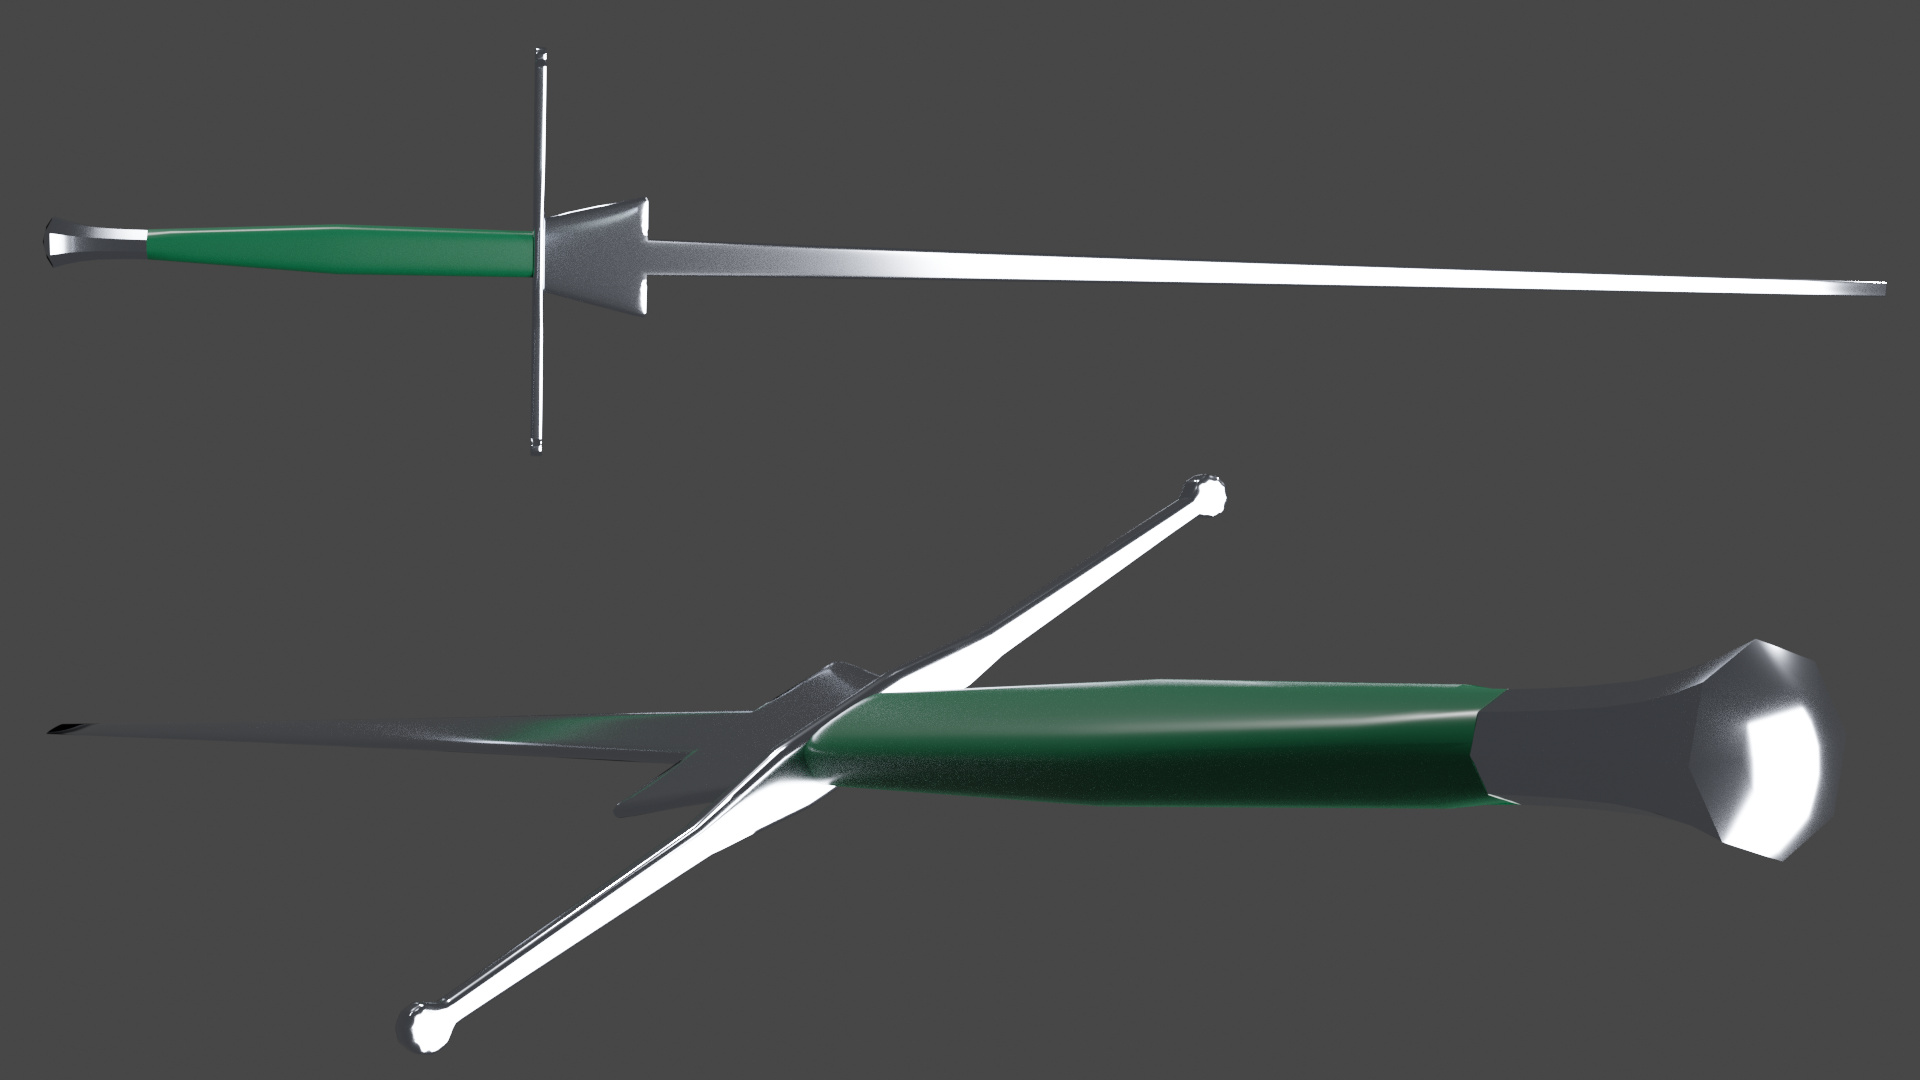
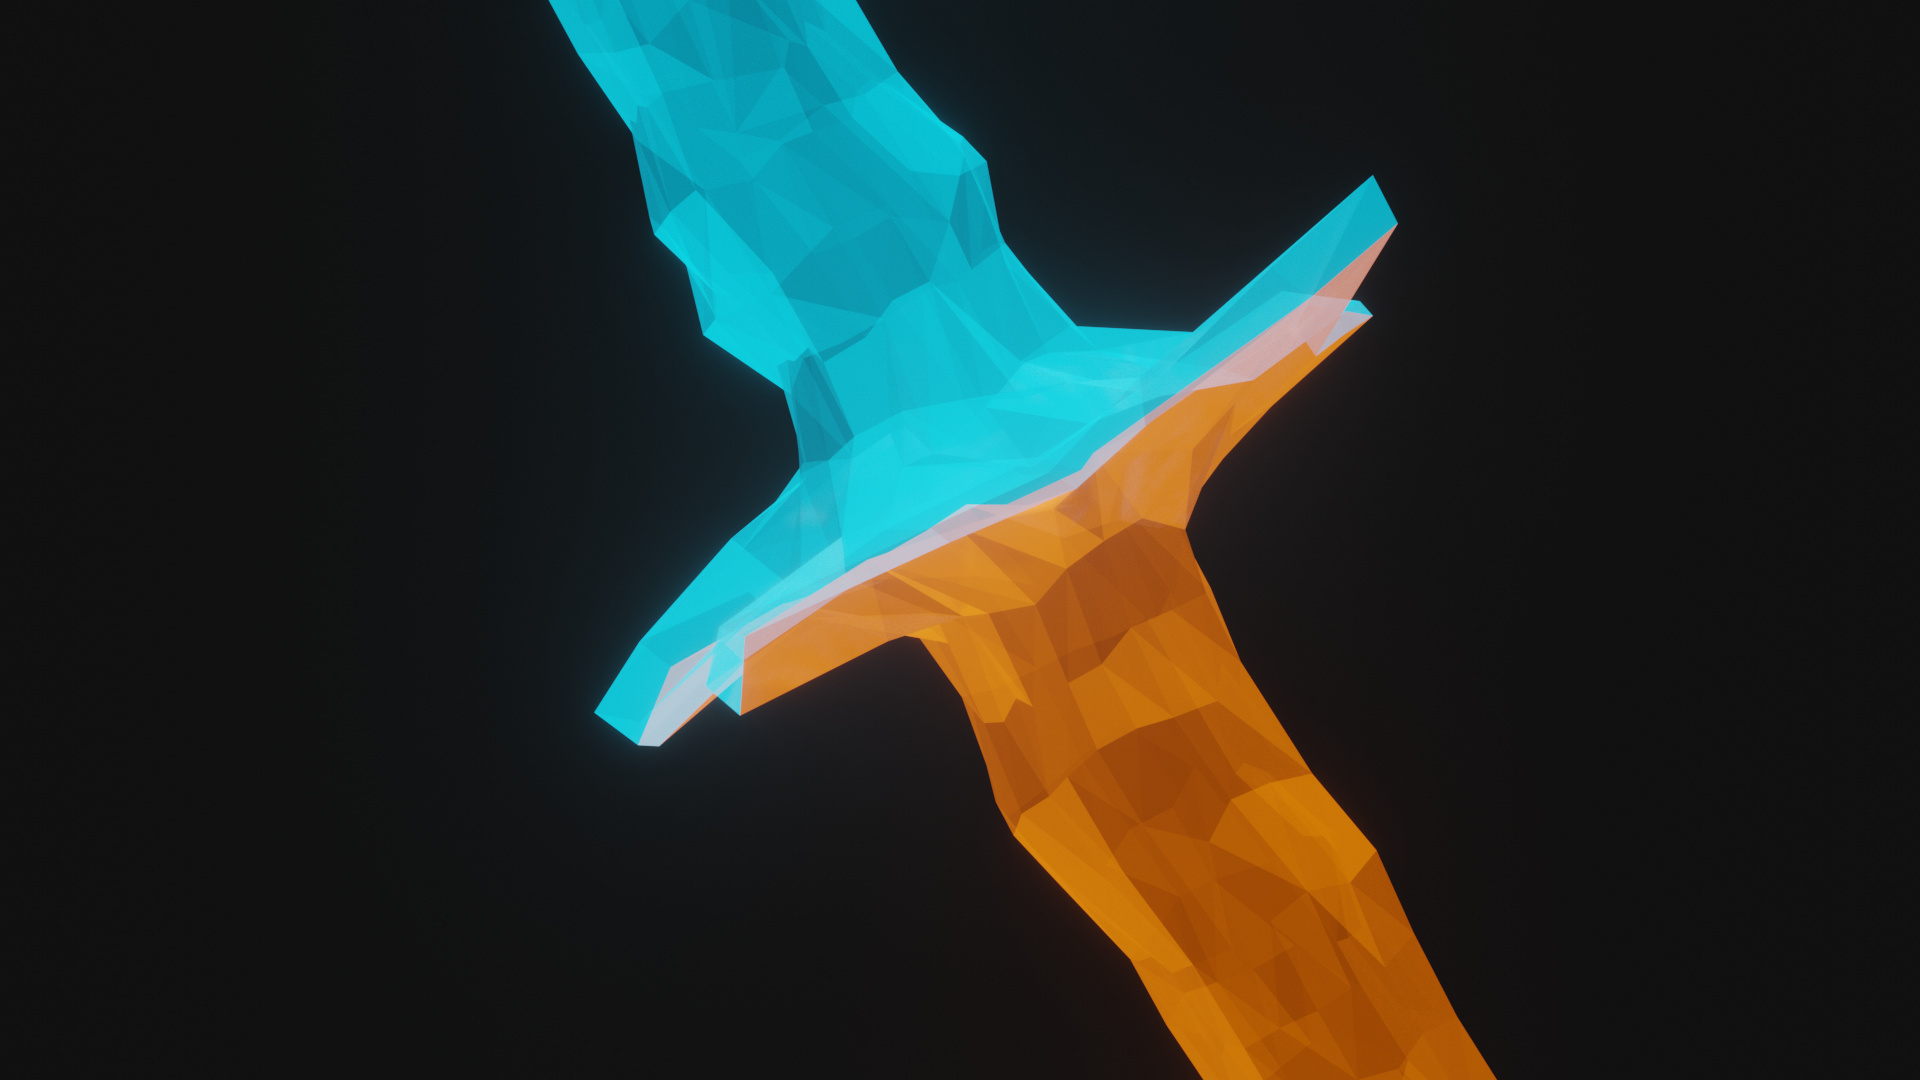
I remade/refined my lowpoly Federschwer a bit. Made it higher poly, reworked the pommel and the materials. Still a long way to go until it looks like the original, but here we go
Old


 Not sure if some of that is AFK time though.) I had a lot of fun though. Only reused asset was the stars, which I made for
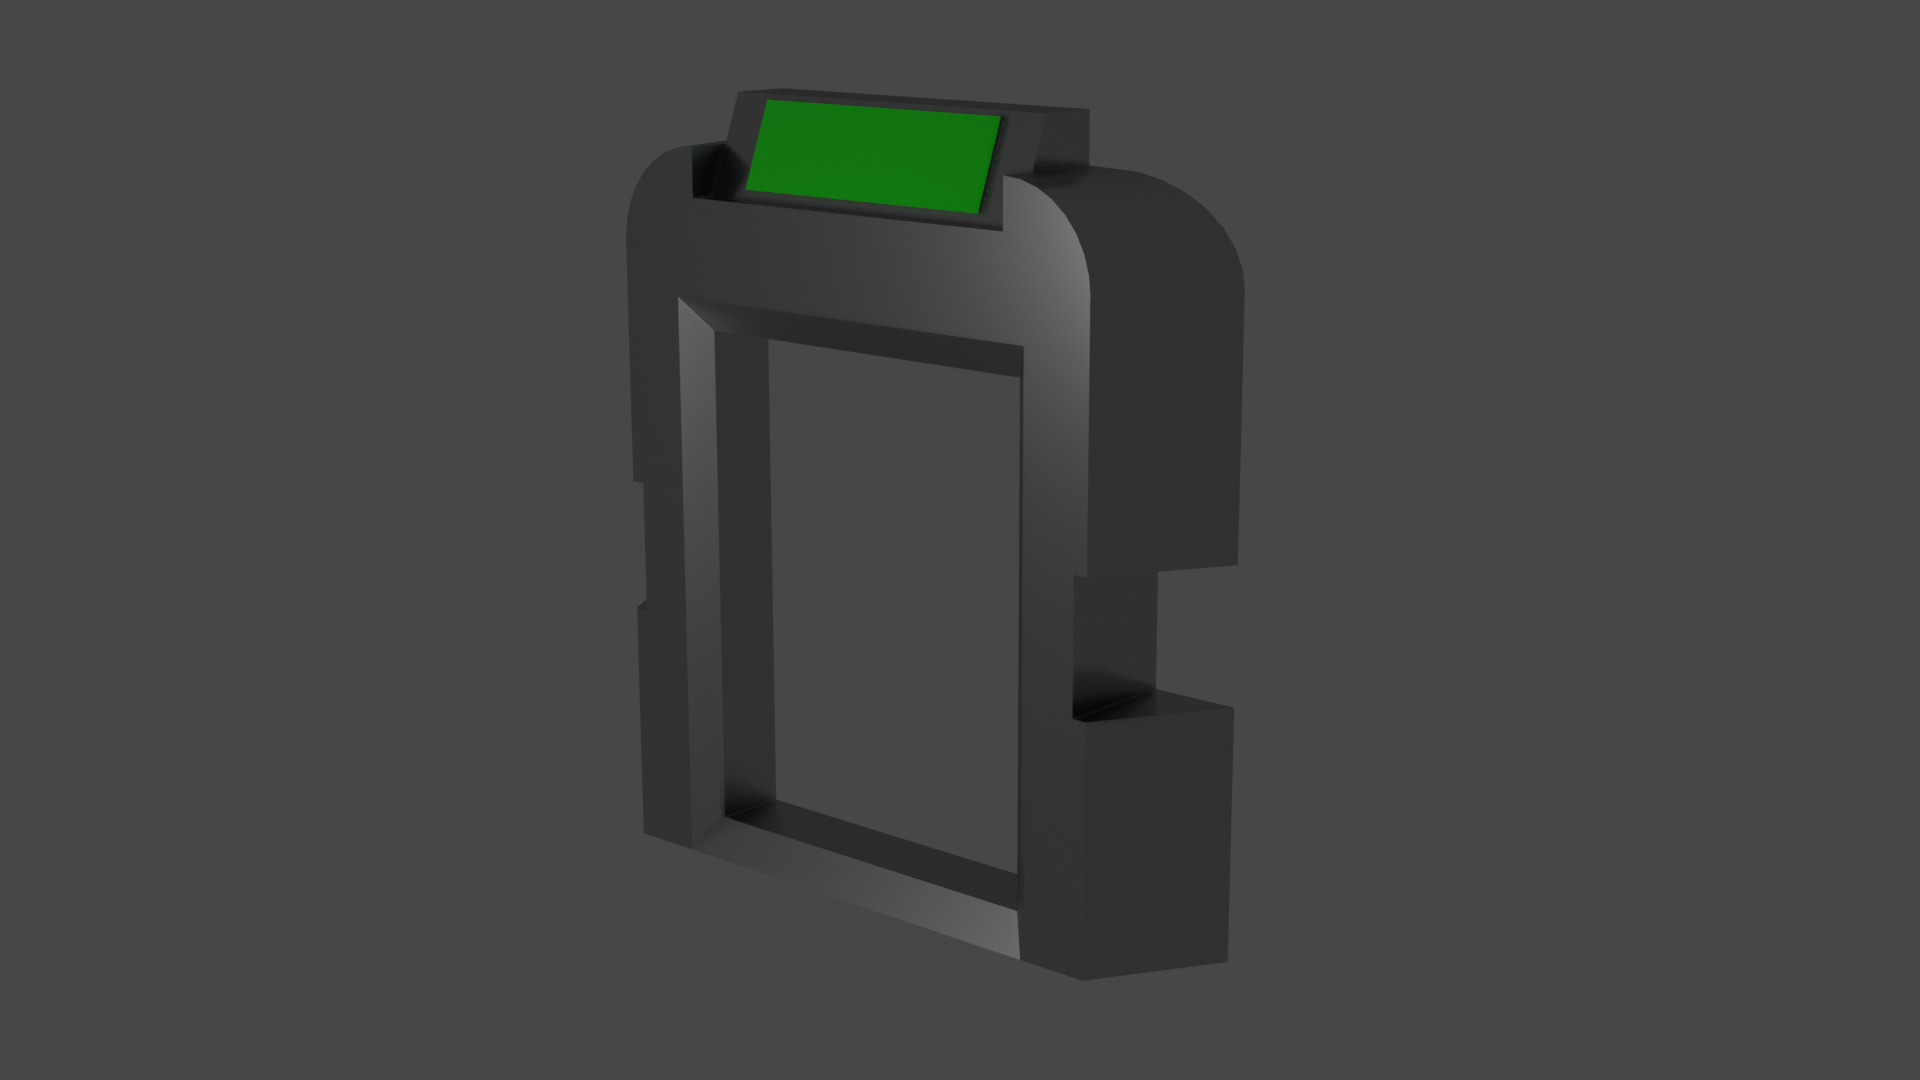

 Quickly got this in: