Lectures include:
-
Section Intro - Crypt Raider - We overview the prototype for the game and our plan of action for creating it.
-
Project Setup - We download all the assets we need for the section and create a new first person project.
-
Modular Level Design - We look at the building blocks included in our asset pack and use these constraints to help us design our level on paper.
-
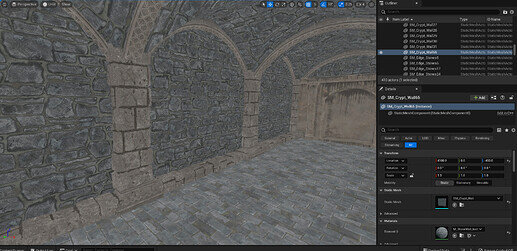
Modular Level Layout - We put our paper design into practice by layout out our level. We learn to use grid snapping and the 4 viewport view to layout levels efficiently. We also learn about keeping our outliner organised in folders.
-
Solution: Modular Level Layout - We go through the rest of the level design in this challenge solution video.
-
Light Types - We encounter some of the main types of lighting: point, spot, rect, directional and skylight. We see how to setup a sky sphere with our skylight and directional light to create natural lighting.
-
Lumen & Light Bleed - We edit the materials in our scene to make them Lumen compatible. Then we block out any light bleeding into our dark dungeon.
-
Level Lighting - We use the different types of light to light our level. We learn about core light settings such as intensity and radius. And we enable shadows for our lights
-
Character Blueprint - We remove the mesh from the first person character and create a GameMode to spawn this by default.
-
Inheritance vs Composition - We go over the benefits of composition and how we can use it in Unreal.
-
C++ Actor Component - We create a C++ actor component and add it to our gate in our level
-
Pointer Types & GetOwner() - We learn what a pointer is and how to store one in a variable. We learn how to get a pointer to the owning actor and print this to the console.
-
Deferencing & Arrow (->) Operator - We see how we can “dereference” a pointer and use this to access functions from a pointer class. We then see a shortcut using the arrow operator.
-
Linkers, Headers and Includes - We learn how to include a header file so that we have access to more functionality. We look briefly into how the C++ compiler works.
-
FMath::VInterpConstantTo - We learn to use the FMath library and particularly the VInterpConstantTo function. We see the various variant of it and learn to read it’s documentation. We then make our Mover go with a boolean.
-
Scene Components - We create a new Scene Component and learn how they are different from Actor Components. We then attach this one to our player so that it rotates with the player view.
-
Line Tracing & Sweeping - We learn what a line trace is and why it might be useful. We also see a helpful alternative, the shape sweep and why we might want to use this instead. We then see how to setup trace channels in the engine.
-
GetWorld() - We learn about the UWorld type and what it represents as well as how to get and store a pointer to it. See see some of the functions it has available to us.
-
DrawDebugLine() - We see how to draw a line for debugging purposes to allow us to visualise our line trace or sweep.
-
References vs Pointers - We step back from our project to see the difference between a reference and a pointer and the pros and cons of each.
-
Const References & Out Parameters - We see how references can be used to pass parameters without a copy. We see how const can be used to protect them and how out parameters can be used.
-
Geometry Sweeping - We learn how to do a Geometry sweep by creating a Shape object and using out parameters to get our results.
-
Input Action Mappings - We see how to configure our input actions in the editor and how this gives us controller and mouse or keyboard support.
-
Blueprint Callable - We learn how to make a function callable from Blueprint. We use this to call the “Grab” and “Release” function on a key event.
-
FindComponentByClass() & nullptr - We are introduced to the PhysicsHandle component and why we want to use it. We then learn to use FindComponentByClass to get and store a pointer to it.
-
DrawDebugSphere() - We learn to draw debug spheres to visualise points in space.
-
Grabbing With Physics Handle - We learn to grab using a physics handle and set the target location and rotation. We take the opportunity to extract a function from repeated code.
-
Waking Physics Objects - We look at waking a sleeping physics object and releasing the grabbed object.
-
Returning Out Parameters - We learn to extract our own functions that use out parameters and how we can pass a result out using one.
-
Overlap Events - We learn about trigger volumes, object types and collision responses so that we can get our volumes to give overlap events in the right circumstances.
-
Constructors - We see how constructors get run before the game runs and how they can be used to set default values and setup our classes. We use this to allow our class to Tick.
-
TArray - We learn what an array is and how we can get the size of one as well as get element from it using the index operator.
-
While & For Loops - We learn to use the simplest type of loop “while”. We use it to get each element in turn from the array. We see how we can do this more easily using a for-loop.
-
Range Based For Loops - We learn the easiest way to loop over a collection like TArray: the range-based for loop.
-
Actor Tags - We see how we can add actor tags in the editor and check for them in C++ code. We use this to give an acceptance parameter to our Trigger Component.
-
Early Returns - We see how we can extract a function with a for loop an how we can make it more efficient using an early return.
-
Dependency Injection - What is Dependency Injection and how can it make our code more reuseable? We answer these questions to allow us to link up our Trigger Component with our mover.
-
Casting & Actor Attachment - We learn how to enable and disable physics for a component as well as how to attach an actor to a scene component. We do this to attach our statues where we drop them.
-
Adding and Removing Tags - We see how we can manipulate the TArray of tags at run time. We do this to tag an object while it’s being grabbed.
-
Boolean Logical Operators - We learn how to use && and ! to make more complex boolean expressions. This allows us to only accept an actor on the pressure plate if it is dropped.
-
Level Polish - We make the Grabber enable physics and detach the Actor from the Trigger. We then make the Mover move back to the starting position. This allows us to make the final puzzle in our level.
-
Crypt Raider: Wrap-Up - We overview the learning takeaways from the section and see how we could take our project further.

