Normal map color ranges

The bake for my “Orc” character (mine is more like an Oni, not that it matters) had glitches, which is not surprising. I was able to get better results in some area, and worse in others, by baking at different ray distances, which is not surprising either. I can create a greatly improved composite in photoshop by blending in the most successful areas from each bake, but what I am struggling with is identifying exactly which areas are OK. Obviously intense greens and oranges are bad, but there are areas that are less horribly glitched that I am less sure about.

glicthes

Even if both those areas are clearly bad, there are other areas where the dividing line is less than clear.

My understanding is that (assuming 24 bit color) the red and green layers of a normal map can go from 0-128, and blue from 0-255. I am not 100% sure this is correct, but it is what I have gleaned, so far, from google searches. Is there a plugin, or some clever use of built-in Photoshop functionality, that will allow my to identify and select the “out of gamut” areas, to borrow a phrase from printing, so I can mask out the bad and retain the good? The obvious bits are easy, but there are a lot of less obvious bits to consider.

1 Like

Many ways of doing things in Blender, I would just try to get the bake to come out right. Those sorts of things usually are mesh of the high and low not fitting well I thought.

1 Like

I am game, how do I do that? I tried a range of ray distances from 0.02 to 0.0001, and all had some issues (0.01 was the best overall). Some areas that only looked OK on 0.0001 were bad on other areas, but a few areas were only good on 0.0001. A very small number of areas seemed to be bad on every version. Lacking much experience in normal baking, I am not sure what else to try. I would be happy to hear any suggestions.

The problematic areas seem to be in two types of location. One is in very tight areas, like his butt-crack and armpit, in between gums and lips, or between his earlobe and neck, the other are some areas that poke out. His nips only baked correctly in the 0.02 ray length. Some of these areas don’t really need to be fixed, since his clothing will hide them, but I would very much like to know how to make it all work properly.

I also have a completely different normal problem:

The normals seem to invert along the seam between the front of his rib-area and the back. The UVs aren’t flipped in either area, but the UVs for the back of his torso is rotated 180 degrees from the front–could this cause this issue?

1 Like

There are several baking questions asked here you can search for. They may well have the solutions already. Things like using the extrusion thing a little.
Alternatively alter the mesh to fit better, may need adding a few polys to the low res to fit the pointy up bits!

On the bit bad/bad bits Do they look ok when used would probably be the best way to tell.

Check the normal facing on the mesh. It may well be the mesh face is backwards.

1 Like

Normals on the mesh are OK-I checked before I UV-mapped, but just to be sure, I checked again.

This is what the normal map in that area looks like applied as a diffuse map:
normal invert

The normal direction is definitely inverted between the two. I am going to try making an alternate UV Map where the front and back of the torso are oriented the same way, and see if that helps.

1 Like

Now they join up fine–apparently orientation of the UV has a major effect: OK normals

I turned on UV seam overlays, because otherwise the break between UV islands isn’t perceptable.

Never mind my blather about the orientation, I hadn’t set up the shader properly. Still puzzling about the bake glitches, however.

Despite my fussing about the glitches, he is looking OK with the normal and cavity maps:

2 Likes

Also, UV stretching can also introduce unwanted effects.

2 Likes

One thing I think everyone should know about in blender (and something that revolutionized normal map baking for me in blender) is using cages.

This is how it’s done:

  1. Duplicate your low poly mesh

  2. Rename it something with CAGE in the name

  3. Go into edit mode with your new cage mesh and press Alt+S (to scale along the normals) until it fully covers the high poly sculpt. Check it from every angle to make sure this is the case and DO NOT change the vertex count of or any of the faces or it won’t work.

  4. Now bake from high poly to low poly again but this time, under “Selected to Active”, check “Cage” and add your cage object which you named appropriately.

image

You will most definitely get a much better result from this. Hope this helps you as much as it changed the game for me.

3 Likes

Have you any idea why cages are not the first resort? I do very little baking but always use a cage, though not on humanoid characters. I can only assume there is a difficulty in tight places?

1 Like

I think it is mainly to cut out an extra set of steps, when it is not necessary. I have a lot of secondary bling on my dude and I am happy to not have to do extra stuff on them, when I can.

1 Like

Finally got an acceptable (to me at least) set of bakes


There are a few dodgy areas between his toes and at the back of his gums, but I think I would have to make major changes to awkward spots in the high-poly model to fix them, and they are hardly visible, in any case. Except for the eyes, he is almost ready for paint.

With normal and cavity maps applied:

4 Likes

Perhaps explain what you did to get the better results do the next person can get a feel for what helped?
He looks great by the way.

1 Like

Thanks!

The biggest headache was the main body. I had created several different problems for myself there:

  1. The skin surface had a lot of pretty wrinkly folds where a human body would be smooth, and the folds often crossed against the grain of what would normally be good topology.

  2. The place where the fingers and toes joined the hands and feet were pretty lumpy and irregular in the high poly, due both to my difficulties with sculpting plus glitches created when narrow gaps tend to disappear during remeshing. I was unable to find a way to really clean up those areas in the high poly (Blender would chug and nothing would change when I applied smoothing). I would approach the whole process for those areas differently, starting from blocking out, if I had it to do all over again.

  3. The lumpiness, combined with narrow spaces between other surfaces meant there was no single setup that would work. A long ray length plus a cage that worked well for the extremely lumpy legs produced chaos in the narrow area between the gums and cheek, which only baked well with no cage and a very short ray length.

I tweaked the low poly model, moving, and sometimes adding geometry so that the low poly model was following the high poly more closely in problem areas. Even after this, I still wasn’t able to get a single bake that worked for everything, so I did a series of bakes, at different ray lengths, ranging from 0.1 to 0.0001, both with and without cages, from (thanks to Mark_Jackson for suggesting Alt-S, which I did not know about, for expanding the low poly) and got a set where most of the surface baked successfully.
I took the four best ones into Photoshop, went to the channels panel and isolated the blue channel, where the worst areas showed up as dark grey to black, and used “Select Color Range”, at maximum fuzziness to select the darkest areas. I then used the selection to mask off those areas.

For example, this is the blue channel of a bake with a cage, at a ray length of 0.05


You can see that the very worst spots are the gaps between the toes (lower left) and fingers (low center) with a few other spots scattered around.

After that, I stacked the four renders I used, best on top, second best below, and so on, plus a layer of completely flat normal fill (rgb green:128, red:128,blue:255) to catch anything that was bad on all four bakes. you can see that the 0.0005 ray length is mostly a mess, but that baked a few tight spots correctly that the longer ray lengths got wrong. All the really awful spots on that one are covered by the cleaner bakes above it. I had to do some manual tweaks to the masks for a some more marginal bad spots, but Select Color Range on the blue channel caught all the bright orange and green areas.
Onilayers

2 Likes

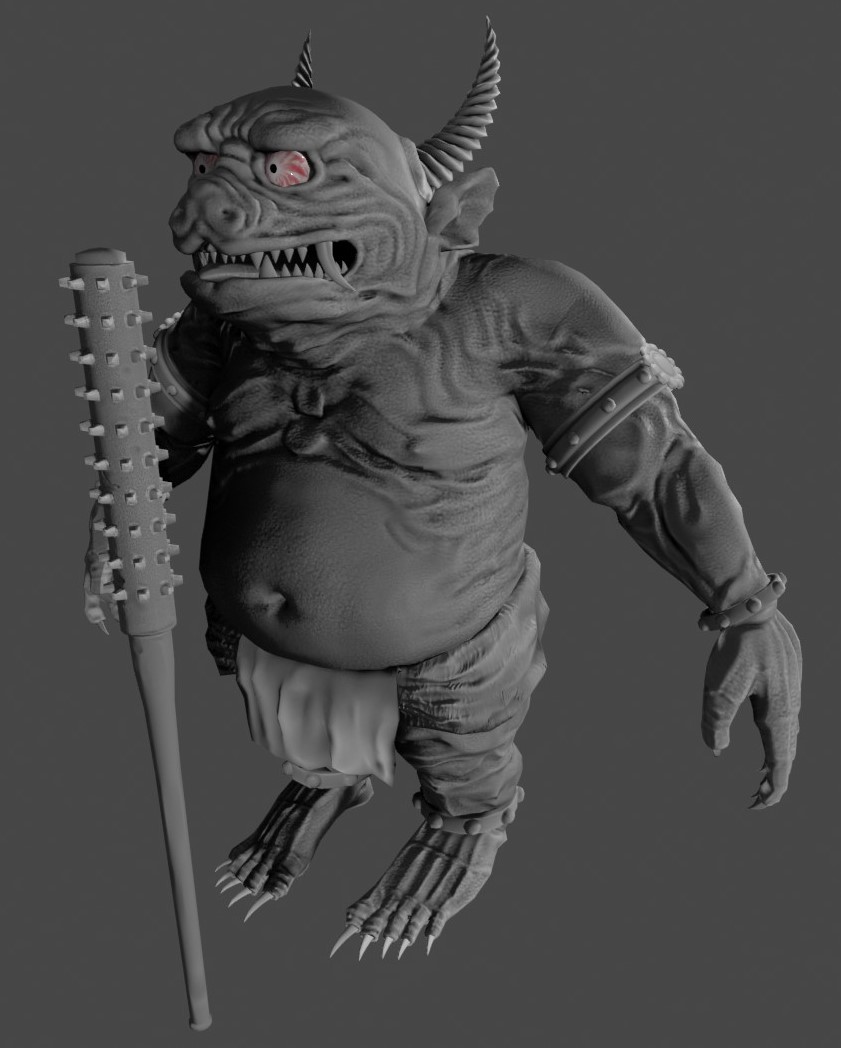
The other parts of the model–the claws teeth, tongue, arm bling, loincloth and weapon had different issues, but were mostly simpler and easier.

The main problems I encountered were these:

First of all, make sure you don’t have auto-smooth checked on for the low poly! That caused me hours of wasted time, although I thought I had gone and checked it off for everything before starting. It completely screwed up bakes, and nothing else I could do would fix it. Turning it off, once I remembered to double check, usually fixed everything.

The loincloth and the kanobo (traditional two handed weapon of the oni) were the easiest, since “Bake from Multires” worked like a charm for me .I am not sure what issues Grant had with it, as he seemed to think it was broken. Possibly it has defects that are only apparent in certain situations.

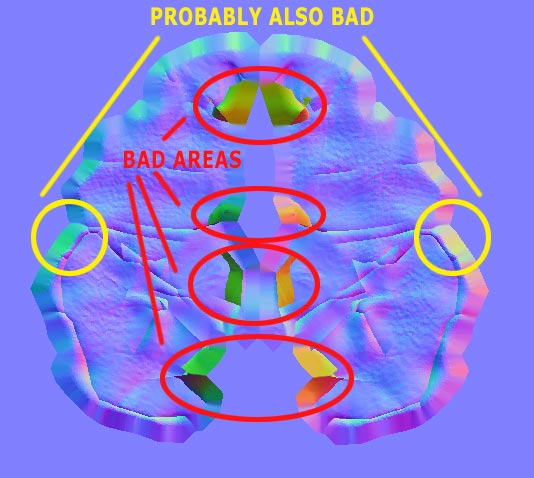
The arm and leg rings caused problems, because of the sharp edges. Sharp edges can be problematic because of the way that baking works. Truly sharp edges (meaning unsmoothed) on the low poly cause split vertex normals, which lead to “misses” on the baking ray casts. Equally, although I understand the mechanics of this part imperfectly, very sharp edges on the high poly can also dead areas.

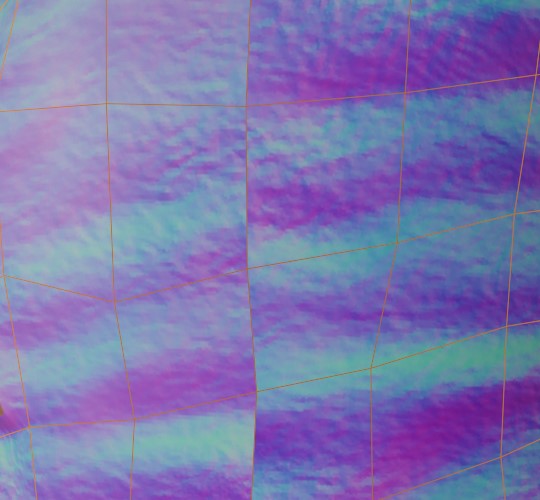
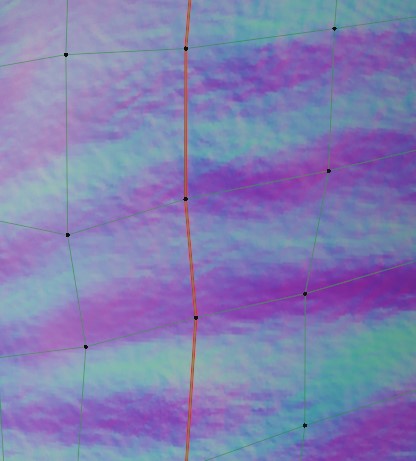
The high poly versions of the arm rings, were just subdivided versions of the low poly models, to get better quality smoothing on the curved surfaces. When I made the first high poly versions I used maximum creasing values on the areas I wanted sharp. This tells the catmull-clark algorithm on subdivision modifier not to soften that edge by moving it and means that only areas with lower creasing are affected. Unfortunately, this perfection of sharpness created stippled bumps along the edges of the normal map. So I trashed the high polys and started over. For the do-over, I applied a 1 level catmull-clark subdiv modifier, with the high crease values, then set out all the crease levels to zero and applied a one level catmull-clark subdiv again. This made the second set of high poly models still have edges that were the correct shape, but with more softened corners. This seemed to fix the normal bake problems and actually looked better anyway, as bracelets and such don’t often have razor sharp edges.

I used almost exactly the same process with most of the other hard-surface type models like the teeth and claws. The florette shape on the upper arm band was difficult because of the tight spacing between it and the rest of the band. I broke the low poly into two pieces to bake it, which fixed the baking issues for that. Note, I might have tried this for the main figures fingers and toes, except the high poly is such a convoluted mess at those points, that I don’t dare go into edit mode and try to make changes on it.

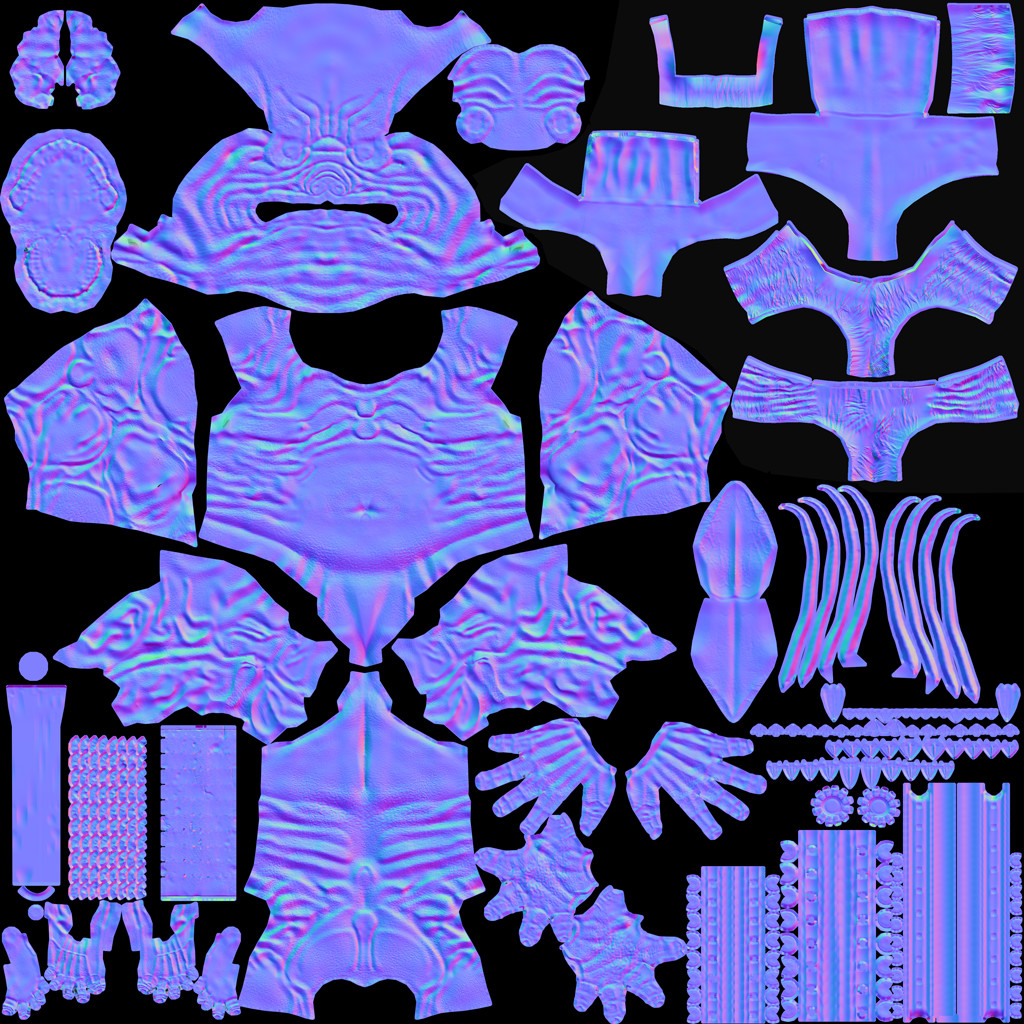
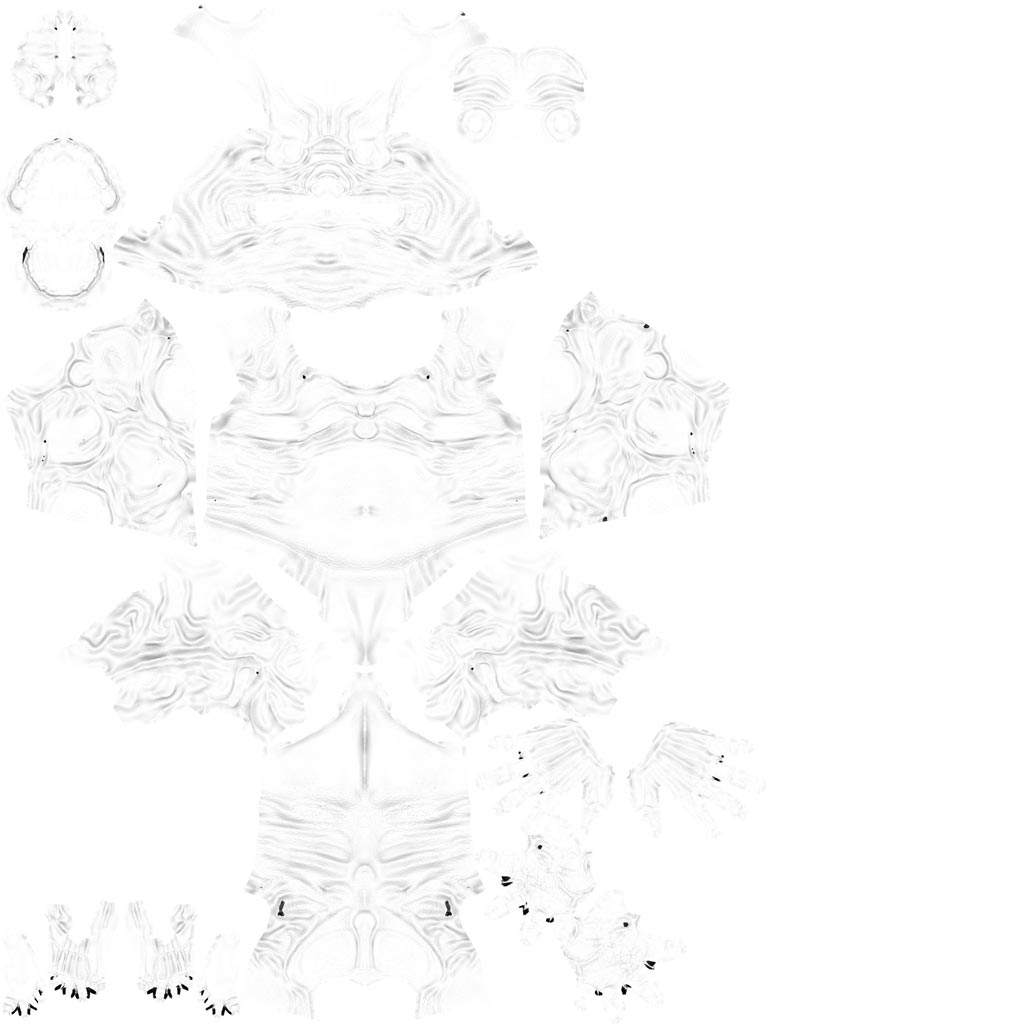
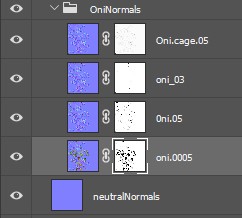
I baked and saved every part separately and composited them together in Photoshop, because I knew I would end up needing multiple tries at some things, accidentally bake cavities over normals, would end up moving things around on the UV map, and generally tend to ruin all my earlier efforts if I tried to only bake to a single normal or cavity map in Blender.

2 Likes

You should look into Substance Painter.
Which is just PhotoShop but totally dedicated to 3D painting.
Does the heavy lifting for normal, height, etc. maps

I have thought about it @FedPete . The texture painting in Blender is cool, but clearly not its most well-developed feature, so I am doing most of of the tweaking and texture map fitting for my Oni in Photoshop. On the other hand, I am not primarily a 3D artist (not even aspirationally), and it isn’t free. Maybe I will look into it someday.

1 Like

Privacy & Terms