I’ve edited this topic to more reflect my experience and note that there are ways around my problem. Unfortunately, I went the way of retopology (re-creating the whole mesh by using the existing one to simplify it without losing detail).
TL;DR version: combining meshes is not recommended if you can help it, unless you know what you’re doing (I didn’t). It’s a hassle. Ideally, make your whole sculpture one piece if you can. It will save you a lot of mental aches. BUT if you did make these mistakes, read below to find out how to fix them thanks to @Mark_Jackson and his tutorials.
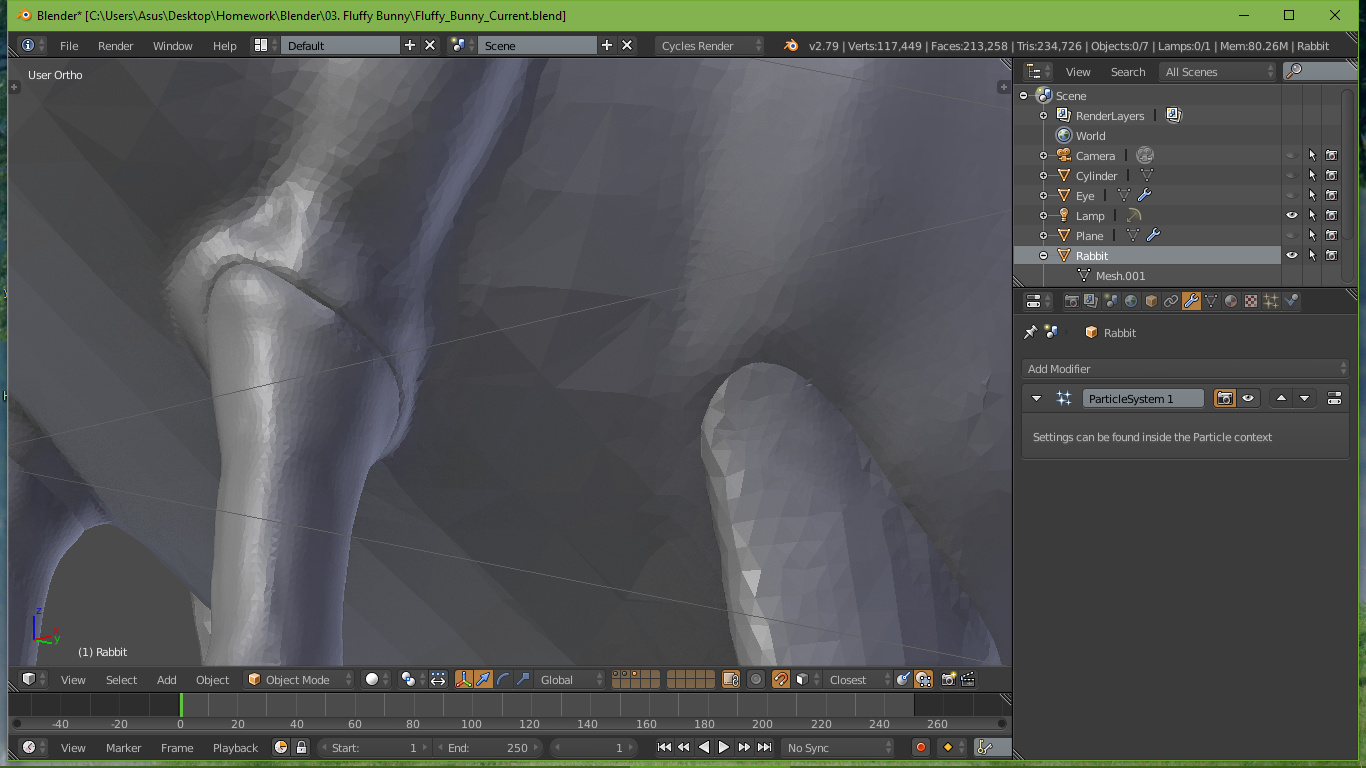
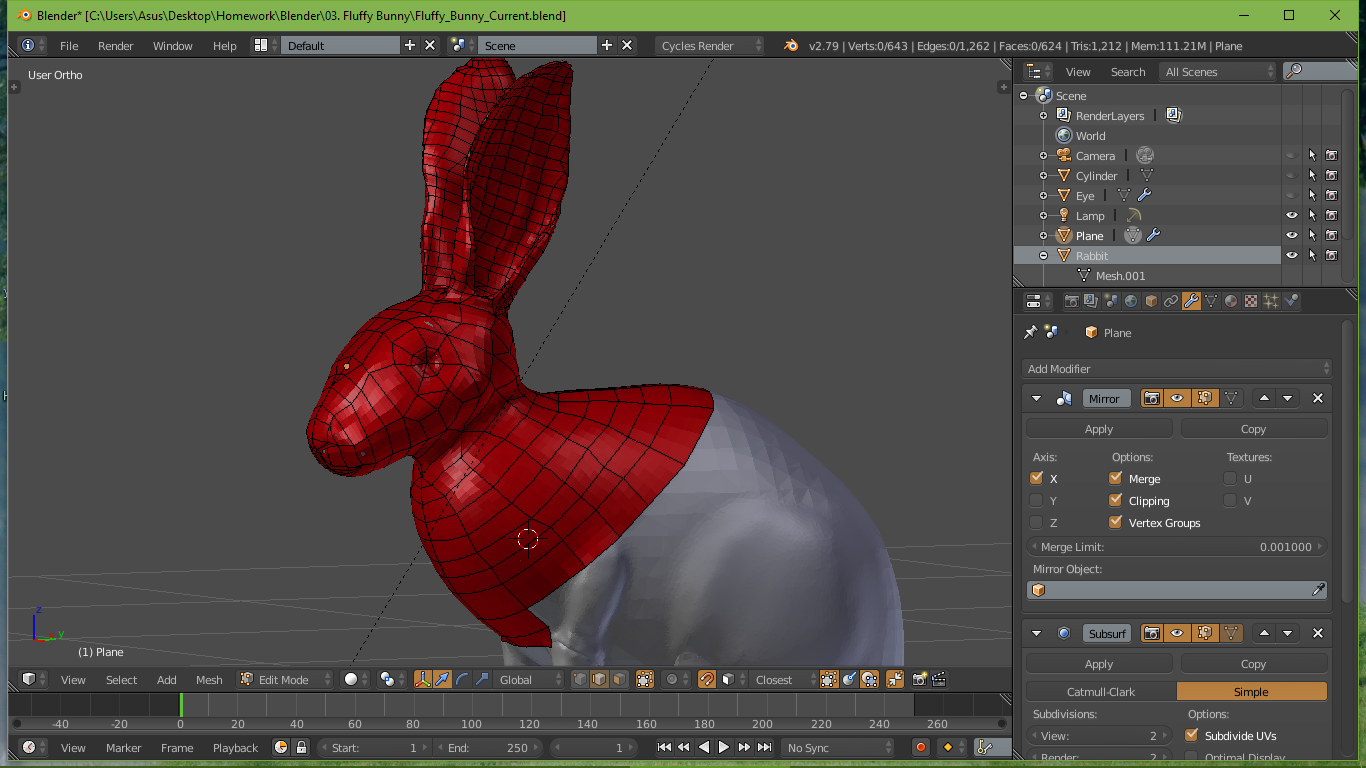
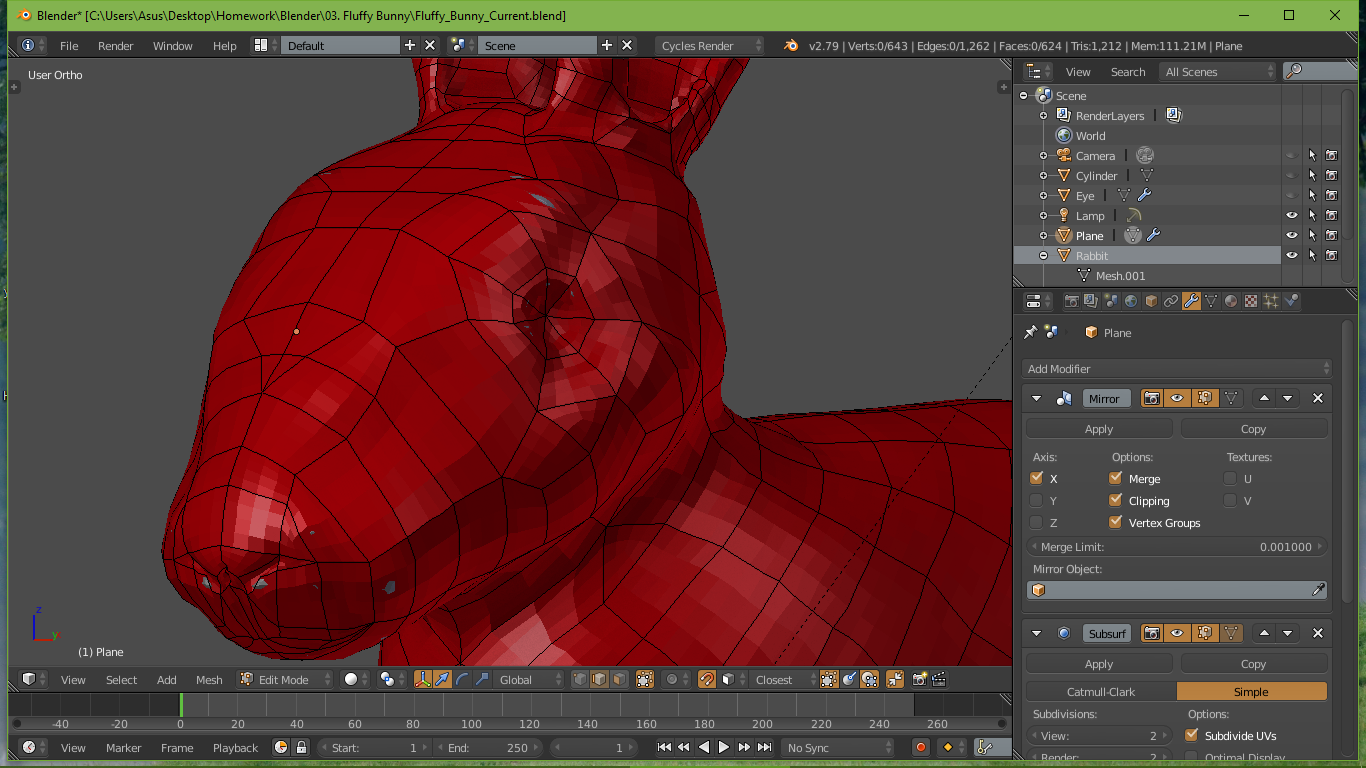
Long version: I found that using extra meshes after the body is done creates problems down the line with hair. Especially, especially, if your body or any piece is inside of another piece. The problem happens when you come hairs. Because hairs stick through the skin due to underlying faces, they will refuse to be combed. Think grass in concrete: you may move it left or right, but you can’t change its root growth-direction. Booleaning not working to the way I expected (I may just be bad at it), I went through retopology method instead. It’s very time consuming (it took me about 10 hours). And then I found out another issue: my rabbit turned out to have non-symmetrical ears (copy and pasted them, hah) and the tail wasn’t straight (apparently the best way to do this is to rig bones to the tail but keep the tail symmetrical to the X axis). This all happened because I decided to flesh out my rabbit after building the body.
See what happens when you add stuff that is not based off one mesh of metaballs but multiple:
So, take-away message: don’t use multiple metaballs or other meshes to add features after the rabbit is done or you’ll have a “hairy disaster” in the later courses.
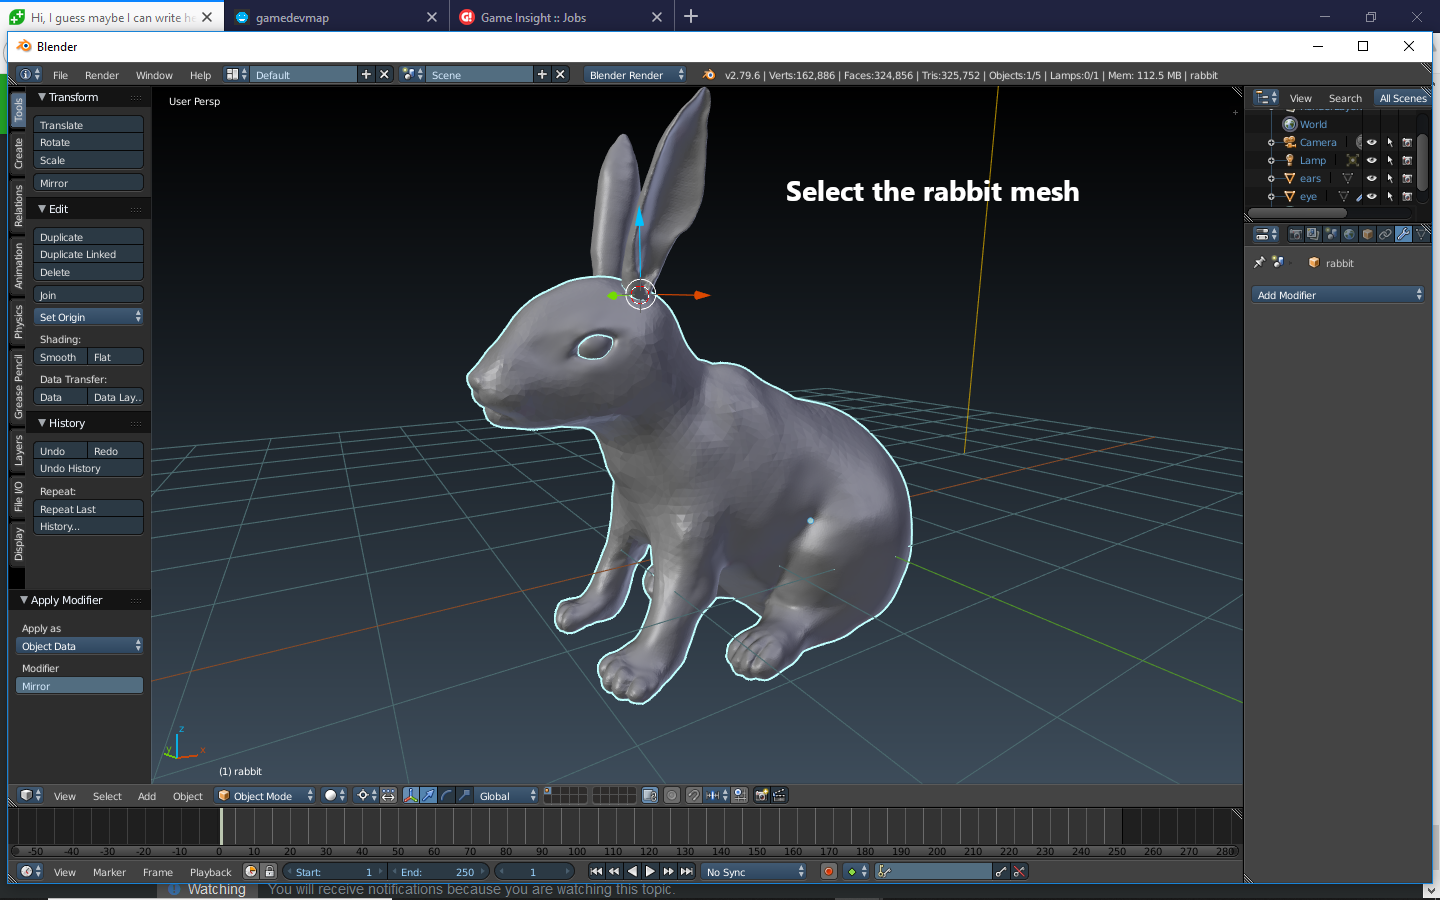
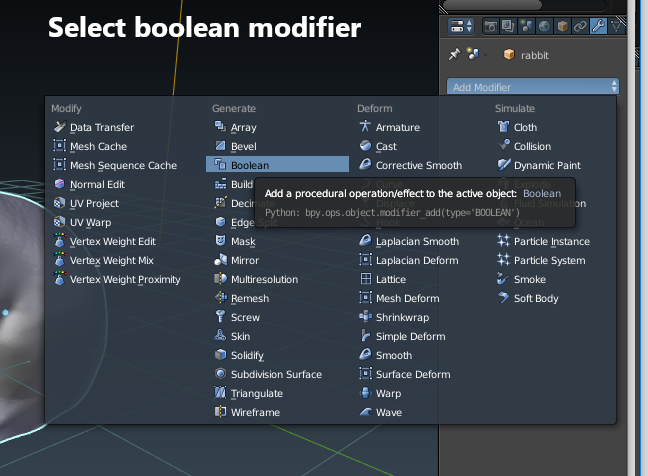
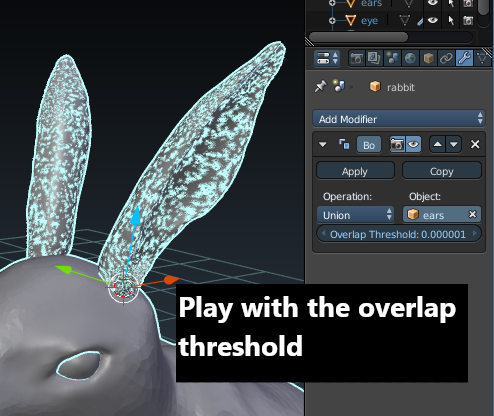
You can add meshes together using the boolean modifier.
Make sure the added mesh is completely inside the main mesh.
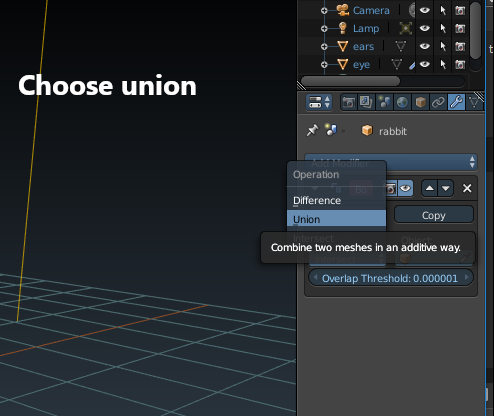
Add a boolean to you main mesh and select your new added mesh and change the boolean type to Union. Hide the original mesh after adding the modifier (do not apply it yet). This helps you see exactly what is going on with it.
Play around with the overlay settings in the boolean modifier until you have what you want. Then apply it.
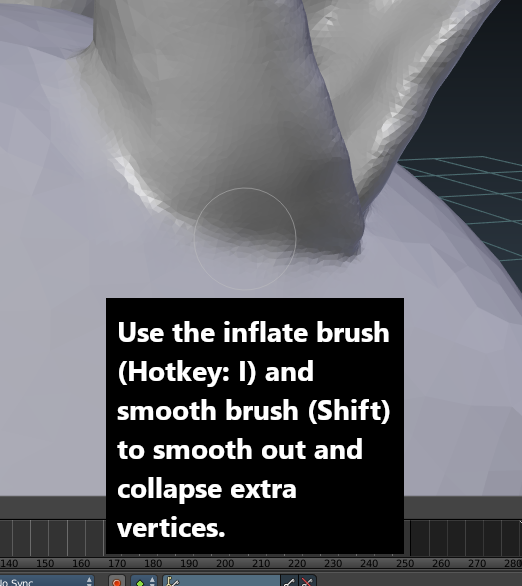
Smooth out the join with the smooth tool in sculpt mode. Make sure you have dynotopper on and this will collapse unnecessary vertices created by the boolean.
I did research on this, and while this is true to some extent, I was told on Blender @ StackExchange that the only way to truly make them seamless is to combine vertices of two meshes. When you have thousands of them and they are not aligned, no modifier is going to fix that. It was an absolute disaster. See the pic below. I still had face issues in the end, no matter the method I tried. I wanted one seamless model (literally seamless) and the only way to accomplish that was to retopologize it.
I’d like to know the magical way of combining this that actually makes it one model. Lol. It’s an impossible task according to them. But maybe you can combine these vertices and prove them wrong. Want to try? Here, an older version of my rabbit where this problem exists: https://www.mediafire.com/file/9mfni92fdzmauht/Fluffy_Bunny.blend/file Anyone who is interested, please do show me how to do it–and this was done with dynamic topology, so you get weird inverted faces when joining things and not everything connects. I’m 99% sure that this model is doomed as it is.
I’ve never used dropbox before but let me know if it works.
The boolean seemed to work fine for me. If you need me to explain anything, please let me know.
Yea I think they were referring to a multires sculpt not a dynotopper sculpt. It’s a bit late for me now so make you a detailed explanation but I promise I will tomorrow evening. For now I can try to explain it briefly.
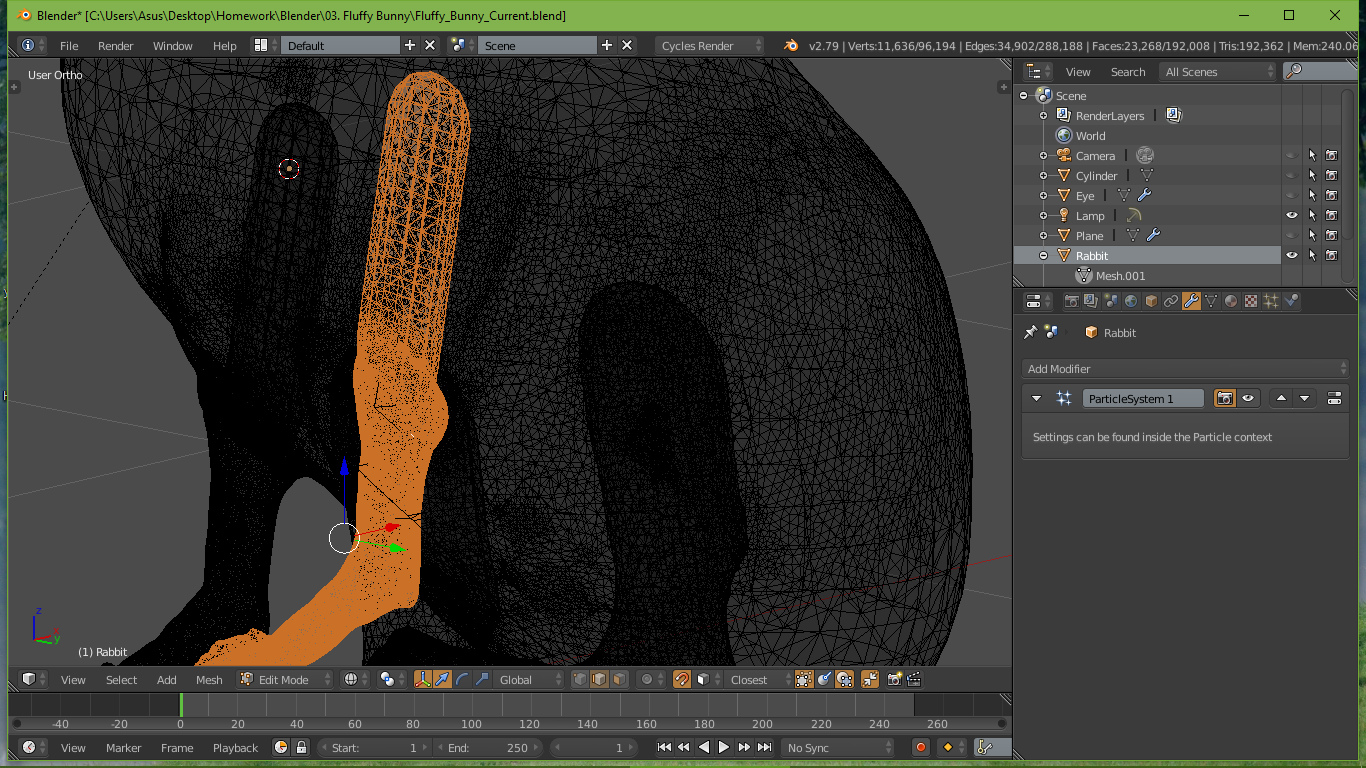
go into edit mode and click on a vertex on a leg and press Ctrl + L as you did before. Then press P and separate by selection. Do the same for each leg.
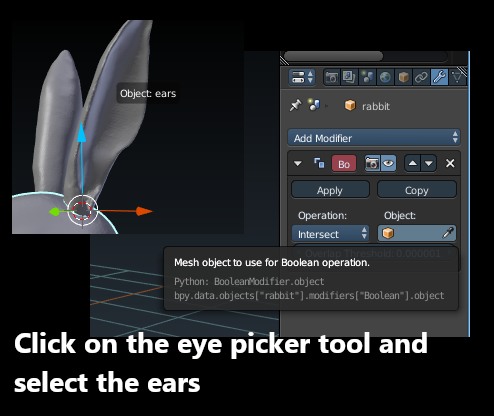
Go into object mode and select your now legless body mesh. In the modifier stack, add a boolean and first set it to Union. Then using the eye-picker in the object (in the boolean modifer), select a leg.
Hide the leg in the overview panel, press Numpad 5 so you’re in perspective view (so you can check inside the mesh).
If it’s not correct, play around with the Overlap Threshold (in the boolean modifer). Divide or multiply it by 10 until you can see that inside the rabbit body the excess has disappeared and on the outside you can still see the leg. Once satisfied, click Apply on the boolean modifier. Rinse and repeat on the other legs until they are all joined correctly before you start sculpting.
Now delete the other legs, go into the esit mode and make sure the normals are all facing out (Ctrl+N) and then go into sculpt mode. Use the inflate brush with dynotopper turned on (because you used a modifier it will be turned off by default) and work around the edge of the join alternating it with smooth (shift). You start to see the vertices collapse and the mesh start to join together. Because X mirror is on, one side should be enough but it’s always safe to check in case your rabbit isn’t quite centre of the scene. This is why it’s better to boolean all legs first before you start sculpting it.
Hope that helps, and as I said before, I will make a more detailed explanation with images tomorrow night if I get time