Beware Asset Creation,
Causes time inflation,
Causes model saturation,
But causes gleeful elation!
I have been a bit silent of late, but mostly due to doing another final final project. My module dungeon was the first, but it went by like a breeze- so true to form I decided to take on another project.
I am trying to keep the style lower poly and stylized, even more so (I hope) than my modular dungeon. I won’t show any of my main scene references, but I will show you the various assets that I have completed thus far.
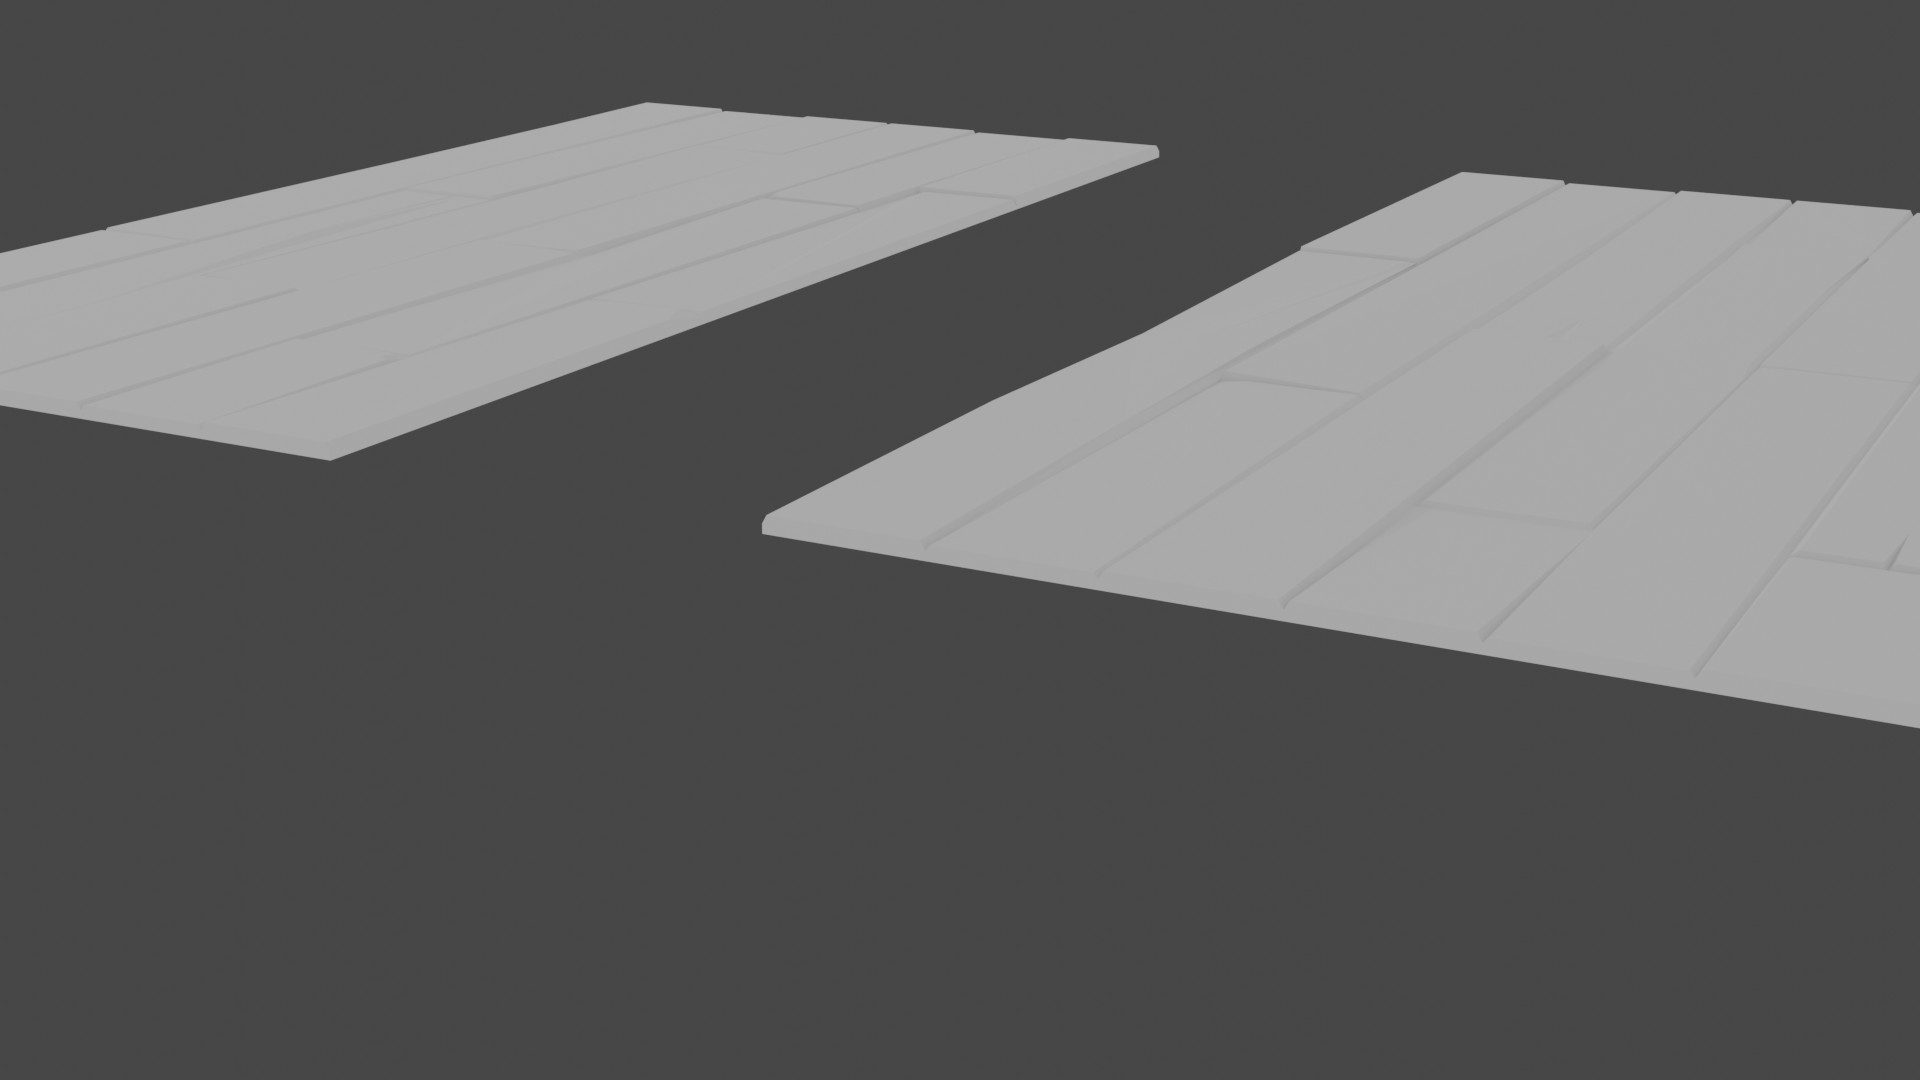
Managed to create 2 module floors. I have the hieghts on each end placed in such a way that I will be able to not lot snap either one together, I can use duplicates, and rotate the same 180degrees, giving some great amount of variability.
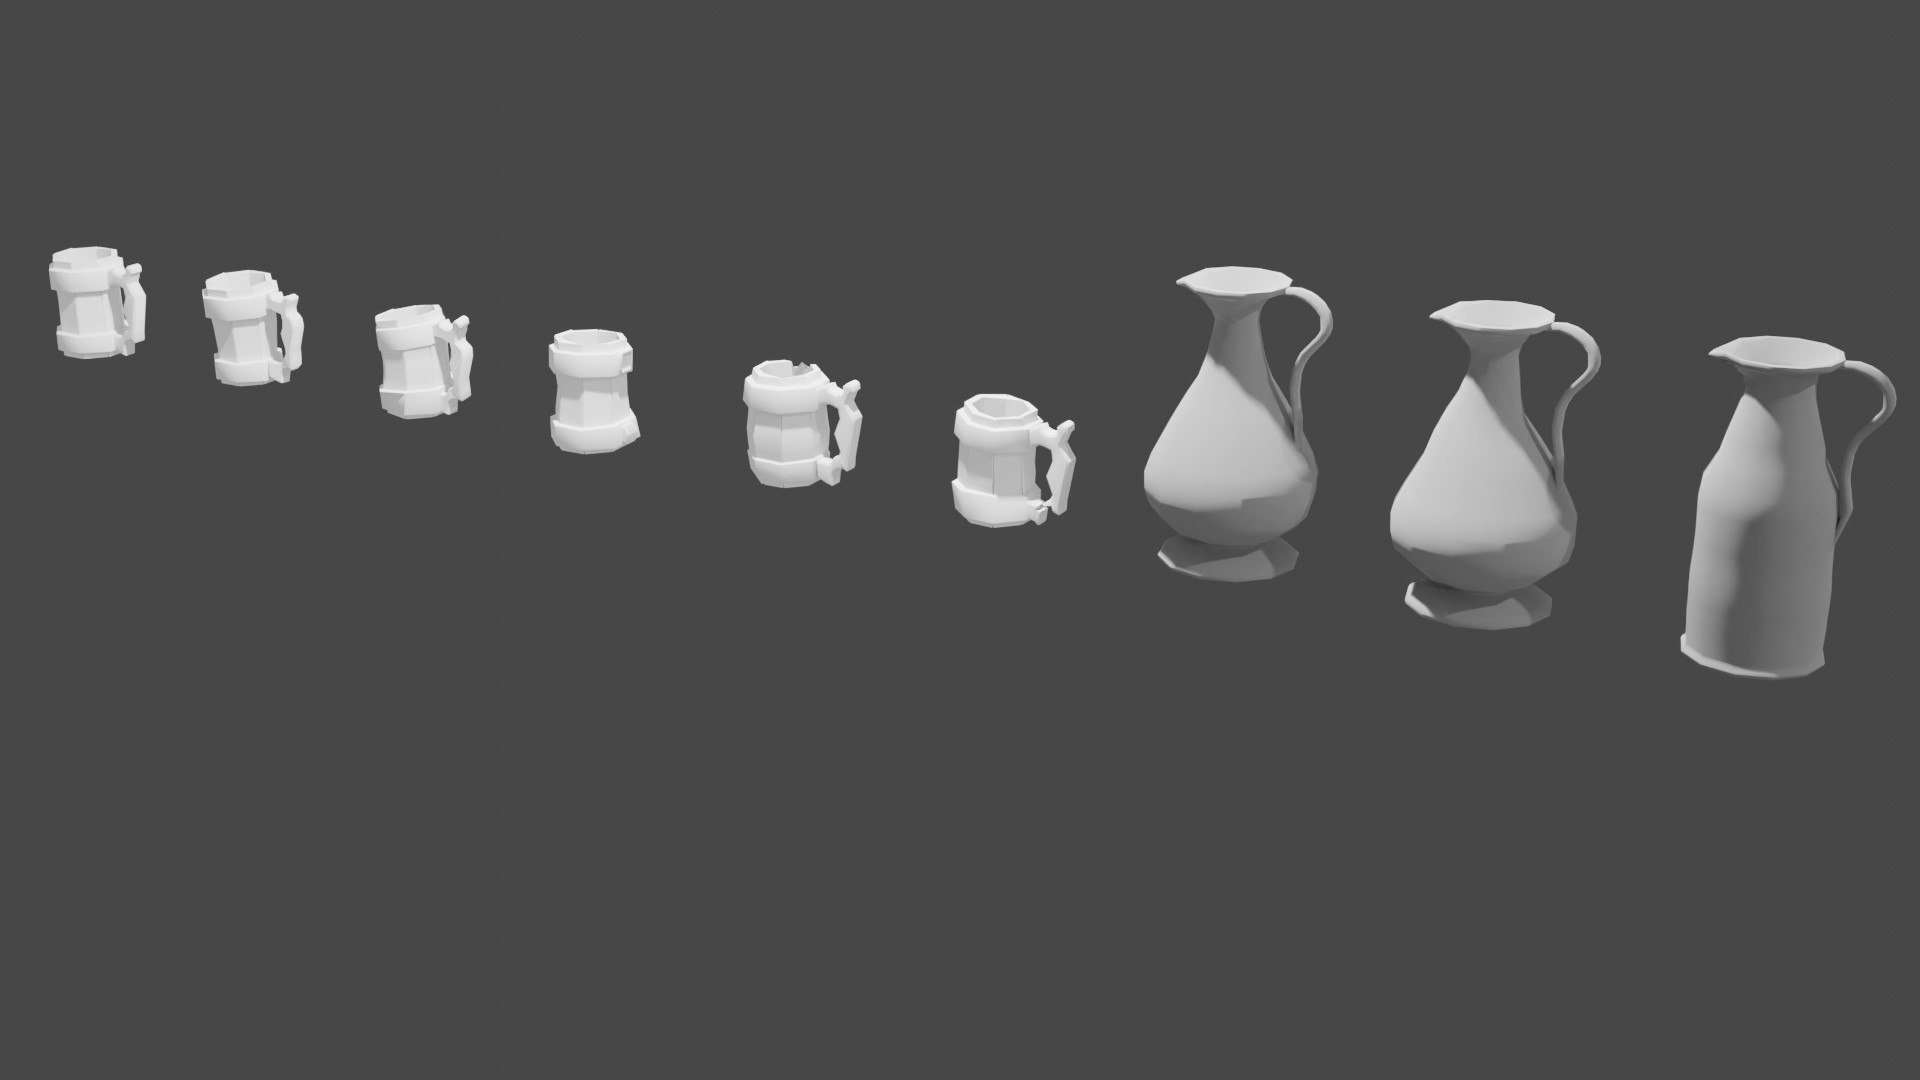
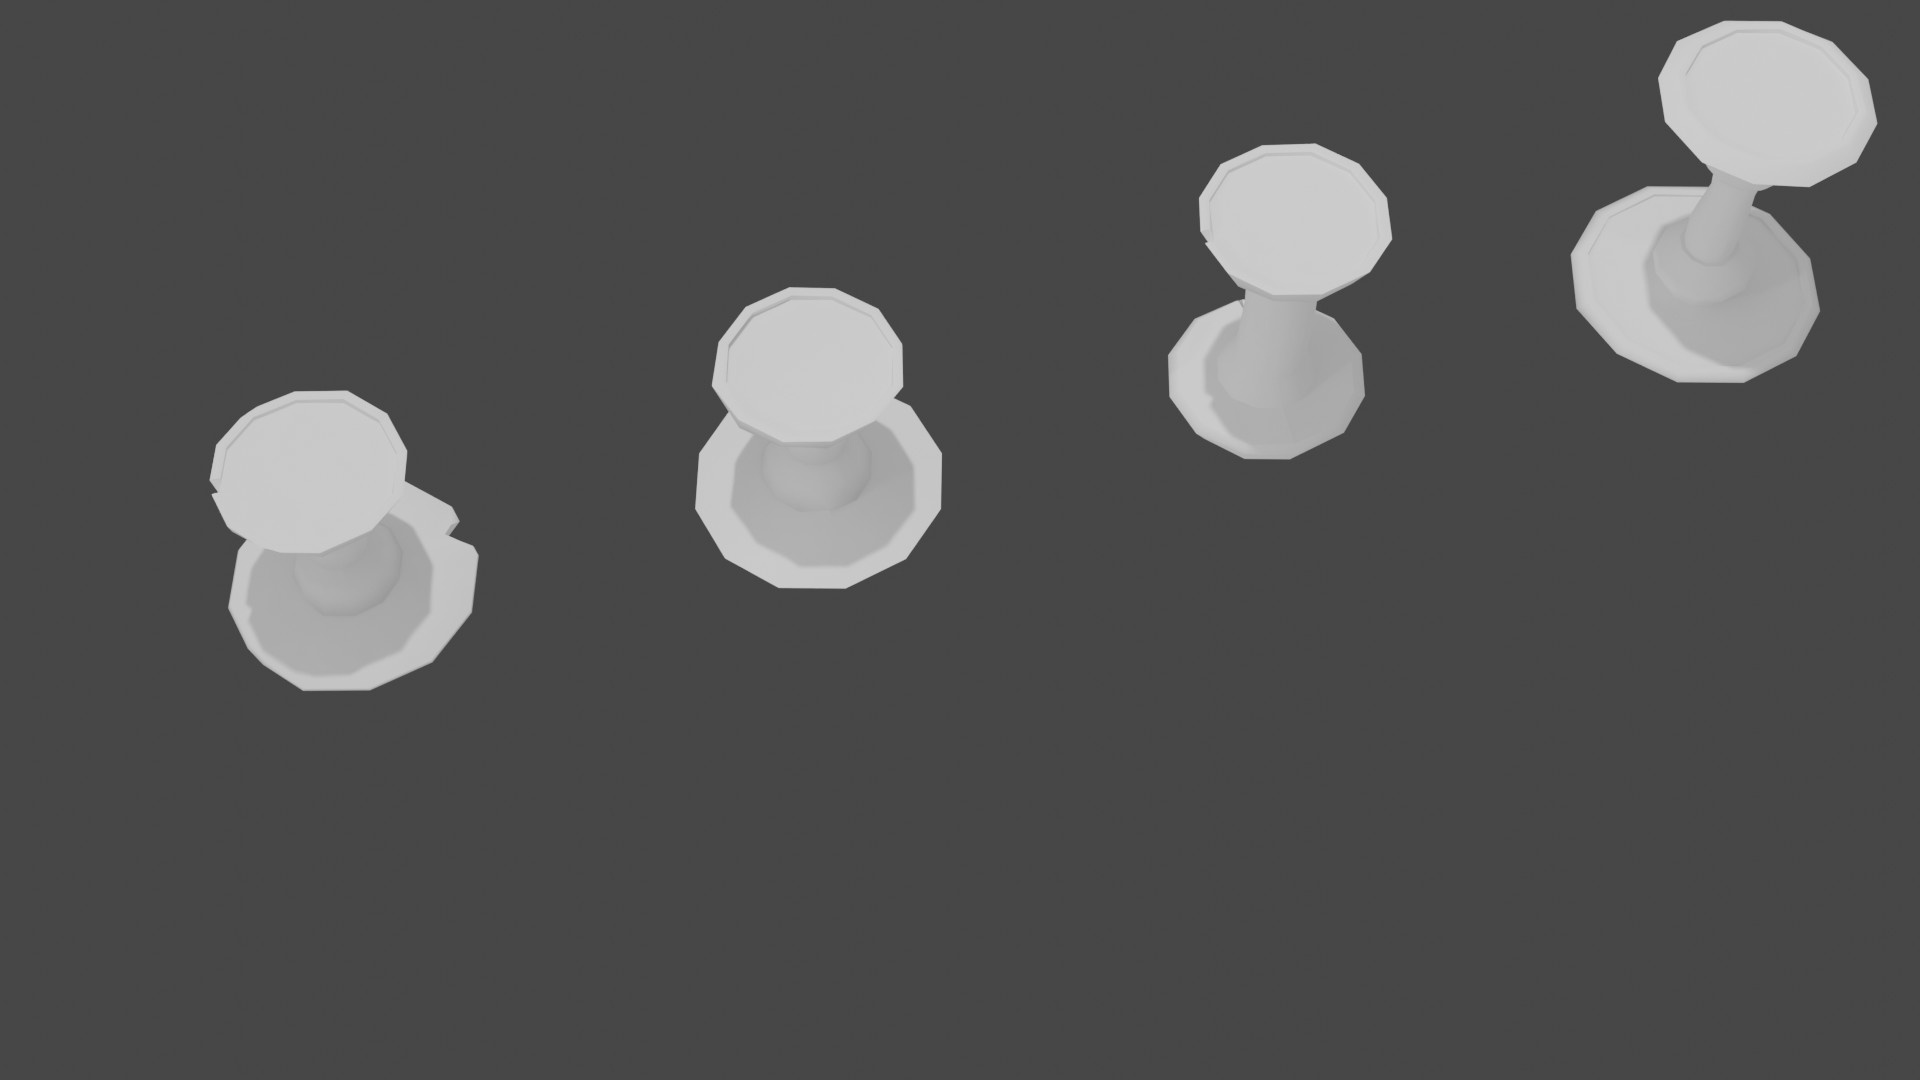
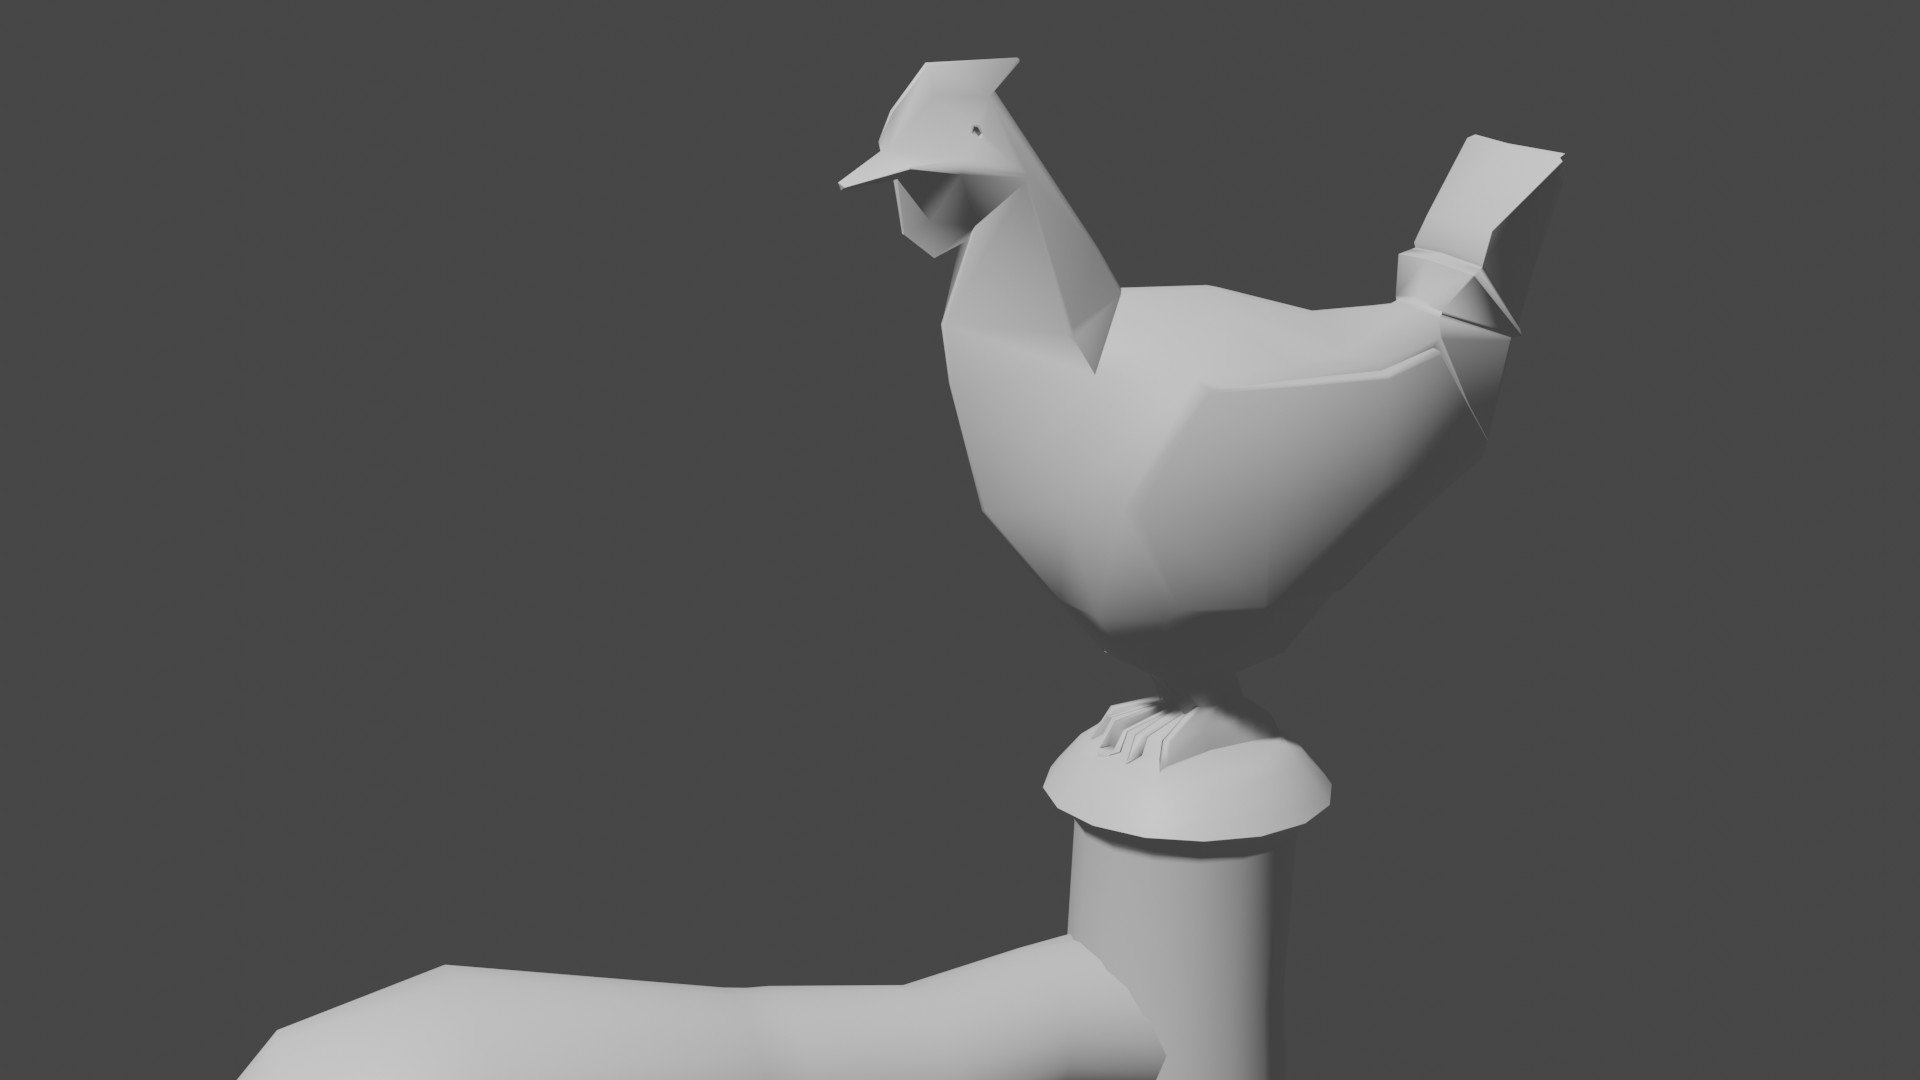
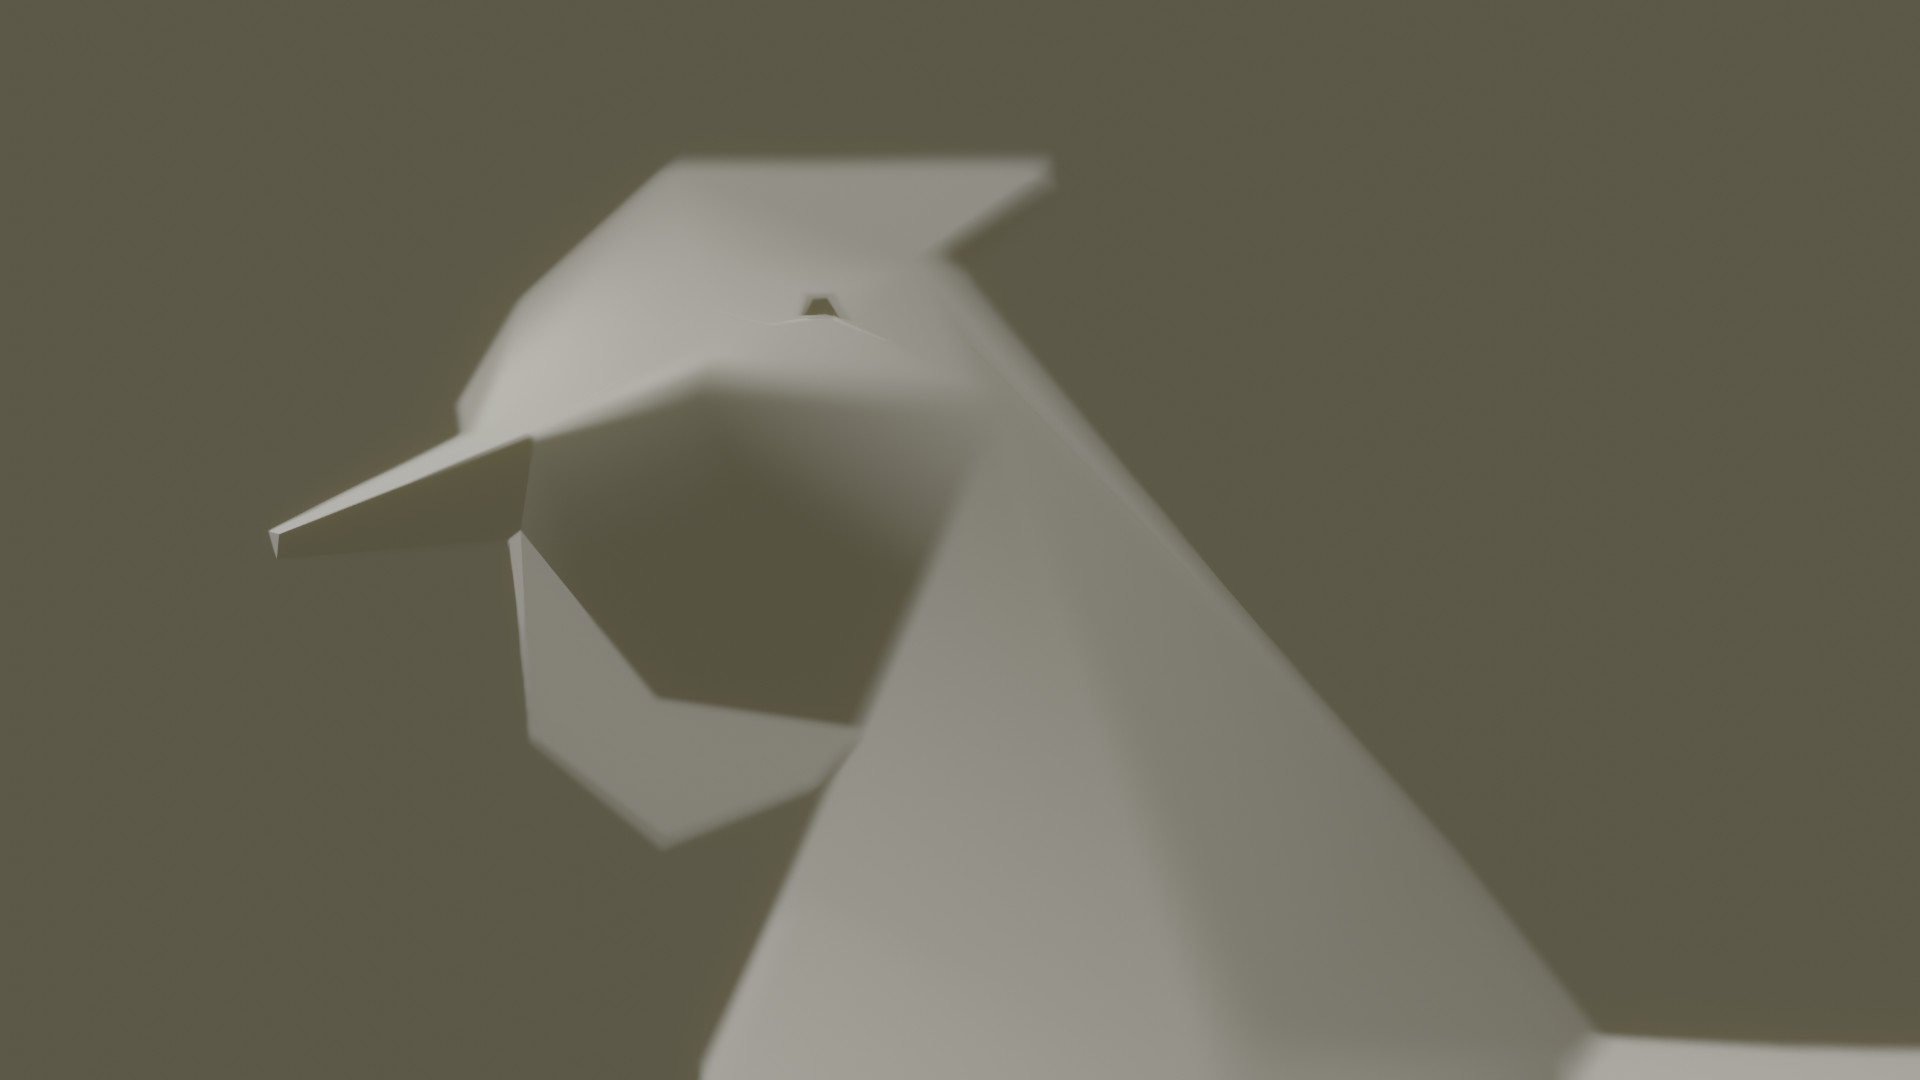
The lamp was originally part of the tall candle stand above, but then I took off that middle piece and began to work with it and stylizing it. I am pretty happy with the results.
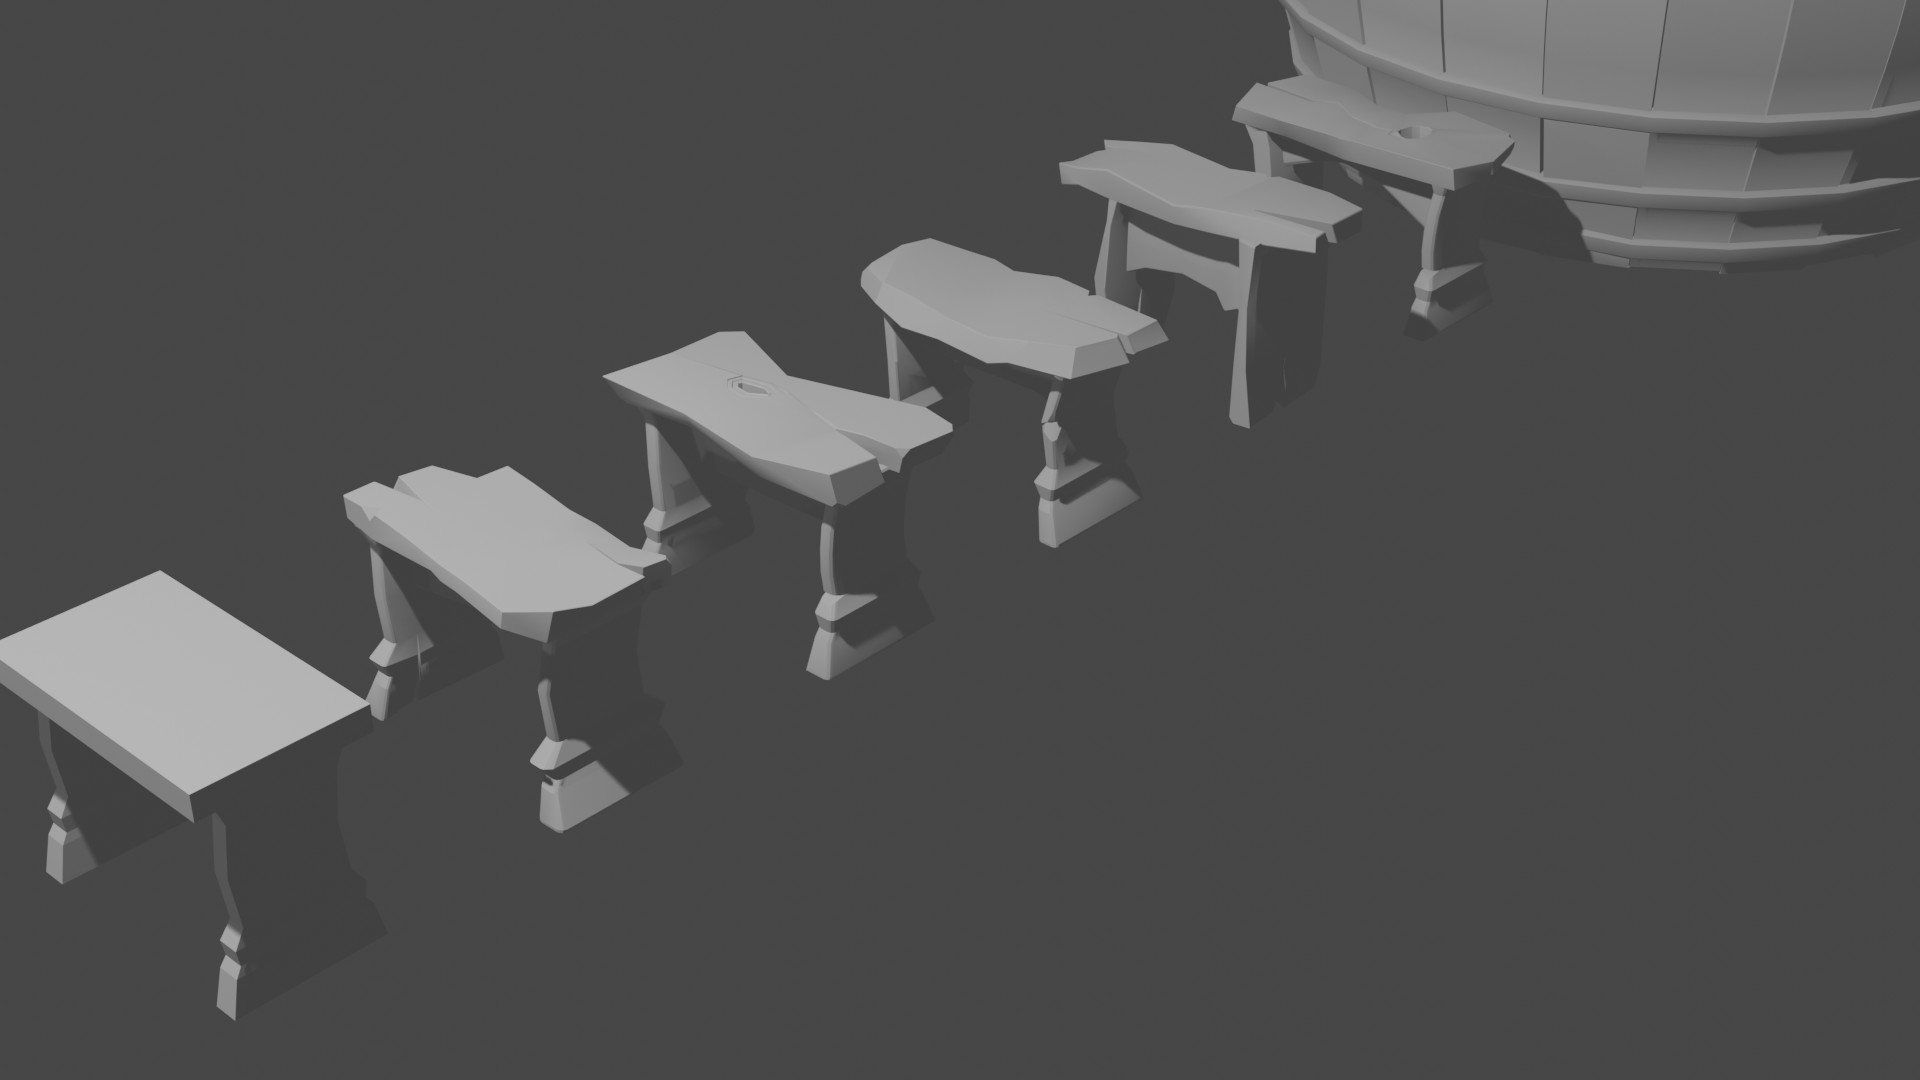
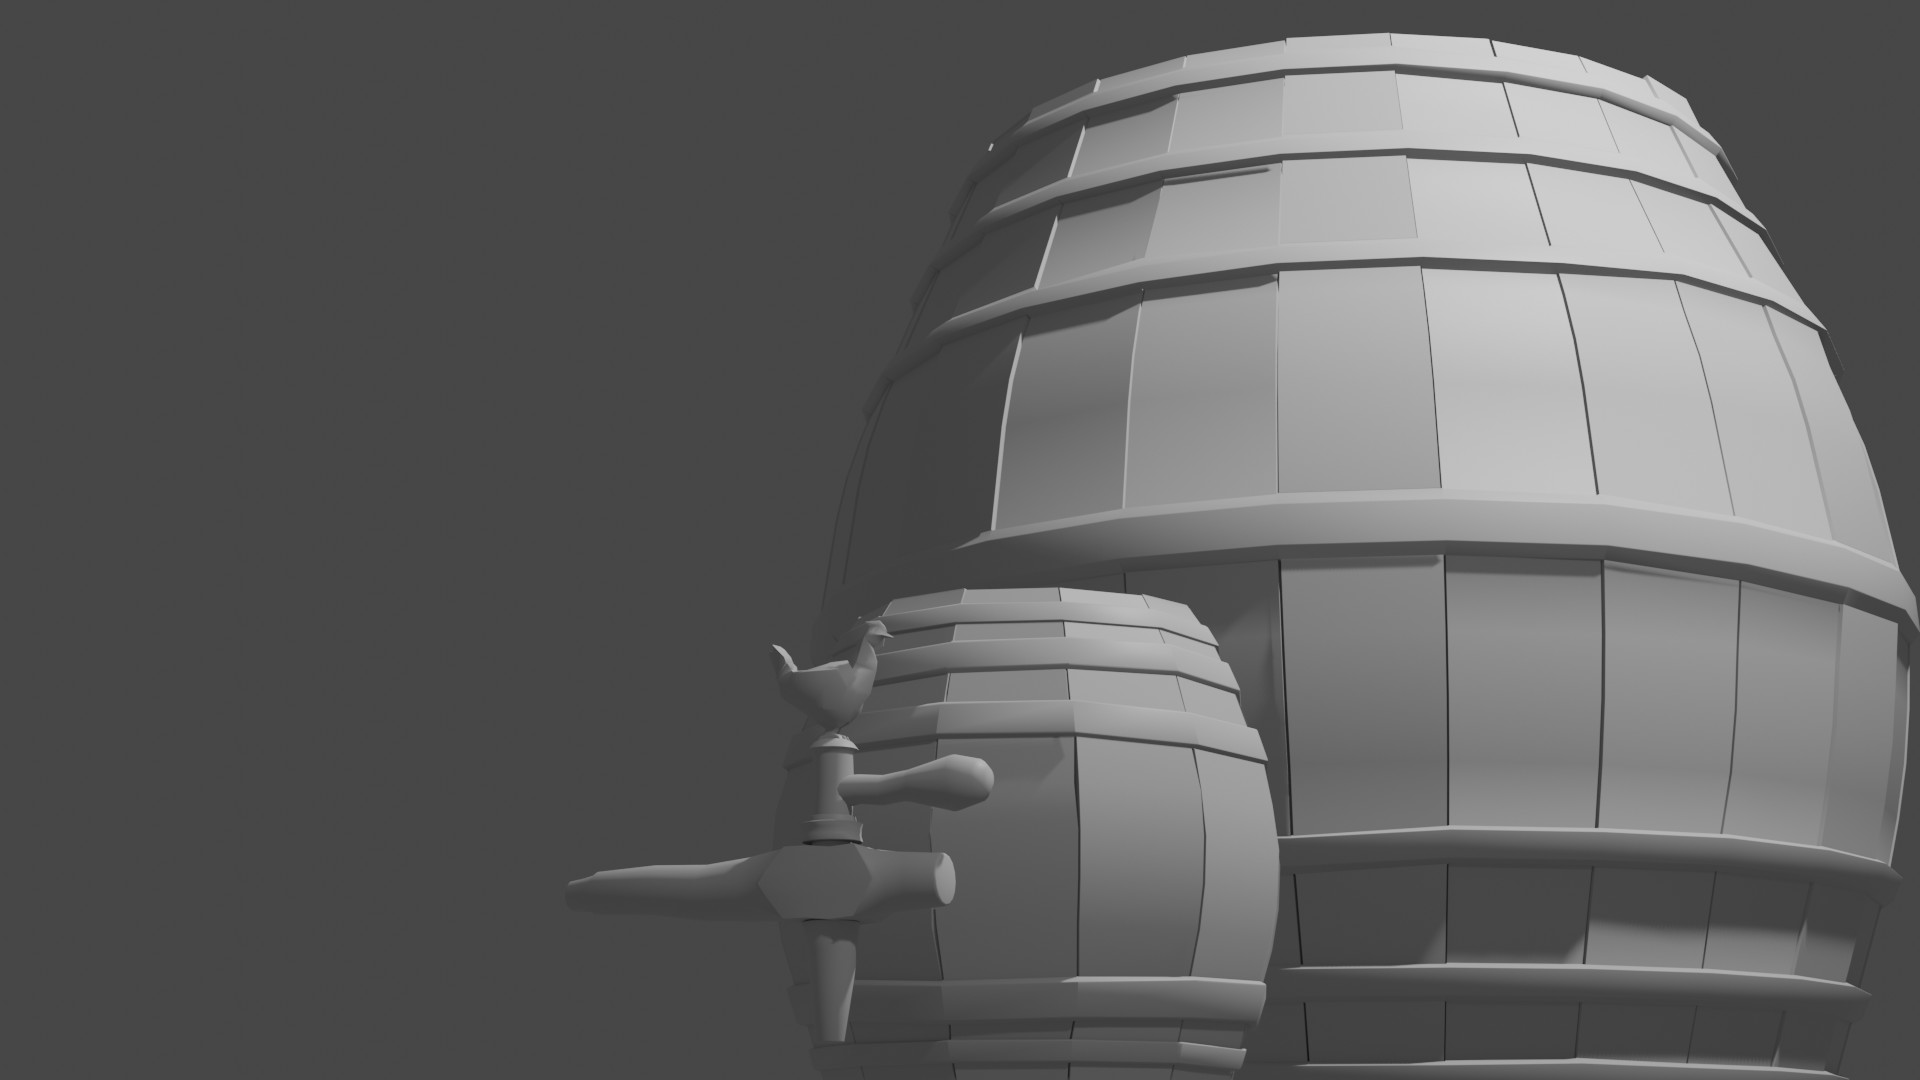
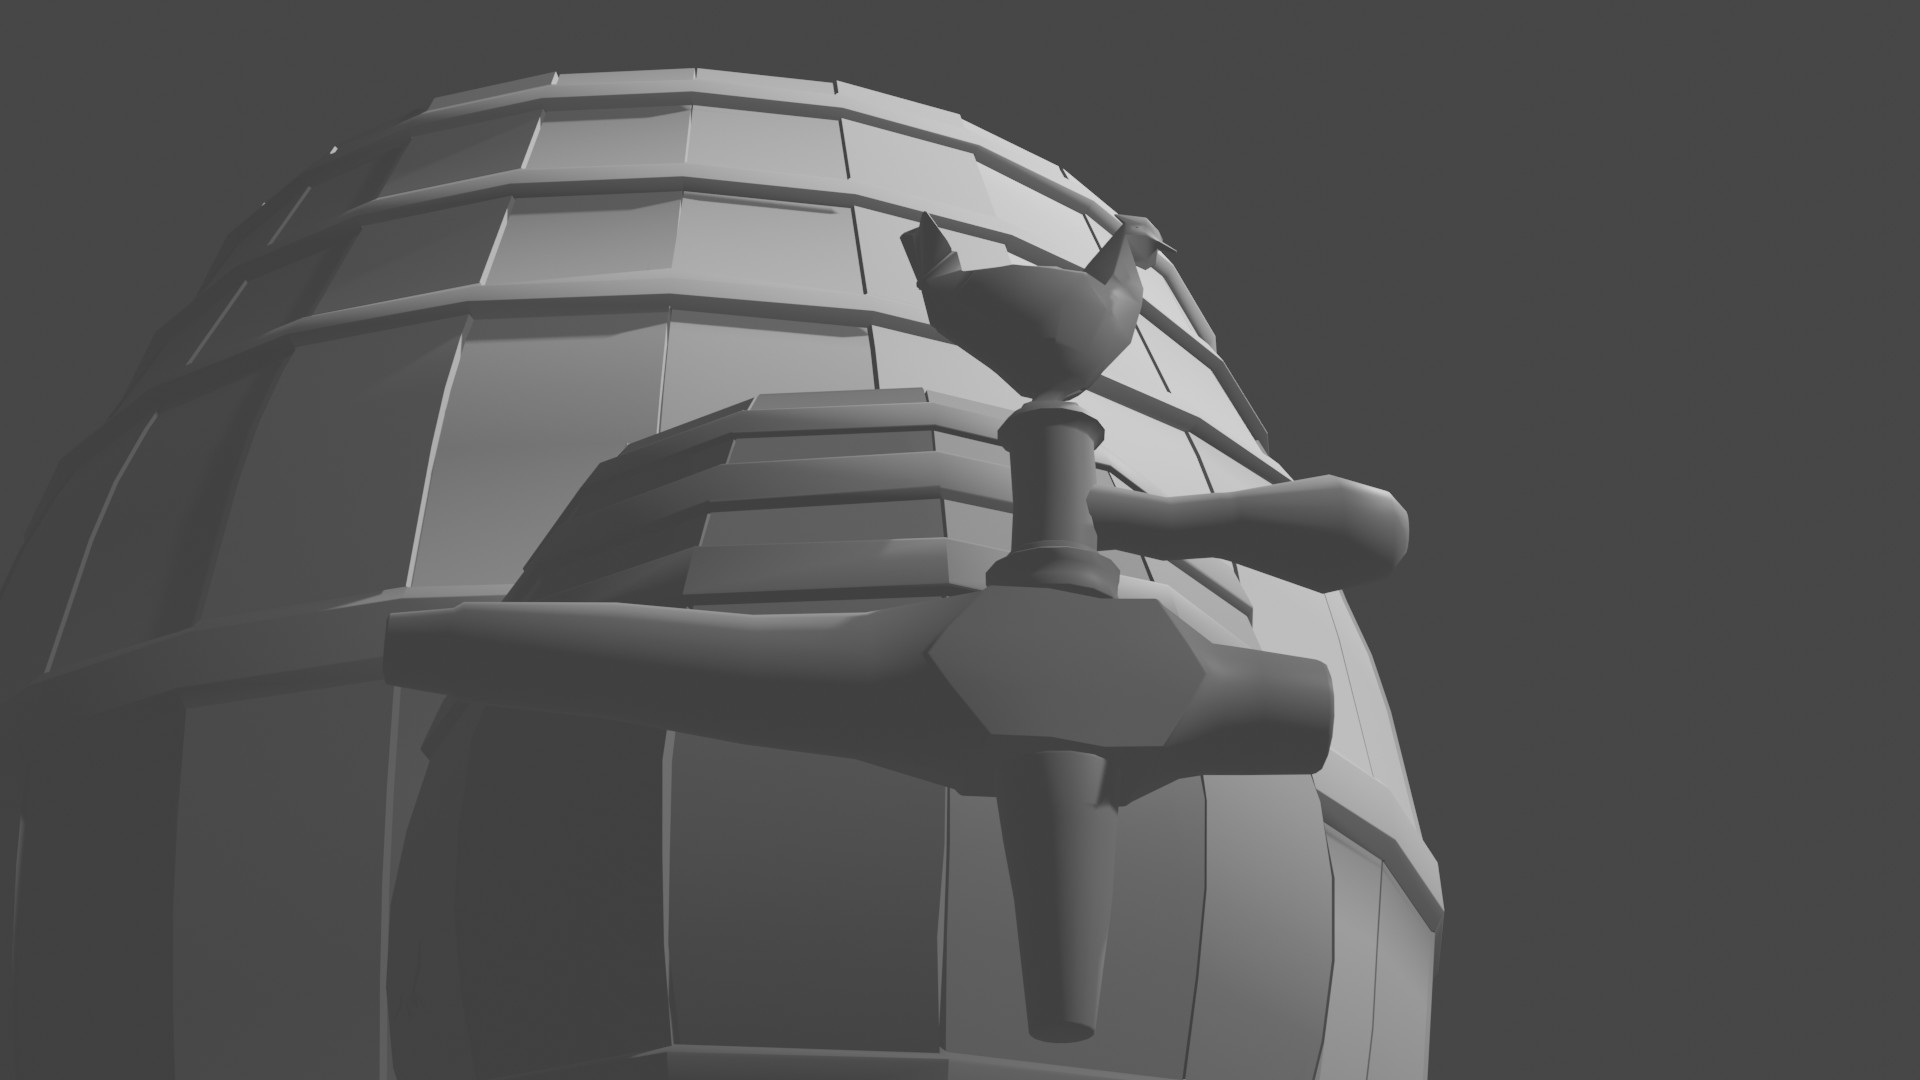
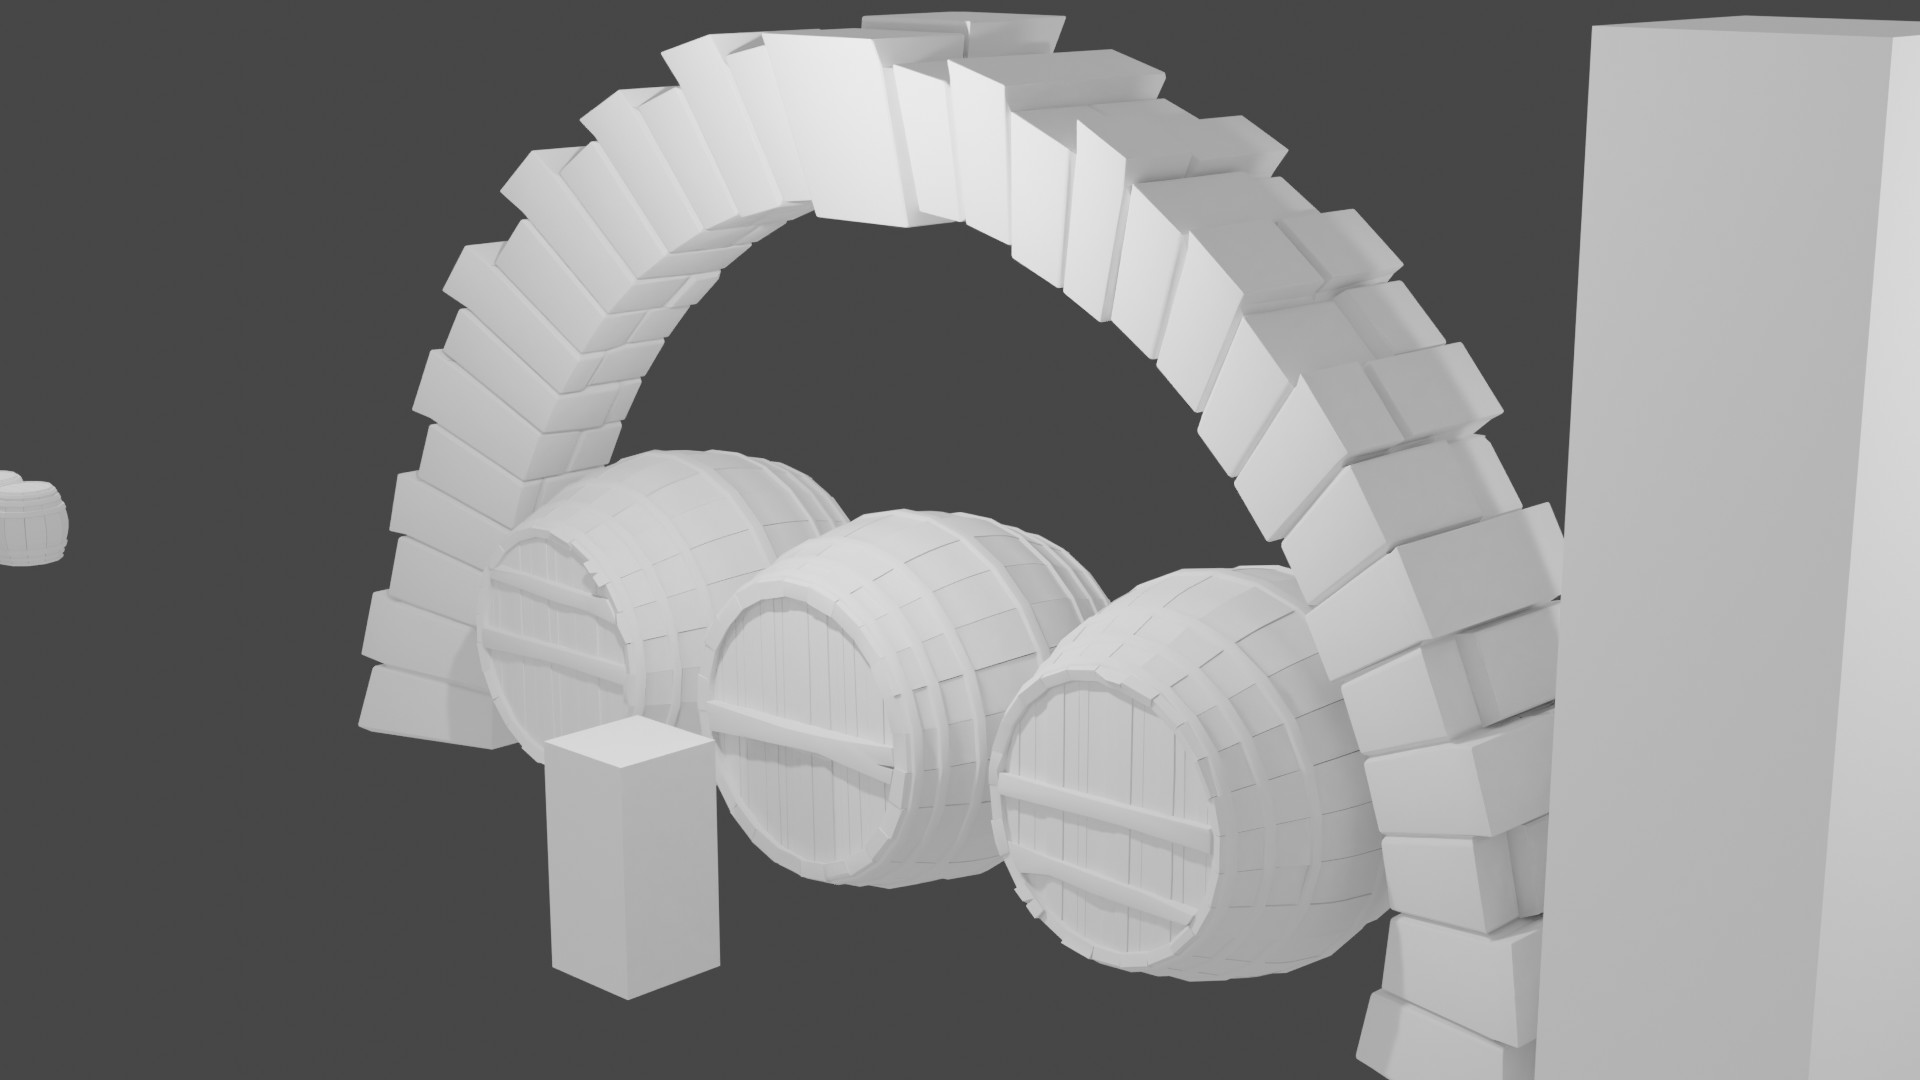
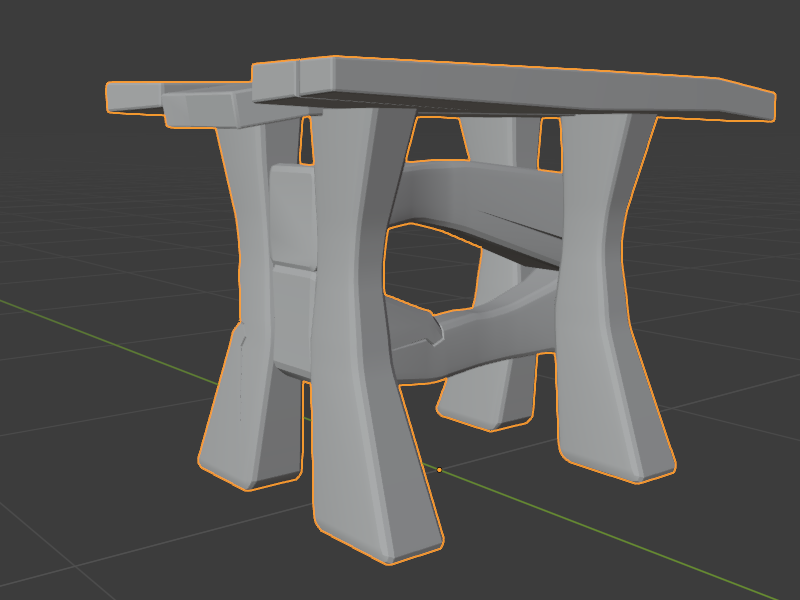
The barrels, tables, and benches are inspired by Ghost of A Tale game. It is very stylish. It is also a good example of what you can do with low poly models with a high quality materials placed on top.
Yes though I find it hard to leave things low poly, but for images or especially animation it is remarkable how much can just be ‘faked’. I guess a lot depends on whether you enjoy the making more than getting to the end result. Hobby or work.
Wow! Great asset library.
It’s fun to see the diversity of the same objects.
But also the tiny details which make it more random.
I think the new Geometry Node system, introduced in 2.9.3, can be a big help for you in this quest for modular assets.
I agree, I have had to try to keep limits on myself. I am trying to keep into perspective my scope. I do not want it to be too low poly because I am not very fond of the overly blocky look- bevels are my friend.
Whatever do you mean? Just because I have talked about taverns, doesn’t necessarily mean I will create one… does it? (I am hoping to create a small card set, not that cards have anything to do with taverns…)
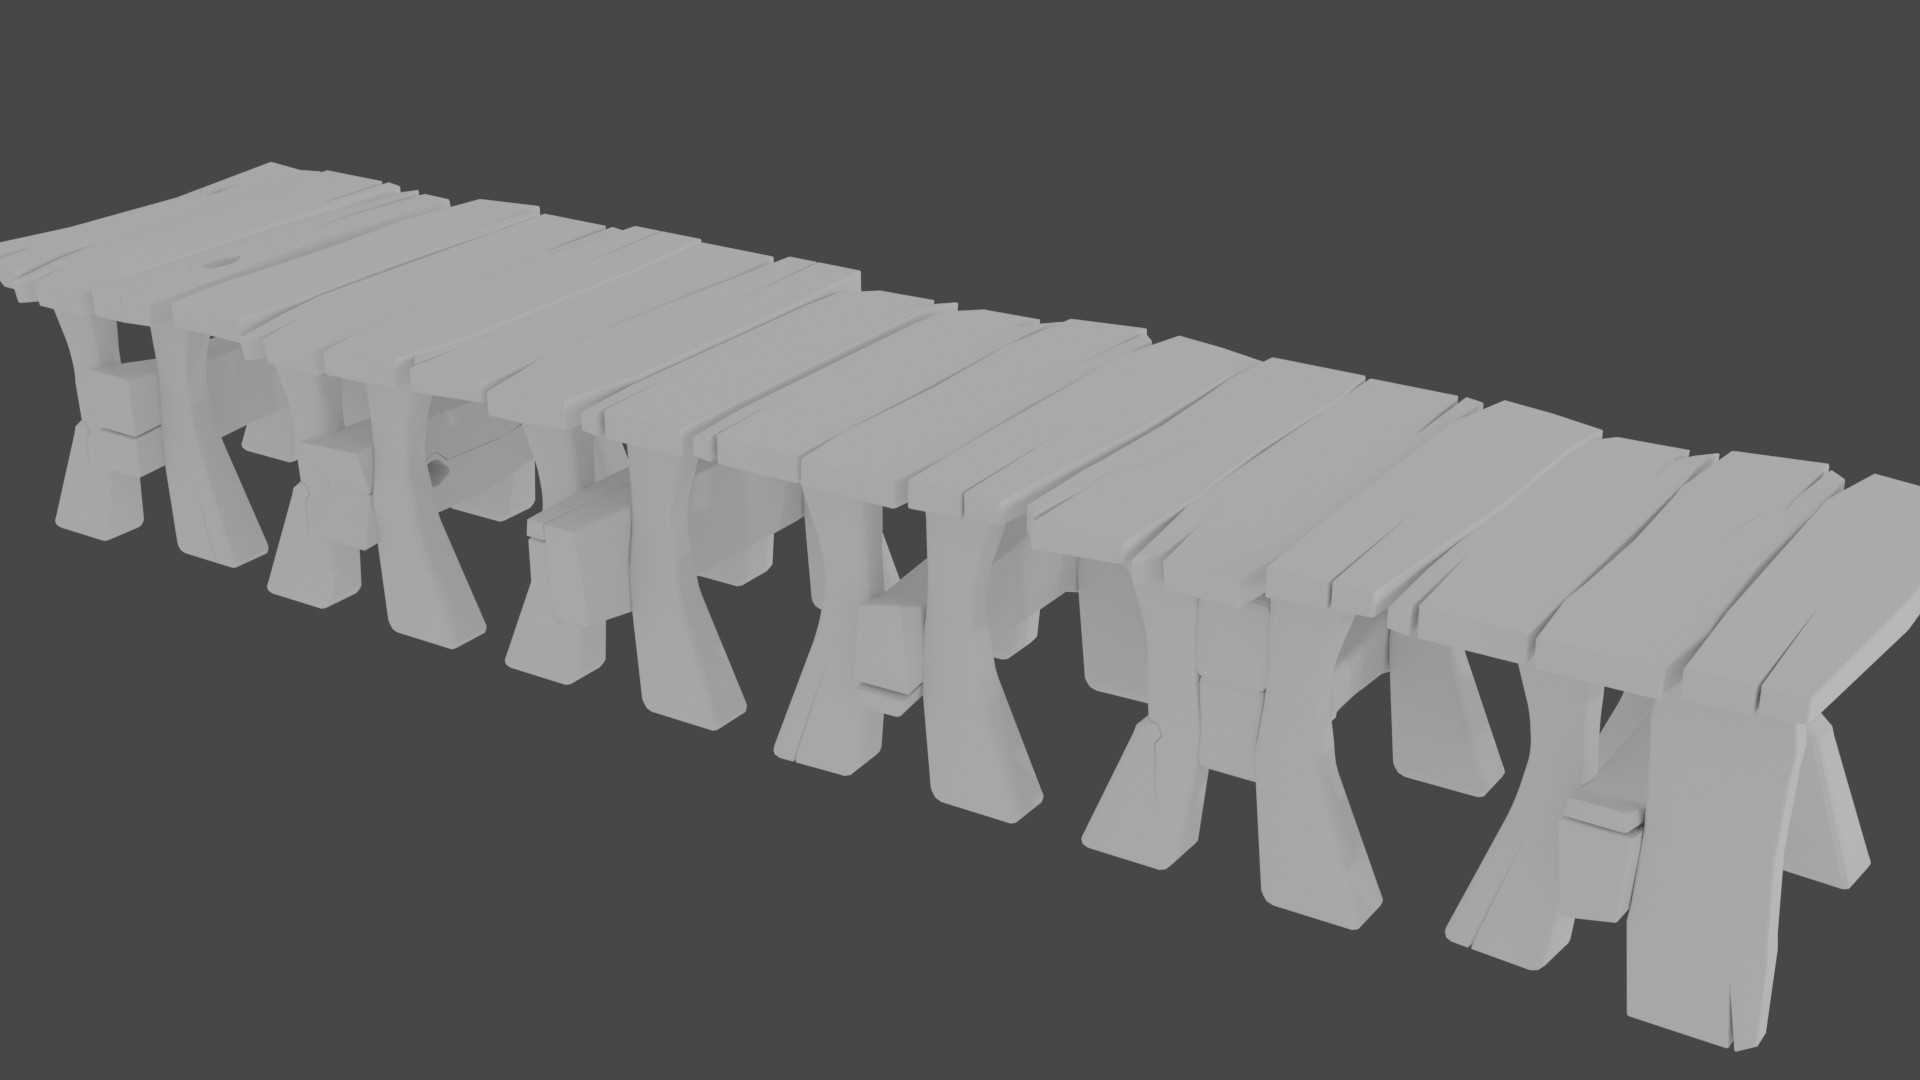
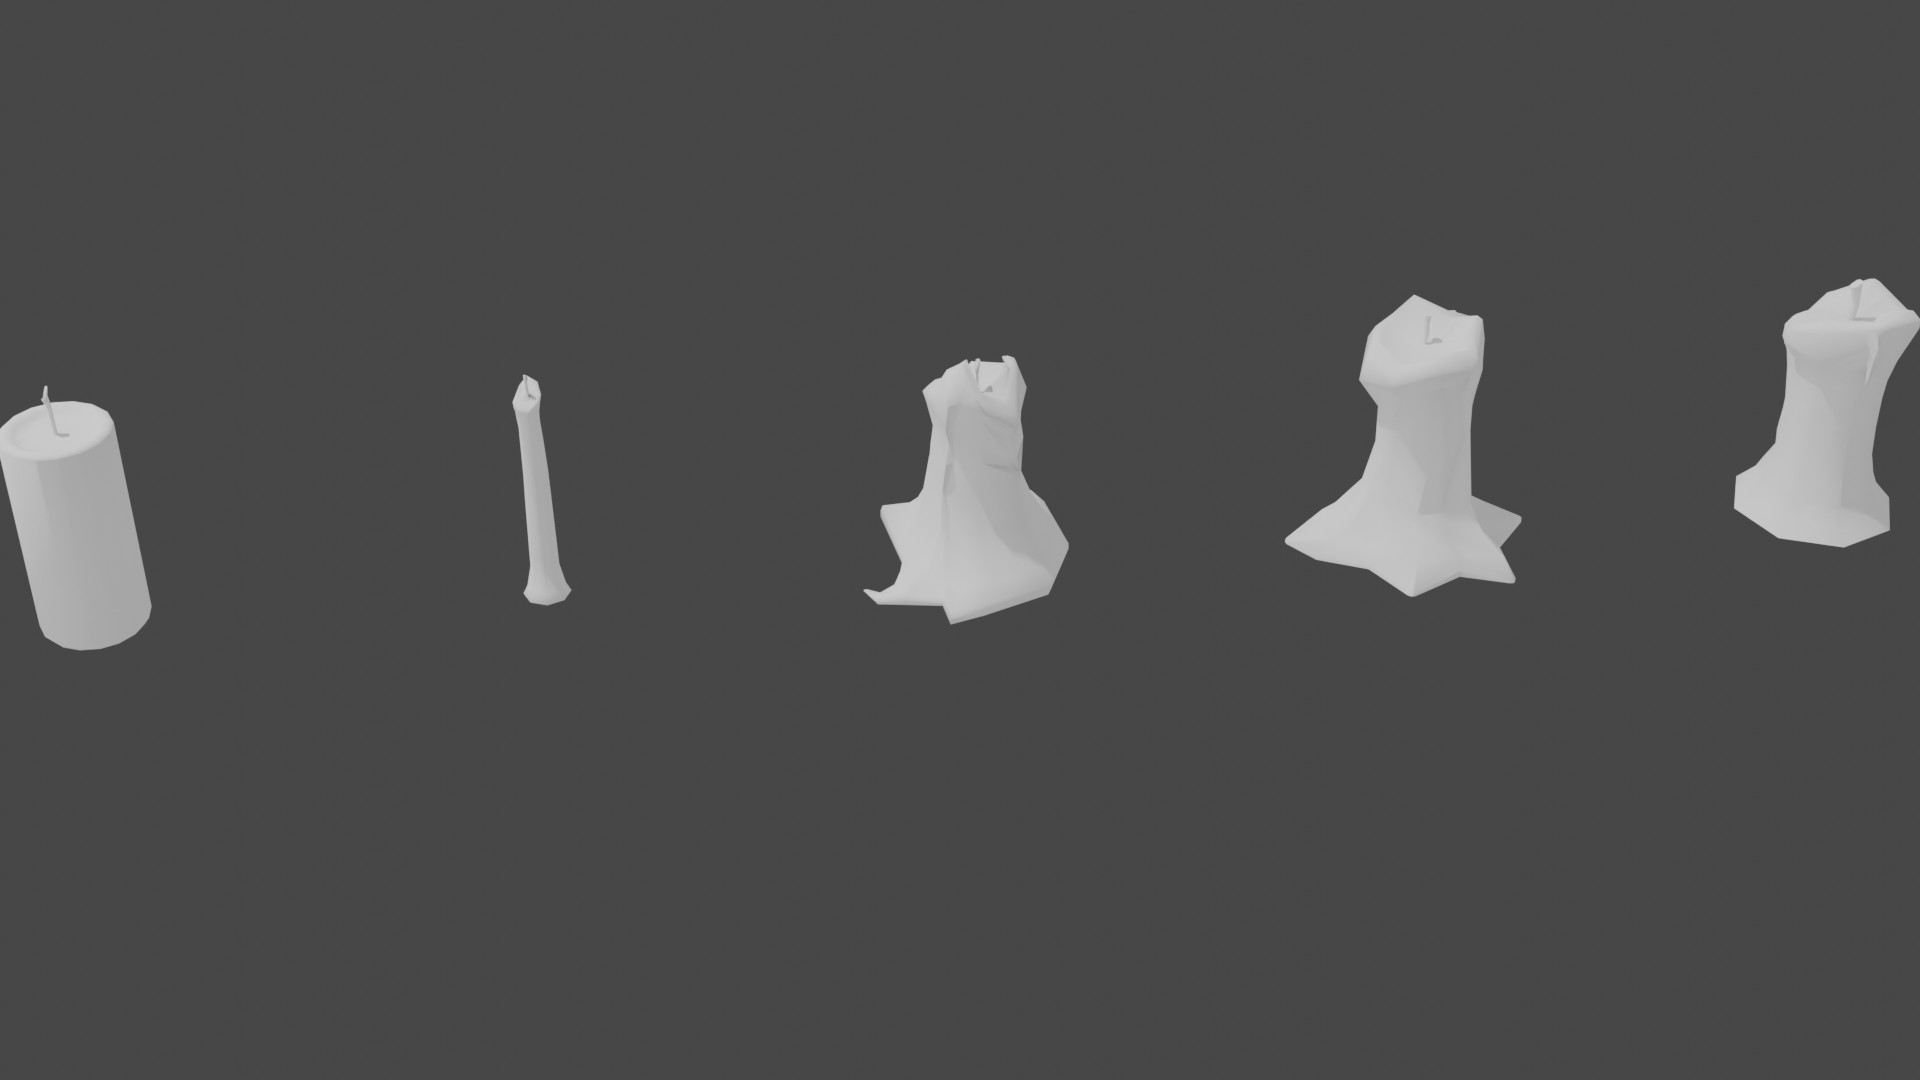
I found that each asset roughly took about an hour or two to complete. The longest amount of time is creating the base model. But once I have a basic style worked out I then proceed to other models.
In some cases I simply swap some of the parts around. You might not be able to see it, but one of the benches were built completely out of seats, or one of the legs of another was replaced with a seat (it broke, so they had to use what they had). I also took some of the table boards and put those on the seats, and vis versa.
The tables feature some similarities. One of the middle sections that stabilize the legs are not made of a thick wooden board, but rather leftover table legs. Thought it would be a nice touch
It does look like an interesting system, but one that I have no clue how to utilize at this time. I will have to put that on FedPete’s expert list of Blender tools to Learn- which already has another item on it; dealing with animations and not having to repeat different animations.
It was an interesting geometry puzzle. I found the Chess set lessons very useful in creating this, particularly the Knight. It will be interesting to see how sculpting works, which I assume is in the next section.
The feet were actually the hardest. I wanted to bevel them and then sink in the middle line. I managed to do it, but it took some time. They don’t look too pretty close up, but further back the intended effect was accomplished.
As you can see, I played around with them to make sure they did the job.
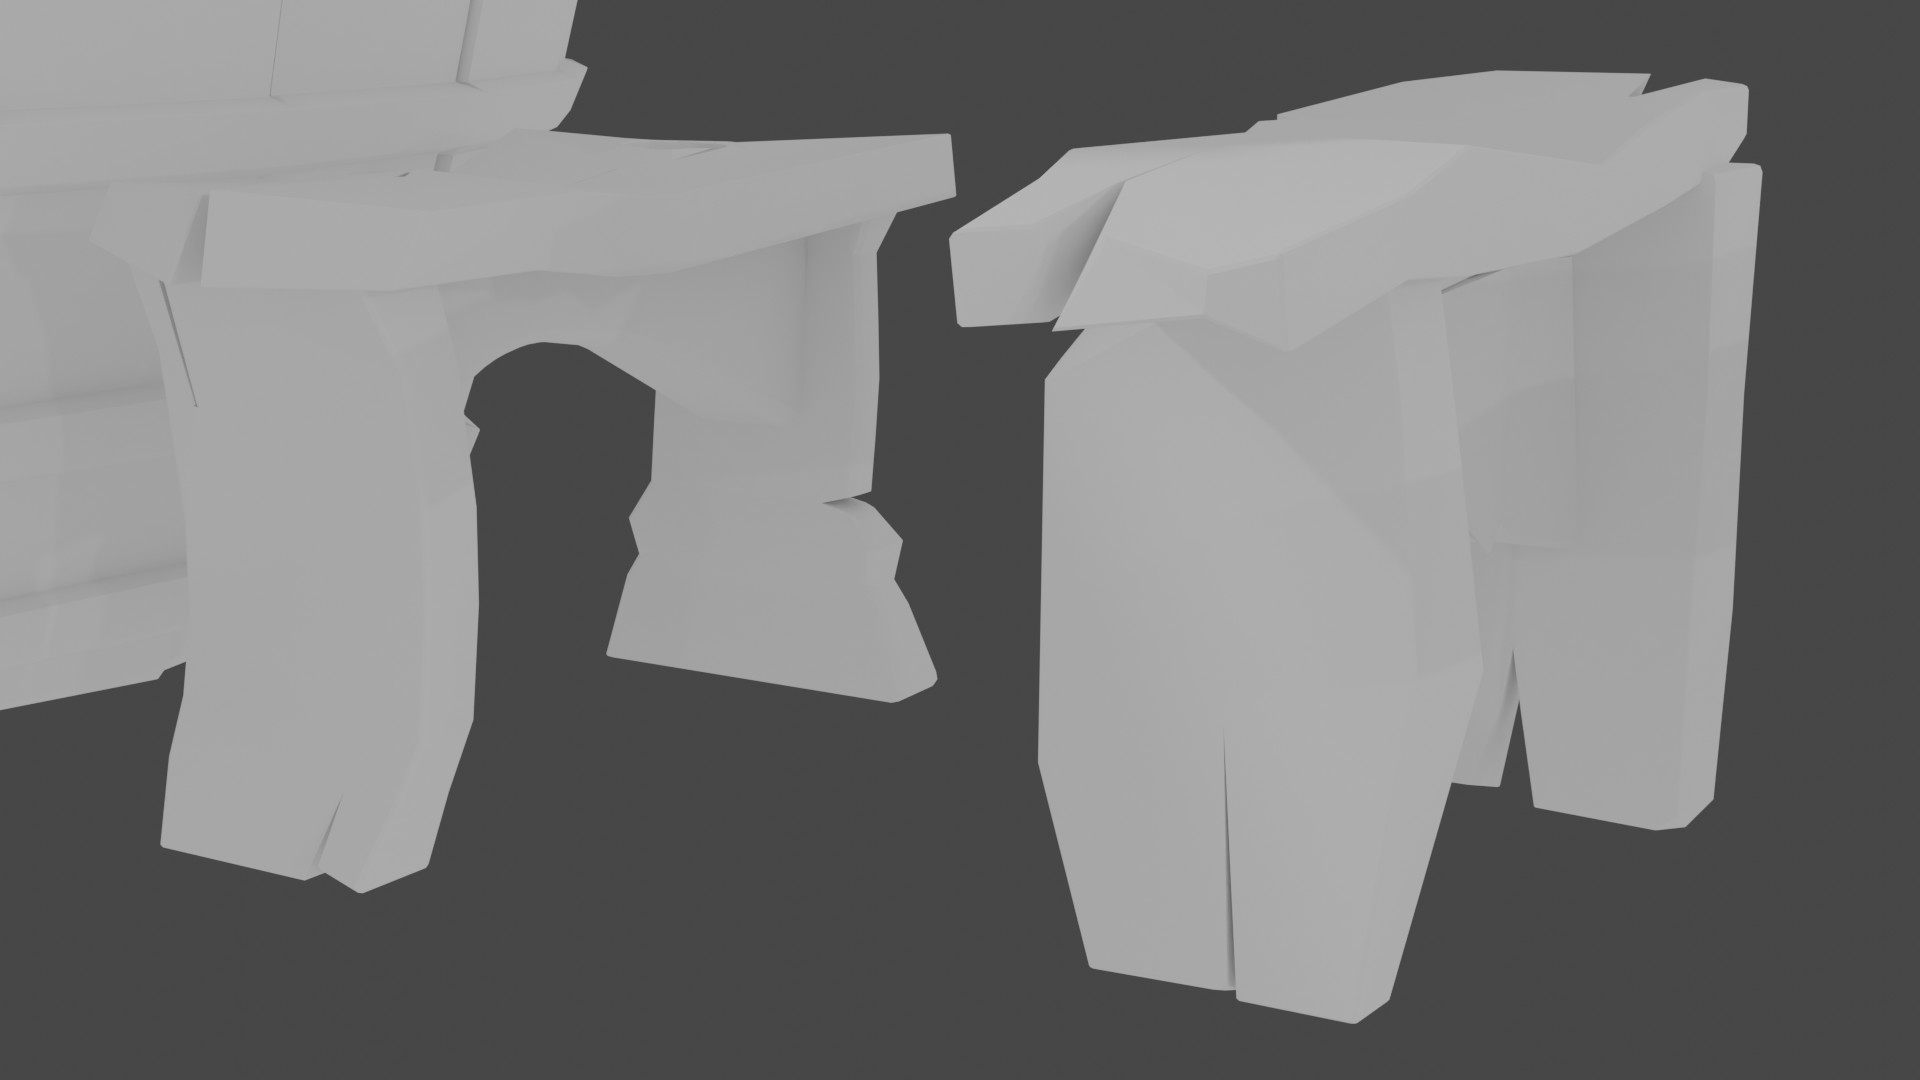
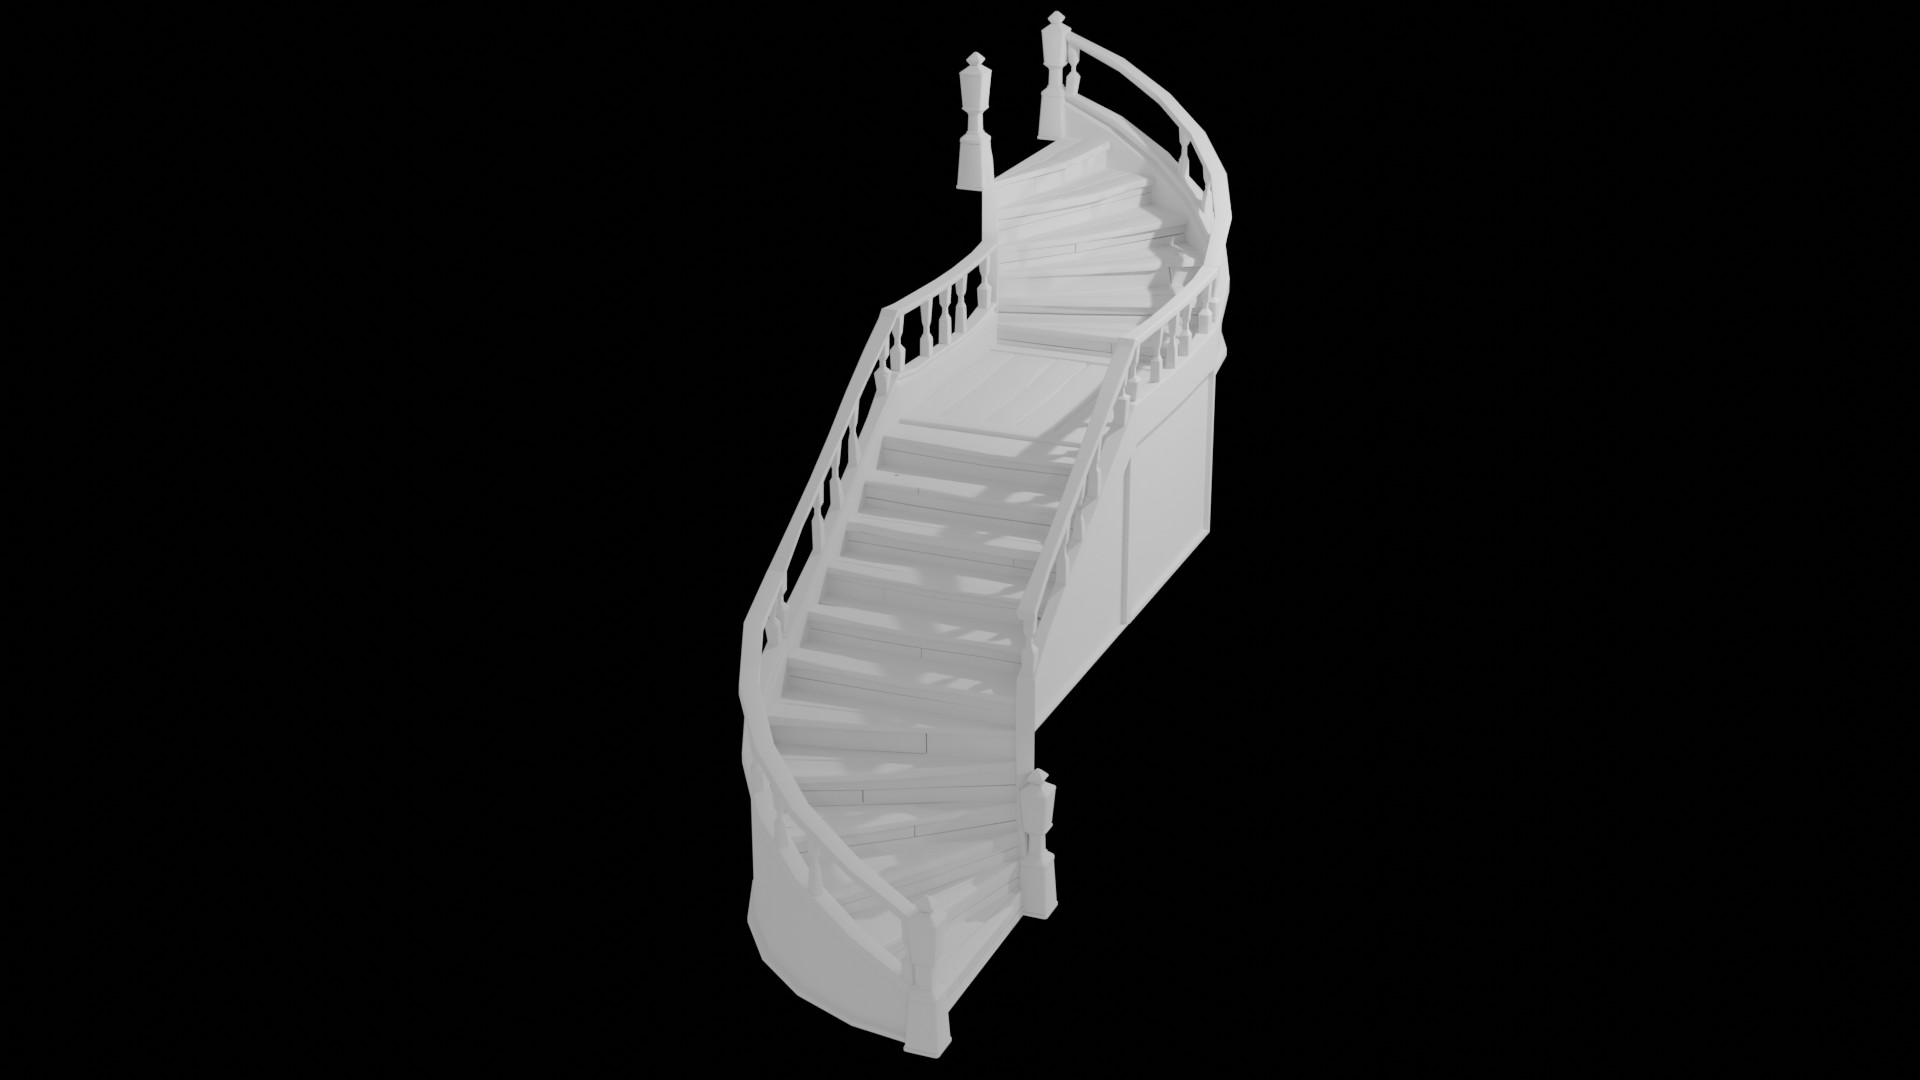
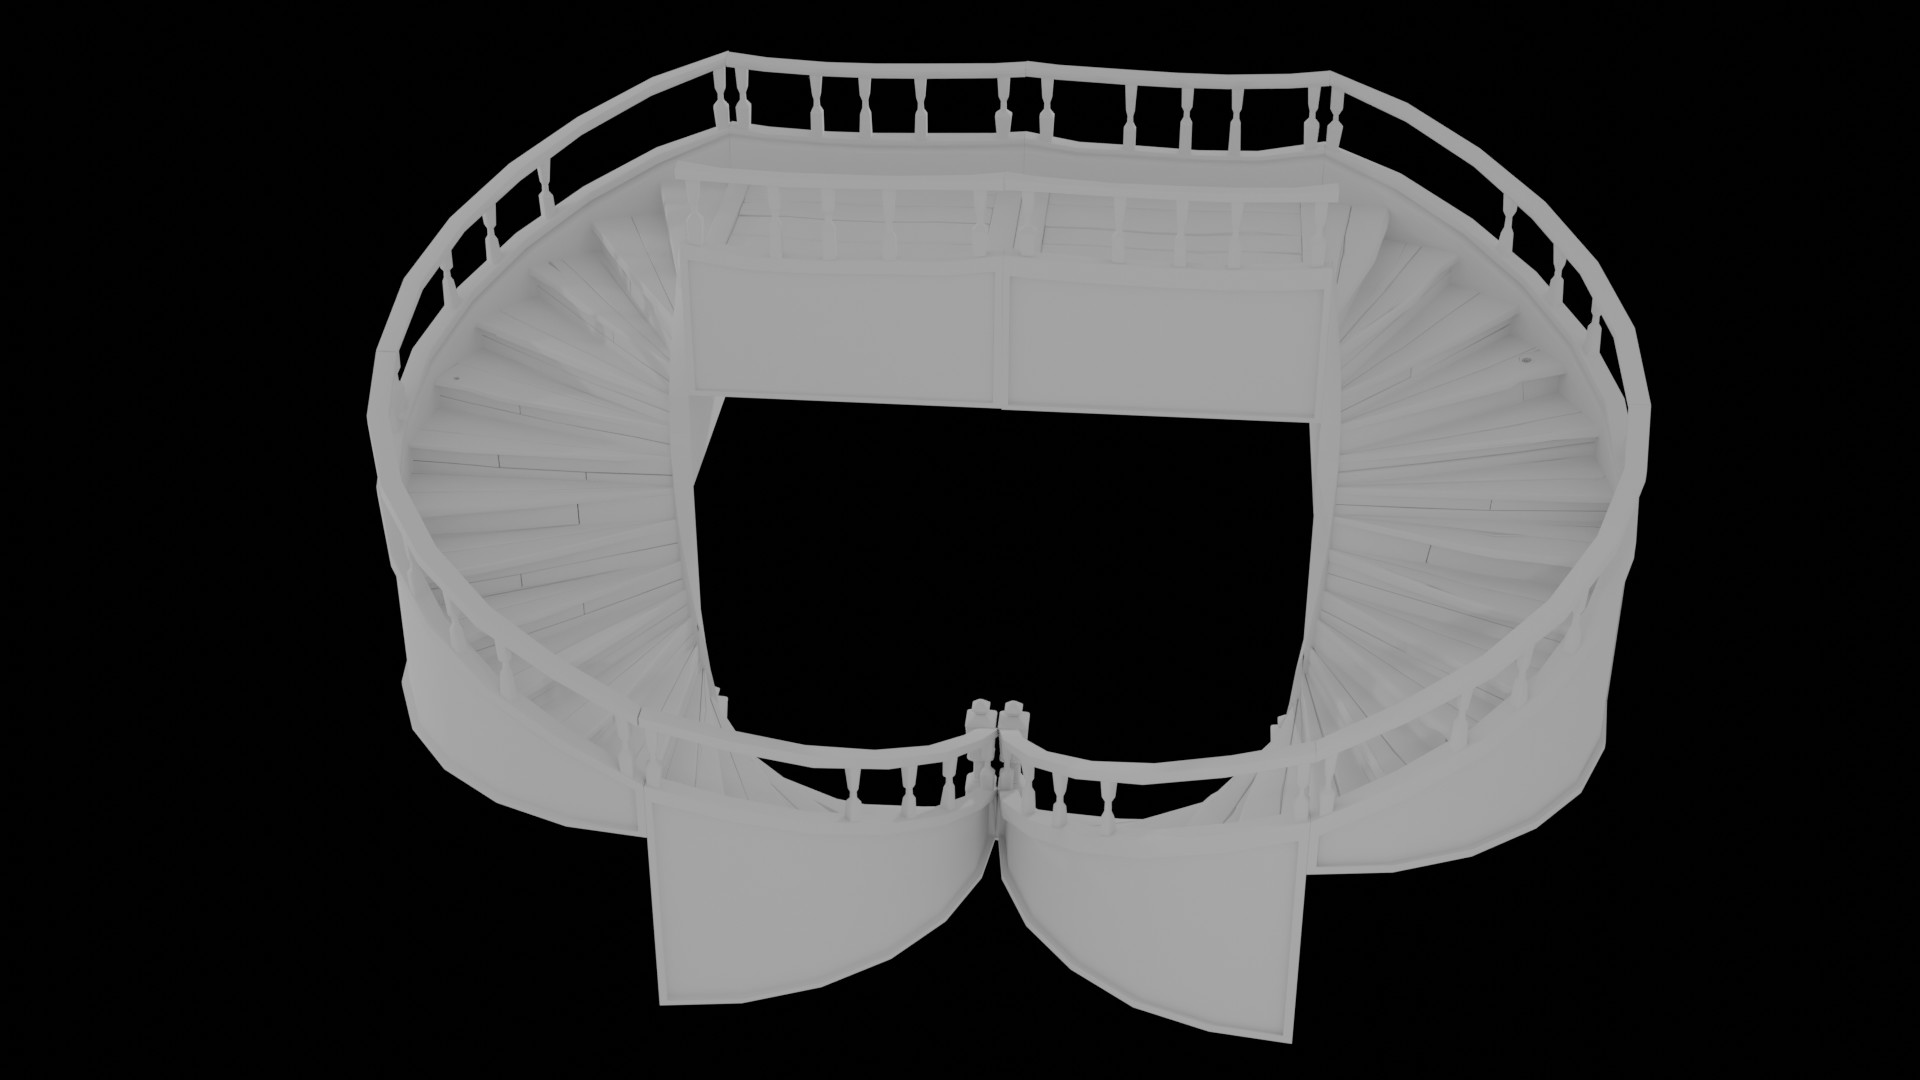
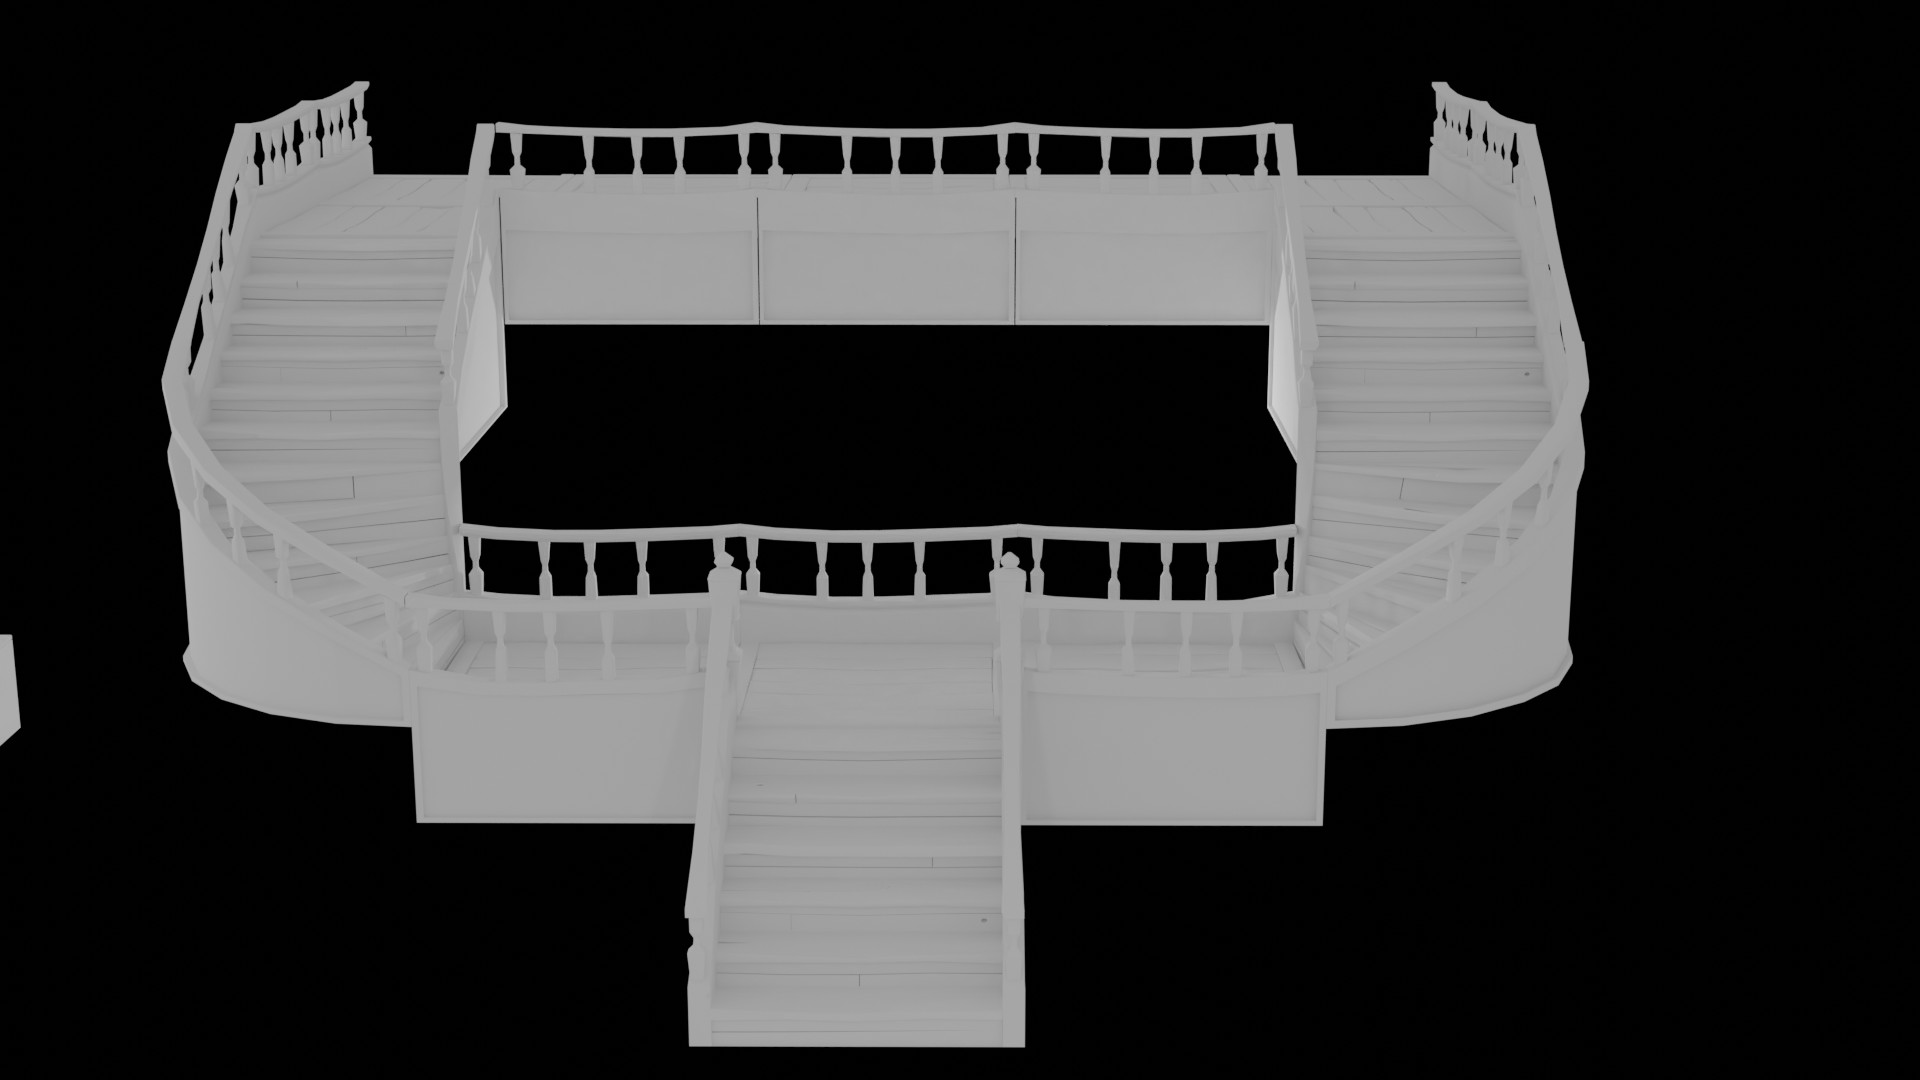
All and all, I am kind of impressed with my first unhandheld attempt at doing module stairs. This was all only using what I have learned thus far without looking outside the box.
I started with stairs going straight up using a box, cuts, extrusions and so forth.
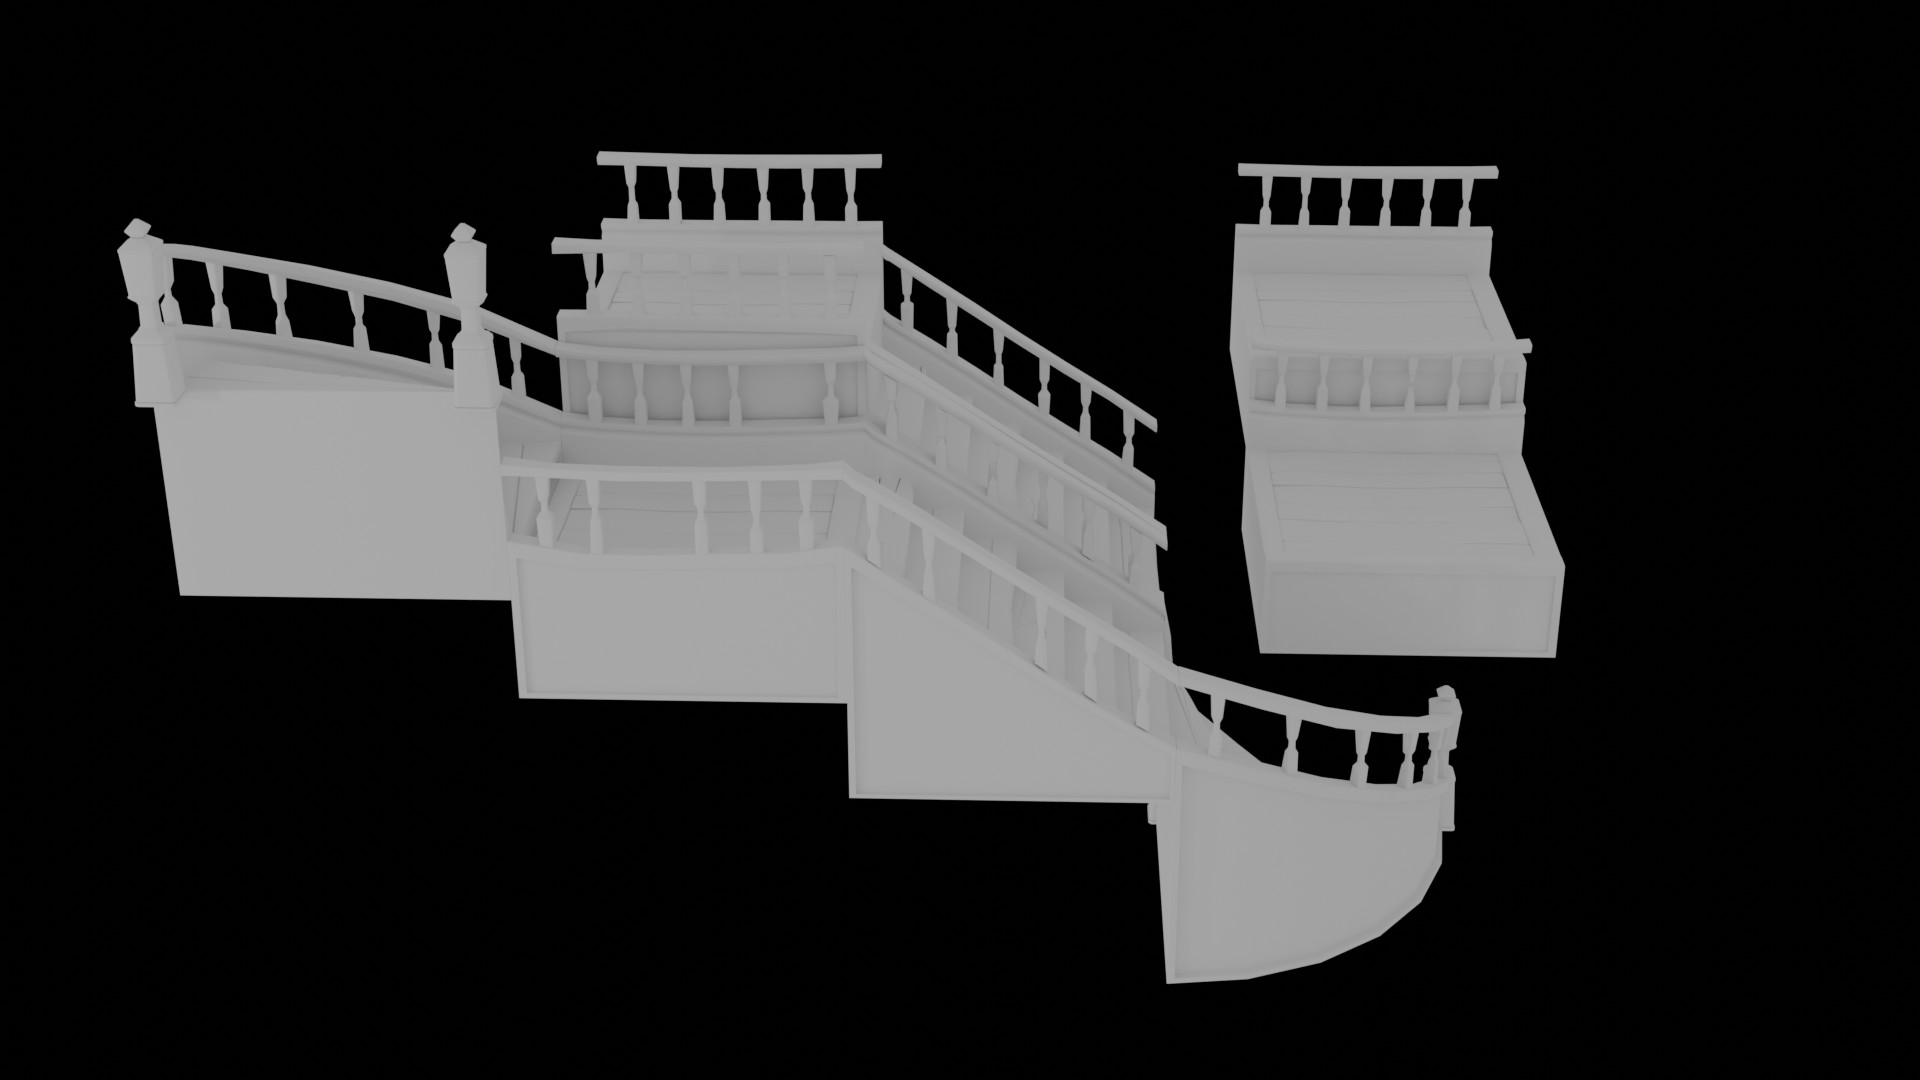
The tougher one to figure out was the curving stair. For this I realized that I needed a quarter of a cylinder.
The rails were taken from the top of the stair edgings, cut out, separated and then filled in. The pillars were the easiest part, and once extracted from the rail, became the main pillars found at the top and bottom of the stairs.
I also had to make sure that each edge more or less lined up in either directions. I also made sure that the parts could fit duplicates of themselves without being too far off.
I started making extra pieces, I realized I could end up making a whole set of pieces all on its own- and then never complete the tav… the scene… Sort of meditative taking each part and making a new one out of it. Really, I only need the original 4 found in the first picture for my scene.
Very fancy stairway.
Why do the rails on the straight section sag so much? Is the intermittent posts/pillars part of an intention to look dilapidated?
Look forward to seeing them with some materials on them.
Yes, they are a little sagacious aren’t they , something that I can change- I had done that on purpose for the scene on purpose. However, as an asset, this could be a little much, repeated waves of wood. I just might duplicate the sucker and then create a straighter model- rails and boards
As for the wide spacing between the rails, I was going for a more simplistic look. But it does make it look a little more like an abandoned house, doesn’t it?
Cheap owners! They should get that fixed! It must have been the same fella they hired when they tried rebuilding that well that was destroyed by that robot many, many, many moons ago. They had to hire someone else (NP3 or some such number), and he gave them a high-poly water-pump for cheap!
No problem with a tumble down rail, so long as no users will be the worse for drink. Accidents happen anyway. The best beer has ‘body’ in it, and keeps the place tidy.
The modular nature needs to take into account the ‘tiling’ effects. If at least the ends of the straight section were a section that was flat at least there would not be the sharp pointy join of that cheap NP3 carpenter look. Lay out for a top of the range NP5 one! Get them fixed up in no time. All the modular section connection points are important in this connected continuous staircase.
A good point to note indeed! I will pointedly make a point to create a straight rail set, otherwise we might end up railing on about my saggy pointed rails!
Makes me wonder what they have in their cellar… perhaps something dealing with stone walls, torches and time shares?
There, I straightened out and undilapidated the rails and floor boards, and added more railings with better spacing. I kept one model around for the more run down look (bends in rails and boards), and made another by modifying the old mesh a little.
I think it has straightened out its act, and will not have to worry about some"body" falling off the edge and thickening some future brew. They would have to call it the Abra Cadaver brew…
Probably the best way to do some of that would be to lift up the slope toward the ends so that it eases down into the next rail and stair bordering. But with any of the other ones, if I try to curve it too much, it might look a little strange if I use them as straight pieces.
Maybe have an “end piece” selection for the left side, for the right side, and for both (for shorter conjunctions). And I would only have to do that for the straight and the straight ascent/descent staircase: about 6 models if I wanted to do a minimal but thorough job, but for the scene, I would only need to clean up the sloping model.
I could consider doing more (and may as I build the scene), but I would like to consider moving on to the next section before the year is out!