6.173: Final Final Project: Incomplete

Actually, that did come to mind and I did implement it!


But irony of ironies, I did not actually need to use my feature slope piece for my scene. I got looking at my reference and design idea and I only needed one straight piece and a curve!

However! There was a section that required an upper area with rails. So I placed it there!.

.

But notice that there are a few blocks covering the intersection areas. Those will be wooden at some point.

Looking at the picture, I realized I just created a bridge!

I will have to keep that in mind for any future project…

Maybe, but I am only working with stairs, walls, and floors. Imagine if it were something more complex, I am sure I would have a run for my money. All I am doing is simply keeping my points together, and if all else fails, put something in-between. And if I want variety: copy, paste, mangle, repeat. Kind of a meditative procedure.

Wow done? Nope, Blizzard Entertainment had nothing to do with this project. They were not even a point of inspiration! Unless you are asking if they have stopped updating, upgrading, and maintaining it- That I cannot tell you as I have not touched WOW in years, so I do not know if if WOW is indeed done. :wink:

2 Likes

Very nice, solves the join issue perfectly, make a feature out of it.

You will find uses for the extra section, you have a ‘kit’ now that can be used in many projects.

2 Likes

:wink: With “WOW”, I don’t mean World Of Warcraft. Just wow! :wink:

2 Likes

:grin:

Okay, I won’t be cheeky- Thanks!

And perhaps something to expand upon if I should so choose? While it could be medieval fantasy, you also have something like Starwars which blends Sci-fi and ancient cultural elements together at once.

As an example: You could walk into a run down wooden Tavern (The featured set), on some “backwoods planet” to lay low, just to find yourself in a tussle with some hulking, 4 armed, saber toothed creature, who is slightly inebriated by the local ferment (but would probably kill most humans). Not long into this scrap you find yourself at the other end of its laser pistol barrel.

Little do they know about your portable shield: not a 70’s version of personal shield, being a 10 kg backpacked contraption, but a one of a kind prototype vest shield that fits under your clothing (and perhaps something you happen to “borrow”, and why you are laying low?). It nearly works and has got you out a great many situations. The downside? It is unstable, causing it to periodically “glitch”, as your scars bear witness to. Hopefully it won’t be one of those times…

1 Like

I have been spending most of my time building up the scene. I find it interesting how I can manipulate, decimate, or create new parts using old ones rather than rebuilding something similar.

Currently I am working on a counter… not a bar counter of course… :unamused: (shifty eyes)

Somehow the roosters got off their tap and multiplied:


Doors are starting to manifest from old floorboard pieces, although the have no handle on the situation, so to speak:


As you can tell, the left has some place holders.

Here is a picture to give you an idea the proportion of the area. This character is 2 meters tall… I wonder why Mr. McTaggard is here?

3 Likes

All those roosters and no hens laying eggs. At least the, er building site workers will be woken in good time. One apparently levitating due to lack of wings! I suspect aliens inhabiting these proliferating roosters! Mind controlling the saps into building a base of operation for invading the world.

2 Likes

If you look closely, that is a rooster imprint. If you have ever seen the original StarWars, then I can point you to the scene where Han Solo was released from him Carbon Freezing tablet and there was an imprint of his backside. Except in this case, it was the Rooster’s side. Now who would go about freezing Roosters in Carbon? Probably Mr. McTaggard.

Do you think that those two are pecking at the beam… I mean ground, for nothing? They think their women folk are either frozen inside or somewhere below. The third one in the background is keeping an eye out to make sure they don’t get caught.

Which perhaps explains Mr. McTaggard. It looks like he is barring that door, or is the door trying to open and he is trying to keep it shut? Perhaps the women-folk of those Roosters are trying to break free?

2 Likes

I have some “window” shots and counters. I started creating a counter based off of one reference just to realize that while building that counter would be neat, it did not actually fit the style of the tavern itself. So I had to start all over again. But I realized that I already had most of the pieces made. I only needed some small wooden pillars, supports and a countertop- but my walls, when edited, served as a a good counter siding.

Original Counter:


So once I put my walls into the chop shop and then created some other parts:

I came up with this:


I found that I could use the support pieces for larger beams or other uses as well. I like how parts become reusable.

Mr. Mctaggart has become a useful measuring tool for this project :slight_smile:

Here are the windows


I the first 4 are actually two, with each side different.

The rest are modified from these two using simple deform. I found that I could come up with some really interesting shapes based upon where I put the origins:

I found that now I had an array of windows, cellar windows, fire place pieces and doorways. If I remove the bottoms I could have more archways.

This project is starting to come together, and I have already built my basic tavern interior. I will stick to the plan and stay interior only, although it is tempting to pursue an @NP5 NP5 Alchemy tower pursuit, except that I would be going inside out- starting with the interior and going to the exterior.

3 Likes

Lots of components and variety. Not sure quite how, or if, they are still working in a modular way though. perhaps that is not part of the inside considerations.

2 Likes

Great assets!

  • Check the location of the ORIGIN POINT for an object, make them part of the module grid!
  • Name them carefully, also the inner mesh naming.
  • Use collections to group if needed.
2 Likes

Thanks.

Once I apply my windows’ modifiers, I plan on moving those origin points to their proper places in relation to their model and the grid.

Naming, I have some sort of name for most parts. I have a sort of naming convention that could use some tweaking: Window Base, Window 1, Window 1.2 (modified version of 1), Window 2 (another variation based off of window base),etc. I will have to clean up my assets after.

I have lots of collections, each asset type has its own. In each I have a base type sub collection so that I can go back and make new assets from it if I should so choose. When I am done, I might show all the assets. I think the more difficult one will be the colour. I could go more realistic, but I think I want to stick to the simple modular tone as found in this section. I can always revisit this again if I want to modify it any.

I also have a separate scene folder to house all my scene pieces.

You are correct. I am displaying a variety of parts, but not actual modular models:

Some of the components were built with a modular model in mind, to be pieces of a modular model. I built them separately so I could have more control over these pieces, and in part because I already had some pieces kicking about. But as separate pieces, they become transferable to other projects, or at least as reference pieces for other projects. Once I have created the piece, I attach it to the modular model and then join them together as one. At this point I am able to follow the normal modular level design routine.

Some of these pieces were just experimental pieces to test variety. I wanted to see how much I could change an existing model using the simple deform modifier- same model, different look. This way I could create different iterations, branch off to other iterations in the process, and then look at which ones would best suit my scene. Then, at this point, I can do as I mentioned above, attach it to the modular model and work with it accordingly.

The rest will be stored away like any reliable hoarder’s “just in case” pile that never gets used. Off in a corner, taking up room, against the inevitable day the never seems to come… inevitably.

I hope to combine modular design with some aspects of non-modular “defining feature”, so long as the second does not become the main feature. :smirk:

1 Like

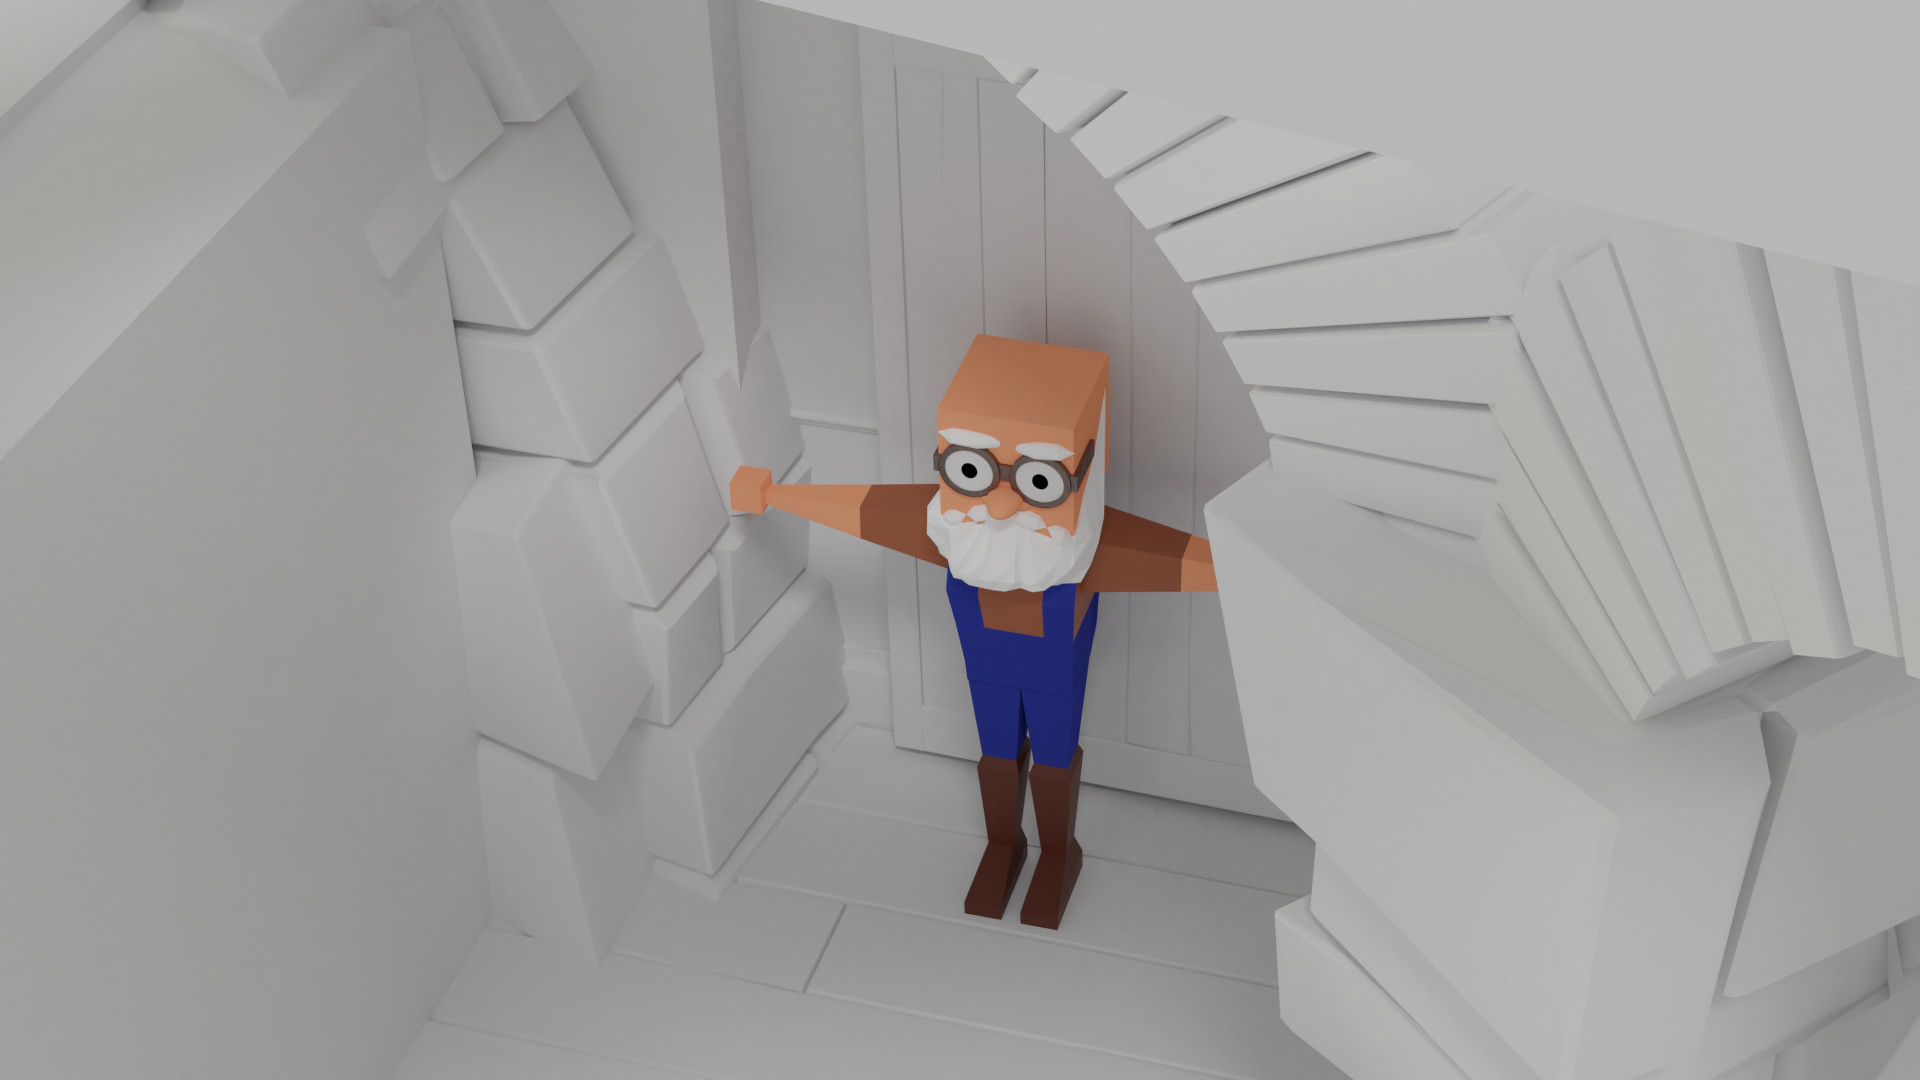
I have been pretty inactive lately, but not unproductive. I have been sure to keep poking my nose in around the website to show that I am still active and have not wondered off. But what is taking me so very long? More of the usual really.

Before I go to the next section I am using this break to solidify what I have learned and experiment a little. Because the modular section did not really cover anything new, it became the ideal spot take a break. In this break I settled into a larger project as means to practice what I have learned thus far. I think this will aid me in the next section where some very new tools will be explored and explained.

It is so very different following a video than attempting to do these things on my own. But in doing so, I have learned to use tools in different ways, and have even (re)discovered tools from previous videos. Along with that I am beginning to gain a sense of how long a model of various sizes will take to create, and a workflow to create them in.

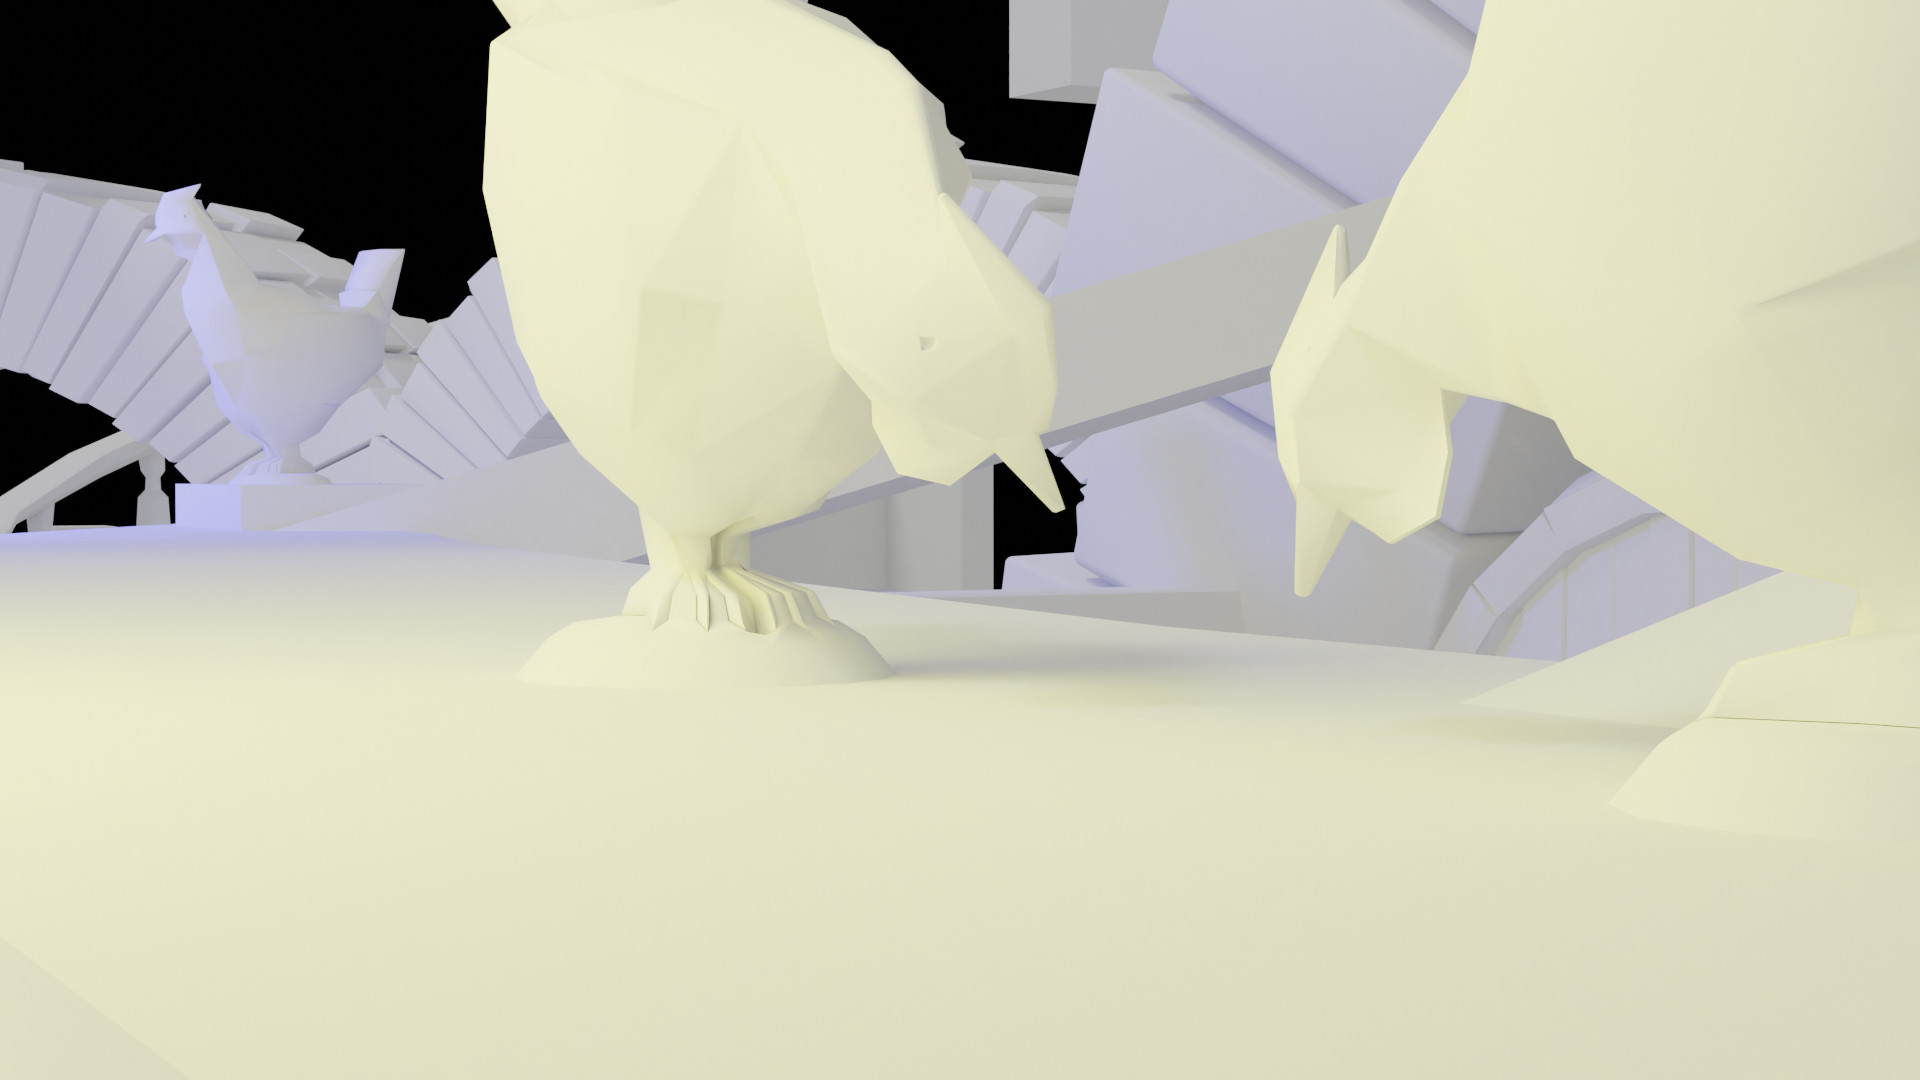
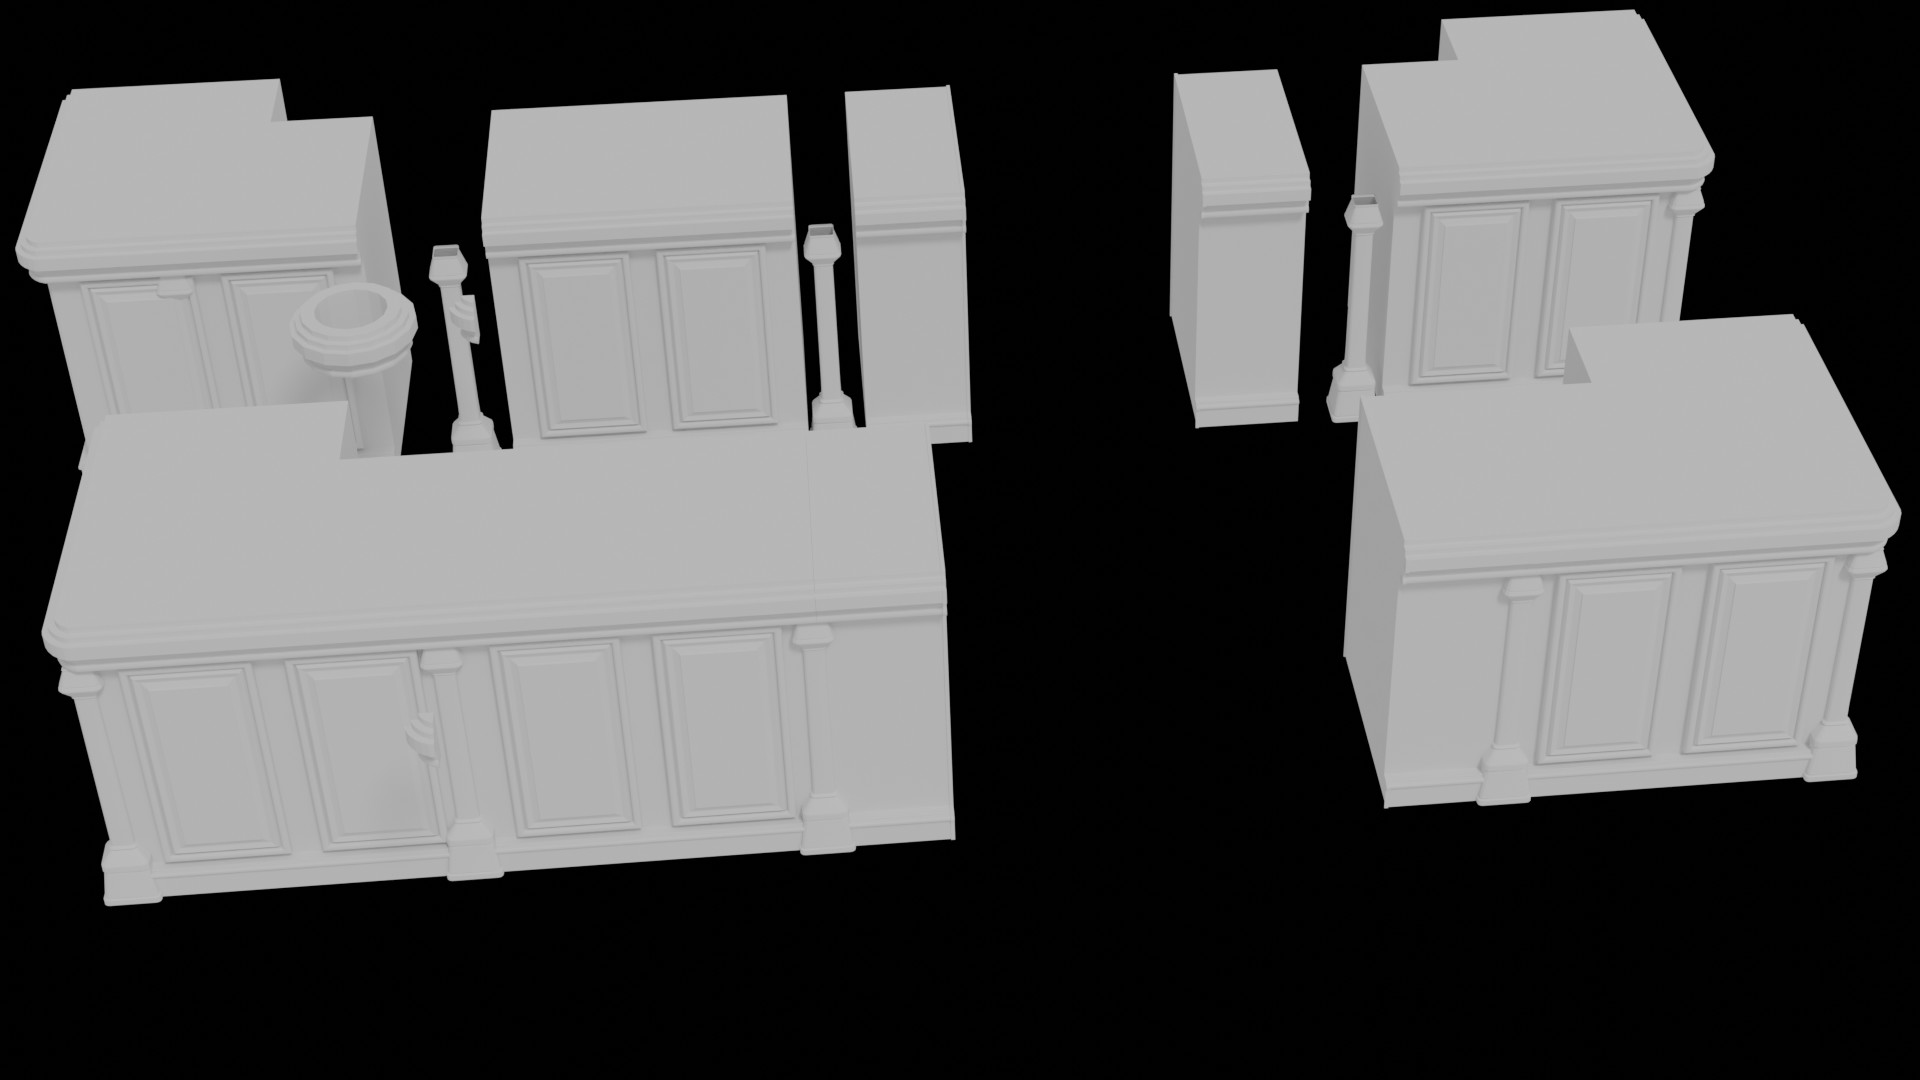
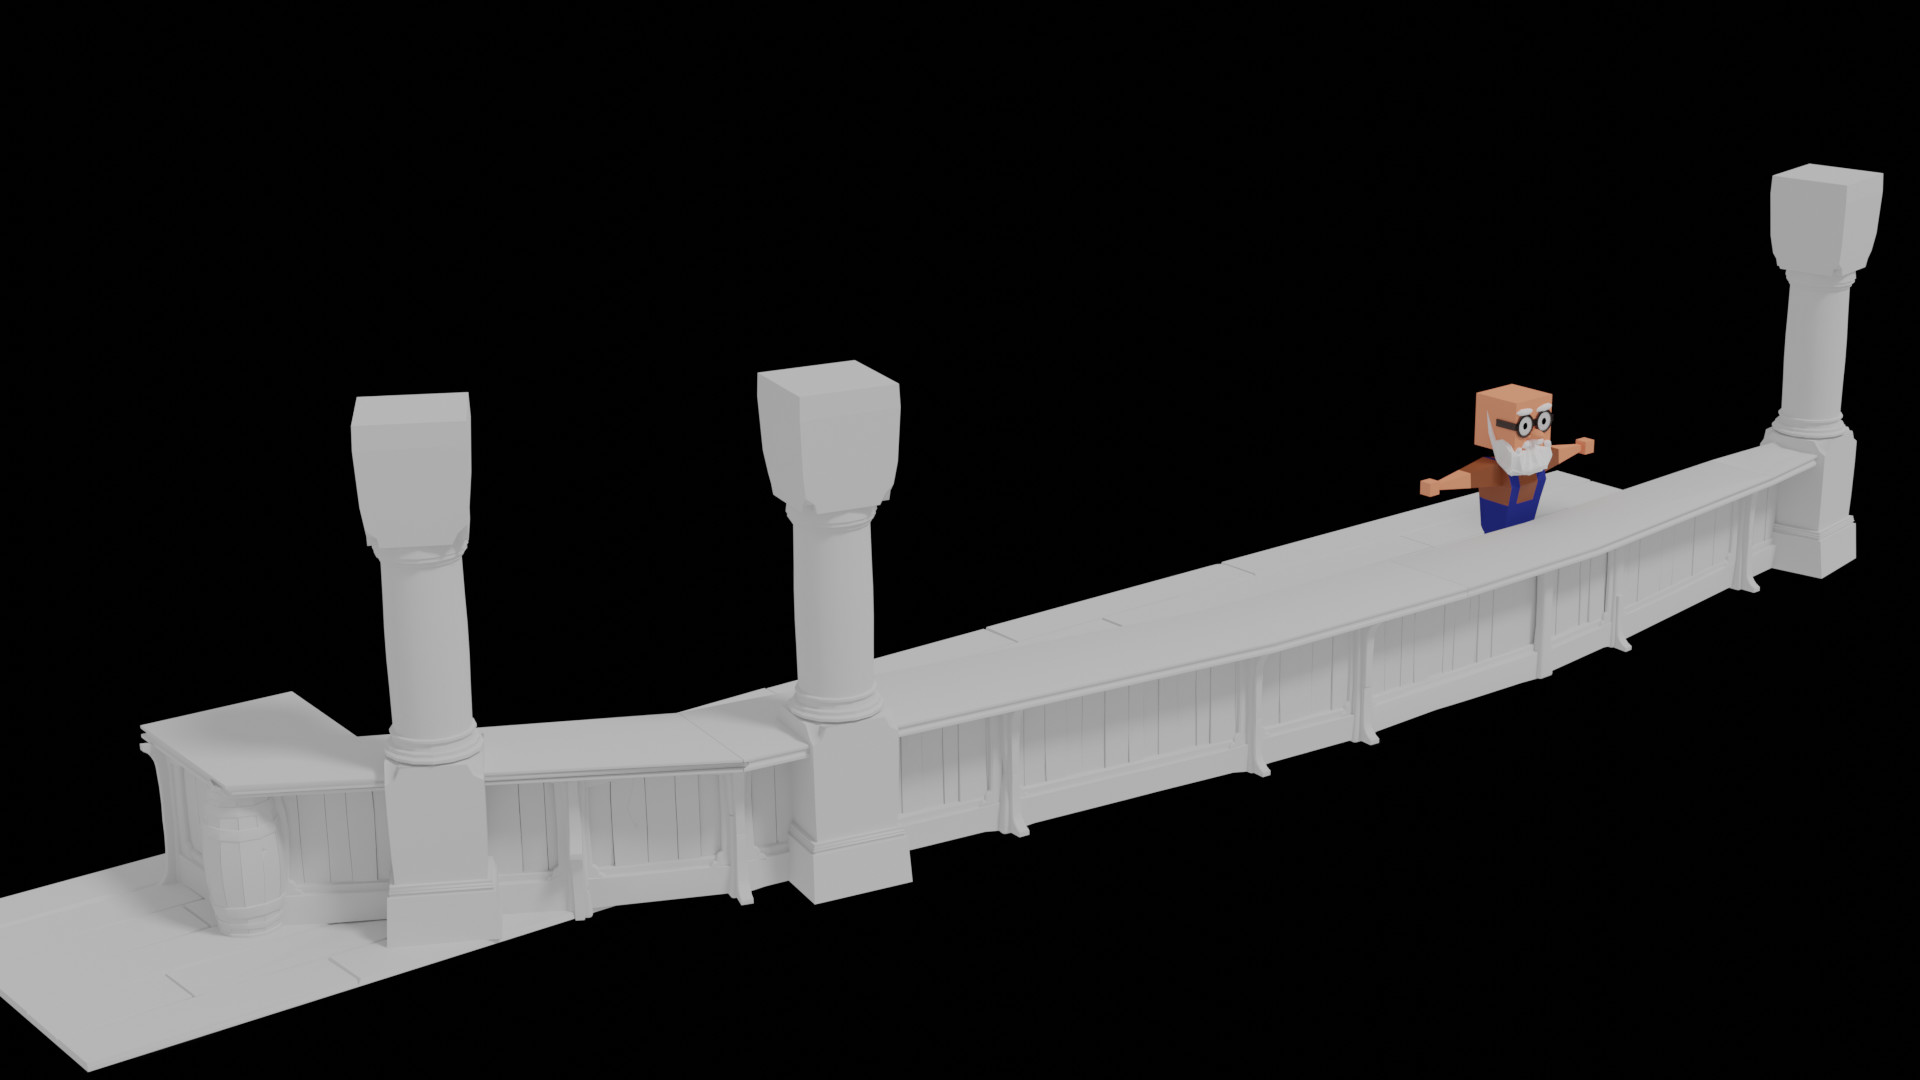
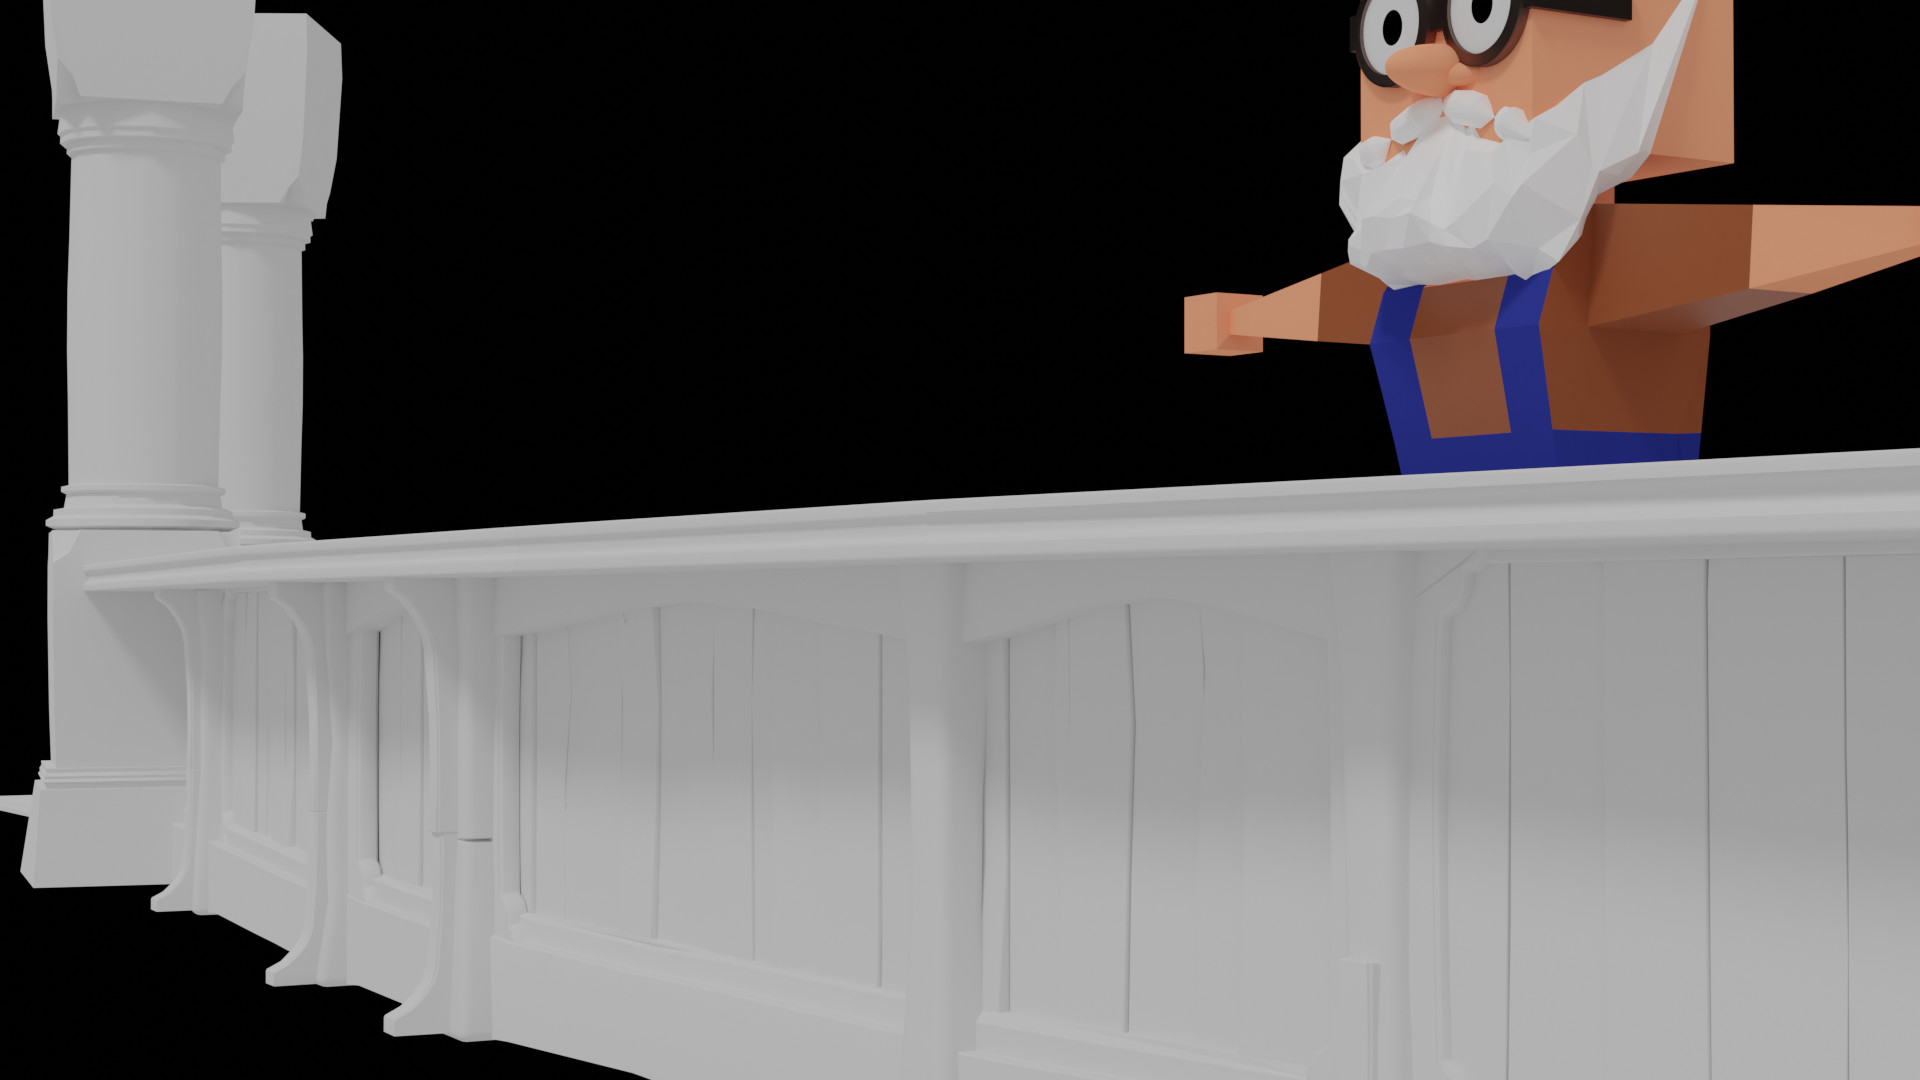
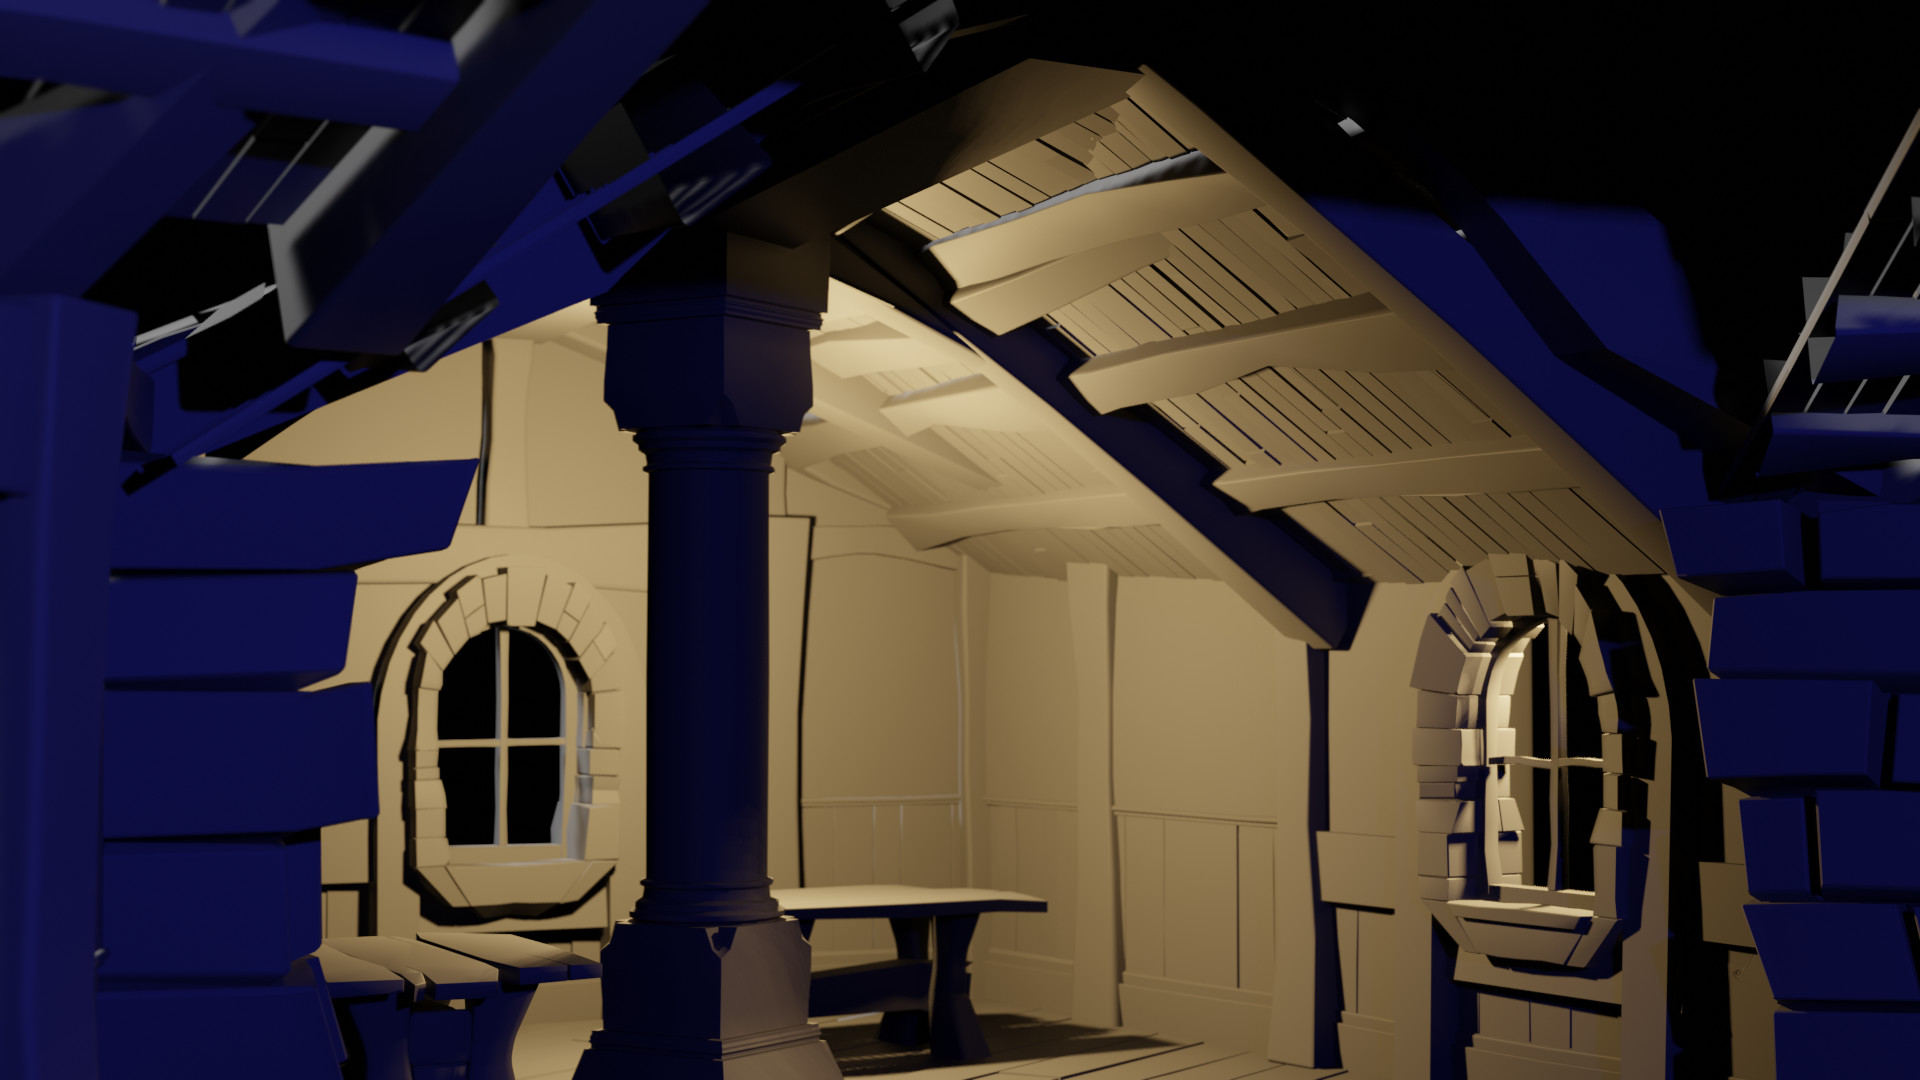
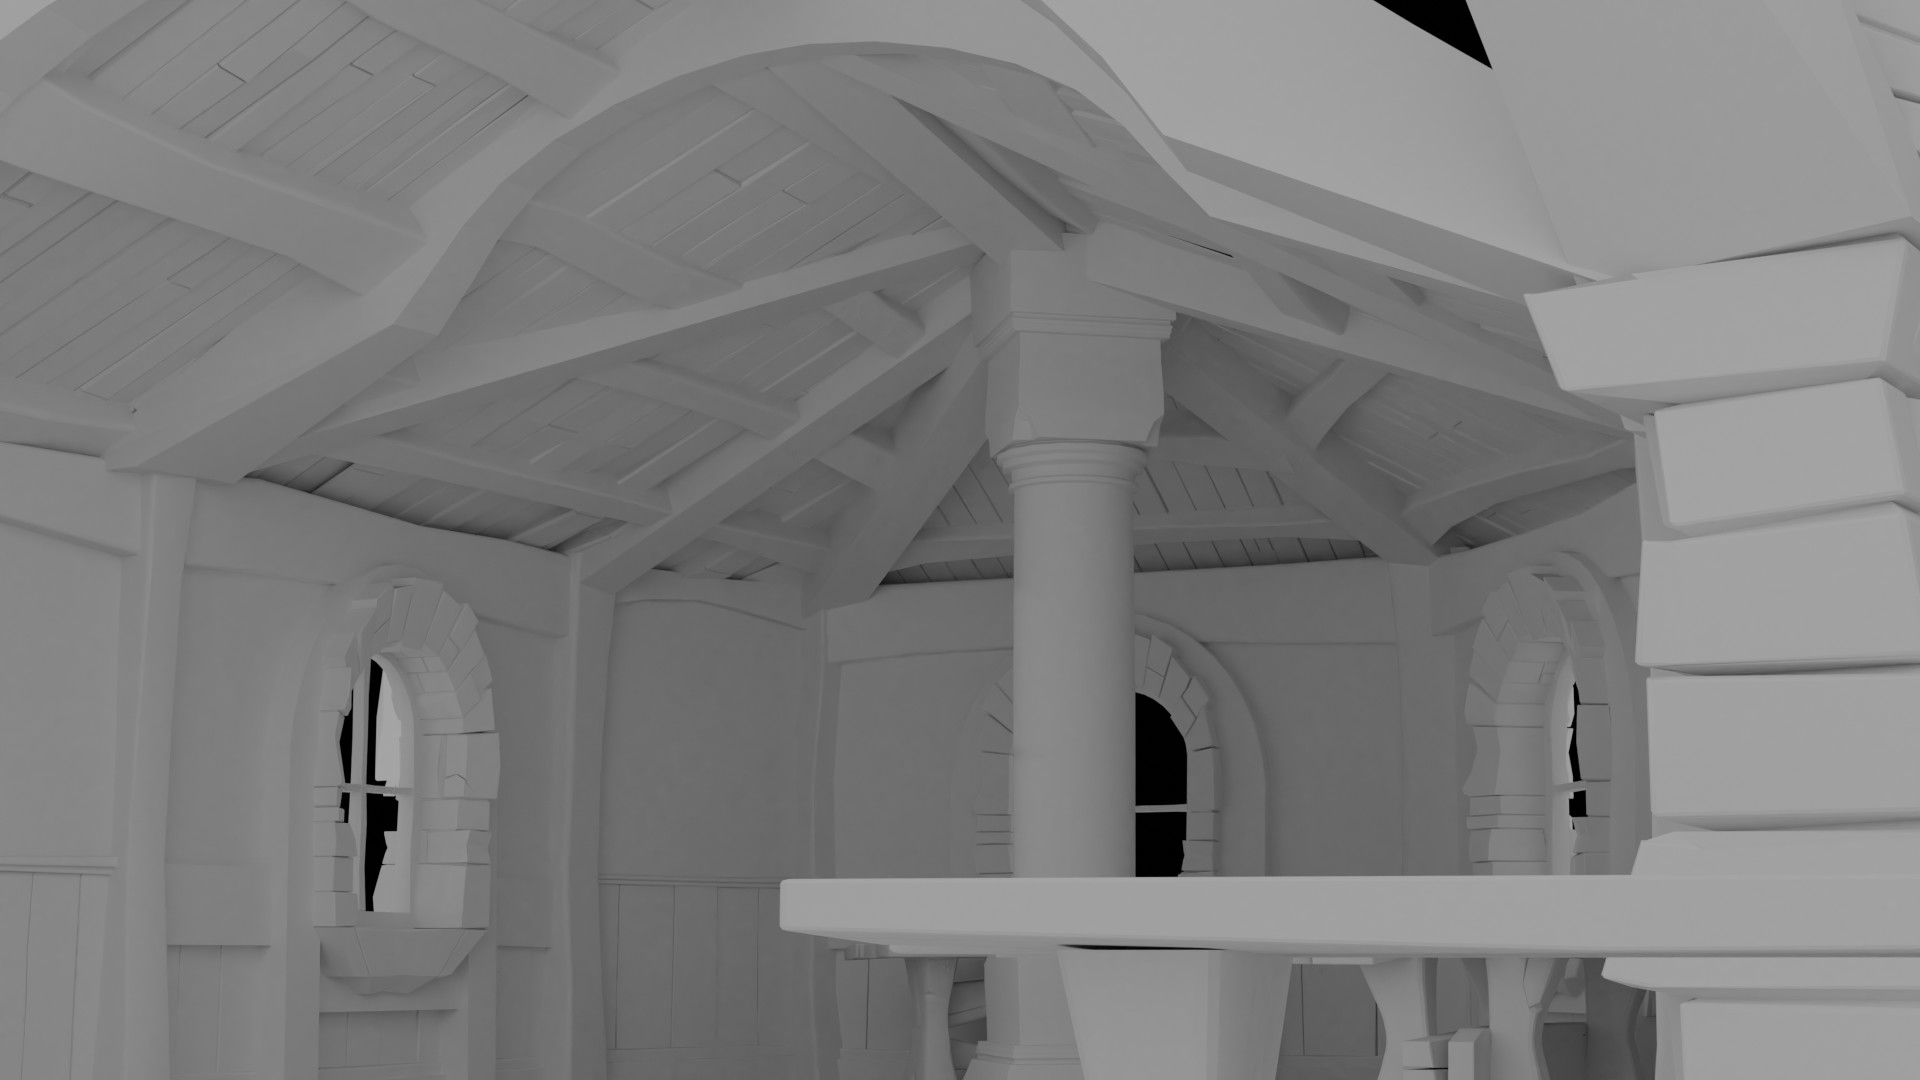
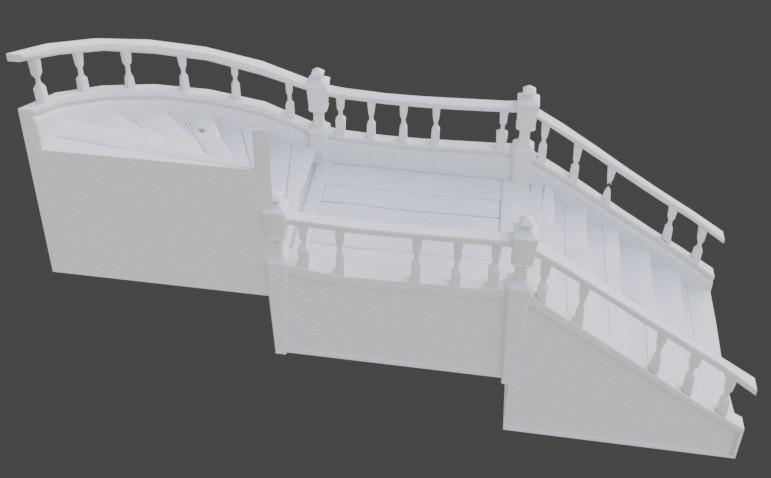
This project is coming along and is almost done. I have left rooms completely unfinished because they were never in the scope of this project. I could, and may later, expand to fill in these gaps. But for the sake of my ambiguous scope, I will leave them out.

There are two major aspects to my modular project:

  1. My idea has some very unmodular aspects to it. So in this way it will break some of my scope
  2. My idea has some very modular aspects to it- and if not, I have been making modular variants so that any other building besides the main one might be produced easily .

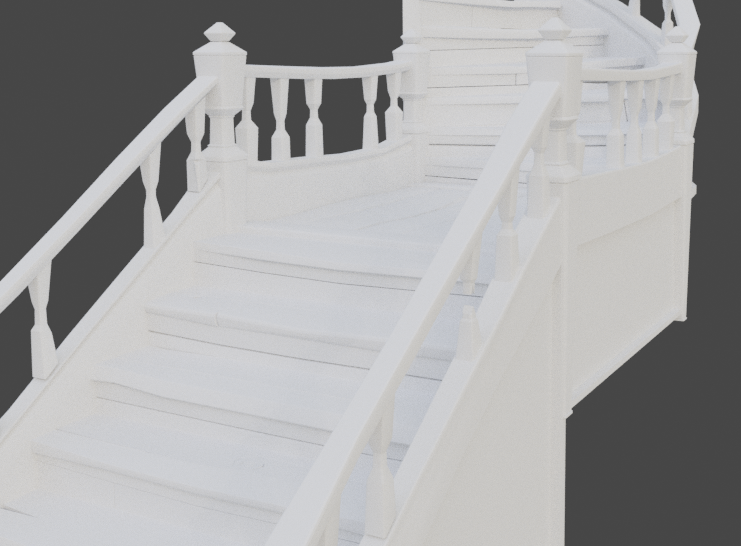
Since my last update I have made:

  1. a frame for my building, added walls, doors, floors, and other things to it
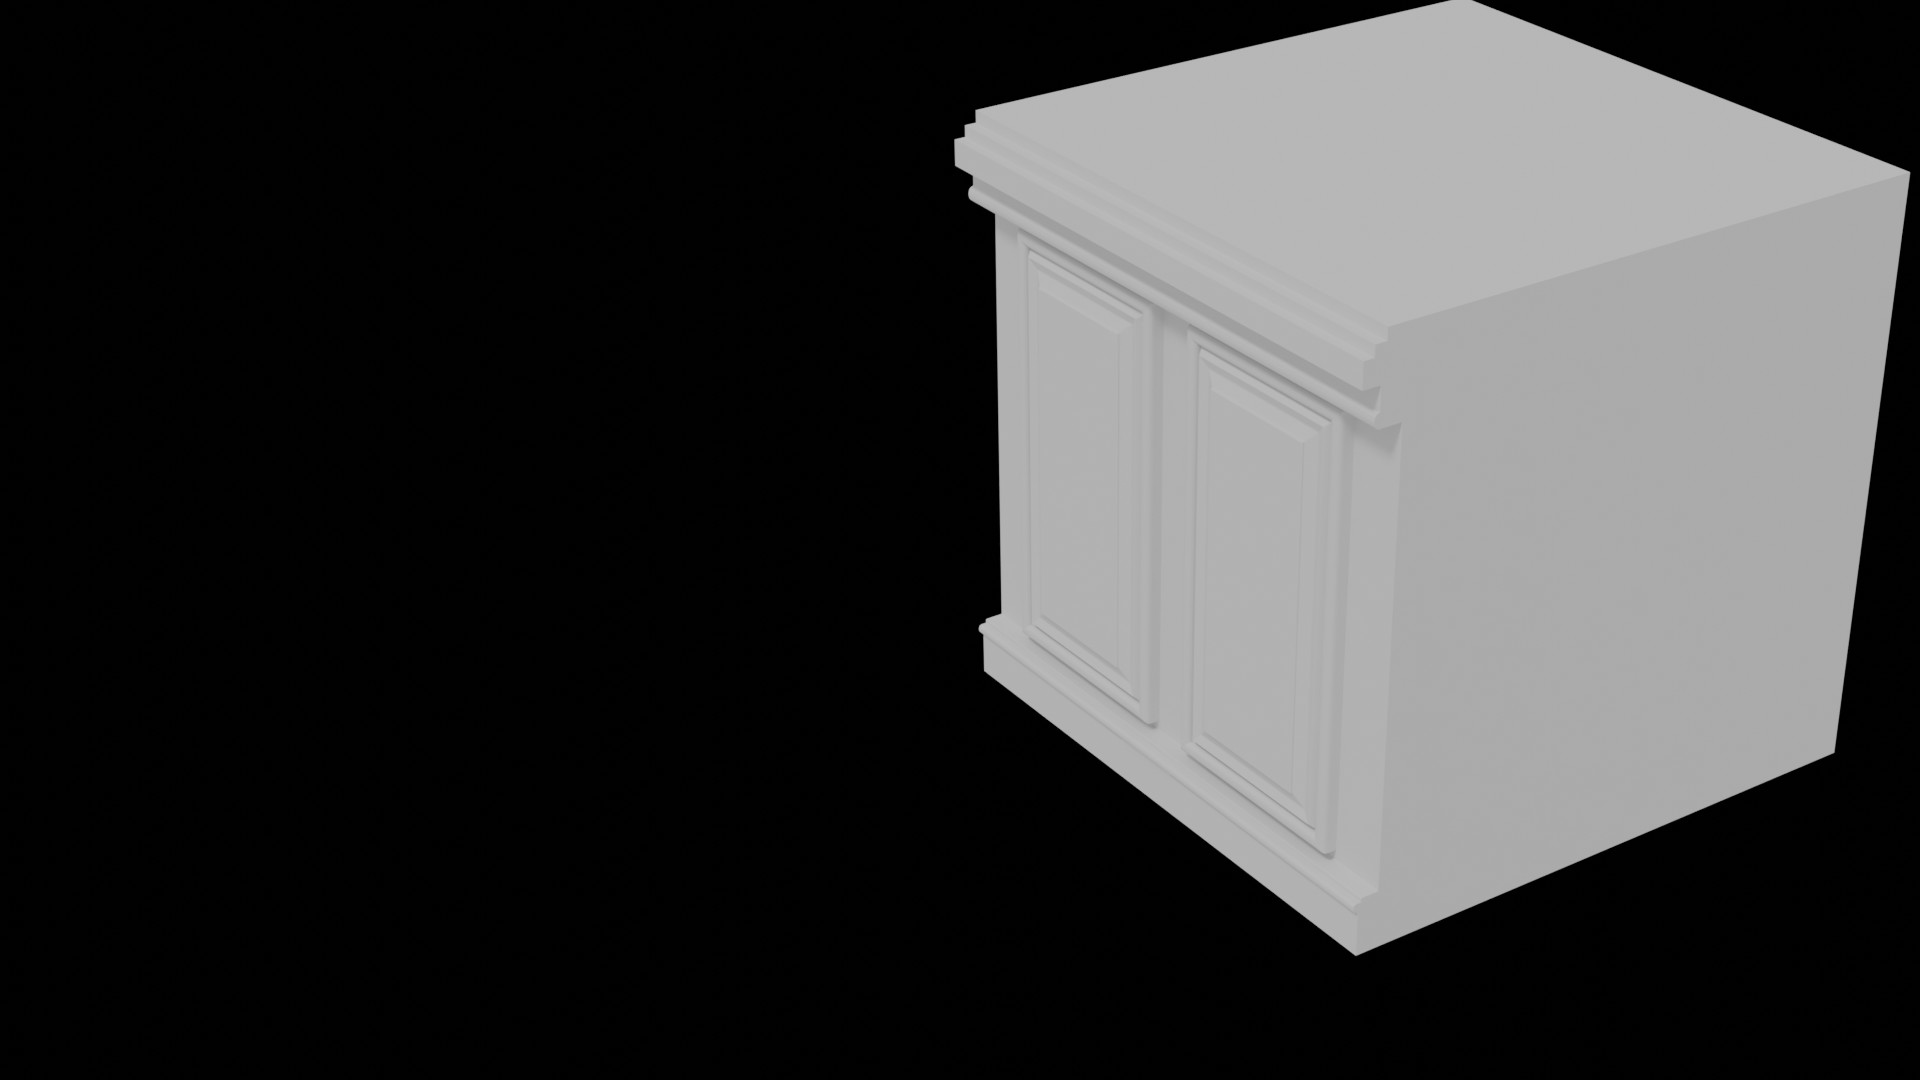
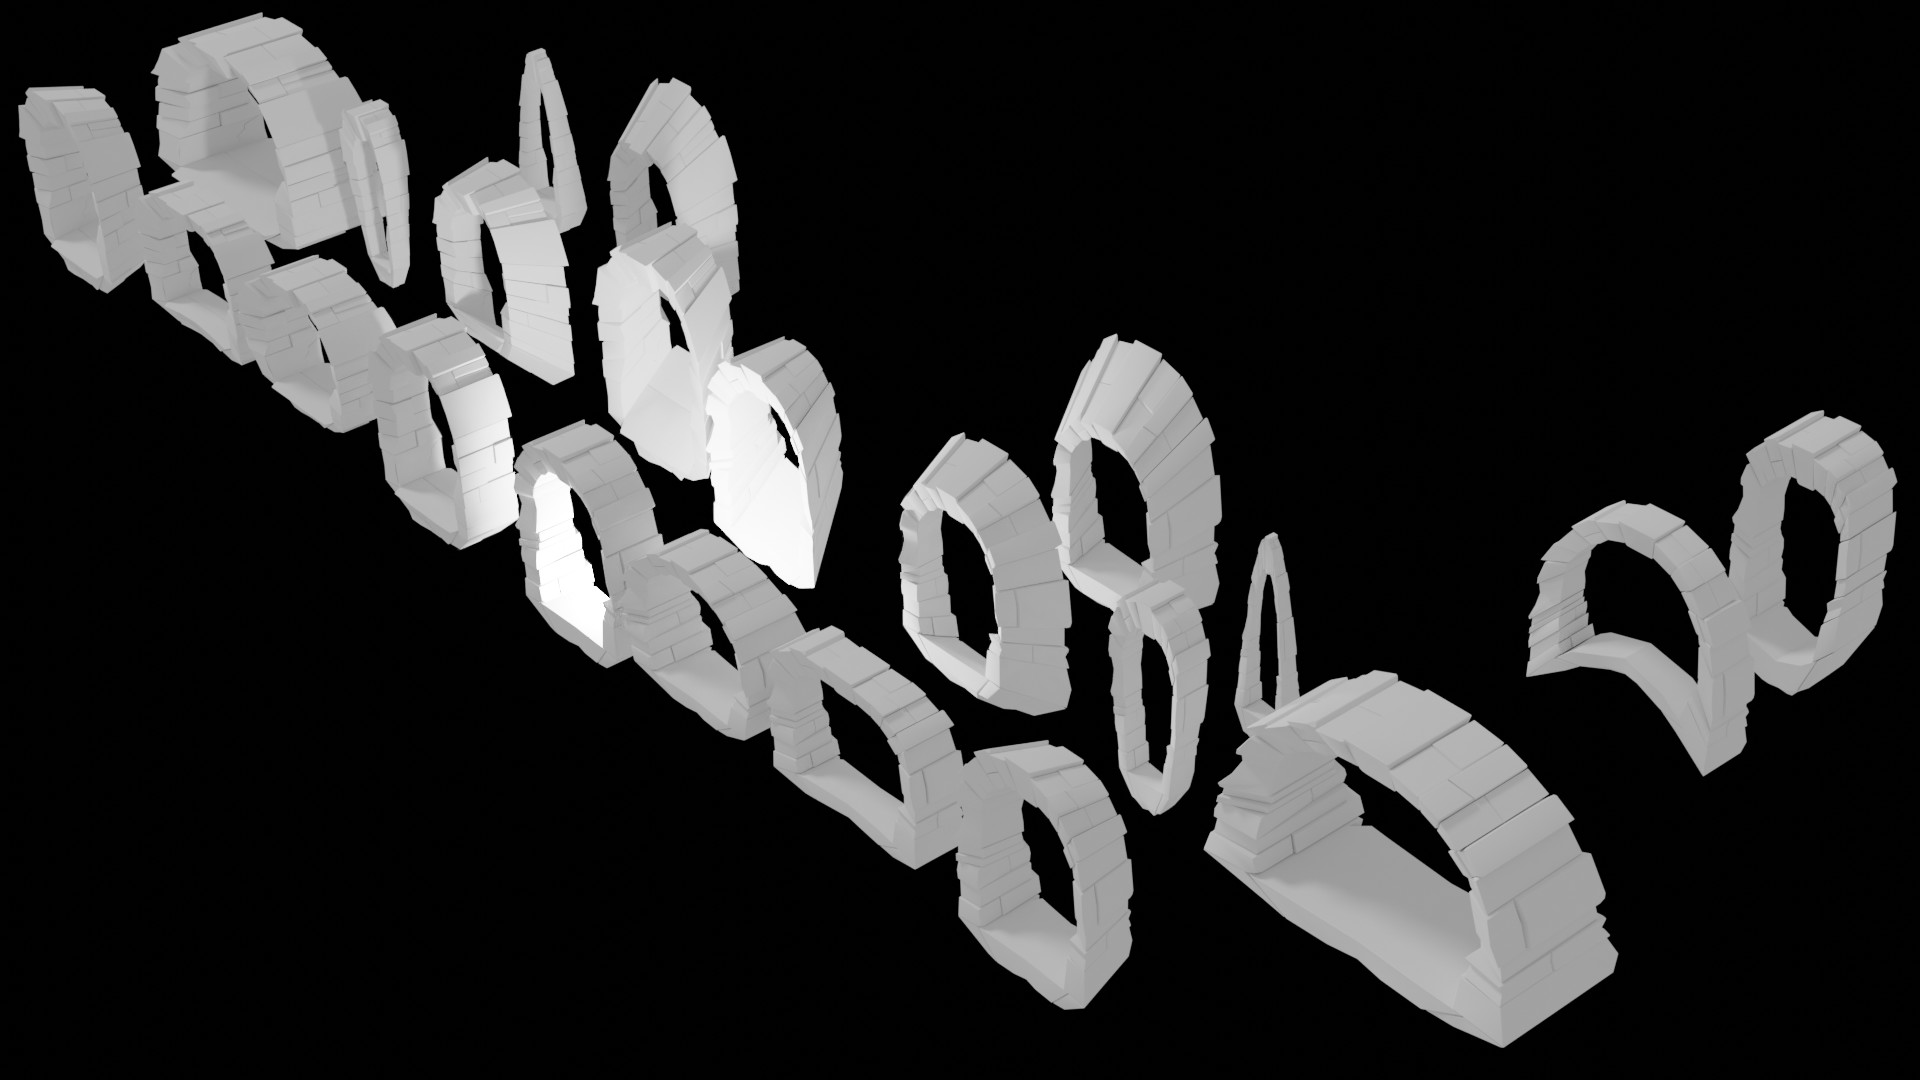
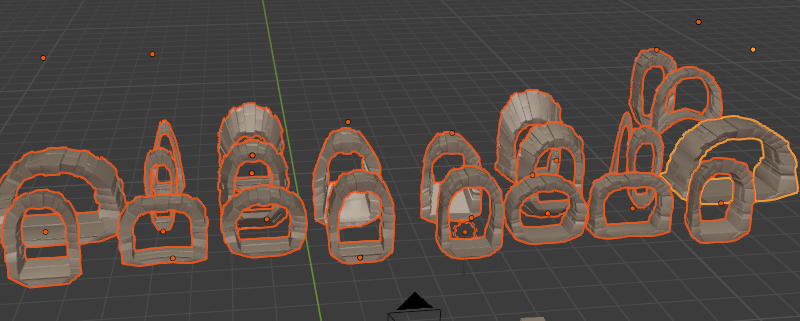
  2. modular walls with and without windows, with outside and inside parts
  3. Modular doors with hinges and handles- this took a little bit but I
  4. Parts for a modular roof that I am near completion. It will feature both inside and outside parts on one model.
  5. Beams to toss about and hide bad looking edges
  6. With at least one variation, often at least two variations of a given model.

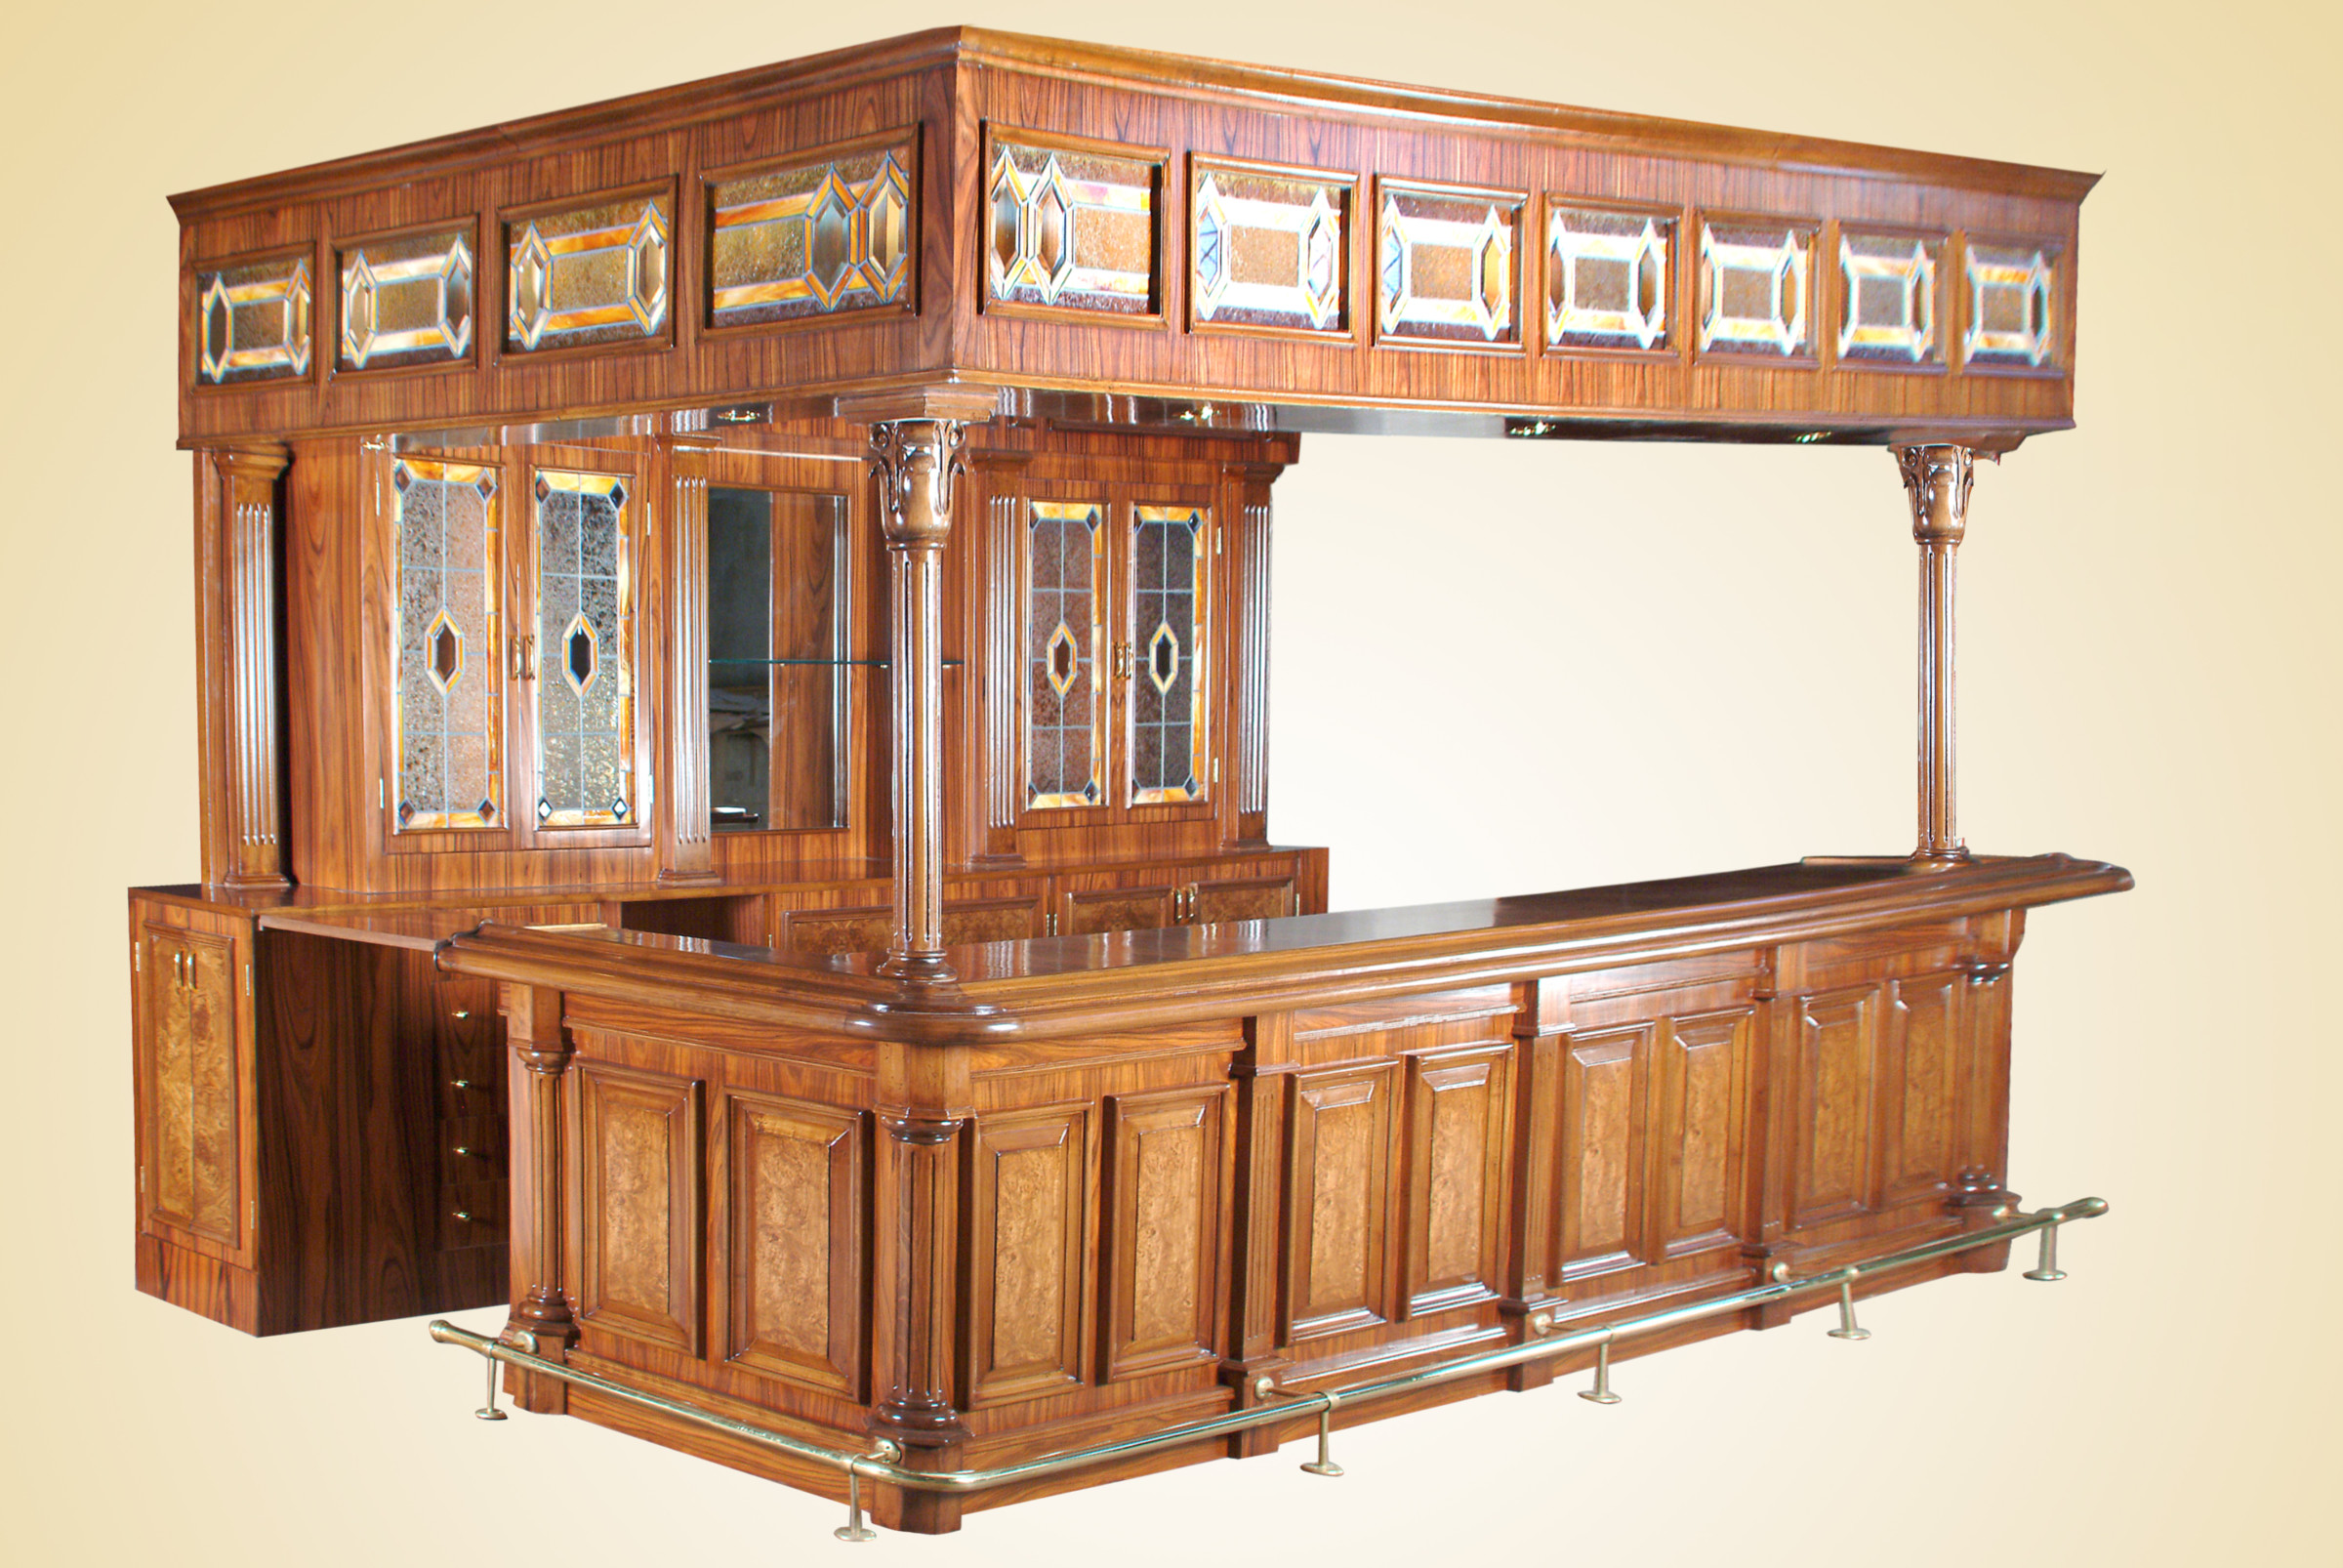
I have yet to make a particular counter for a particular tender of particular goods…modular of course (hopefully).
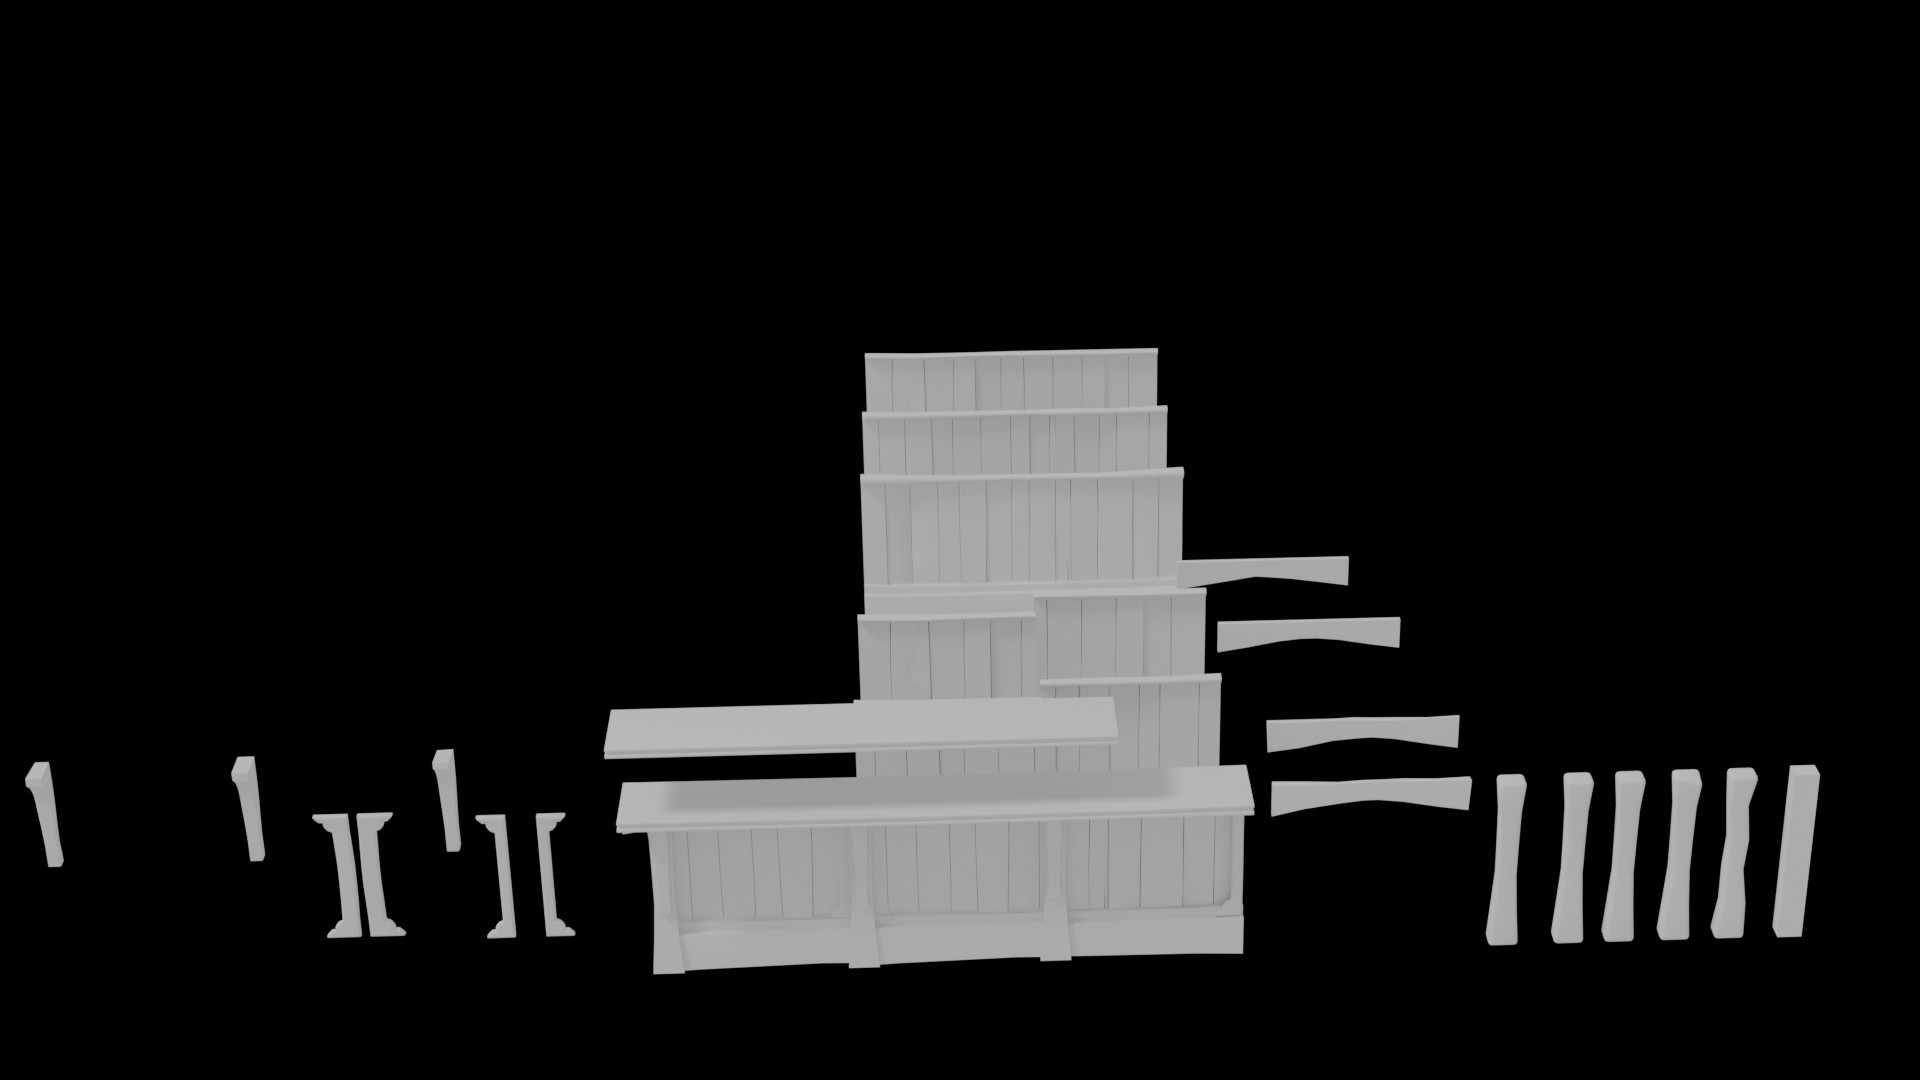
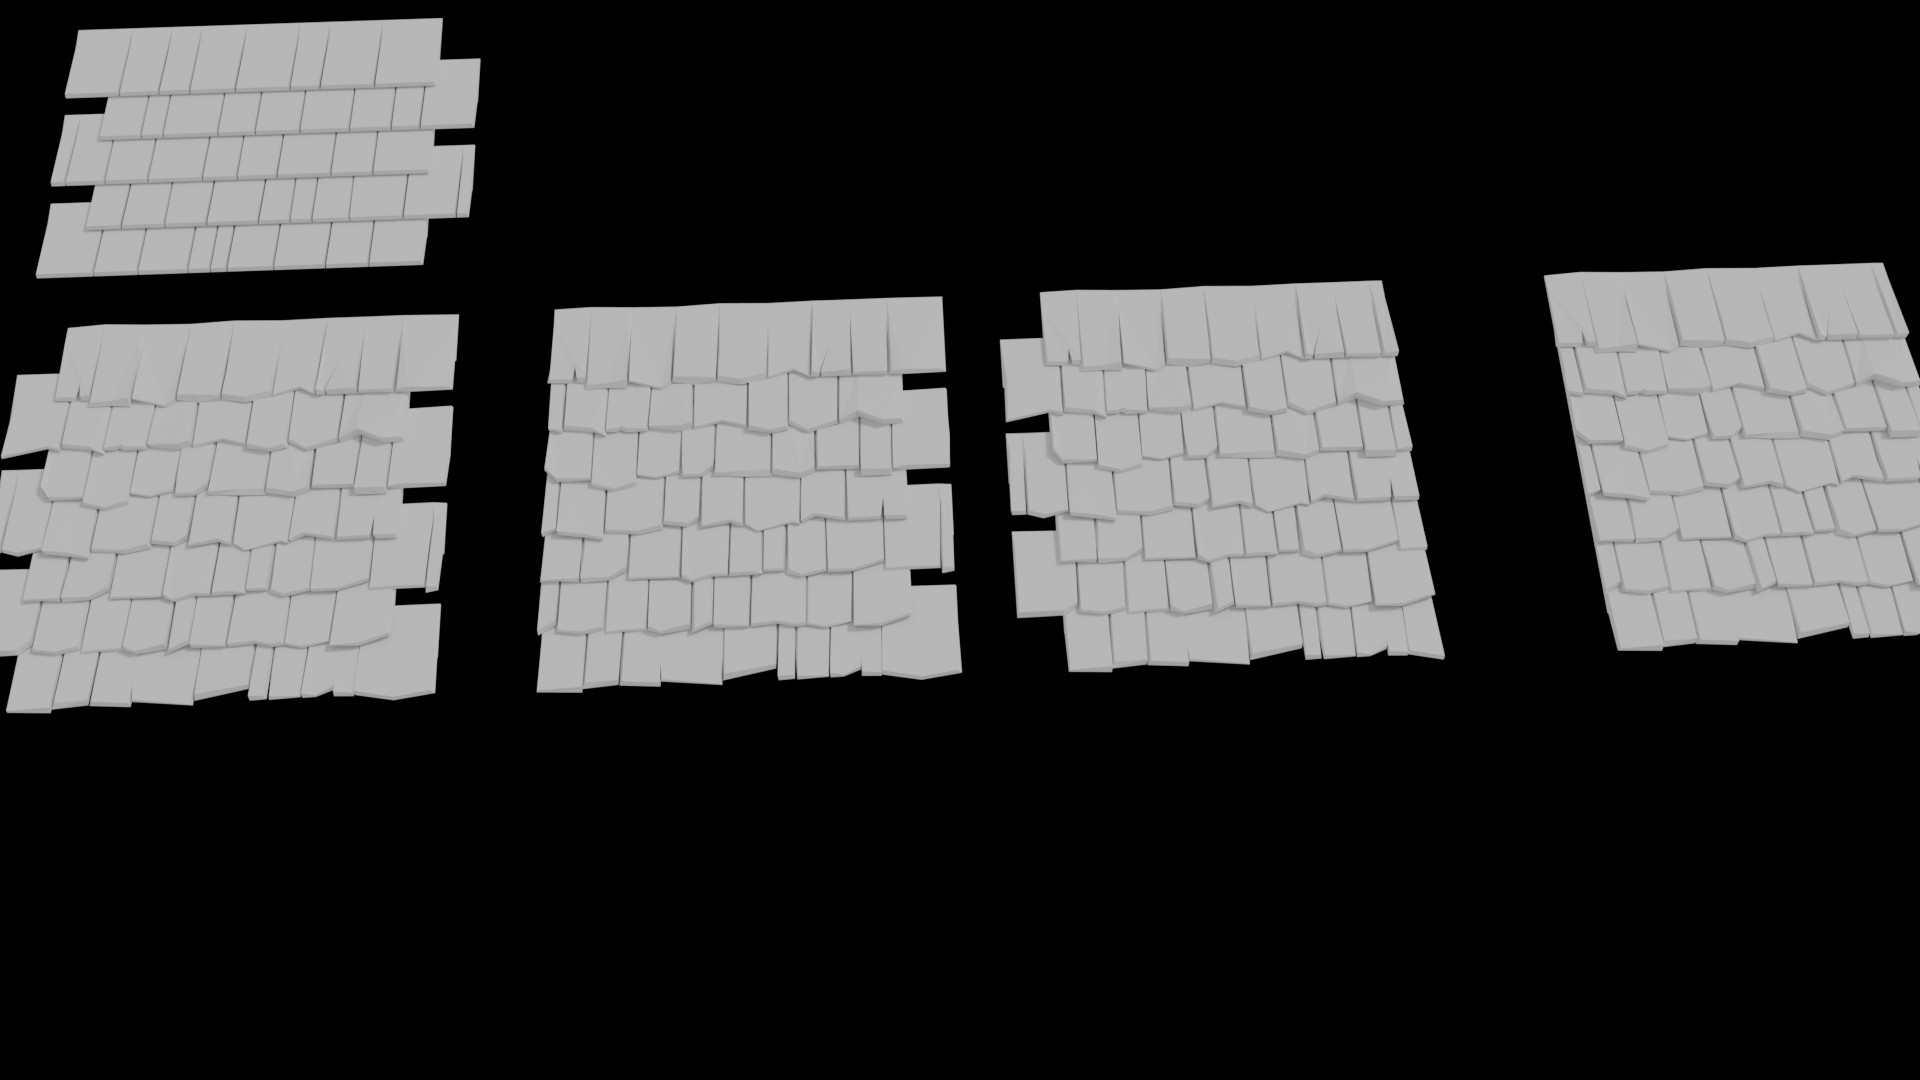
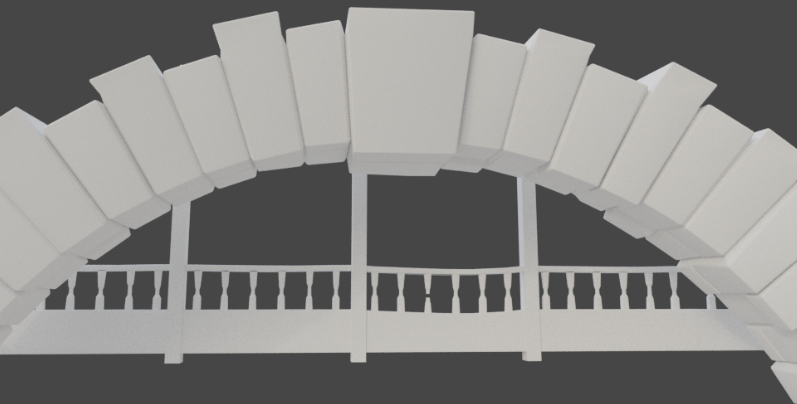
Roof Tiles:
What I would like to share with you is my roof tiles. This took some thinking. I had to decide first of all what kind of roof I wanted. I thought of using hay, like in the low poly videos that Mr. Abbitt released (and I have not taken) on the course section, but I really wanted tiles. I also wanted those tiles to be simple , both in look and make, and I wanted it to be modular.

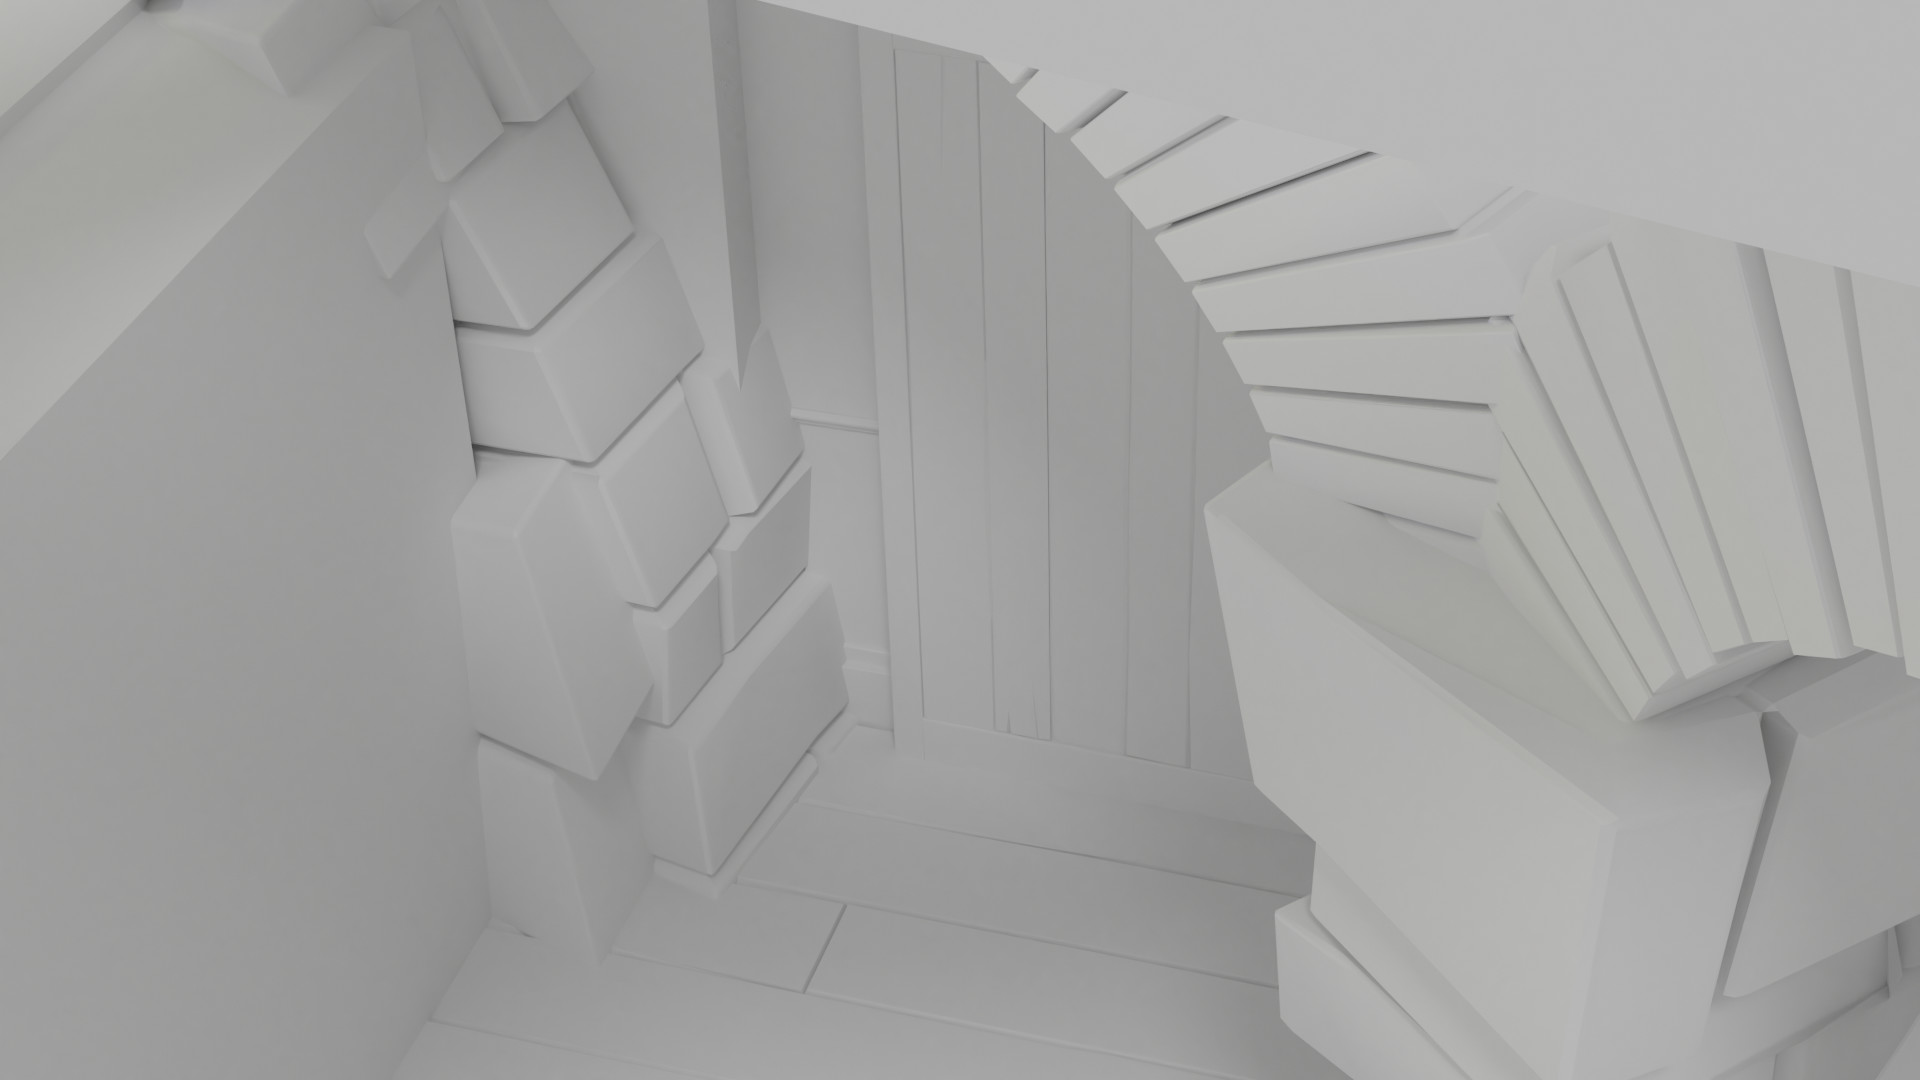
Unlike the floors, which were simply square, I realized I wanted my modular parts to overlap and “snap together”, something that would hide the seams of each model better, rather than cutting straight across it.

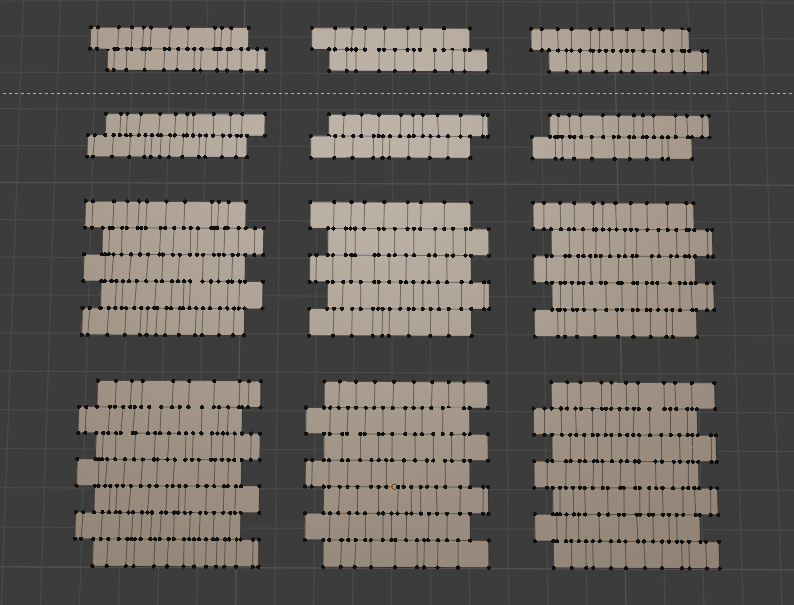
  1. Base Plane design for tiles:

I had originally made a square plane roughly 4 x 4 squares, and loop cut it so that there would be about 8X8 or 9X9 squares. Then I cut out a square on the sides so that I could snap them together (the three bottom tile patterns are the main ones, the top ones are whittled away from them). Then I went in and began to change all the lines so that you could get a roof tile pattern. Finally, I made sure that all the pieces could fit over and under each other and themselves, with all pieces big and small without any tile edges lining up in unwanted ways.

  1. Inset:

    I took one of the main patterns and began experiments with them until I found a process that worked well. I found that if I extruded the whole pattern, then used the inset tool (like with the dungeon brick walls), and then moved the inner parts of the inset up, I had a basic tile.

All I had to do then was move the bottom edges down and away from the tiles to get that desired overlap. I had to bevel the tips so that I could have a nice chunky edge. Then off to some simple detailing

Once I had the process figured out I selected all the other faces and did a bulk change successfully.

  1. Detail

I varied the pieces yet a little more as you can see in the image above. I realized I would need some edge pieces, and it would not hurt to have one tile that had no snap points for any smaller roofs.

I made sure that I only needed to move them 4 apart to get them to snap together well enough
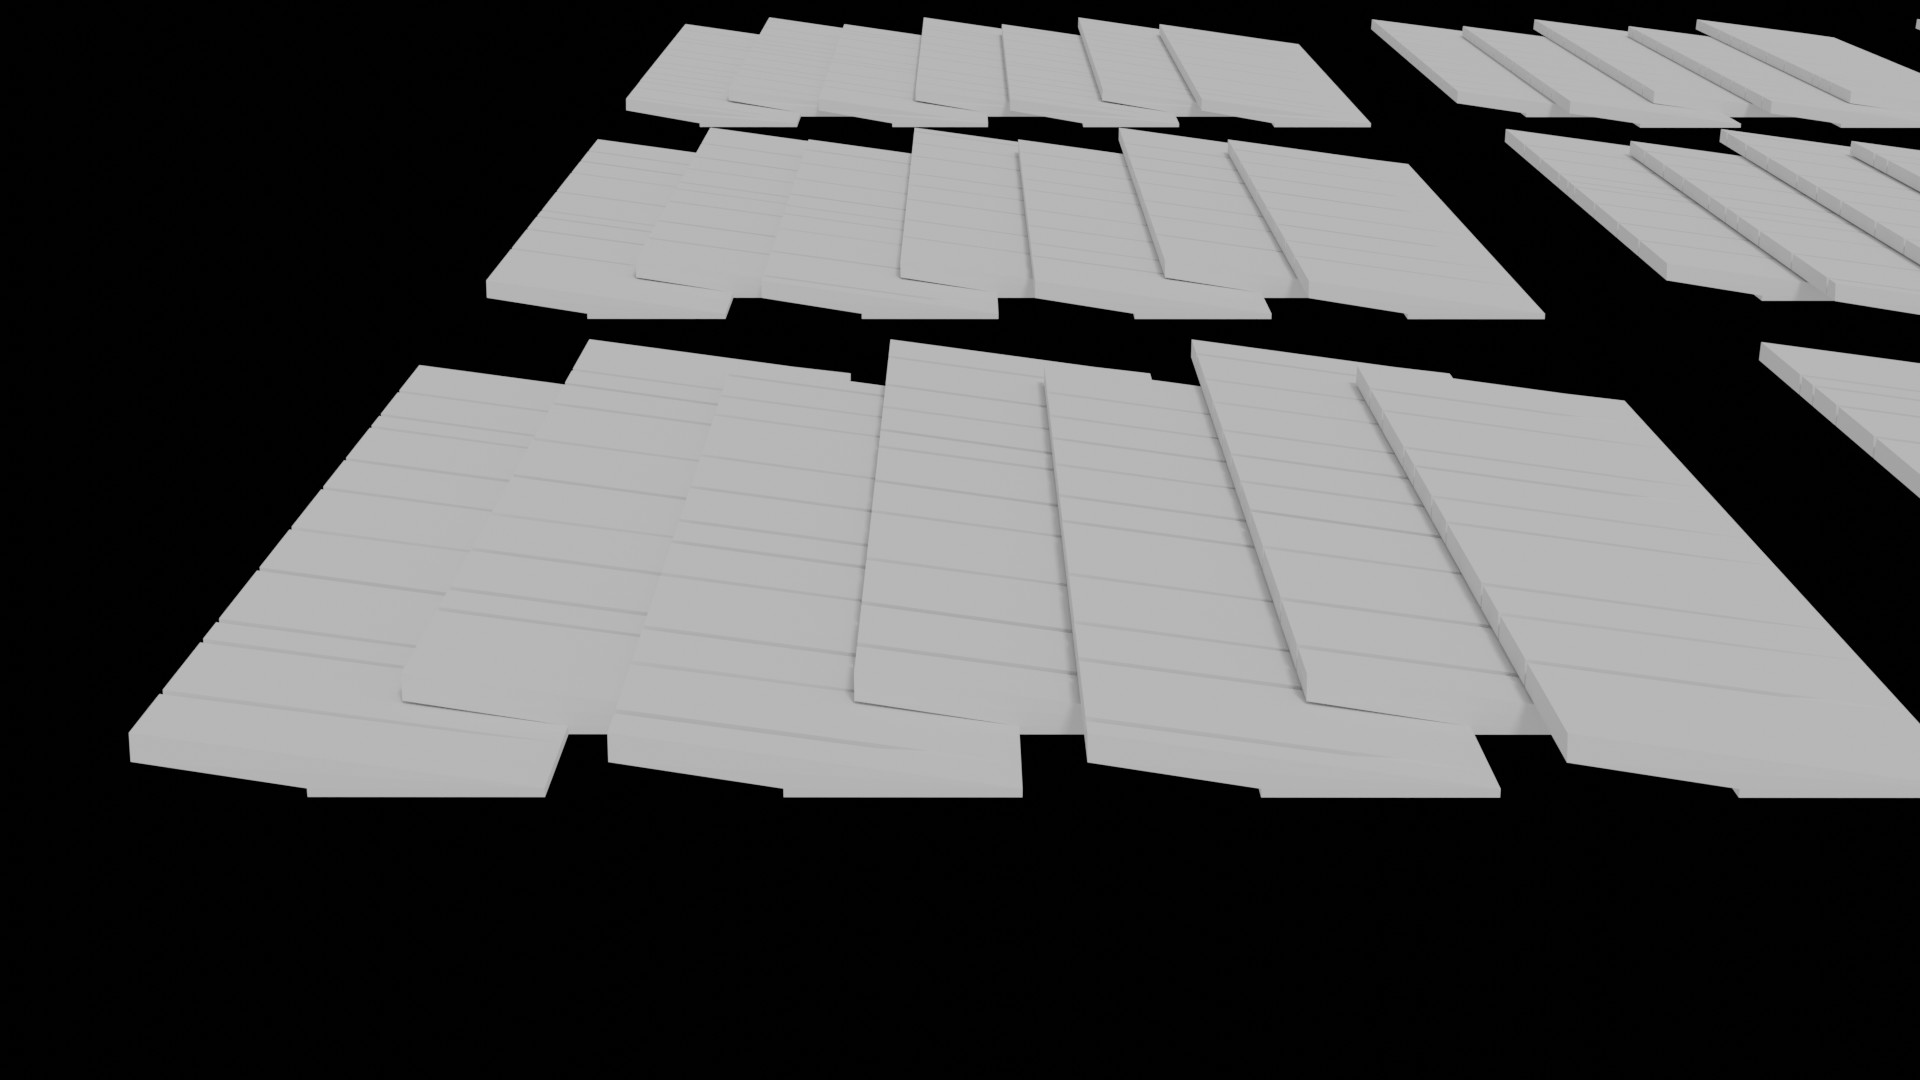
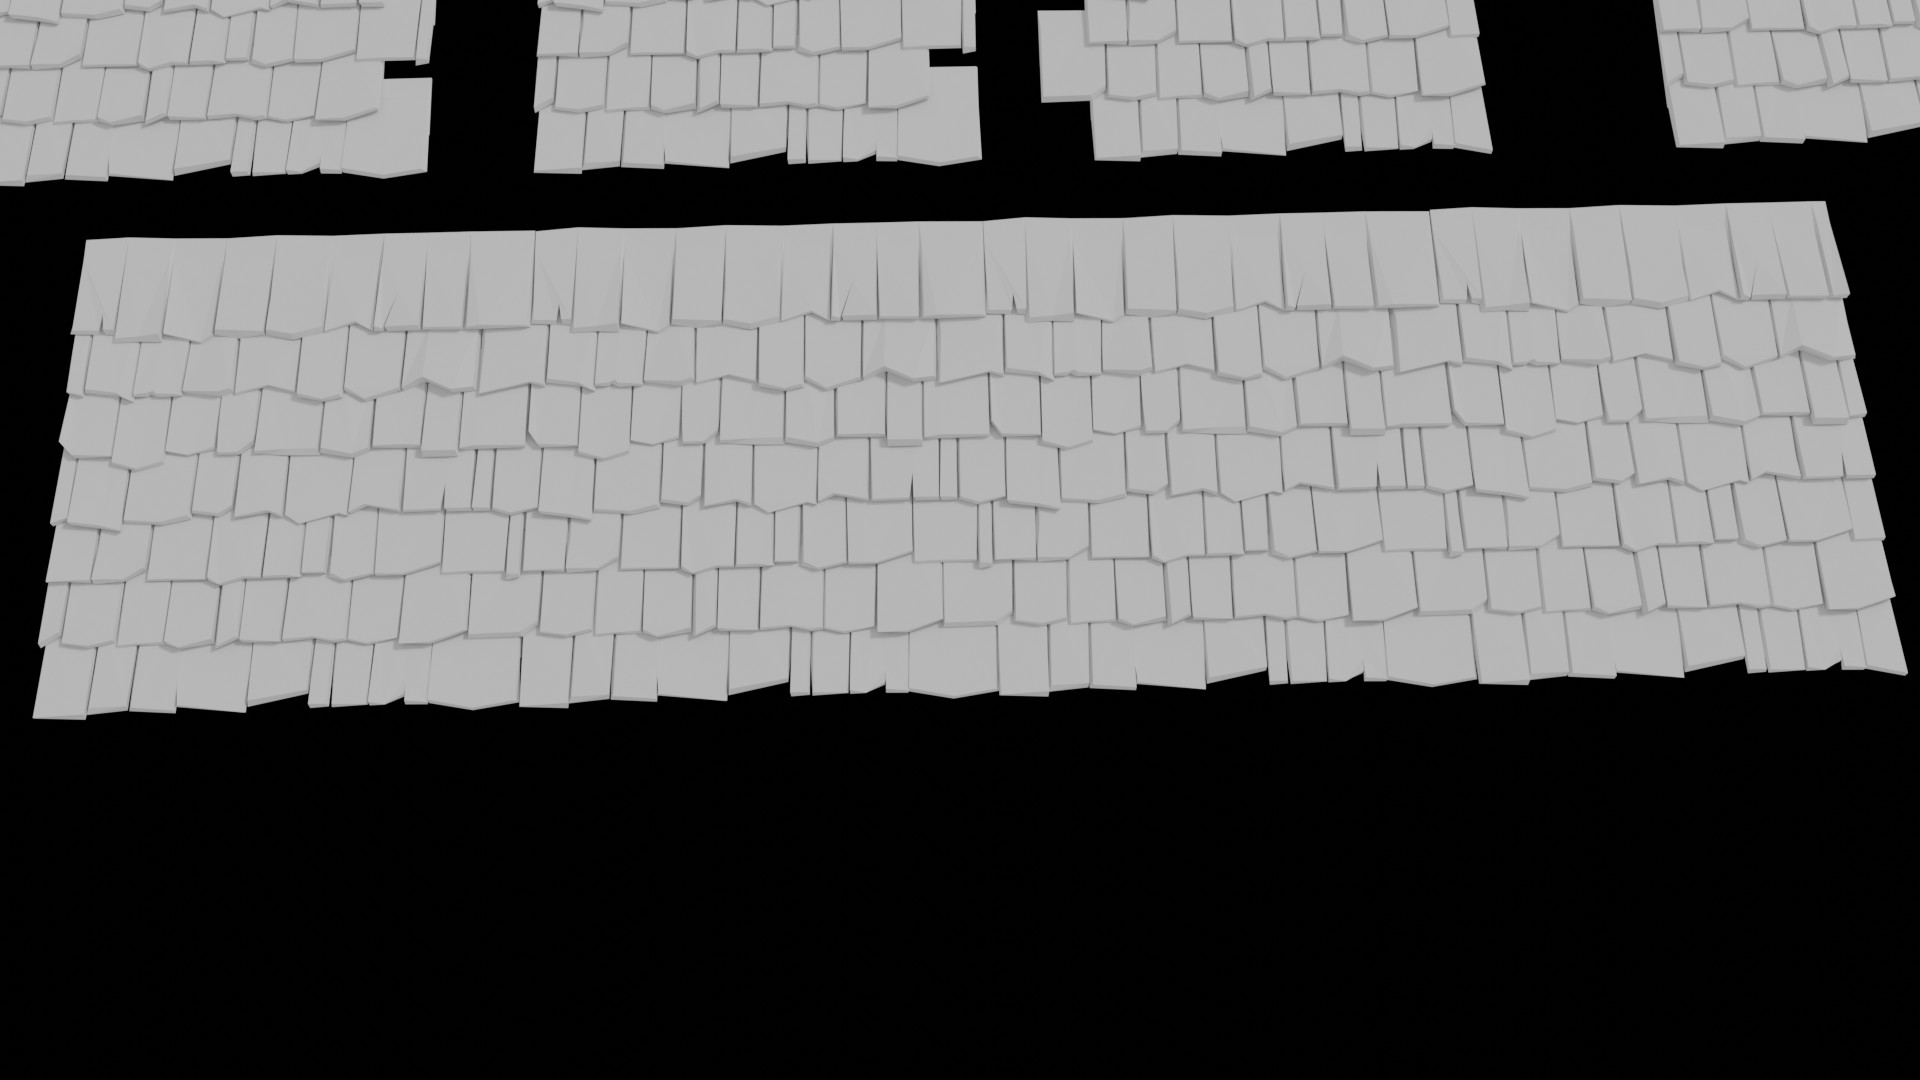
  1. Together:

    This is what it looks like together. Maybe not a big accomplishment to some, but I found it both a challenging and satisfying process. I also learned how to plan my model better and use my tools more efficiently.

Hopefully the patterned tile look will break up some once I get the other two variations up and running… I have saved various stages of the process so that I could always go back to any stage and vary the tiles as needed.

And before I forget: Tis the Season!

Merry Christmas and Happy New Year!

(I have been at this for almost a year now- wow the time flies by!)

2 Likes

This is looking epic!

1 Like

Looking epic.

You made things complicated with the simple wood tiles, extra variation. A regular clay tile type would be easier!

I assume there is a need for all to be modular? Beyond the course section teaching it.

I noticed you were still about sometimes!
happy Christmas and a Blendering new year!

2 Likes

To be honest I did not think of that… Oh well :man_shrugging:

Not exactly, simply the scope of the personal challenge based on the section, but not completely beholden to it. There are certainly parts that are not modular on the building. But the hope is that I will have a decent looking enough and reusable modular asset at the end, one that I might be able to expand on or use as a template or mock up for future projects. Likewise, something to buff out the portfolio a little more.

Thank you. It is my desire to complete it soon enough. But if not, I will display all the assets here. If that ends up being the case, it will not have been a waste of time- I have certainly learned a lot through it and feel a little more grounded in blender.

The “epicness” of the size of this project was actually due to a reference picture I am building it around. Looking back, I should have had only one large barrel, or three smaller ones! Things that you think of only in hindsight?

Somehow a poem seems in order:

Oh Christmas Cheer to the community dear,
The Devs of this site, and to be more polite-

I thank them for their skill and teaching craft,
advice, comments, to us students daft

That with blender to us new skills engender,
Or code, which itself is a load

And to the community too, the hard work that they do
And the students with all the projects they go through

Finally to all a Year Anew, with hopes to Renew
Hope, joy, cheer, to surpass all that we fear

Revive and rekindle our souls, no more dwindle!
May your Christmas and New Year, be to you of Good Cheer!

3 Likes

I have a Couple rooms with ceilings (no tiles on top yet)- but I wanted to show you that rooms do exist. I think they are turning out well, but I can certainly see how knowing how to sculpt could add more detail. Until then, Low Poly Vertices Pull!

The first one is done in Evee, The second room in cycles. The roof of the first was much more “modular” in design, since could plop down walls and ceiling with a few adjustments.

The second Room’s ceiling was not so modular. I took the Modular ceilings and cut them to fit. Unless I have my shapes games wrong, Squares does not fit triangles, and my square ceilings needed to fit triangle frames. That is where the ol’ cutting dungeon wall trick came in. If Good Mr. Abbitt could make a door fit into a stone wall, well I was going to make my ceilings fit a triangle frame!

These rooms are not complete, but the ceiling really does make a difference.


I noted that If I detached these rooms from the main building, they could easily serve as their own buildings. It is something I may try later for a quick building or two.

Enjoy!

4 Likes

They are looking very good.

I just wonder if you are too stuck on the modularity for what you are doing. Triangle ceilings sections just make one and duplicate it round. Sort of modularity but not aiming for universal use. The modularity of the course is really all about game engines as I see it. Where they are happy to slap together buildings from the same parts. That is not quite the same as making reusable sections, assets.

3 Likes

That is in part why I am practicing modularity. It would be nice to have a few modular assets for that sake alone.

And you are likely correct. My intention was to create the basics: items, Walls, doors, floors, windows, roofs, stairs, and ceilings, all of which I have done. Your idea of a triangle roof would have been useful in that one section.

Now having all the parts I want, I have turned all my attention toward completing this Tavern (did I say that aloud?). I will only complete the outside and the main room. Nothing else, including the surrounding terrain, will be touched.

3 Likes

Awesome set of assets :+1:

1 Like

Thanks,

I am getting closer to being done, I almost have all the ceiling put up now. On to Shingles soon.
Parts are going to be left unfinished on the inside “for later”. Mainly visitor rooms, the kitchen, and the basement.

All and all, a nice break from coursework. I have been finding this break foundational in solidifying my understanding of the program and becoming more confident with it. When I am done with this project, I will be happy to continue learning something new now that I have let some of the old settle.

Privacy & Terms