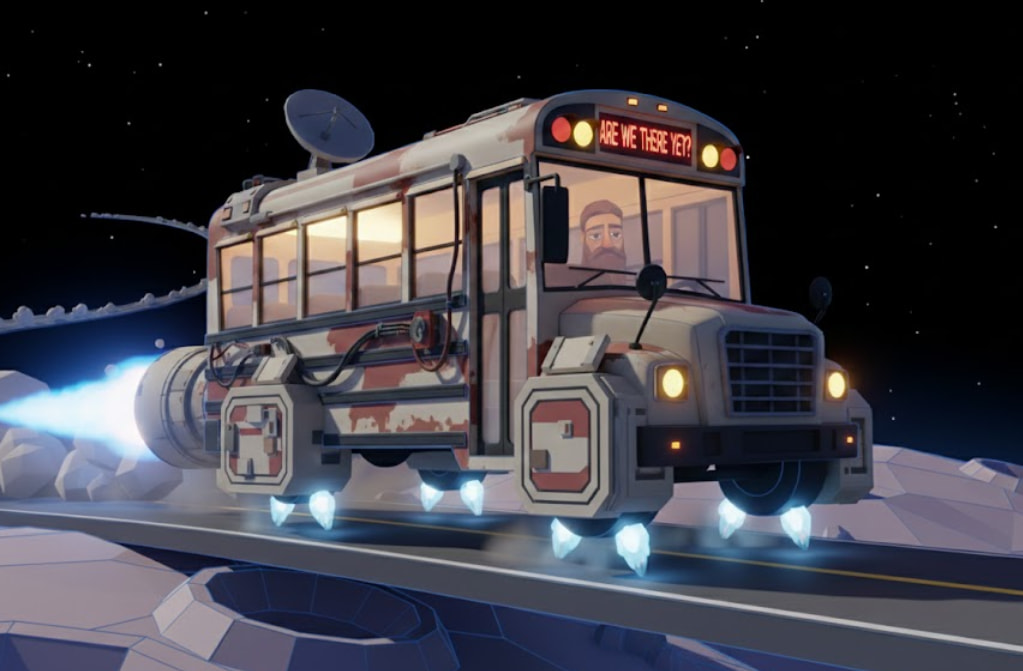
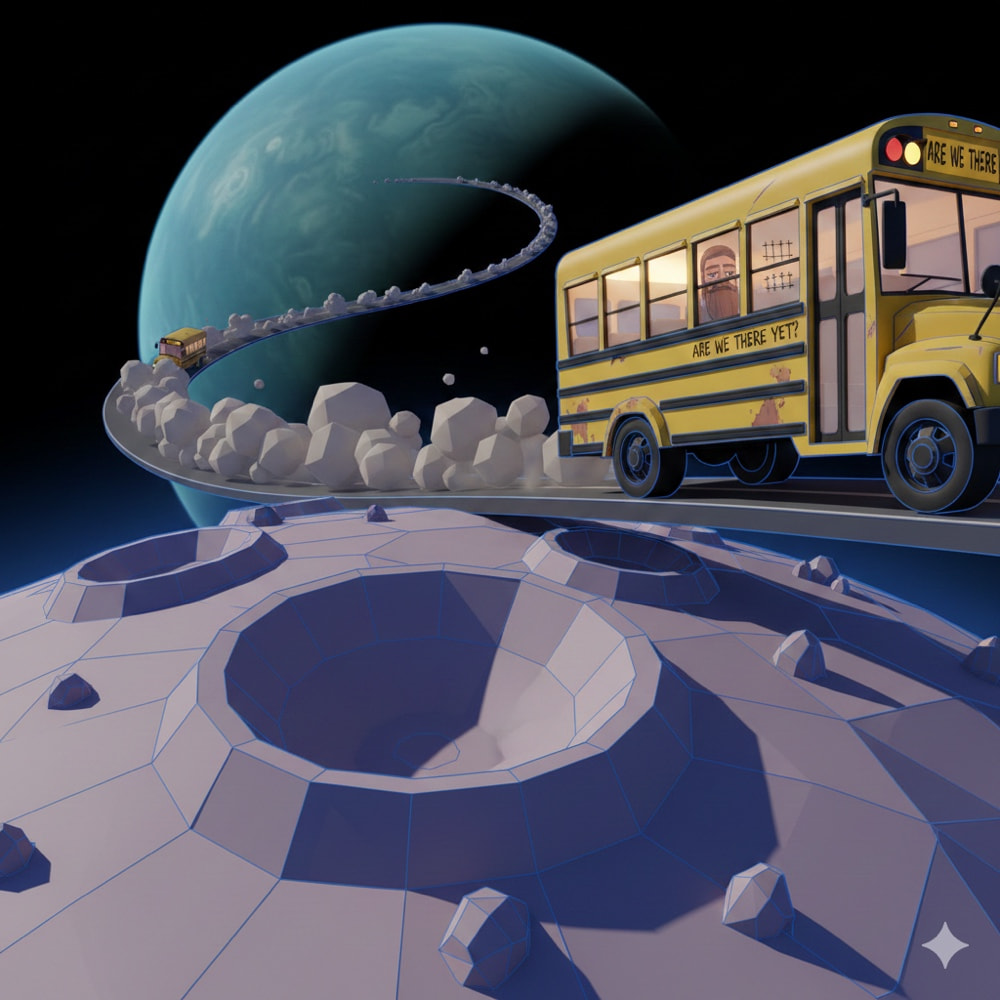
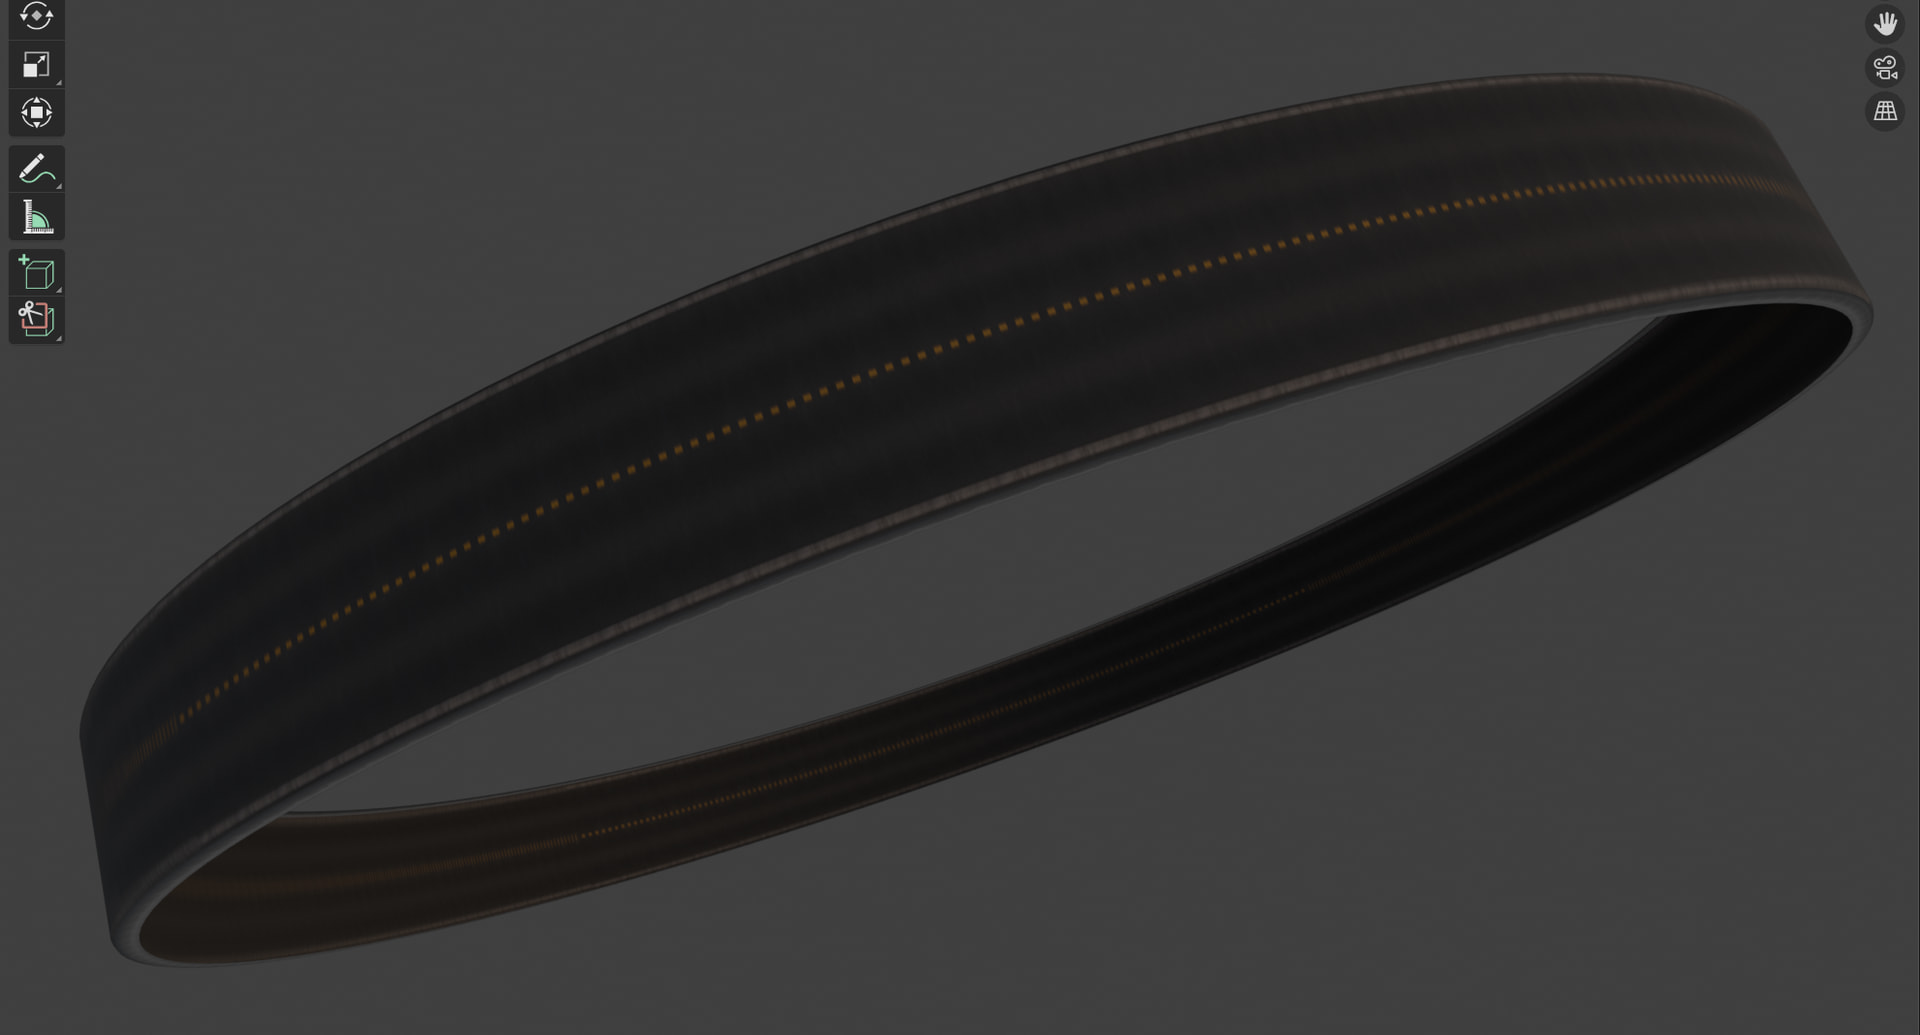
Another breakdown of my latest collab submission “Mobius Tours“.
Inspired by school trips that took forever, to get to the destination, through a landscape that never changed.
After a few ideas and rubbish sketches - why not have a school bus circling around a potato asteroid. And settled on this concept above.
Research
The usual image search on google to populate a PureRef file.
- Asteroids + Craters
- Bus types and dimensions
- Roads
- Road signs
- Coffee shops or bistros, etc.
- An aging person

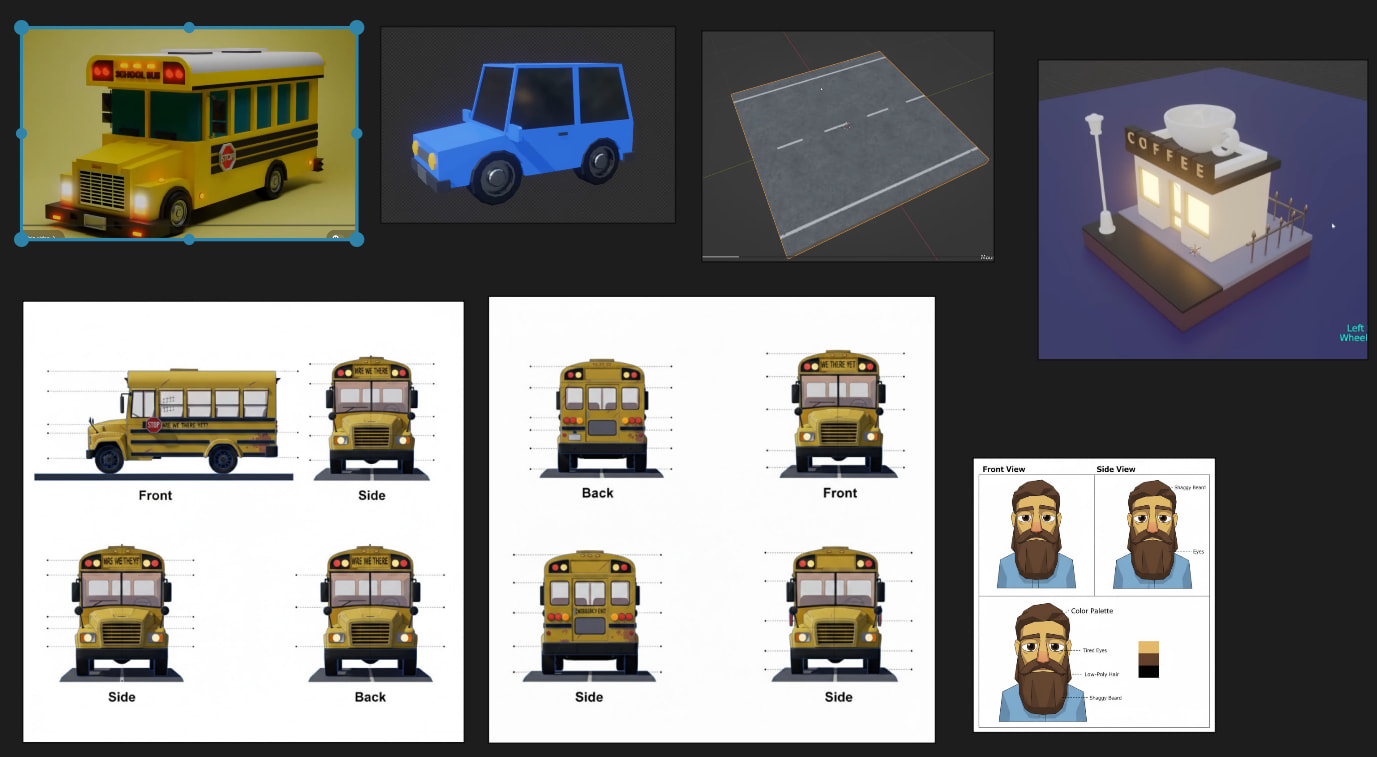
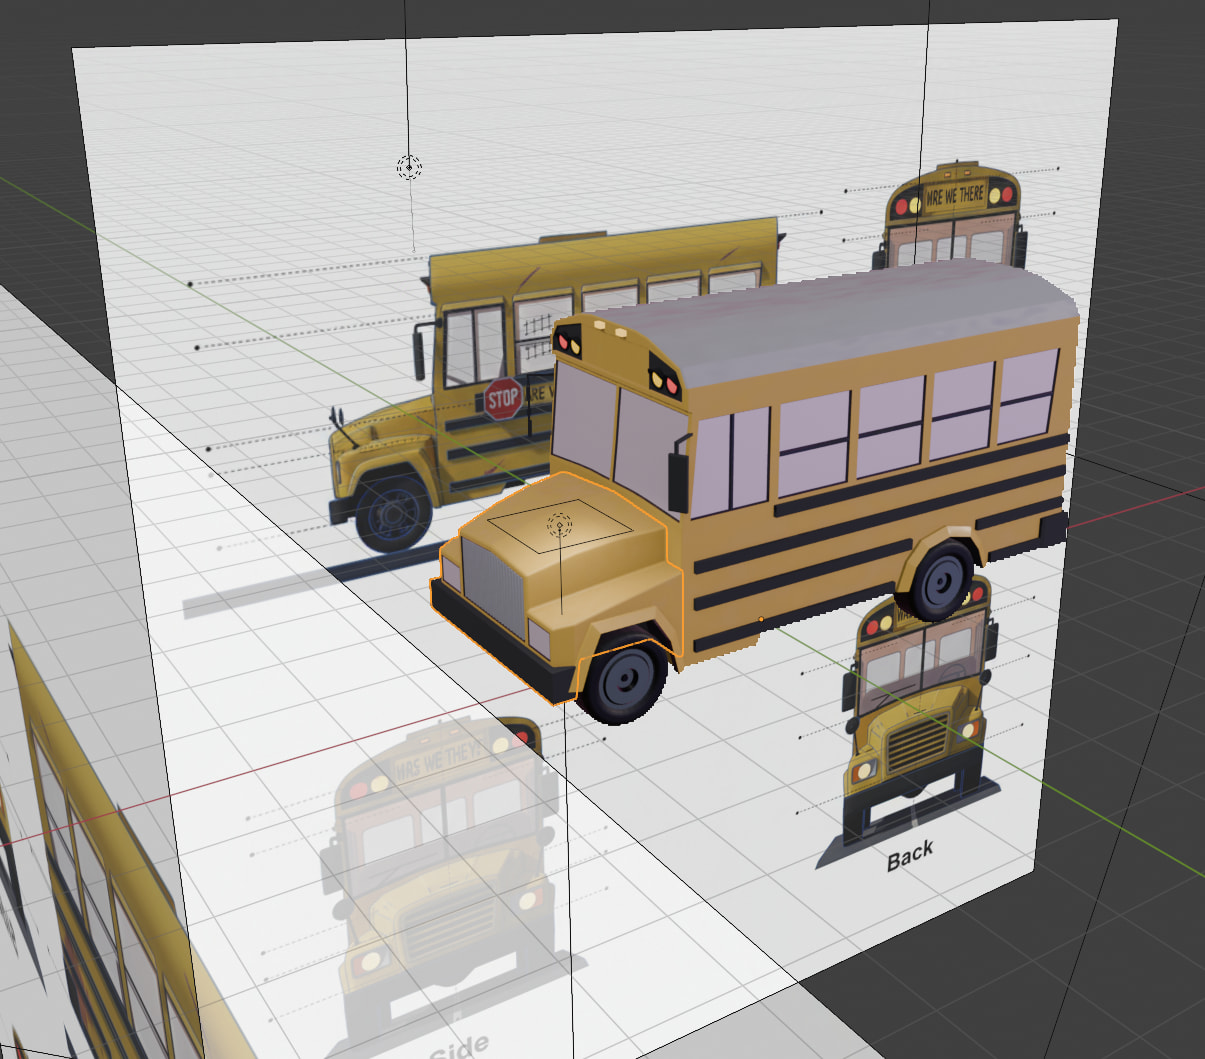
As before, I used Gemini to create the bus template. While it struggled this time (I assume someone turned some nobs) I got a useful image.
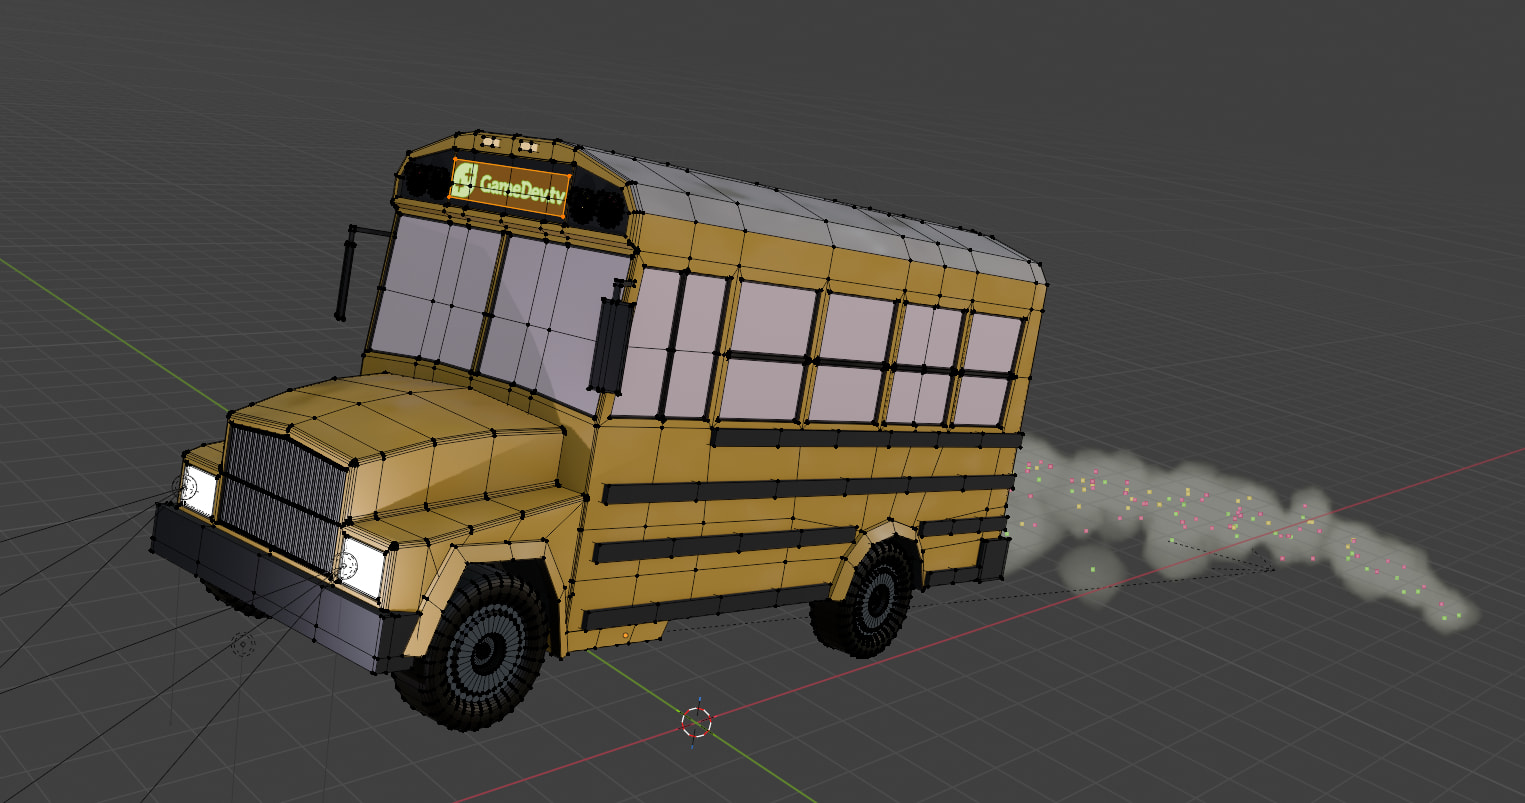
I wanted the image to be dynamic and convey some motion, so I used the Game Dev image as reference. And later applied a Lattice modifier.
With this in mind one of the concept images Gemini created has been different from what I had in mind. However, it came up with the dust trail, which I kept.
The Bus
Making the bus took much longer than I thought it would. I started over three times. And decided to break it down into smaller steps.
Starting with the cabin.
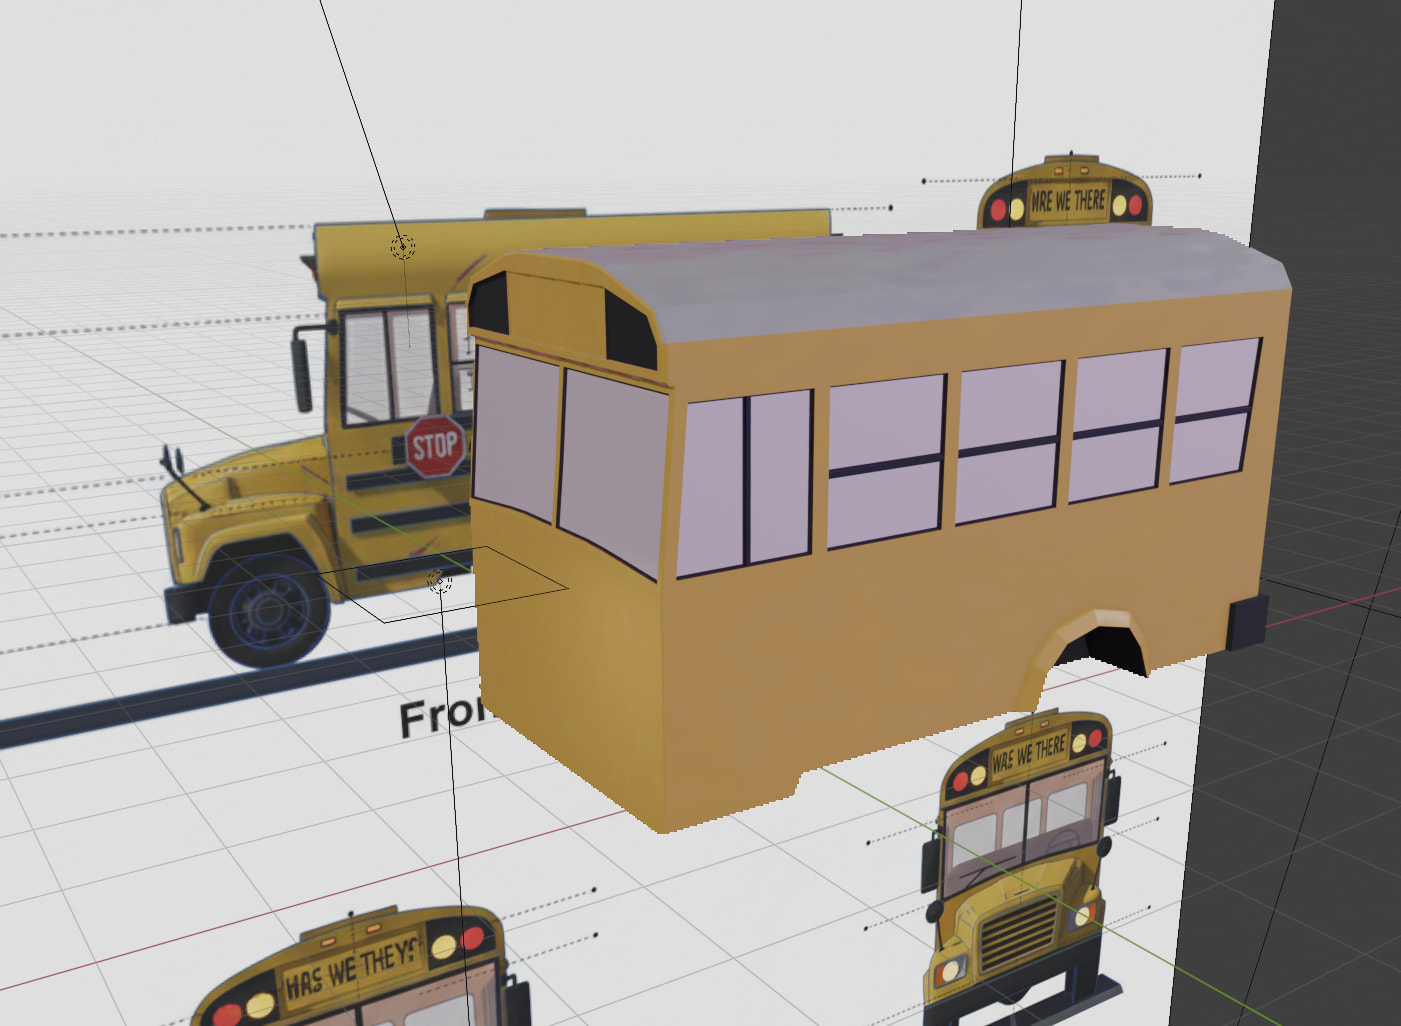
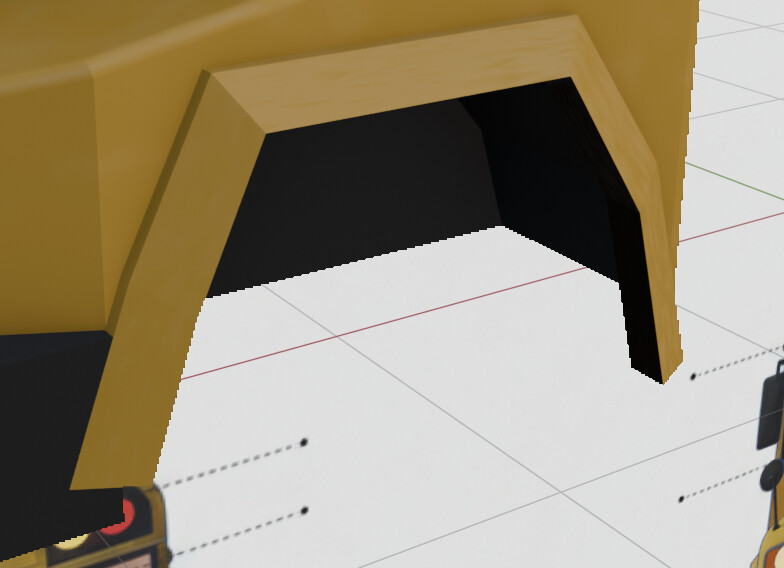
The wheel arches turned out to be tricky. Ended up using inserts and then extruding a manifold inwards (Alt +E).

Then building the front piece. Screwed up and started over.
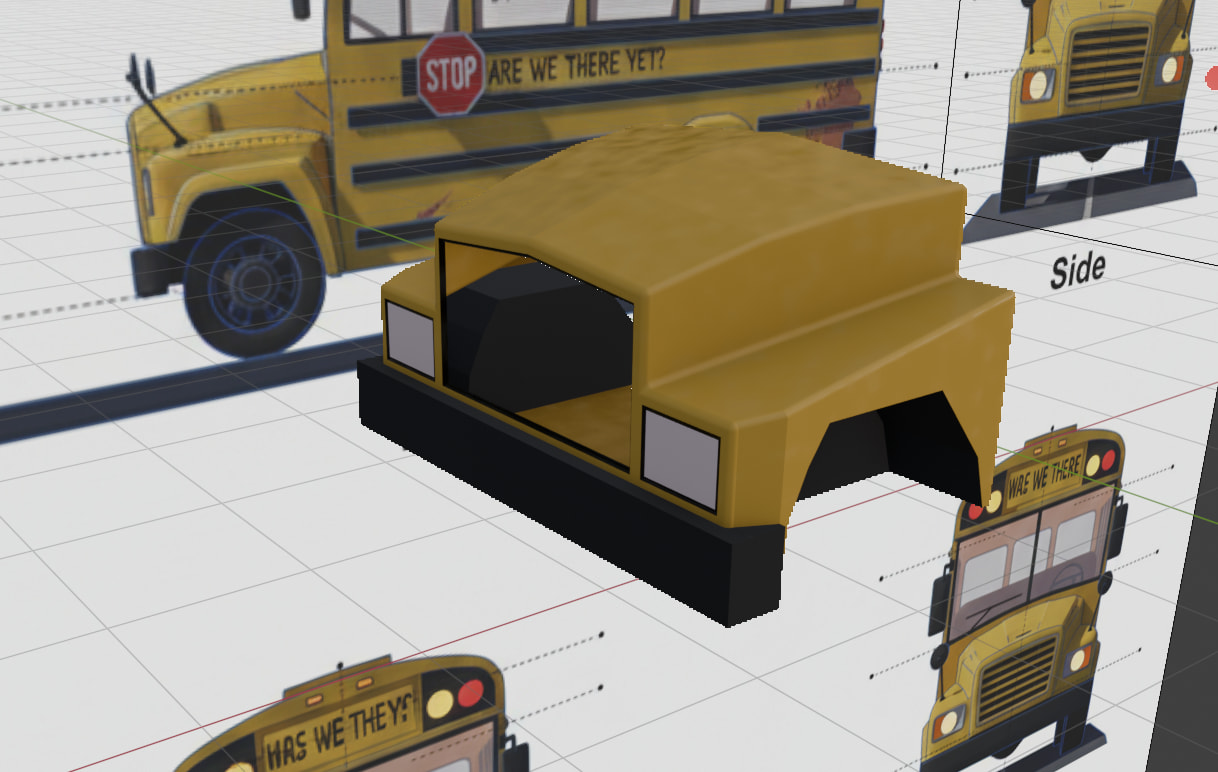

The grill has a set of extruded faces. And of course, I use a mirror modifier for the whole bus.
The front wheel arch … is a copy of the rear one, with some tweaks. Who would have thought that a low poly car/bus is tricky. Another reason why I love the collab challenges (@FedPete).
The windows, back door, areas for the number plate, are inserts again.
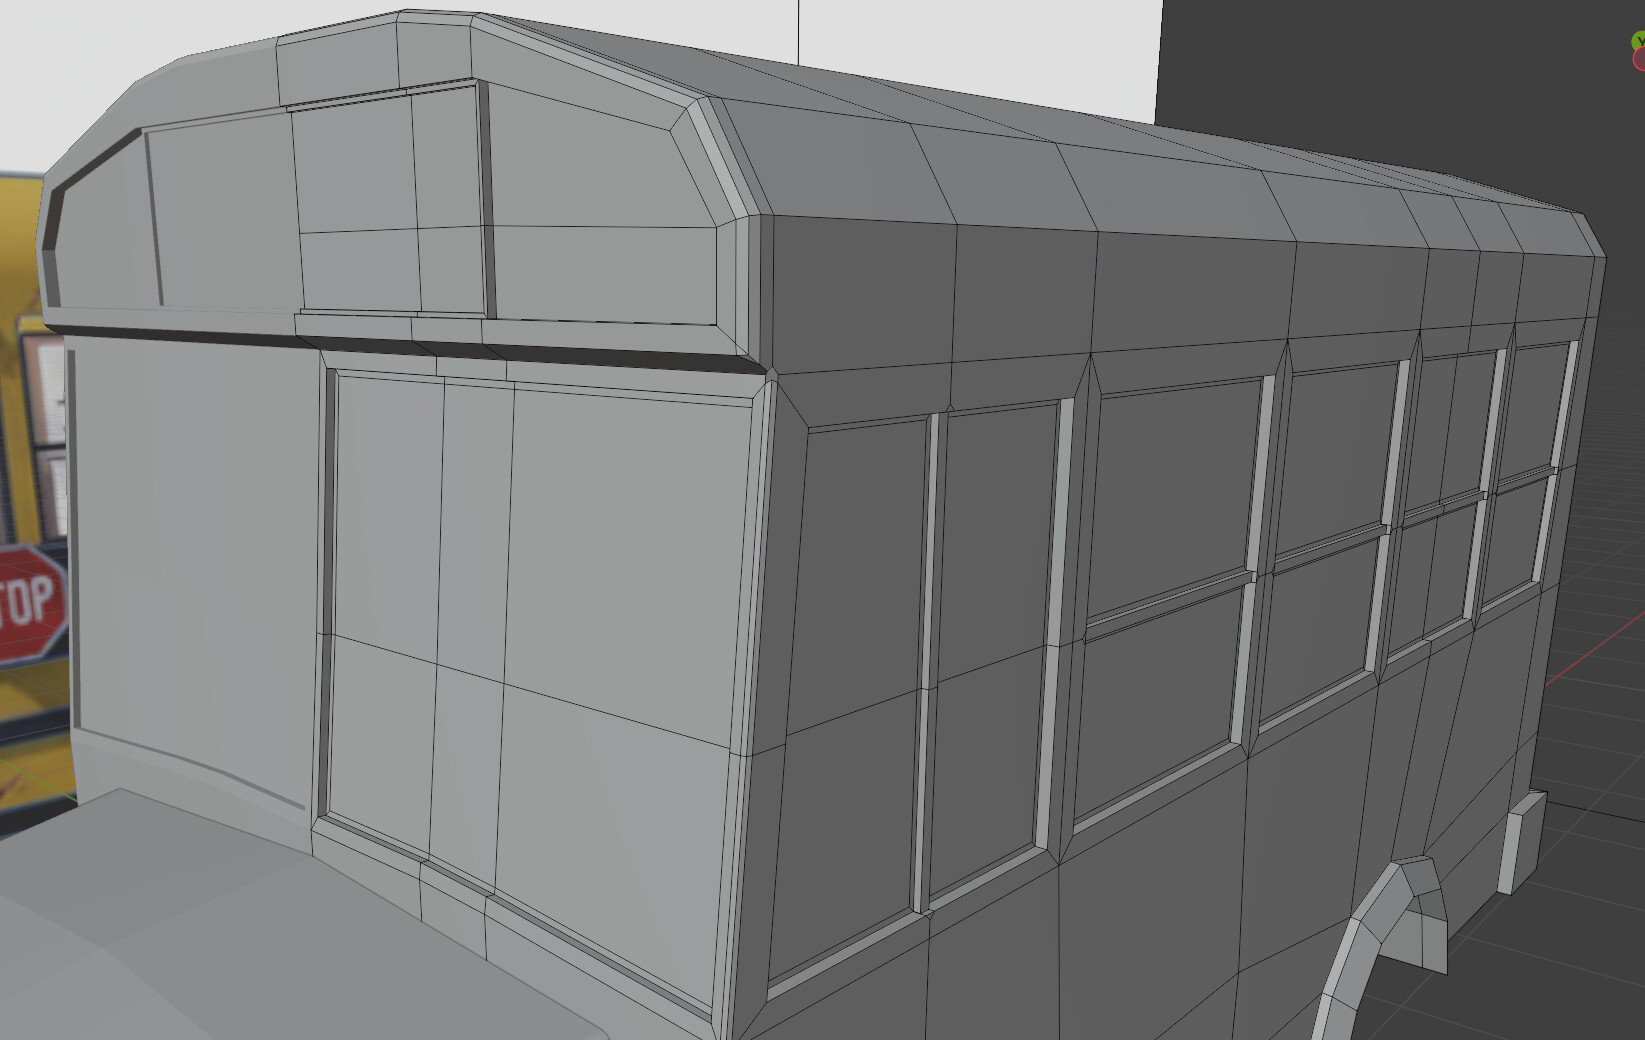

From there on I started adding details, like the top lights, side bumpers, etc.
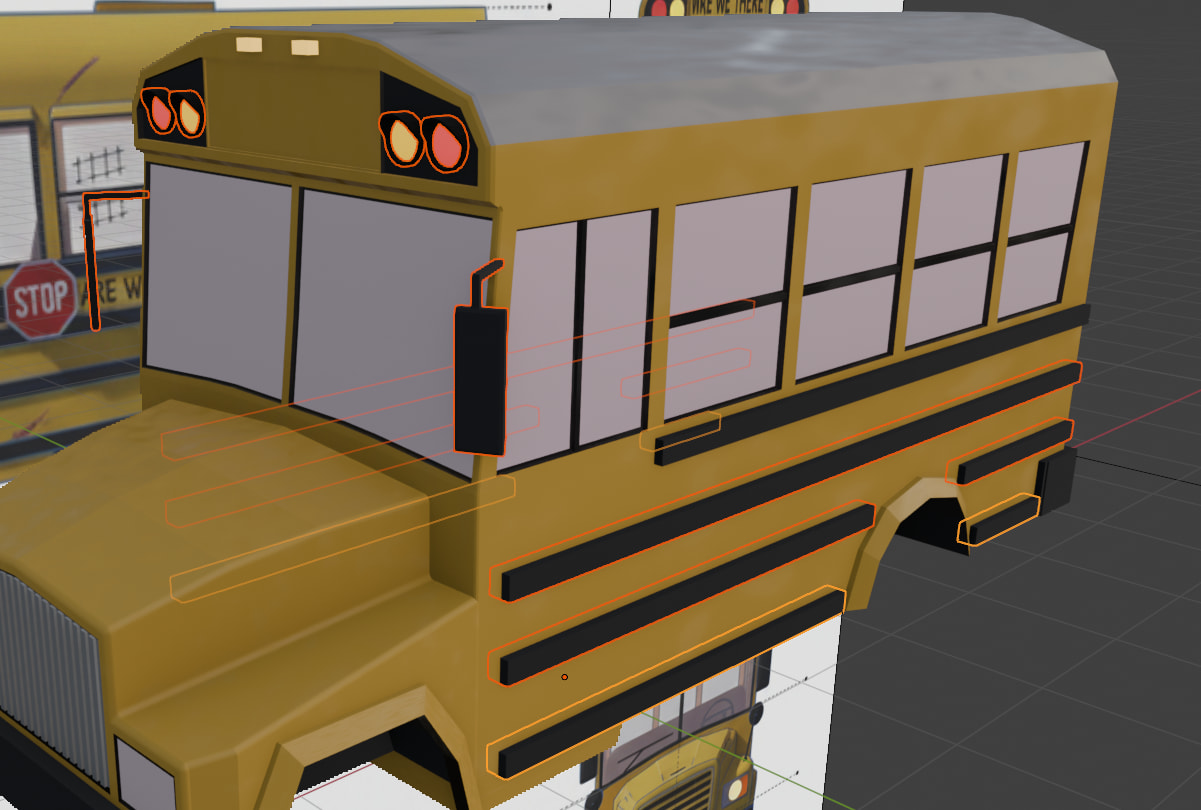
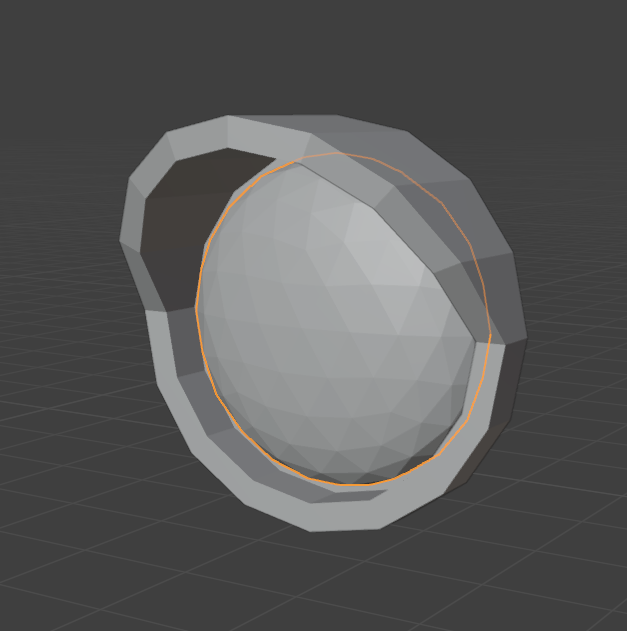
The lights are a modified cylinder and flattened ico for the bulb.

Btw, I strongly recommend the add-on 3D ViewPort Pie Menus. It allows you to align the vertices and move the object origin without leaving edit mode. (Thx Ryan King Art!)


Wheels are a simple cylinder with inserts and beveled tires. Given the scale I didn’t bother adding tire treads.

Here we go:
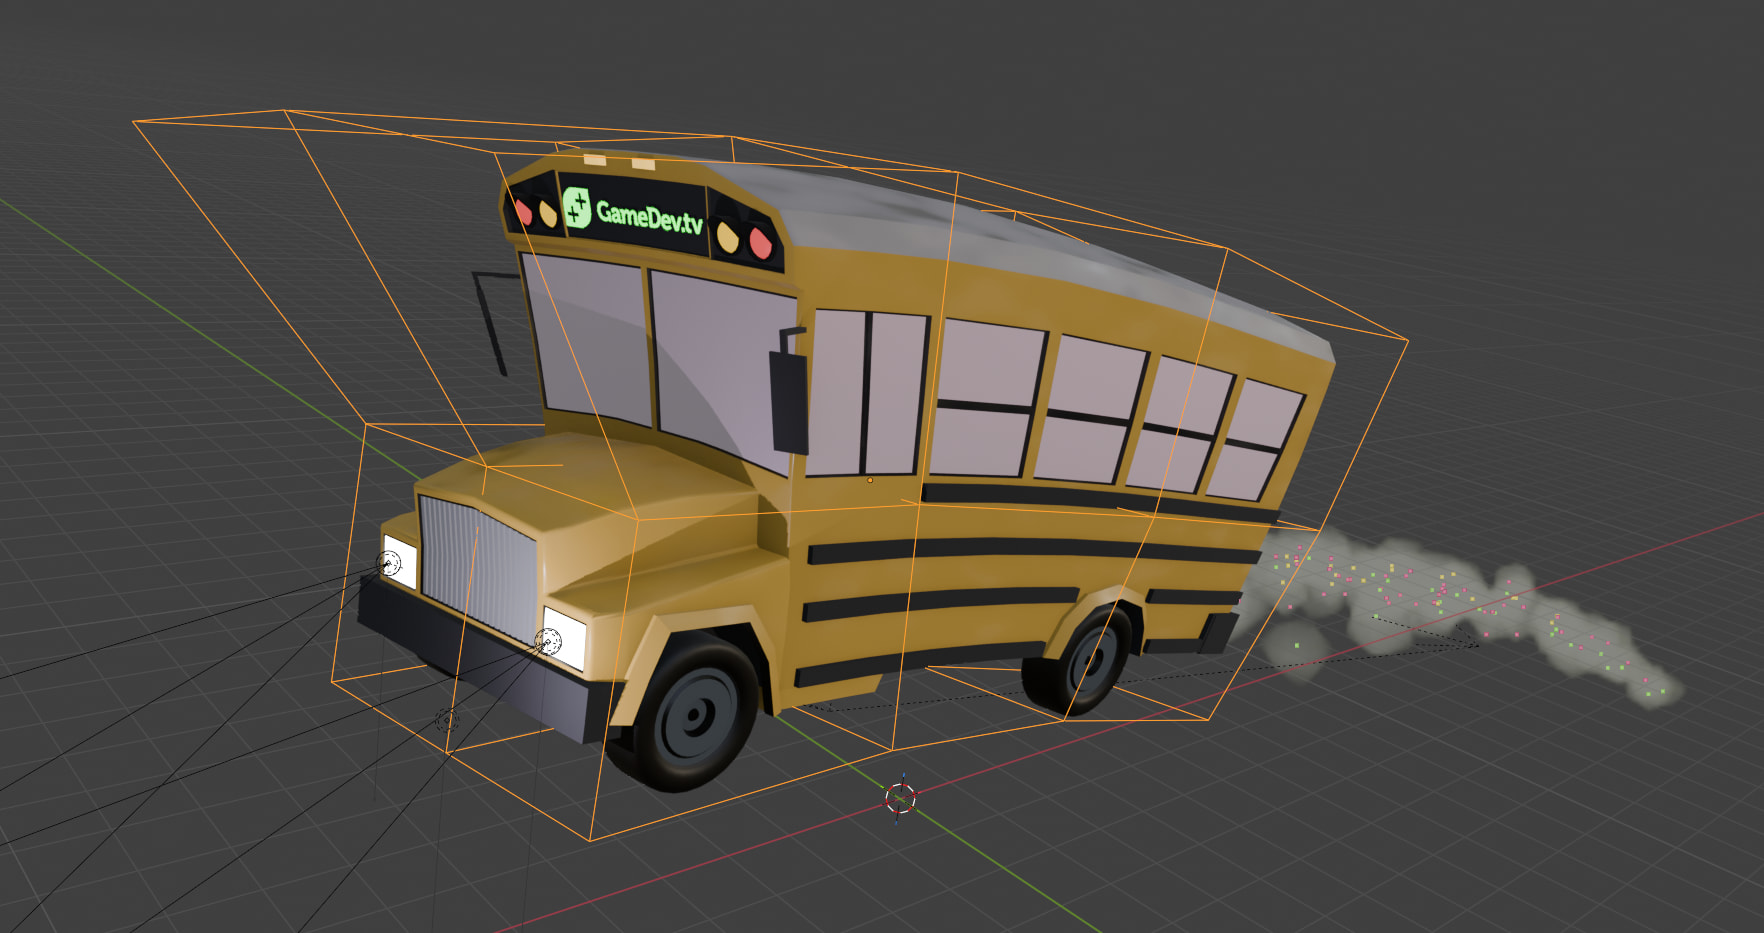
To get the dynamic feel and some of the wonkiness, I used a Lattice modifier. (Thx @Grant_Abbitt for mentioning this in the wonky shelf and chair video). Select the wonkifiable object, then Add > Lattice to Selected (creates a lattice around the bounding box.)
(I grabbed the gamedev.tv logo from the website, added transparency using Affinity).
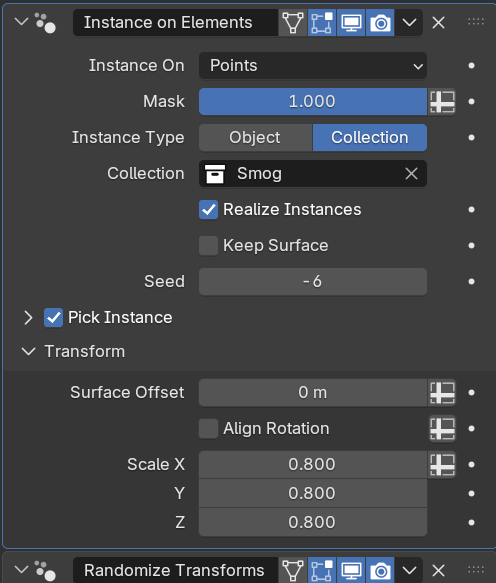
The dust trail - while there might be better ways to do it, I wanted to try one of the new modifiers. It is a grid plane with randomized vertices (edit mode > vertex > transform > randomize). Then dissolved the grid to keep only the vertices.
The modifier is Instance on Element. Instances are three low poly dust clouds placed in a collection.
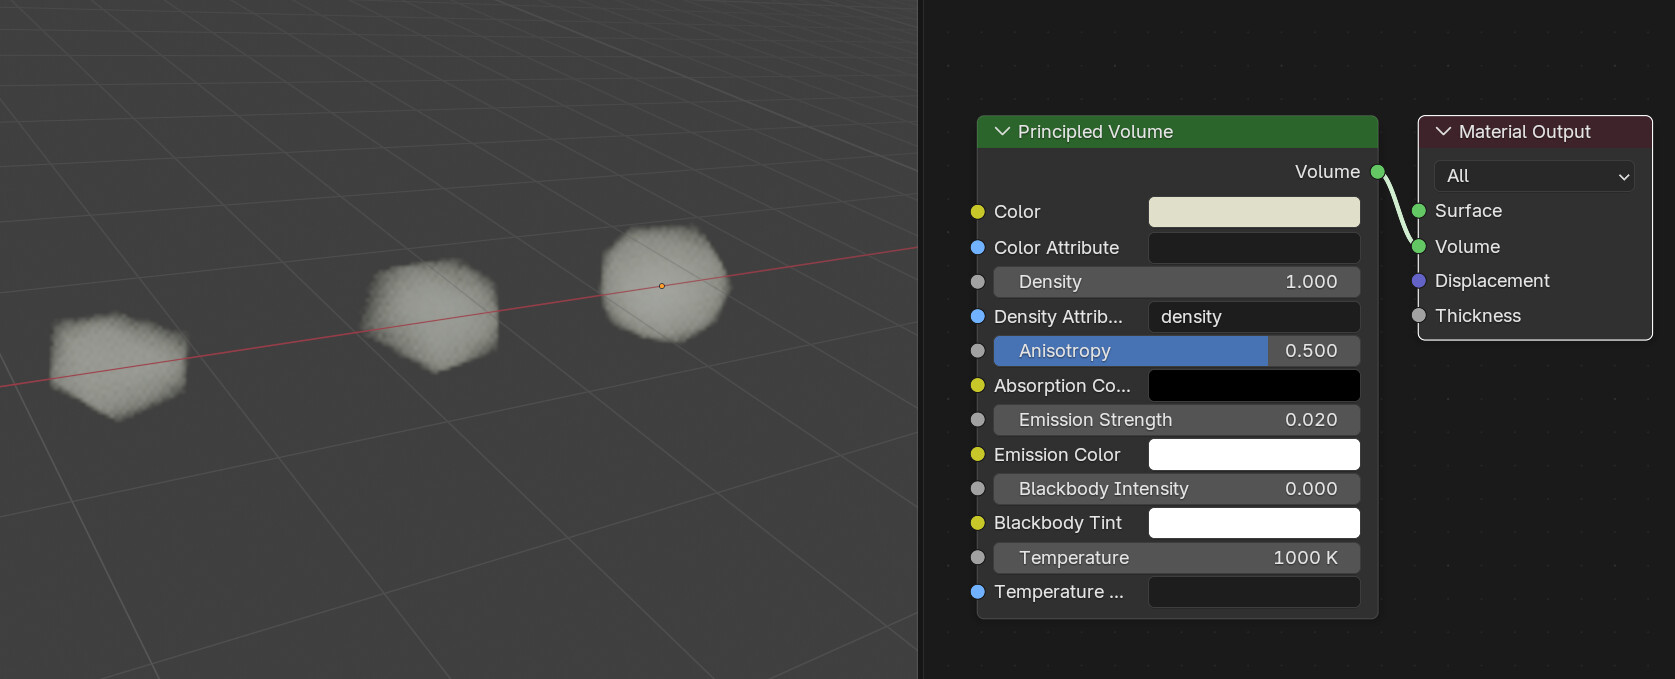
Adding the modifier to the grid. Select collection and check pick instances to randomly pick one of the objects from the collection. The Randomize modifier does exactly what the name says

There are four dust trail objects in total - more is more!
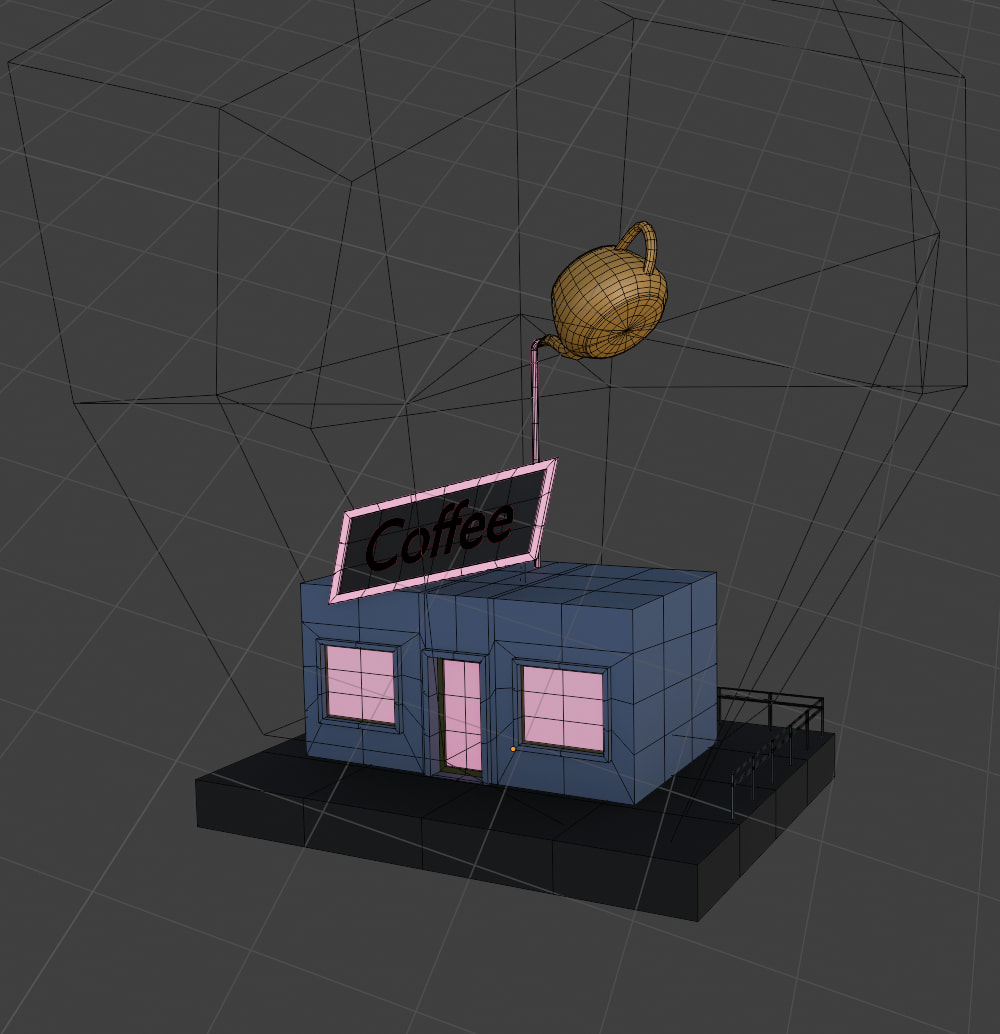
The Cafe
That’s a last-minute job. A cube with some inserts for the windows and doors. Haven’t used text in blender. The Mesh it creates is horrific. To remesh it, add a Remesh Modifier. Set the mode to Sharp. Uncheck Remove Disconnected. Increase the Octree Depth (usually 4 to 6) until the letters look crisp. Apply the modifier. You now have a clean, grid-based mesh.

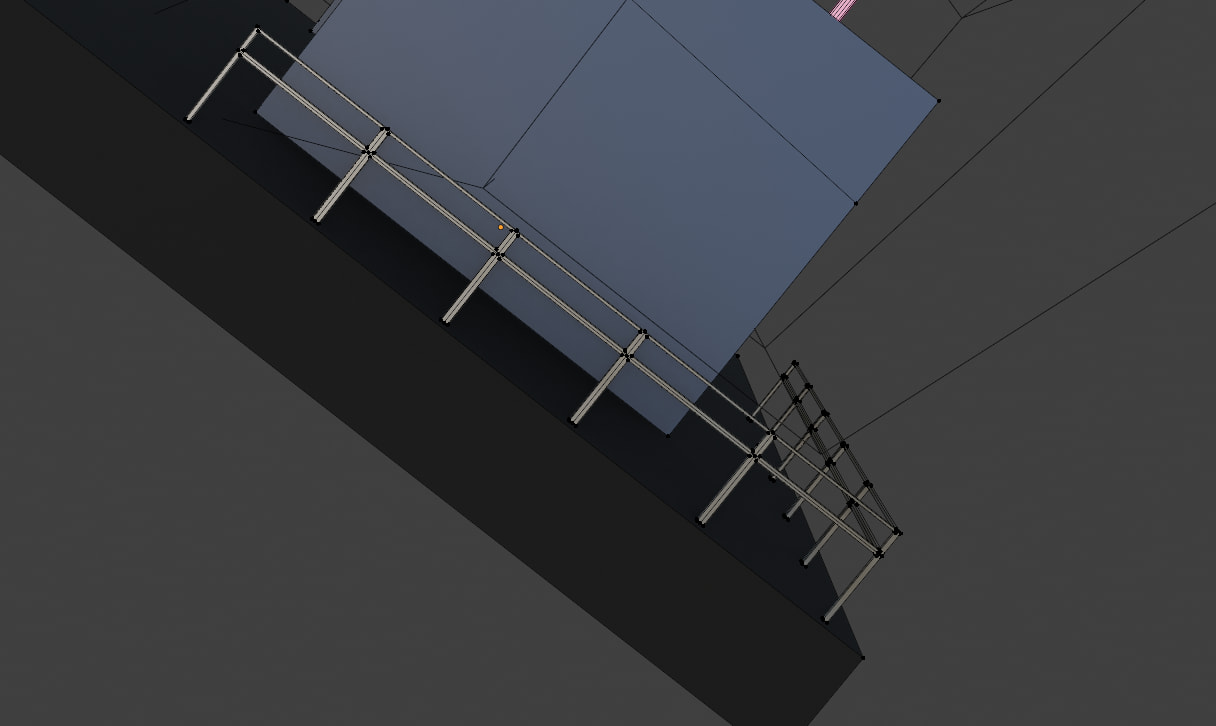
The guard rail is made using a plane, a few loop cuts, inserts, and then used loop tools >>> bridge to create the holes.
The Tea Pot is an asset (the only one I used) and part of the extra mesh add on. (time … the idea was to place a cup and saucer on the roof)
Wonkiness again

One thing, to make sure the object deforms with the lattice, add more loop cuts.
Coloring
Both for the bus and cafe, I have been lazy and collapsed the unpacked UV into a single point.
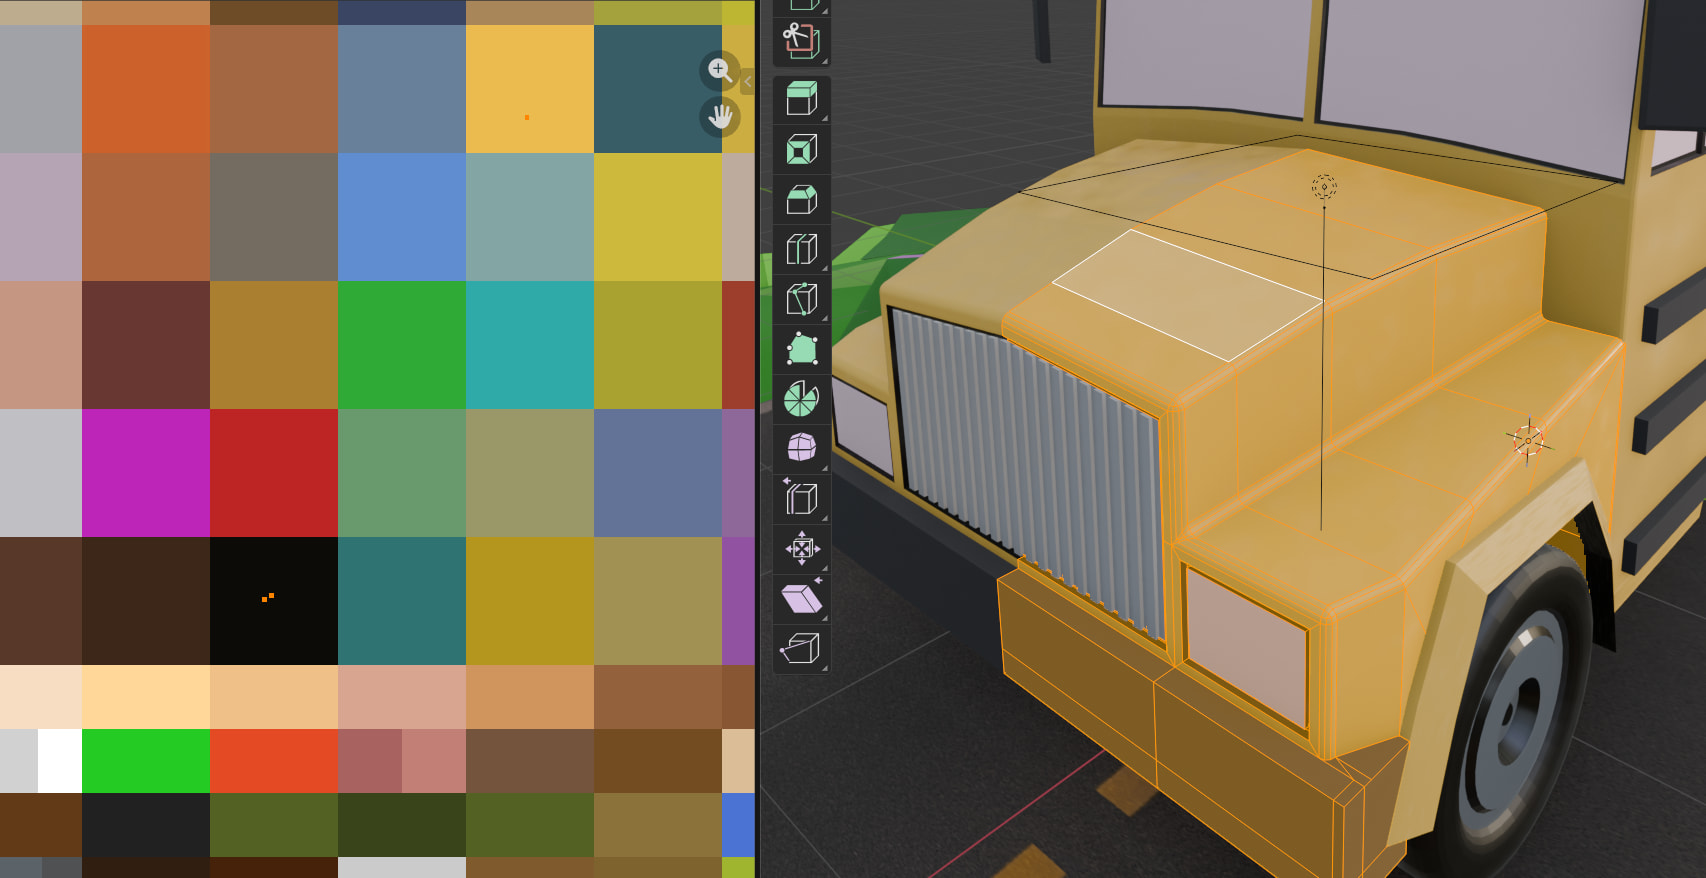
E.g., select the faces for a specific color, unpack, then scale it to zero. Move the dot to the color you want. Rinse repeat.
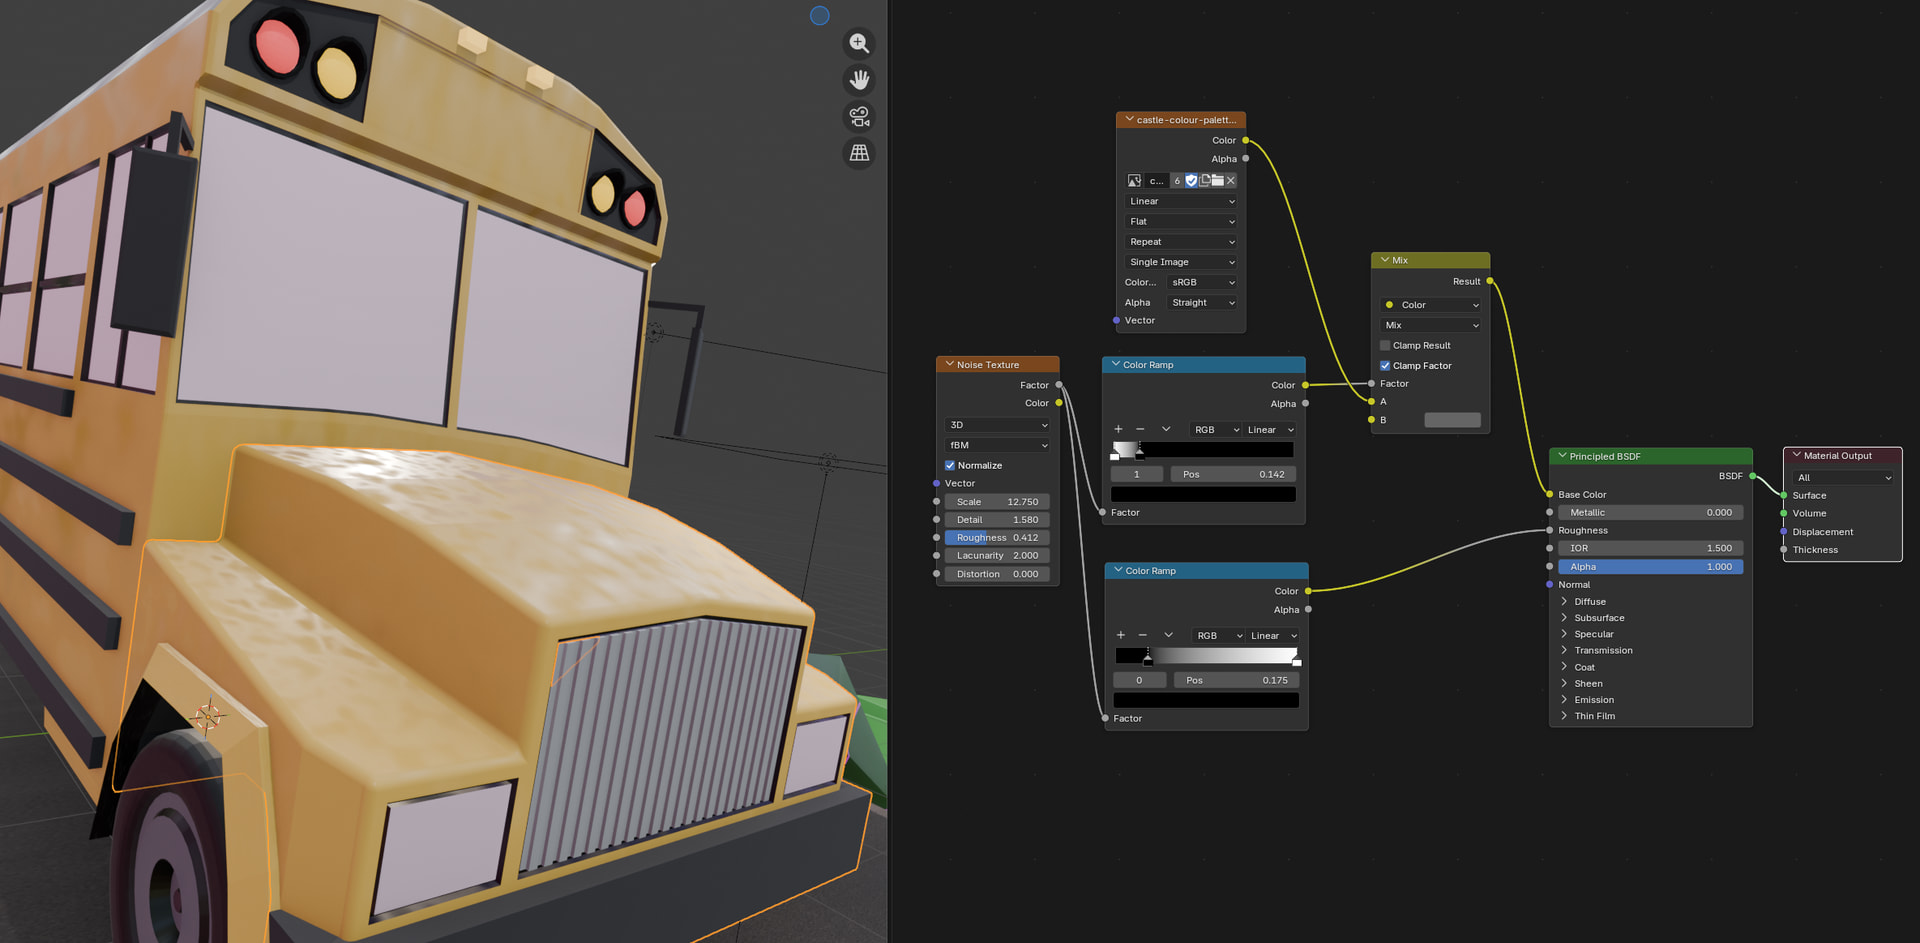
To make the bus look more interesting, I added a noise texture for roughness and smudges.
Because, why not.
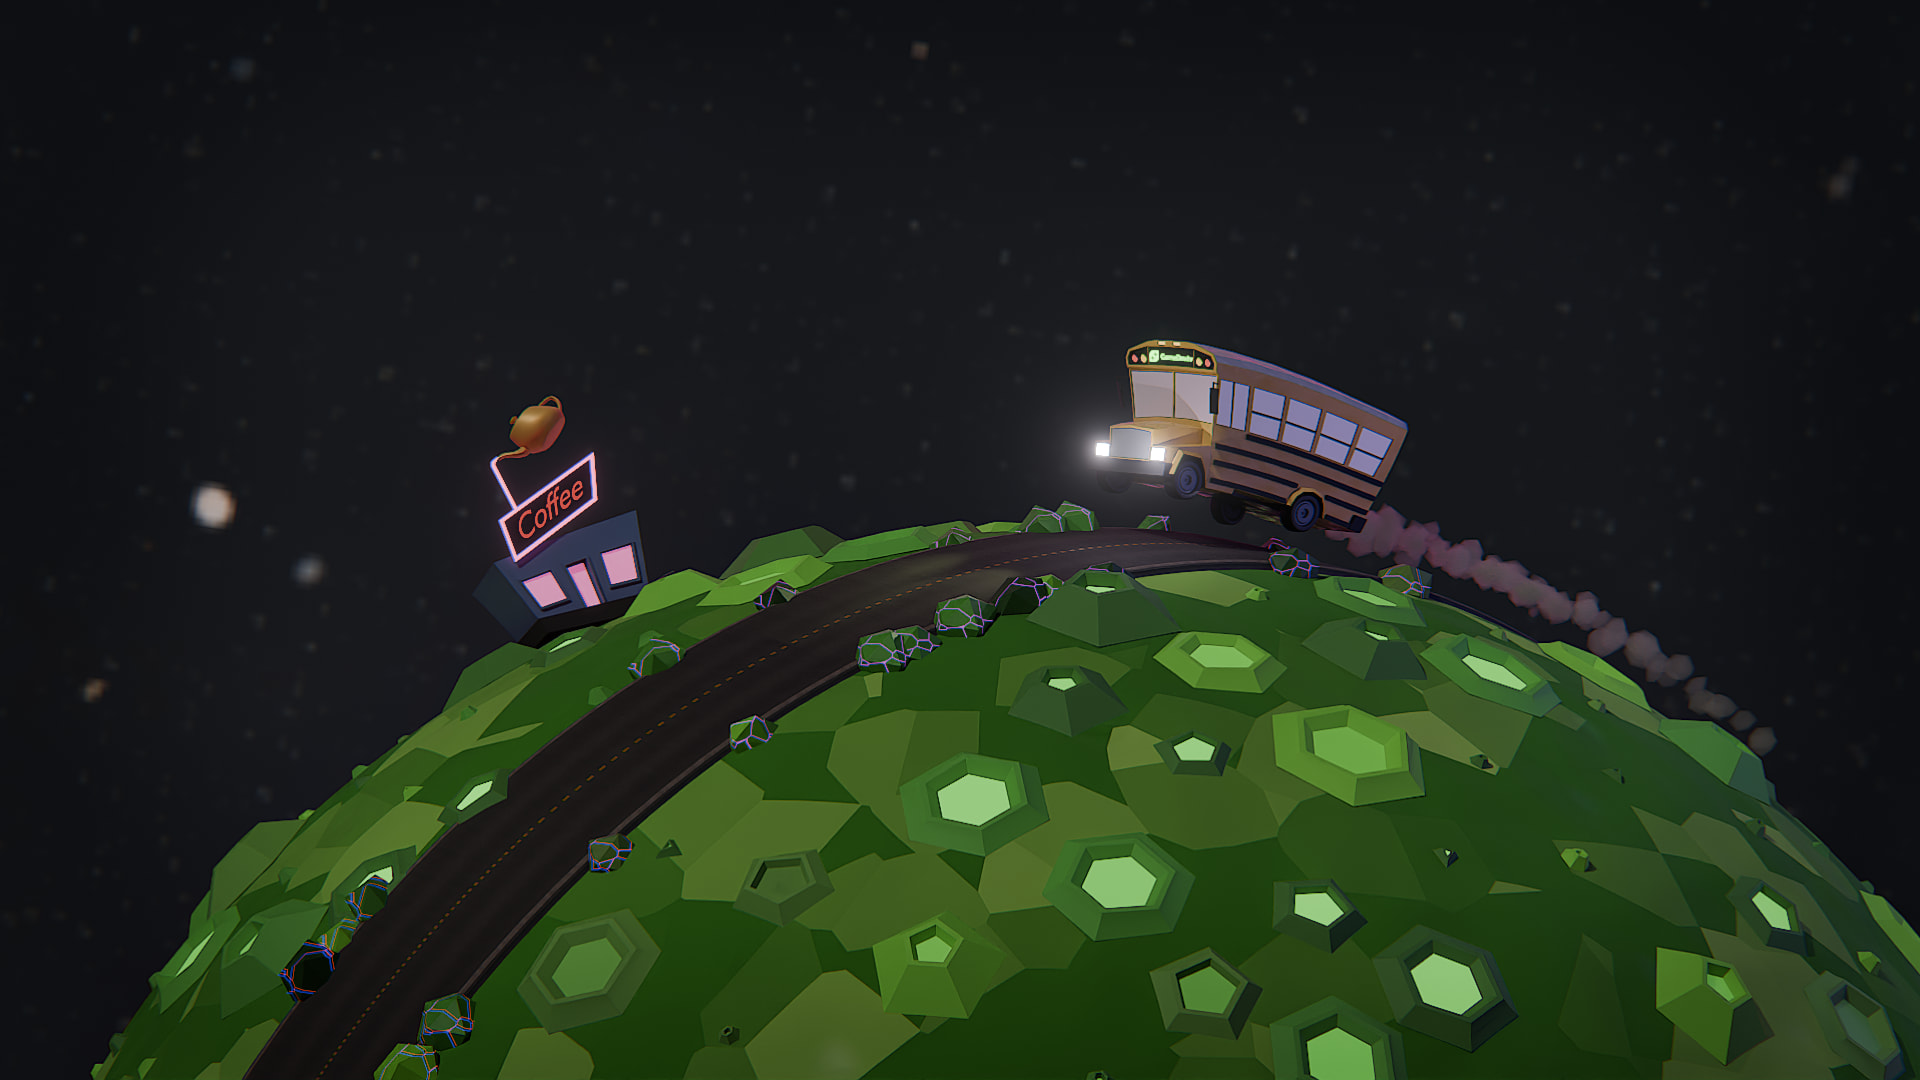
The Moon
… is a simple Icosphere, with a relatively high subdivision. Still added a subdivision modifier.
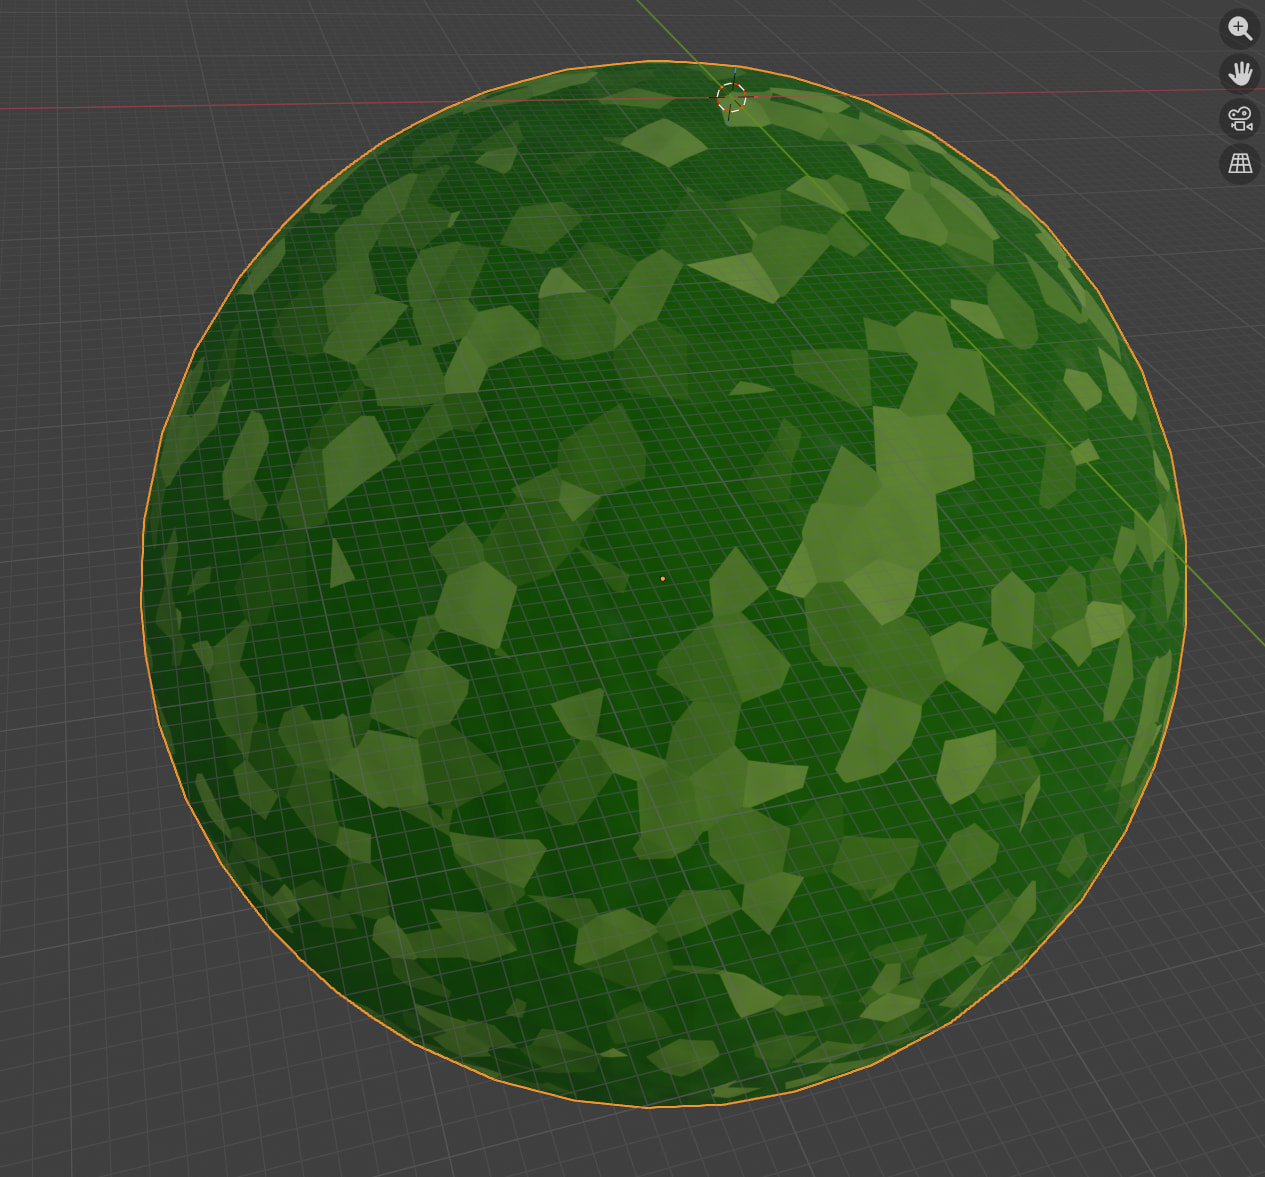
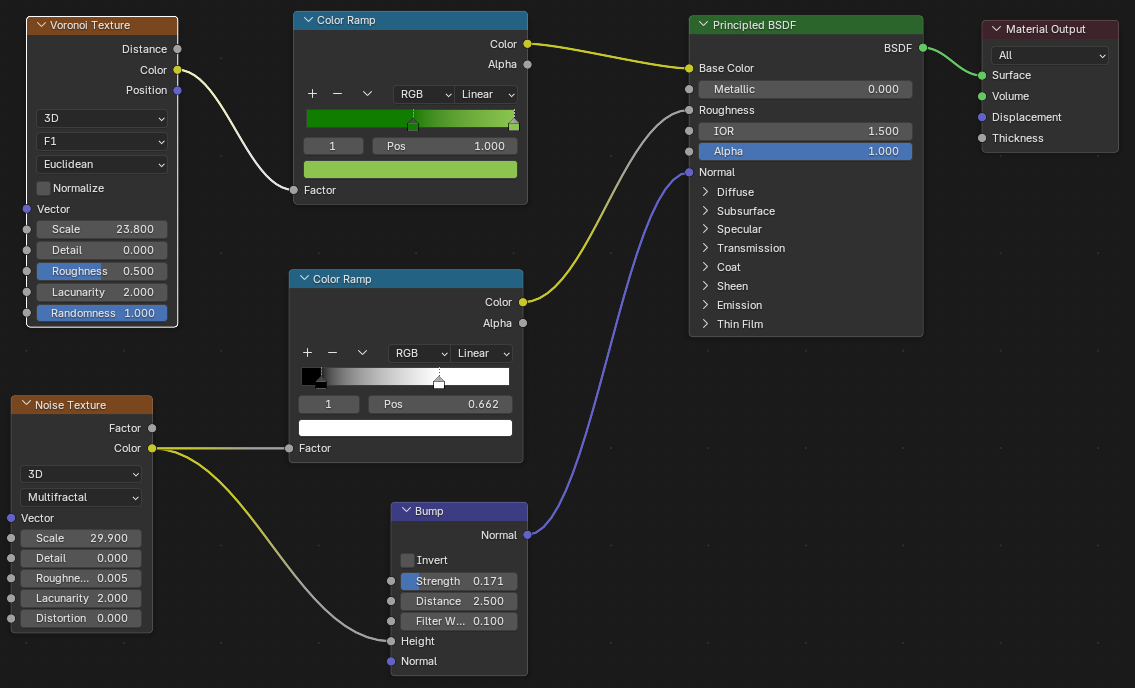
The texture is procedurally generated, using Veroni and Noise textures. Why - to learn these nodes and due to time limitations.
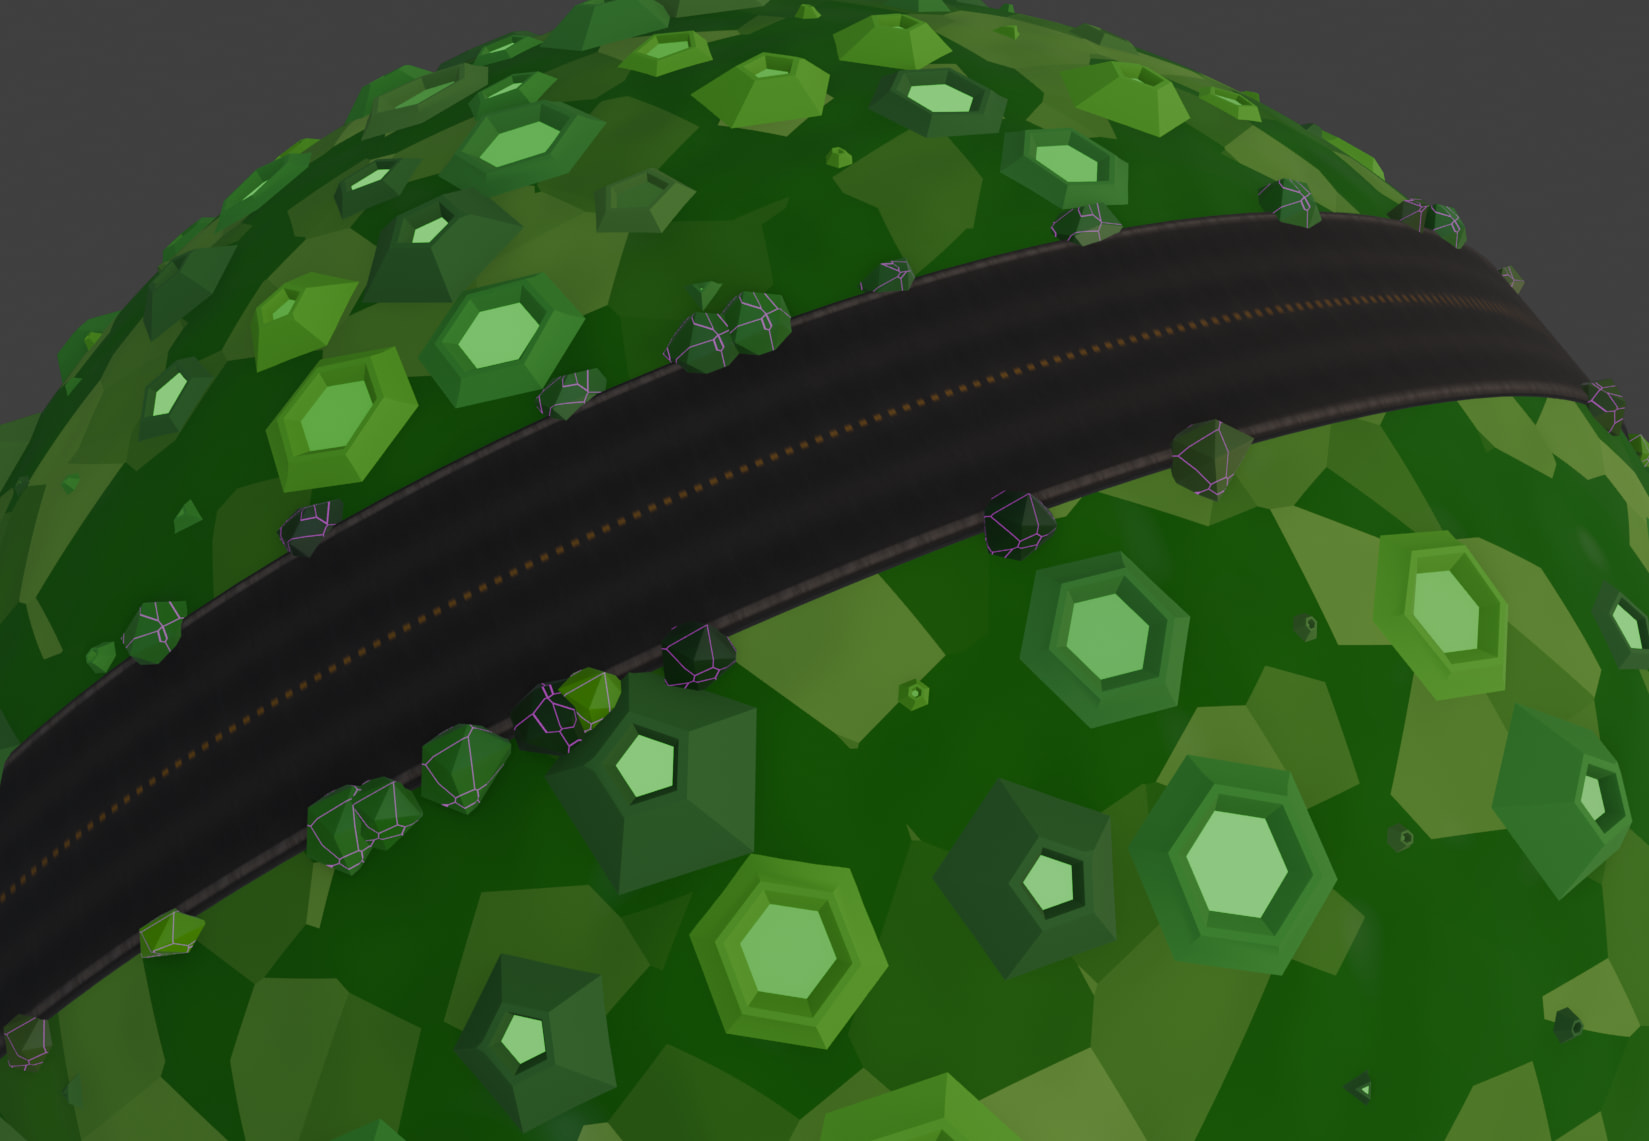
The road is made from a simple geometry and an array. I wanted to play around with the new array modifier. The Bevel modifier helped to make the piece look more real. Found the texture online. Bu
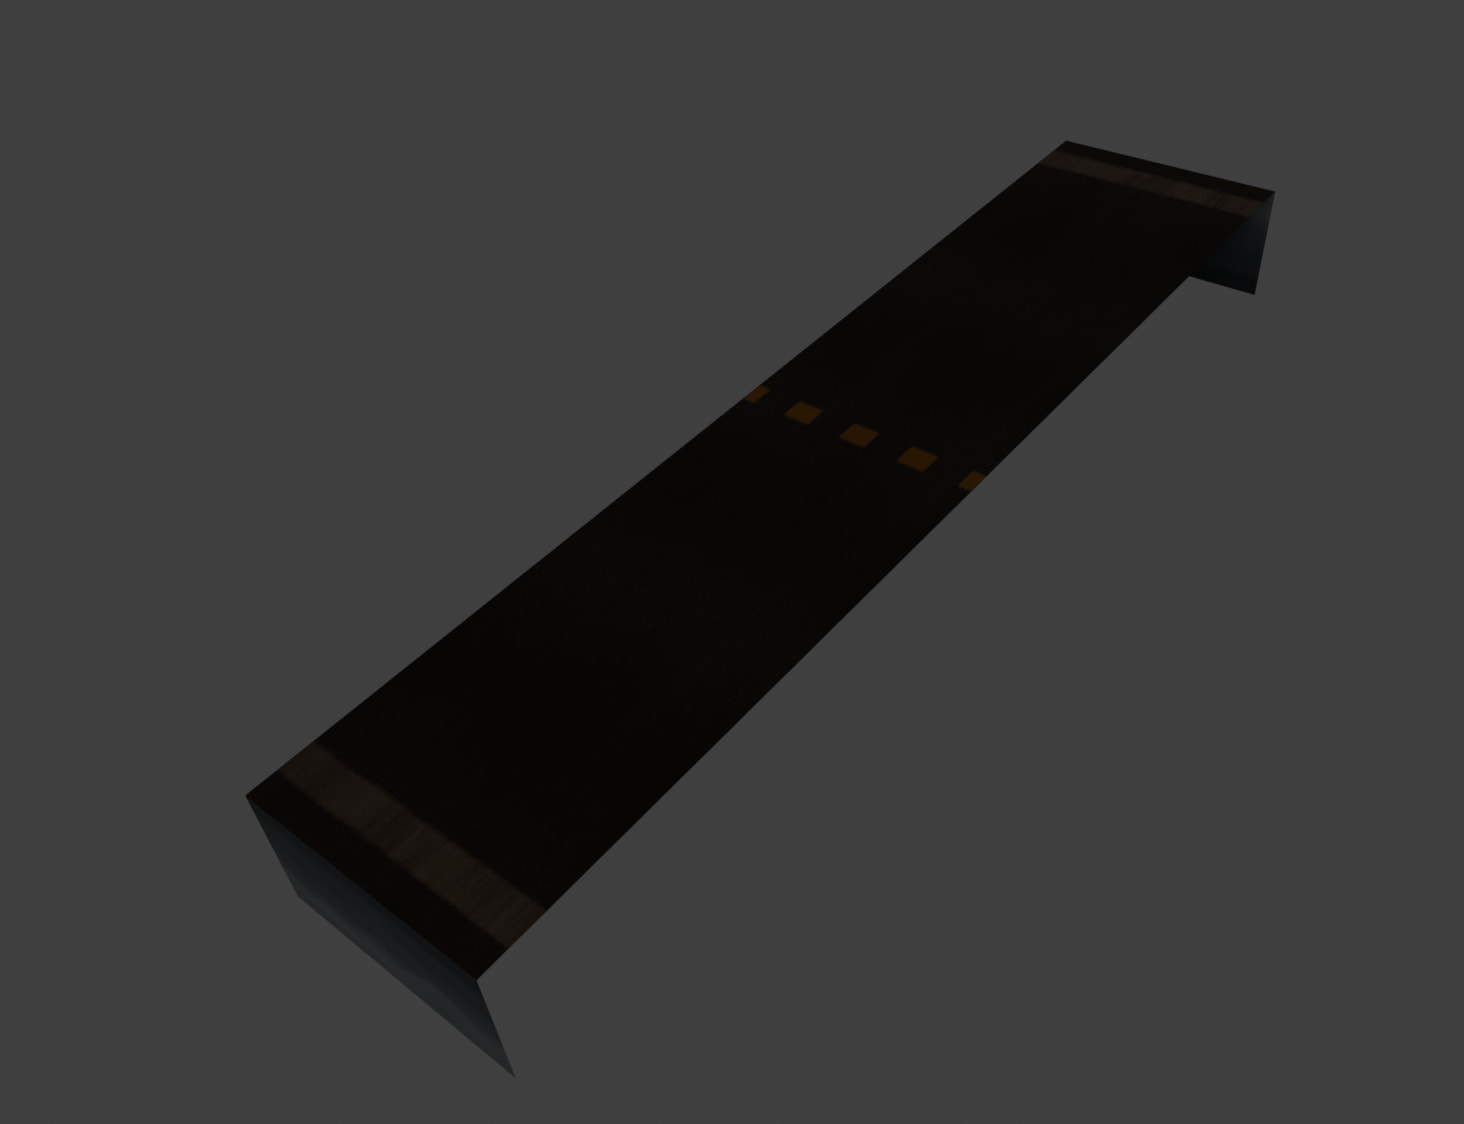
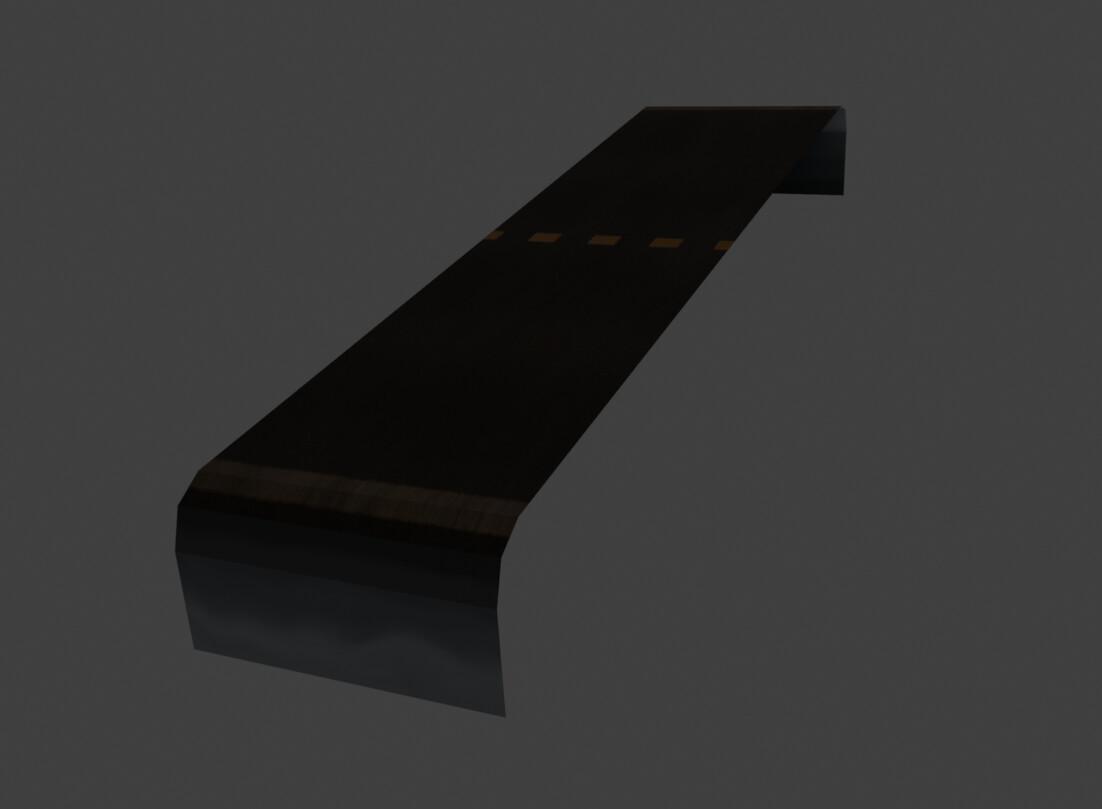
The texture caused issues on the side pieces. After trying to figure out my, I created a custom texture and painted it on.
The new array modifier is fantastic.
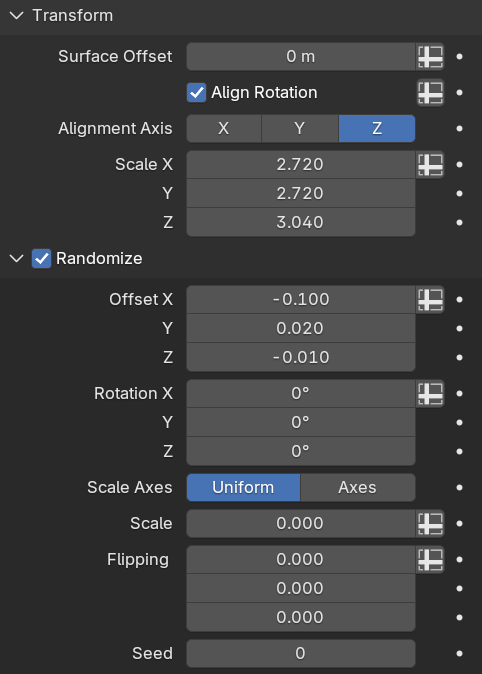
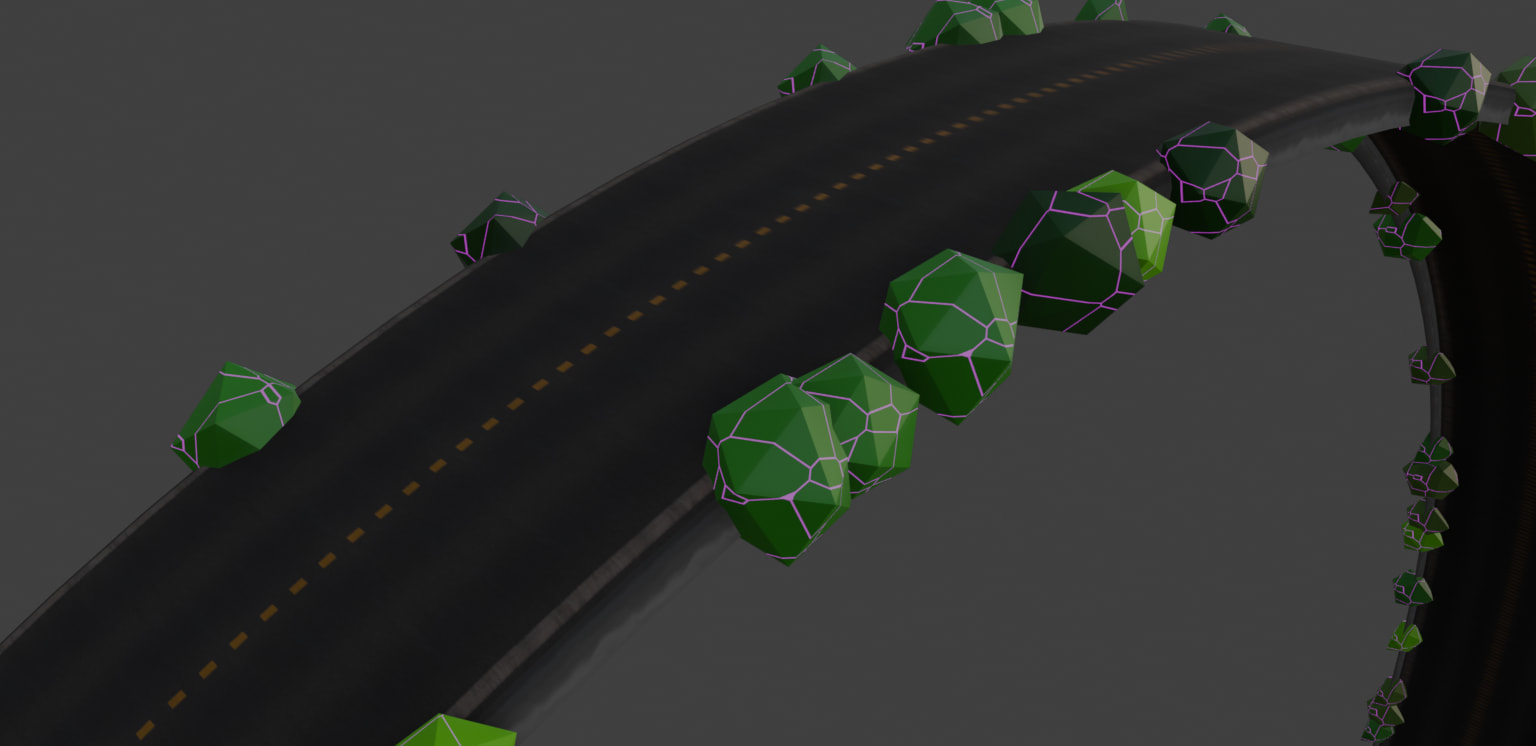
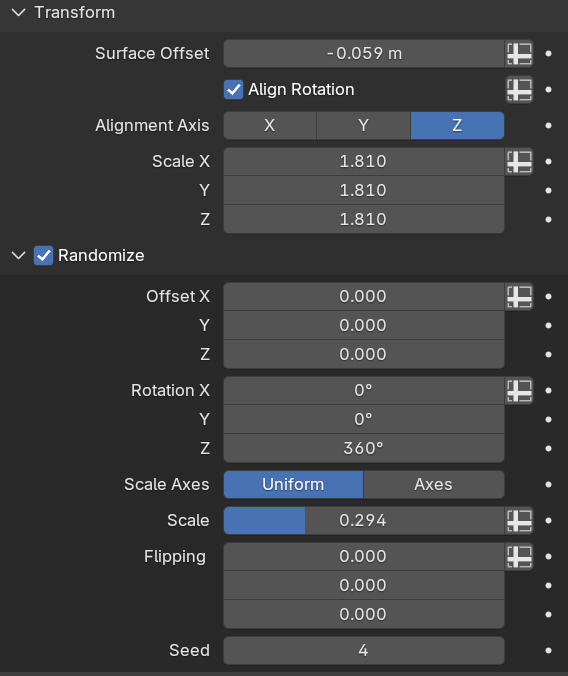
Adding Rocks
The rocks are added using the Scatter on Surface modifier on a copy of the road object. I kept the edges only. Again, rocks are in a collection
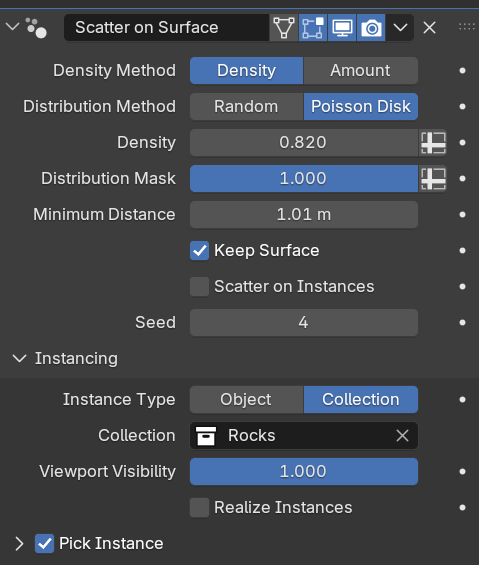
To learn more about gen textures, I ended up using nodes again.
Mainly to have color variations between the instanced rocks.
Adding Craters
I tweaked a few cylinders to become craters. And added these to a collection, to distribute them on the moon’s surface later.
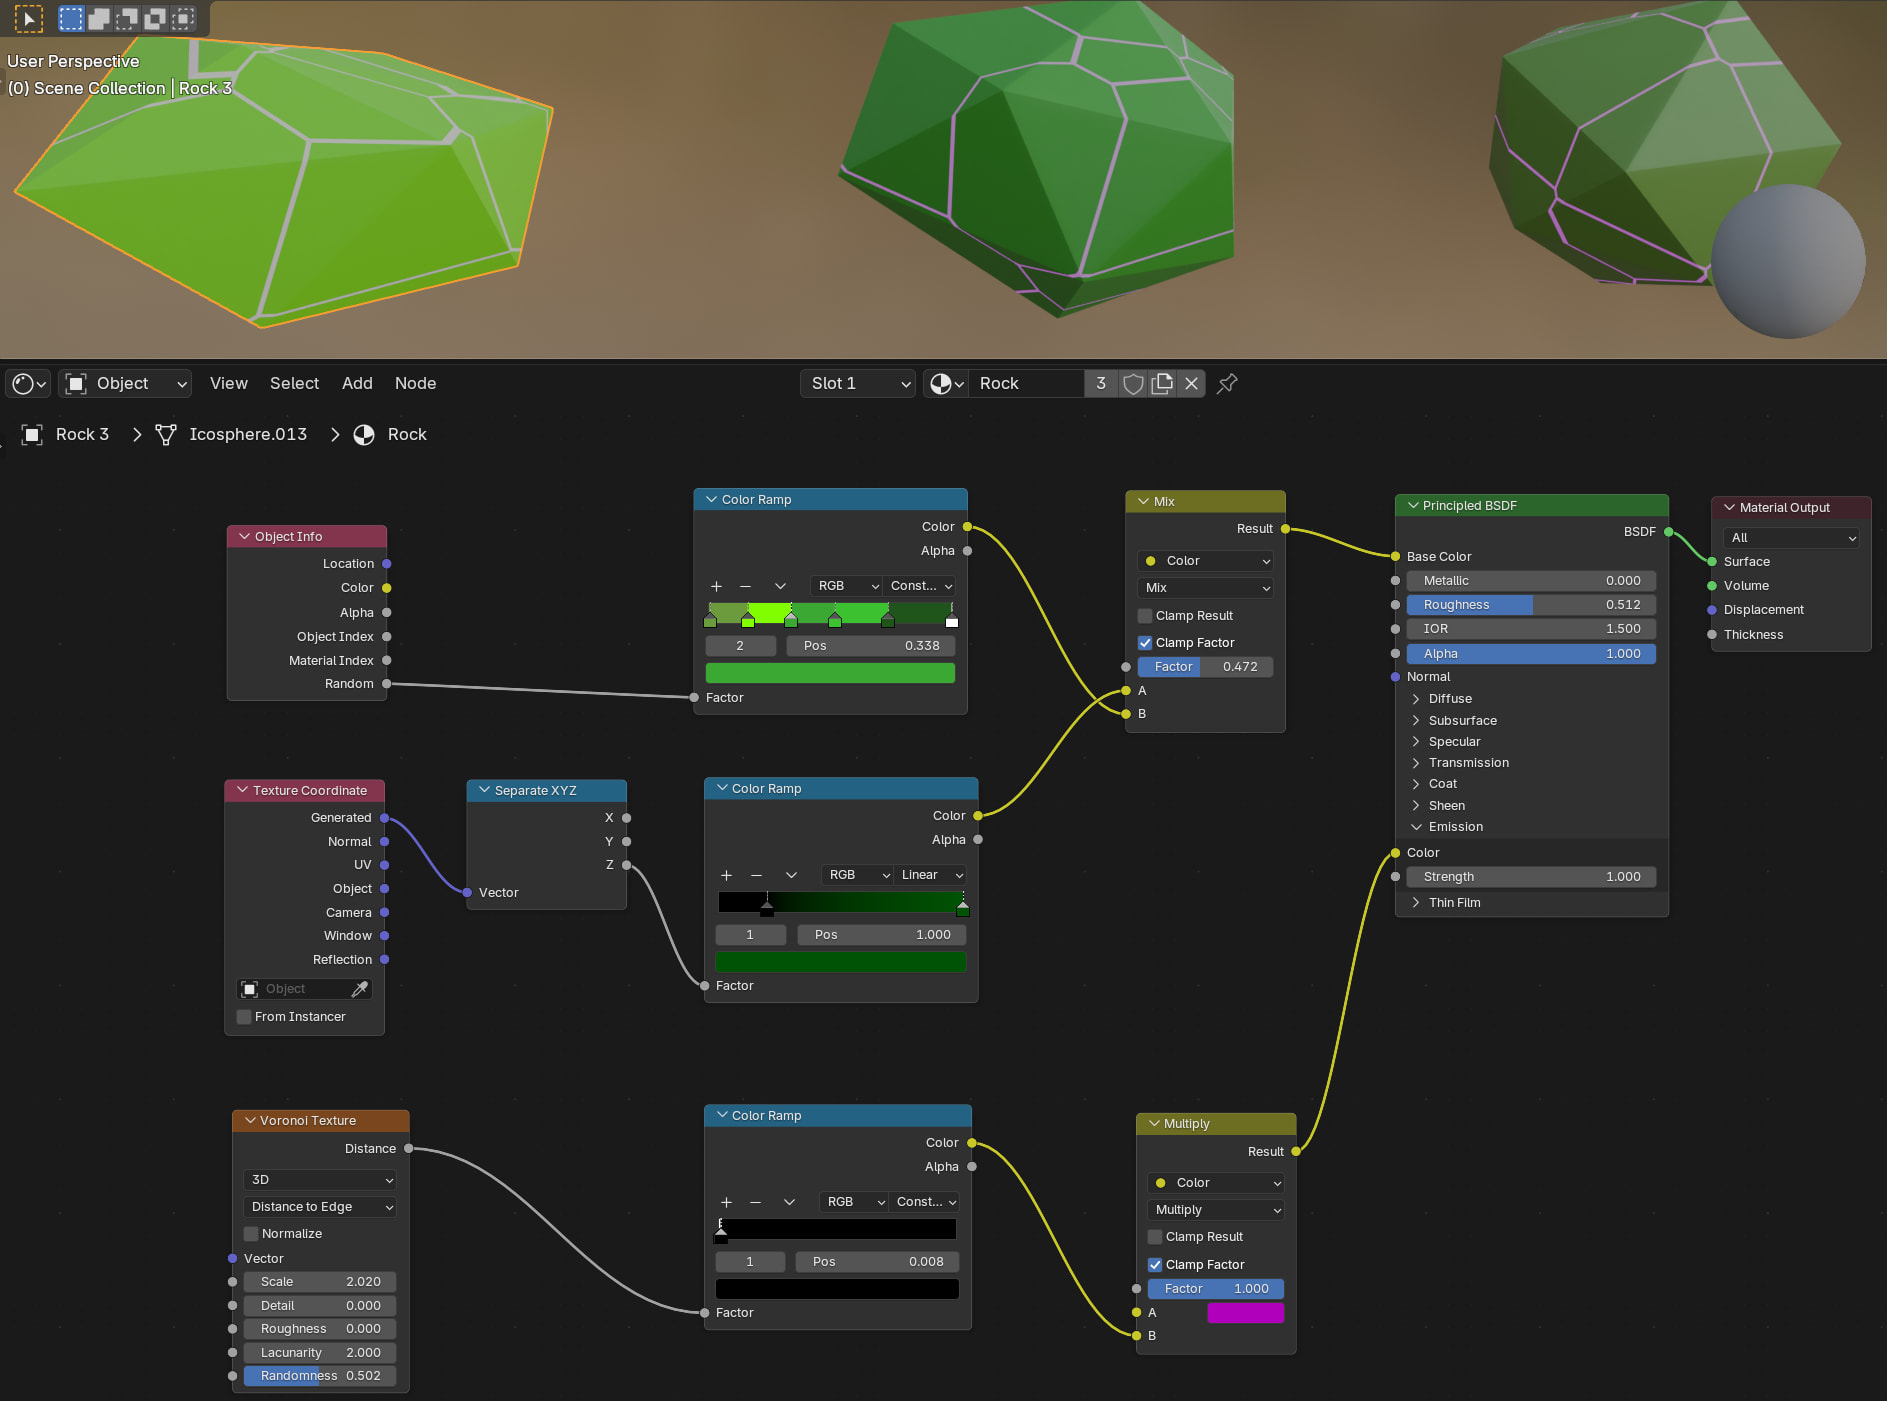
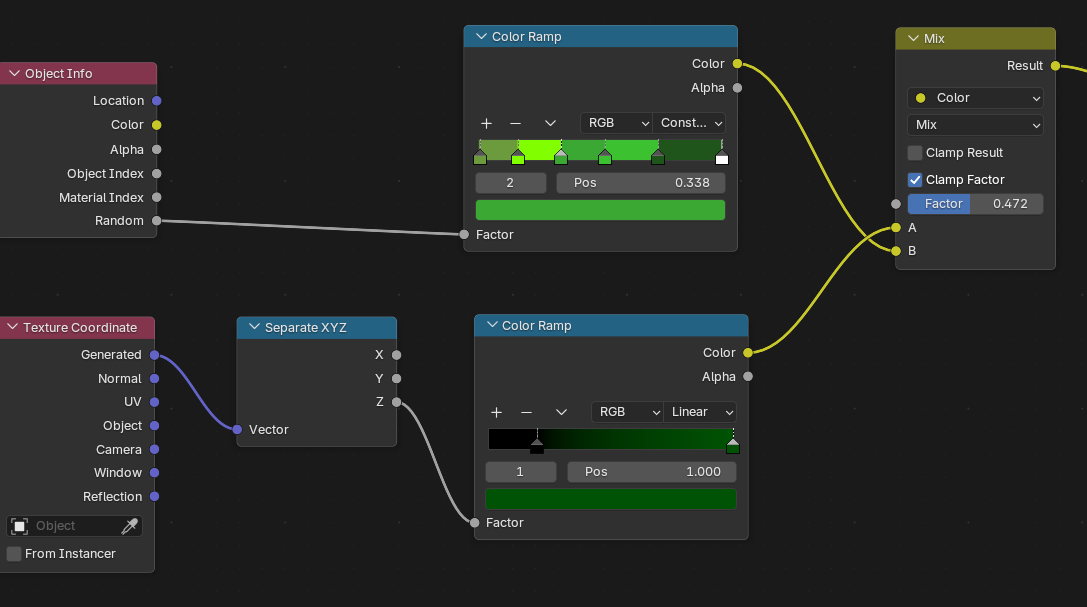
First the colors. Slot 1 is for the crater
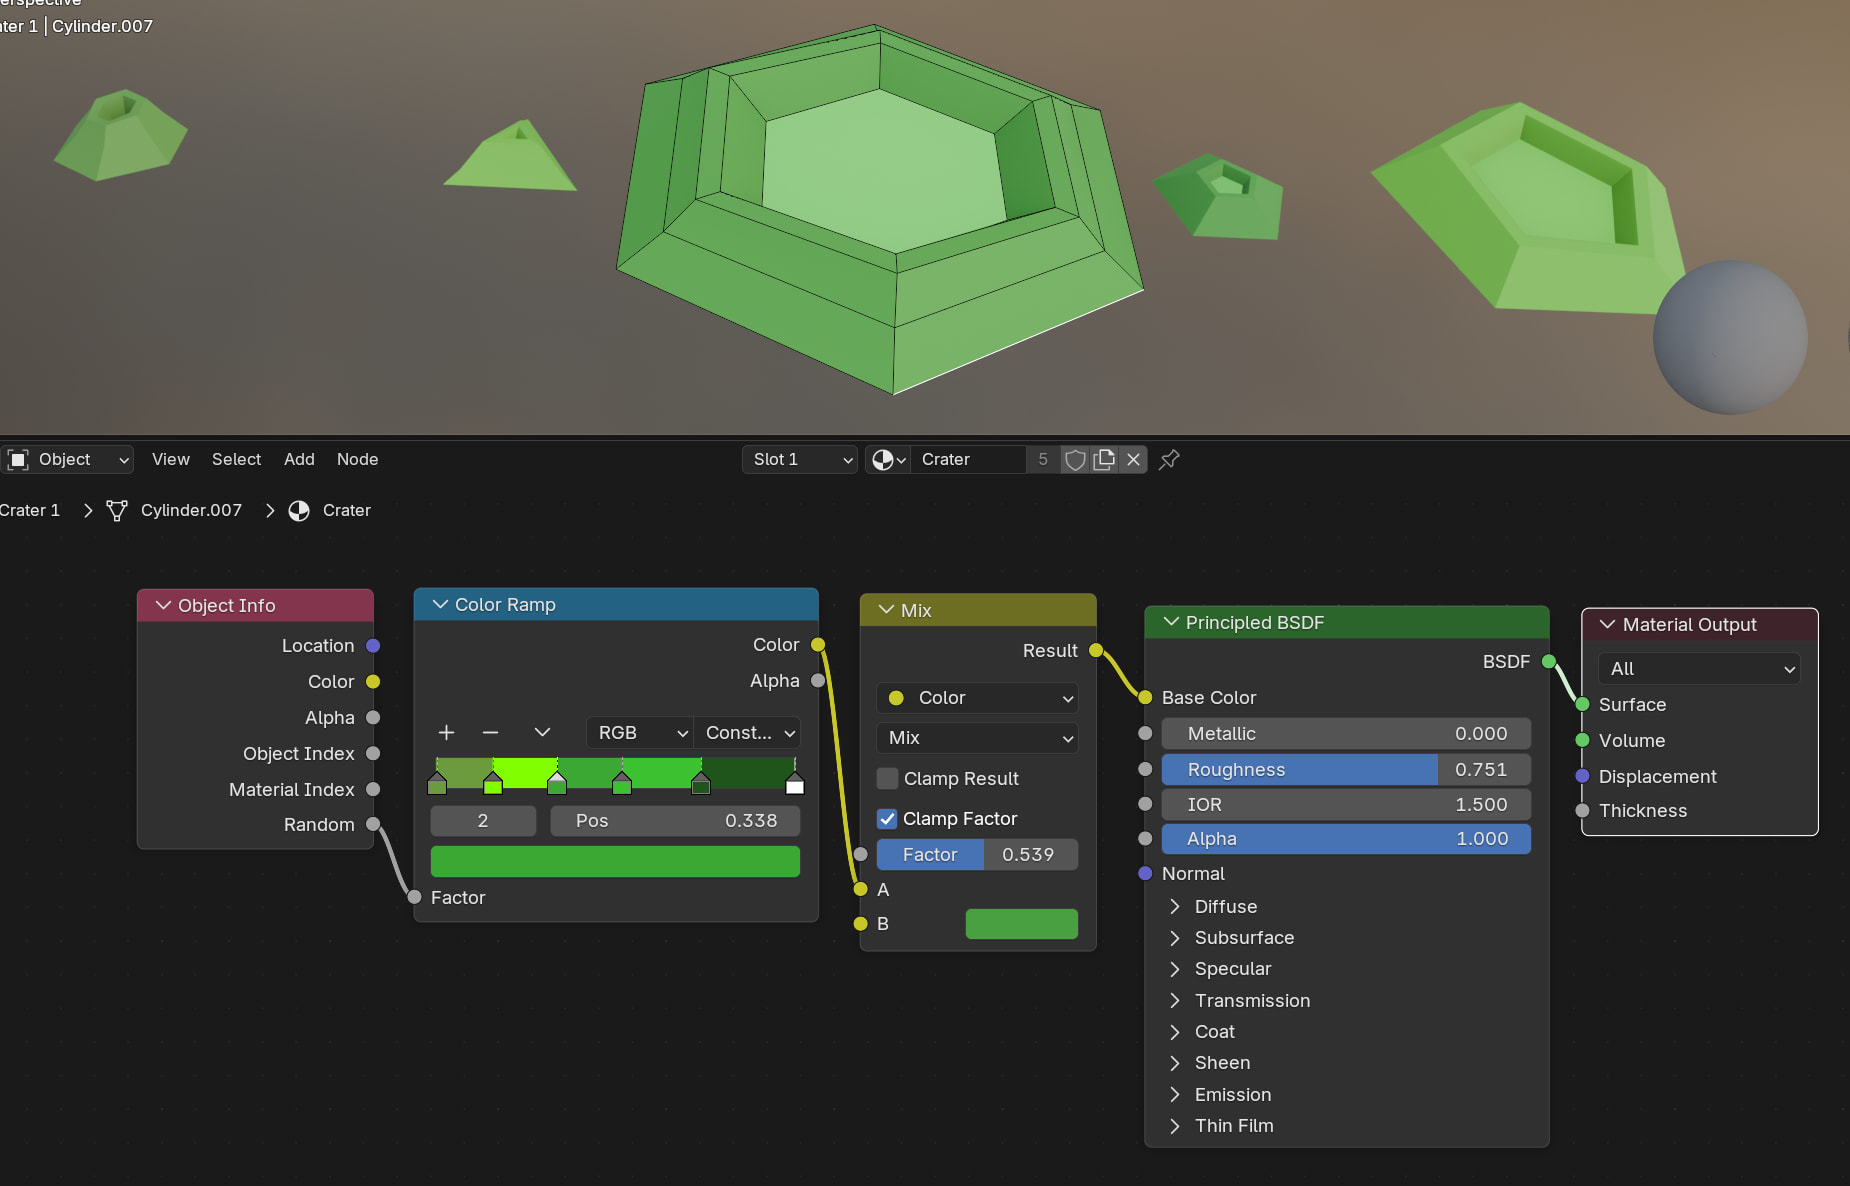
Slot two is used for the glowing base of the crater. The Object info random output allows to tweak the base color, as well as the intensity of the glow of each generated crater.

Adding the craters to the surface. Ryan King Art in his latest videos on creating a Winter Forest Environment mentioned another new modifier, the Scatter on Surface. Perfect.
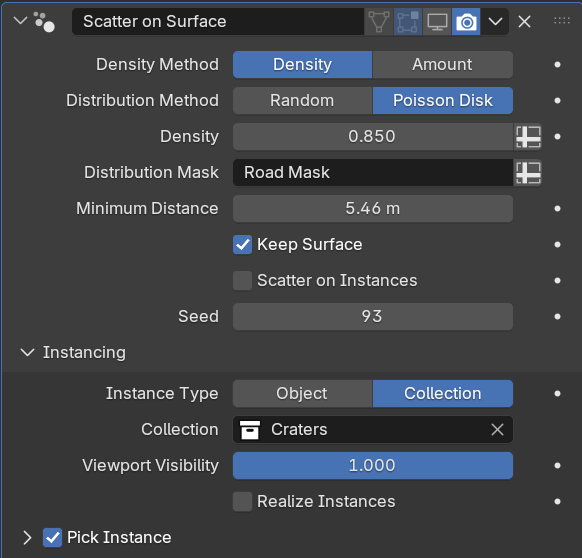
The issue now is that craters are placed on the whole moon, including where the road is.
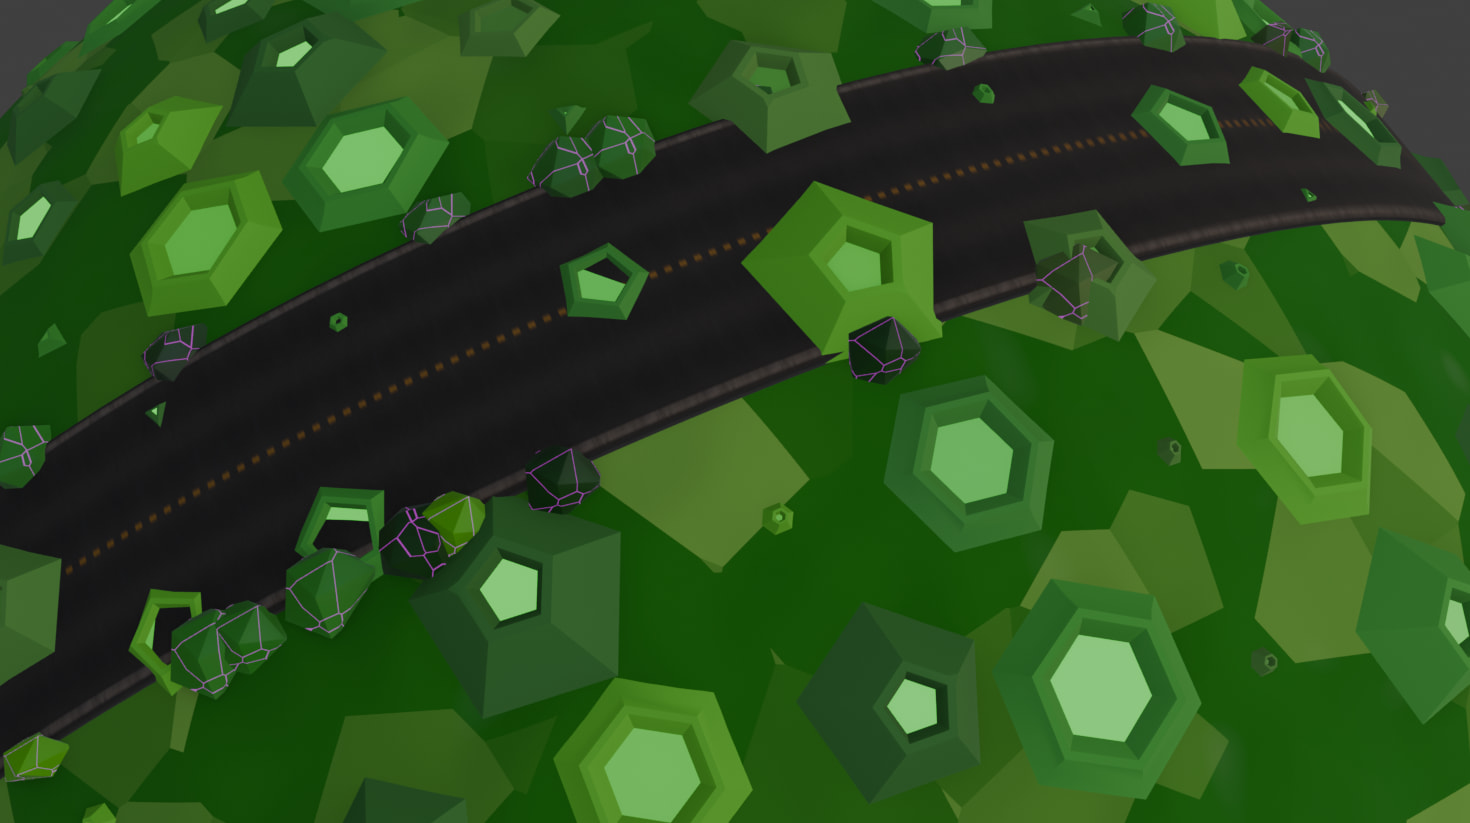
Luckily Ryan mentioned to use weight paint to control object placement.
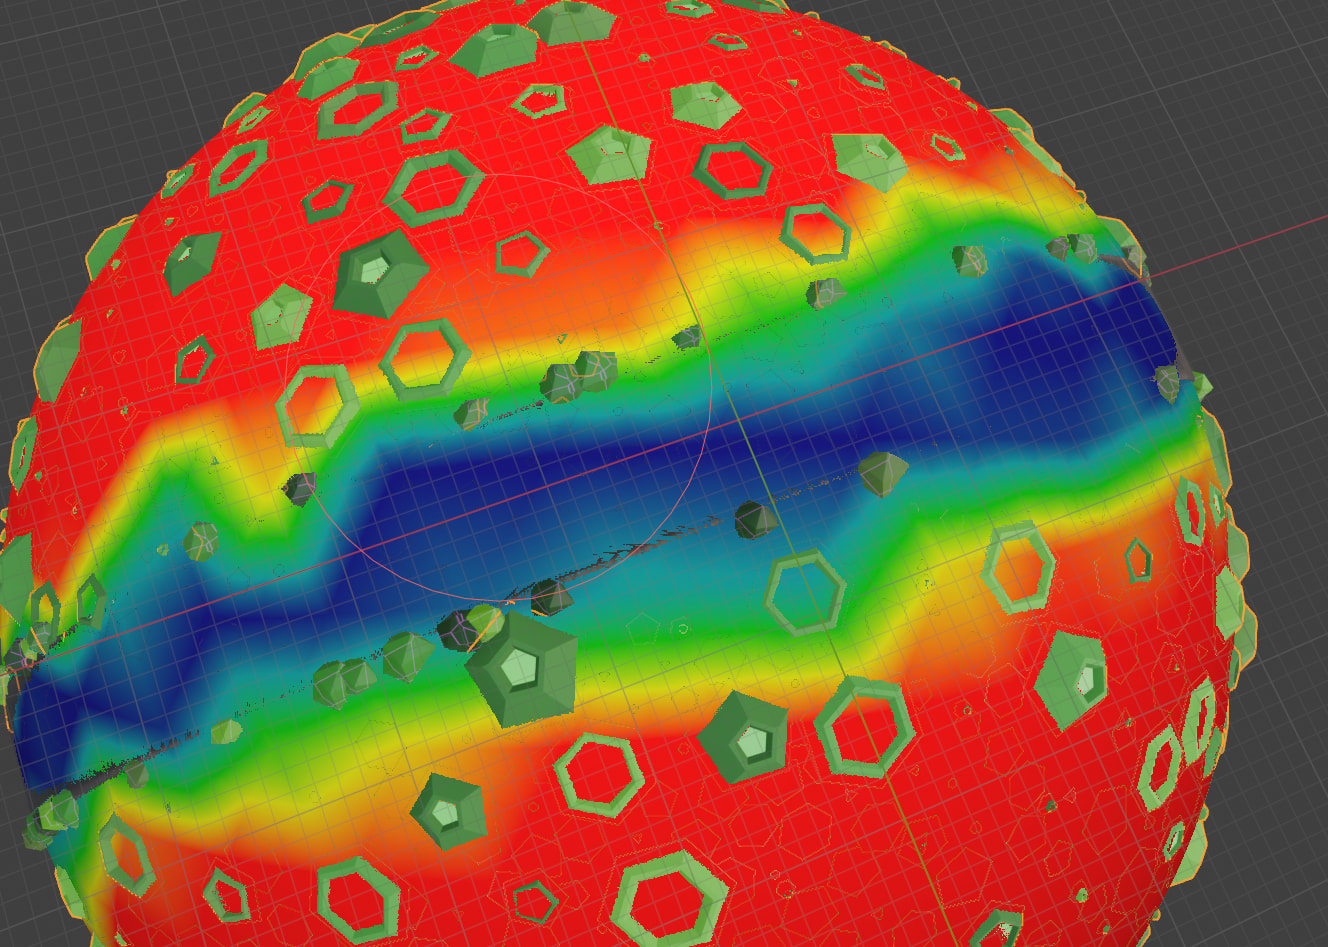
Quick rundown:
- Select the object the surface the craters are on.
- Switch from Object Mode to Weight Paint mode (top left dropdown).
- Paint the areas outside the road red (Weight 1.0) and leave the road blue (Weight 0.0).
- Go to the Data Properties tab (green triangle icon) and look for Vertex Groups. You’ll see a new one (likely named “Group”). Rename it to “Dust_Mask”.
- Go back to your Modifier Properties (the wrench icon).
- Look for the Distribution Mask input (shown in your first image).
- Click the small icon on the far right of that row (it looks like a spreadsheet/grid). This switches the input from a single value to an Attribute.
- Click the empty field and select your Dust_Mask vertex group.
Nice.
The last bit was adding the lights. A sun, two fill lights. and the headlights.
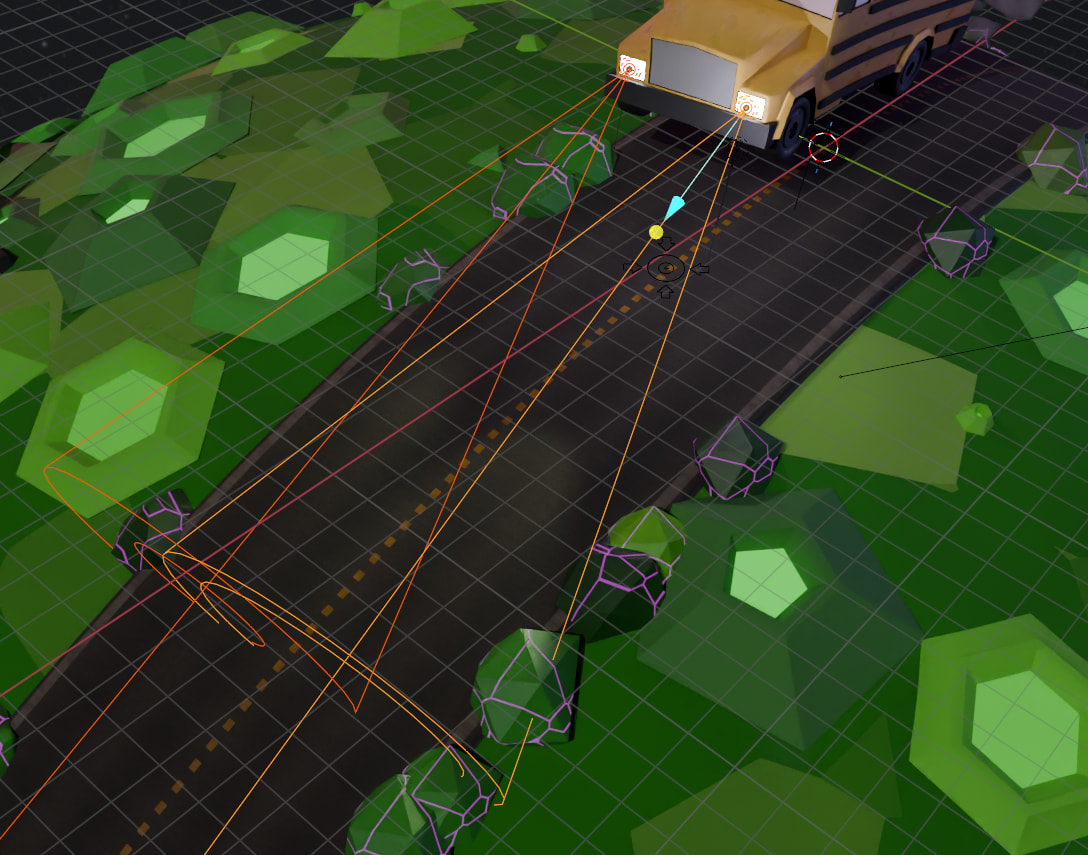
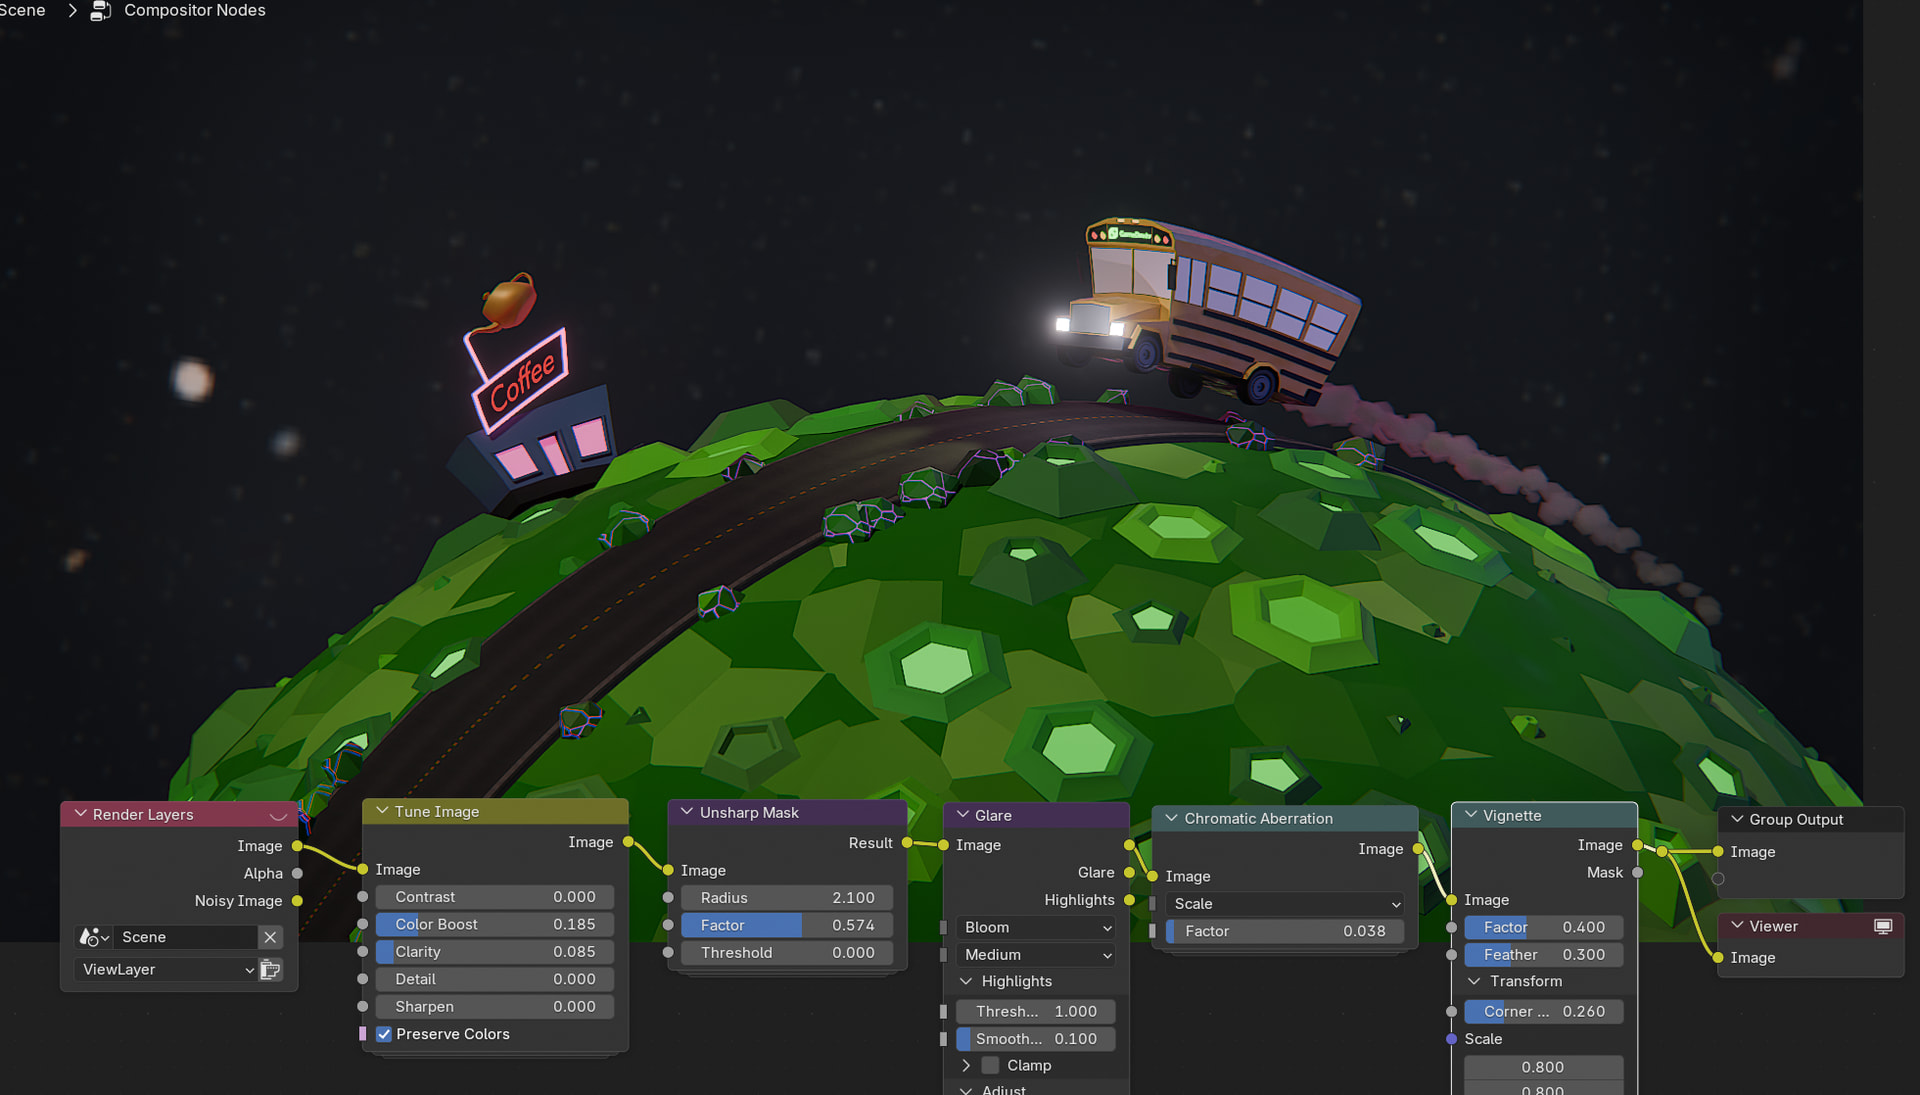
Cameras and Compositing
I placed 5 cameras to find the best view port. Whenever I thought that the view looked good, I added a new camera. The worst is not being able to restore a previous angle.
Without the comp editing, the image looked flat.
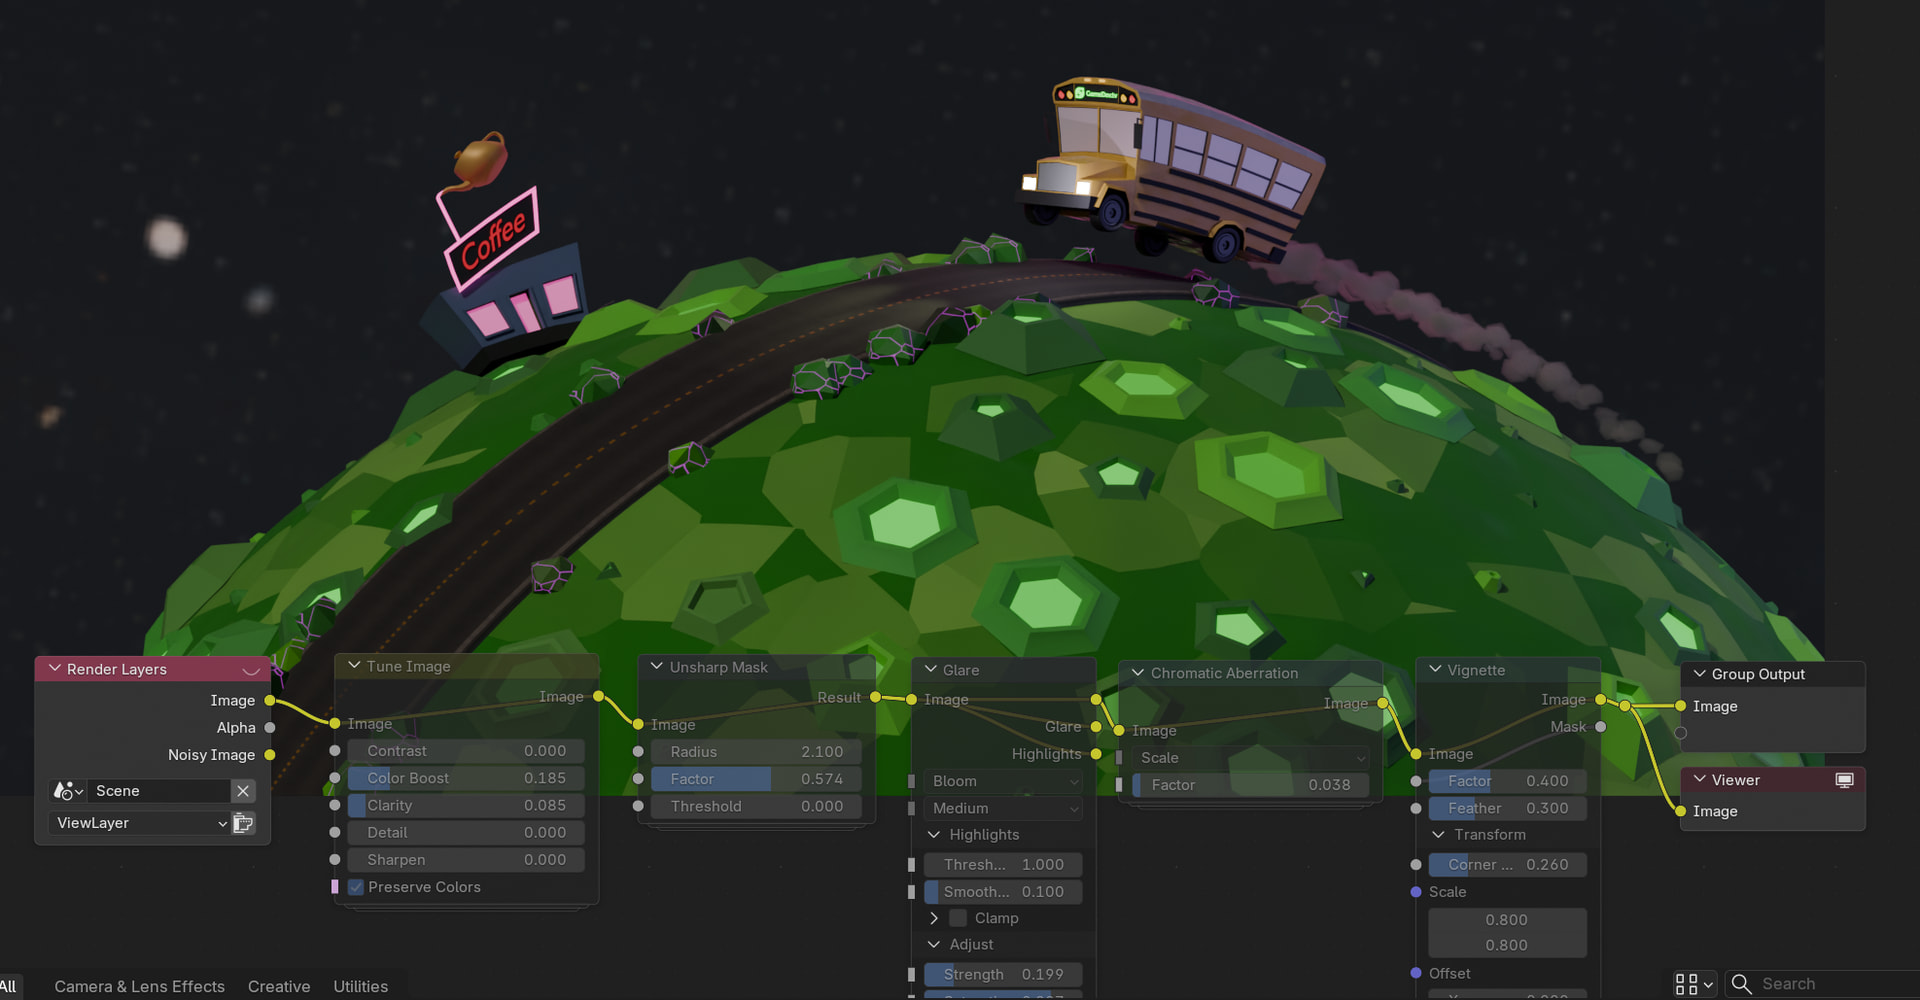
Adding these modifiers, what I would have done in Davinci Resolve until now, makes a big difference
And there you have it.
Cheers,
Ray
ps: The competition can be found here 2026 Collab: Week 06 “Are we there yet”