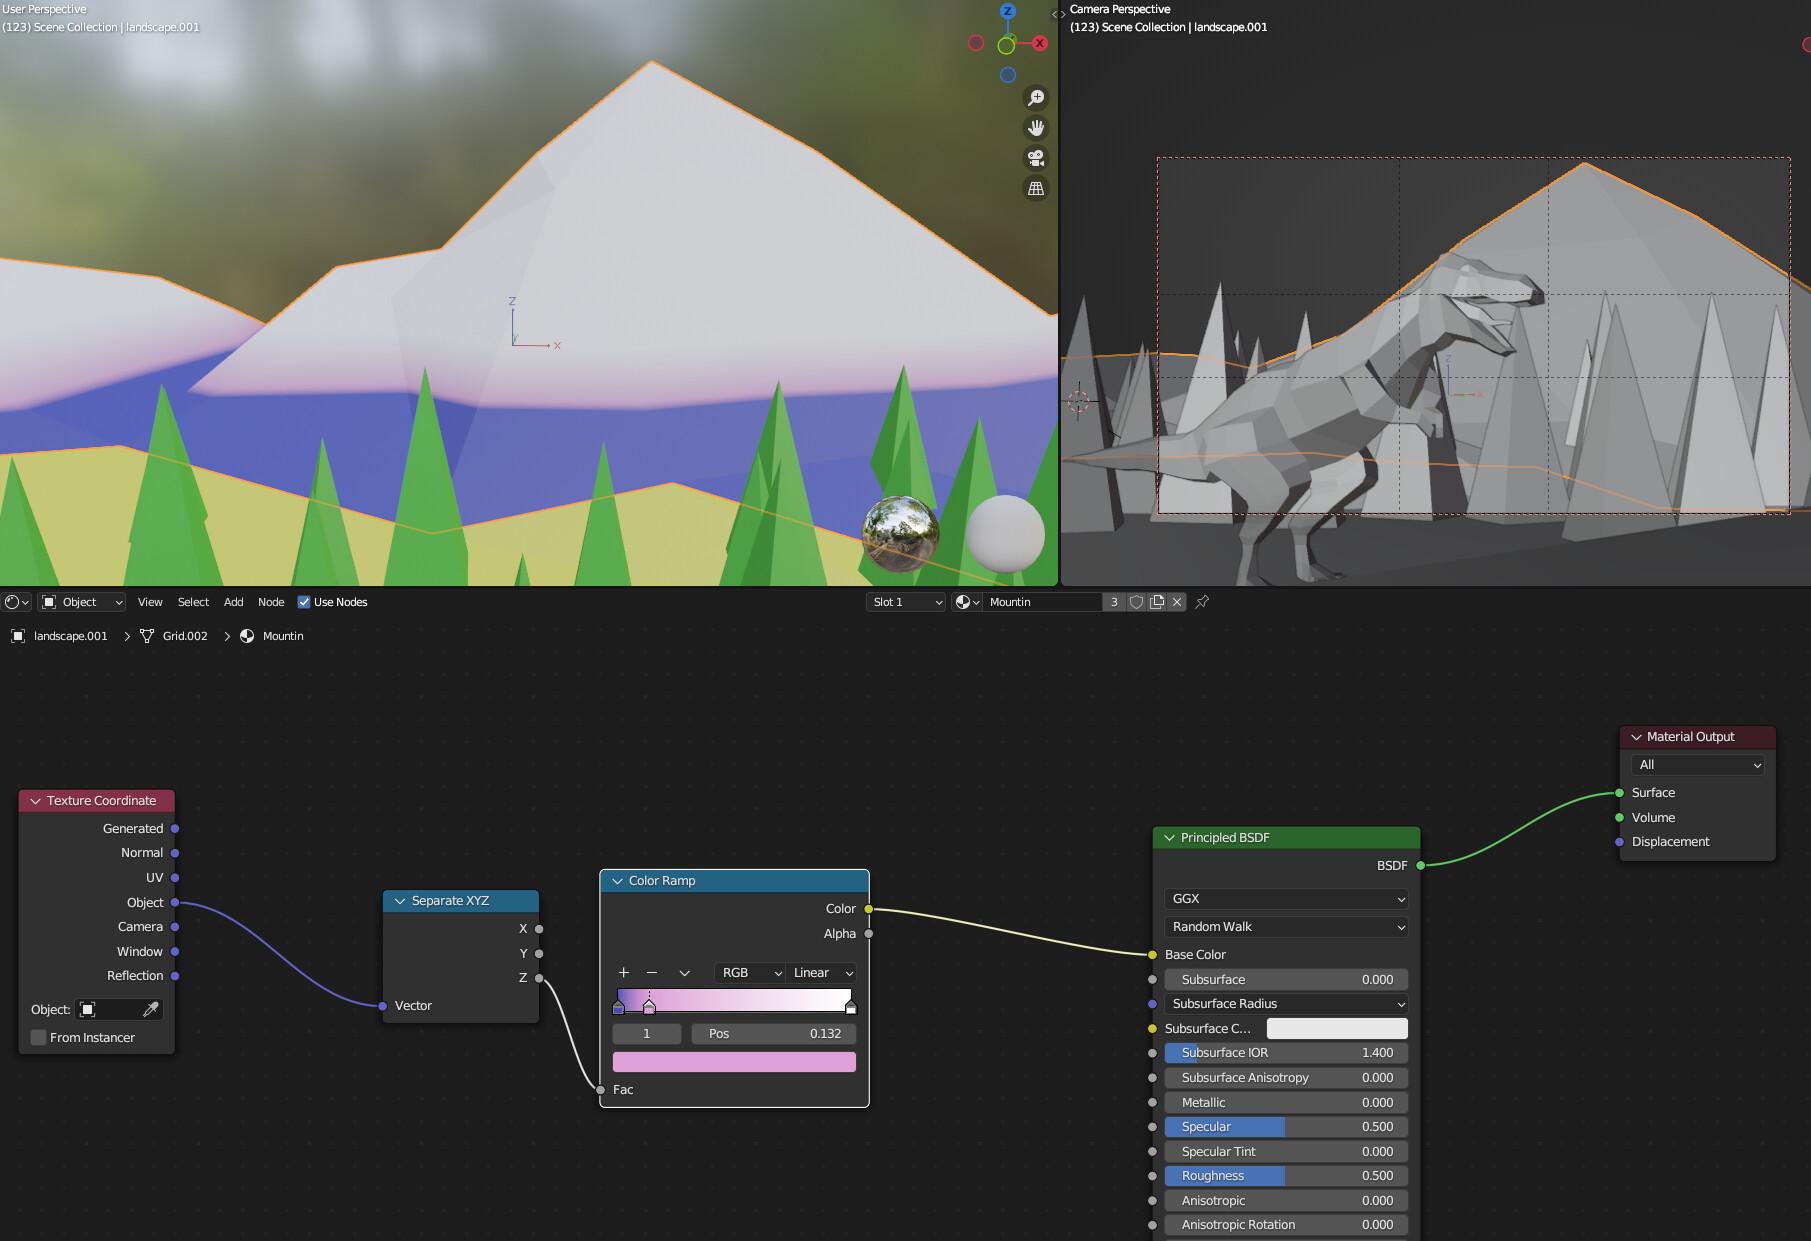
Hello, could you please explain about texture coordinates and how did you achieve such effect? I followed your instructions and got the result on the screen.
Ive investigated that topic a bit, and found that object coordinates are origin dependent but they are not normalized and Im receiving z=1 on top of origin. So one of the way of fixing that issue is scale origin, but you haven`t modified it in lectures.
Thank you in advance
2 Likes
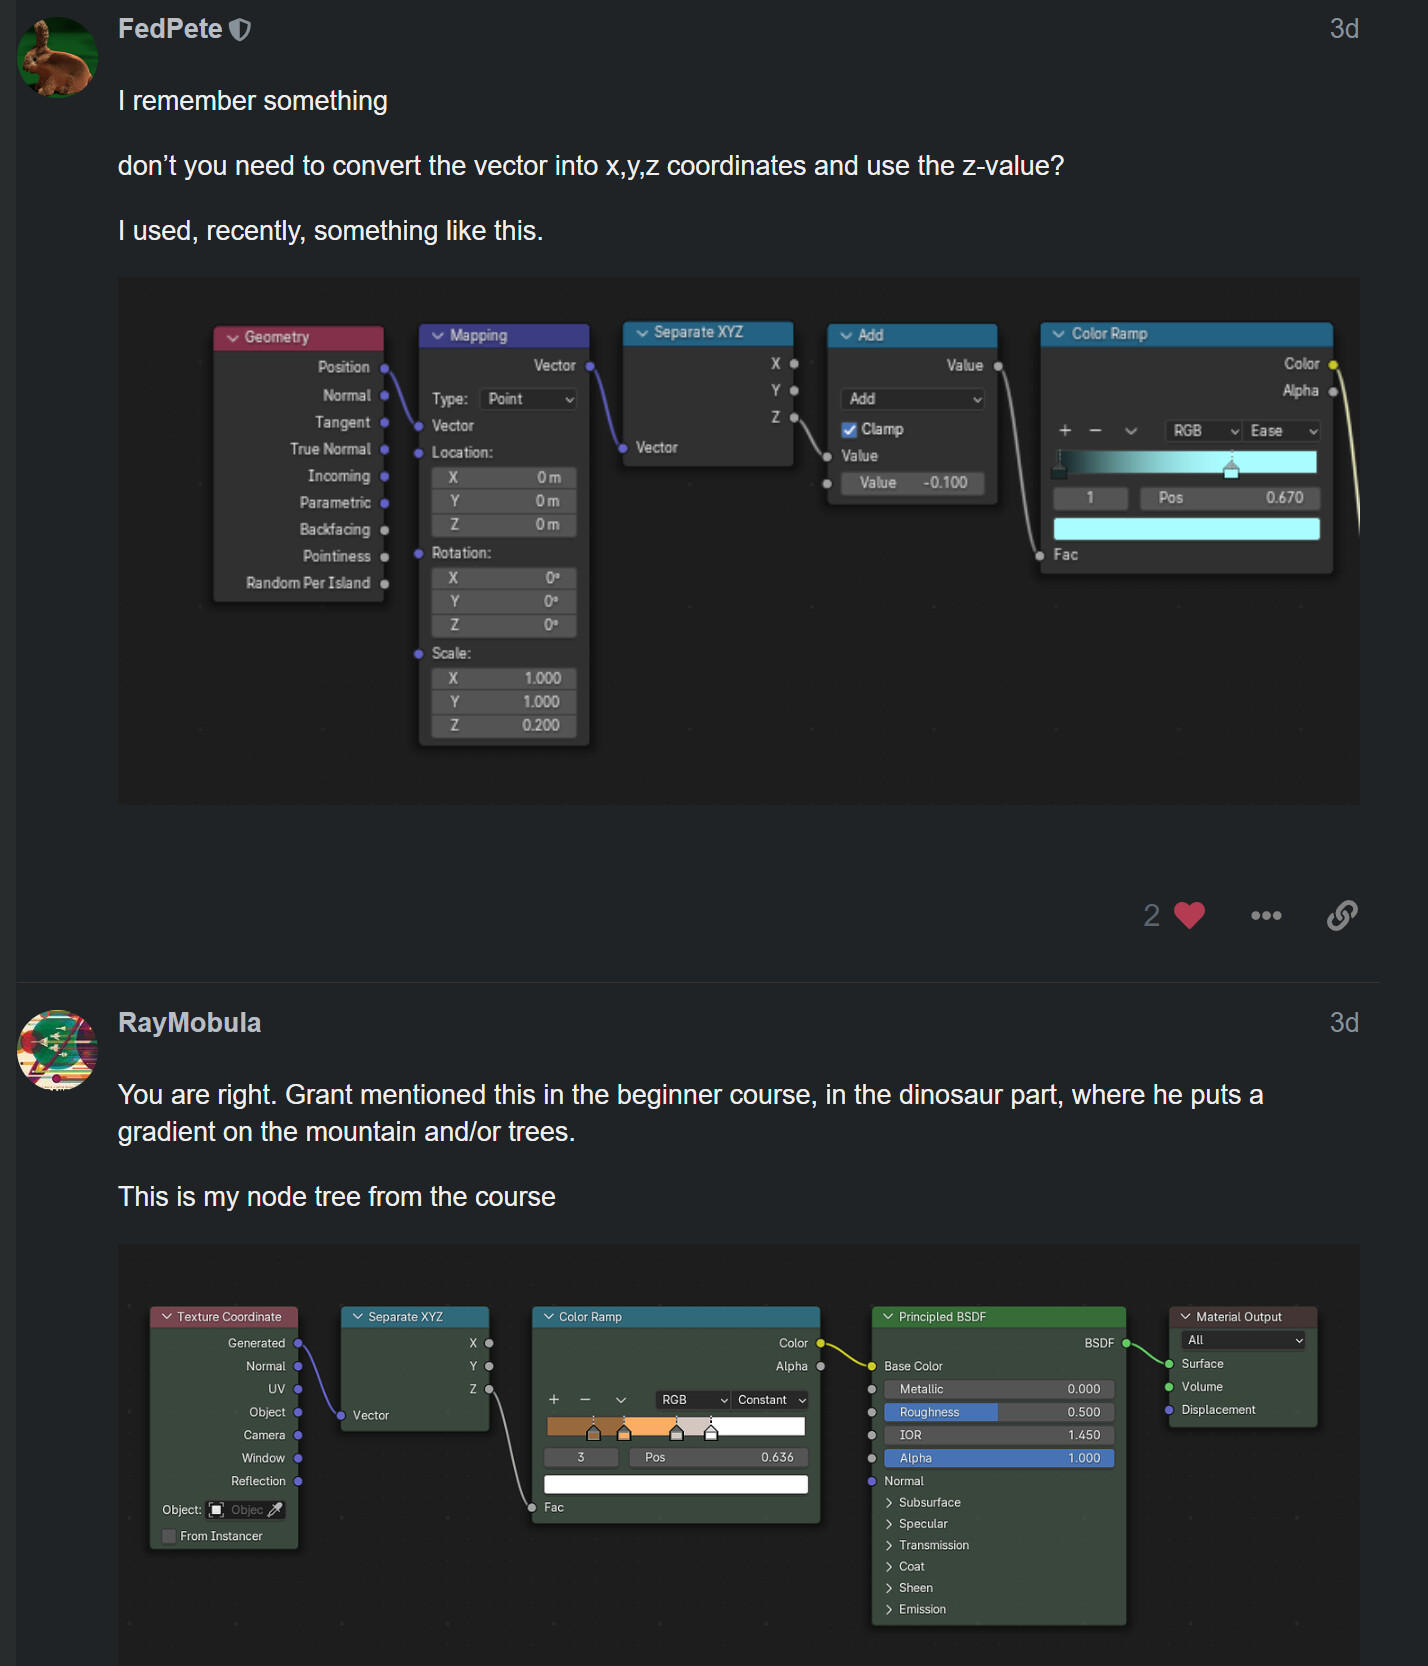
There are some previous explorations of this gradient issue that may well help.
4 Likes
You forgot to add a mapping-node. with that you can change the location and scale
3 Likes
Actually mapping node helped , thanks. But I`m a bit confused because in the lecture it worked without it, on the screen mapping used in pair with geometry , on the second texture coordinates is not paired with mapping node.
2 Likes
Yeah thanks, it works with mapping , good solution. I`m just a bit confused since in the lecture there were no mapping node used and still worked well
2 Likes
Because, even if you follow the step of the teacher, there will be differences.
Like the scale of objects and how you manipulate those vertices.
The mesh inside the object (mountain), can have different properties and outcome.
But all vertices are related to the ORIGIN point (orange dot) of the object!.
Part of your mesh can below of this origin point and also above.
Speaking in absolute percentages it can be 100% … 0 … -100%, or in Blender values 1 … 0 … -1
That’s why there can be differences in your and teachers out come.
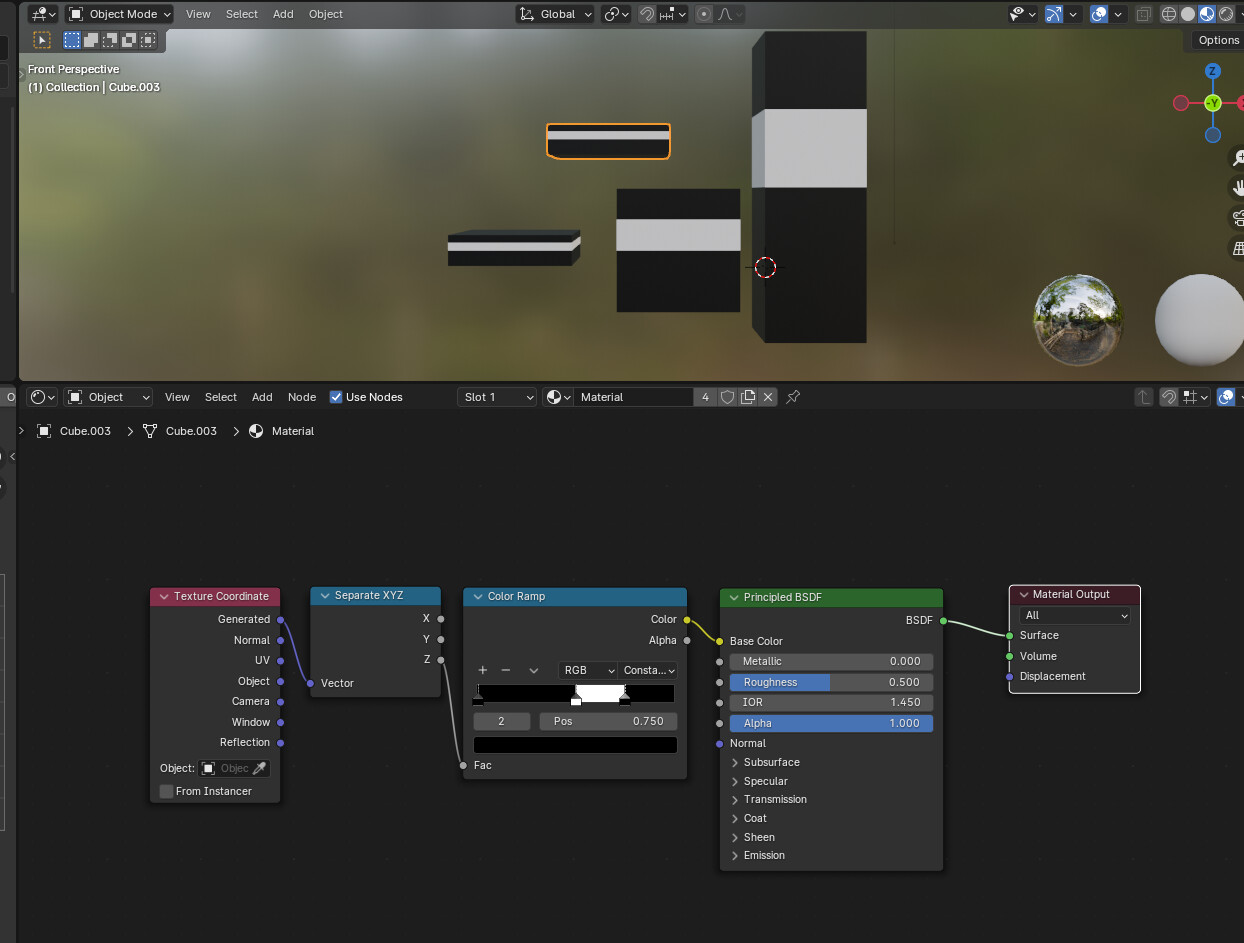
Using GENERATED COORDINATE, means the 1 … 0 … -1 is independent of the size of the object, also the position of the origin doesn’t matter, it generated from the object it self.
If you use, Object as a texture coordinate the bars will change. And are related to the objects origin point and the -1 values creating havoc on your texture.
Because the color ramp goes from 0 … 1 , while the input is from -1 …0 … 1
4 Likes
Got you , thanks. Yeah actually mapping node is the the thing I needed, I`ve discovered that those coordinates depends on the origin, but modifying origin was not good idea on my opinion. Mapping node resolves that quite well
3 Likes
from the blender manual
Generated
Automatically-generated texture coordinates from the vertex positions of the mesh without deformation, keeping them sticking to the surface under animation. Range from 0.0 to 1.0 over the bounding box of the undeformed mesh. See Texture Spaces for more information.
I recommend right-clicking on a node you want to learn more about and then using the last option to view the blender manual.
1 Like
This topic was automatically closed 24 hours after the last reply. New replies are no longer allowed.