If you’re reading this, there probably aren’t very many posts yet. But don’t worry, you can be the first! Either create a new post or just reply to this one to say ‘hi’.
1 Like
Hey Ben & Michael,
Just saying thanks for adding this to the course. It is very helpful to newer users to Blender since it seems not a lot are aware of it nor how much it affects what they do.
My favorite thing is being able to extrude from all sides of an object outward with the Individual Origins pivot point. And I sometimes switch between Median Point and 3D cursor depending on how I want extruded things to merge together. So there are a lot of uses.
Have a good day guys~
3 Likes
Thanks James, Glad you hear you are enjoying the course 
Thanks for adding this to the course. I can’t tell you how many times I’ve purchased 3D items that I have the hardest time rotating, simply because the creator didn’t take into account the item’s pivot point/origin. It drives me crazy.
Thanks Michael and Ben for putting in the extra pivot point lecture!
Half way into the course (I’m currently working on the animated lamp) and I still find rotation a bit confusing from time to time, had no idea I have been accidently switching pivot point behavior. What a life saver this lecture is!
On a side note, is there an option to get notifications when extra lectures are added?
Hi Michele,
Other than maybe seeing the “Be the first to post” topics being made, I’m not sure about notifications. But one thing you can look for in the Course Content on Udemy are the #/# numbers for each Section and the Checkmarks for each Lecture.
So if you already completed a section and you see the number one less than the total or something, then you can tell if there was a new lecture added.
Hope that helps~
Hi James,
Thank you for your reply! That’s exactly how I find out there’s an extra lecture waiting for me, 27/28.
I will check on the course content page and the forum more frequently to make sure I don’t miss out on things!
Thanks again
Hi,
i did it but not the same way.
Intuitively i went for “edit mode”, then selected the down face of the cube, then scaled.
Don’t know if it’s ok tho…
But it worked tho.

I clicked the S key on the keyboard and scaled it bigger than it originally was. Hope that is a correct way.

1 Like
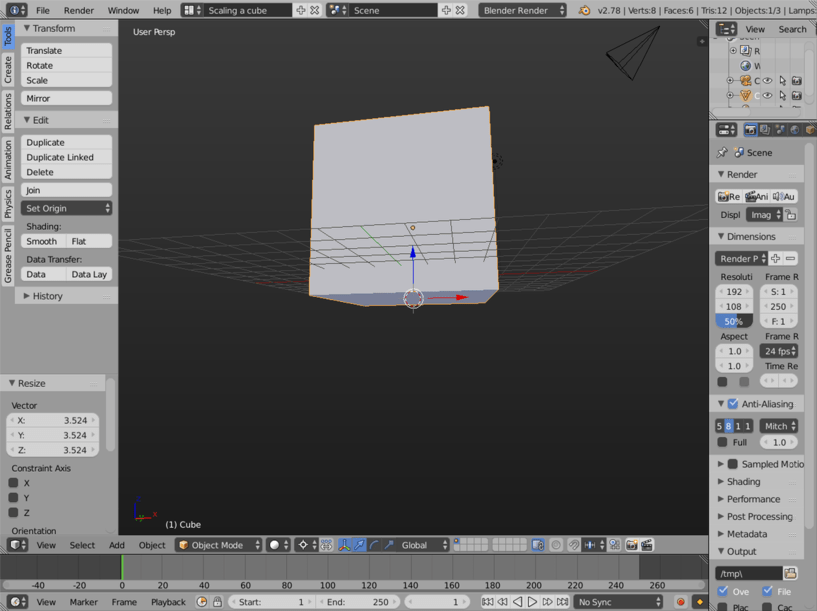
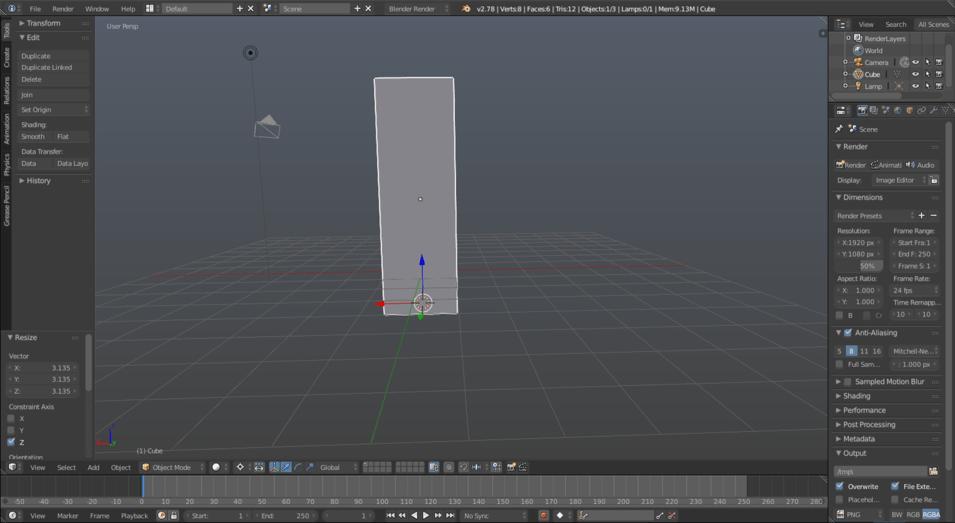
SO I tried doing exactly the same as in the lecture, but it was weird.
In the first image, I selected the face and tried scaling it, but all it did was it moved it, in the opposite direction from the movement of the cursor.
In the second picture it moved as desired, i.e it scaled keeping the base fixed at the same level, but only scaled the base’s surface.
So what changed it? It’s the key for “Manipulate Key Center Point” that was “turned off” when I scaled as in the first picture and it was turned on, when I was scaling as in the second picture. Please do mention that in this lesson may be by re-uploading the same video with an addition.


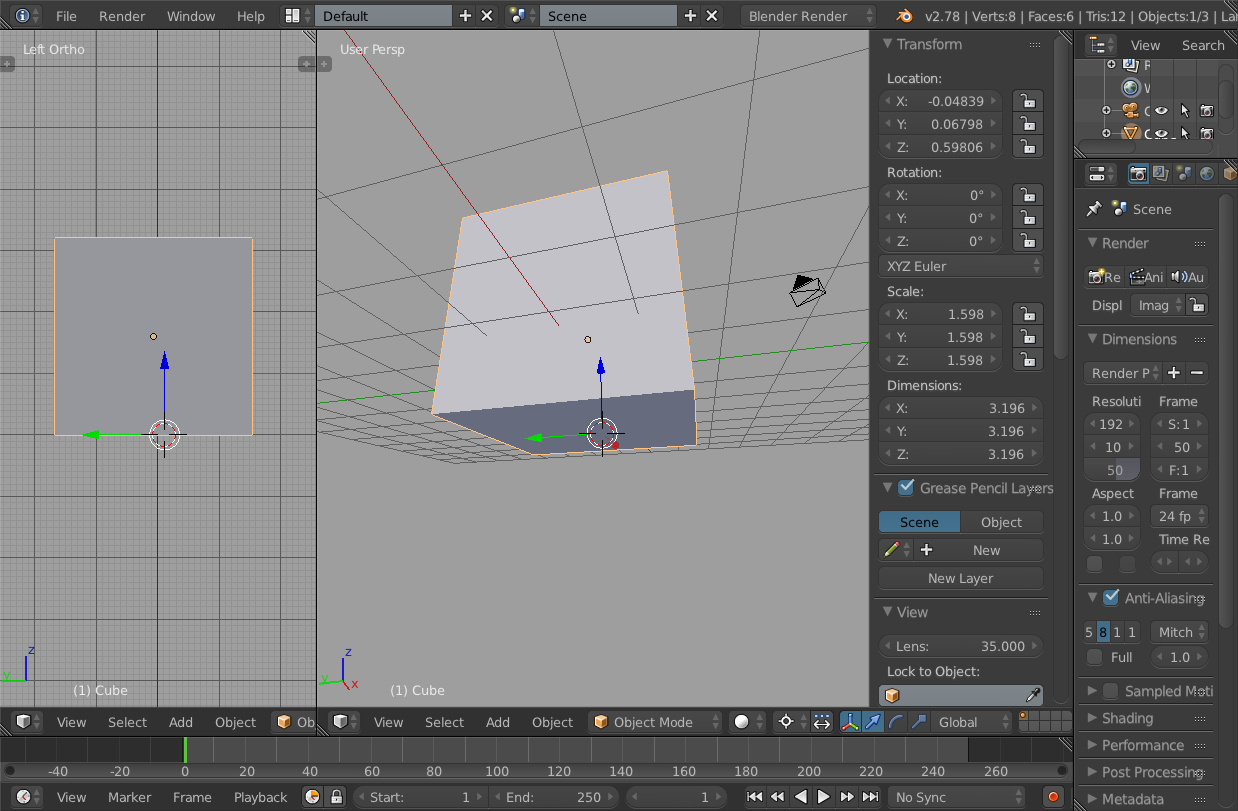
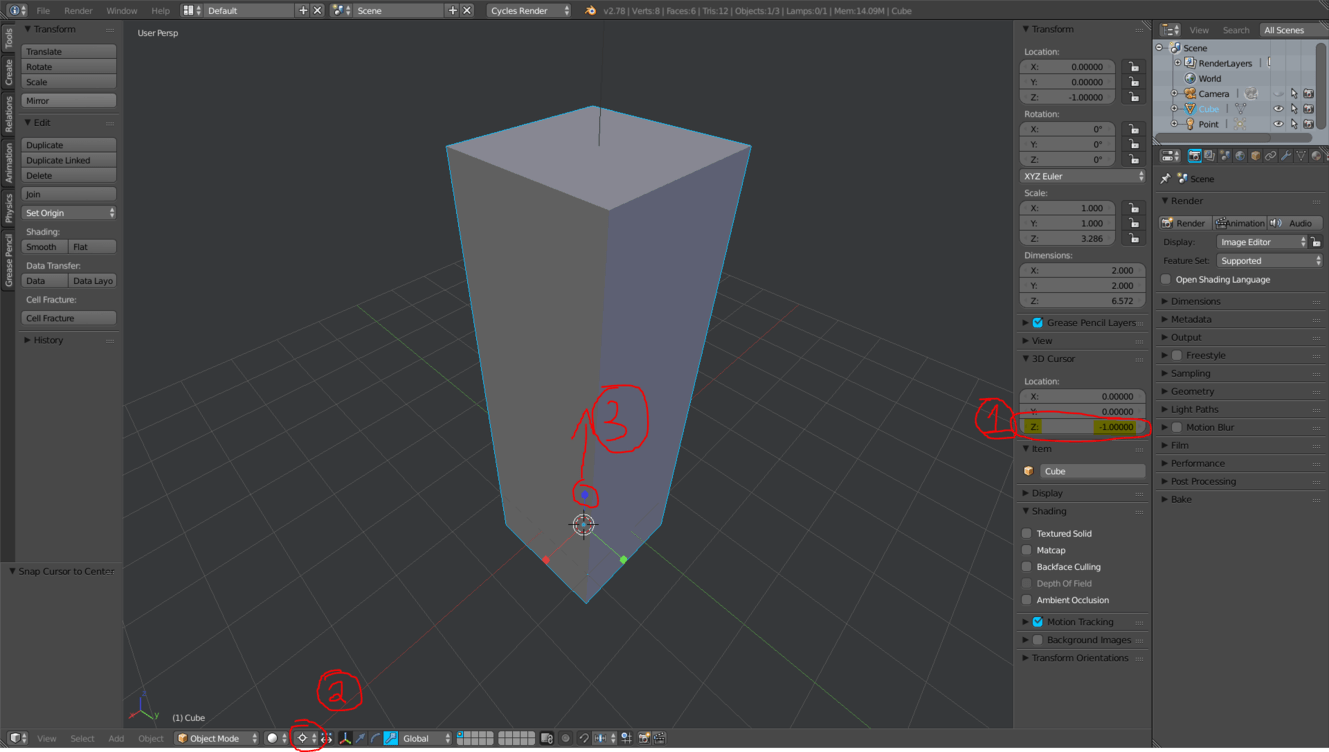
For this one I put the 3D cursor at the base of the cube by changing its z location to -1. Then I scaled the cube up with the 3D cursor as my pivot point. Handy Dandy!

2 Likes
At first my cube wasn’t scaling properly, but then I realized that I had pressed “Manipulate Center Points” or something. Maybe hit the shortcut (alt+,) while going through the pivots. But, I right clicked on it and hit reset to default value and then the scaling started working properly.
1 Like
My way of doing it:
- [Tab] for edit mode;
- Face selection mode;
- R-mouse-click on the bottom face;
- [Shift]+[S] for Snap menu and select the option ‘Cursor To Selected’;
- [Tab] back to Object mode;
- Select the ‘Pivot Arround 3D Cursor’ on the ‘Pivot Point Menu’;
- [S] key to scale.
Nice and crisp! 
1 Like
First I changed the z coords for the 3D cursor to be on the bottom of the cube (I used the snapping points hot key ‘ctl’ after dragging the mouse to the left from the entry box on step one to make it a bit easier to get it on the bottom of the cube), changed the pivot point to the 3D cursor and then scaled up on the z axis.
This was interesting because I was wondering how to do that a bit more easily, thanks Michael 
2 Likes
Got it! I will admit I had to re-watch it; the challenge’s wording had me stumped at first. After seeing the solution, and was able to replicate it  It truly is almost impossible to see in 3D unless you have an orthographic view! I also so appreciate this being added to the course! I look forward to being able to create permanent custom pivot points later too? -Cheers!