[Update: 06/14/21]
I have created the animation now. It is nothing special for the time being, simply a play test of getting everything to work. I have some more subtle ideas, but for now this is my “story board” animation.
Likewise I found it interesting that I could set my render to “1”, and then put in denoising. I do not mind the “painted” style as a prototype, and I whipped through the rendering much quicker that I would have expected: between 8-9 seconds per frame rather than 30 seconds or more. I may tweak with the settings to see if I can add a few more bounces before the count changes too much.
Without Further Ado:
[ORIGINAL POST]
Just saying hello, I am still alive and still kicking. Right now I am at a bit of a standstill with both projects (blender and C++), in part because I am on the “creation” portion of each. Since this is the Blender section, I will give an update of that here:
1. Preliminary Remarks:
Relating some experiences for the sake of contrast with the lesson.
Keyframes seem both easy and hard. I used to play with Adobe Flash, so I have some idea of on how animation should work. They had a nifty feature that is somewhat akin to blender’s 3d animation, called “tweening”. That is, you have a shape, place it in an earlier frame, and then at another position in a later frame. You activate the tweening, it move the shape for you.
Prior to adobe, I used to make cartoons using dictionary corners as flip books. I would use all 500 pages or more.
2. Differences and Rabbits
Discusses a useful book, traditional animation, and how it is different or corresponds to 3d animation
Interesting difference is that if you want a picture, you simply draw it. I had read the Animator’s Survival Kit by the lead art Director of Who Framed Rodger Rabbit, Rodger Williams. Very useful as both a history to animation at large, as he lived through its various changes, and bears many foundational elements that 3D artists of today must use. I highly recommend it. His first edition book looked at 3D as an up and coming medium, but I also saw that he made another addition and added many extra things that his first book was missing, probably making some updates since the changes in the industry. That was at a time I was priming myself up to a cartoon animator, but I had been born about 10 years too late.
But the point is: They used to have Key Frames that your drawings would work up to, much like a comic strip, save you added the bits between the scenes.
But again the main difference: if you want a position, you simply draw it. Both an easy and hard task. You only have to draw your backgrounds once and keep it there- and only on on side. You only redraw those things that are being animated. Look at any cartoon, Bugs Bunny, Snow White, they have lots of stills and only a few moving things, and many shows reuse animations. Saves time.
3. Blender
Shows how 3d animation, in my experience, is the same, yet vastly different. Being easy and difficult in a manner of its own.
But now enter Blender.
You have to pull your bones to a special spot. Then you need to key it in. You have to create every aspect of the scene, simple or not, and this can be time consuming. But over time you will have an assortment of models, textures, and animations reels like traditional animations. With this sort of backlog I could see one being able to save time over time, if one is a bit of miser and aims at this.
As an interesting side note, these keyed in frames are similar to traditional animation’s key frames, both being the key picture that is the start and end an important movement. These were drawn in by the lead animators, and the “betweeners”, that is the animation studio’s underlings, would come in behind and fill in the rest.
It is being ingrained in my brain what the teacher was talking about: before you move any part, make sure you key it in first. Otherwise it will be in that position in all other parts of that animation.
4. Challenges
Some Challenges I came across and, for the most part, have overcome thus far. They may be useful to those who happen to be experiencing issues of a similar sort.
I have had many “What is going on?” moments.
-
Key Frames: Working with key frames is easy in theory, but frusterating in practice, at least when you are first learning them.
I would select all and then it would only key in the main selected bone. -
Rig Ball: using the Rig Ball is its own challenge. I decided to toss the ball and work straight with the bone. I could not get the moments I actually wanted. Perhaps because my lamps are a little more complex of a model. Certainly a short term solution, but probably not a good long term on.
-
Duplicating and Moving Keyed in Frames: I wanted to reuse some key motions so that I would not have to go through the motions of keying in every frame to a place they had been earlier. Then I discovered a nifty use of the time line. I can cut and paste the frames from there. Not only that, I could select who sections and move them about if I did not like the timing. Very, very useful.
- Lighting:
Struggles with Lighting, and some useful tips that may help others
This is very important. I had made a glass like material, but the emissive bulb was not coming through the glass material as I would have expected. I had to pump it up to 20000 watts before it started becoming bright enough.
I also tried using point lights to help, but the light would simply bleed through my material. What to do?
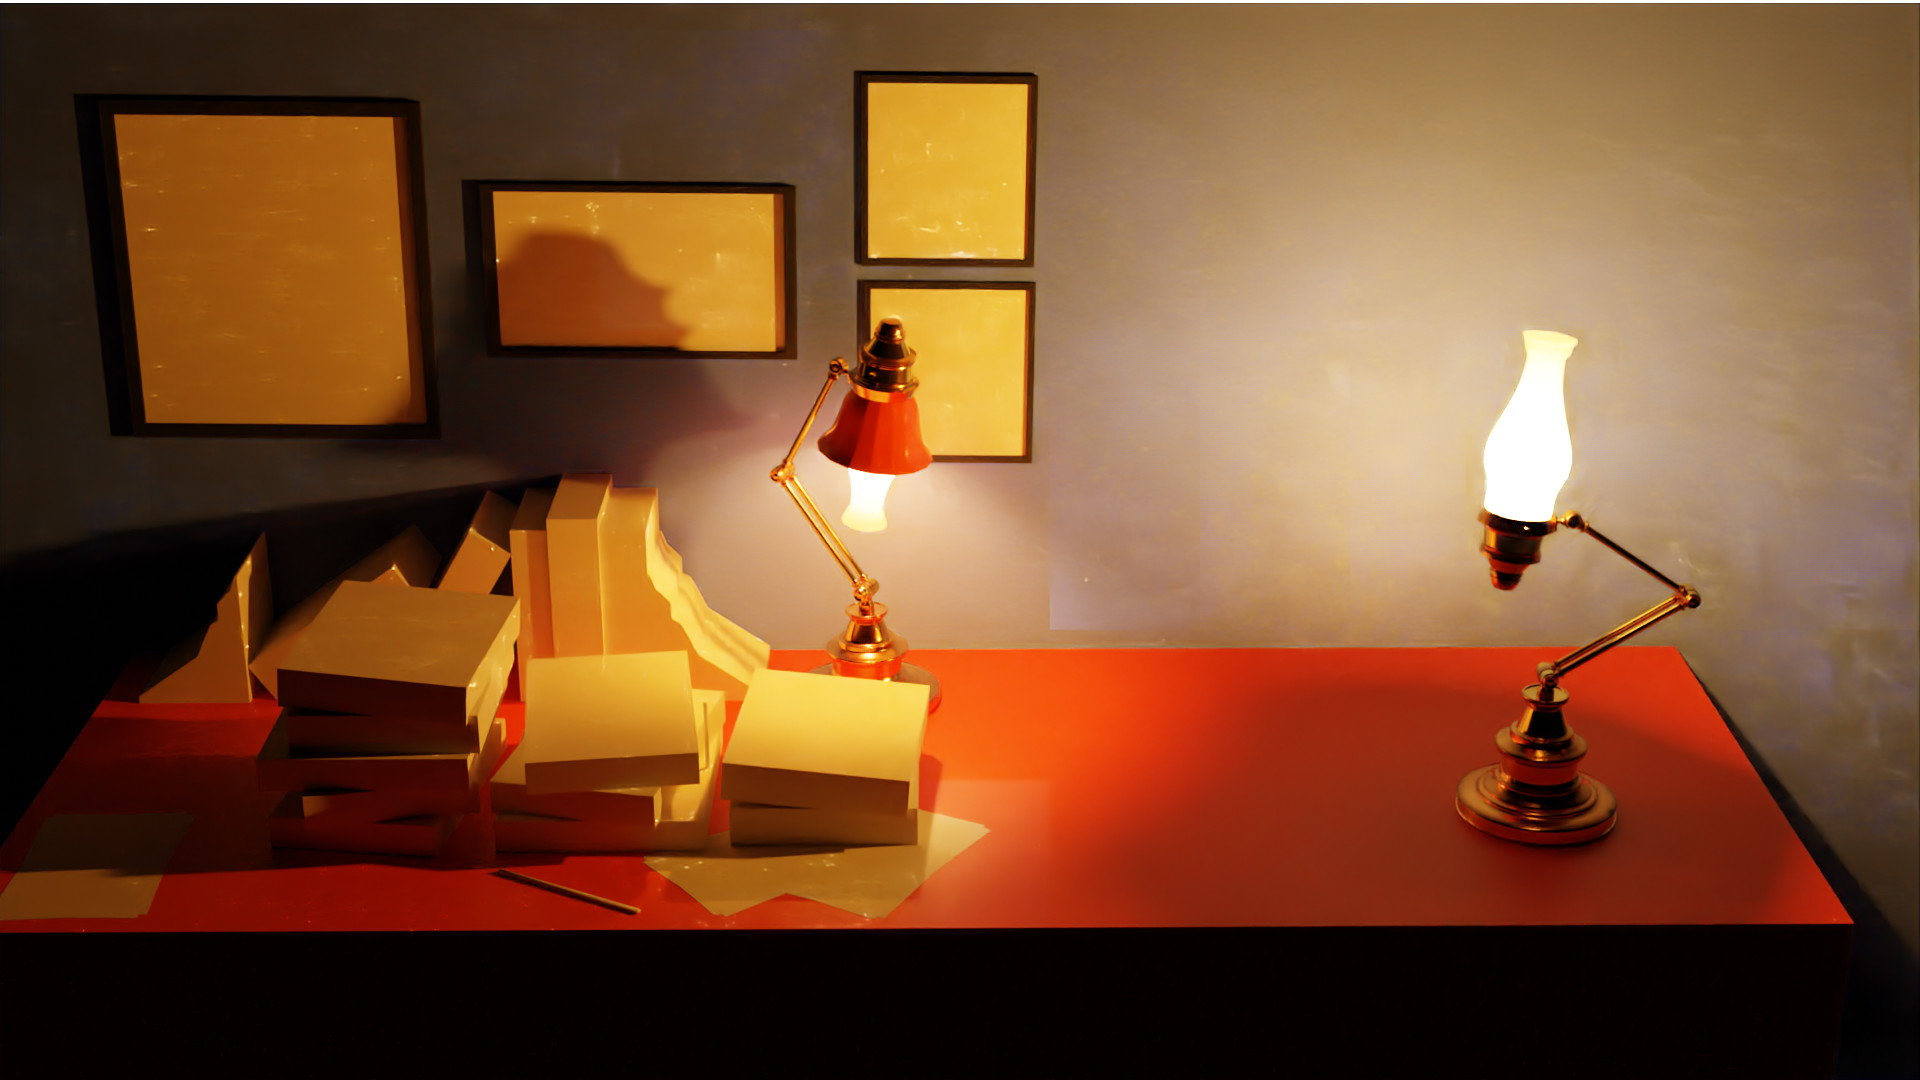
I did a little research and eventually came up with my own solution on how to keep my frosty lamps, but also have the light penetrate through the glass. Yet, at the same time, I was able to make the light bounce off the glass material itself, making it glow. I have only done that to the glass. There is a another piece that I may consider applying it to as well to my “Droop Face Lamp”, but that is not my goal right now.
Here is the scene:
Here is my Glass Material:
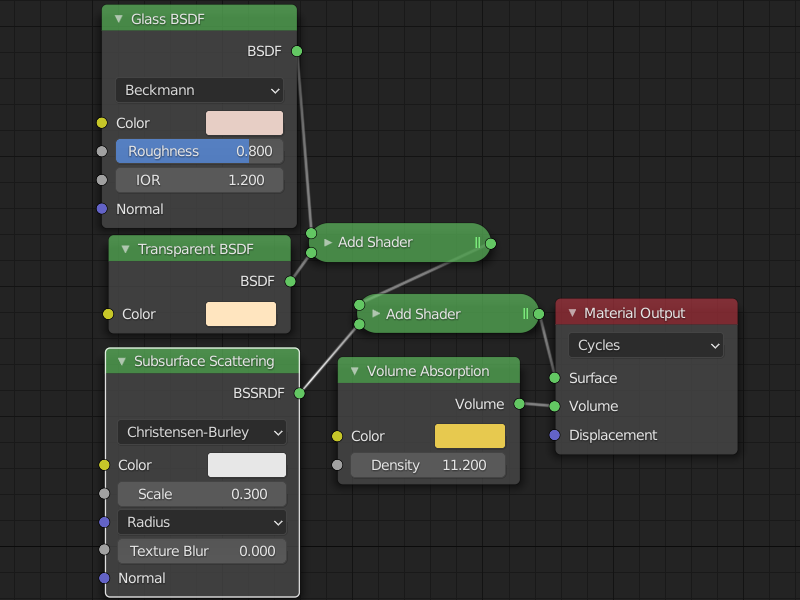
Explanatory remarks on the Nodes I used:
What Came to my rescue was: Add Shader, which allowed me to plug many things into one surface node in the Material Output as you can see above. Transparent BSDF allowed the light to pass through as I wanted it to, while the Subsurface Scattering allowed for some of that light to bounce around with the actual glass part of the lamp. So in effect the light both passes through and bounces about.
My original node only had the Glass BSDF and Volume Absorption.
I can see why some people specialize in light: it seems simple, yet it is indepth, complex, and a very necessary component to any game, film, or any other 3d project, since it sets the background mood and tone in a away akin to music. Seen, yet unseen, more felt than noticed. 
