My last video featured the lamp sliding over to his location, jumping upon books, and then falling down. This was a sort of storyboard.
Now I have that same lamp happing. I utilized Auto-Keyframes with little issue and decent results. I have also been reusing old keyframes so that I can make some semblance of animation loops. This really sped up some of my animation workflow. Timing and motion graphing still need to be adjusted. I am also looking to clear up my animation at the end.
The flurry of movement is going to be the lamp’s explanation to the other what he plans on doing. Once smoothed out a little better, the lamp will bob his head three times to indicate what he has in mind.
I decided not to render my animation out this time, but rather record it. I will put things to the render once I have my main animations finished, and then again at the end of this section.
Are you using the NLA editor? (Which is a very difficult user experience …)
Yes, good action.
Make also short sequences 3-4 sec. Maybe in different Blend files, but then you need to master version and object control. Render to images and build the video in Blender video. You can add image sequences.
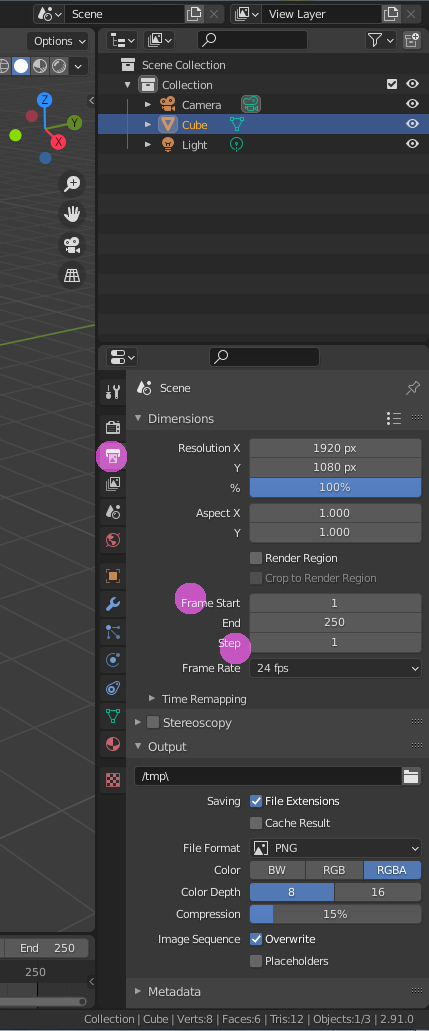
Another trick is to render only even frames, see if the animations looks good, no errors, then render the uneven ones.
I am doing little sections at a time, more or less. However, after that I have no clue about version and object control, rendering to images and building up the video and image sequencing, or rendering even and odd frames. I bow before your superior knowledge and wisdom (as I continue to blender… blunder along).
@NP5 I used a reference to help animate those steps better. While not a professional copy of it, I just wanted to get a basic feel of the motions. Lots going on in that undescribed source.
If you animate one hop-with-the-lamp. This animation sequence can be put in the Blender NLA editor as an object. You can multiply the object data, so you can have multiple hops of the lamp, but you need only to maintain one ‘hop’. If you make this ‘hop’ higher, then all copies will follow.
With NLA you can also merge animations. Maybe in the last ‘hop’, you want to rotate the head. You create only a head animation and as an object, you merge this one with the NLA into a ‘hop’ with ‘turn head’.
But NLA is hard to get grip on. Not intuitive.
If you have a big project, some models (lamp) that can occur in different scenes and ‘.blend’ files. But if you change the lamp model, how to apply those changes to all copies in different .blend files? For this, you can use linked mesh models. Which has its pitfalls to learn.
I only explain this because it is handy to know when starting bigger animation projects. Bigger than the animated lamp challenge. If more project management is involved. Not handled in-depth for the course.
Now that I have gone through some of the videos dealing with the renderings, How does one render even or odd frames only? Are you talking about in the Video Editor, or are you talking about the actual rendering the animation out into images, such as png’s?
But start:1 and step:2, generates frame 1,3, 5, 7, …
But start:2 and step:2, generates frame 2,4, 6, 8, …
I always render to .PNG, cost disk space. But the you can redo some render parts.
Some animation renders (Different camera point of view) using different .blend files or scenes.
Then you have a wide collection of sources, to manipulate them in Blender video or other tools.
Most people do everything in one blender animation motion. But having the possibility to manipulate sequences is the base for video editing.
In blender video, you can select a range of images still and import (linking) them.
Change the image, only the vedeo needs to rerenderd, not the image import.
So basically set the step to two, render out the separate images, and this will help with manipulating the image, look for visual errors, and save time during the production process.