This is the Blender Collaboration 2025, week 32 challenge. Don’t be afraid to join, a lot of us are beginners. This is all to practice, have fun, learn, and get together.
This week’s subject is “Theatre”.
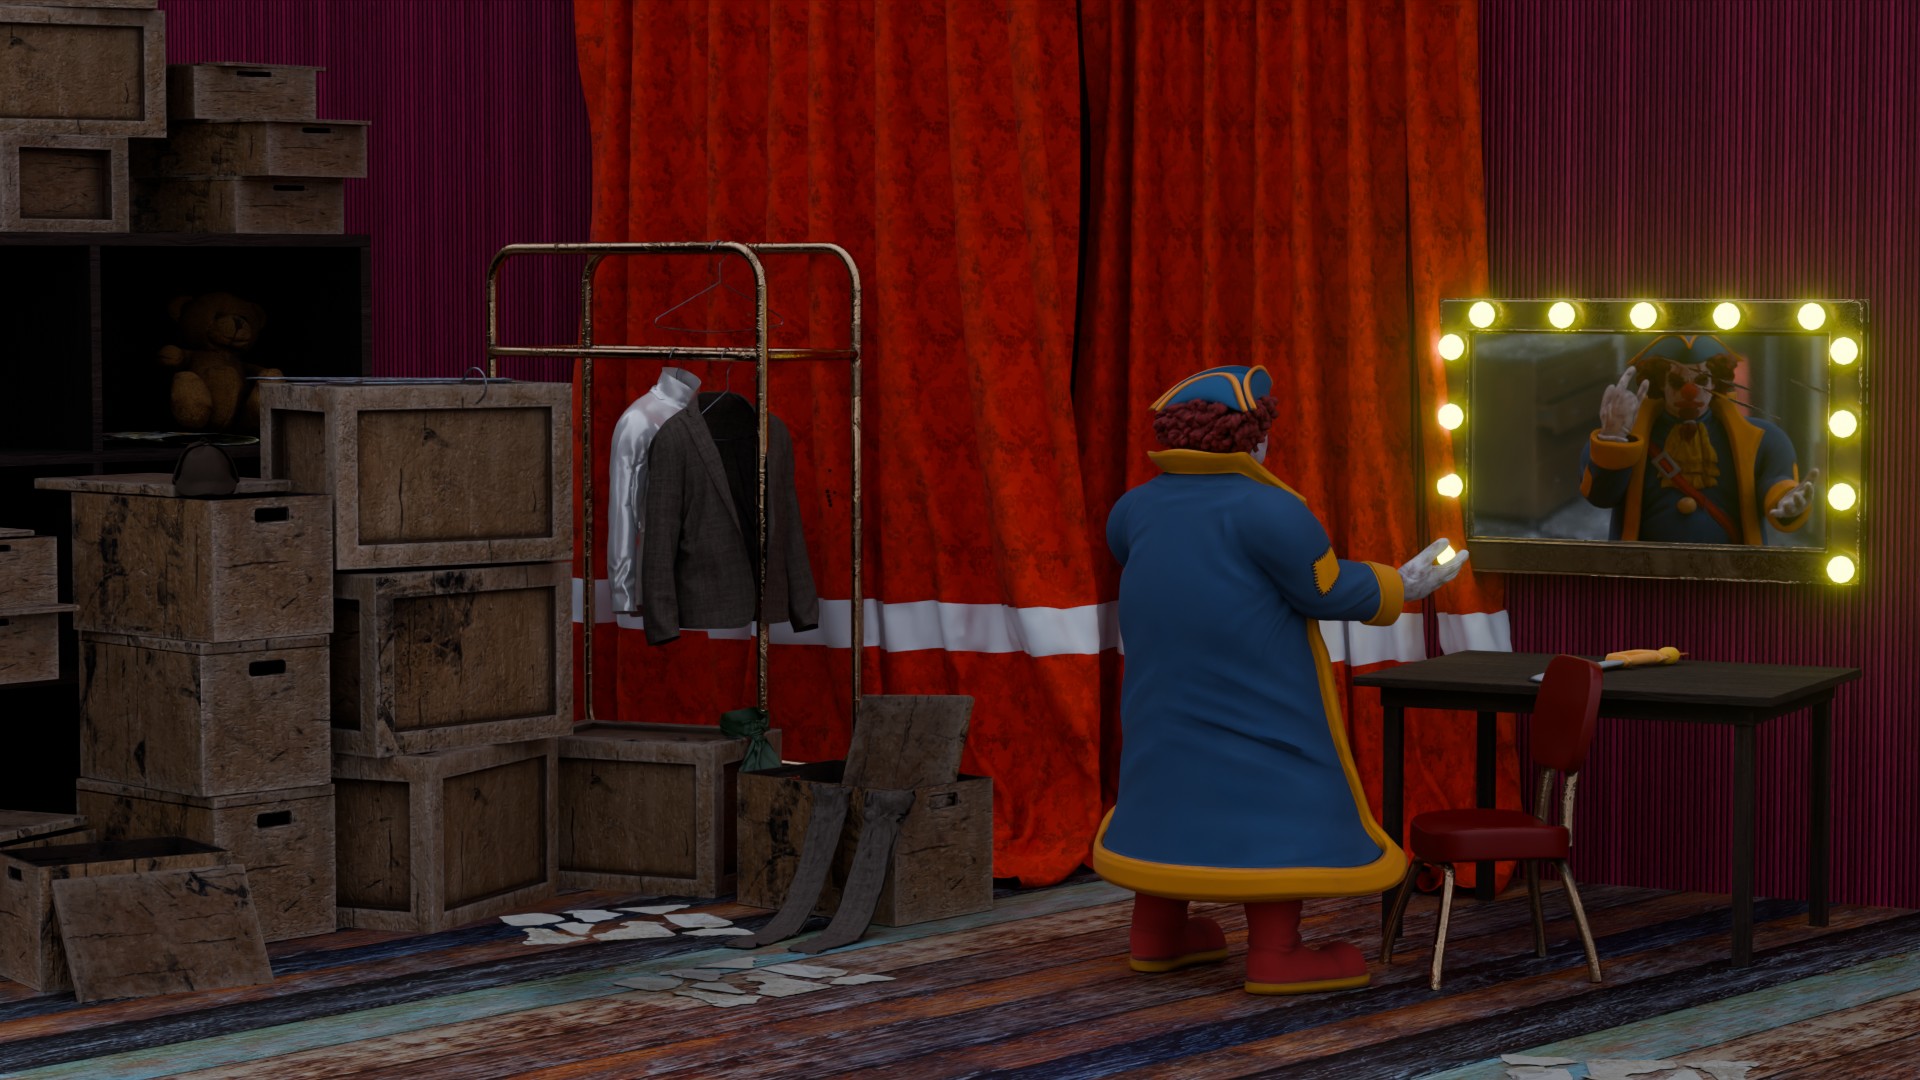
“Theatre” - Thinking like to explore a concept inspired by ‘Theatre’—more specifically, the traditional ‘Comedy & Tragedy’ style. The inspiration is more about drawing from that classic theater mood and symbolism.
The rules are simple. 1 subject, 1 entry, 1 week.
You create whatever object or scene or whatever you can think of that has something to do with the subject. It can be as simple or complicated as you want, all entries are welcome!
Post your picture here in this thread. At the end of the week, we start to vote. And if you are the winner, you may choose the next subject and win a unique badge.
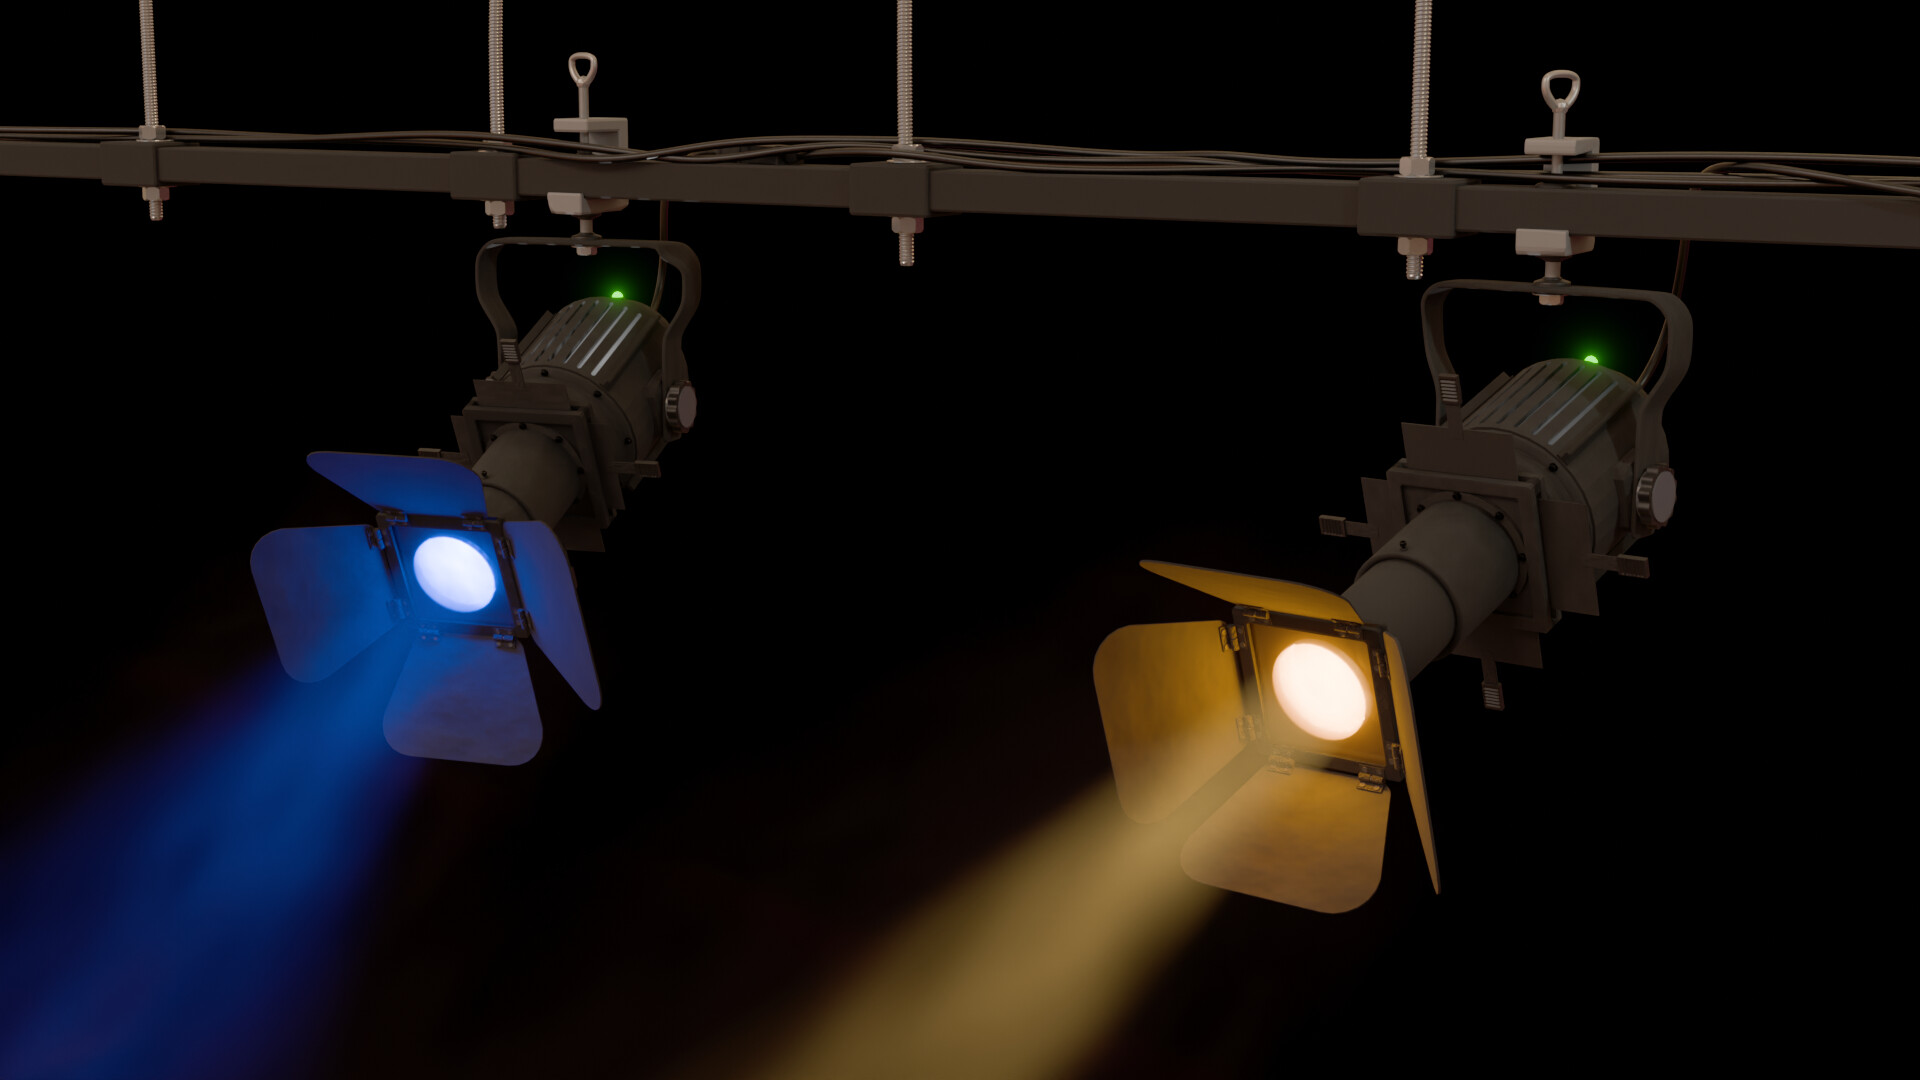
This is my entry for this weeks Collab challenge. This is the first content I created outside the courses I have taken here recently (thank you @Grant_Abbitt and @StephenWoods).
This scene is created from scratch, except for the bolts, nuts, and threaded rods which I made with the BoltFactory add-on (BoltFactory — Blender Extensions, why reinvent the wheel?) and the Theatre 02 HDRI made by Oliksiy Yakovlyev (Theater 02 HDRI • Poly Haven).
I have tried to apply as much as possible the concepts and how-to’s from the courses, which made making this scene easier:
The Boolean - difference modifier is a great friend, as it makes hollowing out shapes a breeze. It was easy to make the air-cooling slits is the housing using this modifier, together with a 2-axis mirror modifier.
Parenting groups of related objects to empties to move/rotate groups together, like for example the metal panels at the front, which can be easily rotated that way.
Some baby steps in geometry nodes, like for example the rivets in the hinges (a bit hard to see), who have a random rotation and height offset of the vertices of the outward face, based on the seed which can be set in the properties pane. Geometry nodes were also used to create the knobs at the side of light housing, and for the shape of the grip of the metal tightener of the part that fixes the assembly to the rail. Another application of geometry nodes is the position of the aperture blades, which can be controlled in the properties pane, which make it easy to create variety in geometry between spotlights.
Use of the compositor to add glare to one object only: the green control lights. I found that Cryptomatte works very well for this purpose.
Some issues I ran into:
Forgot to keep an eye on the amount of faces. The nuts, bolts, and threaded rods look nice, but created a ton of faces, which increased the render time a lot. I think I would have been better of baking some UV maps and use them on cylinder, for the rods for example.
The settings for lighting, especially using volume scattering, appears to be a study on its own (size of cube defining the volume with scattering, how much backscattering, which texture (settings) to use for the particle density, light settings, HDRI placement and strength, etc., etc,). It took me a fair amount of time to figure out settings which gave a nice result. Finally I figured out that gamma in colour management seems to be the most important parameter to tweak for a scene like this.
Getting a grip of how data is passed through a geometry node network, and how nodes reference the tables and process the data, is on a steep learning curve. Step by step my understanding grows, but it is a bit of a tough nut to crack (for me).
Unwanted reflections in the scene at rendering.
Needed more time to finish the project than initially anticipated (I think this is common one).
I really liked to make this for the Collab, because I learned a lot in the process. I can recommend this activity to anyone wanting to learn to get better at modelling and at using the software.
Yes, for the collab you need to think ahead.
Where to spend time on. Like your rivits and bolds.
if you don’t see them in detail, is there an other way to add these visual details.
True!
Many student do this at the last moment (me too). But it’s an important part of the total scene. You it is then better to start early (as in a mock) to get the feel you’ve trying to achieve,
It’s like sculpting. Starting with a big undefined blob. Then adding details from rough to precise.
But in the beginning we’re enthusiastic, wanting to see it work and shine. Forgetting the basis rules. Jumping into details because it’s fun to do.
But if you know the tools you can gradually add details at the end.
We @BlenderCollab have a few days to vote. You can vote fast but also think slowly about design, colors, technique, difficulty, subject, realism, etc. Choose consciously and not on your entry.
The new subject week 33 “Wheels” has already started. The winner of this week’s “Theatre” challenge may select a subject for next week 34 and win a badge.
Congratulations for @Srl1. It was a close call. 1 Vote difference.
I like the scene setup. Backstage with a character preparing his act.
Bill_Menot - Great work! I like this way of playing with lights. Maybe adding more light sources, to get beams of colors influencing each other into new colors. It makes the scene more playful.
Note: I don’t want to offend anyone. I try to write down positive ideas and visions in my simple use of the English language. I am also sometimes more inspired by a particular subject or solution. I’m also learning from you!