(I already finished this Blender course. Redoing it, to learn the new Blender 2.8 stuff; hot-keys, menus and
options). I did this one because I like the challenge.
If you like to color it in, here’s your chance. Water well.blend (5.9 MB)
Have fun.
(I already finished this Blender course. Redoing it, to learn the new Blender 2.8 stuff; hot-keys, menus and
options). I did this one because I like the challenge.
If you like to color it in, here’s your chance. Water well.blend (5.9 MB)
Have fun.
If im able to do this after im done with this course i will be amazed
Thank you! It seems difficult but it is just more work. And using the basic tools of Blender.
Al those things, you will learn in the this Blender course. Have fun, follow the challenges and in the future I can see you version of this project.
For me the difficult part starts now. Adding, colours, textures and lighting. And of course, composition.
Have fun, enjoy this course.
It looks real already 
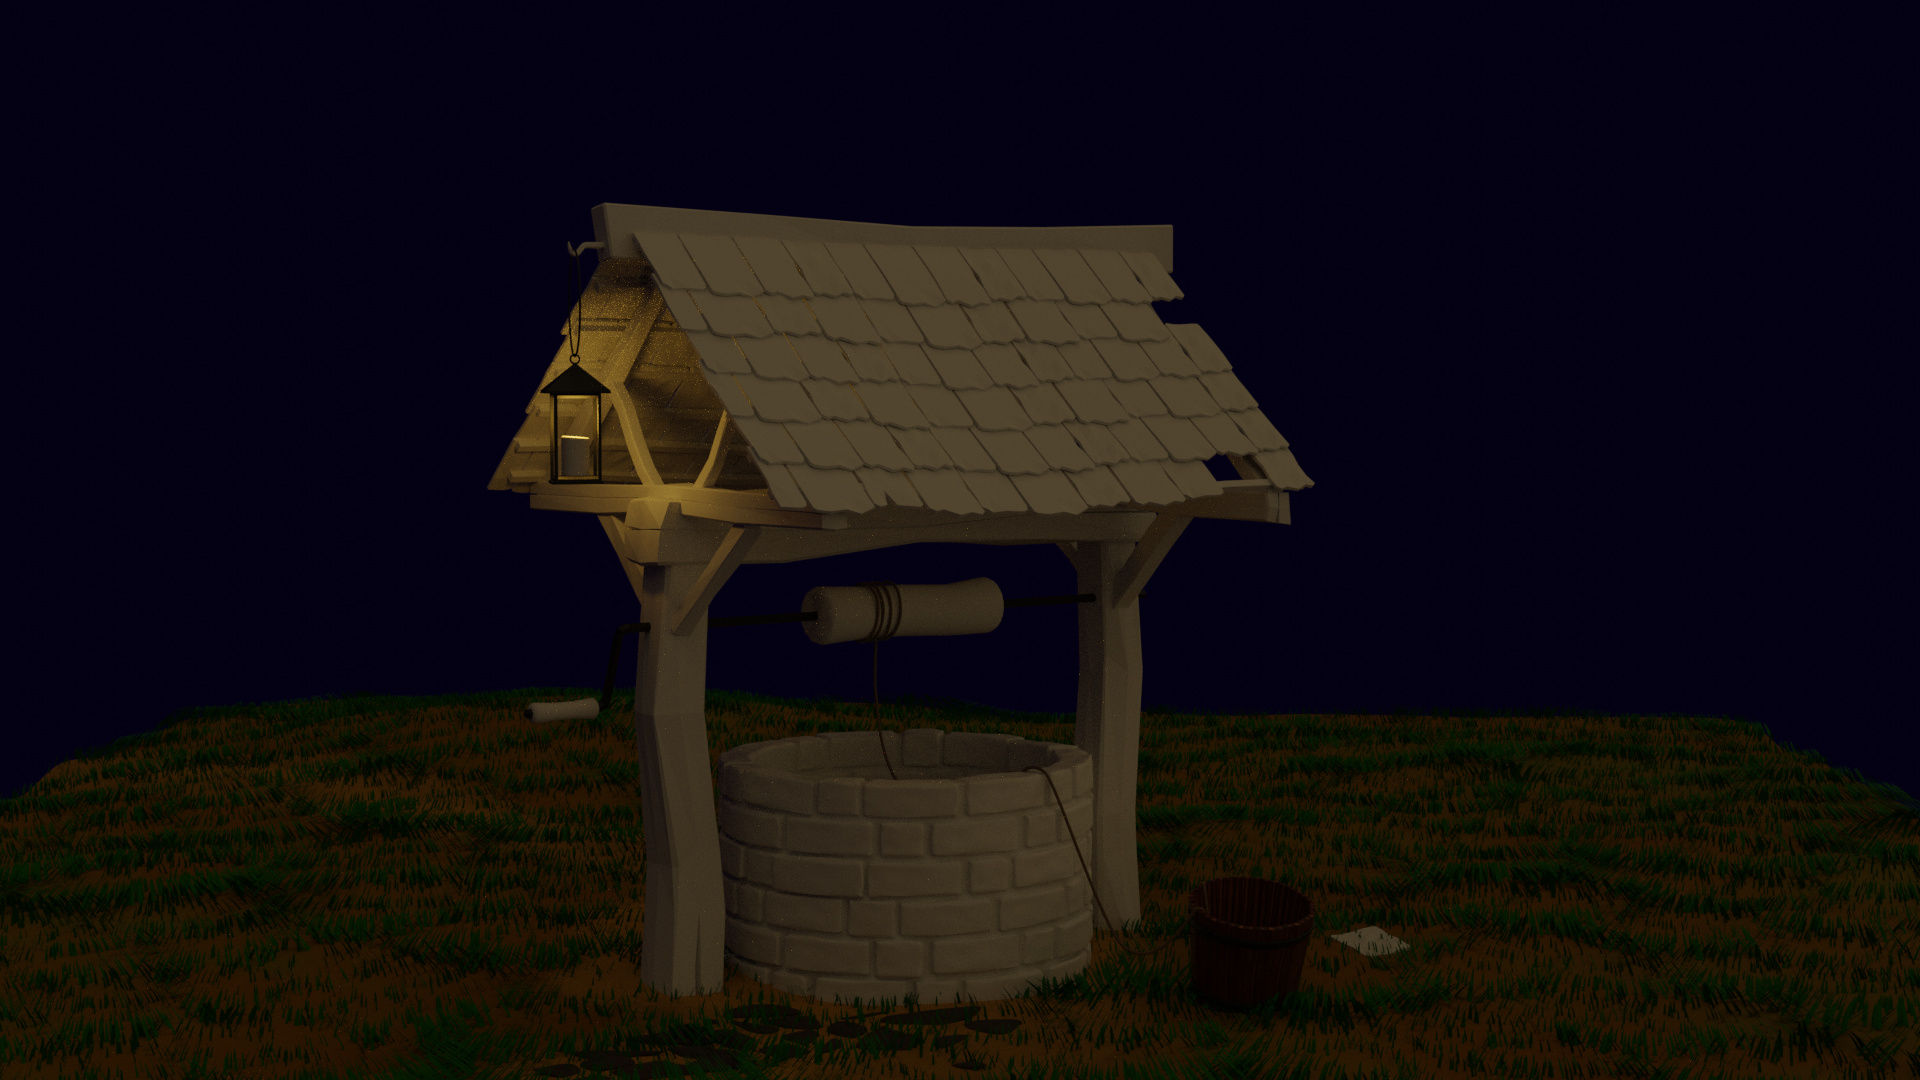
I decided to make the scene dark. And use a form of moon light and candle to light the scene.
Because I did some test runs, on grass mainly. To determine render times (cycles). And also to solve the problem of filling in the background (with what ? Trees, bushes, … all increasing render times).
With a dark background I don’t have the need for details. Like the water bucket. It’s (too) dark, so I don’t need to go deep in material design. Which I find a difficult task to master.
Have fun.
Impressive !
I must say, meshing is easy in compare to texturing. Setup a clay model, low on vertices, is hours of fun.
But then lighting, colour composition, bump maps, normal maps, stock photos, mixing modes, nodes, system crashes …
And then a lot of new ideas and improvements. But for now, this is it!
Comments, ideas, improvements always welcome.
Done in Blender 2.8
0.9M Verts, 550K Faces, 1.1M Tris and 6200 objects. 128 Samples, 18 minutes Cycles Time on Pentium i7 core. And trustful Windows 7 
Have fun, go render something!
Love it!
Very nice!
The style feels like being in Middle Earth or some Fantasy Setting very Picturesque. 
Really good stuff as always @FedPete !
As a critique,
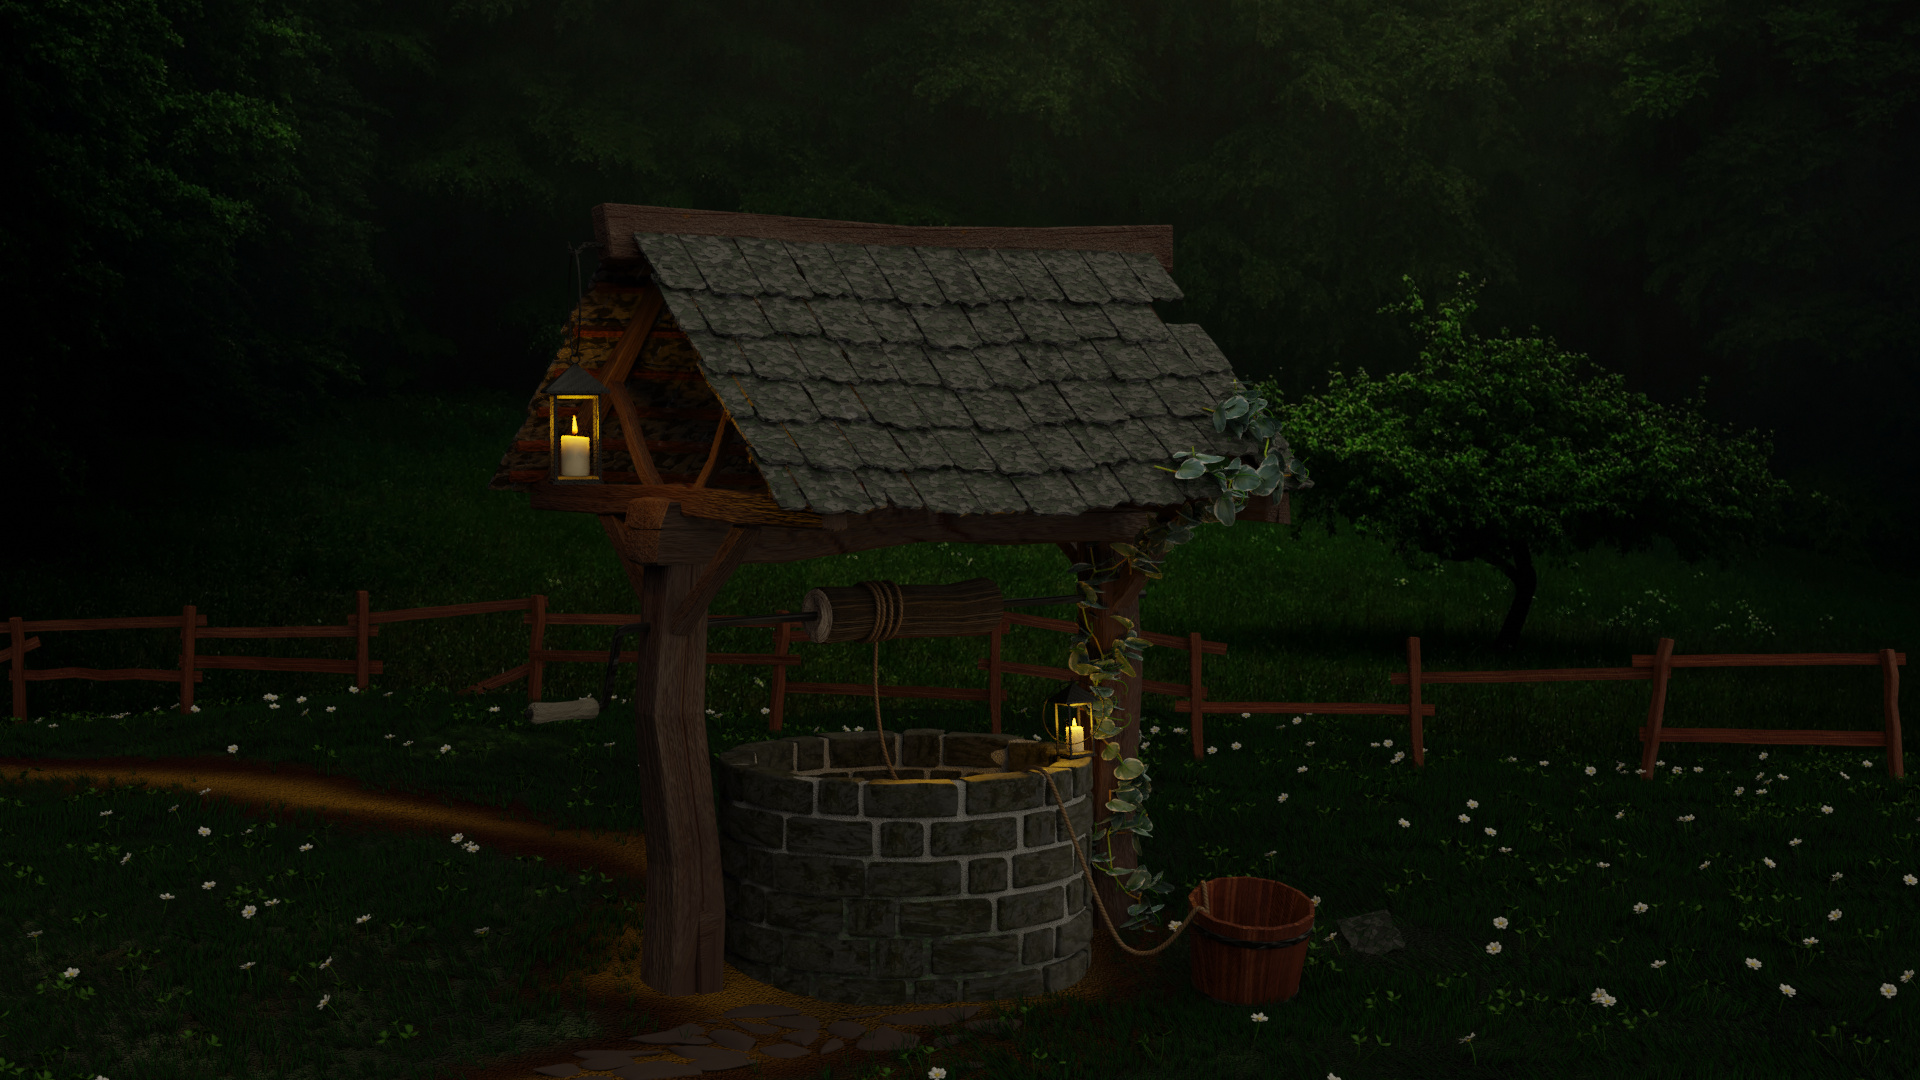
I don’t like that the roof and the bricks have the same color or almost the same.
Also I don’t know why but the tree on the background keeps taking my attention, I try to look the Well which should be the main object in the scene but I keep looking at the tree… maybe because looks like it’s more lit than the well itself, despite the the fact the well has 2 candles.
Also about the tree on the background. Is it mesh?
I concur. I experimented with more green. But with you point of view, I know now, what I am looking for.
As I said earlier, texturing, lighting is more difficult then mesh modelling (except for clay …).
Yes, true. But, I did also a bit of cheating. I don’t have the skills to make a full 3D scene easy. I don’t think my computer is capable of handling that amount of data. I cheated by using a background plane. And searching for a stock image which is not so aggressive. And has a single flat color. The tree has some natural highlights.
To hide the fact that I am cheating, I wanted to create a dark scene. But then the composition became too dark.
So I brighten up the scene, added a second candle (which is maybe not so logical in the story). Flatten the color of the backgroud image plane. Tried hard to match my 3D color with the grass in this tree image.
And to mislead the viewer more, add a fence to hide the transition of 3D grass and 2D stock image grass.
Then I saw your clothing experience and thought, maybe adding a washing line, in front of the tree.
But again, bit afraid of reaching the end of my computer capabilities. It’s getting complex. Although, the 2.80 improvements helps a lot.
I want the finish this project. But every time, I still tweak the scene a bit. Why? I think because the time spend on this project is still worth it. While other projects just die, this one is currently a favourite project of mine.
So, thank you for the feedback. I appreciate it very much! It’s a learning process. Thanks.
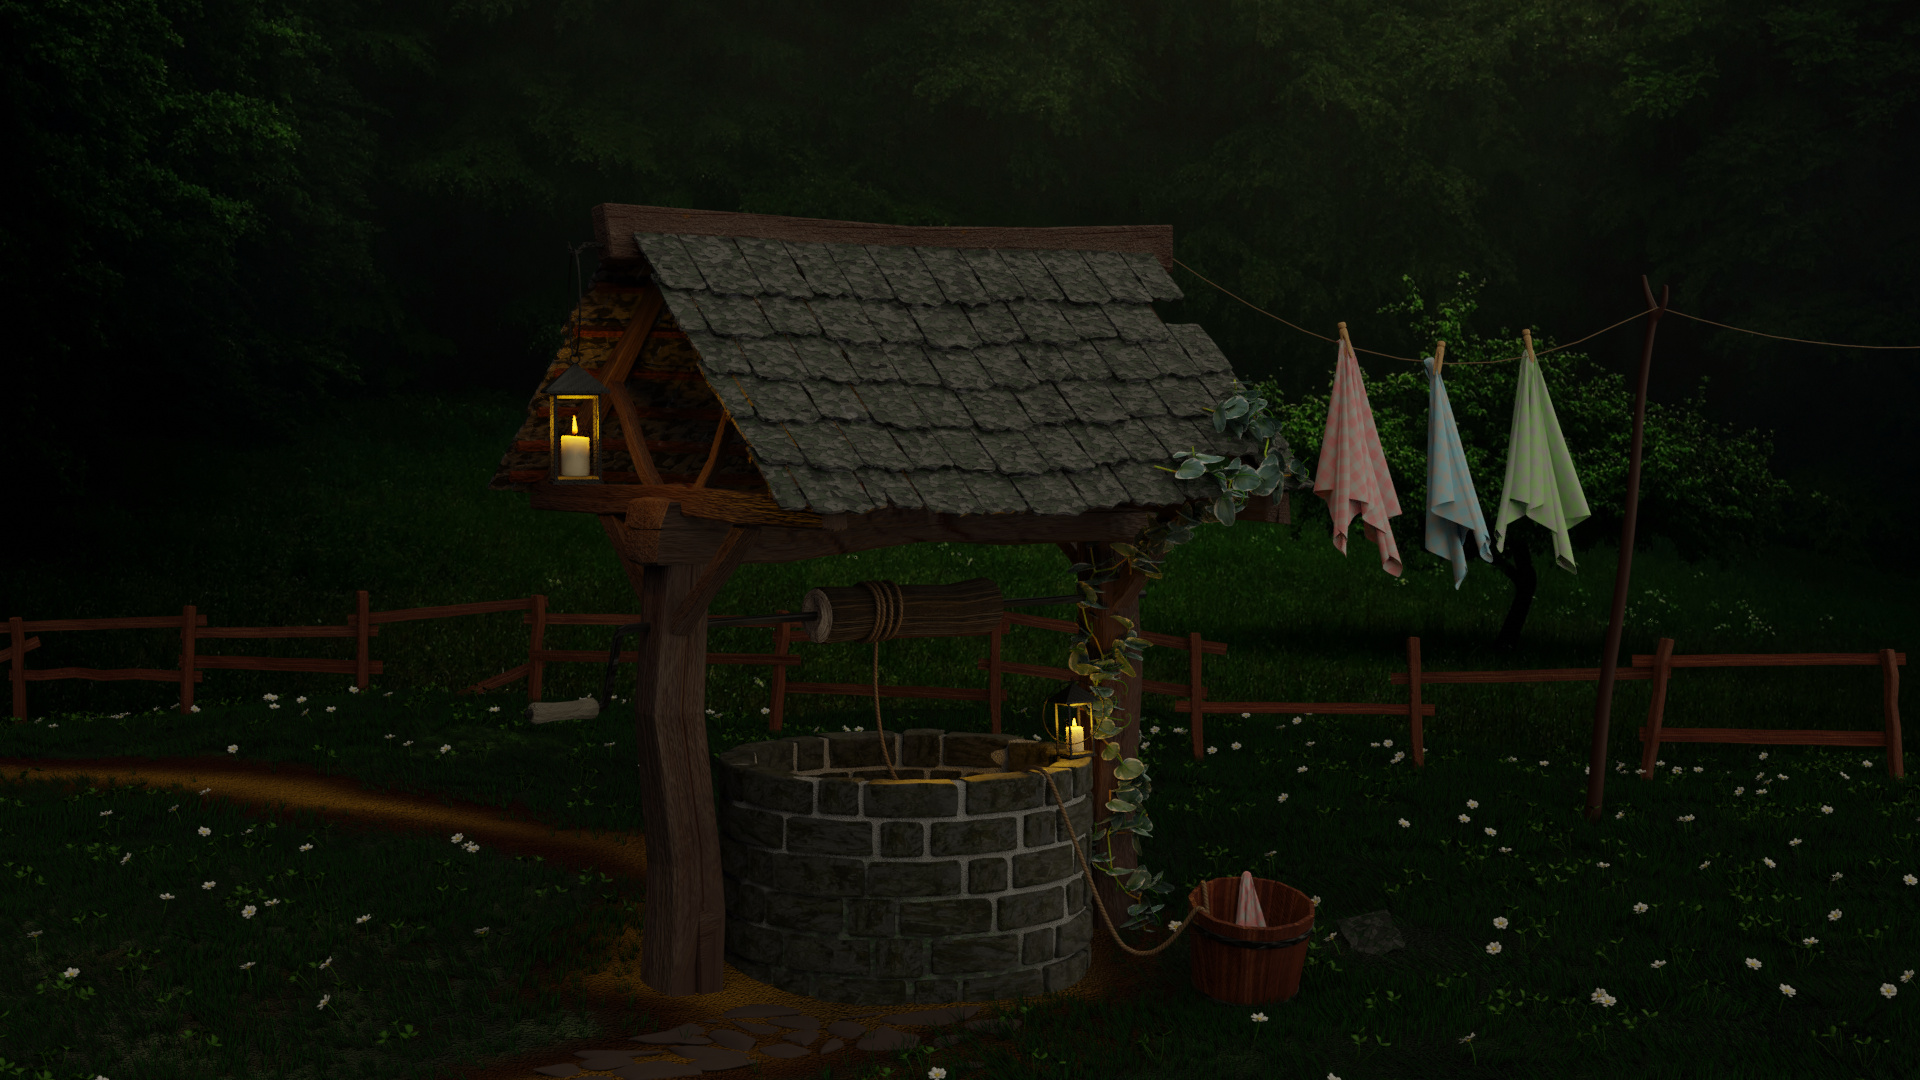
@capa14 I added some towels, but I think it’s too much.
Now I need some counter balance on the left side of the well. Or change colors (flatten) of the towels.
Maybe, It’s time to know when to stop ? To morrow last try.
Edit: Changed image
Trying to cover the tree? ![]()
Sry, but now I can only pay attention to the colorful floating towels which doens’t fit at all to the mood of the scene xD
Yeah… remove the towels and move on ![]()
Nice work, Pete!
Wow! this is really amazing!
Wow! incredible ! I also want to learn such skill . May you Help me how create real objects please?
Just follow this course. It will be hard sometimes, not to drop focus and stay on track. I started this course 2.79 in 2016. I did more than a year about this course. Nearly all aspects of Blender will be handled, but in a superficial way.
My version of the well, is not based on the first lessons of this Blender course, but with knowledge and skill of 3 years playing with Blender.
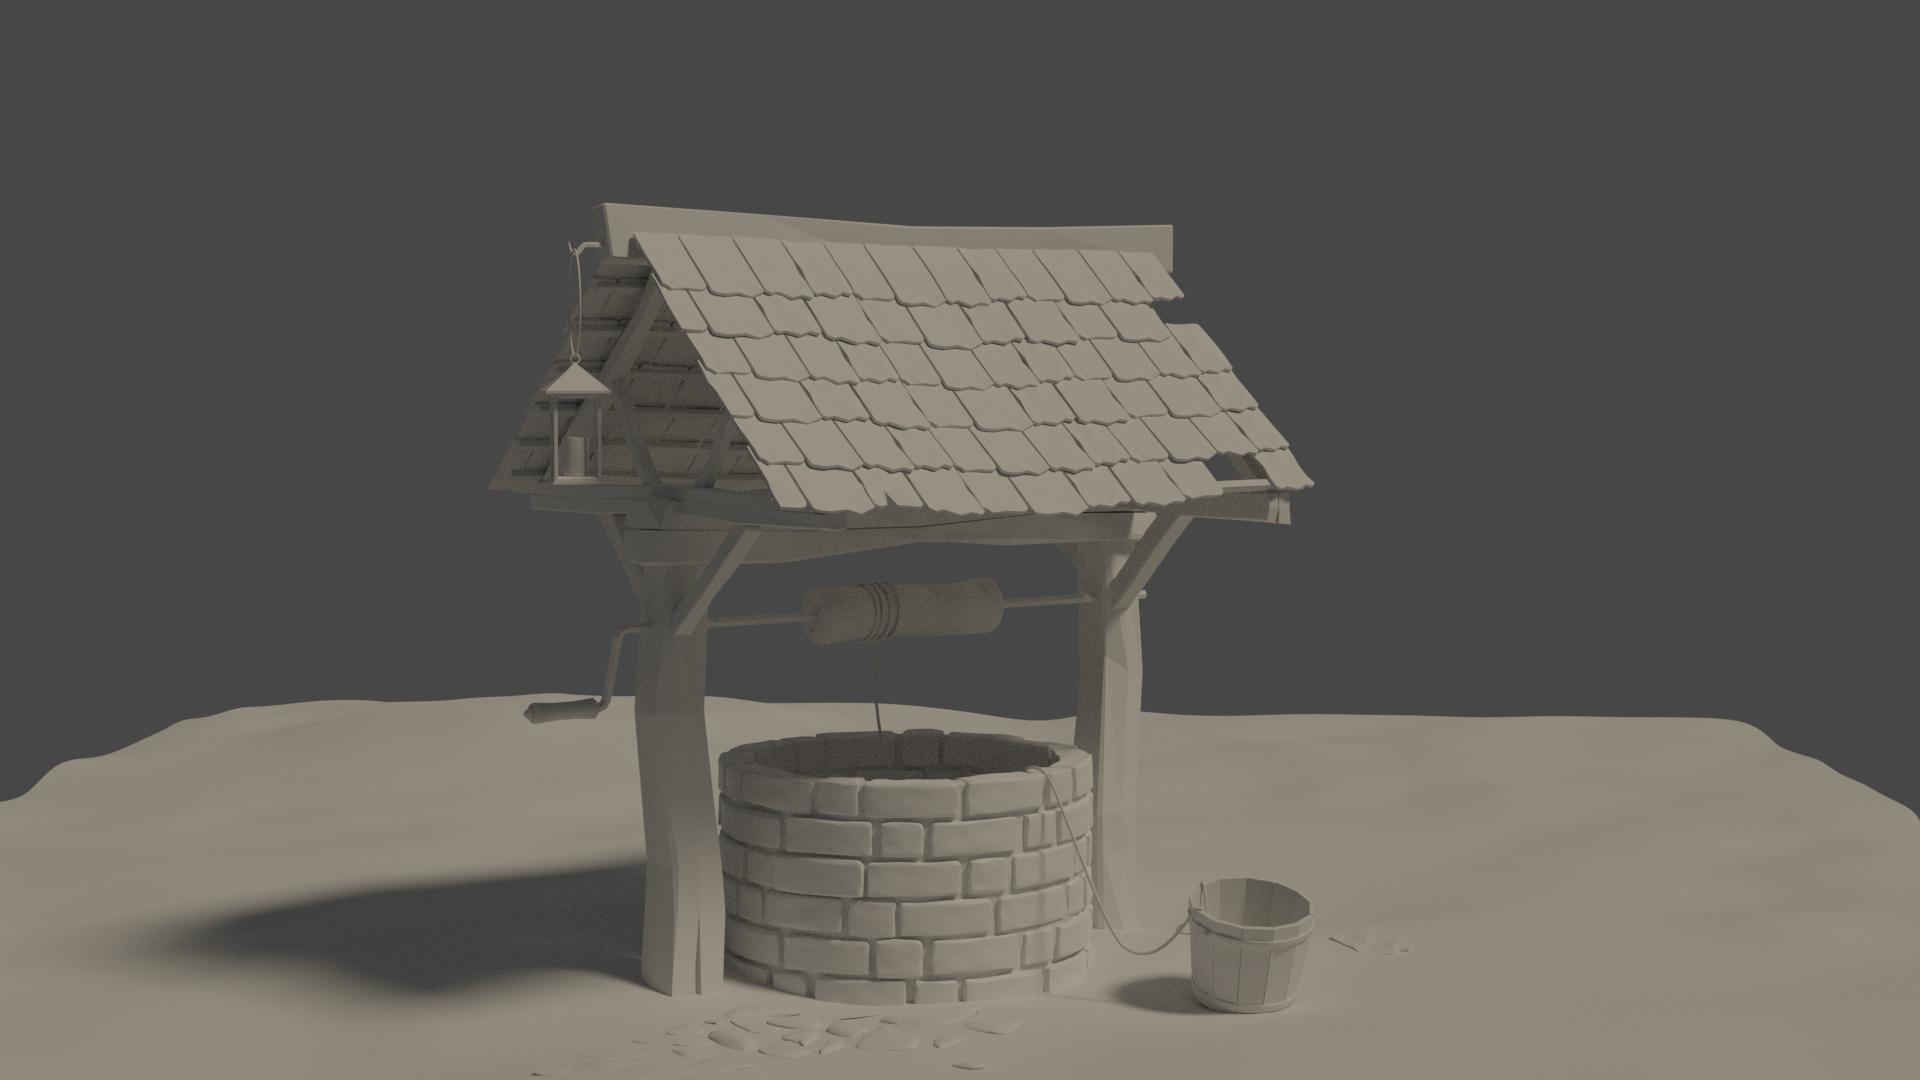
A model walk through.
The well consist of three different modeled stones. Copied by an array modifier. Following a curve (circle).
This object is then again used in a second array modifier, to make the vertical layers.
The roof has the same procedure. 3 tiles in an array modifier. Building layer by layer. Then I collapsed the tiles into one single mesh object. And cut of some tiles, bending the roof.
The rest is Cycles texture nodes to create materials.
The floor is particles hair. But instead of hair you use a grass object.
And a second particle system for the flower object.
The towel, is a plane object with a lot of subdivisions. Which is deformed using the physics clothing simulator. (al four of them are the same, just a duplicate).
So it looks like a complex project! But broken into parts, each part is reasonable simple. And discussed in the Blender course. I know since 2.79 and 2.8x there are some changes in course flow with different side projects. But the tools I used where explained in this course. My main basic knowledge base, for creating stuff like this.
Be patient, work a lot on small projects. Try to learn something new every time. See other tutorials on the web. Try to understand what they are doing, instead of copy a behavour.
And above all, keep having fun. And now, go render something!
Thanks for sharing experience .
If you’ve made this after those initial lessons, then I’ll call you HOLY SON OF BLENDER…
I finished this course first (using Blender 2.79) then did this challenge with the new Blender.
You can compare it with your current level. And how you increase your knowledge and skills after finishing this course (completely). It took me more than a year (once or twice in a week).
Don’t give up and have fun!