Hi guys,
I started following the RPG course on the combat system, but I’m stuck. In lesson 2.3, good old Rick talks about downloading and unzipping assets. I downloaded the two zip files from the resources section and unzipped the first, but I can’t find the Unity file for the assets to import, but instead a whole series of folders containing the assets. How do I proceed? Do I have to do it manually? Or is there a workaround? Are you planning on updating the package so that it can be imported into Unity 6000.2.13?
Thank you
Are you on a Mac by chance?
Mac’s Archive Utility detects that the .unityPackage within the zip is itself a form of a zip file, and it expands the contents for you automatically. While the feature is handy in some instances, when it comes to a zipped .unityPackage it is a definite problem.
Fortunately, there’s a solution, which is outlined here: Mac users solution: No .unitypackage asset in the zip file attached
TLDR: Open Archive Utility, Uncheck option “Keep expanding if possible”
Hi Brian Thank you for answer. Yes. I’m Mac User. I’m sorry, I didn’t say. I’ve a question: When I download the resources by Udemy, the archive utility don’t do it. it unzip correctly the zip file and I find correctly the unityPackage file. why for this zip don’t?
I’ve imported all asset but I’ve have an other problem


As you can see, it’s seem that the materials can’t find the texture. but the textures are in the folders and are connected. maybe there isn’t some button unchecked? How can I fix the problem?
Most likely, your project is using the Universal Render Pipeline (URP) instead of the Built In Render Pipeline (Legacy)
All you need to do is convert the materials, which is something you’ll often have to do with assets from the Unity "Asset Store. The performance benfiits of using URP over the Legacy pipeline are significant, however.
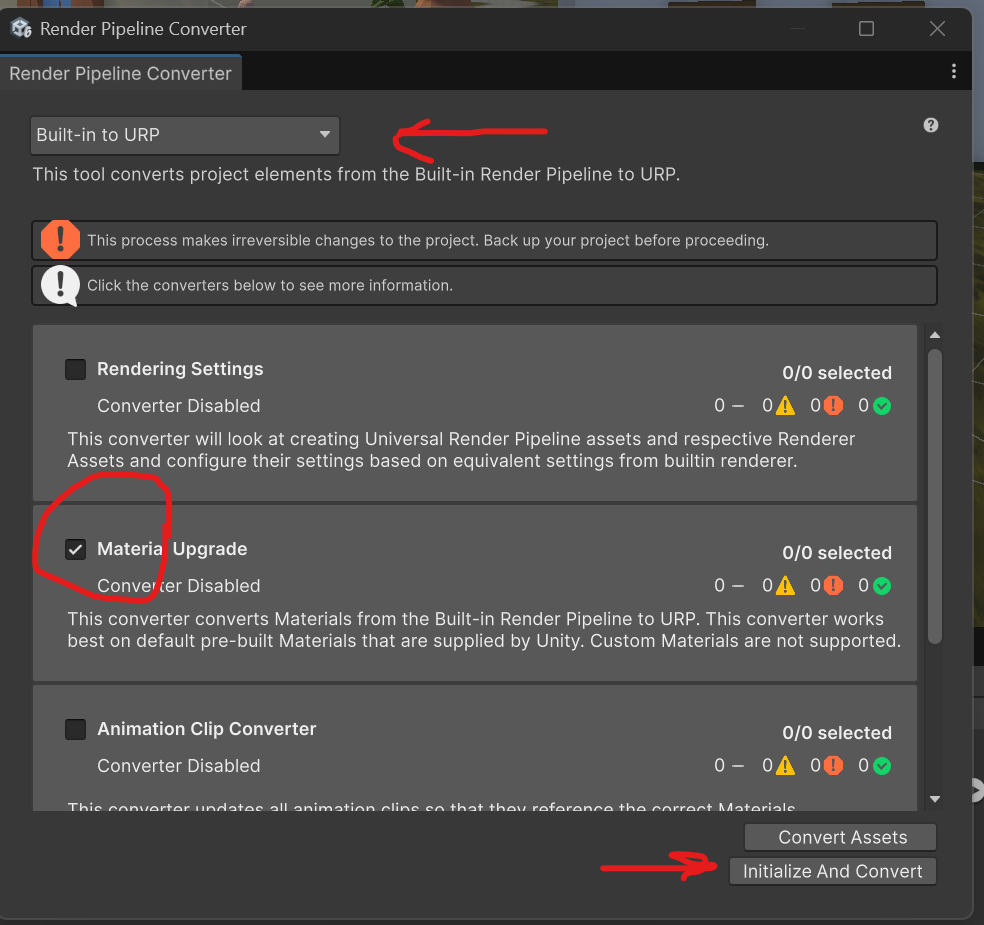
Go to Window | Rendering | Render Pipeline Converter

Make sure Built-in to URP is selected in the drop down
Check the Material Upgrade Box
Then click on Initialize and Convert.
You’ll get a warning box that these changes are irreversable, but that’s ok, because once your’e used to URP, you’re not ever going to want to go back.
Note that this process doesn’t work for all materials, only materials made with the standard shaders in the old Built in render pipeline. It doesn’t work for custom shaders. The good news, however, is that in this course, all of the assets we provide are using the standard shaders and can be easiliy converted with this process.
Thank you very much for your hint. it works but there is one problem: as you can see in the screenshot there is one resource that has some problem with upgrade. How can I fix it?
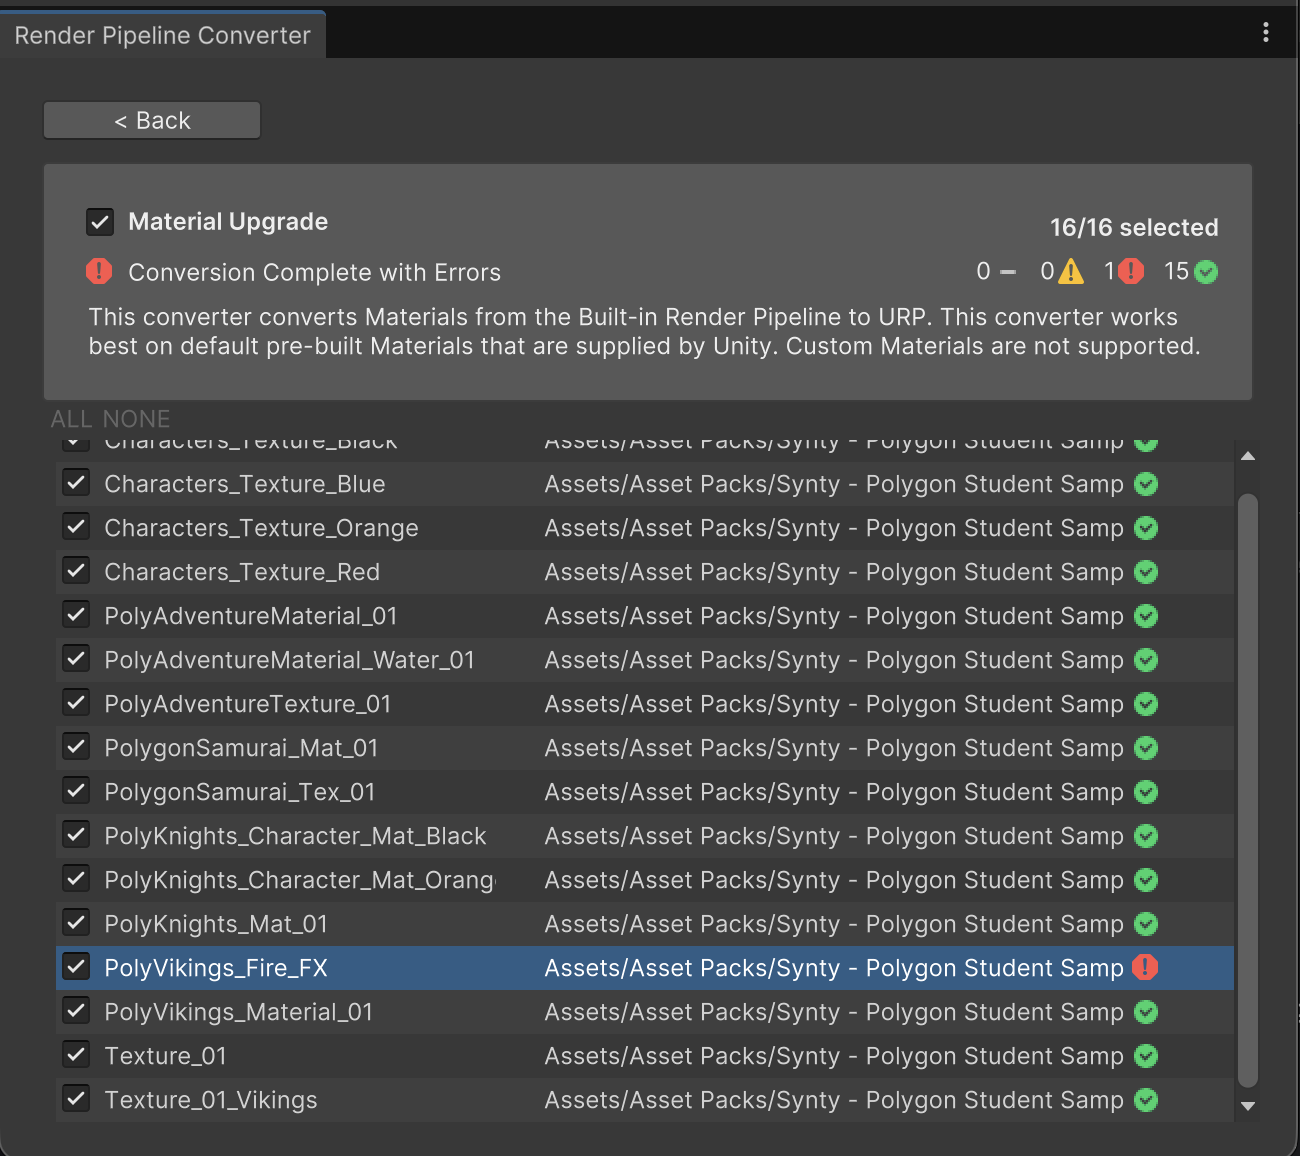
It looks like that particular asset is using a non-standard shader. The converter isn’t really able to fix that.
Here’s what I did:
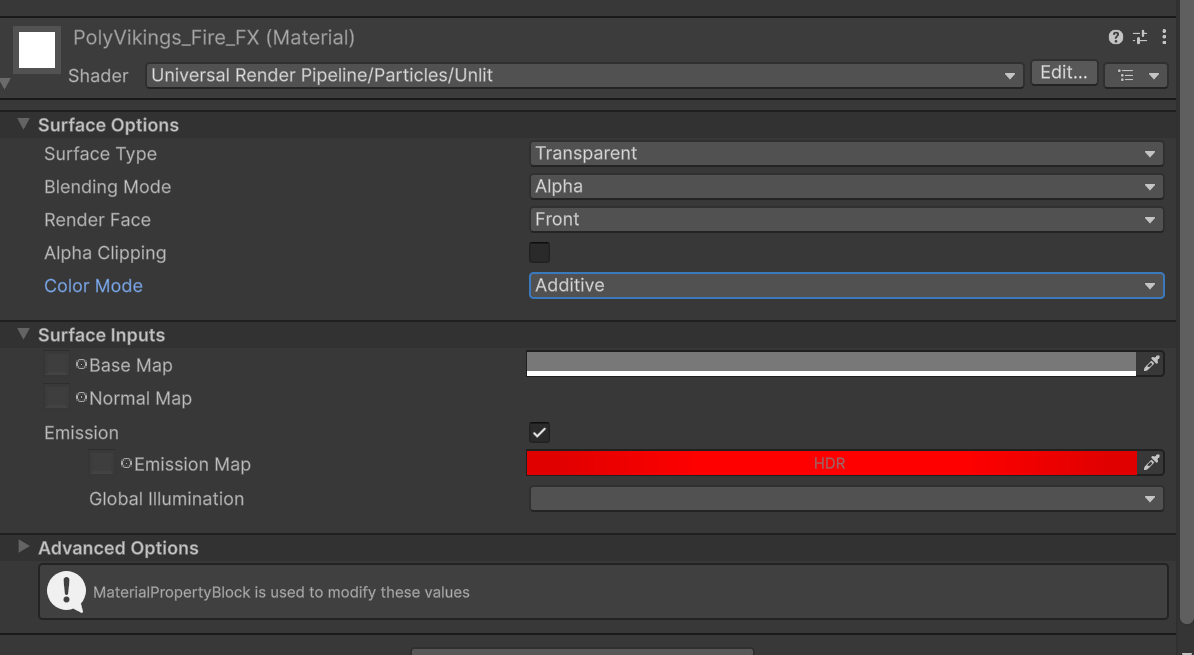
Open the PolyVikings_Fire_FX material, and change the shader option to Universal Render Pipeline, Particles/Unlit, then make the surface options match the image below. There is no image for the basemap or normal map, just set the color to soemthing like I’ve set it. Check the Emission box and adjust the emission map color to your liking. You can see the final effect by opening the FireFx prefab in the prefabs section of the Polygon Student Samples.