Hello there,
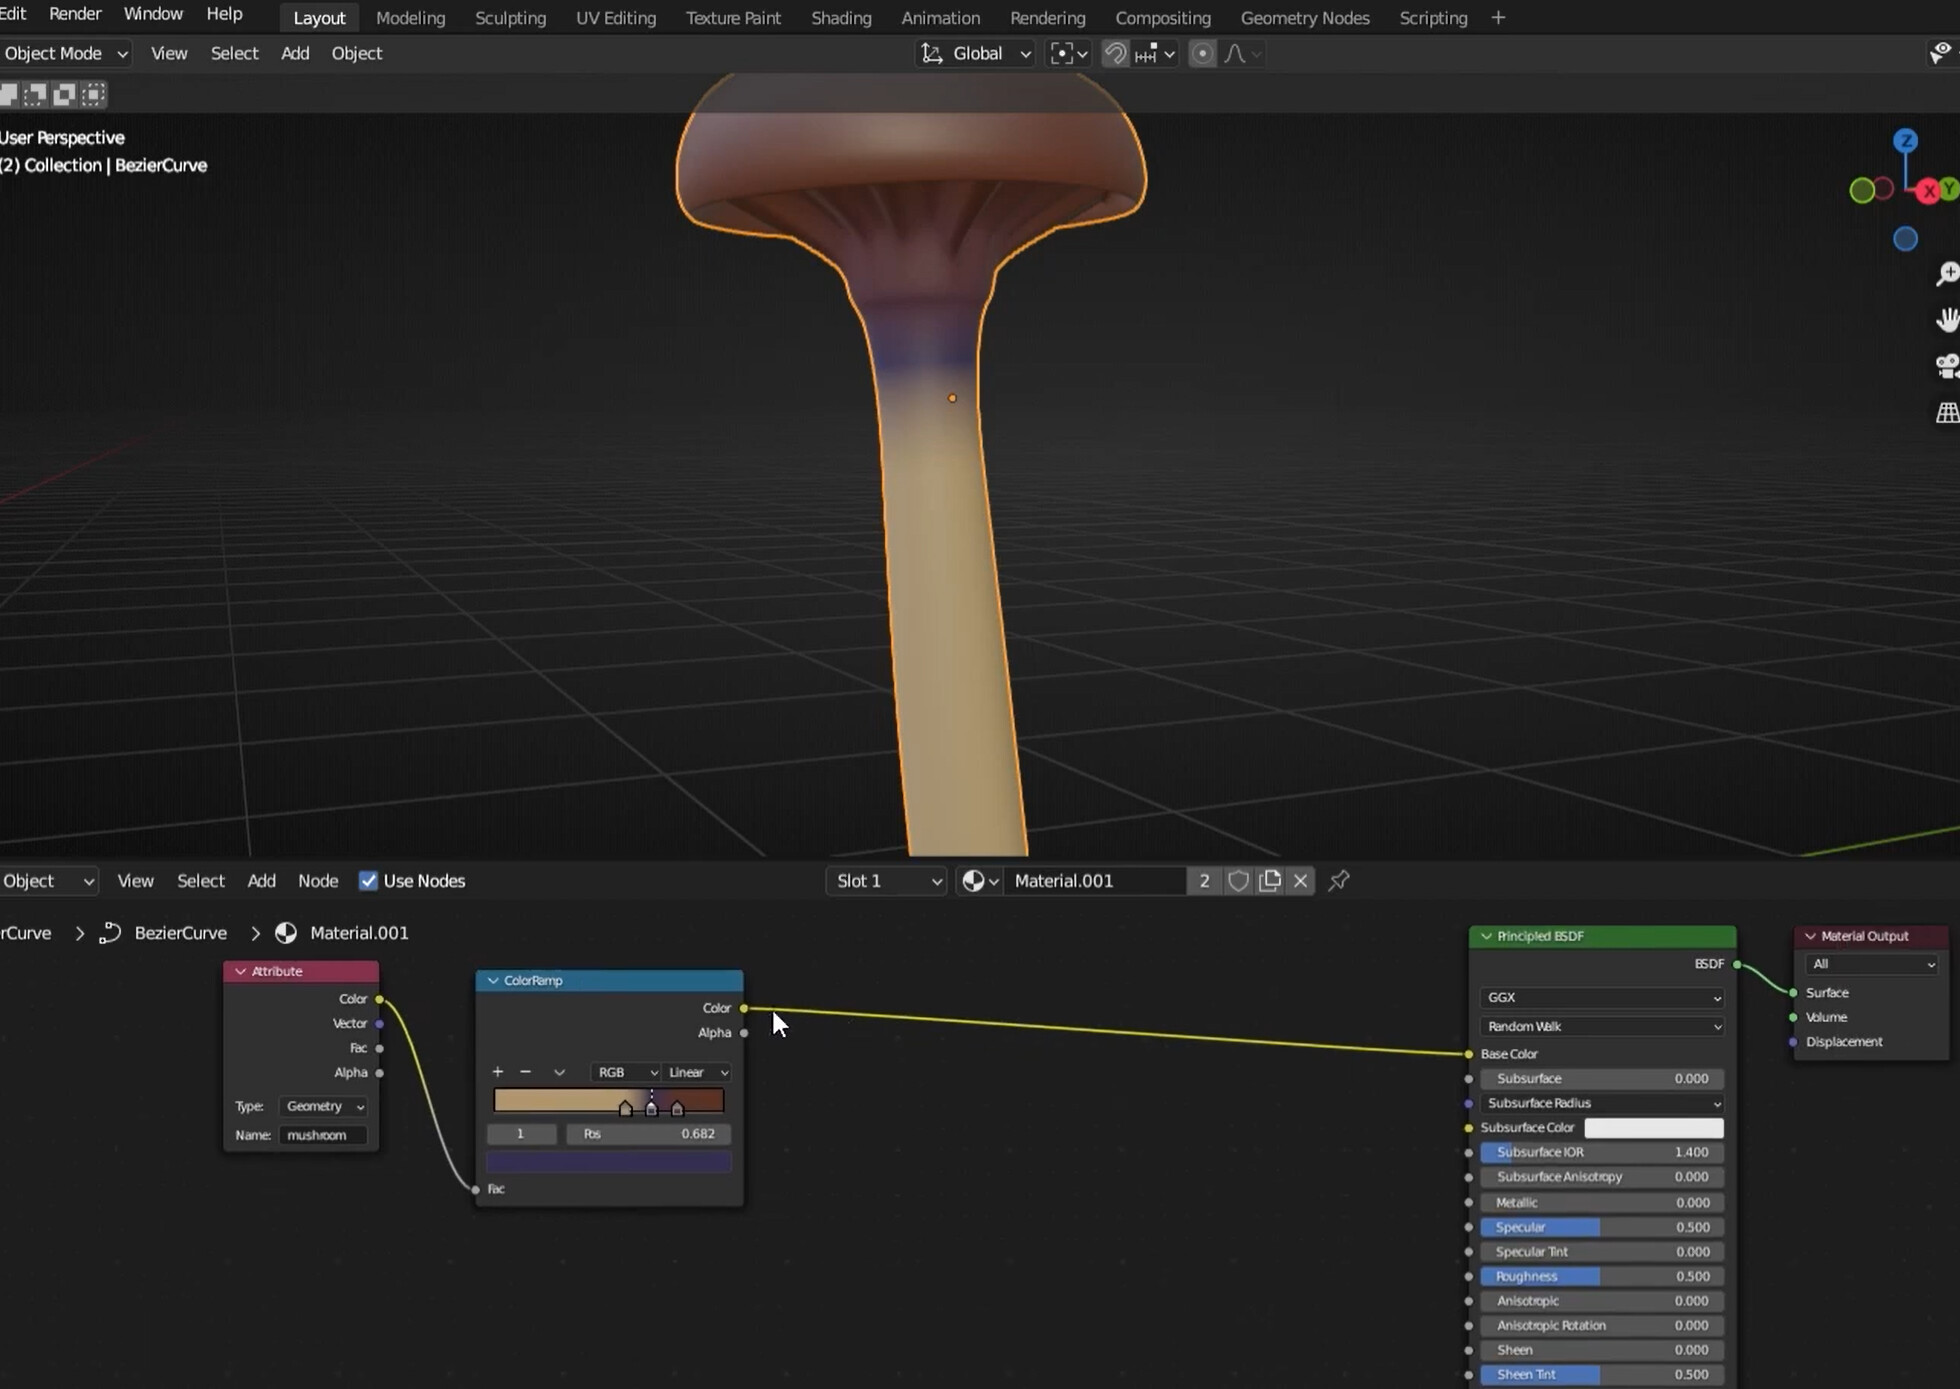
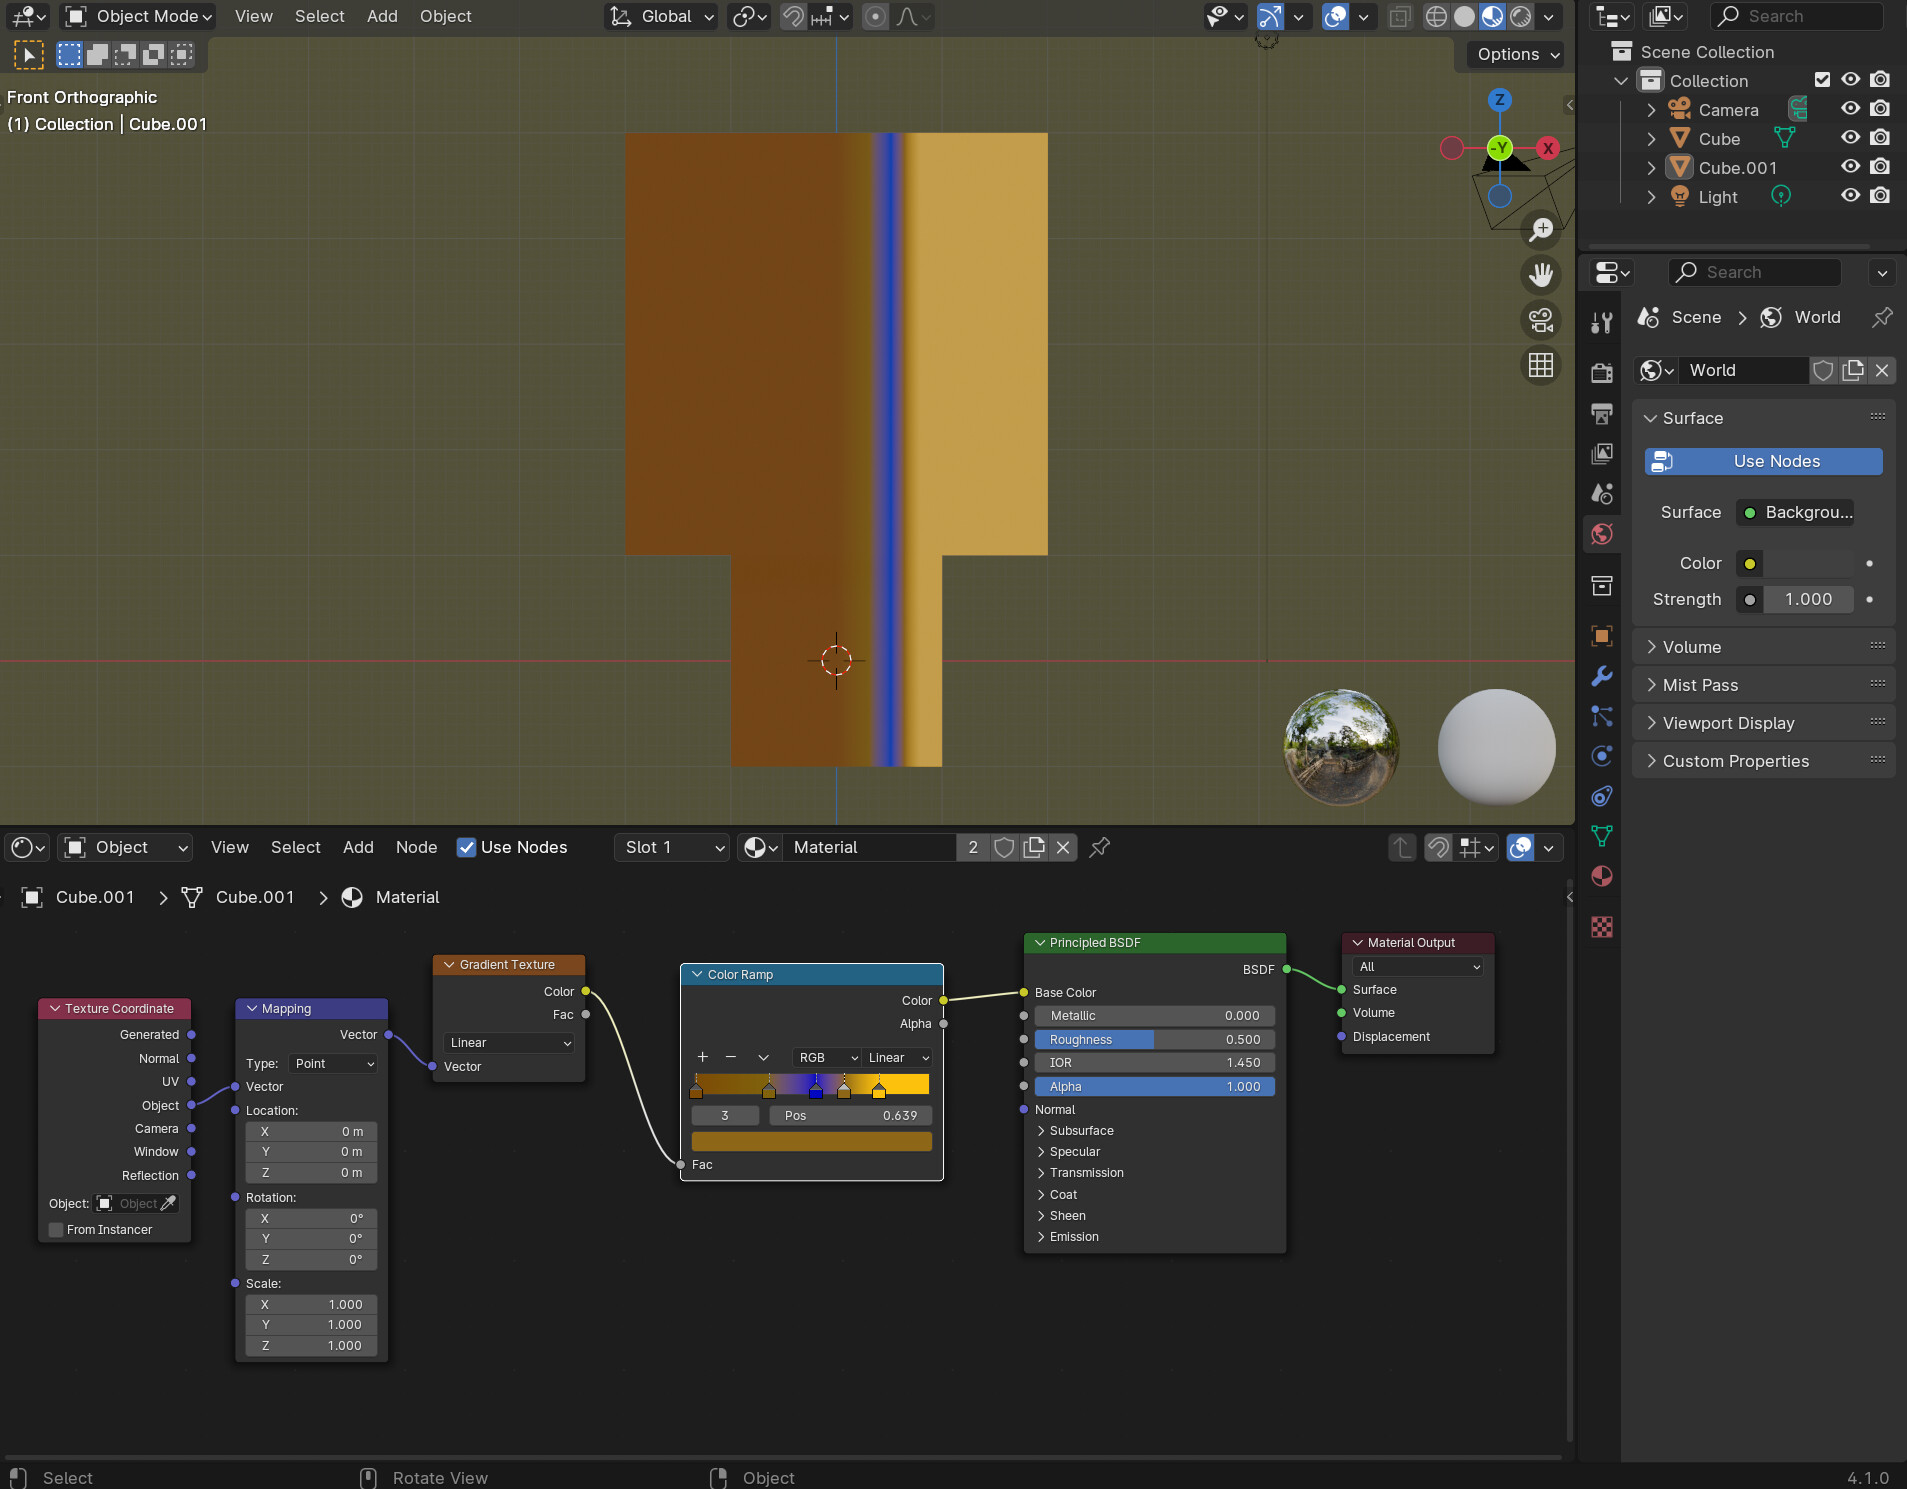
I’m trying to add a colour gradient to one of my objects - the big mushroom with the door - but the gradient is rotated by 90 deg and off scale.
I have this setup from a YouTube video, and they don’t have the problem, using the same nodes.
Rotating by 90 deg (mapping node) along the y axis fixes the alignment, but the scale is still off. Now the whole mushroom is brown. Tweaking the scale is not giving the result I want.
(https://youtu.be/FwkYULJ17GQ?si=ECptQaJd11MPt3Gj&t=1862)
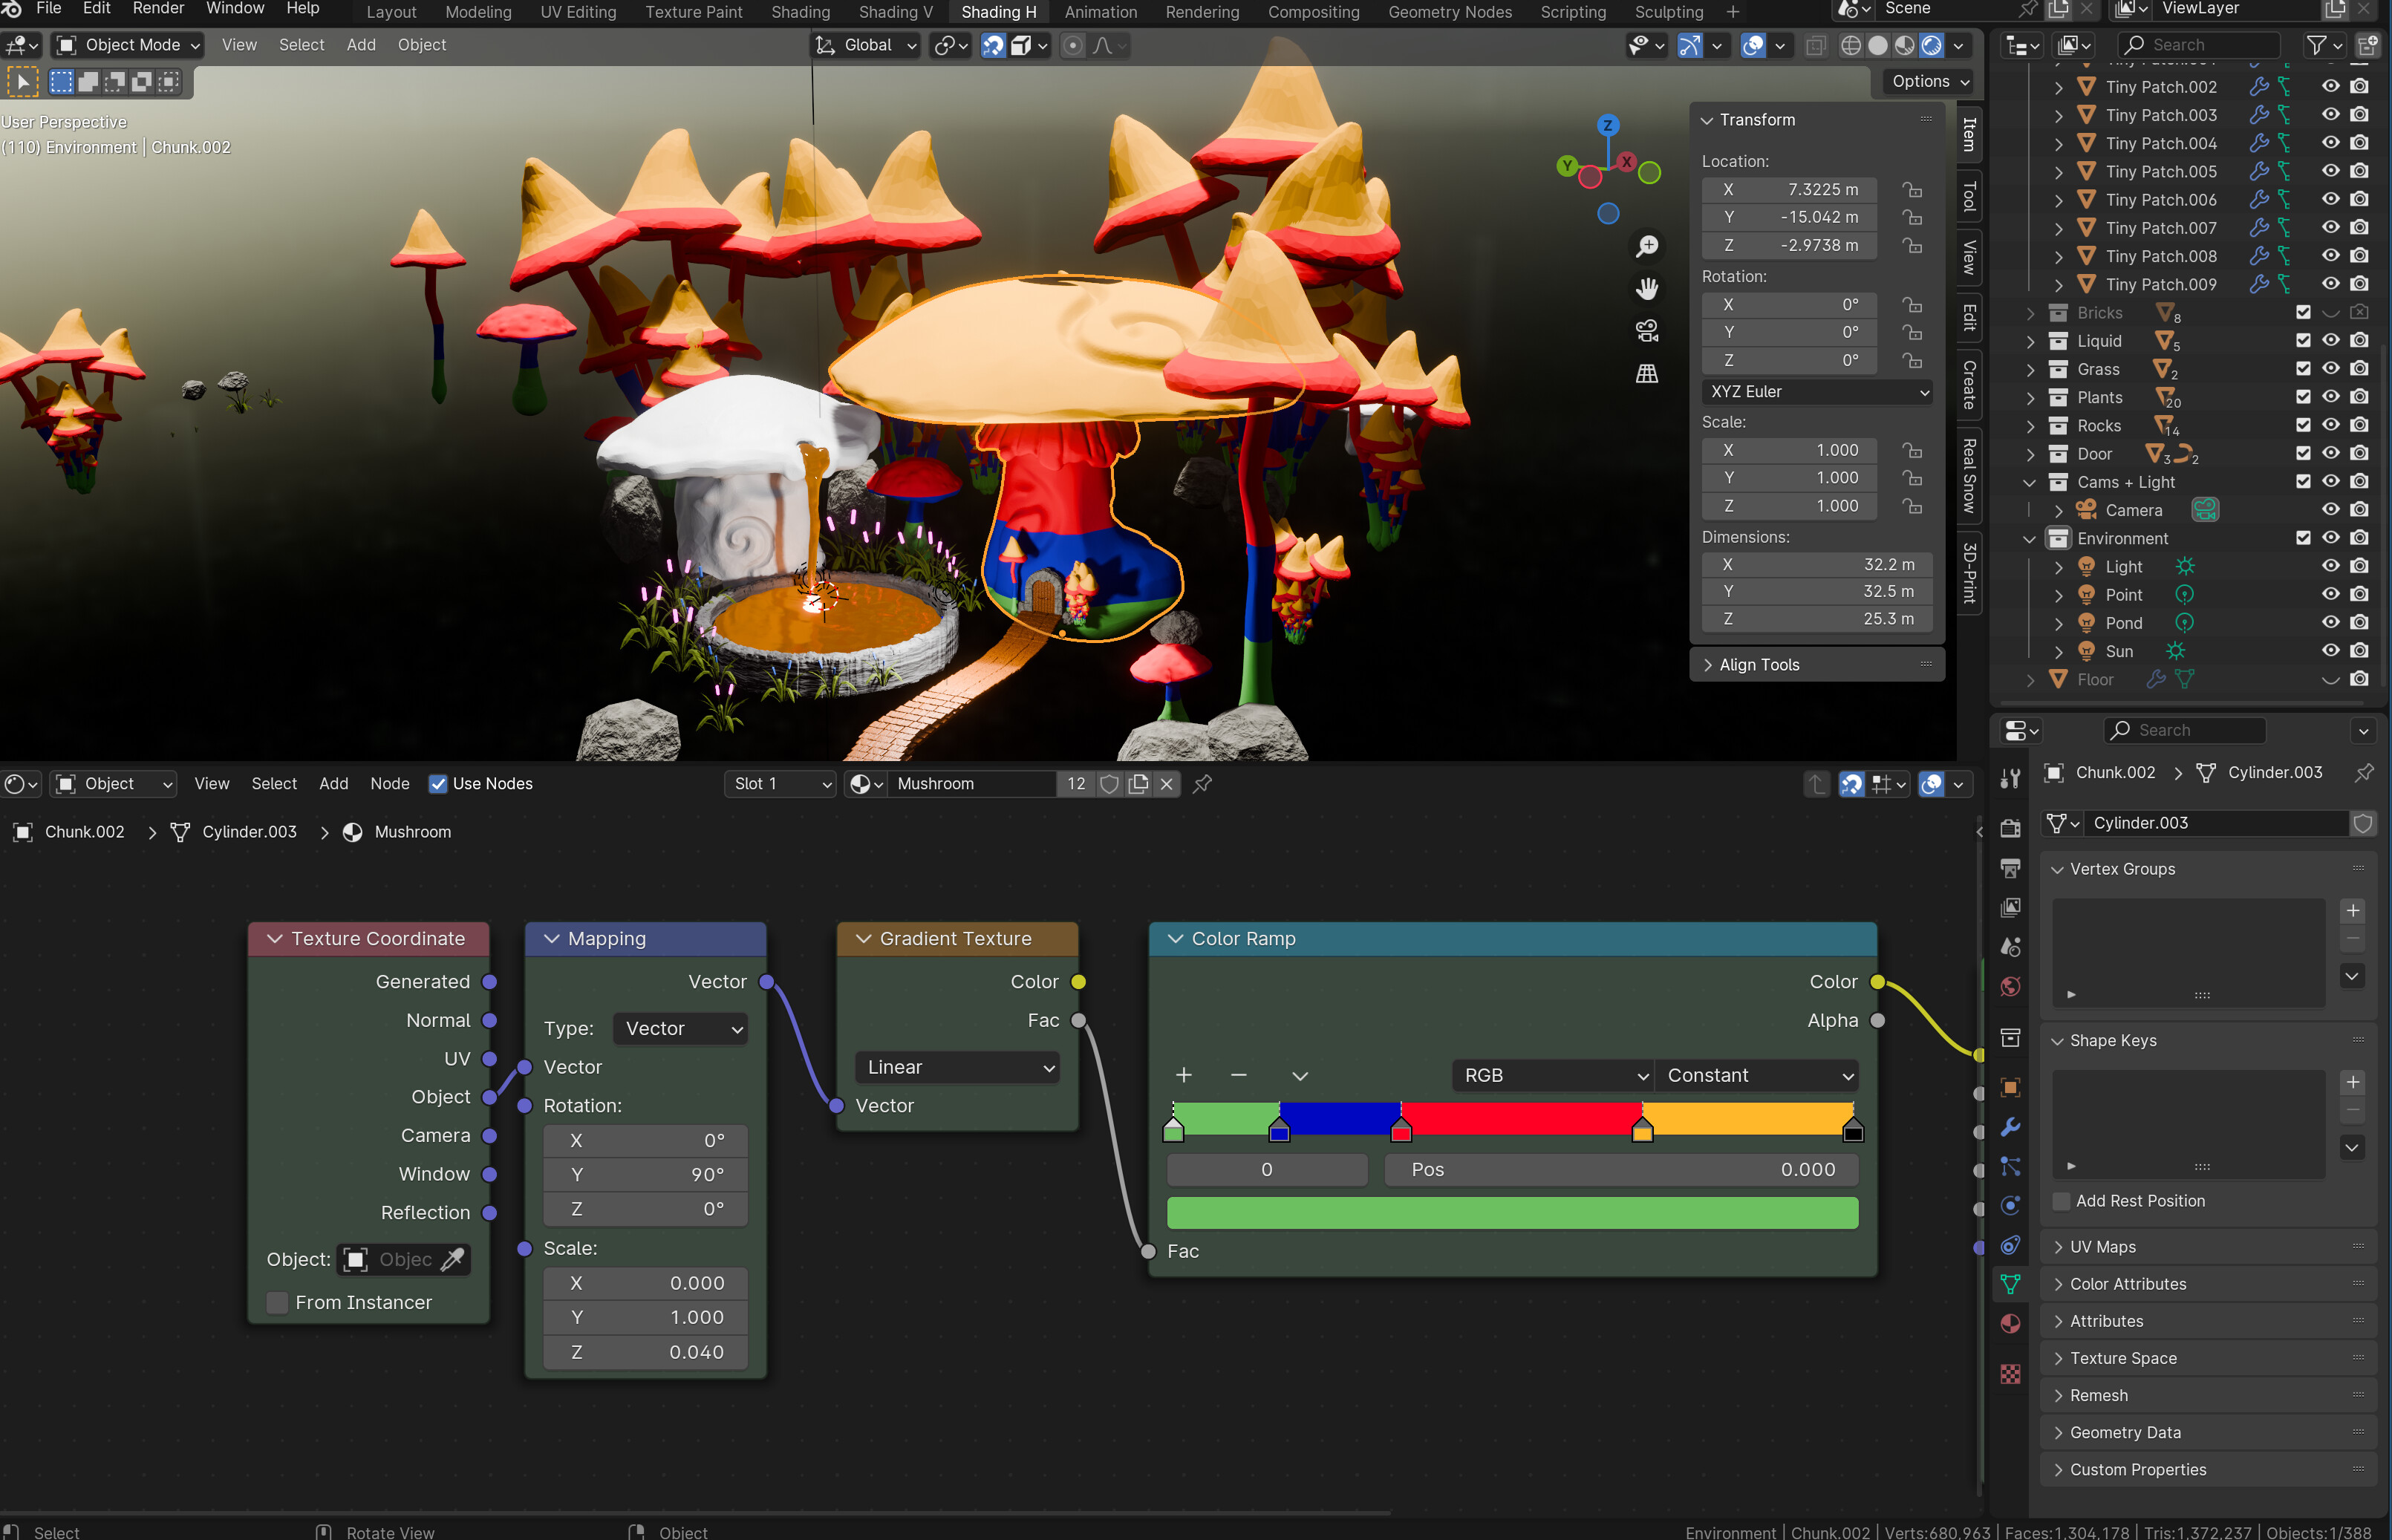
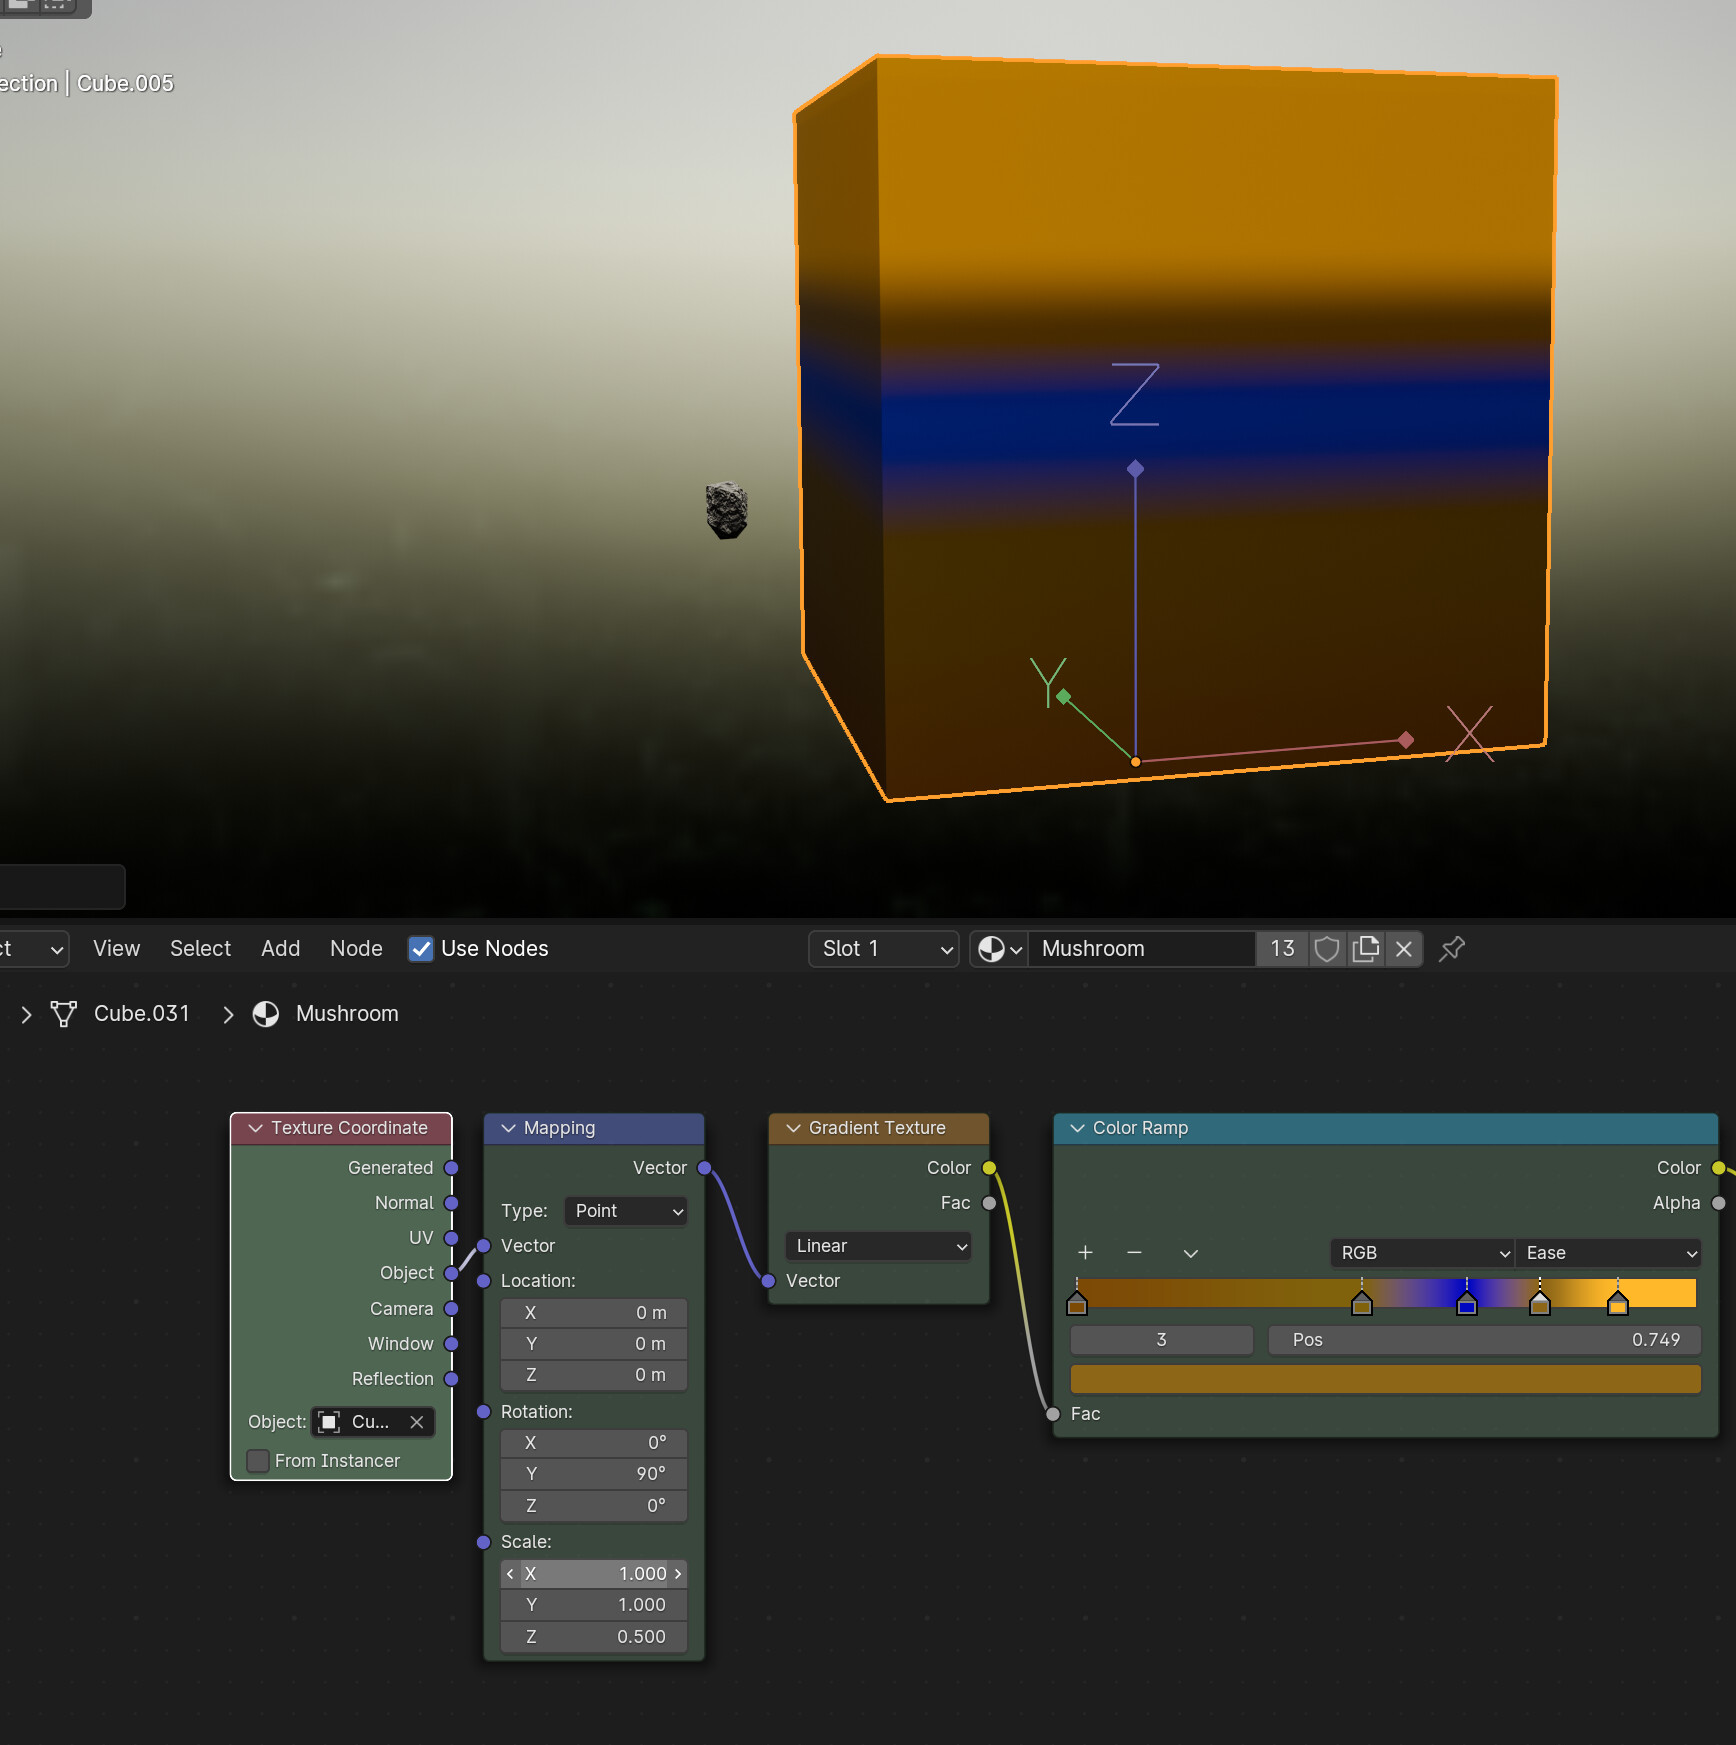
I tried another approach shown in a different video, using an attribute node.
In his video the mushroom is generated from a curve, and the length aka height is stored in the attribute node.
I tried calculating the height of my object from the bounding box, to get the equivalent of the length he used. Nope.
What do I miss? (And yes, the materials node course is on my todo list  )
)
Thanks,
Ray
1 Like
Without reading your details, did you try to apply rotation Ctrl-a?
Because the texture coordinate is based on the object itself … check also the origin point of which the object mapping is related to.
3 Likes
I see also Y rotation 90 …
1 Like
Yes. And the origin point is bang in the middle.
I edited my post to make it more obvious why there is a 90 deg rotation.
Maybe the node-god @StephenWoods has a suggestion
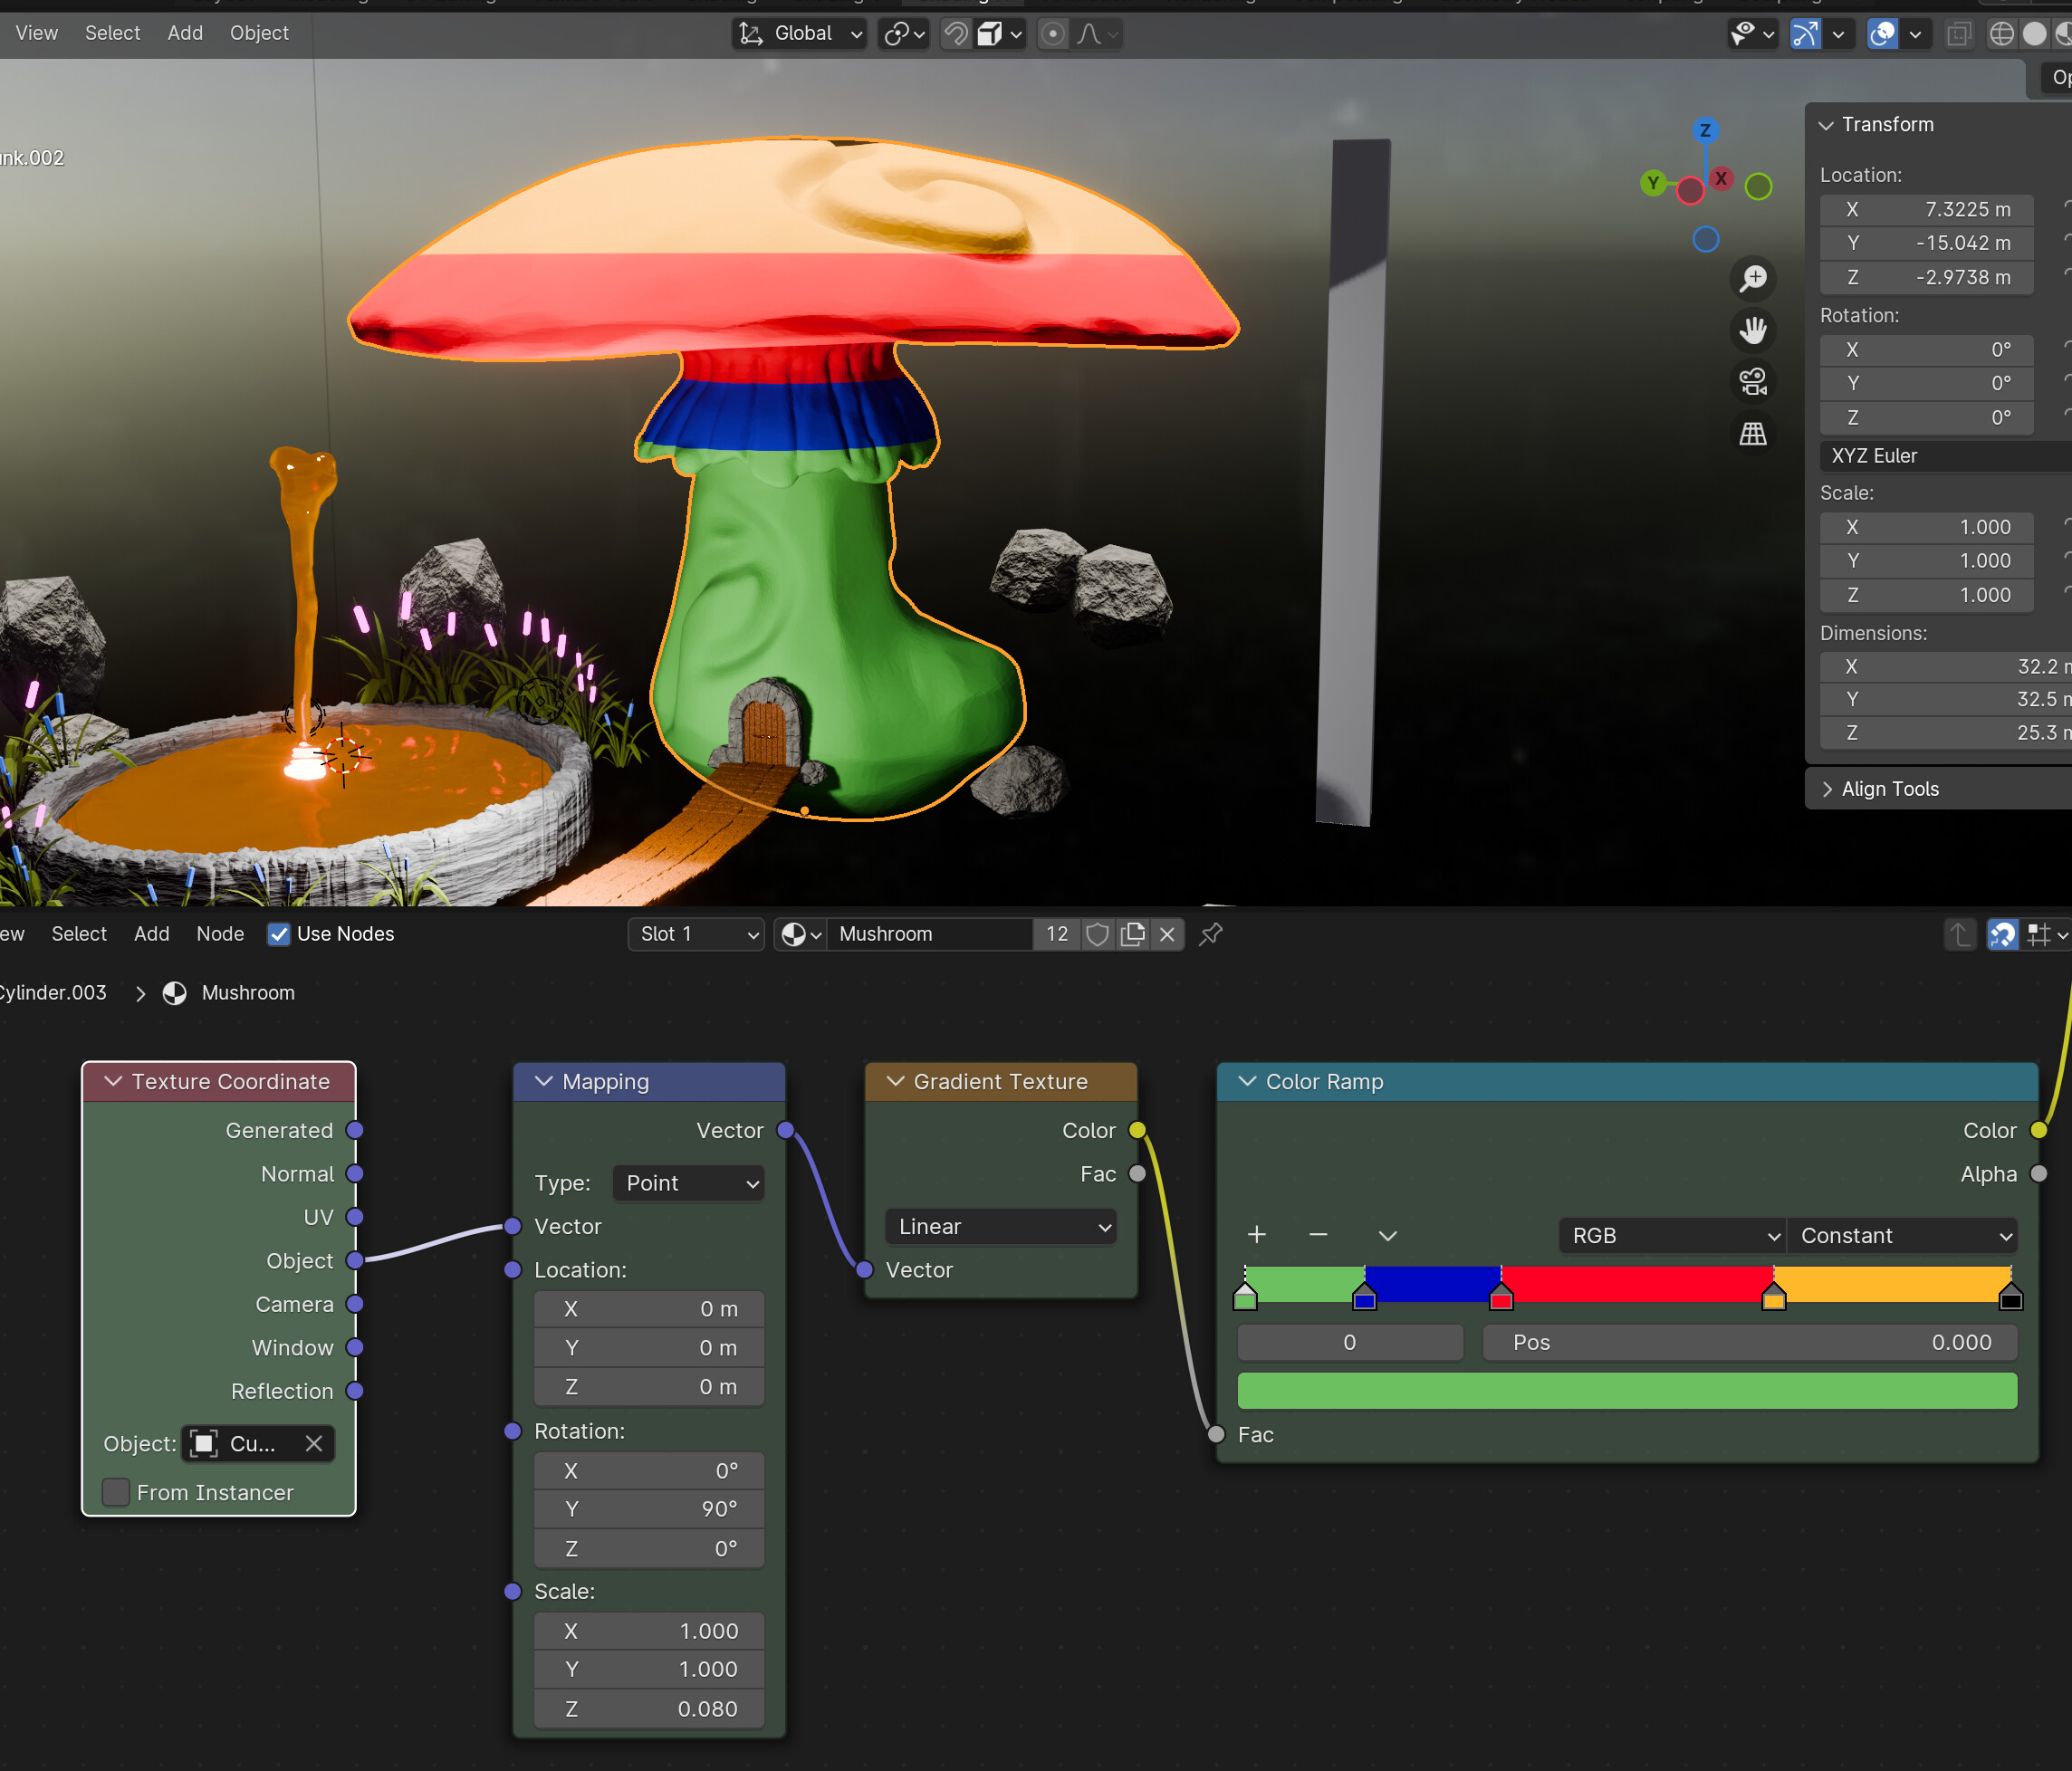
Odd. I rotated the mushroom in edit mode by 90deg. Then the texture was correct. In object mode I had to rotate it again, so the mushroom has the correct alignment. Applying the rotation in object mode Ctrl + a flipped it again.
Also centered the origin. nope.
However, …
Played around with the origin and scale again.
Even with a reference object, a cube with the same height as the mushroom, I have to scale it down along the z axis in the mapping node.
But I think this shouldn’t be necessary.
1 Like
The gradient is probably happening “above” or “below” your mesh. Try playing with the “Location” values in the mapping node to see if you can find it.
1 Like
Tried this, and it didn’t work.
1 Like
Is your mushroom roughly the same height as the mesh used in the tutorial you were watching? That seems like the most likely reason for a scale discrepancy. In my experience, the gradient texture always needs a scaling in the mapping node to distribute as I want on a mesh, so I don’t find this too strange a behavior.
2 Likes
I will keep this for now.
2 Likes
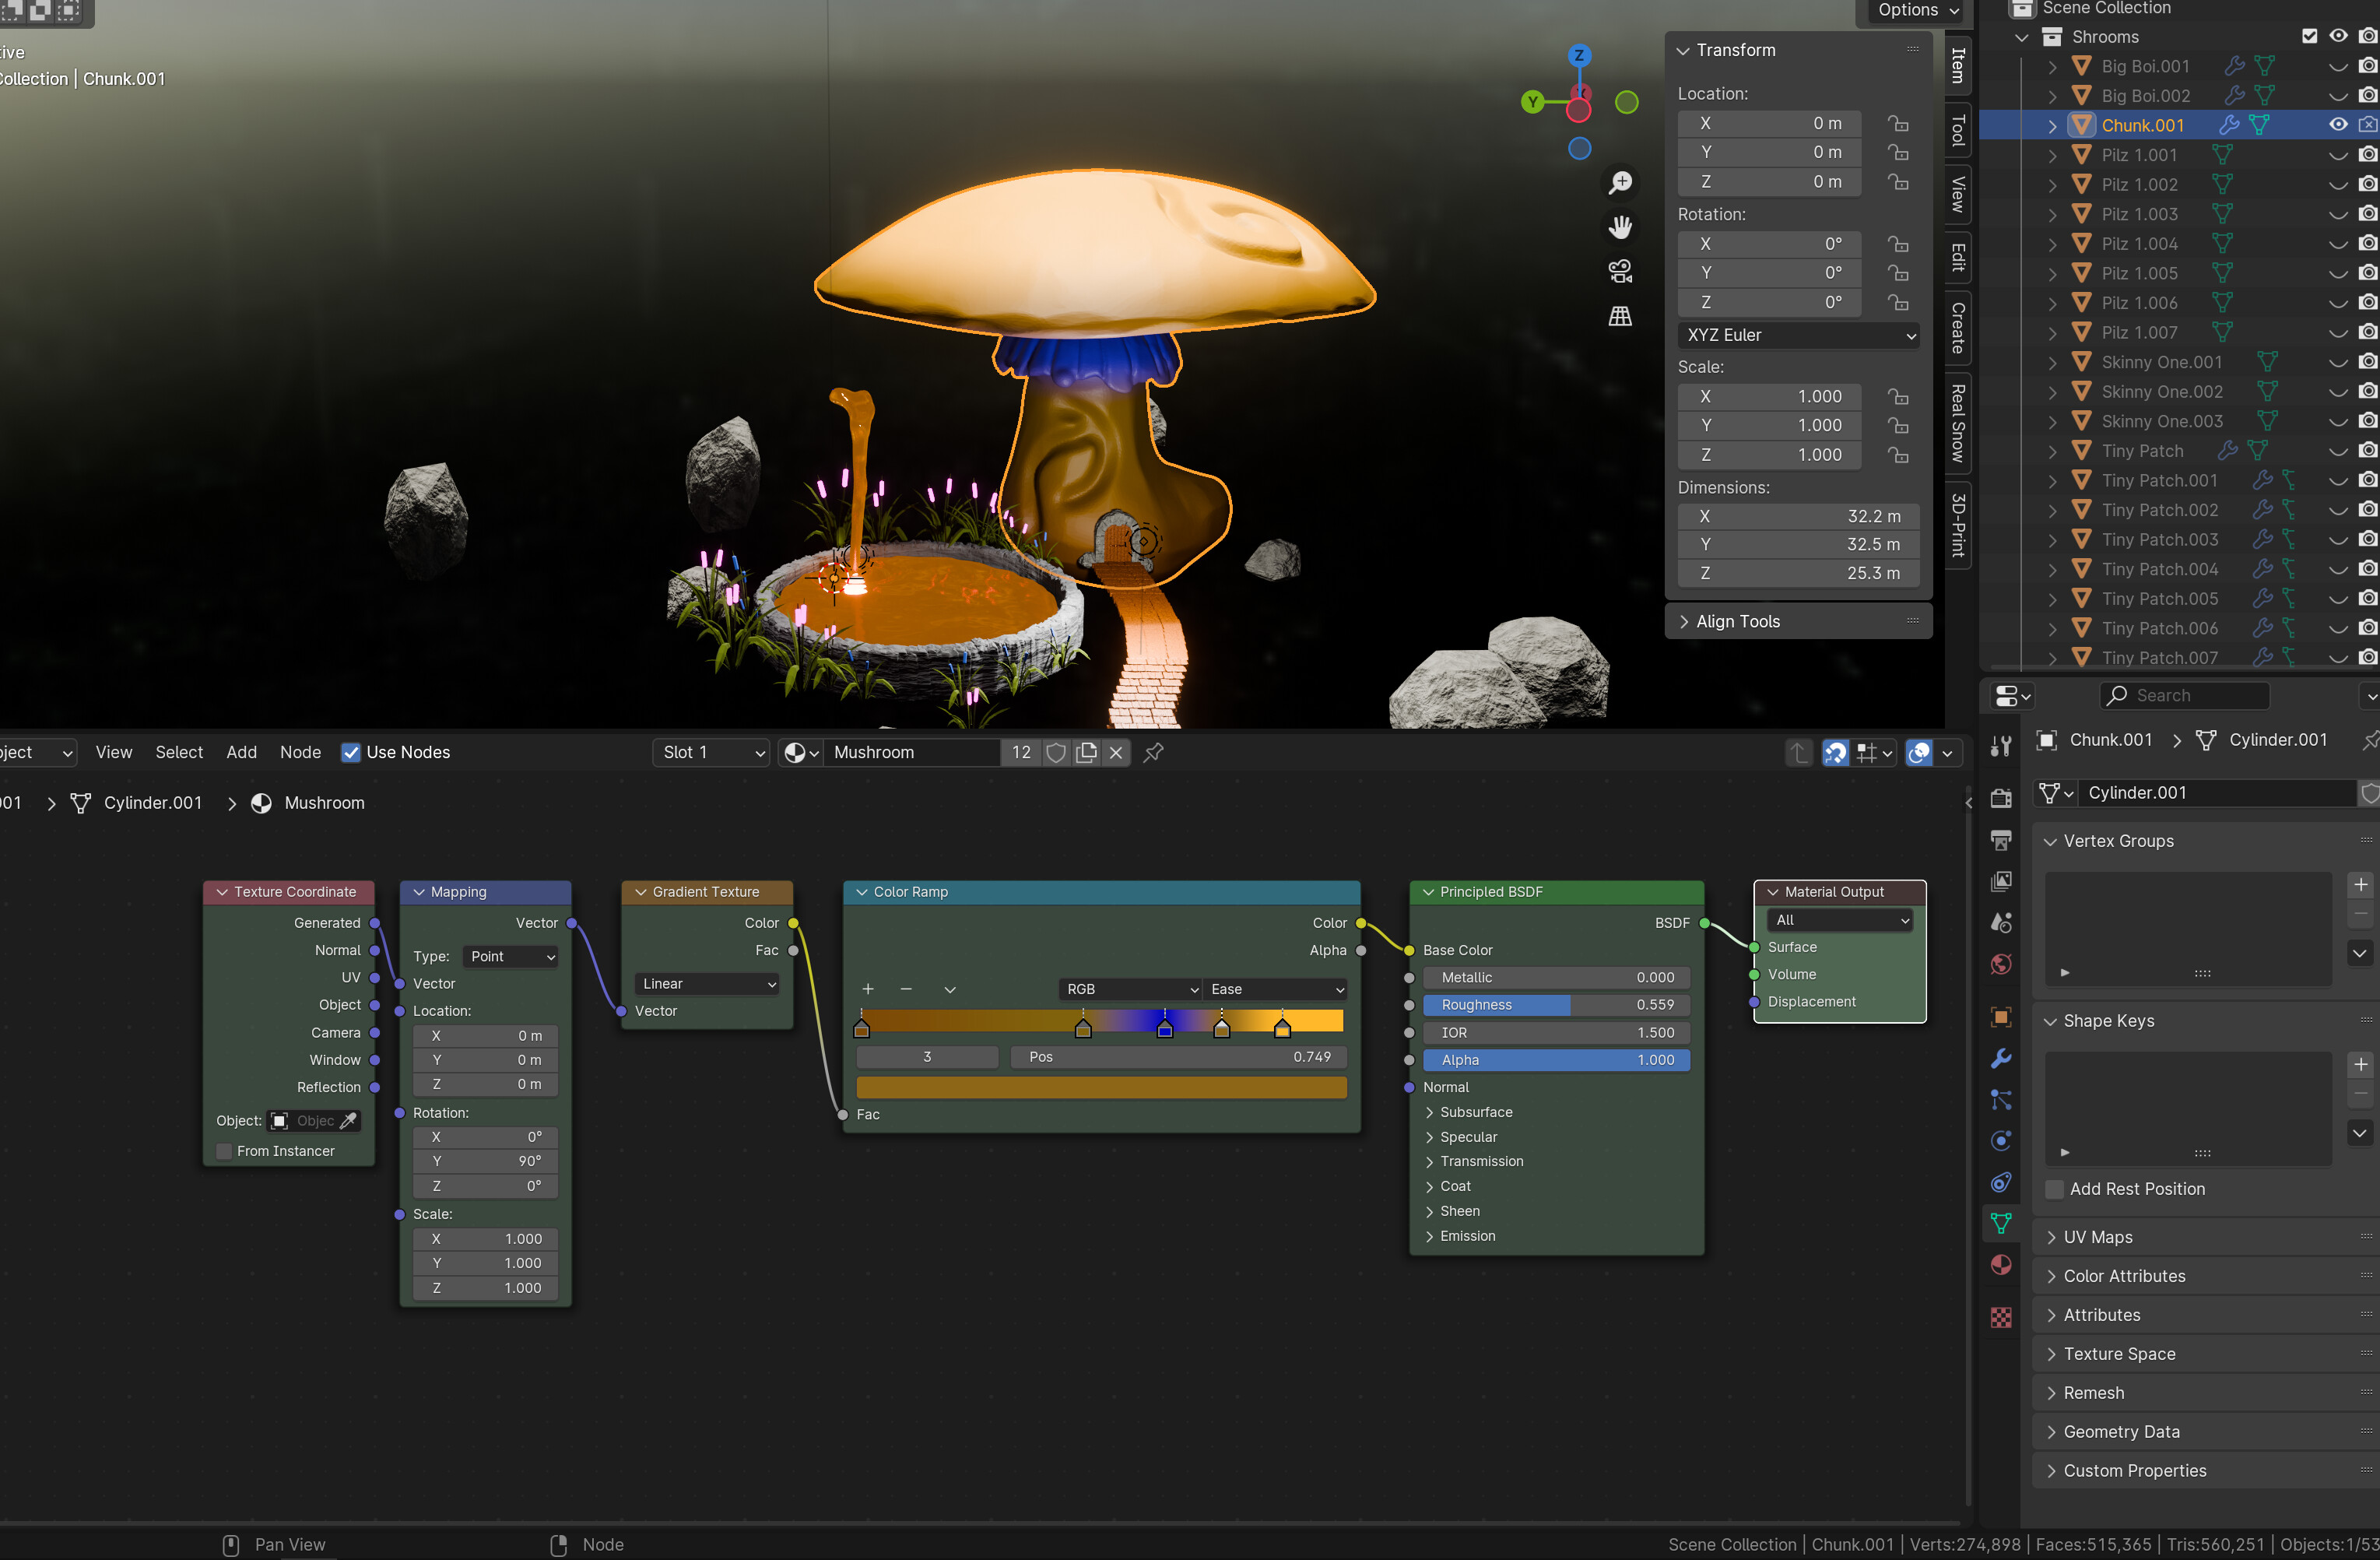
Ugh - works now. Still must rotate it by 90, but scale can stay at 1.
Reading the manual helps for sure…
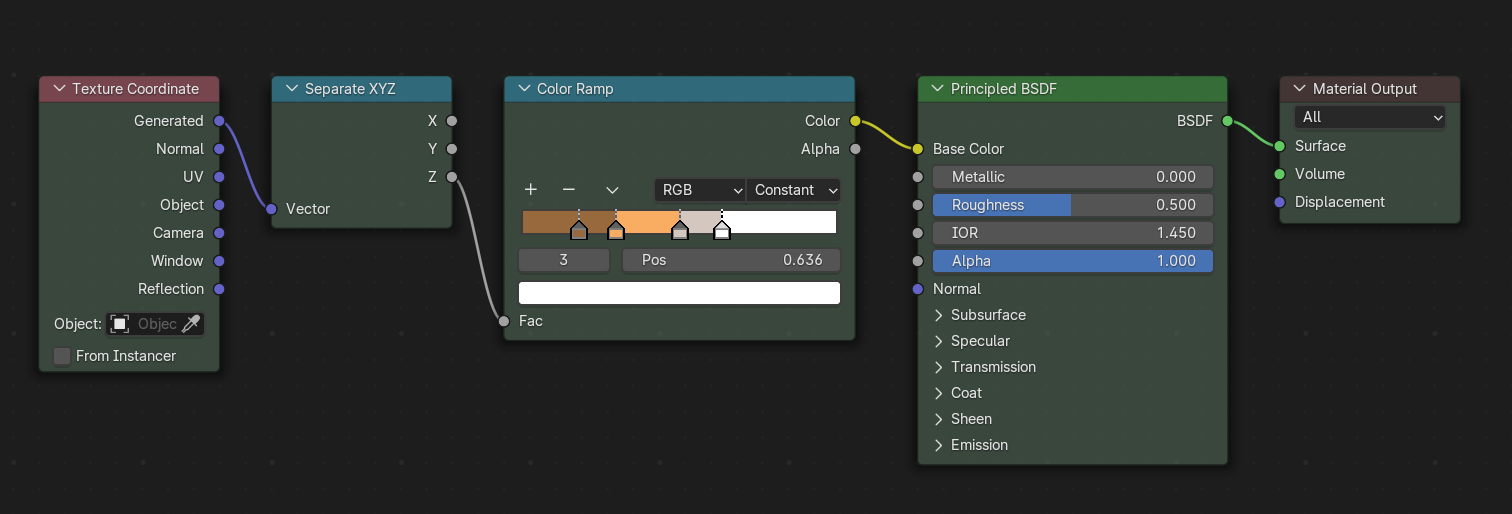
Generated
Automatically-generated texture coordinates from the vertex positions of the mesh without deformation, keeping them sticking to the surface under animation. Range from 0.0 to 1.0 over the bounding box of the undeformed mesh. See Texture Spaces for more information.
lol - Range from 0.0 to 1.0 over the bounding box - I tried to build this manually (see above). At least my thinking was on the right track.
I’m sure I tried Generated as input before, well, here we are.
Time to do the texture course then 
2 Likes
You give me an idea.
About the size, it shouldn’t matter since the texture coordinate node should pull the data from the used object and normalize it.
1 Like
For context, I just made a quick scene with a default cube, a default cube scaled by 2 with scale applied, and moved above the original. They have the same material (I did my best to freehand approximate your cutoff values in the color ramp from your last photo).
Note that the gradient is by default from left to right, and the ‘width’ of the gradient part absolutely depends on the ‘actual size’ of the mesh in question.
1 Like
Cool. Thank you for putting in the work to help. I love this community!
Funny, I did the same, fiddling around with a cube.
Generated is the way to go. See the solution.
Using Object doesn’t work.
Or you have to start fiddling around with the object’s origin and scale.
If rotating the texture by 90 deg is all that it takes, that’s fine with me.
2 Likes
Good that you found a way you like it. I believe the generated coordinates are based on the bounding box of the object (and scaled like a default cube would be if scaled to the bounding box of your mesh). It is a good way to go if you want it to scale with resizing your mesh. Object takes into account the actual size of things, so if you wanted the bottom foot of a room to look dusty, say, then you could use the object coordinates and a gradient scaled appropriately to mask things in a uniform way. If you’re doing it for a single mesh, it’s not likely to matter very much, but if you use the same material for several objects in a scene, then you should be more intentional about it.
Glad I could help 
2 Likes
Yes, it’s the bounding box (see my comment in the solution), and that is what I was after.
Not sure why in the video he got away with Object, without selecting an object. The manual says the selected object is used as reference to have data in the object output.
Object
Uses an object as a source for coordinates. Often used with an empty, this is an easy way to place a small image at a given point on the object. This object can also be animated, to move a texture around or through a surface.
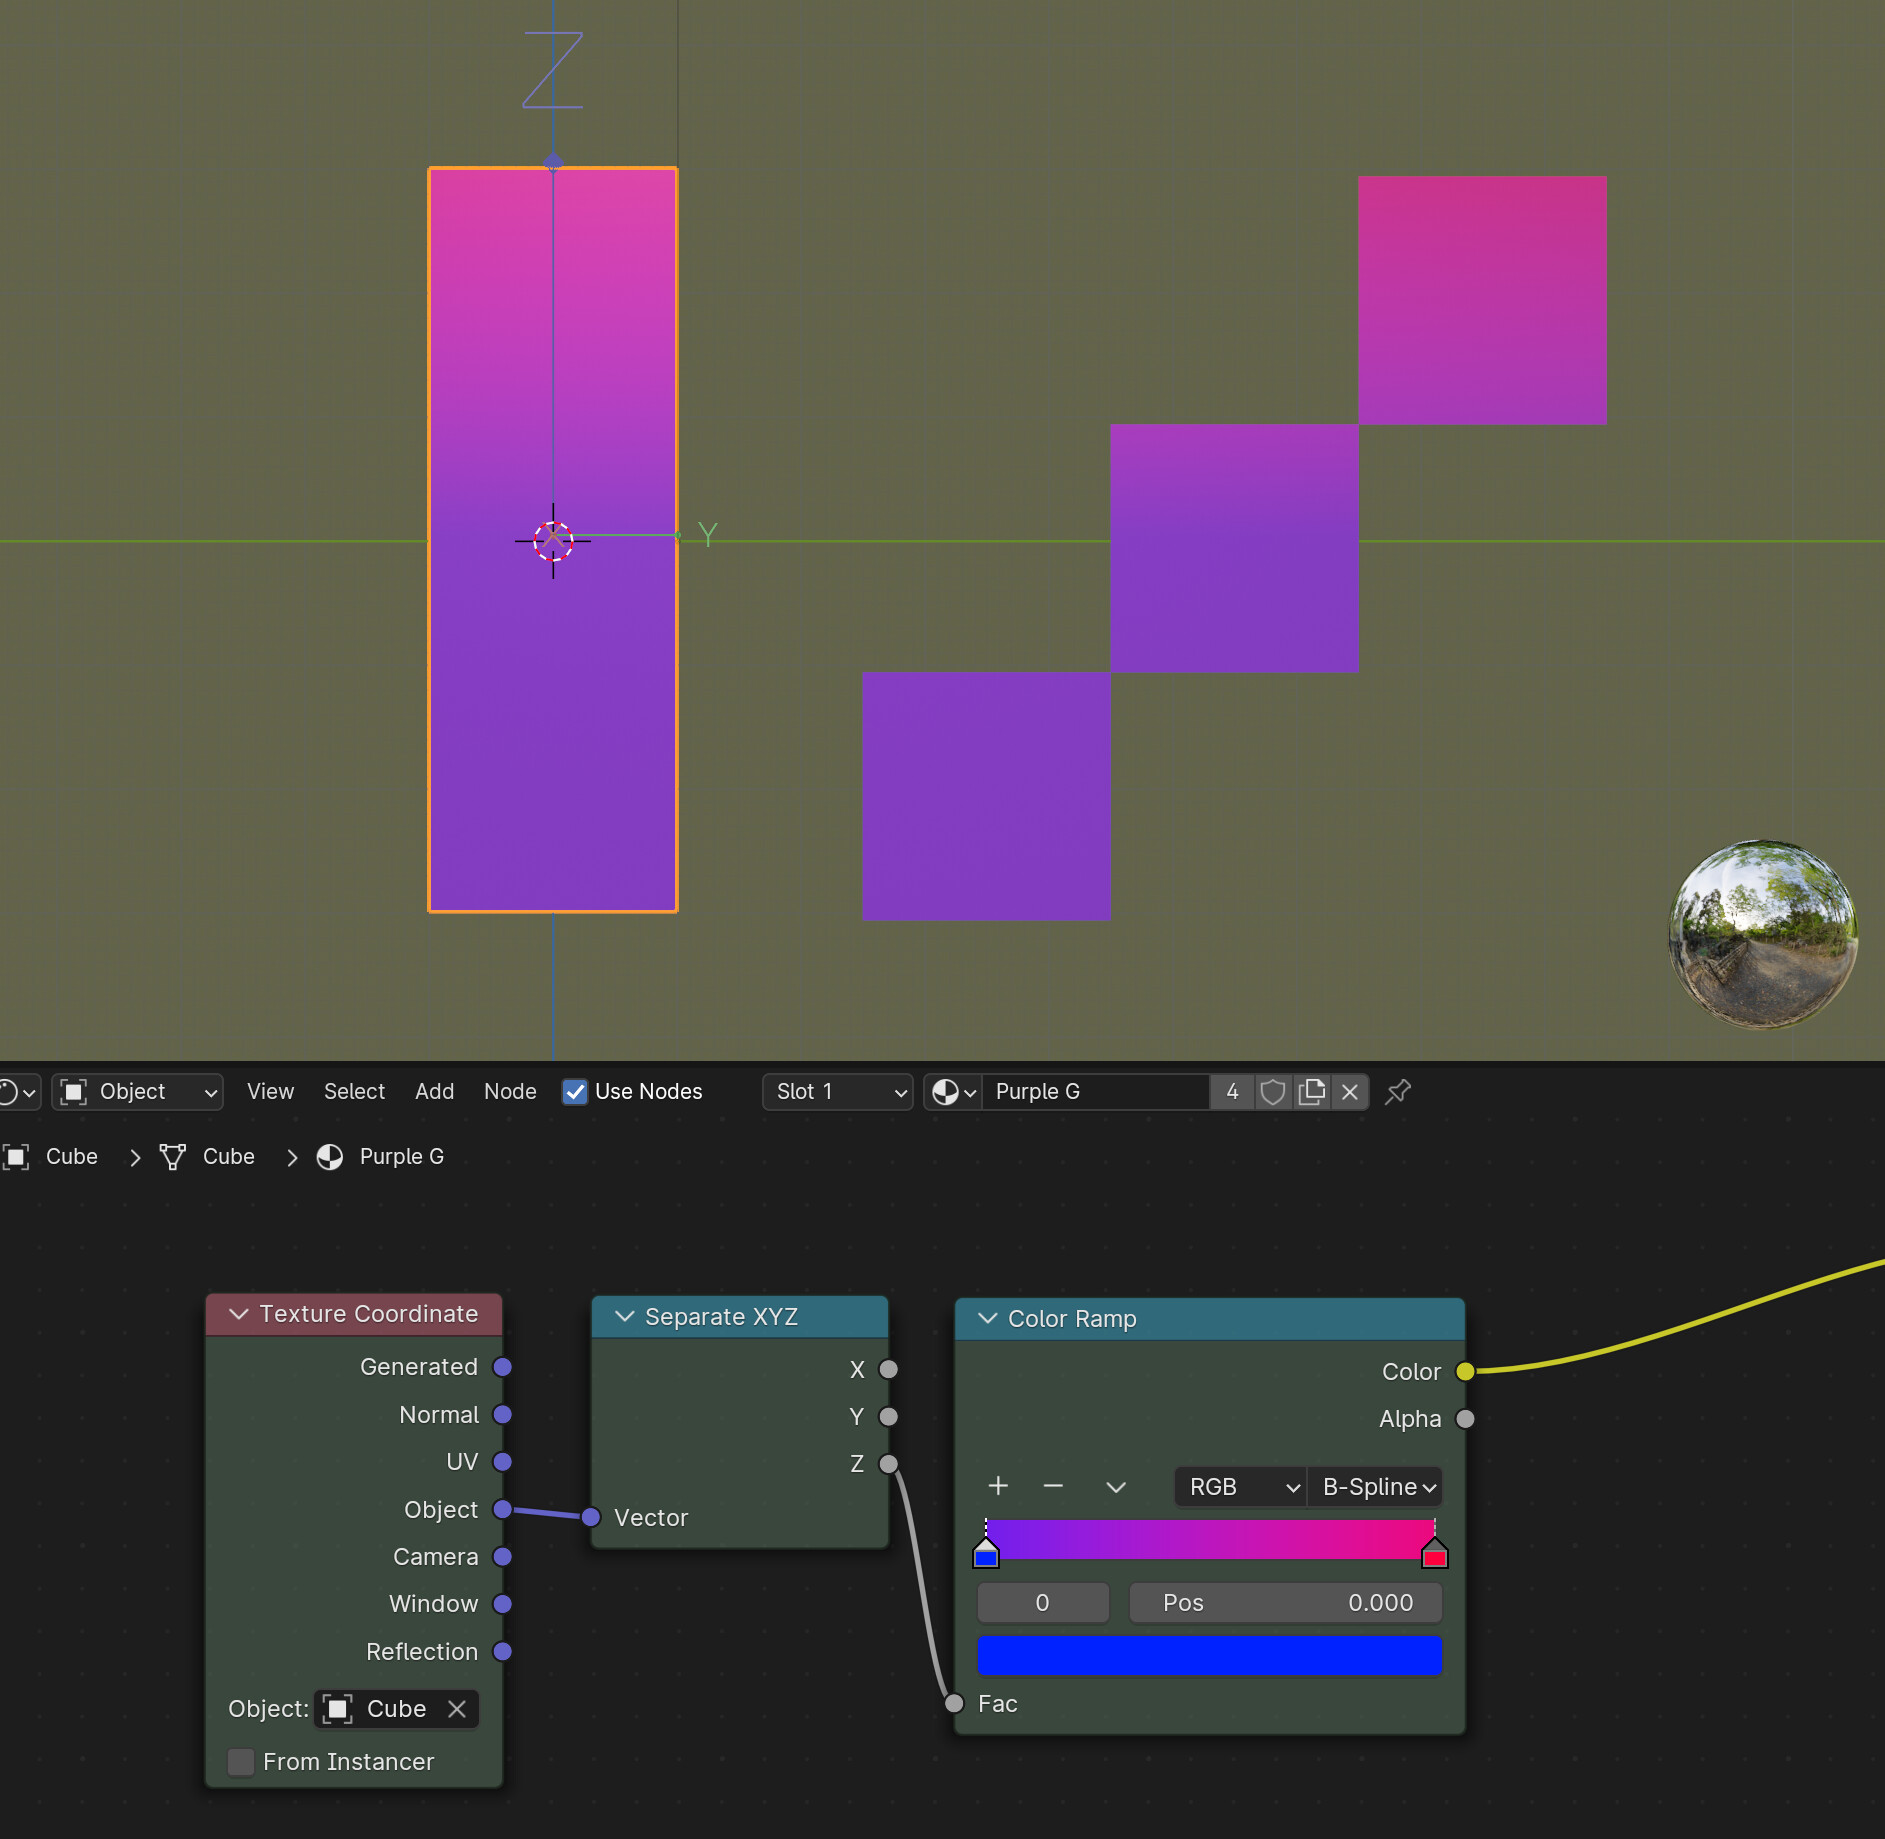
I had my run in with the color ramp a while ago, to better understand it I made this.
The three cubes use the same material as the rectangle. Moving the rectangle’s origin changes the gradient’s center.
3 Likes
If you don’t have an object selected, then Object coordinates will be based on the object origin for each mesh separately. Thus if you only have a single mesh with the material, having no object selected and having that object selected work the same way. If you do have multiple meshes and there is a particular object chosen in the coordinate node, then the texture coordinates are based on the object origin of the selected object.
One example of where you might want this behavior: imagine you have a shader that is supposed to be the cross section of some wood. If I were to, in real life, shave down a tree into a sculpture, then the surface would depend on exactly where in the tree I made my cuts, and how big my sculpture was.
If I had the appropriate shader set up on several meshes, having an object identified would have the effect of having cut the different meshes from different parts of the same tree (those in the middle would have the tree rings cylindrically cut from the middle, where as those farther away would look like the rings were mildly curved planes), whereas having no object identified would make it look like each mesh was cut out of the center of different trees with very similar ring structures.
Using generated coordinates would scale the grain of the wood according to the size of each object, which probably is not what you would want.
1 Like
I remember something
don’t you need to convert the vector into x,y,z coordinates and use the z-value?
I used, recently, something like this.
2 Likes
You are right. Grant mentioned this in the beginner course, in the dinosaur part, where he puts a gradient on the mountain and/or trees.
This is my node tree from the course
I used this node tree like you described recently too. My original post was to understand why it works in the YT video by CBaileyFilm. Usually, his tutorials work (Great channel, btw.).
My goal is to be aware of several ways to get the same or similar result.
2 Likes