Good evening, or maybe good morning, since it is almost 1AM over here. A week ago, I had a Problem with merging two objects after Retopology.
With a lot of Trial and Error I figured it out and carried on without any problems, but now it seems like my stupid decision to cut off the legs and remodel them has come back to haunt me.
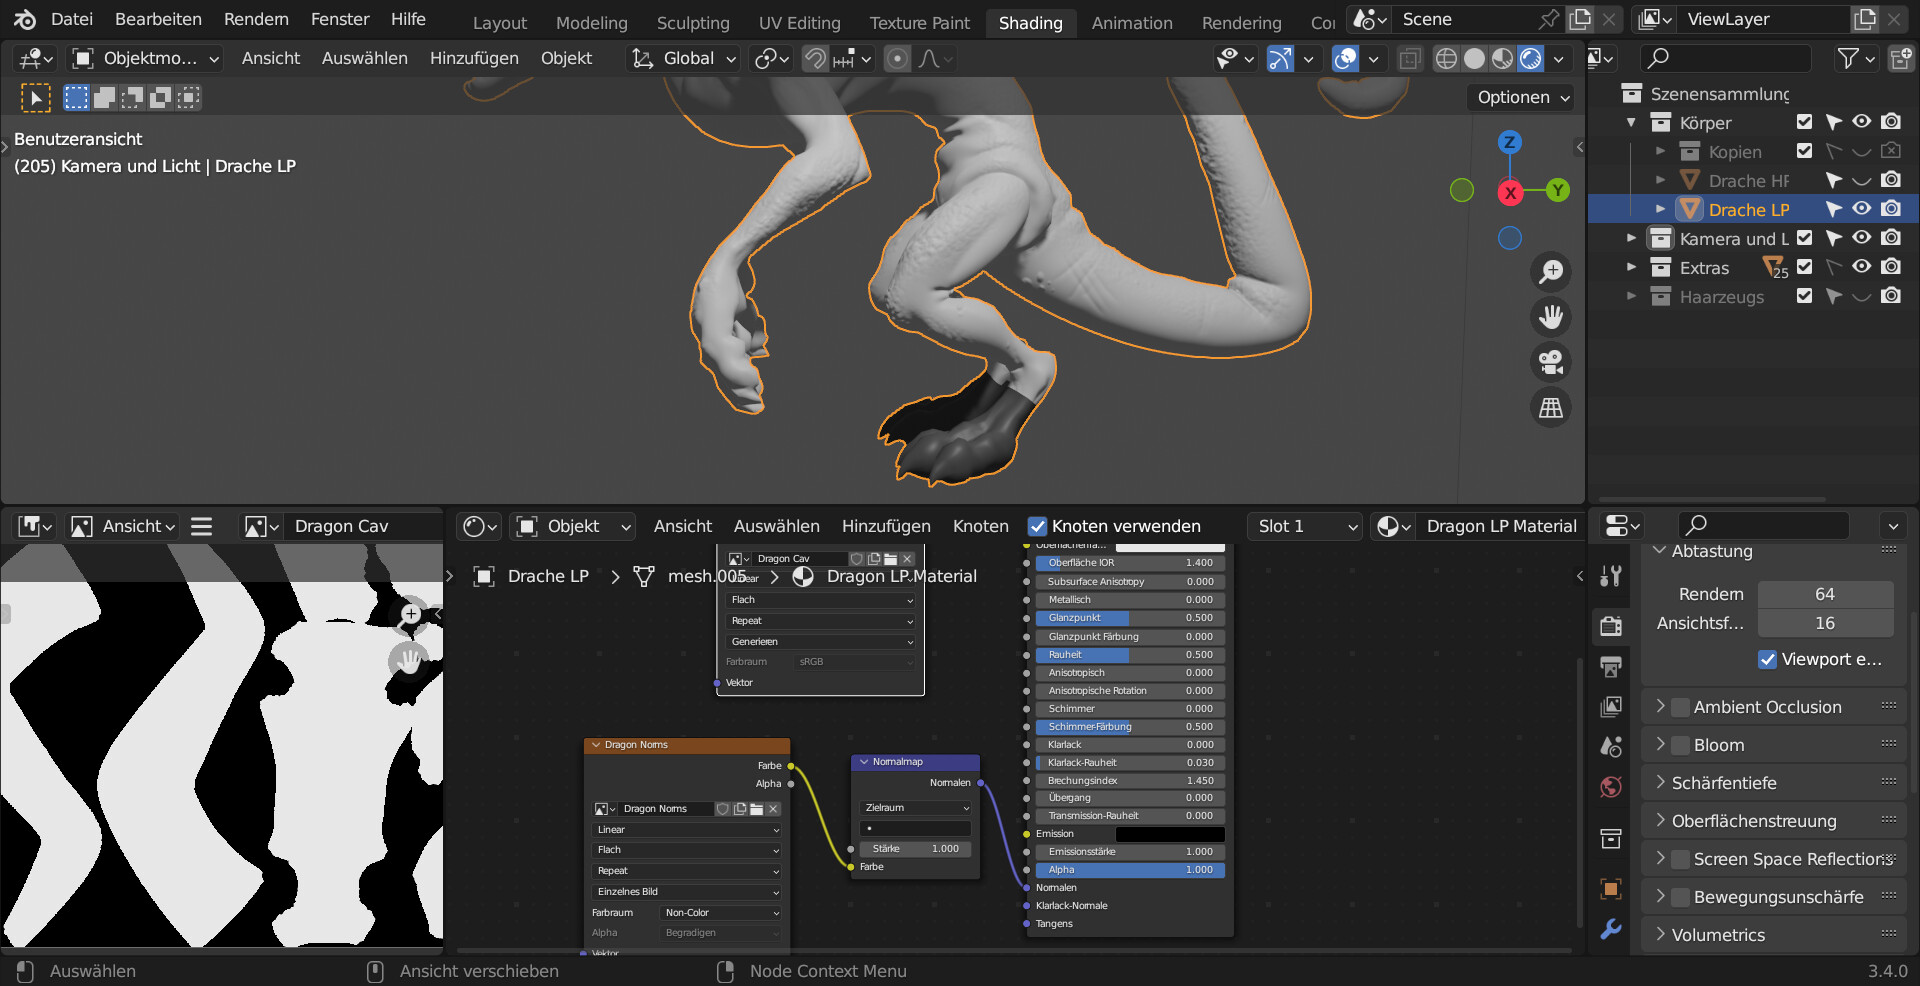
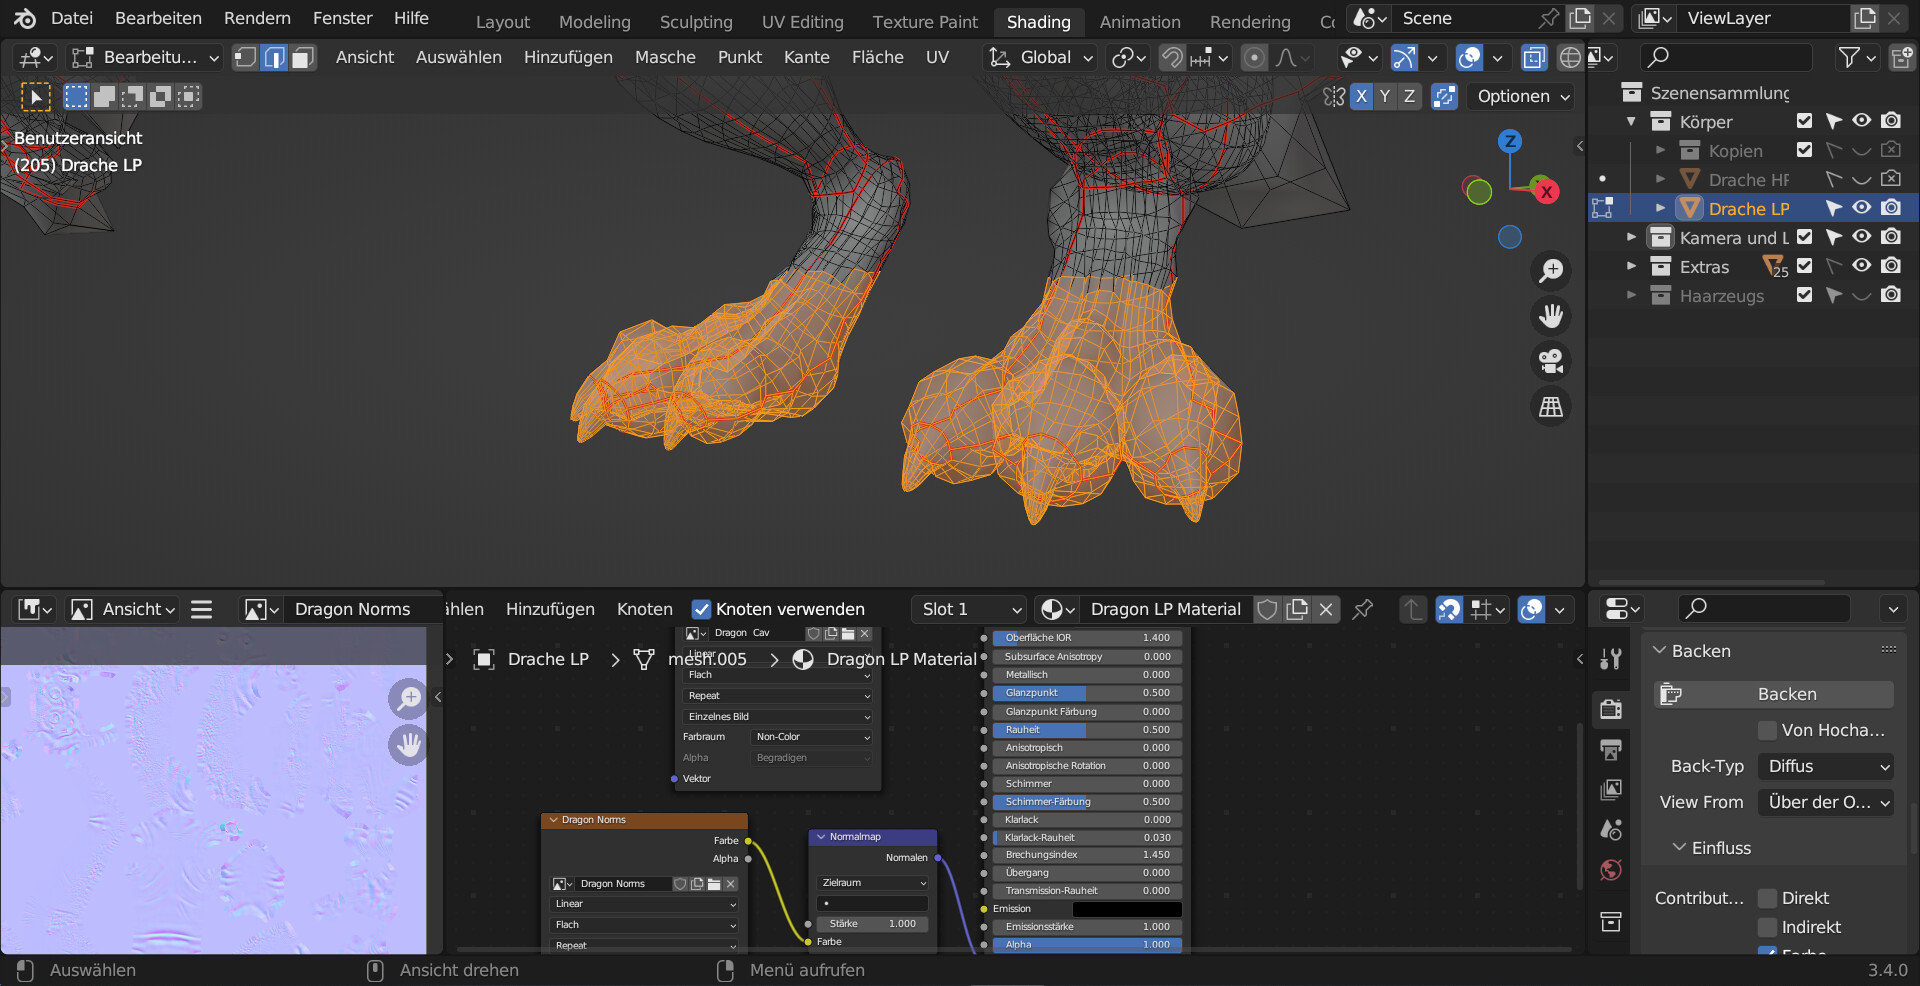
For some reason, the Normals Texture Baking only affects the part above the ankles and ColorRamp only affects the part below.
1 Like
I think you already know what’s going on unfortunately. Although the object outline goes cleanly all the way around the object, the topology is almost certainly not logically linked as a single mesh (ie if you press L to select linked topology in Edit Mode, the division will show up in the outlines).
I don’t know enough about baking and materials to say if there is a way to fix this problem without fixing the underlying mesh issue, but I think FedPete’s original idea of a Boolean Union is probably your best bet to avoid a remesh.
If that doesn’t work very well, I think you’ll just have to bite the bullet and do the remesh anyway, rebuilding whatever detail work gets lost (you can always make an incremental save first and use your current version as a reference), because then you’ll know for sure that this issue is behind you. A little painful right now maybe, but that feeling will pass, and your dragon will thank you in the end =)
1 Like
I tried around for a few hours, but couldn’t really find a solution. Boolean Union doesn’t work, unfortunately. I followed some Tutorials with different solutions, but it always stays the same.
But now I also wonder, how do I even remesh this?
Since there is the Multires Modifyer with all the details on it, I can’t just hit Shift+R or Strg+R.
1 Like
Are the materials all on the one mesh one object of the HP?
If it is the low poly that is two separate bits of mesh. Just hand delete a gap of verts between the two parts and connect them up normally, manually.
1 Like
That´s exactly what I did a week ago, when I remodeled the Legs. I sculped the legs, Retopology, Ctrl+J, manually connected them and then did the finer Details.
Or do you think it will go differently this time, when I delete a gap and then connect them again?
1 Like
No It appeared you ere selecting and it was acting as if they were still separate parts.
Have you checked the correct texture is ‘assigned’ to all of the mesh?
2 Likes
I’m unsure how to check that, unfortunately.
I mean, the baked texture does appear on the rest of the body, just not on the feet.
Would it be possible, that I put the Blender File here, so that you can take a look at it yourself?
I think NP5 is suggesting that if there are still two separate meshes, they might not both have the baked material assigned to them (in the Shading workspace).
1 Like
If you can upload it somewhere we can get it, that might be a way of seeing what is going on.
1 Like
Here is a link to the Zip Folder on Google Drive, I hope that works.
This should be the Version, before I started trying out different solutions.
Sorry, the file’s restricted on google drive. Uploading a cap because I know next to nothing about google drive, so I wouldn’t know what needs to be changed about access privileges on your end.

1 Like
I have no Idea how this works either, but maybe the Link will work this time. ^^;
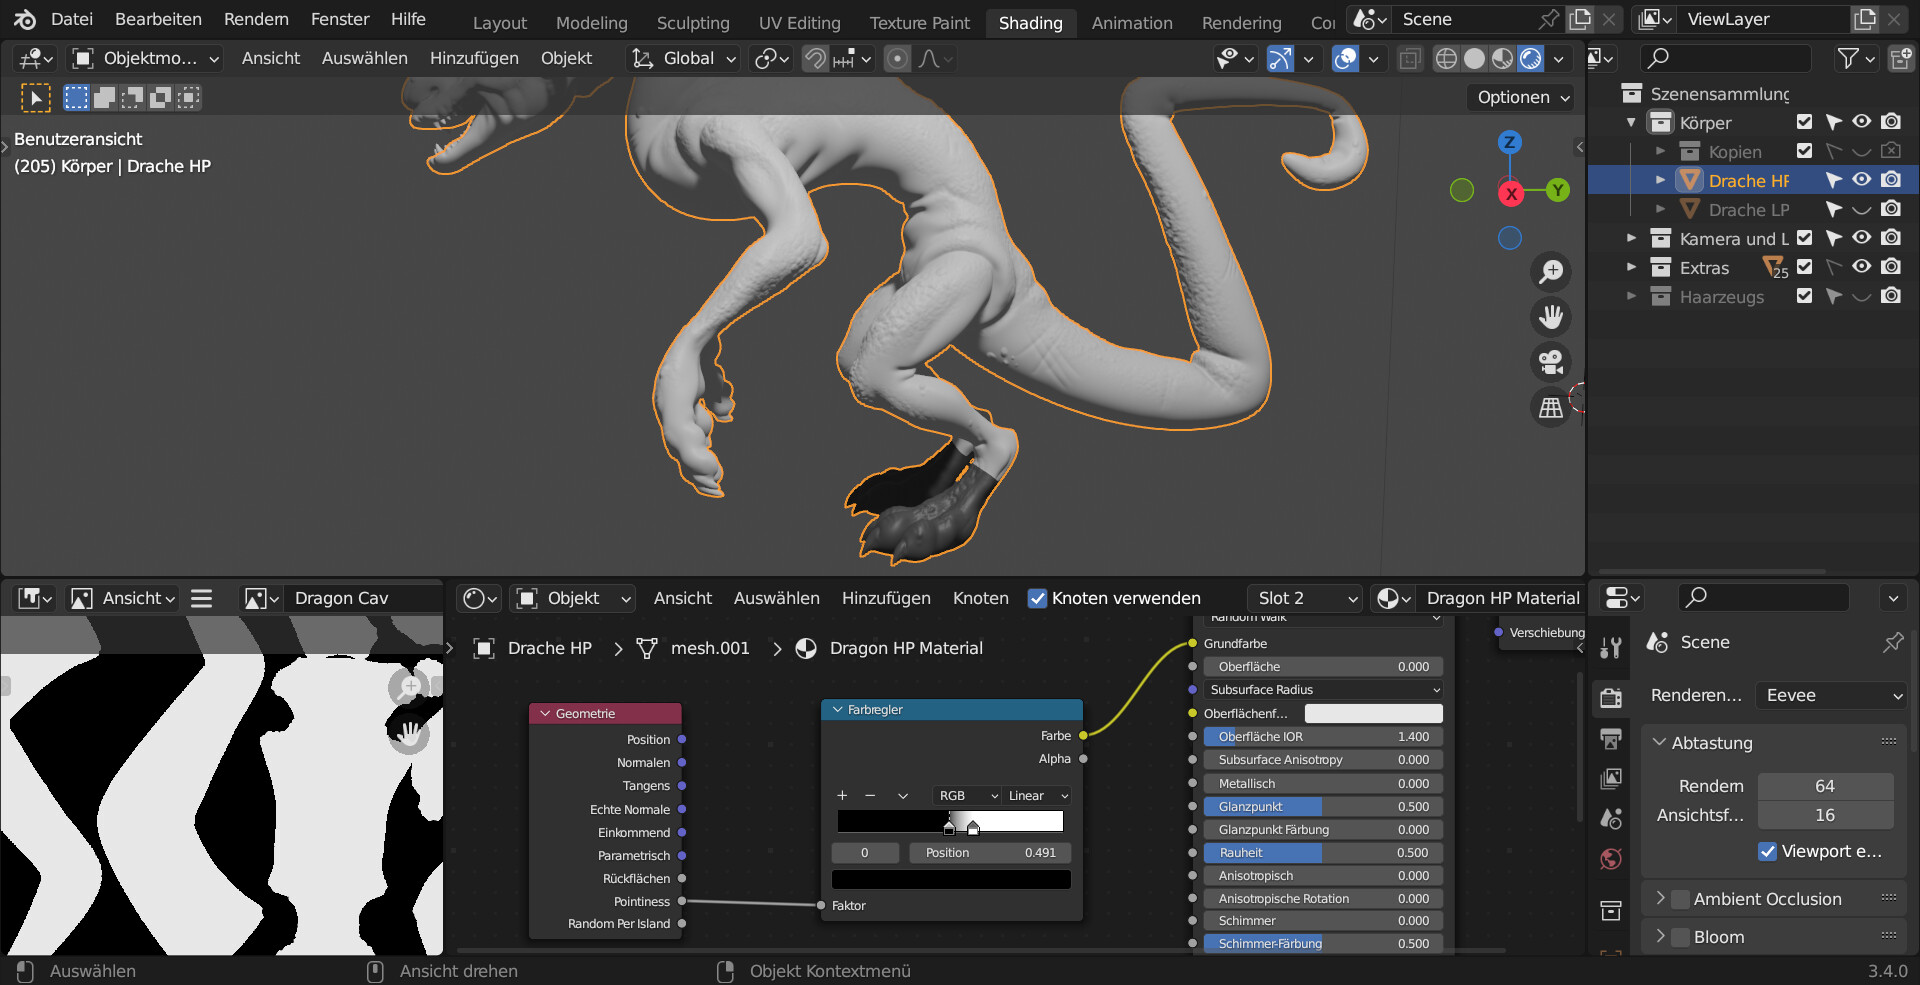
No worries, I got it this time. The good news is that it looks like your mesh is actually topologically linked, and this is true both for your HP and your LP meshes. It also looks like NP5’s suspicion was correct; where the entire body mesh is set to material slot 1 - Dragon HP Material, the feet are set to slot 2 - Dragon LP Material.
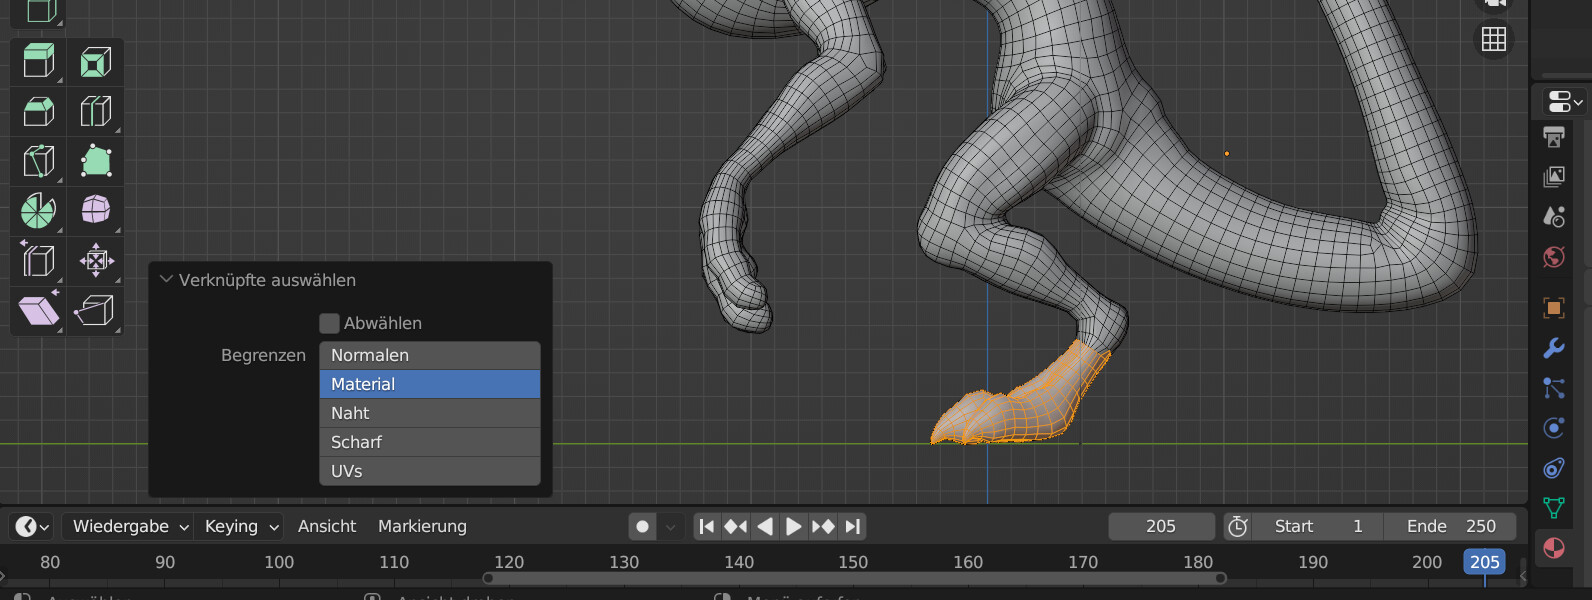
I was able to fix your file very quickly, but I don’t know how to send it back to you (and I may well have set the meshes to the wrong material anyway), so I’ll describe what I did instead. In Edit Mode, just box-select the feet while in X-Ray Mode or Wireframe Mode. Then, in the Shading workspace, assign them to use slot 1 instead of slot 2 (doesn’t matter if you include some of the ankle faces in the selection; they’re already slot 1, so nothing extra will happen). I did this with both the HP and LP objects. You can then change slot 1 to hold whatever material you wanted.
Looks great btw, something quite different from the “average” dragon =)
2 Likes
Ah, I understand what the problem is and how I should be able to fix it, but I can’t find a way to even see the feet using Slot 2. No matter how I select it, it always says slot 1. I wonder what I am missing.
Excellent! Then we’re further ahead.
I think the reason might be because your HP and LP models are right on top of each other - not accounting for that is the only way I was able to emulate this. There are two places where you can see exactly which model you have selected at any time, which I have circled here in “active object orange” =)
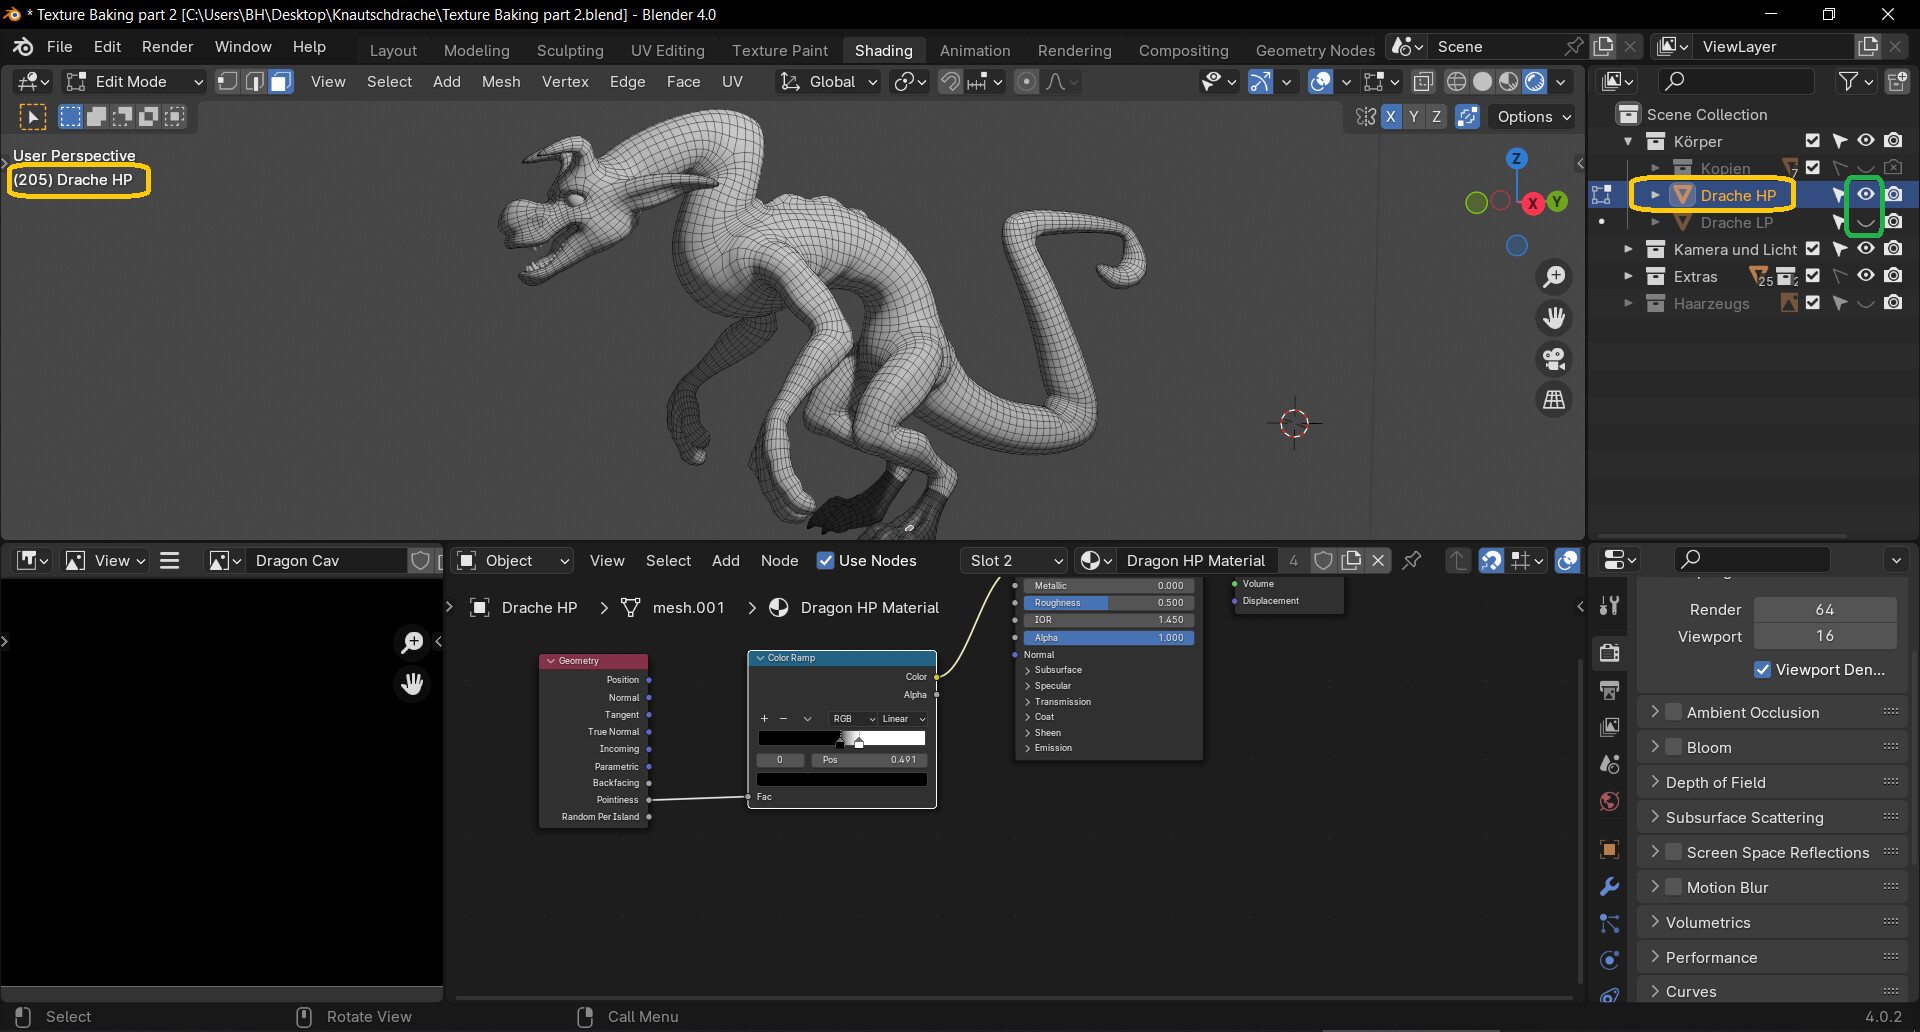
Try hiding one model in the Viewport and fixing the remaining model first, then hide that one and go back to the first model to fix that. I have circled the visibility icons in green to better demonstrate what I did. Here’s the material assignment I’m seeing in the Shading workspace (since the actual slot number doesn’t matter; the material does). Compare these findings to your own so you can confirm you’re getting your selections right:
- Drache LP in Object Mode: Dragon LP Material
- Drache LP in Edit Mode, with any non-foot topology selected: Dragon LP Material
- Drache LP in Edit Mode, with any foot topology selected: Dragon HP Material (that’s not a typo)
- ~
- Drache HP in Object Mode: Dragon HP Material
- Drache HP in Edit Mode, with any non-foot topology selected: Material.002
- Drache HP in Edit Mode, with any foot topology selected: Dragon HP Material
As you can see, the feet of both models are using different materials to their body counterparts, so both models need to be fixed.
Also, keep in mind that while you are in Edit Mode looking at one model, you cannot directly change the active object to be the other model (and of course, you can only see the material properties for the active object, so that’s important). This might have contributed to the confusion, so to change the active object, follow one of these methods once you have switched which model is visible in the Viewport:
- 1: Go back to Object Mode select the other model, then return to Edit Mode.
- 2: While still in Edit Mode, mouseover (not click) on the other model and press Alt + Q. You will see a flash on the screen when this works, and it’s a very handy shortcut, especially when sculpting with multiple meshes!
You should be able to see (at the locations I circled in the screenshot) that the selection has changed. This should be everything you need now =)
Sorry for the text wall, but it does no good to be unclear on my end!
1 Like
Now I feel even more stupid, because I followed your instructions several times, but it still doesn’t say Slot 2 for the LP feet part.
If not here, then where does it say Slot 2, and where do I change it then?
Don’t worry, we are all learning. I suspect this might be your first Blender course, because while this one covers things like baking (which I haven’t even explored yet), I don’t think it covers much about the underlying basics of how materials are configured in Blender. This sculpting course is actually an intermediate course as far as I’m aware, and the assumption is that you’ve completed the Blender Complete course or have some experience already.
Don’t get me wrong, you’ve obviously done well with it so far, it’s just that there are clearly some gaps in your foundational knowledge about materials. I’ll see if I can help with that, but I would also highly recommend you take Grant’s Blender Complete course. It’s exceptional.
Materials in a .blend file are saved totally independently of everything in the outliner. Any given object can have any number of material slots on it, and those slots are exactly that: empty slots. They hold a material, just like a variable in math holds a value. Also, just like a variable, you can change which material is held in that slot at any time, and this is usually easier than trying to re-select all of that topology again. You can even have the same material in multiple slots on the same object if you want, but there’s no benefit to doing that in normal situations.
Similarly, where an object can have multiple material slots, individual faces are assigned to exactly one slot, and this assignment to a slot is what dictates what material is displayed on that face. The slot number itself makes no difference - slot 1, slot 2, slot 50, who cares; what matters is which material is being held in that slot, and by extension, what faces are assigned to that slot.
Specifically in your situation, forget about whether it says slot 2 or not. Instead, think about what material needs to be showing, and assign the faces to the slot that you put that material in. I don’t own this course, so unfortunately I can’t tell you which materials to use, but I would imagine the entire Drache LP should be covered in the Dragon LP Material (your screenshot looks correct), and likewise for HP. I should probably also point out that your screenshot is still in X-Ray Mode, so to confirm that the material looks the way it should, you can turn that off.

- Yellow: Drache LP is selected
- Orange: LP material is assigned to the feet

- Red: It says slot 1. Ok, fine, so we will use slot 1 to hold the LP material
- Blue: If we’re going to use slot 1 for the feet, and we want the entire dragon to have the same material, then selecting any of these faces should also show slot 1. Except… don’t bother looking for slot 1, because if slot 5 was also holding the LP material, and these faces were set to slot 5, that would be fine! Unusual, sort of like a fraction of 6/4 that isn’t reduced to lowest terms yet, but the result is the same: 1 and a half.
I hope that helps to demystify this for you, not least because I’m not sure how else I could explain it if it doesn’t. Then all I could suggest is to let the Bob Ross of Blender (Grant) take over =)
You will get it fixed; you’re 98% of the way there already.
2 Likes
I actually have been working with Blender for quite some time already and most of what you wrote down I already know, I was just worried I would come over as rude if I said anything, since you put all this work into describing how to fix it. Also, I had hoped, that maybe you told me something I didn’t know yet, that could be the solution to my problem.
I always looked at the Material Names to see if it really used the right one, but for some reason I just called them Slot 1 or 2. I should have written the Material names in my Question, I’m sorry.
But now, after reading through your last message, I finally figured out what I did wrong all this time… I used Edge selecting Mode instead of Face selecting mode…that’s all it was…
Thank you for all your help, I was now able to assign the right Material to the right faces and the Texture baking went well too. Now I can finally start with Texture Painting. ^^;
2 Likes
It’s all good; I was wracking my brain trying to figure out what could possibly be missing on your end. I’m glad you got it working after all that; good luck! ^v^
2 Likes