Lose Screen Animation and Overlay

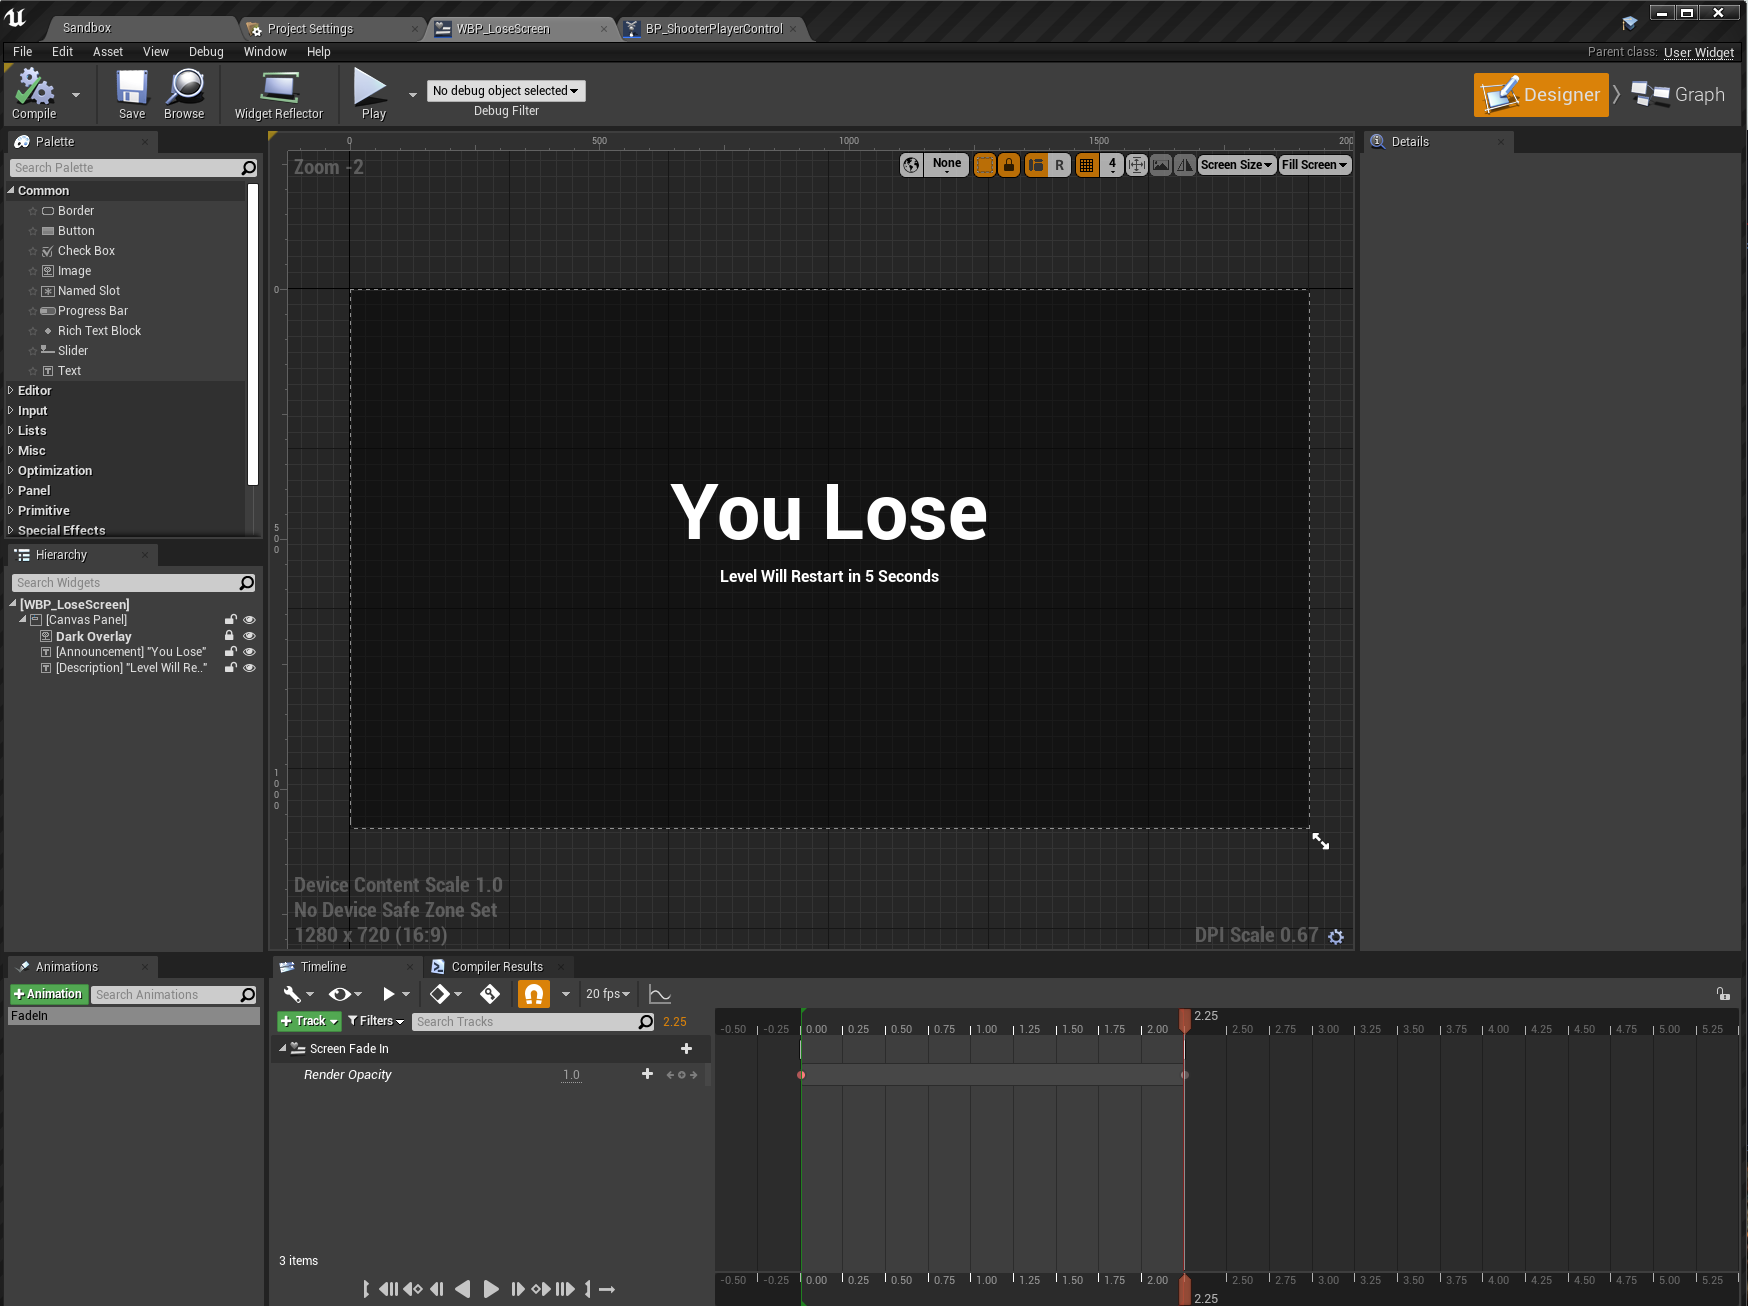
I took it upon myself to customize it a bit. Namely, I added an overlay to the background which took more time than I thought it would to figure out, but its actually really easy.

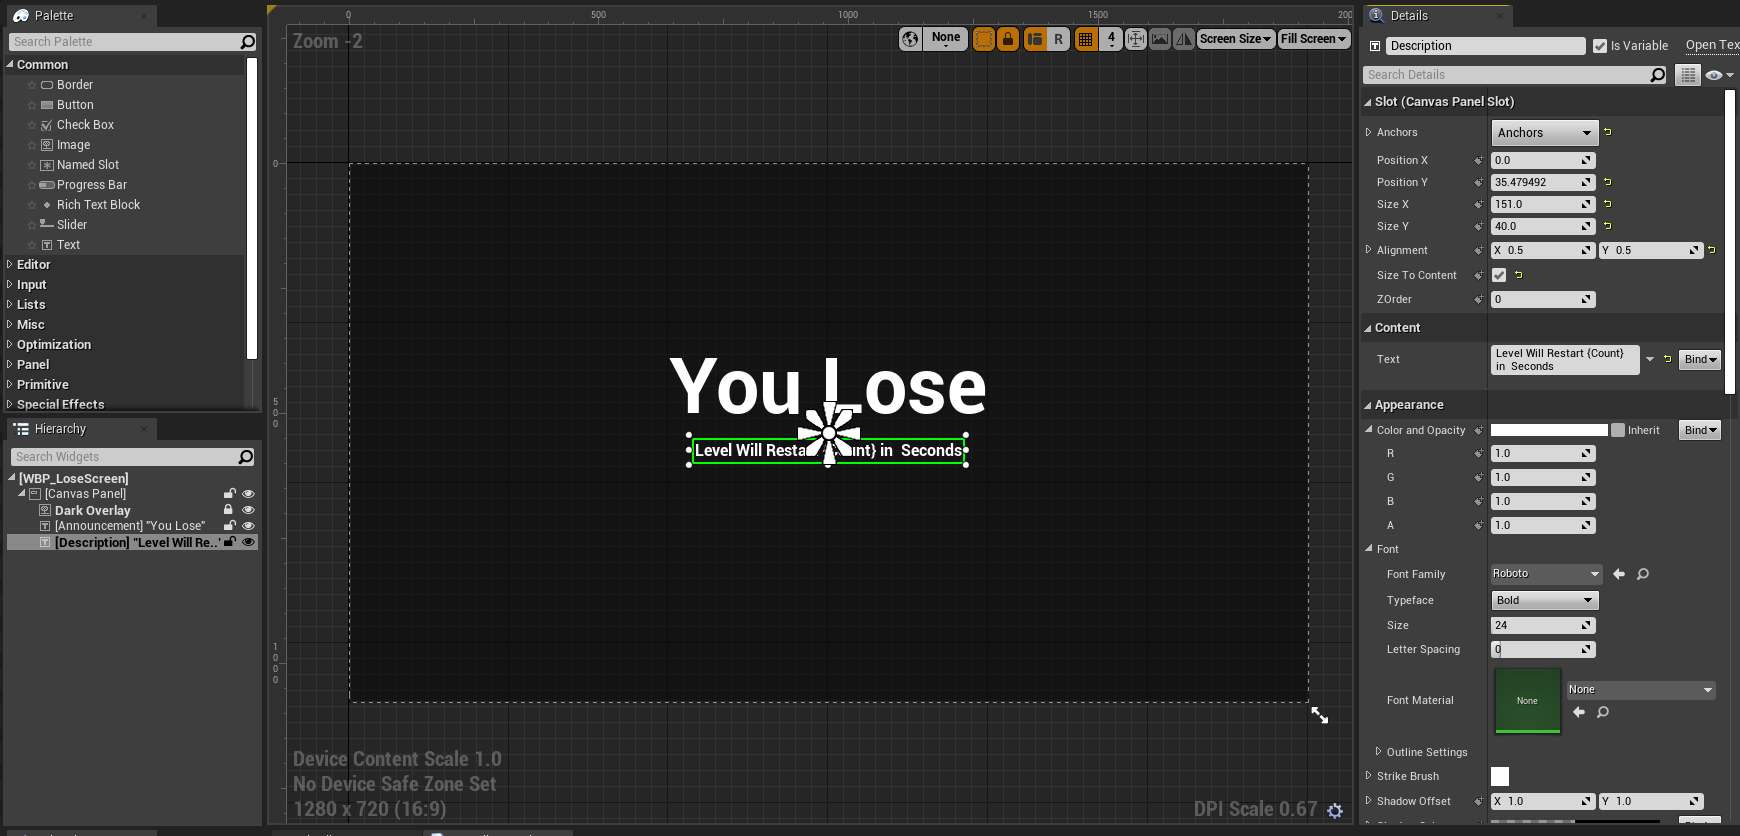
The image widget doesn’t have to have an image, and so you can pick just a color instead, which perfectly suits my purposes. I’m 100% against red text, sorry about that, so I just stuck with white for contrast and readability reasons and set the overlay to rgba(0, 0, 0, 0.5).

For text size, I wanted to emphasize that the player lost, so I set the Annnouncement font to 115 so that it’s obnoxiously larger than the default description text below it. Setting reader precedence in this way is important to UX, so a good rule of thumb is that the largest font takes precedence and then attention moves outwards from the last users point of attention (this probably has a name, but I’m winging this name), from left to right, and top to bottom, bright to dark, and moving to non-moving.

I made sure to place the Dark Overlay layer above the Announcement and Description layers so I don’t have to mess with ZOrder at all. For those that do want to mess with ZOrder, the higher ZOrder items comes to the front, and lower items are further back. Negative ZOrder will place an item behind its parent, which can be useful. I don’t know how this differs from z-index for web applications, so those are the basics. I’d imagine it works closer to ZTransforms for web apps than z-index though.

Dark Overlay is also has the anchors set to fill screen, and I set the offset for each side to 0 so that the overlay changes depending on screen size.

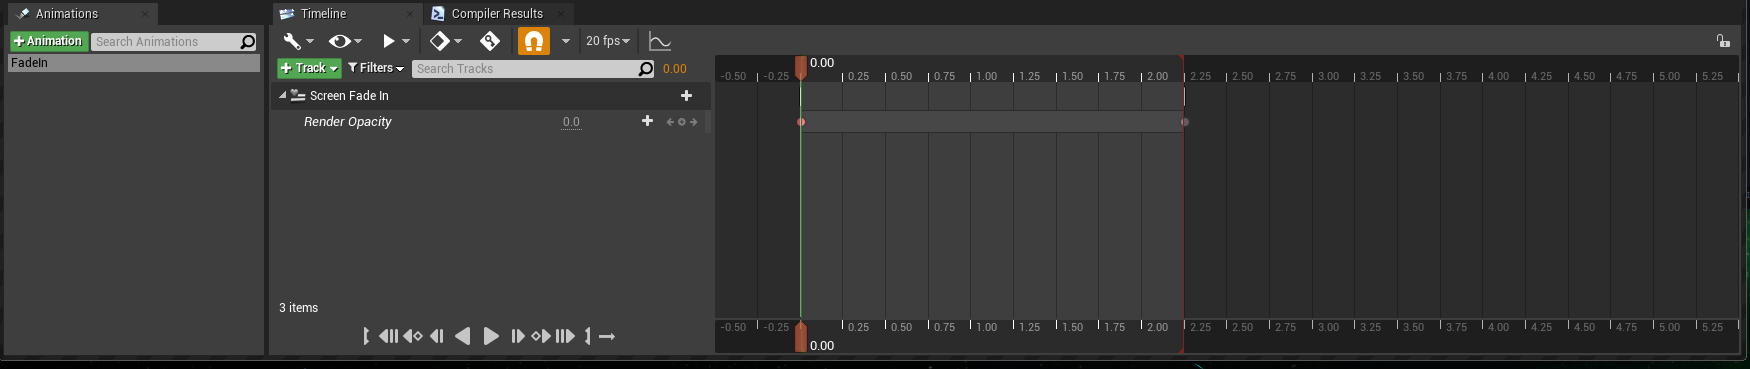
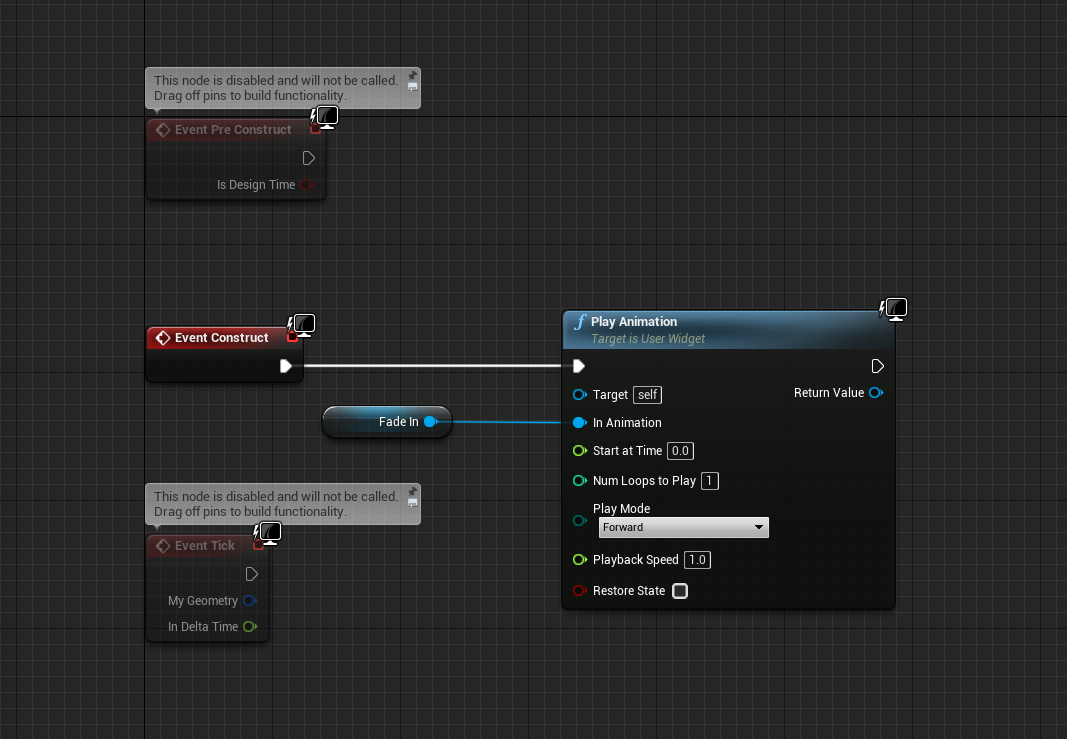
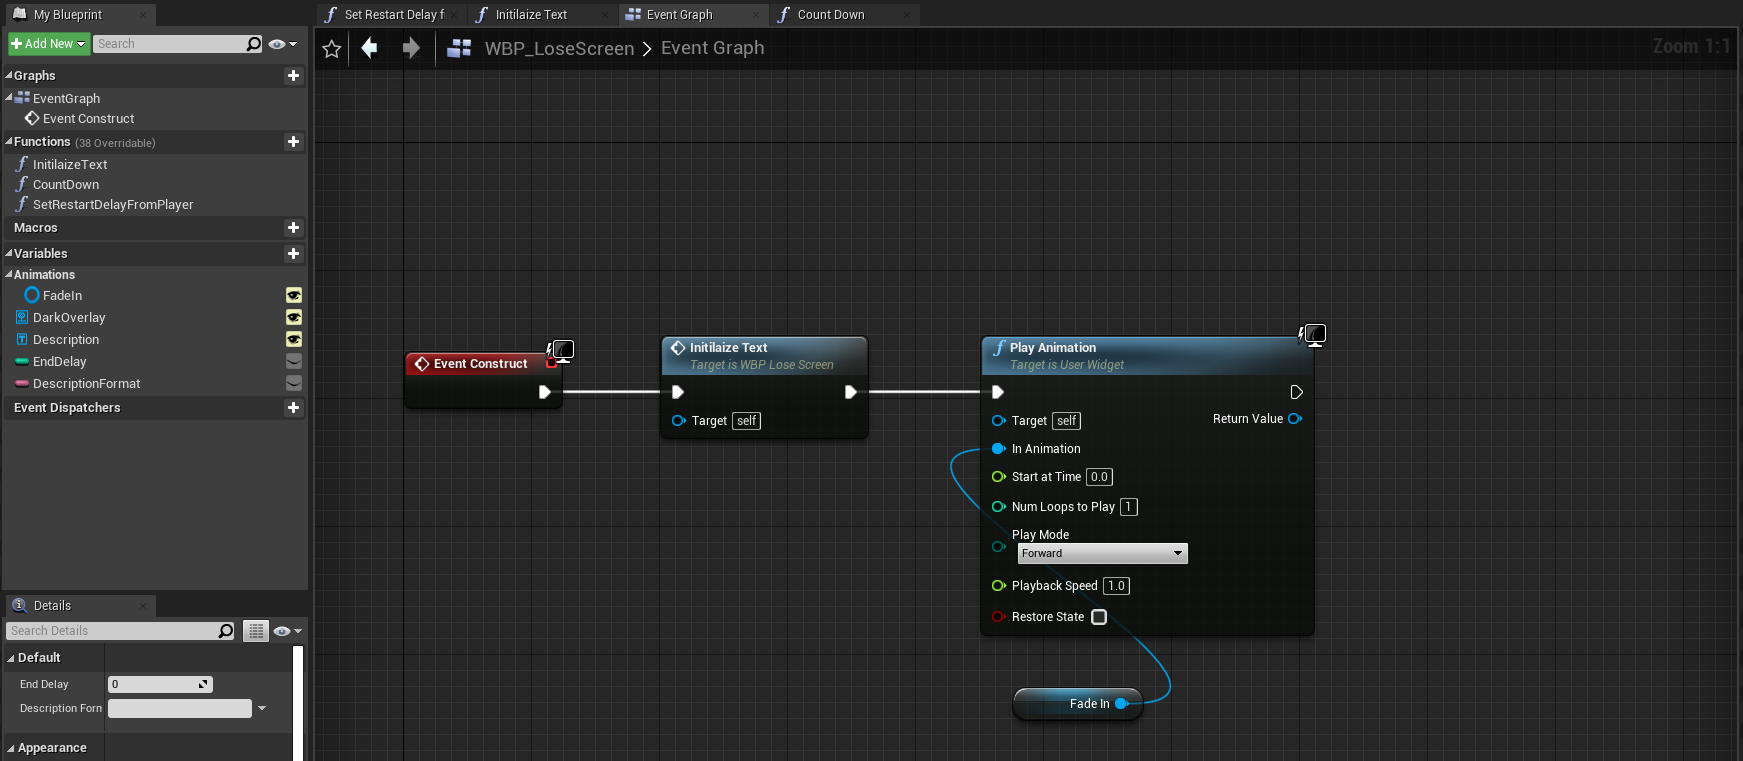
Then of course I wanted to add animations, which is actually pretty easy. Having the screen just pop in instantly isn’t as fun. I created an Animation named FadeIn, which can be named whatever you want under the animation panel, because the actual animation happens under Timeline. This panel is non-interactive, so it’ll be fine them however.

I then created a track for the entire canvas panel, because there is 0 reason to set these animations separately and tracked Render Opacity in the timeline. At 0 seconds, Render Opacity should be set to 0, and then at 2.25 seconds, Render Opacity should be set to 1. I went with something long reminiscent of other classical defeat screens like in Dark Souls or Grand Theft Auto. It Gives players time to process that they lost, and it kind of rubs it in as a form of Time based Death Penalty. You can almost hear the screen as it fades in.

Then I went into the event graph and added a PlayAnimation node set to the FadeIn Animation I created and that’s really it.

Sorry for the long commentary. As a web designer, UX is kind of my element.

1 Like

I took this a step further later due to this post:

Making the Lose Screen parametrized - Unreal Courses / Show - GameDev.tv

I figured that we could also implement the countdown feature from the previous lecture as well, but with quite a few changes. One thing is that I prefer to lean towards WISIWIG functionality, so my code varies in a few ways what we set up in Toon Tanks. I don’t like just saying TEXT in bold and then adjusting that, though that kind of widget has its uses. Personally, I prefer to have things lean towards something more visual, so this is what I’ve ended up with for Designer:

This is due to the discovery of a blueprint function called Format Text, which coming from web development, this is a god send for me. Basically format text lets you declare parts of a string that should contain a certain variable by surrounding that variable with handlebars in the text.

Of course we will have to plug everything in manually, but the text I’m working with is:

Level Will Restart in {Count} Seconds

Ignore what the screenshot says above, I noticed a typo as I added it.

After that I adjusted what I had from the event graph a bit and created a few new functions:

The first was Initialize Text named because I was trying to copy what we did in Toon Tanks. We want this to play before the animation starts.

The main purpose of this function is to take the text in the Description Widget, and set that to the Variable Description Format, while also calling the function that gets the Restart Delay from the player Controller. I actually noticed an issue with the function doing too much with this and refactored shortly after to call Restart Delay from the Event Graph instead of within Initialize Text, but the code above will work just fine. I’ve just refactored it since then.

So now it just sets the Description Format Variable from the Description Widget Text, and then Calls Countdown, which makes more sense.

Set Restart Delay From Player just casts from PlayerController0 to grab the restart delay then sets that to the End Delay variable.

I Adjusted a few things within CountDown where it differs from Toon Tanks as you might see from below.

I got rid of the branch that removes the UI because the entire game restarts at the very end anyway, so there’s no reason to manually remove it which means we get rid of the branch.

Then we Target the Description Box, and set the contents based off of the Format Text function after we feed it the DescriptionFormat, and EndDelay variables. Then we Decrement EndDelay and set that new value to EndDelay, which you don’t need to do because that was in there while I was troubleshooting, so just ignore that even exists.

After that just use Call Timer by Function Name to call the CountDown function again, and set the interval time to 1.0.

Then you press play, and enjoy what took me a bit too long to figure out.

There’s probably a few more ways to refactor this code, but I’m definitely happy with it now.

1 Like

Privacy & Terms