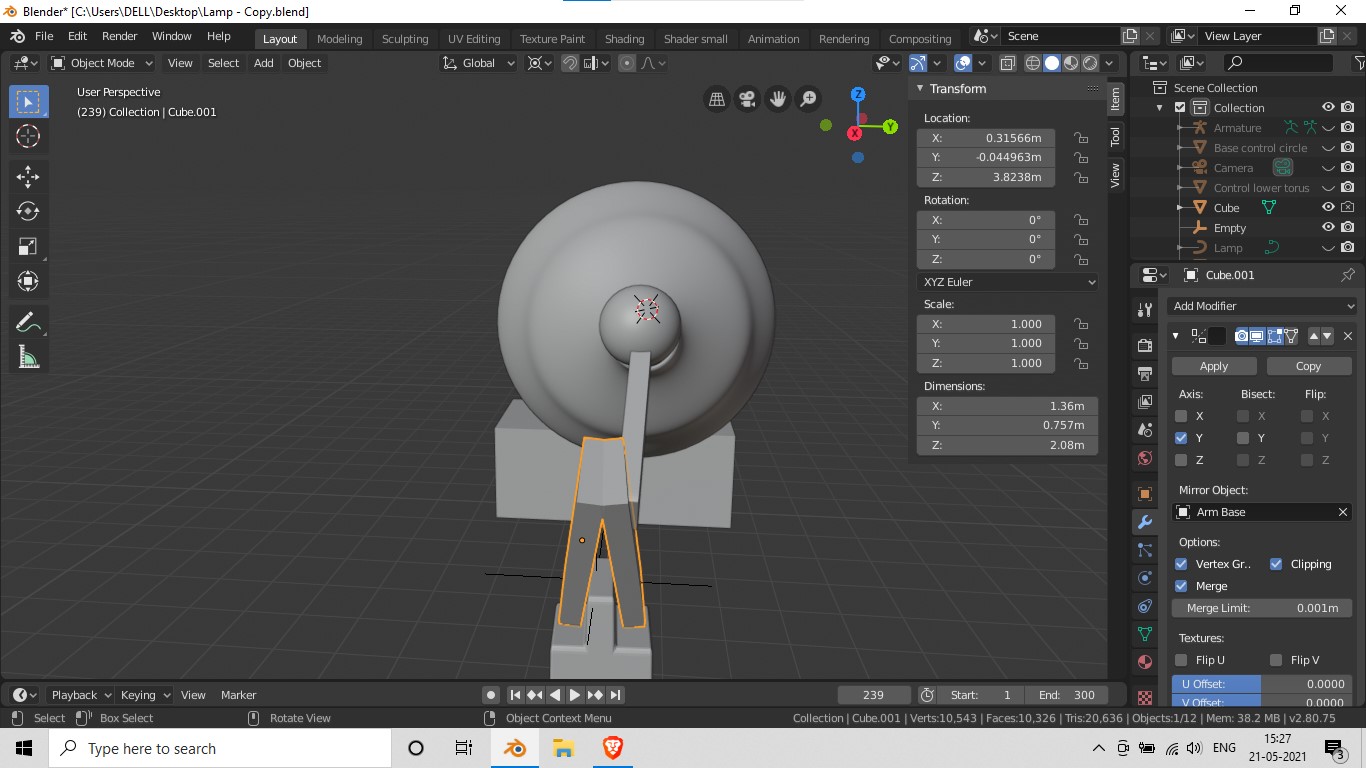
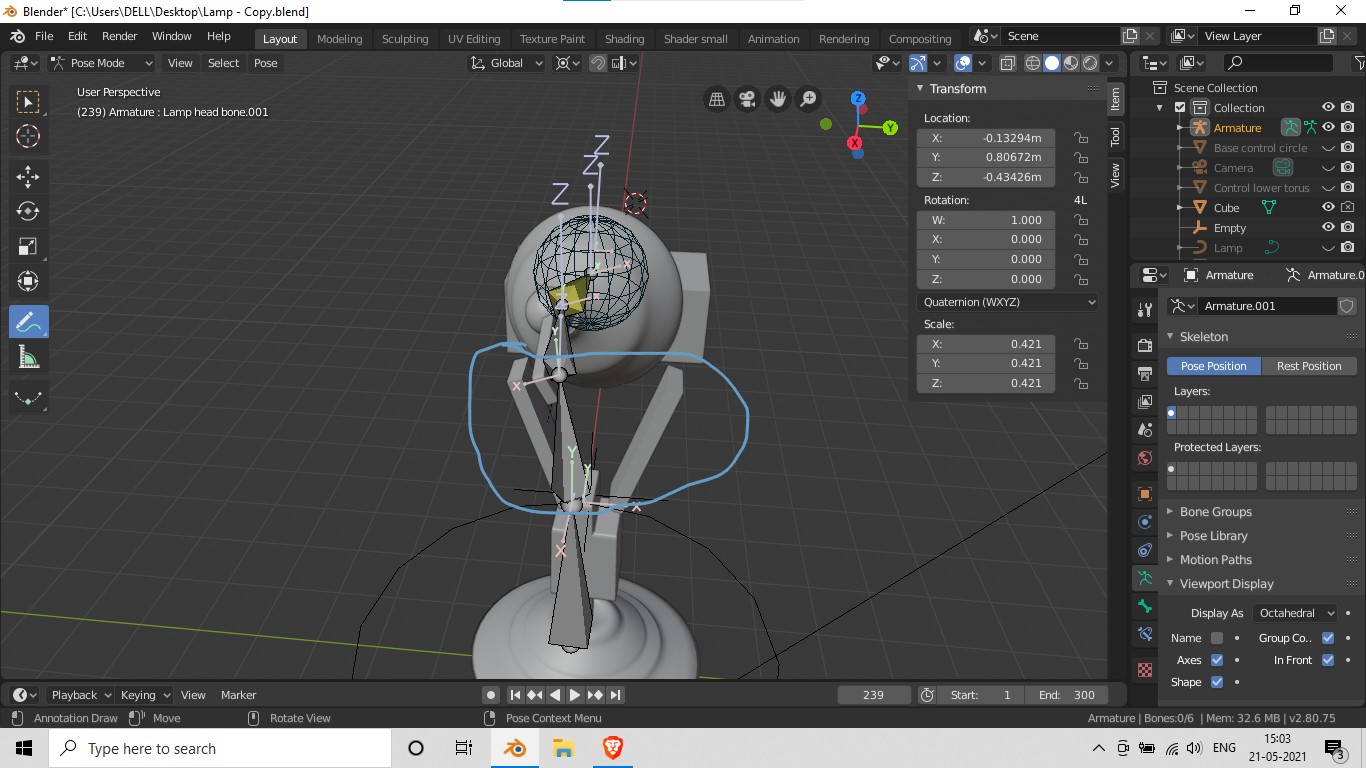
I have created the lamp armatures and control bones as well. When I am moving and checking the control bones in pose mode, lower arm bones (created with mirror modifier) are going in different directions. I have tried again by making the arms, armatures and control bones again from zero but still the error is same. I have even tried by selecting base stem and empty as objects in mirror modifier but none is working. I have asked this question in the my udemy course 3 times but nothing is working. Really stuck and frustrated. Please help.
Apply the mirror modifier.
1 Like
Can you find a solution here?
https://community.gamedev.tv/search?q=bone%20category%3A199
Most problems ocure when the local & world X, Y and Z-axes are mixed up.
Or as if they where mirrored.
Ok, I’ve added some instructions here in the image.
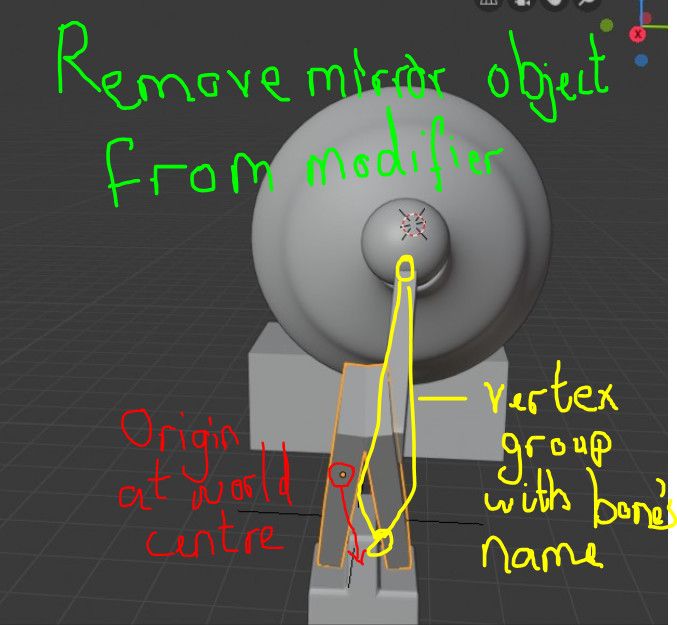
This should work, so long as…
-
…the origin of the mesh is at the world centre (this means you no longer need a mirror object).
-
…there is no Mirror object in the mirror modifier (this creates a relative static point in space which will take into account the relative position of the bone to the mirror object causing the mesh to rotate).
If you try both those things, it should work fine (in theory). Hope that solves it!
EDIT:
I made a quick file to demonstrate how this is done. I made a basic upper body mesh with a basic IK chain. It uses the mirror modifier and can animated on either side individually. Feel free to check out the file.
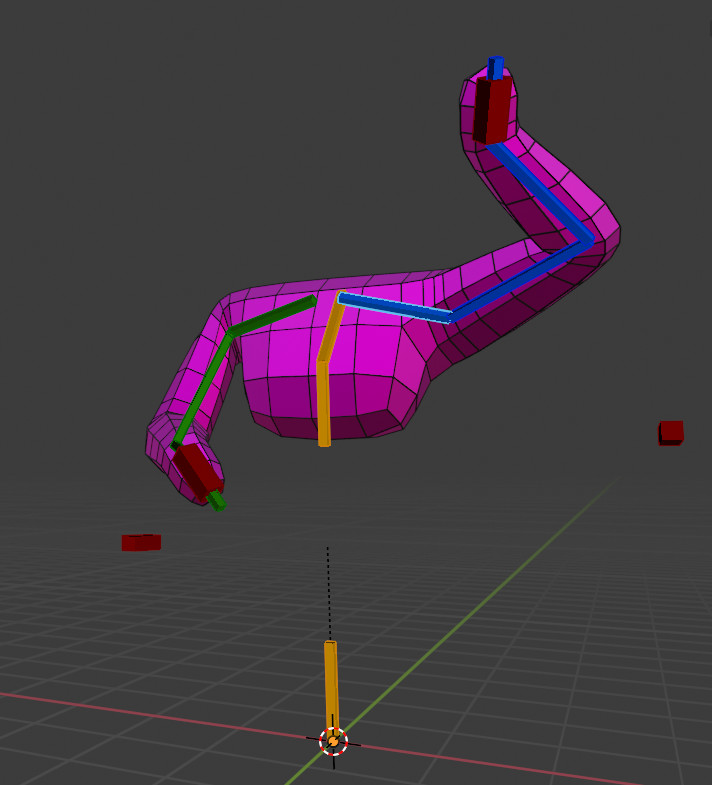
Hope you find that useful.
https://drive.google.com/file/d/1SVUbh7mHxFlBOJFIgpcTFZlLsc-sRV5t/view?usp=sharing
1 Like
Till this point vertex group topic is not introduced in the course. Instead of vertex group, is there any other solution ? If I remove the mirror modifier then what to use ?
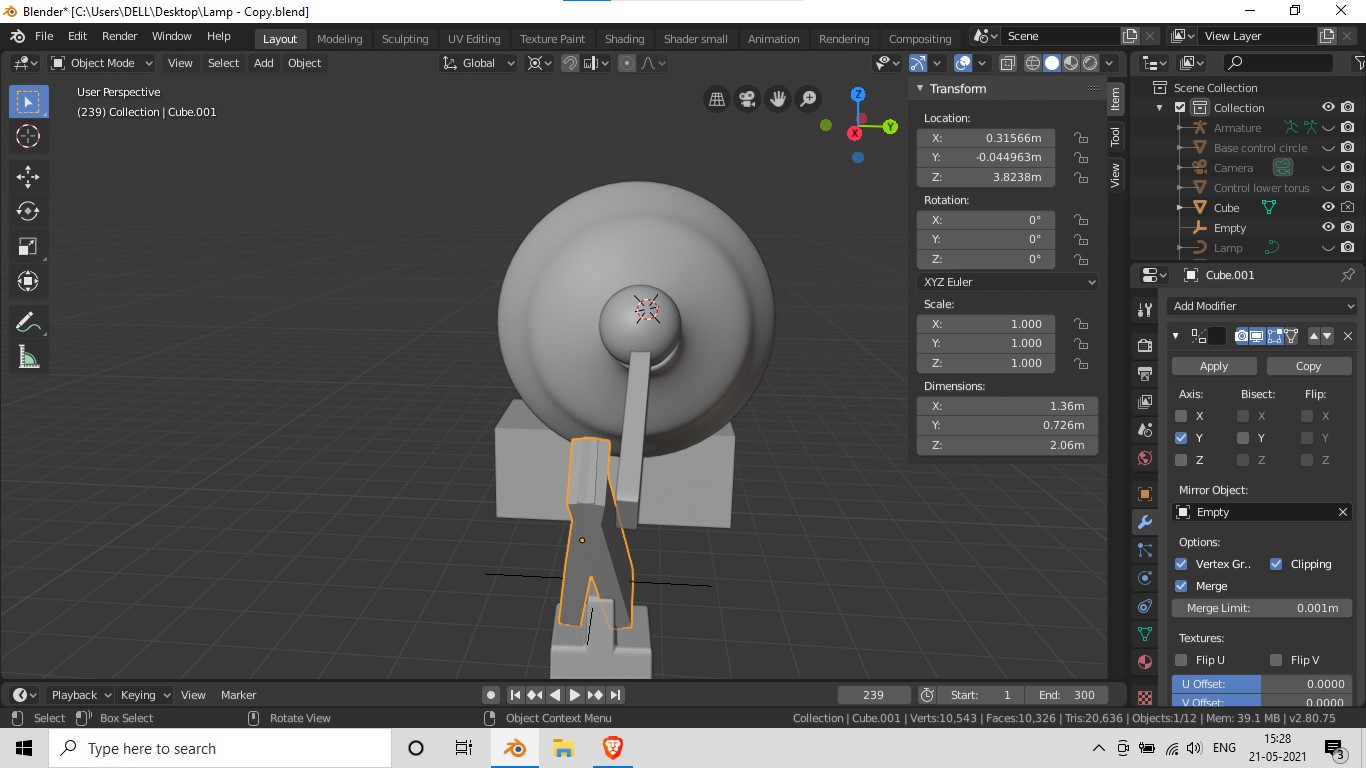
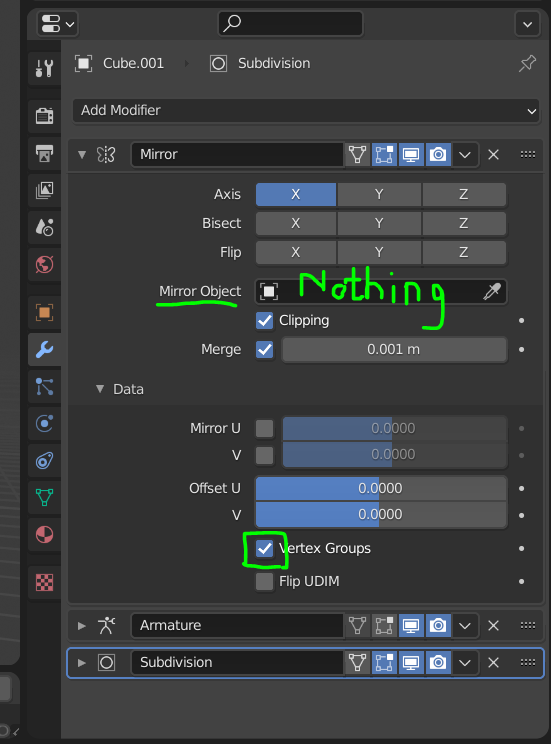
You should keep the mirror modifier but remove the mirror object inside the mirror modifier.
The object will then mirror based on its origin point, so we must make sure the origin point is in the right place (at the centre of the scene world)
1 Like
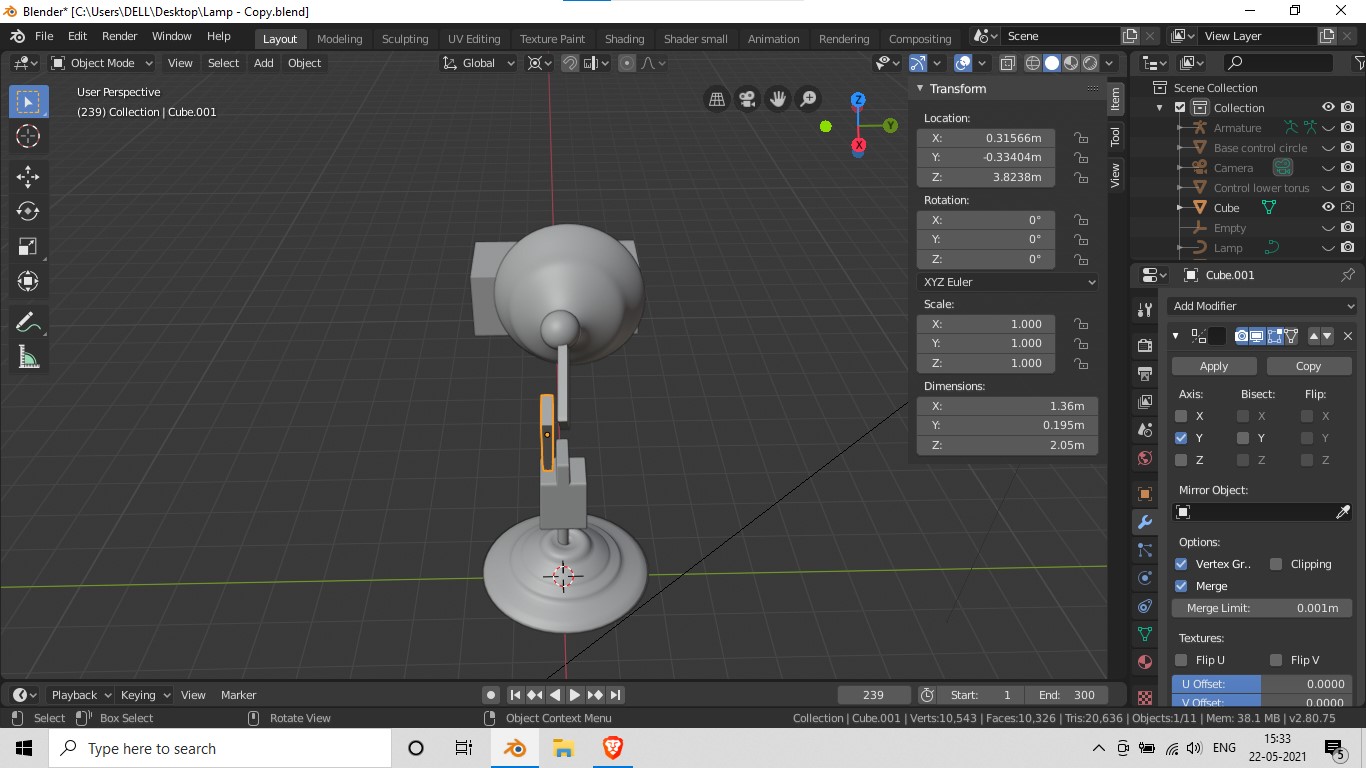
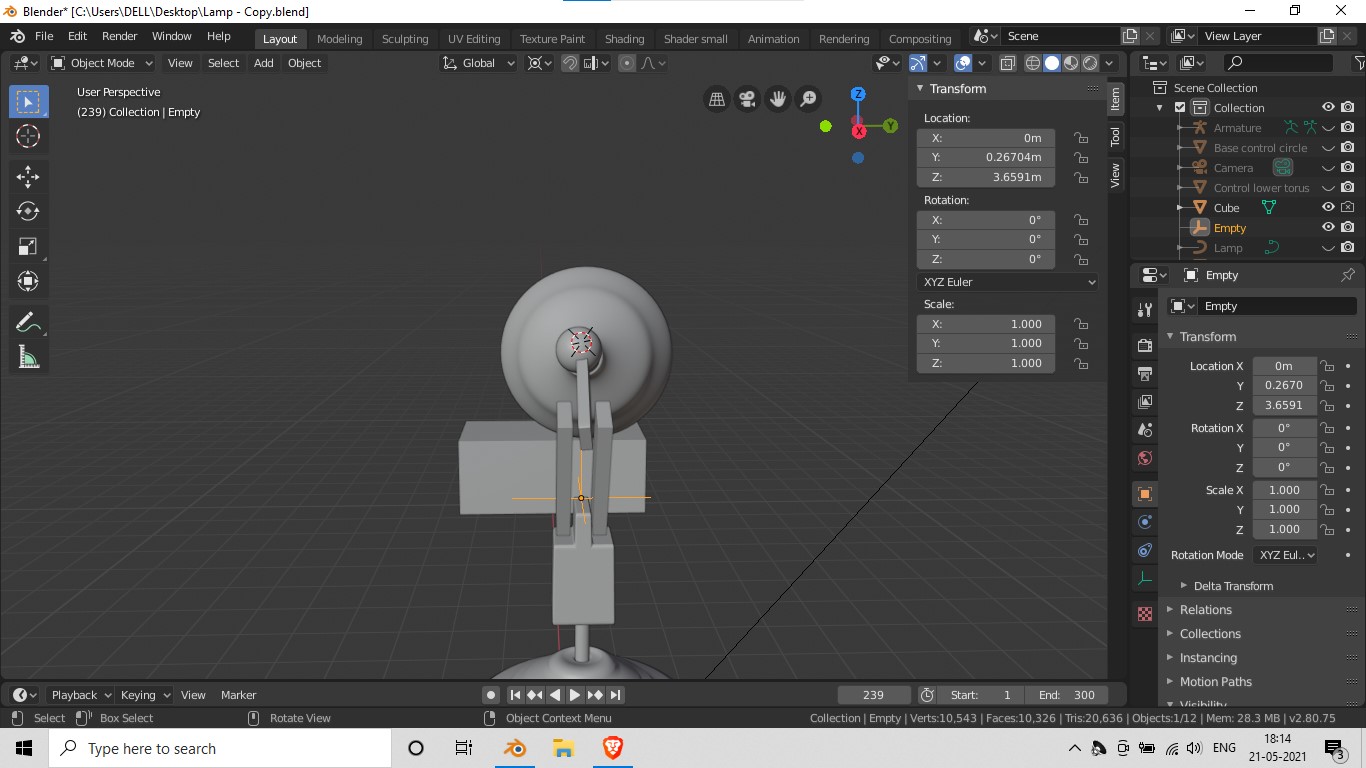
Yep, so your origin needs to be set where your 3D cursor is
Right now it’s in the centre of the mesh (the orange dot) so it’s mirroring right on top of itself.
In Object mode:
Right-click -> Set origin -> Origin to 3D Cursor
3 Likes
Thank you so much. It solved my issue. I was having issue with origin. I was applying mirror modifier right but my lamp origin point was not world origin.
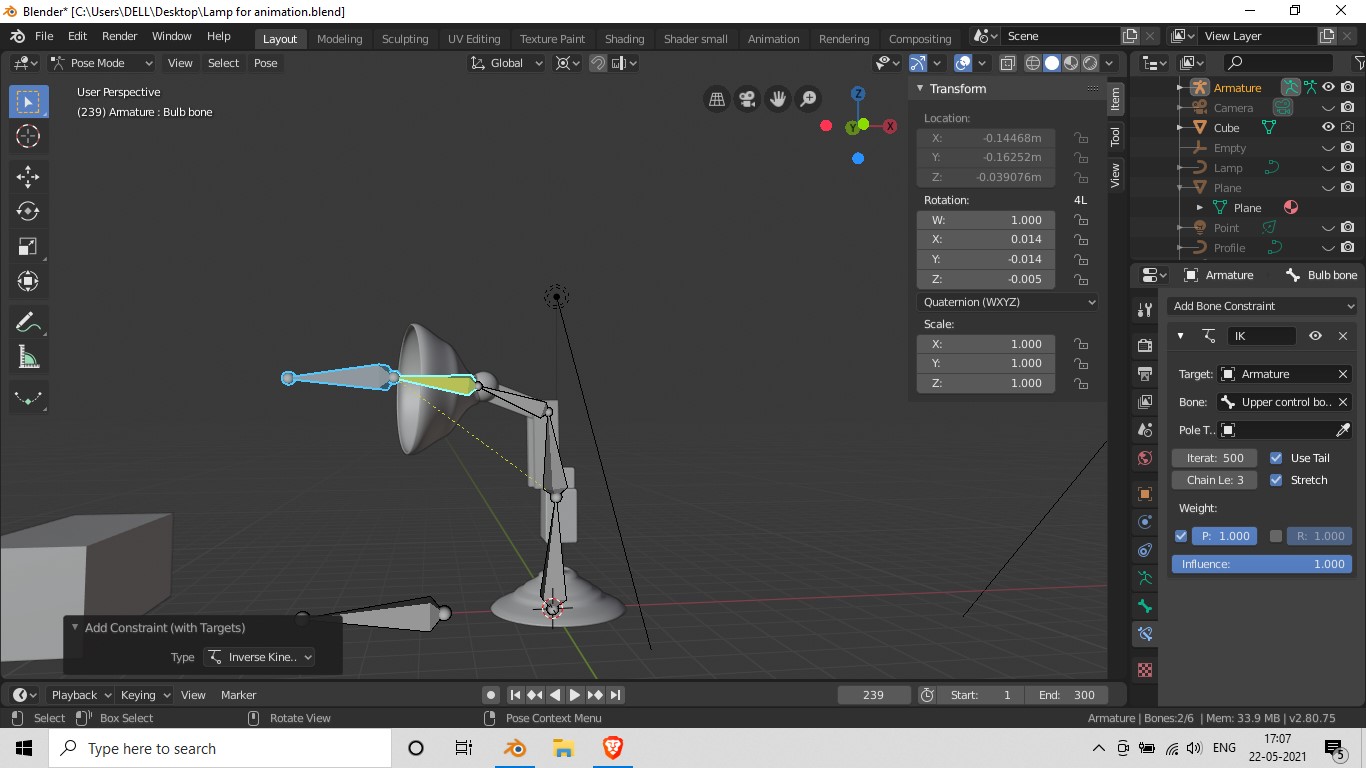
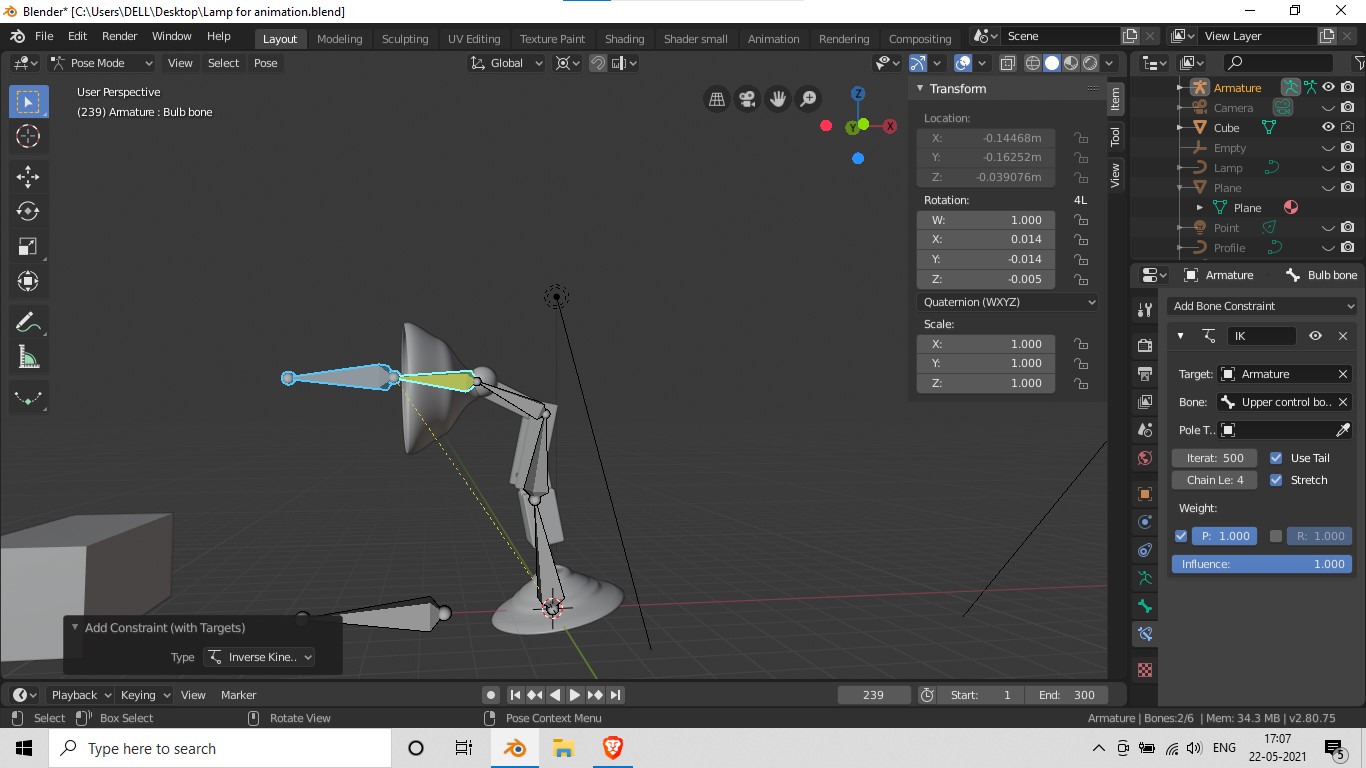
I have added IK to my armatures but I am able to add up to chain length 3 only. After adding 4 (as explained by the instructor in the course video), base of the lamp has rotated on its own. Up to chain length 3 it is ok but all 4 bones needs to be linked. Where is my error ?
Please suggest.

1 Like
You need to probably subdivide the root bone, set the position correctly inside the mesh and then check the parenting is still correct. Then you can set the IK chain to 4. The longer the IK chain becomes the more unweildly the rig becomes. I think you should keep the IK chain to just 3 and have a separate bone for the stem near the base which is the parent to the start of the IK chain and a child of the root bone.
1 Like
You are really an expert. Don’t know how much time I need to clear the basic points.
Anyway, Thanks a lot. Your suggestion worked and I am able to proceed further now because I was stuck on this point from last one week. Could you please suggest how can I reduce this highlighted shadows of my lights. I did not find any option in shadows or under lighting.
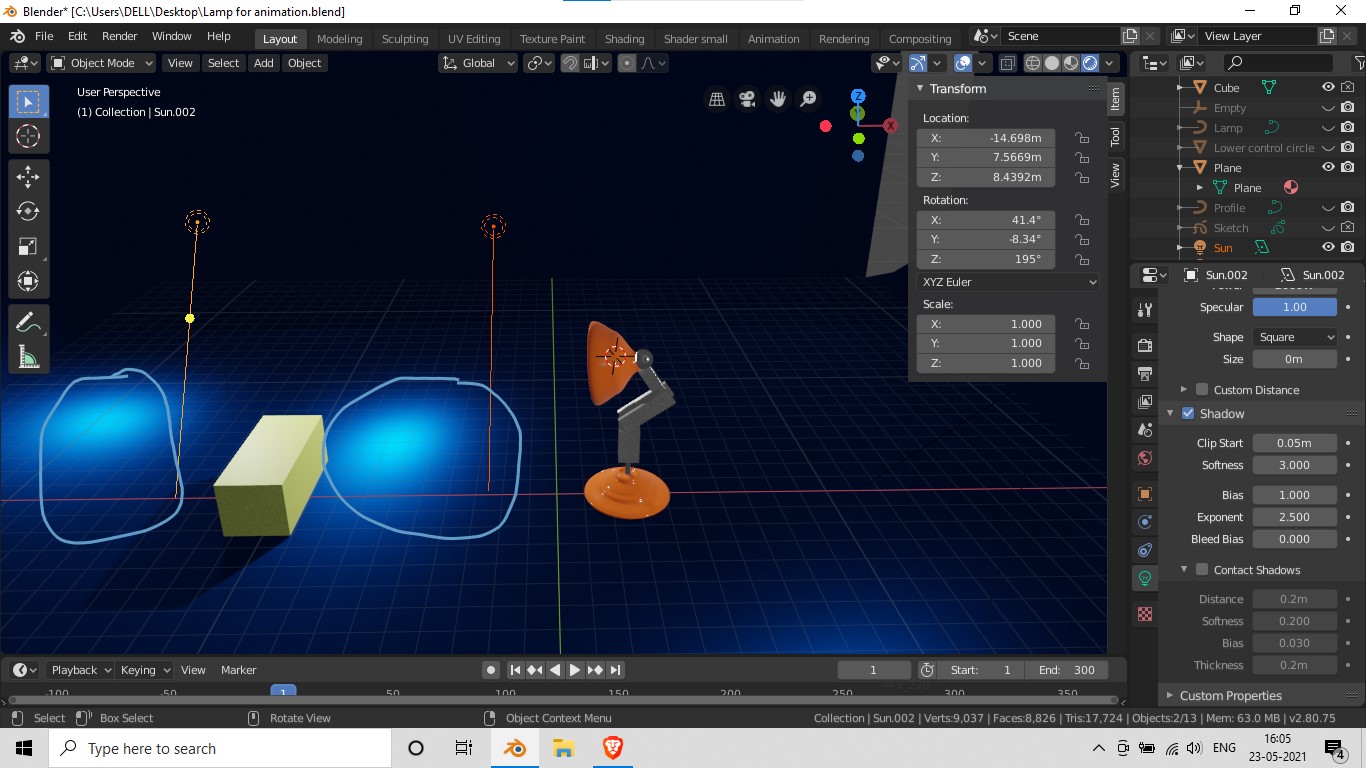
I don’t know much about lights but perhaps you could increase the size of the area light as shown below:
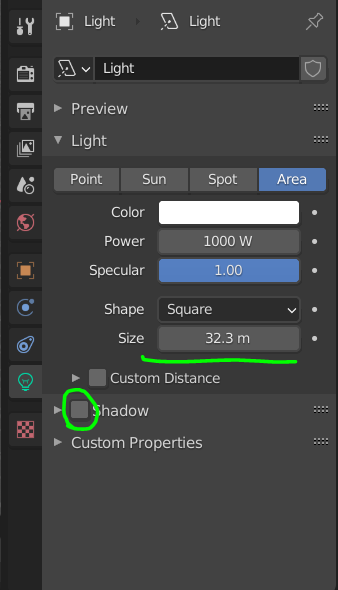
You can also turn on and off shadows with a check box and play with the specular value.
1 Like
An area lamp of zero dimension? My guess is you just need to give it some size to spread the light out. (plus there may be bug like issues with area lamps in the very early version of Blender you are using. Mikey does mention that in lecture 112.
1 Like
It is confusing to name it as a sun lamp, while it is as AREA type of lamp.
Which shines in a given direction. So probably those marked spots are light reflections from lamps. But we can’t see all lamps you’ve added to the scene.
There is/was a bug in Blender when you change a sun type lamp into an area type lamp.
Don’t change the type, but delete the sun lamp and ADD a new AREA lamp.
Focus on the animation, which is difficult enough and after that add, change the light settings.
If the floor material is very reflective, then those marked spots are going to happen very quickly.
1 Like
This topic was automatically closed 24 hours after the last reply. New replies are no longer allowed.