OK, I could definitely be wrong here and I probably am but I am struggling to get it right in a way described in lecture 175 when it comes to creating church vault. However I managed to get it differently and I am proud of it, but I would love to know what I did wrong following instructions from the lecture step by step-… Now I will sort of quote teacher “Michael Bridges” as he said he did in lecture:
“I produced an arch which is just a series of edges joint together and I mirrored that along one of the axis. I then duplicated that around the other way while keeping the mirror modifier applied- and when I applied Boolean modifier with union between these two, I got left with the hole just as I wanted. So then I used that mirrored it again, rotated and got the vault”.
In my case I couldn’t get this result…
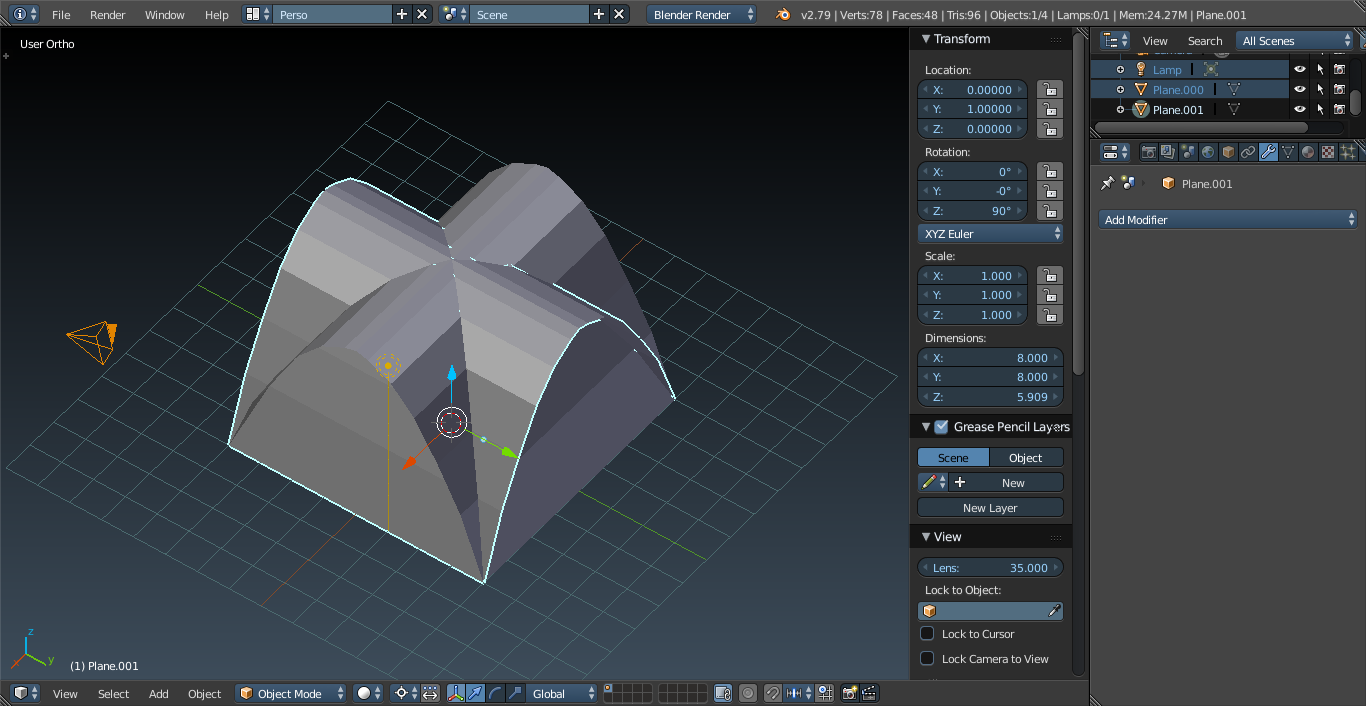
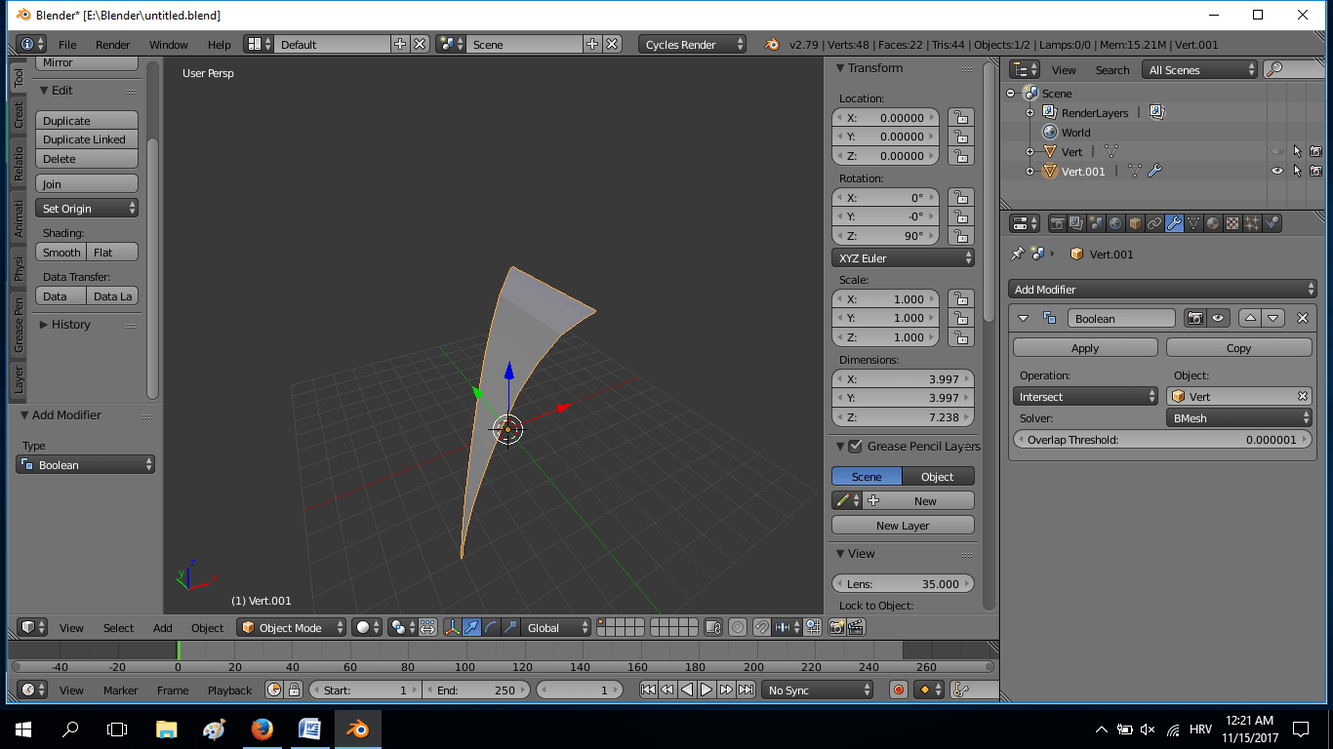
First of all, I created half of an arch and then entered the edit mode where I used Extrusion by Y axis to +8 and I got this:
Then without using mirror modifier to get the rest of the arch, I duplicated an item and rotated it by 90 on Z axis, and of course I ended up with this image:
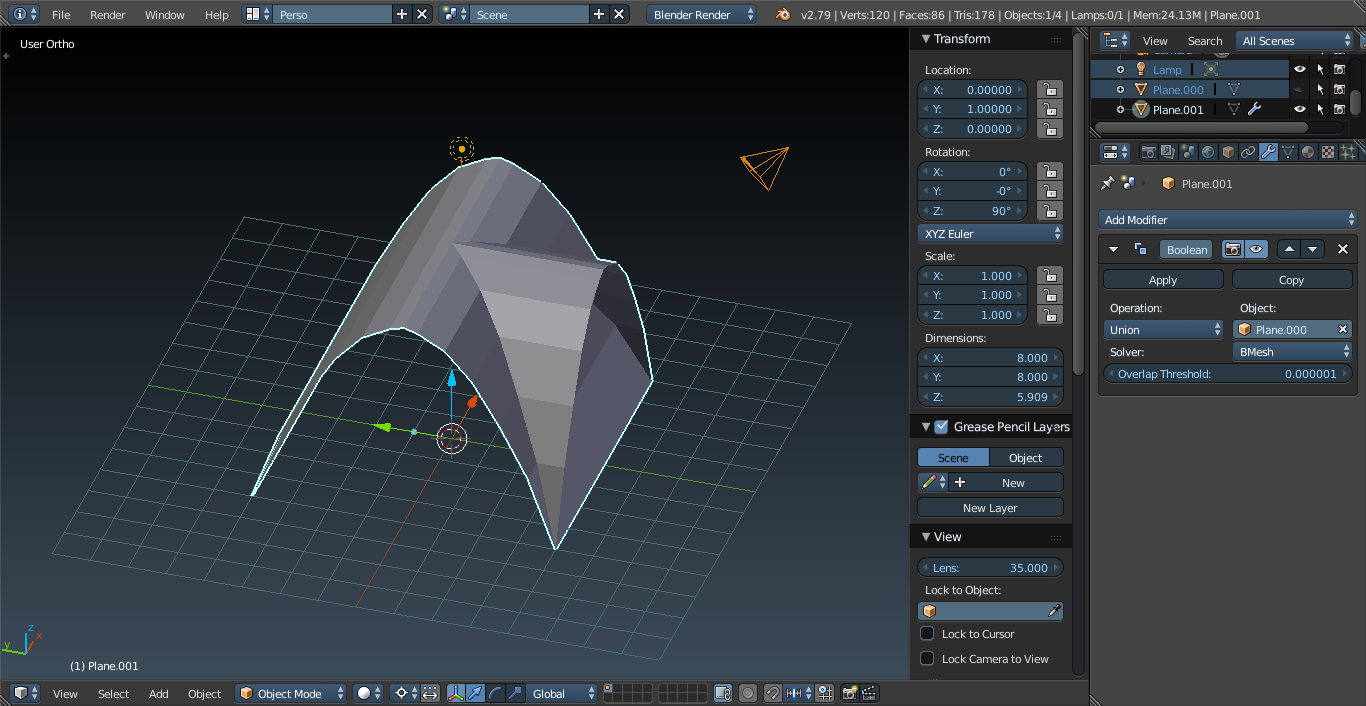
Then I used Boolean Modifier but not to original arch (vert) but coppied one(vert.001) and not Union option but INTERSECT and after hiding original file this is what I got left with
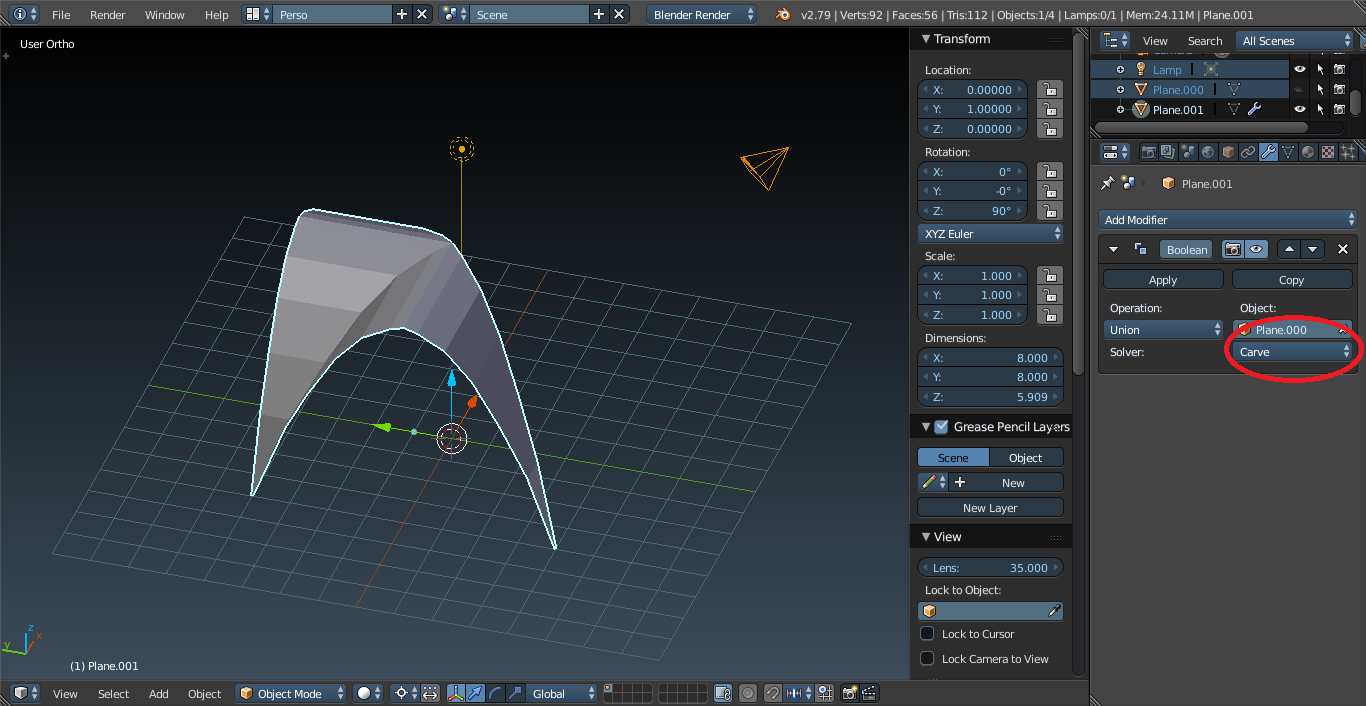
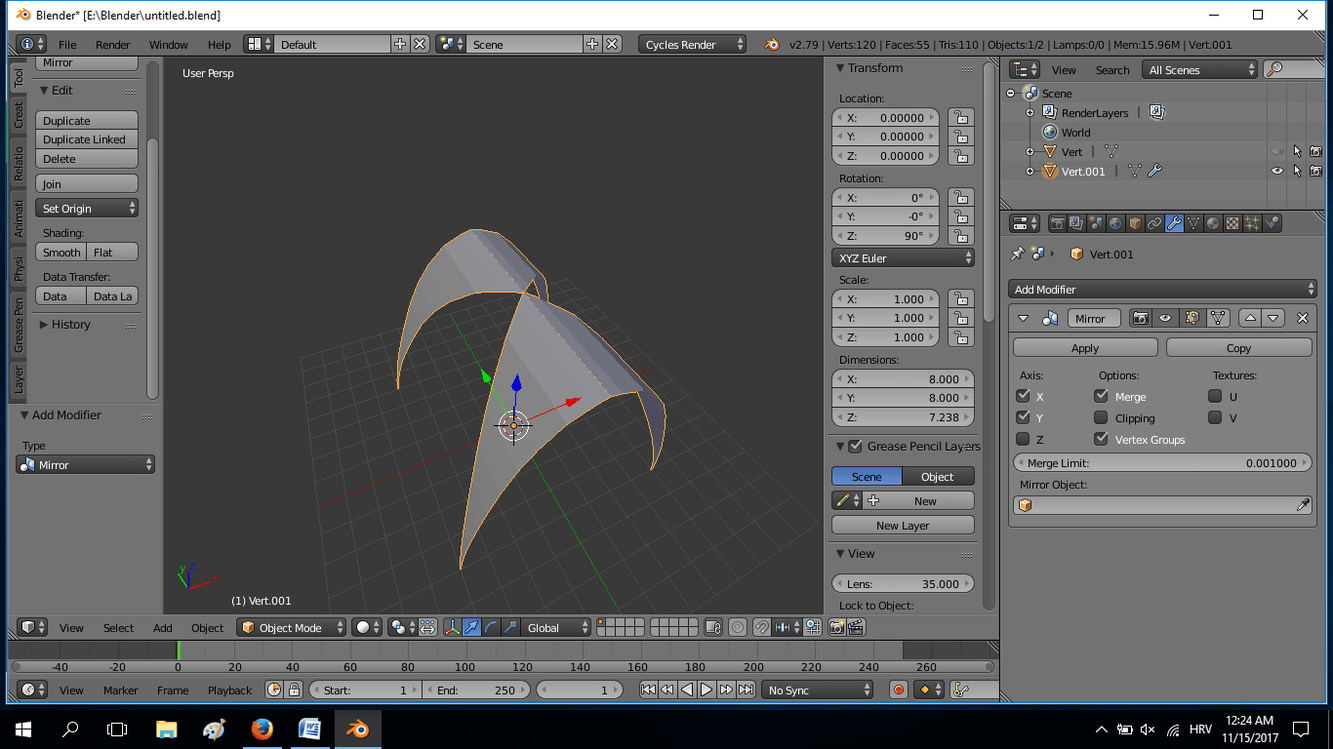
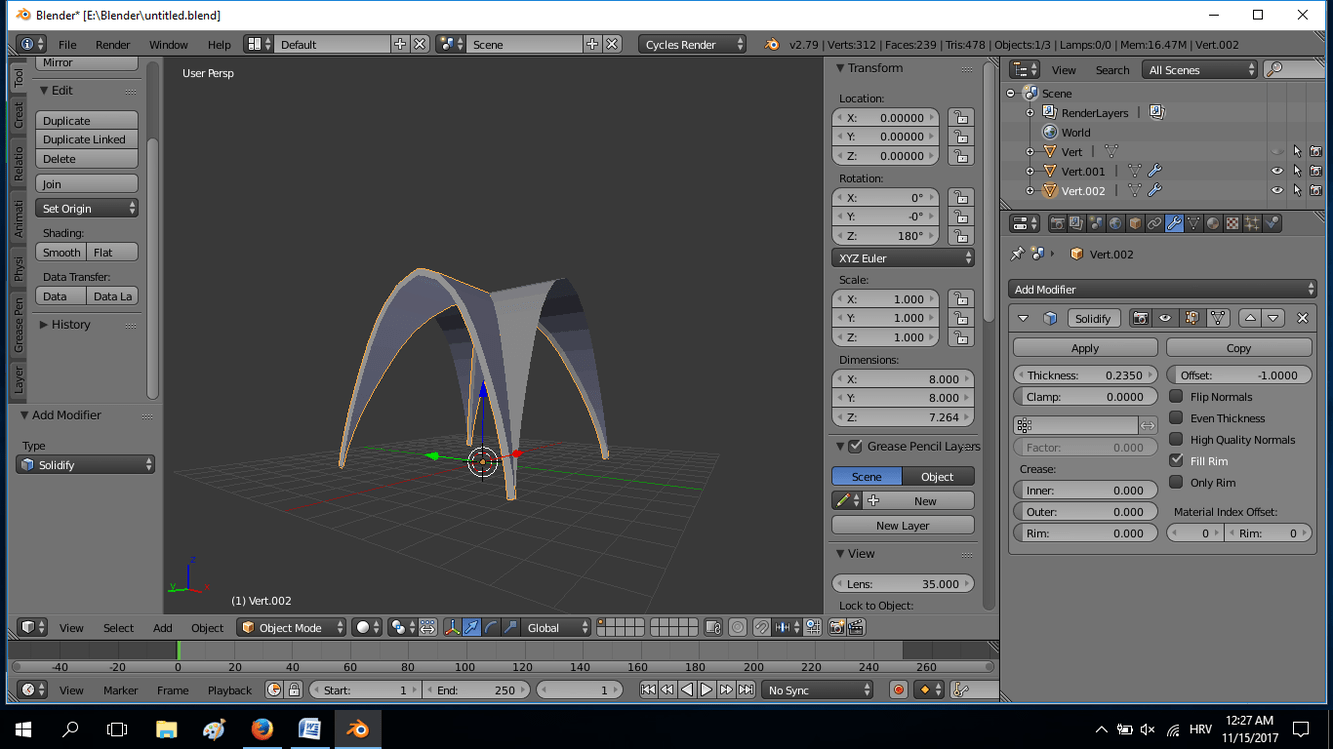
and the only thing I needed to do was to duplicate this and rotate on Z axis by 90 and then finally apply solidify modifier to get thickness and final image is this:
And this is what I got using Boolean modifier at Union (and to be honest I will have to study this modifier more since I did not get a wrap of it first time…kinda got it, but not 100 percent…but I will get there )
So can anyone tell me if I did wrong with Union or what else? Is it maybe difference in versions of blender, since I also have option to curve or BMesh under Boolean though I tried both of these and could not get results?
Hi, @Pavao_Akrap
I think I know where the issue comes from, tell me if it is the right answer to your problem.
If I get it right you tried to replicate Michael’s solution and couldn’t manage with boolean union, so you found an other solution with boolean Intersect
The last image is what you got stuck on with trying Union, right ?
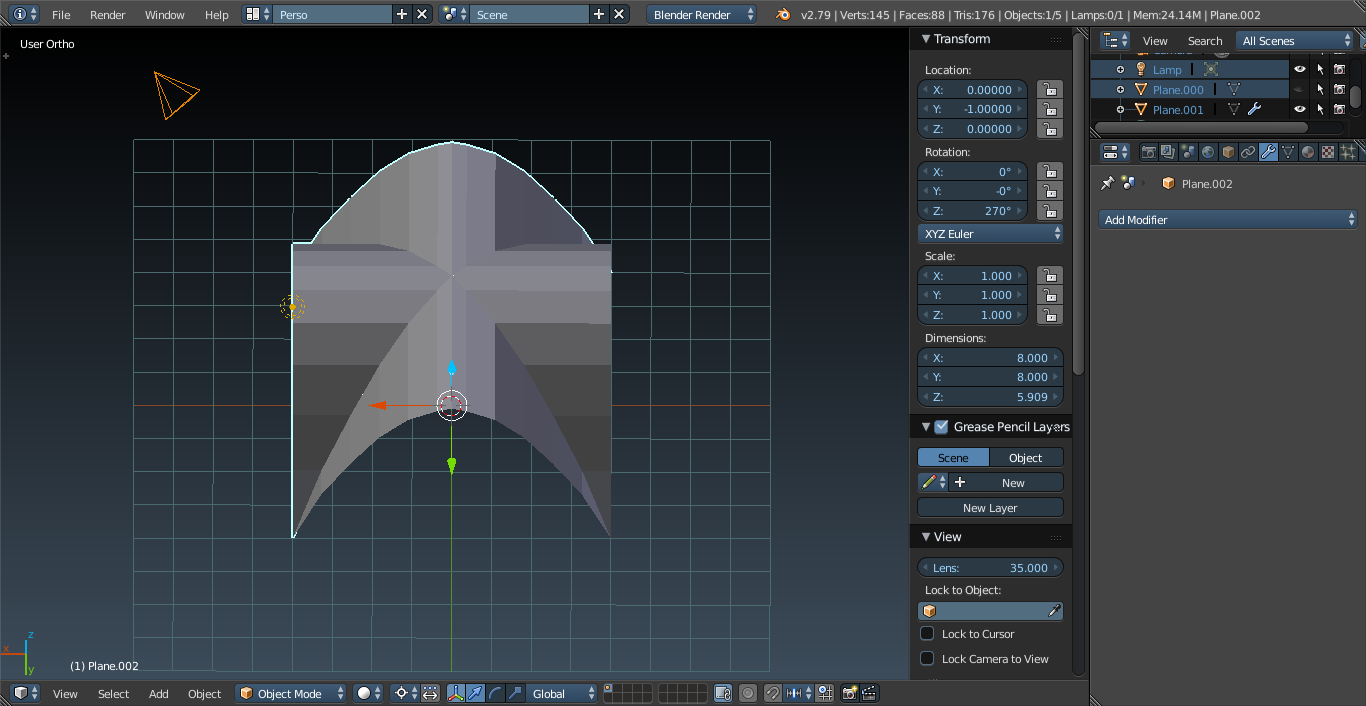
Well let’s get one step before applying the boolean modifier.
You should have ended up with something like that:
(You said you couldn’t get results, but did you hide the other mesh to see actual differences ?)
And if you apply and then rotate 180 around Z axis, you should have your structure!
Then join the two, solidify and it’s done!
Unfortunately I can’t say what this Solver does exactly because there is a TODO on the corresponding line in the blender manual (Boolean Modifier - Blender 5.0 Manual). My guess is that it is a way to figure out the cuts between the two objects.
I hope this helps !
Hy Hiju and thanks for your effort! Now I cant remember if I ended up with something like this, but I probably did, and even now while looking at what you got left with, I could not see the final structure, but the key words are I COULD NOT SEE it…so probably yes, my mistake, but I am sort of proud and happy I have found my own way…I will try to see with your solutions if I get to the end…but if you did, no reason for me to fail…so thanks once again!


 )
)