Creating an InventoryItem Editor

This topic will be devoted to the creation of an InventoryItem editor, using some of the skills taught in the first section of the RPG: Dialogues and Questing course. It relies on the code taught in the RPG:Inventory Systems course.

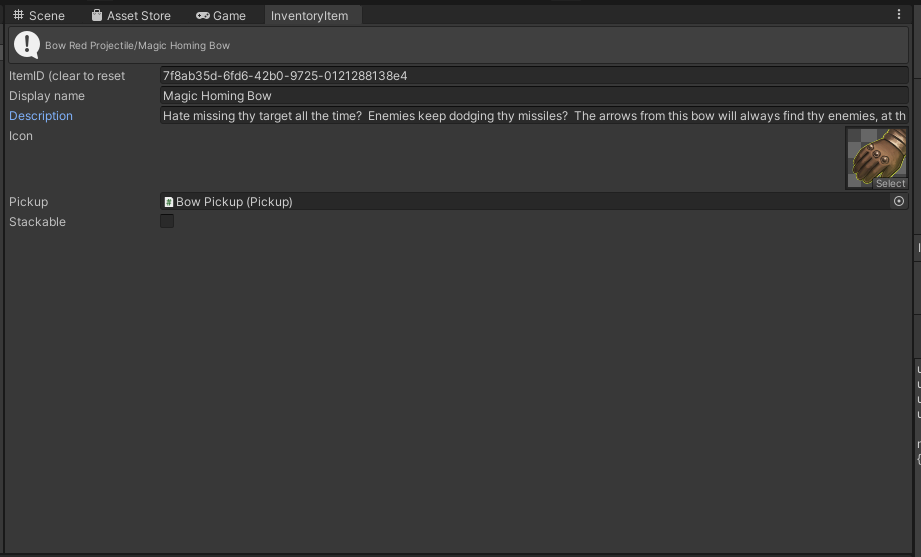
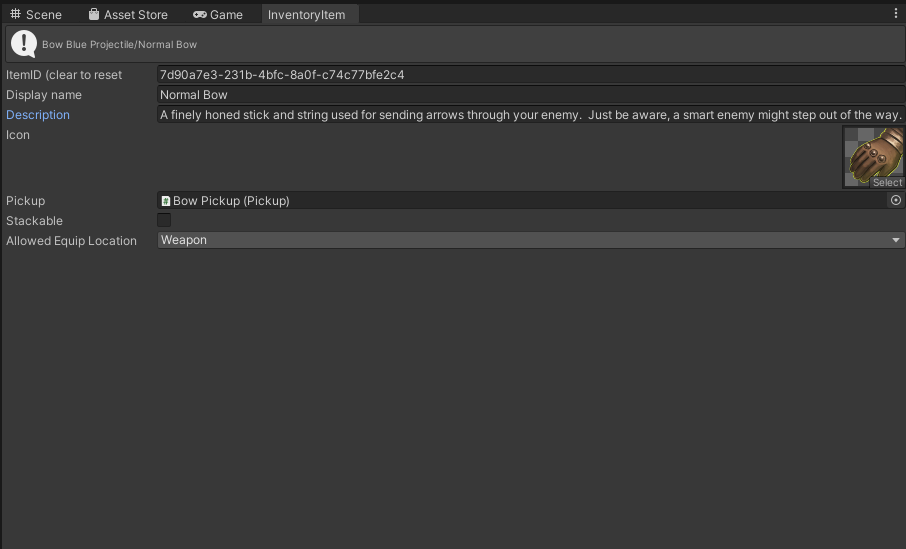
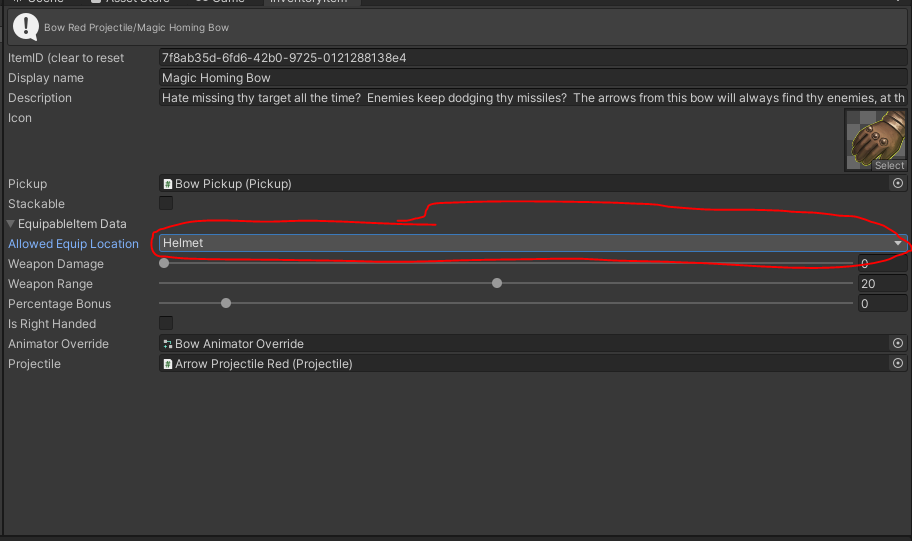
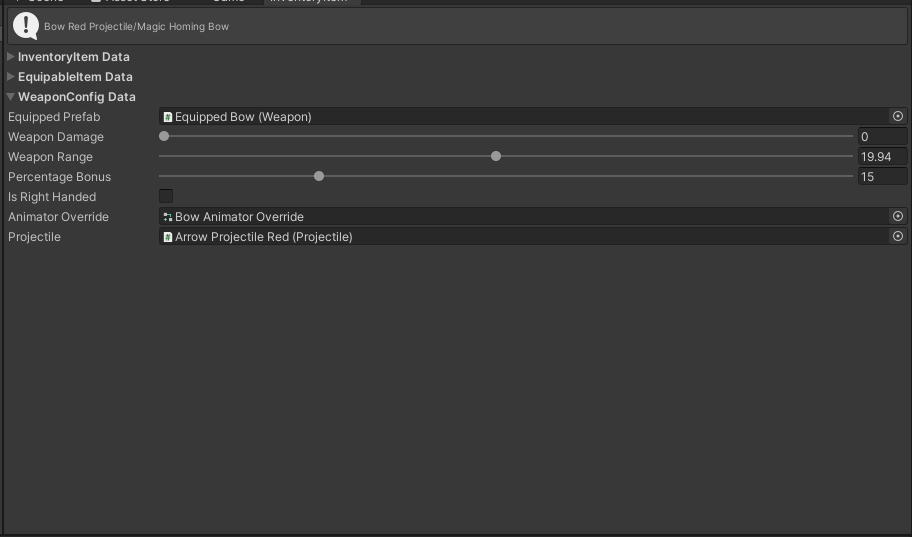
What I set out to do was to create an Editor Window capable of editing any InventoryItem or it’s descendants. In the Inventory course, we set things up so that all inventory items, including action items (the basis for spells, potions, or special actions) ultimately descend from a common ancestor, the InventoryItem. I also wanted the editor to show a preview of the tooltip that will be displayed in the game.

The next couple of screenshots will show you our goal, what we are aiming to create.

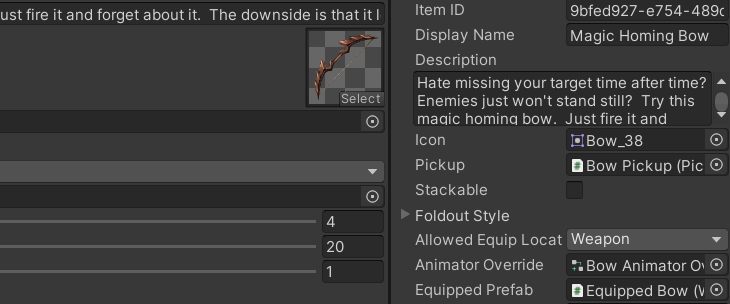
A WeaponConfig Editor:

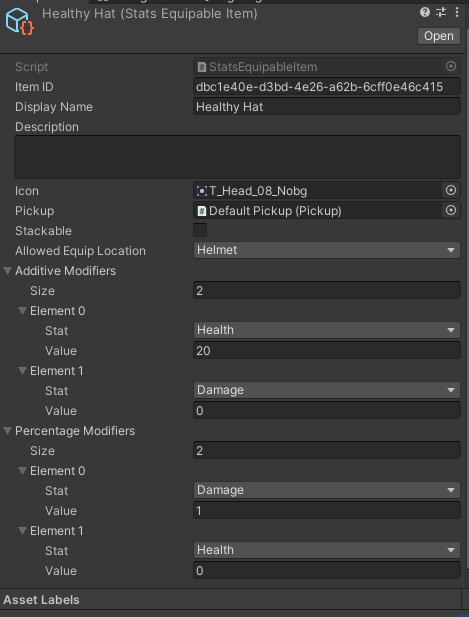
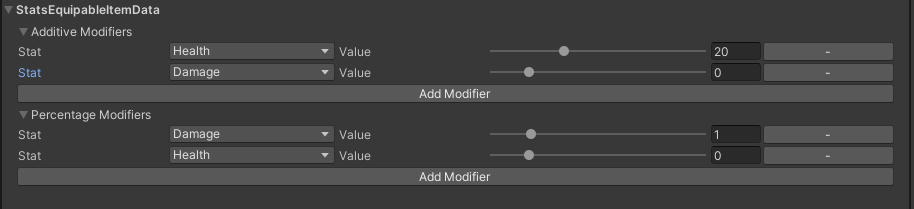
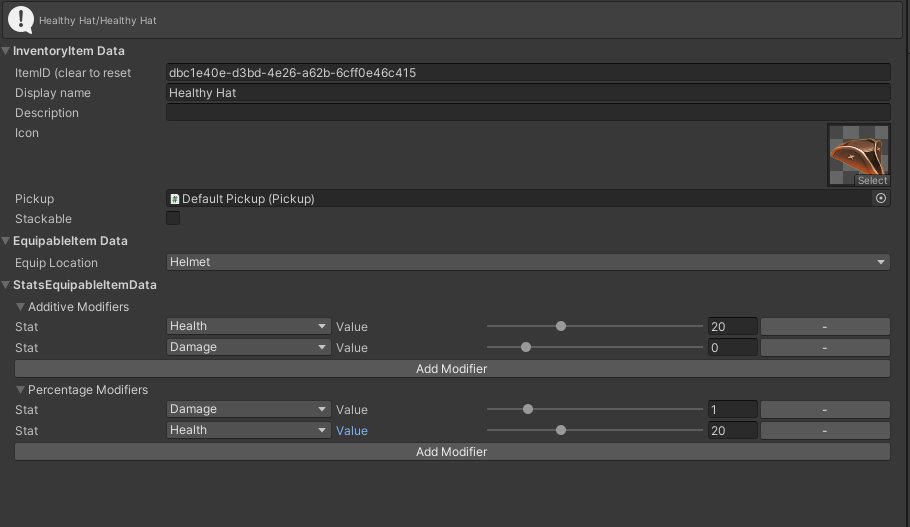
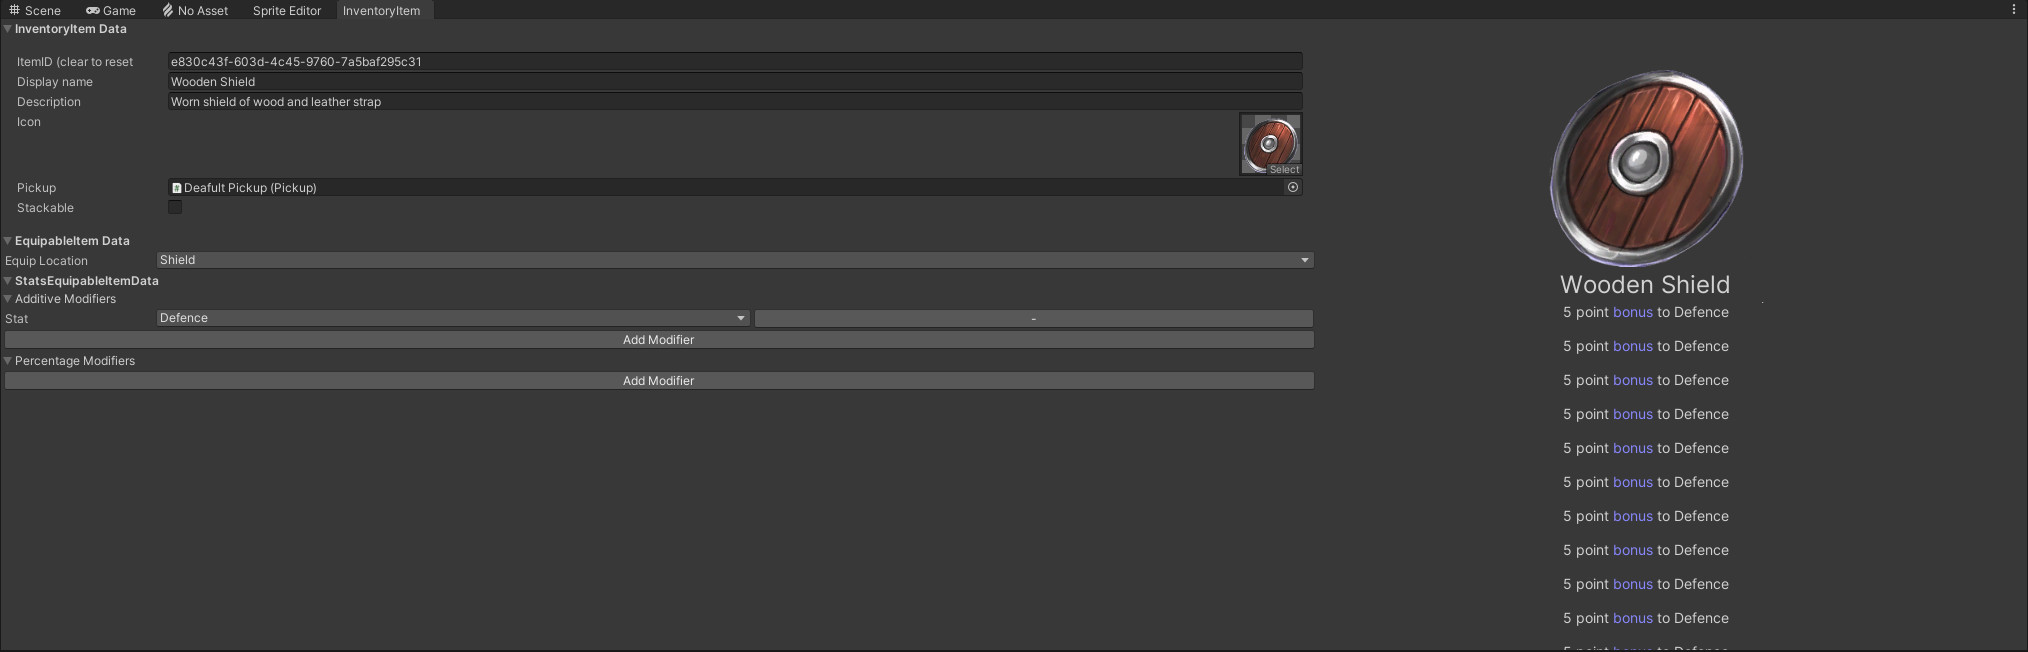
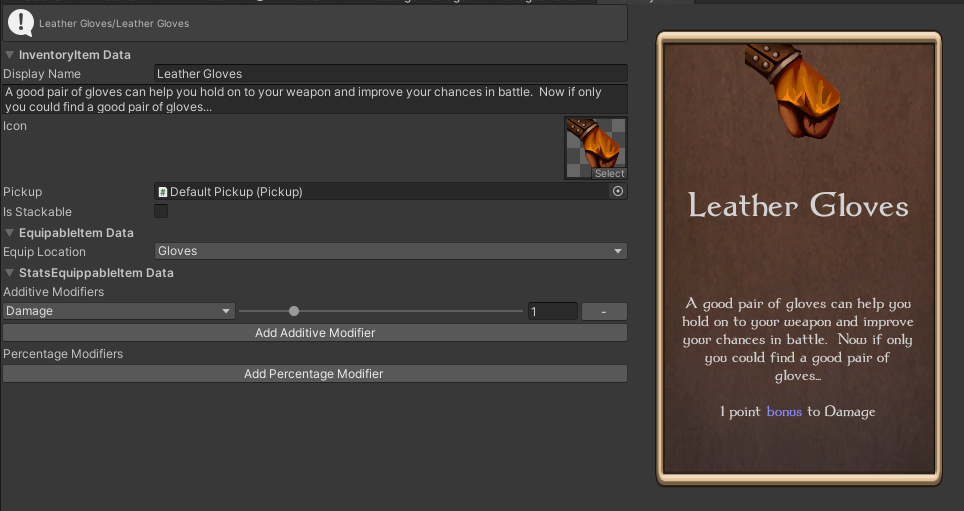
A StatsEquippableItemEditor

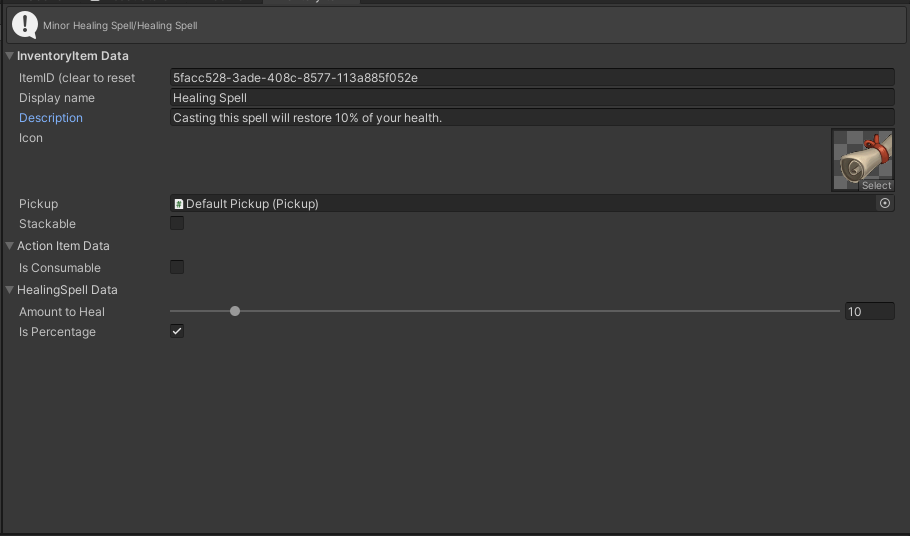
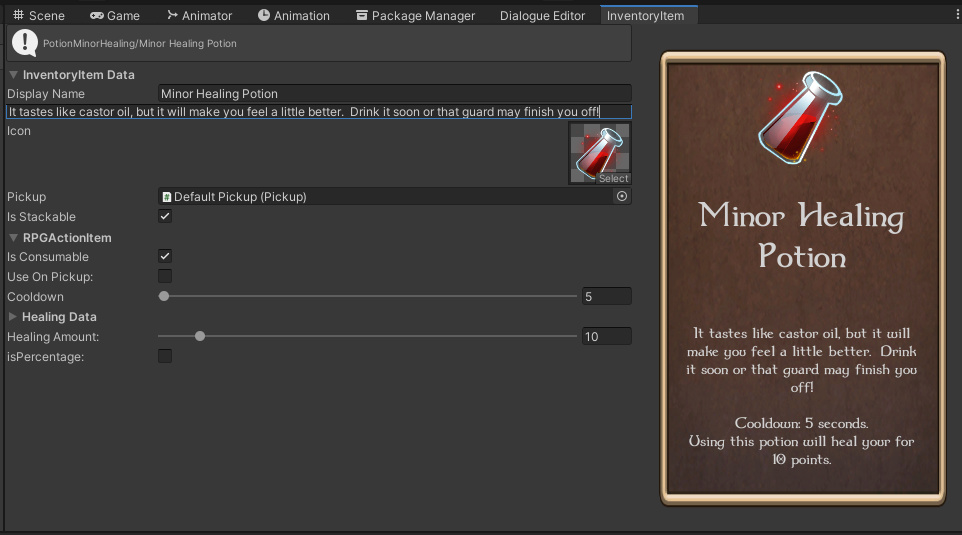
An ActionItem Editor

All with one editor.

This first post (lesson?) will lay the groundwork to get us started. Many of these early steps will look familiar if you’ve completed the first few lessons of the Dialogues and Quests course, setting up an Editor Window.

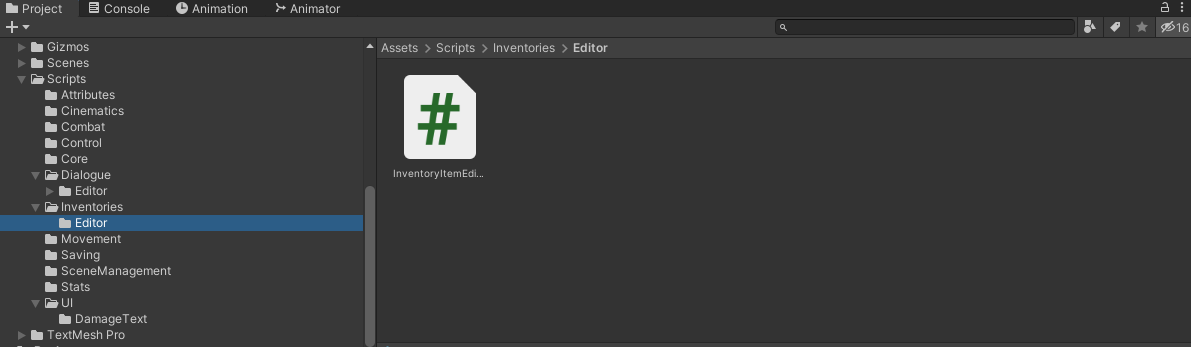
We’re going to start by creating a folder under Scripts/Inventories named Editor
In the Unity Assets structure, Editor is a magic word, much like Resources. Where any file in any folder named Resources is guaranteed to be included in your final build, any file in any folder named Editor is automatically stripped from the project in a final build. This is important because Unity basically strips away everything derived from Editor when packaging the build (since you’re not supposed to be able to edit). By putting the EditorWindow class in an Editor folder, this prevents compiler errors.


We’ll create a new C# script and call it InventoryItemEditor. If you’ve been following the course, you should already be familiar with namespaces. Set the namespace to GameDevTV.Inventories.Editor.
Change the class from deriving from MonoBehavior to EditorWindow

using System;
using UnityEditor;

namespace GameDevTV.Inventories.Editor
{
      public class InventoryItemEditor: EditorWindow
     {
     }
}

We’ll need a Menuitem directive with a ShowEditorWindow method:

        [MenuItem("Window/InventoryItem Editor")]
        public static void ShowEditorWindow()
        {
            GetWindow(typeof(InventoryItemEditor), false, "InventoryItem");
        }

We’ll need a callback to hook into the OnOpenAsset system that Unity uses to select the correct editor when a file is double clicked.

        [OnOpenAsset(1)]
        public static bool OnOpenAsset(int instanceID, int line)
        {
            InventoryItem candidate = EditorUtility.InstanceIDToObject(instanceID) as InventoryItem;
            if (candidate != null)
            {
                return true;
            }
            return false;
        }

And we’ll need to implement OnSelectionChange()

        {
            var candidate = EditorUtility.InstanceIDToObject(Selection.activeInstanceID) as InventoryItem;
            if (candidate == null) return;
            selected = candidate;
            Repaint();
        }

Note that we don’t need to use the OnEnable and OnDisable to hook into Selection.selectionChanged as shown in the course. We can simply implmement the function OnSelectionChange(). Like Awake() and Start() in MonoBehavior, it is called automatically if it exists in an open EditorWindow.

Next, we need to implement the method responsible for drawing the EditorWindow, OnGUI()

        void OnGUI()
        {
            if (!selected)
            {
                EditorGUILayout.HelpBox("No Dialogue Selected", MessageType.Error);
                return;
            }
            EditorGUILayout.HelpBox($"{selected.name}/{selected.GetDisplayName()}", MessageType.Info);
        }

Notice that the first thing we do is check to make sure that there is a selection. If there isn’t, we’ll leave a handy helpbox to inform the user to make a selection and abort the method. After this, it’s safe to assume that selected exists and we can draw the functions.
No InventoryItem
image
An InventoryItem selected
image

This does highlight a handy trick to ensure that when we double click on an InventoryItem, the editor has it selected when we open in it. (Simply using OnSelectionChange() doesn’t work when the editor isn’t open because the EditorWindow doesn’t exist yet.

We’re going to add a second ShowEditorWindow() method with a parameter. This one won’t get the preprocessor directive to add a MenuItem.

        public static void ShowEditorWindow(InventoryItem candidate) { 
            InventoryItemEditor window = GetWindow(typeof(InventoryItemEditor), false, "Dialogue Editor") as InventoryItemEditor;
            if (candidate)
            {
                window.OnSelectionChange();
            }
        }

This method allows us to hook into the selection after the window is created, by calling OnSelectionChanged. Then a simple change to OnOpenAsset will call this new method instead of the one opened by the Main Menu Editor

            if (candidate != null)
            {
                ShowEditorWindow(candidate); 
                return true;
            }

That’s it for this post. In my next reply to the topic, I’ll get things started drawing the basic information about InventoryItem
I’ve forked the RPG code from the course repo to show the changes.
This Post’s GitHub Commit - Created InventoryItemEditor/boilerplate

8 Likes

Lesson 2: Drawing InventoryItem’s fields

In this section, we’re going to draw the basic inspector for the InventoryItem. Not that this will be along ways from drawing the entire class, and we’re going to do this the classic way before switching to a more intuitive approach in the next post.

Before we can begin to write code to draw our fields in the EditorWindow, we’re going to need to lay some groundwork in the InventoryItem.cs file. (In the course project, this is file is Assets/Asset Packs/GameDev.tv Assets/Scripts/Inventories/InventoryItem.cs)

What we need are custom setters for our fields. As our fields are private, we can’t simply change them. In fact, we want to be able to enable the Undo system across our editor, so it’s important to use Setters even if the fields are public.
The Undo system is Editor code. As such, it can’t be in the final build. We deal with this by surrounding code containing Undo with the #if UNITY_EDITOR/#endif processor directives. Simply put, this tells the compiler that if we’re using the Editor, include this code. If it does not, exclude the code and pretend it does not exist.

Here is a basic setter for the first field in the InventoryItem, ItemID

        public void SetItemID(string newItemID)
        {
            if (itemID == newItemID) return;
            Undo.RecordObject(this, "Change ItemID");
            itemID = newItemID;
            EditorUtility.SetDirty(this);
        }

The first line is a check to make sure that the item has actually changed. If the string hasn’t changed, there’s no point in setting an Undo point or setting the object’s field as dirty.
The next line instructs the Undo system that the item has changed. You’ll find it in the Edit/Undo in the main menu. You’ll be able to Undo the changes you make or even Redo them if they have been undone.
The next line makes the actual change.
The last line tells the Unity Editor system that the SerializedObject is “dirty” and needs to be saved/re-serialized. There has been some debate about the need for this line. This will be the fourth iteration of this editor I have written (I put it in three previous projects, in various prototype stages before preparing this version for the tutorial). In all iterations, without SetDirty() changes, some of the time (randomly), changes weren’t reflected in the normal inspector, and randomly saving the project does not catch the changes. I found that using EditorUtility.SetDirty(this); clears this problem up, and causes no harm since all it does is set a flag for the Editor serializer. This is also the reason for the if check in the beginning of the setter… the Undo system will ignore the RecordObject if there are no changes between RecordObject sessions, but if we change the value every frame, the InventoryItem will essentially always be dirty as long as the editor window is open. Now it will be dirty only when we actually make a change.

This process will be repeated for every Setter we use throughout the InventoryItem editor project. To reduce a small bit of boilerplate typing, I made a couple of helper functions for the Undo and the SetDirty.

        public void Dirty()
        {
            EditorUtility.SetDirty(this);
        }
       
        public void SetUndo(string message)
        {
            Undo.RecordObject(this, message);
        }

This lets us make a small change to our Setters:

        public void SetItemID(string newItemID)
        {
            if (itemID == newItemID) return;
            SetUndo("Change ItemID");
            itemID = newItemID;
            Dirty();
        }

We now need to add the remaining Setters for the InventoryItem class:

        public void SetDisplayName(string newDisplayName)
        {
            if (newDisplayName == displayName) return;
            SetUndo("Change Display Name");
            displayName = newDisplayName;
            Dirty();
        }

        public void SetDescription(string newDescription)
        {
            if (newDescription == description) return;
            SetUndo("Change Description");
            description = newDescription;
            Dirty();
        }

        public void SetIcon(Sprite newIcon)
        {
            if (icon == newIcon) return;
            SetUndo("Change Icon");
            icon = newIcon;
            Dirty();
        }

        public void SetPickup(Pickup newPickup)
        {
            if (pickup == newPickup) return;
            SetUndo("Change Pickup");
            pickup = newPickup;
            Dirty();
        }

        public void SetItemID(string newItemID)
        {
            if (itemID == newItemID) return;
            SetUndo("Change ItemID");
            itemID = newItemID;
            Dirty();
        }

        public void SetStackable(bool newStackable)
        {
            if (stackable == newStackable) return;
            SetUndo(stackable?"Set Not Stackable": "Set Stackable");
            stackable = newStackable;
            Dirty();
        }

Now that our setters are in place, we can start drawing the actual properties (I bet you were wondering I was ever going to get to that)

Like the Dialogue editor in the Dialogues and Quests course, we’re going to be taking advantage of EditorGUILayout to autolayout our fields for us. No complicated math to figure out where each field needs to be.

        void OnGUI()
        {
            if (!selected)
            {
                EditorGUILayout.HelpBox("No InventoryItem Selected", MessageType.Error);
                return;
            }
            EditorGUILayout.HelpBox($"{selected.name}/{selected.GetDisplayName()}", MessageType.Info);
            selected.SetItemID(EditorGUILayout.TextField("ItemID (clear to reset", selected.GetItemID()));
            selected.SetDisplayName(EditorGUILayout.TextField("Display name", selected.GetDisplayName()));
            selected.SetDescription(EditorGUILayout.TextField("Description", selected.GetDescription()));
            selected.SetIcon((Sprite)EditorGUILayout.ObjectField("Icon", selected.GetIcon(), typeof(Sprite), false));
            selected.SetPickup((Pickup)EditorGUILayout.ObjectField("Pickup", selected.GetPickup(), typeof(Pickup), false));
            selected.SetStackable(EditorGUILayout.Toggle("Stackable", selected.IsStackable()));
        }

Each field type has it’s own corresponding layout tool. For the strings:
EditorGUILayout.TextField("label", string property);
For the bool
EditorGUILayout.Toggle("label", bool property);
and for the objects (sprites, pickups)
(propertyType)EditorGUILayout.ObjectField("label", object property, typeof(propertyType), false);

That last one looks a bit scary, but let’s put it into practice for a sprite:
(Sprite)EditorGUILayout.ObjectField("Icon", selected.GetIcon(), typeof(Sprite), false);

All of these return the corresponding type, so we can use them in our Setters
selected.SetIcon((Sprite)EditorGUILayout.ObjectField("Icon", selected.GetIcon(), typeof(Sprite), false));

One more tiny bit of business to attend to, InventoryItem doesn’t have a method to retreive the Pickup, meaning that selected.GetPickup() does not exist. That’s easy enough to fix in Inventory Item by adding a simple getter

     Pickup GetPickup()
     {
           return pickup;
     }

Now we can view our (not terribly impressive yet) custom inspector.

You’ll note that we’re still a long ways off of our completed inspector from the previous post in the thread. We still need to implement the members in the child members. The trouble is, we don’t know what the child members are.
We could test the item against each type/child of InventoryItem and draw the custom inspector for that type, but that solution seems inelegant, and requires you to edit InventoryItemEditor with each new type you create. (That doesn’t seem relevant until you consider that ActionItem will have a new class for each type of action… healing spells, a fireball, etcetera).

We’ll set up a solution for this in the next post.
This Post’s GitHub Commit - Draw Basic InventoryItem Fields

4 Likes

Lesson 3: Delegating Responsibility To InventoryItem
One of the challenges I faced when creating this editor was figuring out how to draw the correct elements. For example, in a StatsEquipableItem you need to draw Additive and Percentage stats, but in a Weapon, you need to draw the weapon damage, weapon model, which hand the weapon goes in, weapon speed, and weapon range

My first version of the editor actually cast the selected as each individual object, and then drew the controls as needed.

WeaponConfig weaponConfig = selected as WeaponConfig;
if(WeaponConfig)
{
     ///Draw WeaponConfig controls
}
StatsEquipableItem statsEquipableItem = selected as StatsEquipableItem
if(statsEquipableItem)
{
    ///You get the idea
}

It didn’t take long to realize a flaw in this design… When you get to ActionItems, which also descend from InventoryItem, you start to get an insane number of if statements, and every time you make a new ActionItem child, you’ll have to write a new cast, if statement and drawing set…

The solution I found was simple: Why not let the ScriptableObjects draw their own inspectors?
We already have to have a section of Setters with Editor code in them. That Editor code is surrounded by #if UNITY_EDITOR/#endif directives. It really wouldn’t be hard to include a method to instruct the objects to draw the part of the inspector they are responsible for. Thanks to the magic of virtual/override, we can reduce the call in EditorWindow to one call.

Let’s take a look at how this is done.

In InventoryItem.cs, create a method within the Editor block

     public virtual void DrawCustomInspector()
    {
            if (!drawInventoryItem) return;
            SetItemID(EditorGUILayout.TextField("ItemID (clear to reset", GetItemID()));
            SetDisplayName(EditorGUILayout.TextField("Display name", GetDisplayName()));
            SetDescription(EditorGUILayout.TextField("Description", GetDescription()));
            SetIcon((Sprite)EditorGUILayout.ObjectField("Icon", GetIcon(), typeof(Sprite), false));
            SetPickup((Pickup)EditorGUILayout.ObjectField("Pickup", GetPickup(), typeof(Pickup), false));
            SetStackable(EditorGUILayout.Toggle("Stackable", IsStackable()));
     }

You’ll note that this is functionally identical to the block in our EditorWindow, we’re just executing the code in InventoryItem.cs instead. This works because we’ll be calling it from the EditorWindow, and it has set up the layout already.
In the EditorWindow code, we can now remove all of the selected.EditorGUILayout code, and replace it with selected.DrawCustomInspector();
As you can see, visually nothing has changed

Of course, we still haven’t drawn our data for StatsEquipmentItem. We also have drawn data for EquipmentItem itself which is responsible for holding the EquipLocation. We’ll start with EquipableItem.cs

#if UNITY_EDITOR
        public void SetAllowedEquipLocation(EquipLocation newLocation)
        {
            if (allowedEquipLocation == newLocation) return;
            SetUndo("Change Equip Location");
            allowedEquipLocation = newLocation;
            Dirty();
        }

        public override void DrawCustomInspector()
        {
            base.DrawCustomInspector();
            SetAllowedEquipLocation((EquipLocation)EditorGUILayout.EnumPopup("Equip Location", GetAllowedEquipLocation()));
        }
#endif

There is no need to change a thing in InventoryItemEditor.cs for this. While selected is cast as an InventoryItem, anything that is overriden using the override component will use the method call from the child component instead of InventoryItem. As you can see our DrawCustomInspector() for EquipableItem simply calls it’s parent using base.DrawCustomInspector(); It then draws it’s only field.

Now we’ll do the same thing in WeaponConfig, but with another helper method we’re going to place in InventoryItem.cs

        public bool FloatEquals(float value1, float value2)
        {
            return Math.Abs(value1 - value2) < .001f;
        }

This is just another helper function, this one for float equality testing. Bear in mind, it’s probably just fine to say if(firstfloat==secondfloat) in the code as this is an Editor, but best practices say a comparison should be in the style of comparing the difference to a threshhold. For our purposes, .001f is beyond the change of any value we’re likely to set. You can skip this if you like and just make the == comparison.

#if UNITY_EDITOR

        void SetWeaponRange(float newWeaponRange)
        {
            if (FloatEquals(weaponRange, newWeaponRange)) return;
            SetUndo("Set Weapon Range");
            weaponRange = newWeaponRange;
            Dirty();
        }

        void SetWeaponDamage(float newWeaponDamage)
        {
            if (FloatEquals(weaponDamage, newWeaponDamage)) return;
            SetUndo("Set Weapon Damage");
            weaponDamage = newWeaponDamage;
            Dirty();
        }

        void SetPercentageBonus(float newPercentageBonus)
        {
            if (FloatEquals(percentageBonus, newPercentageBonus)) return;
            SetUndo("Set Percentage Bonus");
            percentageBonus = newPercentageBonus;
            Dirty();
        }

        void SetIsRightHanded(bool newRightHanded)
        {
            if (isRightHanded == newRightHanded) return;
            SetUndo(newRightHanded?"Set as Right Handed":"Set as Left Handed");
            isRightHanded = newRightHanded;
            Dirty();
        }

        void SetAnimatorOverride(AnimatorOverrideController newOverride)
        {
            if (newOverride == animatorOverride) return;
            SetUndo("Change AnimatorOverride");
            animatorOverride = newOverride;
            Dirty();
        }

        void SetEquippedPrefab(Weapon newWeapon)
        {
            if (newWeapon == equippedPrefab) return;
            SetUndo("Set Equipped Prefab");
            equippedPrefab = newWeapon;
            Dirty();
        }

        void SetProjectile(GameObject possibleProjectile)
        {
            if (!possibleProjectile.TryGetComponent<Projectile>(out Projectile newProjectile)) return;
            if (newProjectile == projectile) return;
            SetUndo("Set Projectile");
            projectile = newProjectile;
            Dirty();
        }

        public override void DrawCustomInspector()
        {
            base.DrawCustomInspector();
            SetEquippedPrefab((Weapon)EditorGUILayout.ObjectField("Equipped Prefab", equippedPrefab,typeof(Object), false));
            SetWeaponDamage(EditorGUILayout.Slider("Weapon Damage", weaponDamage, 0, 100));
            SetWeaponRange(EditorGUILayout.Slider("Weapon Range", weaponRange, 1,40));
            SetPercentageBonus(EditorGUILayout.IntSlider("Percentage Bonus", (int)percentageBonus, -10, 100));
            SetIsRightHanded(EditorGUILayout.Toggle("Is Right Handed", isRightHanded));
            SetAnimatorOverride((AnimatorOverrideController)EditorGUILayout.ObjectField("Animator Override", animatorOverride, typeof(AnimatorOverrideController), false));
            SetProjectile((Projectile)EditorGUILayout.ObjectField("Projectile", projectile, typeof(Projectile), false));
        }

#endif

Note that for the float fields I used sliders, which allow you to set the range of a field, and provide a handy slider for the field. In the case of Percentage Bonus, I used an Int Slider to restrict the percentage to whole numbers. This isn’t required, but I wanted to show you how it works, and for float fields that really work on whole numbers anyways (like in my Grid based game, the number of spaces you can move each turn) it’s really handy.

So we now have our inspector showing every field for WeaponConfig, but there’s a subtle problem. It’s possible to create a Weapon and set it’s equip location to someplace other than the Weapon.


This simply will not do. It would be better if you couldn’t change the slot when the item is a WeaponConfig, and if you couldn’t set the item as a weapon if it’s a normal StatsEquipableItem…

We’re going to do this with a virtual method in EquipableItem that we’ll override in WeaponConfig

        public virtual  bool IsLocationSelectable(Enum location)
        {
            EquipLocation candidate = (EquipLocation)location;
            return candidate != EquipLocation.Weapon;
        }

And we’ll change the draw code to include the function to test the location. Note that because of the various calls for EnumPopup, we must use a new GUIContent for the label rather than just a string.

SetAllowedEquipLocation((EquipLocation)EditorGUILayout.EnumPopup(new GUIContent("Equip Location"),allowedEquipLocation,IsLocationSelectable,false));

Now what will happen is that when you call the EnumPopup, it will check each enum in the popup before displaying it to see if the popup is valid. We’ve set the default to allow any location except for Weapon, because we only want a weapon in a WeaponConfig.

Now we’ll override that IsLocationSelectable in WeaponConfig.cs

        public override bool IsLocationSelectable(Enum location)
        {
            EquipLocation candidate = (EquipLocation) location;
            return candidate == EquipLocation.Weapon;
        }

This time the ONLY value selectable is Weapon. The other values are grayed out.

One more feature to make this inspector a bit more organized, is to add Foldouts to each section.
You’ll need a unique bool for each foldout to make this work.
In the DrawCustomInspector() functions, after base.DrawCustomInspector() if it’s an override, add an EditorGUILayout.Foldout(bool, string)
Here’s the example with InventoryItem

        bool drawInventoryItem = true;
        public GUIStyle foldoutStyle;
        public virtual void DrawCustomInspector()
        {
            foldoutStyle = new GUIStyle(EditorStyles.foldout);
            foldoutStyle.fontStyle = FontStyle.Bold;
            drawInventoryItem = EditorGUILayout.Foldout(drawInventoryItem, "InventoryItem Data", foldoutStyle);
            if (!drawInventoryItem) return;
            SetItemID(EditorGUILayout.TextField("ItemID (clear to reset", GetItemID()));
            SetDisplayName(EditorGUILayout.TextField("Display name", GetDisplayName()));
            SetDescription(EditorGUILayout.TextField("Description", GetDescription()));
            SetIcon((Sprite)EditorGUILayout.ObjectField("Icon", GetIcon(), typeof(Sprite), false));
            SetPickup((Pickup)EditorGUILayout.ObjectField("Pickup", pickup, typeof(Pickup), false));
            SetStackable(EditorGUILayout.Toggle("Stackable", IsStackable()));
        }

Now I can collapse the entire InventoryItem section of the Editor so I can focus on the elements I want to edit.

I’ve probably stretched the limit of this post, in the next post, we’ll tackle drawing the StatsEquipableItem with it’s two arrays of attributes you can set for bonuses. I’ll show you a way to manage a list in an Editor that is far superior to the standard inspector.

This post’s Github commit - Virtual DrawCustomInspector()

1 Like

Lesson 4: A Better Way to Manage Lists

Probably the thing I hate most about Unity’s built in inspectors is the way it manages Lists and Arrays. Editing a list in the inspector is a pain, especially if that list has a structure in it, like our Modifier structure used in StatsEquipableItem.
This is how the inspector looks when you’ve added a few stats to the modifer list in StatsEquipableItem


By the end of this lesson, our InventoryEditorWindow’s lists will look like this:

We’re going to start by making our Setters. In the first few iterations of this inspector, I actually created setters for each of AdditiveModifiers and PercentageModifiers. So a separate SetAdditiveStat, SetPercentageStat, AddAddiveStat, RemoveAdditiveStat, etc… the methods piled up. This time around, I decided to structure things a bit differently, by passing the actual List to the setters to act on.

The first thing we need to do is to change the modifier declarations at the top of StatsEquipable.cs from Modifier additiveModifiers; to List additiveModifiers.

        [SerializeField]
        List<Modifier> additiveModifiers= new List<Modifier>();  
        [SerializeField]
        List<Modifier> percentageModifiers = new List<Modifier>();

Don’t worry, the data won’t be lost, because Unity Serializes the values for both arrays and lists in the same way. As long as the types are the same, they’ll convert easily in the Inspector.

Now we can make our helper methods. Remember, all of the rest of the code must be within an #if UNITY_EDITOR/#endif block or you won’t be able to build your project.

        void AddModifier(List<Modifier> modifierList)
        {
            SetUndo("Add Modifier");
            modifierList?.Add(new Modifier());
            Dirty();
        }

        void RemoveModifier(List<Modifier>modifierList, int index)
        {
            SetUndo("Remove Modifier");
            modifierList?.RemoveAt(index);
            Dirty();
        }

        void SetStat(List<Modifier> modifierList, int i, Stat stat)
        {
            if (modifierList[i].stat == stat) return;
            SetUndo("Change Modifier Stat");
            Modifier mod = modifierList[i];
            mod.stat = stat;
            modifierList[i] = mod;
            Dirty();
        }

        void SetValue(List<Modifier> modifierList, int i, float value)
        {
            if (modifierList[i].value == value) return;
            SetUndo("Change Modifier Value");
            Modifier mod = modifierList[i];
            mod.value= value;
            modifierList[i] = mod;
            Dirty();
        }

The handy thing about objects (like List) is that they are passed between functions as reference automatically. This means that if you pass a List to a function expecting a List, it will receive the pointer to your original list. This means we can modify the list that’s passed to us in a method and the modifications will hold.
There are still restrictions, however, like you cannot add or remove items from the list in a For loop.

Next, we need to iterate over that list and show our fields…

void DrawModifierList(List<Modifier> modifierList)
        {
            int modifierToDelete = -1;
            GUIContent statLabel = new GUIContent("Stat");
            for (int i = 0; i < modifierList.Count; i++)
            {
                Modifier modifier = modifierList[i];
                EditorGUILayout.BeginHorizontal();
                SetStat(modifierList, i, (Stat) EditorGUILayout.EnumPopup(statLabel, modifier.stat, IsStatSelectable, false));
                SetValue(modifierList, i, EditorGUILayout.IntSlider("Value", (int) modifier.value, -20, 100));
                if (GUILayout.Button("-"))
                {
                    modifierToDelete = i;
                }

                EditorGUILayout.EndHorizontal();
            }

            if (modifierToDelete > -1)
            {
                RemoveModifier(modifierList, modifierToDelete);
            }

            if (GUILayout.Button("Add Modifier"))
            {
                AddModifier(modifierList);
            }
        }

        bool IsStatSelectable(Enum candidate)
        {
            Stat stat = (Stat) candidate;
            if (stat == Stat.ExperienceReward || stat == Stat.ExperienceToLevelUp) return false;
            return true;
        }

We start with a temporary variable modifierToDelete set to -1. The logic is as follows… if we want to delete an element, we’ll set modifierToDelete to the index of the modifer. At the end of the for loop, we’ll check to see if the number is greater than -1 and act accordingly.

We’re using a standard for loop with an indexer instead of a foreach loop. For each of the modifiers in the list, we’ll get a reference to the modifier, and begin a Horizontal Layout Group. This will put everything for our modifiers on one line, space divided between the elements.
First we’ll draw our StatPopup, then the value, then finally a button for deleting the element. I used an IntSlider for the values, but you could just as easily use a regular slider. Just be aware that floats look terrible in tooltips.

Notice that with the Stat enumpopup, I once again included a validation method. This lets us filter out stats that don’t make sense to add modifiers to, specifically ExperienceReward and ExperienceToLevelUp. Those two options will be greyed out in the popup.

This leaves our actual DrawCustomInspector() method.

        bool drawStatsEquipableItemData = true;
        bool drawAdditive = true;
        bool drawPercentage = true;

        public override void DrawCustomInspector()
        {
            base.DrawCustomInspector();
            drawStatsEquipableItemData =
                EditorGUILayout.Foldout(drawStatsEquipableItemData, "StatsEquipableItemData", foldoutStyle);
            if (!drawStatsEquipableItemData) return;
            
            drawAdditive=EditorGUILayout.Foldout(drawAdditive, "Additive Modifiers");
            if (drawAdditive)
            {
                DrawModifierList(additiveModifiers);
            }
            drawPercentage = EditorGUILayout.Foldout(drawPercentage, "Percentage Modifiers");
            if (drawPercentage)
            {
                DrawModifierList(percentageModifiers);
            }
            
        }

I decided to include another foldout section for each of the modifier types. This lets you tidy up your inspector even more while you’re working on it.

Now our StatsEquipableItem inspector is ready to go, and should look like this:

Personally, I think this looks a little cluttered, even with the foldouts. Let’s add a little visual polish to make each section a touch more visible. We’re going to add a GUIStyle to each section to bring the margins of the content in just a touch, but leave the foldout lines the way they are.

In InventoryItem.cs, add a GUIStyle contentStyle to the properties. It should be a protected style, and should be tagged [NonSerialized] or it might appear in the regular inspector.
Then in the first line of InventoryItem’s DrawCustomInspector add the following line:

contentStyle = new GUIStyle {padding = new RectOffset(15, 15, 0, 0)};

Now for each of the content blocks we’ve created in the DrawCustomInspector methods, after the if check for the foldouts, insert the following line:

EditorGUILayout.BeginVertical(contentStyle);

and at the end of the method, add

EditorGUILayout.EndVertical(contentStyle);

This will bring your content in a small amount on the right and left, making things appear less cluttered.

We are now at the point where it doesn’t matter if it’s a WeaponConfig or a StatsInventoryItem, we can see and edit all of the properties in the same Editor Window.

In the next post, we’ll create a simple healing spell/potion that can be dropped on the ActionBar, and set this up for easy editing as well.

This Lesson’s Commit, A Better Way To Manage Lists

Lesson 5: Creating Actions

It’s time to start adding some ActionItems to our RPG. Most of the groundwork has been laid in the Inventory course, but there isn’t a very practical example of an action. We’re going to create a simple healing spell Action that doubles as a spell and a potion.

First, we’re going to make some small modifications to ActionItem.cs

We’ll start by getting rid of the [CreateAssetMenu()] item. There is no real point in creating an ActionItem out of the box, as it doesn’t do anything. The CreateAssetMenu() is so that we can test the basic “does this work” with the UI and nothing more.

We’re also going to add a virtual bool CanUse(GameObject user). This is so the UI can tell if the user is in a state to use the item. It’s an aweful shame to use an item only to have it do nothing because the conditions weren’t met.

For now, this is just

        public virtual bool CanUse(GameObject user)
        {
            return true;
        }

Now you can add code in the ActionStore and ActionSlotUI to determine if the action is useable. While I’m not going to set that up for you, I’ll demonstrate how this works internally in this lesson.

By now, you’ve probably cleverly figured out that we need setters and a DrawCustomInspector() for the ActionItem data, which for now is just a consumable bool. In a future tutorial, I’ll be going through adding cooldown timers to the actions, which will be handled in the ActionItem.

#if UNITY_EDITOR


        void SetIsConsumable(bool value)
        {
            if (consumable == value) return;
            SetUndo(value?"Set Consumable":"Set Not Consumable");
            consumable = value;
            Dirty();
        }

        bool drawActionItem = true;
        public override void DrawCustomInspector()
        {
            base.DrawCustomInspector();
            drawActionItem = EditorGUILayout.Foldout(drawActionItem, "Action Item Data");
            if (!drawActionItem) return;
            EditorGUILayout.BeginVertical(contentStyle);
            SetIsConsumable(EditorGUILayout.Toggle("Is Consumable", consumable));
            EditorGUILayout.EndVertical();
        }

#endif

That’s it for our ActionItem setup. Now it’s time to create our Healing Spell. I make my action scripts in a subfolder of Scripts called Actions. The actual Action Items I create, I put under Game/Actions/Resources
Create a folder Actions and a script HealingSpell.
Here’s what mine looks like:

using GameDevTV.Inventories;
using RPG.Attributes;
using UnityEditor;
using UnityEngine;

namespace RPG.Actions
{
    [CreateAssetMenu(fileName="New Healing Spell", menuName = "RPG/Actions/HealingSpell")]
    public class HealingSpell : ActionItem
    {
        [SerializeField] float amountToHeal;
        [SerializeField] bool isPercentage;

        public override bool CanUse(GameObject user)
        {
            if (!user.TryGetComponent(out Health health))
                return false;
            if (health.IsDead() || health.GetPercentage() >= 1.0f) return false;
            return true;
        }

        public override void Use(GameObject user)
        {
            if (!user.TryGetComponent(out Health health)) return;
            if (health.IsDead()) return;
            health.Heal(isPercentage ? health.GetMaxHealthPoints() * amountToHeal / 100.0f : amountToHeal);
        }

#if UNITY_EDITOR
        void SetAmountToHeal(float value)
        {
            if (FloatEquals(amountToHeal, value)) return;
            SetUndo("Change Amount To Heal");
            amountToHeal = value;
            Dirty();
        }

        void SetIsPercentage(bool value)
        {
            if (isPercentage == value) return;
            SetUndo(value?"Set as Percentage Heal":"Set as Absolute Heal");
            isPercentage = value;
        }

        bool drawHealingData = true;
        public override void DrawCustomInspector()
        {
            base.DrawCustomInspector();
            drawHealingData = EditorGUILayout.Foldout(drawHealingData, "HealingSpell Data");
            if (!drawHealingData) return;
            EditorGUILayout.BeginVertical(contentStyle);
            SetAmountToHeal(EditorGUILayout.IntSlider("Amount to Heal", (int)amountToHeal, 1, 100));
            SetIsPercentage(EditorGUILayout.Toggle("Is Percentage", isPercentage));
            EditorGUILayout.EndVertical();
        }

#endif

    }
}

Our CanUse function tests to make sure that the user has a Health component, and that the User is not dead, or has full health. (Healing when Dead… leads to Zombies, we don’t want Zombies!).

The Use function checks again that the User has Health and is not Dead. It then calls Health.Heal with a value of either the AmountToHeal in points, or a percentage of the user’s Max Health depending on if IsPercentage is checked.

With the editor code I’ve included in the script, it will draw properly in the CustomEditor


The Healing Potion will heal the user for 10 points of damage. The spell which doesn’t dissappear on use, will heal for 10% of the user’s max health.

One more tidbit for this lesson that I’m including after just figuring out how to accomplish it. One of the annoying things when you have a custom Component reference as a prefab instead of a GameObject is that the inspector won’t allow you to just click and search through the assets like you can do with a GameObject, or Sprite, or Animator, etc. Unity handles the built in classes well, but leaves us in the dark with our own classes. In our InventoryItem chain, this means the Weapon equippedWeapon prefab, the Projectile projectile prefab, and the Pickup pickup prefab.

The first step is to tell the EditorGUILayout.ObjectField that we’re searching for a GameObject, not the actual thing we’re searching for…

GameObject potentialPickup = pickup?pickup.gameObject:null;

Now in our ObjectField we’re going to cast it to a GameObject and use typeof(GameObject) instead of casting to a Pickup.

Next is some changes to the SetPickup (and similar changes to Weaponconfig’s SetEquippedPrefab and SetProjectile methods.

        public void SetPickup(GameObject potentialnewPickup)
        {
            if (!potentialnewPickup)
            {
                SetUndo("Set No Pickup");
                pickup = null;
                Dirty();
                return;
            }
            if (!potentialnewPickup.TryGetComponent(out Pickup newPickup)) return;
            if (pickup == newPickup) return;
            SetUndo("Change Pickup");
            pickup = newPickup;
            Dirty();
        }

What we’re doing is first checking to see if the potentialNewPickup is null… if it is, we still want to set the field to null, so we’ll set up the Undo, set the object to null and return;
Then we’re testing to see if the GameObject has a Pickup component. If it doesn’t, we’re going to reject the GameObject (i.e. just return and do nothing).
Once we’ve established that we’ve got a nice shiny new Pickup prefab, we set it and we’re done. It’s a little longer method than using a Pickup in the ObjectField but the end result will make life a little easier. Especially if you are consistent in your naming conventions and include pickup in the names of Pickups, projectiles in the names of Projectiles, etc. You can just type pickup in the search bar and get valid results. All three of our class references are adjusted in the newest Github commit.

The next lesson will focus on previewing the tooltip that is displayed during the game, using the information from the scriptable objects.

This lesson’s Github commit: Creating Actions

Lesson 6: The Tooltip Preview

Believe it or not, we are almost done with our InventoryItem Editor Window. The next stop is adding the tooltip preview, which will entail dividing the window into two panes.
In the first section of Quests and Dialogues, we explore using BeginArea(rect) and EndArea to create moveable nodes on the screen. We’re actually going to use a variation of this, but just creating two fixed nodes. One pane will be 2/3rds the width of the inspector, the second pane will occupy the remaining third of the inspector.

There is a little housekeeping to take care of first. The idea behind this inspector is that we’re going to be simulating the tooltip that users will see in the game. One of the things I felt was important in a tooltip when I did my project is that if an item has bonuses, these should be reflected in the tooltip. This led me to make change to GetDescription() in InventoryItem. Rather than simply leaving it as public string GetDescription(), I changed it to a virtual method.

public virtual string GetDescription()
{
     return description;
}

Because there might be some time when a class needs the raw description without additions from other classes, I also included another getter to get the raw description.

public string GetRawDescription()
{
    return description;
}

We can now override GetDescription() to suit our needs in child classes.

We’ll start with the WeaponConfig. We want to let the user know if this is a ranged or melee weapon, what the weapon’s range is, what the base damage is, and what bonuses to damage it may have. We probably also want to include the snarky description (at least if you’re like me, item and class descriptions are snarky and meant to bring a chuckle to the player).

        public override string GetDescription()
        {
            string result = projectile ? "Ranged Weapon" : "Melee Weapon";
            result += $"\n\n{GetRawDescription()}\n";
            result += $"\nRange {weaponRange} meters";
            result += $"\nBase Damage {weaponDamage} points";
            if ((int)percentageBonus != 0)
            {
                string bonus = percentageBonus > 0 ? "<color=#8888ff>bonus</color>" : "<color=#ff8888>penalty</color>";
                result += $"\n{(int) percentageBonus} percent {bonus} to attack.";
            }
            return result;
        }

You’ll note that I’m using “\n” tags and color tags within the string. Both TextMeshPro, and the Editor labels support RichText if you enable it. We’ll be enabling it in code for the Editor, and to enable it for the tooltip, find the tooltip prefab, navigate to the TextMeshPro component for the description, go into more options and check the “Rich Text” box.

So what we’re doing with this method is starting by identifying the weapon type. If there is a projectile assigned, then by definition it is a ranged weapon.
It then adds in the raw deescription, and adds the weapon’s range, damage, and percentage bonus.
Now when a tooltip or the Editor asks for GetDescription() it gets a nicely formatted description with all the information.

Next up is the StatsEquipableItem:

        string FormatAttribute(Modifier mod, bool percent)
        {
            if ((int)mod.value == 0.0f) return "";
            string percentString = percent ? "percent" : "point";
            string bonus = mod.value > 0.0f ? "<color=#8888ff>bonus</color>" : "<color=#ff8888>penalty</color>";
            return $"{Mathf.Abs((int) mod.value)} {percentString} {bonus} to {mod.stat}\n";
        }

        public override string GetDescription()
        {
            string result =  GetRawDescription()+"\n";
            foreach (Modifier mod in additiveModifiers)
            {
                result += FormatAttribute(mod, false);
            }

            foreach (Modifier mod in percentageModifiers)
            {
                result += FormatAttribute(mod, true);
            }
            return result;
        }

The first method is a helper… it takes a Modifier and returns a formatted string… an example would be a Modifier with a stat of Stat.Damage and a value of 10, in the percentageModifier list would read:

10 percent bonus to Damage

With this helper method, we can now simply cycle through each additiveModifier and percentageModifier and add the string to the result.

And finally, we have the HealthPotion… this one you’ll need to do custom for each class you have… so if you make an Ice spell, you’ll need a custom description modifier for it… Here’s mine for HealthPotion

        public override string GetDescription()
        {
            string result = GetRawDescription()+"\n";
            string spell = isConsumable() ? "potion" : "spell";
            string percent = isPercentage ? "percent of your Max Health" : "Health Points.";
            result += $"This {spell} will restore {(int)amountToHeal} {percent}";
            return result;
        }

Now that our Descriptions are out of the way, it’s time to get to the business of making Panes…
I’ve separated out the code to draw the Inspector into it’s own method, and created a method for drawing the tooltip. We’ll start with what our OnGui looks like, because this is how we’re going to create two panes…

 GUIStyle previewStyle;
        GUIStyle descriptionStyle;
        GUIStyle headerStyle;

        void OnEnable()
        {
            previewStyle = new GUIStyle();
            previewStyle.normal.background = EditorGUIUtility.Load("Assets/Asset Packs/Fantasy RPG UI Sample/UI/Parts/Background_06.png") as Texture2D;
            previewStyle.padding = new RectOffset(40, 40, 40, 40);
            previewStyle.border = new RectOffset(0, 0, 0, 0);
            
            
        }

        bool stylesInitialized = false;

        void OnGUI()
        {
            if (selected == null)
            {
                EditorGUILayout.HelpBox("No Item Selected", MessageType.Error);
                return;
            }
            if (!stylesInitialized)
            {
                descriptionStyle = new GUIStyle(GUI.skin.label)
                {
                    richText = true,
                    wordWrap = true,
                    stretchHeight = true,
                    fontSize = 14,
                    alignment = TextAnchor.MiddleCenter
                };
                headerStyle = new GUIStyle(descriptionStyle) { fontSize = 24 };
                stylesInitialized = true;
            }
            Rect rect = new Rect(0, 0, position.width * .65f, position.height);
            DrawInspector(rect);
            rect.x = rect.width;
            rect.width /= 2.0f;

            DrawPreviewTooltip(rect);
        }

I’m actually throwing a few things in here… We need some styles to properly draw the Tooltip, and there are specific places where they should be initialized…
You can initialize the previewStyle (which defines the background of the rect) in OnEnable. That’s useful because you only want to load the background once, not every frame.
The other styles MUST be in the OnGUI thread (either in OnGUI or called by OnGUI because they are copying an existing style, and Unity gets upset if you put it in OnEnable.

DescriptionStyle defines the text. If you want to change the font, you can add it in the initialization block.
HeaderStyle copies the DescriptionStyle, but increases the font size, so the name is bigger in the tooltip.

I use the bool stylesInitialized to prevent the styles from being defined over and over again. This is very important if you load a font, as you don’t want to load a font each frame.

Next, we create a Rect based on the EditorWindow’s dimensions…
The EditorWindow has a property Rect position which holds the current location, width and height of the window. Our BeginArea, however, needs to start at 0,0, since the dimensions you give to BeginArea are relative to position, not relative to the editor…
We’ll set the rect’s width to position.width*.66 (2/3rds of the window) and the height to position.height to take the whole window.
This rect will be passed to DrawInspector.

        Vector2 scrollPosition;
        void DrawInspector(Rect rect)
        {
            GUILayout.BeginArea(rect);
            scrollPosition = GUILayout.BeginScrollView(scrollPosition);
            selected.DrawCustomInspector();
            GUILayout.EndScrollView();
            GUILayout.EndArea();
        }

DrawInspector creates a drawing area, and also a scrolling area in case the inspector overflows horizontally.
Then it’s back to the selected.DrawCustomInspector();

This leaves the moment I teased everybody with all the way at the top of this thread, the Preview Tooltip…

If you look again at OnGUI, we’re setting the x of rect to the width of the rect, then dividing the width by 2 before passing it to DrawPreviewTooltip… This is just a trick to make a rect of the other 1/3rd of the Editor Window. You can change the ratios if you want, just be careful not to accidentally overlap the panes.

        void DrawPreviewTooltip(Rect rect)
        {
            GUILayout.BeginArea(rect, previewStyle);
            if (selected.GetIcon() != null)
            {
                float iconSize = Mathf.Min(rect.width * .33f, rect.height * .33f);
                Rect texRect = GUILayoutUtility.GetRect(iconSize, iconSize);
                GUI.DrawTexture(texRect, selected.GetIcon().texture, ScaleMode.ScaleToFit);
            }

            EditorGUILayout.LabelField(selected.GetDisplayName(), headerStyle);
            EditorGUILayout.LabelField(selected.GetDescription(), descriptionStyle);
            GUILayout.EndArea();
        }

First, we begin a new area with our Rect…
Then, if there is an Icon, we draw the icon with it’s size based on the size of the pane.
GUILayoutUtility.GetRect(iconSize, iconSize) is a handy function. It instructs the layout to set aside the area requested, and returns a rect of the location that it has set aside…
We then use that rect as the coordinates for GUI.DrawTexture to draw our sprite.

After that, we just draw Labelfields for the displayName and description. Because we overrode the description, it will automatically have the correct information based on the class…

This pretty much concludes the tutorial on creating an InventoryItem EditorWindow.

Here are a couple of challenges if you want to extend your adventure in EditorWindow coding…

  • It’s fairly easy to make the regular inspectors use our DrawCustomInspectors(). Research regular Editors and create an Editor that will edit InventoryItems and it’s children (there is an optional boolean on the [directive] you’ll be putting on the Editor to edit the children as well). While the tutorials out there have you drawing each property with specialized property commands and creating positions, etc, all you really need to do is get an instance of the selected object, and call DrawCustomInspector(). I’ll leave this challenge unsolved in the repo for now.
  • Add a Rarity to the InventoryItem’s list of properties… Most games have rarities like Common, Uncommon, Rare, Epic, and Legendary… perhaps an Enum? Change the color of the title in the tooltip to match the rarity…

A quick shout out to @Adir who noticed that I have the full health check in HealingSpell comparing GetPercentage to 1, when Health.GetPercentage() returns a full 0-100 range. The obvious fix is to change the check to health.GetPercentage>=100.0f

This lessons GitHub commit: The Tooltip Preview

6 Likes

Thank you for this awesome tutorial! Great stuff!

Brian,
I’m enjoying this.
I screwed something up. I got the “Foldout Style” foldout in the inspector but not in the editor. I obviously missed something crucial.
EDIT: I got this fixed in a further down in the discussion.

Thank for the great tutorial. I am having an issue where the GetDescription() is create repetitive data and have not found the cause yet:

Make sure that GetDescription doesn’t reference itself in a recursive way:

For example:

public override string GetDescription()
{
     return "5 point bonus to Defense/n" + GetDescription();
}

will create unwanted recursion, but:

public override string GetDescription()
{
     return "5 point bonus to Defense\n" + base.GetDescription();
}

will get the previous data without the recursion.

I commented out the setDescription and reset all my item descriptions and it appears to have fixed the issue, but can you add some clarity to this why not to use setDescription?

Oh, it was a different issue.
Change the SetDescription line to look like this:

SetDescription(EditorGUILayout.TextField("Description", description);

Using GetDescription will add the extra data to whatever you type, causing the extra lines to repeat. We want to use description directly here as we’re changing just the base description.

Absolutely insane amount of effort. Just like your Predicate PropertyDrawer lesson… man, you should get paid for this content. I’ll happily donate or purchase any course you make in the future

image
:wink:

2 Likes

Seconded on the getting paid. I was searching the forums for something entirely different and came across this. This is good stuff, man. I may have to adopt this.

One thing is for sure once I start bringing all the RPG stuff into the 3rd person combat “shell” I have made… I am normalizing all those SO MenuNames… They are spread across so many oddly named folders :joy:

Do you have a “Brian’s Corner” where you have this stuff all collated? We seem to have a lot of the same ideas for extension you just do them better than me. (I wanted to make this post while I am still in an okay mood. I am about to torture myself messing with the PersonalSpace stuff again because I can’t take the collider being that fat)

1 Like

https://community.gamedev.tv/tag/brians_tips_and_tricks

LOL… where we are right now.

Recently there was that article about how Zoomers have trouble with filesystems since everything is indexed and searchable these days. I am like the opposite. When things aren’t partitioned out like that my brain just breaks down. The way the forums here are set up with tags more than a traditional nested topic layout messes with me.

It’s not my favorite format either, but it’s what we have to work with.

I just finished up all the RPG courses a few days ago and have been going through and implemented the PropertyDrawers for the Predicates and have moved on to this Editor. Love what you’ve done here and feel like wrapping Editors around the RFP should be a course in its own. I’ve gotten everything working properly including all the customizations I have made except for adding the conditions to the EquipableItem object. I had assumed with the PropertyDrawers in place, this should have been as simple as adding the Condition as an Object Field, but it looks like as soon as I add the typeof(Condition), visual studio stops recognizing the method. I tried using a generic GameObject and casting it like we do elsewhere and that does not work either. I think I’m losing it somewhere in the editor with the relationship between the Condition and Condition.Predicate and would appreciate any pointers how to work through this? Guessing it’s not quite as simple as dropping the Condition object into the editor.

Edit: Just realized Condition is not a GameObject, which explains why I can’t pass it in the ObjectField. After playing around with it , it turns out I need to access it as a PropertyField. Still work to make it modifiable, but getting it to show was the head scratcher.

EditorGUILayout.PropertyField(new SerializedObject(this).FindProperty("equipCondition"), true);

Turns out to be much easier than expected to get the Predicates working. Not sure if this is the most efficient way, but it works.

I added this at the top of the class

#if UNITY_EDITOR
        private SerializedProperty condition;
        private SerializedObject equipableItem;

        private void OnEnable()
        {
            // Link the properties
            equipableItem = new SerializedObject(this);
            condition = equipableItem.FindProperty("equipCondition");
        }
#endif

and then just had to add 3 lines to DrawCustomInspector

        public override void DrawCustomInspector()
        {
            base.DrawCustomInspector();
            drawEquipableItem = EditorGUILayout.Foldout(drawEquipableItem, "Equipable Item Data", foldoutStyle);
            if (!drawEquipableItem) return;
            EditorGUILayout.BeginVertical(contentStyle);
            SetAllowedEquipLocation((EquipLocation)EditorGUILayout.EnumPopup(new GUIContent("Equip Location"), allowedEquipLocation, IsLocationSelectable, false));

            // Refresh the SerializedObject
            equipableItem.Update();

            // Automatically uses the Predicate PropertyDrawer
            EditorGUILayout.PropertyField(condition);

            // Write back changed values, mark as dirty and handle undo/redo
            equipableItem.ApplyModifiedProperties();

            EditorGUILayout.EndVertical();
        }
2 Likes

Everything up to this point was fine and dandy, however GameObject.TryGetComponent doesn’t exist in the version of unity (2018.3.3f1) I’m using while following along with the RPG course. Does this method get added in a future release of unity?

1 Like

Privacy & Terms