OK, yeah, I’ve done that. The problem with that is, if the ground isn’t flat, then the circles look funny. I’ve seen people talk about using projections to do this instead, but that’s the part I can’t figure out. I was hoping that’s what you were using and you could explain it to me 
@ben wouldn’t health change be another prime target for delegates rather than testing for health in every update?
Larry
Hey I choose to not having this type of UI for my game (yet) and so I’ve worked on a floating bar (just see that I’ve anticipate a futur chapter  )
)
here is the result :
Greetings All,
As usual I’m finding myself going off and doing more than I probably should at this point. What can I say, I’m enjoying the process. I’ve included the YouTube version of a peek into my project, “WellSpring”. I was able to demonstrate the movement, the custom follow camera I spent WAY to much time making as well as the auto hiding foreground objects when a player passes under them and lastly the customized Health and Endurance meters. My RPG is set in pre-history, so I’m already trying to get a little feel for some of the elements. I’m going to go ahead and attach the control script for my Health pools. (Quite literally a pool in a vessel.)  As always, I’m very interested to hear what you have to say and look forward to any comments you might care to leave. Have a great day!
Jenn
using UnityEngine;
using UnityEngine.UI;[RequireComponent(typeof(RawImage))]
public class PlayerHealthBowl : MonoBehaviour
{
[SerializeField] private Text healthText;
[Tooltip(“Check if you wish heath text to show.”)][SerializeField] private bool useText = true;private RectTransform rectTransform; private Player player; private const float Y_ADJUST_AT_ZERO_HEALTH = 12.0f; // Use this for initialization void Start () { rectTransform = GetComponent<RectTransform>(); player = FindObjectOfType<Player>();}
// Update is called once per frame
void Update ()
{
    // Base formula to produce a desirable curve to scale function for heath bowl.
    // f(x) = 1 - (x - 1)^2 from 0 to 1
    // simplified: f(x) =  x * (2 - x) from 0 to 1

    float scaleCurve = player.healthAsPercentage * (2 - player.healthAsPercentage);
    Vector3 adjustedScale = new Vector3(scaleCurve, scaleCurve, rectTransform.localScale.z);
    rectTransform.localScale = adjustedScale;

    Vector3 adjustedPosition = rectTransform.anchoredPosition;
    adjustedPosition.y = Y_ADJUST_AT_ZERO_HEALTH - Y_ADJUST_AT_ZERO_HEALTH * scaleCurve;
    rectTransform.anchoredPosition = adjustedPosition;

    if (useText)
    {
        healthText.text = player.healthAsPercentage.ToString("P0");
    }
    else
    {
        healthText.text = "";
    }
}
}
Hi Jenn,
I REALLY like what you did with fading the foreground objects and would like to do the same. Would you mind giving me some pointers on how you went about it? (I’m guessing its using the camera raycast that already looks for the layers?)
I also like your health-bar ideas!
Looking at your stuff has made me realise I need to get some other concepts for mine working before I can go much further… I have a ‘Mist’ system to work on as a core concept, which I think I need to get working now. Should be an interesting challenge - having a way to dynamically adjust the fog based on events and/or location…
Hmm, maybe I should check first if weather is covered later in the course…
Hey Brian,
Thank you for the kind comments. I’m happy to share what I did and give you as much as I can to help you implement it in your game as well. Before I get into that I wanted to comment and say that your idea to use fog as a core concept for you game sounds very cool! I can’t wait to see what you do with that. As far as weather being covered in the course. I’m only a tiny bit ahead of where you are so I have no idea. Let’s hope though!
To make the system auto hide the gameObjects in the foreground required me to make a few modifications. As you mentioned in the Camera RayCaster I added a few lines of code to help this function. I’m going to give you an edited version so you don’t have to deal with the parts that are unimportant to this function.
Inside "CameraRaycaster class def. add the following:
[Tooltip("Amount to shorten ray toward player to prevent ray hitting player.")]
    [SerializeField][Range(0f, 10f)] private float distanceAdjustment = 1.6f;
Camera viewCamera;
private GameObject player;
private float cameraToPlayerDistance;
private RaycastHit objectBlockingViewHit;
private const int noDefaultLayerMask = ~1;
Inside “Start” add the following:
cameraToPlayerDistance = (player.transform.position - transform.position).magnitude;
Inside “Update” add the following call:
LookForObjectBetweenPlayerAndCamera();
Add the following method to your CameraRaycaster class:
private void LookForObjectBetweenPlayerAndCamera()
{
    Ray ray = viewCamera.ViewportPointToRay(new Vector3(0.5f, 0.5f, 0f));
    //Debug.DrawRay(viewCamera.transform.position, viewCamera.transform.forward * (cameraToPlayerDistance - distanceAdjustment), Color.white);
    if (Physics.Raycast(ray, out objectBlockingViewHit, cameraToPlayerDistance - distanceAdjustment, noDefaultLayerMask))
    {
        //print("Object between Camera and Player: " + objectBlockingViewHit.transform);
        BlockFader blockFader = objectBlockingViewHit.transform.GetComponent<BlockFader>();
        if (blockFader != null)
        {
            blockFader.RegisterObjectRayHit(); // Update block hit every cycle hit.
        }
    }
}
So let me try to explain what and why. We need the distance between the player and the camera which is calculated in the line inside the “Start” method and used in the new raycaster so that we get only hits of objects between the player and the camera. The problem is that this distance will also send back hits for the player. My solution was just to shorten the distance using “distanceAdjustment”. I should note that a more elegant solution might have been to add the player to the mask on the ray but I didn’t’ think of it at the time and this works with just a little adjustment until you find the value that is just short of the ray detecting the player.
The new method, “LookForObjectBetweenPlayerAndCamera()” basically sets up the new ray. The return value of the Physics.Raycast Unity method is a bool. The actual return value is stored in objectBlockingViewHit as specified by the “out” parameter modifier which we know that Ben doesn’t like. (lol) Once we find a hit, I just grab the transform of the hit and ask it to find it’s own component “BlockFader” so that we can pass a command to that script.
The 2nd requirement is that you add the BlockFader script to any object that you want to fade in the foreground. Please note that this will only work if that object also has a collider component. It’s what the raycaster is looking for. Also I use layer 0 as the ignore layer. That is the raycaster will look for everything that is NOT layer 0 (Defalt). You’ll need to change all blocks you want to be able to fade to any other tag than Default. I created a “Environment” layer in my game and added all other pieces in the scene that were not walkable to this layer. In that way the RayCaster can find them. Lastly, I make the assumption that the player is in the exact center of the screen. If your character is located in a different place on screen or changes you’ll need to adapt the following line inside the LookForObjectBetweenPlayerAndCamera() method.
Ray ray = viewCamera.ViewportPointToRay(new Vector3(0.5f, 0.5f, 0f));
Here is my BlockFader script:
using UnityEngine;
public class BlockFader : MonoBehaviour
{
[Tooltip(“Time in seconds to fade block in and out.”)]
[SerializeField][Range(0.1f, 5.0f)] private float fadeTime = 0.3f;
[Tooltip(“Time in seconds to auto fade back in.”)]
[SerializeField][Range(0.1f, 10.0f)] private float resetTime = 1.0f;
[Tooltip(“Level of Alhpa to fade to. (0 = transparent, 1 = fully visible”)]
[SerializeField][Range(0.0f, 1.0f)] private float minimumAlphaLevel = 0.2f;private bool isInFadeState; // Assumes false or starting state is visible. private MeshRenderer meshRenderer; private Color currentColor; private int defaultLayer; private const int ENVIRONMENT_LAYER = 10; private Material defaultMaterial; private Material fadeMaterial; private float layerChangeTime; private float fadeInTime; private FadeTransState fadeTransState = FadeTransState.none; private enum FadeTransState { nowFadingIn, nowFadingOut, none }// Use this for initialization
void Start ()
{
meshRenderer = GetComponent();
defaultLayer = gameObject.layer;
defaultMaterial = meshRenderer.material;
fadeMaterial = GameObject.FindGameObjectWithTag(“FadeBlock”).GetComponent().material;
}// Update is called once per frame void Update () { CheckDeveloperCodes(); CheckforFadeTimedEvents(); ProcessFadeTransitions(); } private void CheckDeveloperCodes() { if (Input.GetKeyDown(KeyCode.T)) // (T)oggle transition for all blocks. { SetTimesAndLayer(); ToggleFadeState(); } } private void ProcessFadeTransitions() { if (fadeTransState == FadeTransState.nowFadingIn) { currentColor.a += Time.deltaTime * (1f - minimumAlphaLevel) / fadeTime; if (currentColor.a > 1.0f) { currentColor.a = 1.0f; gameObject.layer = defaultLayer; // Layer as before change. meshRenderer.material = defaultMaterial; fadeTransState = FadeTransState.none; } meshRenderer.material.color = currentColor; } else if (fadeTransState == FadeTransState.nowFadingOut) { currentColor.a -= Time.deltaTime * (1f - minimumAlphaLevel) / fadeTime; if (currentColor.a < minimumAlphaLevel) { currentColor.a = minimumAlphaLevel; fadeTransState = FadeTransState.none; } meshRenderer.material.color = currentColor; } } private void ToggleFadeState() { if (isInFadeState) // Set up to transition to Visible. { currentColor = meshRenderer.material.color; gameObject.layer = defaultLayer; // Layer as before change. fadeTransState = FadeTransState.nowFadingIn; } else // Set up to transition to Transparent. { meshRenderer.material = fadeMaterial; // Change Material to a alpha enabled Material. currentColor = meshRenderer.material.color; fadeTransState = FadeTransState.nowFadingOut; } isInFadeState = !isInFadeState; } public void RegisterObjectRayHit() // Raycaster msg: This gameObject is between camera and player. { SetTimesAndLayer(); if (!isInFadeState) // If we are not in Fade State, start fading. { ToggleFadeState(); } } private void CheckforFadeTimedEvents() { if (!isInFadeState) return; // Only check while object is currently in fade state. if (Time.time > fadeInTime) { ToggleFadeState(); } else if (Time.time > layerChangeTime) { gameObject.layer = ENVIRONMENT_LAYER; } } private void SetTimesAndLayer() { gameObject.layer = 0; // Default Layer layerChangeTime = Time.time + (resetTime / 2f); fadeInTime = Time.time + resetTime; }}
The way my BlockFader script works is this. BlockFader looks for a function call to it’s public “RegisterObjectRayHit()” method. Once this hit is registered, the system fades the block out waits for a set time and then fades back in. In this way I only have to worry about registering a hit one time. The fade back in is automatic and I don’t have to call any other function to restore the block back to the way it was. The 3 serialized fields I used are “fadeTime”, “resetTime”, and “minimumAlphaLevel”. There are tool tips on these to help but just quickly, fade is amount of time it take to transition In or Out. and the Reset time is the time it takes to automatically start to fade back in after the last RayHit and minimumAlphaLevel is just that. the level of alpha to fade the blocks to. (0 = invisible, while 1 is opaque).
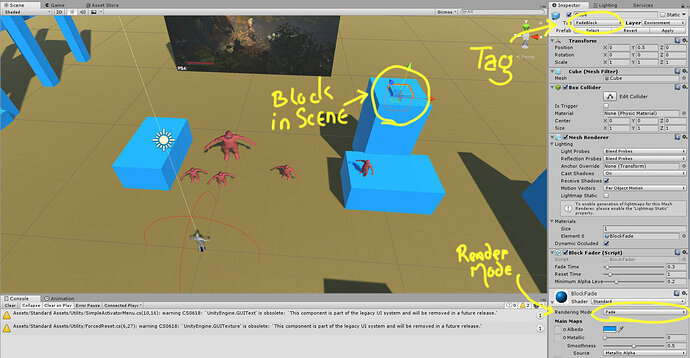
There are a few things you need to have in your scene to insure this function works. Alpha transitioning of opaque shaders are not allowed in Unity, and I looked into swapping the shader rendering mode from opaque to fade but the system does not like that. It is far less difficult to swap the shader completely. Basicly you keep the shader you have on the object, then when you begin the fade you 1st change out the shader to the fade version. The problem is that unity does not guarantee that the shader will be included in the build IF that shader is not included in the scene somewhere. So you need to make a object have your shader with fade mode and set the Tag of the object to “FadeBlock” so that the BlockFader script can find this block and more important the shader in the scene. Just add a new tag called “FadeBlock” to the tags list and assign it the block you put in your scene. Here is a quick snapshot of mine so you can see the details.
Now to make the system work, you’ll have to do all of the following:
- Modify your CameraRaycaster script.
- Adjust the “distanceAdjustmet” slider on the CameraRaycaster.
- Create and add the BlockFade script to all blocks you want to be able to fade.
- Create a block with shader that had default rendering set to “Fade” and tag that block with “FadeBlock”.
- Make sure that any block you want to be able to fade has a layer OTHER than default (0).
- Remember that the function assumes your player is in the center of the game screen.
I am sorry there was so much to this but hopefully this will help. If you find yourself struggling please feel free to contact me and I’m happy to help you to get it working. I’m not certain this is the most efficient way of doing this but it has been very reliable now that I have the kinks worked out. Best of luck!
Jenn
Thanks for sharing Jenn. You’ve earned inspiration points! I am also using a third person chase camera and I could definitely use some of this foreground fading logic. I may have found my new weekend goal.
Thanks Jenn.
Really busy at the mo but will hopefully find time to take on some of your ideas next week!
Will let you know if I come up with any thoughts on simplifying it.
Hi Jenn,
I’ve done a bit of work on this and a bit of googling on the subject too - and have my own solution running now.
Its pretty much based on your raycaster but I based my fader on this: https://answers.unity.com/questions/44815/make-object-transparent-when-between-camera-and-pl.html
Some interesting differences…:
private void FindBlockingObject()
{
    // Ray ray = viewCamera.ViewportPointToRay(new Vector3(0.5f, 0.5f, 0f));

    // Define the Ray to cast - from camera to player
    Ray ray = new Ray(transform.position, player.transform.position - transform.position);
    Debug.DrawRay(transform.position, player.transform.position - transform.position);

    RaycastHit[] hits;
    // the ~ in front of notFadePlayerMask is a binary NOT
    hits = Physics.RaycastAll(ray, distanceToBackground, ~notFadeLayerMask);
    foreach(RaycastHit hit in hits)
    {
        HandleFade(hit);
    }
}
Here you can see that I replaced your Ray with one which will find the player - as you suggested.
I also changed the Raycast to a RaycastAll to handle situations where there is more than one object blocking the view.
To avoid the player - I built up a layer mask (notFadeLayerMask) - and set it up in the start…:
        // Set up the layermask to ignore
    foreach (Layer layer in unFadableLayers)
    {
        // This line shifts a binary bit of 1 left (int)layer times and
        // does a '|' (binary OR) to merge the bits with the previous - so for each bit,
        // if either or both a '1', the result is a '1'
        notFadeLayerMask = notFadeLayerMask | (1 << (int)layer);
    }
It took me while to understand how layermasks and binary shifts work - but I’ve got it now. It was well worth doing this just to get that understanding. Basically this layermask contains these layers:
public Layer[] unFadableLayers = {
    Layer.Enemy,
    Layer.Walkable,
    Layer.Player
};
I did get a little confused as to what the raycast does with the supplied layers. I built it with items that I did NOT want to fade - as the documentation for raycasting suggested - but it did the opposite and I ended up using a binary NOT in the raycast (ie. ~notFadeLayerMask ). It works but I don’t completely understand why it needs to be that way.
In the HandleFade helper method, it does something clever. It checks if the object to be faded has a fader script attached - and if it doesn’t - it attaches one at runtime…:
 private static void HandleFade(RaycastHit hit)
{
    Renderer hitRenderer = hit.transform.gameObject.GetComponent<Renderer>();

    if (hitRenderer == null) { return; } // skip if no renderer present

    Fader fader = hitRenderer.GetComponent<Fader>();
    if (fader == null) // fader script not attached to object hit
    {
        fader = hitRenderer.gameObject.AddComponent<Fader>();
    }
    fader.BeTransparent();
}
And within the fader script - it destroys itself when its finished ‘un-fading’. I don’t know if there are performance implications with this but I like the way it is set up. Here is the Update part of the fader script:
	void Update () {
    // Visible again - so destroy.
    if (!shouldBeTransparent && transparency >= 1.0)
    {
        Destroy(this);
    }

    if (shouldBeTransparent)  // Fading Out
    {
        if (transparency >= targetTransparency)
        {
            transparency -= ((1.0f - targetTransparency) * Time.deltaTime) / fallOff;
        }
    }
    else  // Fading In
    {
        transparency += ((1.0f - targetTransparency) * Time.deltaTime) / fallOff;
    }

    Color newColor = new Color(oldColor.r, oldColor.g, oldColor.b, transparency);
    material.SetColor("_Color", newColor);
    shouldBeTransparent = false;
}
I think the core of this is quite elegant. I can’t really take credit - I mostly copied it from that link.
But I learned a LOT in doing this. Many thanks for the inspiration!
Brian
Awesome Brain,
You taught me a few things in your script. I didn’t even know there was a RaycastAll. That would have helped a lot when I was trying to change them all. lol. That solution is a lot less difficult to implement. Well done. Well any inspiration you’ve paid back. I’ve already spent WAY too much time on this but now I’m thinking about going back and refining the code. Honestly, I think I’m going to leave it and move on. I’m anxious to get onto new parts.  Thanks so much for taking the time for a great response.
Jenn
P.S. One final note. Your layer mask when you set it 
notFadeLayerMask = notFadeLayerMask | (1 << (int)layer);
your setting a 32 bit int to basically 0000,0000,0000,0000,0000,0000,0000,0010 (bitwise this is 1 << 1)
You are literally left shifting that 1 bit LAYER columns over. And the ~ flips the mask so you get a 1 for every 0 and 0 for every 1. The reason it works that way is because the raycast method call uses a laymask to say which layers it IS looking for, where any layer with a 1 is looked at and any layer with a 0 is not. Before your use of bitwise not (~) you’re telling the function to look for ONLY that layer and ignore everything else. 
I’m thinking about low poly style, so health bar made of trialngles should be proper 
We could, however there’s no evidence yet that what we’re doing is causing a performance issue. Thanks for the suggestion, and apologies for the huge delay in replying!
I’ve done health bars for private client games before and always found it much simpler to do it this way:
-Put the “empty” graphic on top of the “full” graphic
-Start the “empty” graphic’s x scale at 0 and slowly scale it up as the player loses health by just inverting the percentage.
No need for masks or convoluted UV logic. No need to use the Update method. No need to worry about distorting the look of your filled health, since you’re only scaling the negative space and creating an illusion that it’s
Emptying. All you might want to add is a “tray” image below both graphics so make it look nicer and more
Contained. And of course, change your pivot for the health bar graphics to left side.
I’ll officially make my own as soon as I find a decent free paint program for this MacBook, since my PC with creative cloud decided to die last week (or get stuck in infinite bootup hell with laptop monitor stuck in sleep mode)
hey!! Iv been working on the health… Just following along for now, but shortened the hight and lowered the bar, feeling good so far though. 
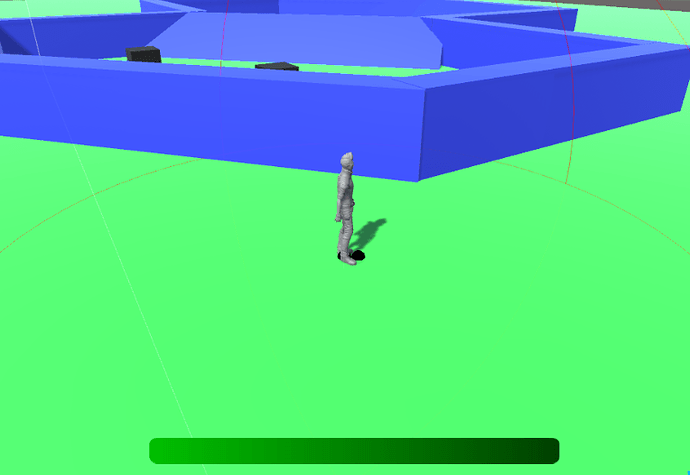
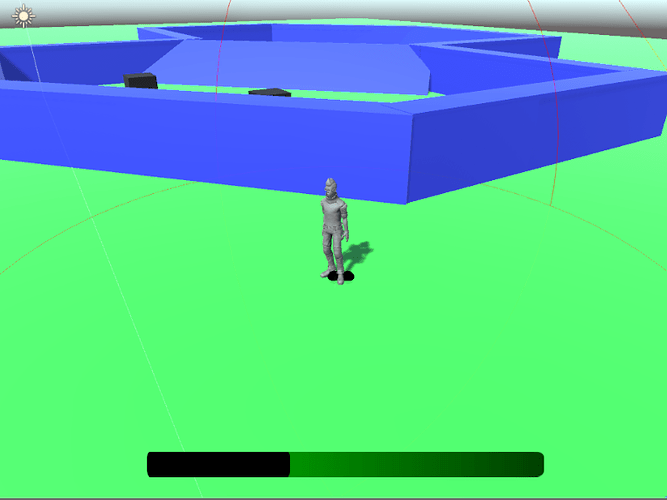
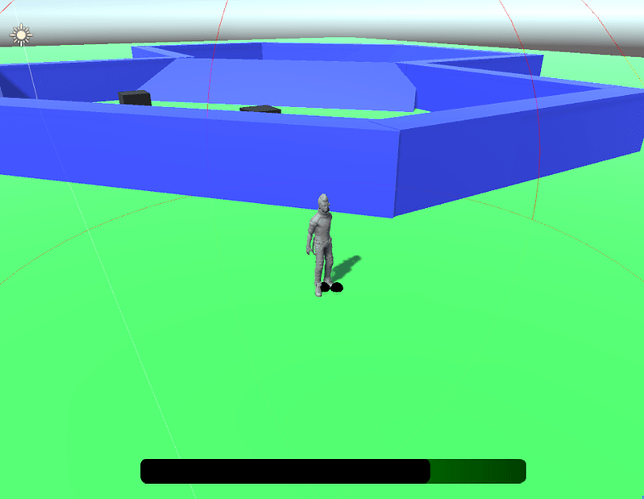
(Screen shots of my method; I used the observer pattern to detect changes and no update method. I put on some temporary code to detract the player health with key presses. Disclaimer being I am a programmer, not an artist)

