
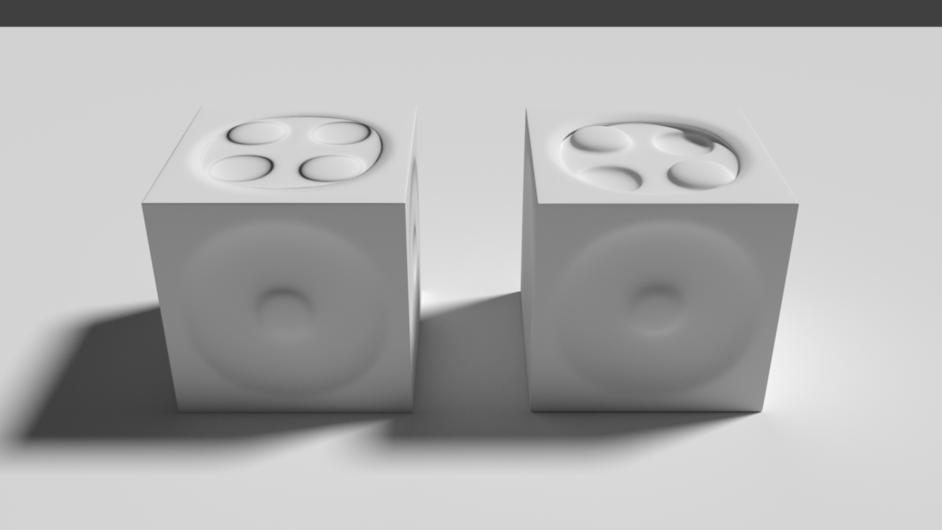
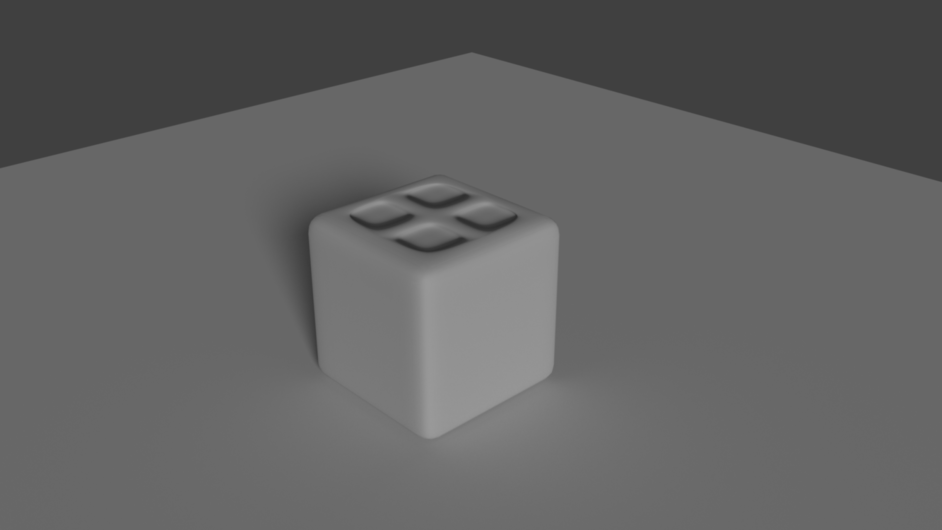
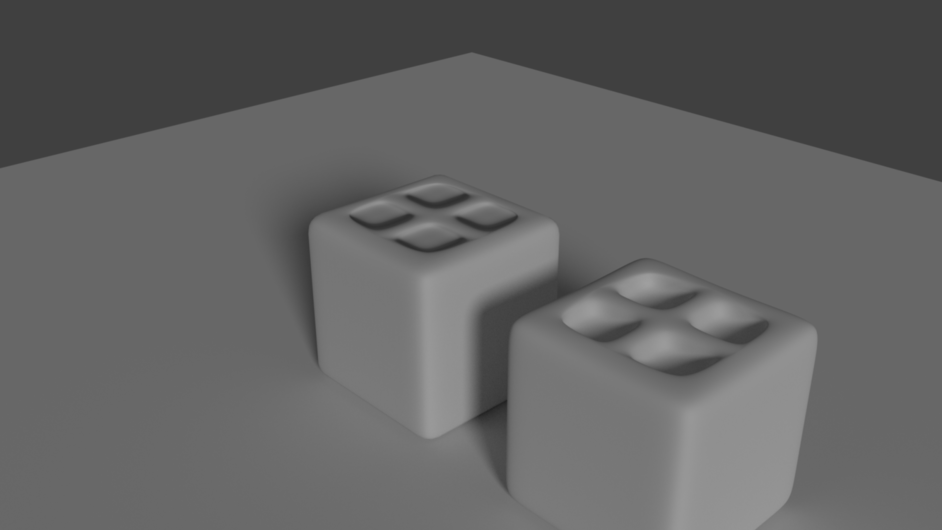
Can you tell the difference?
One is 12226 verts the other is 152 


4 Likes
It looks great.
I believe the one on the right is the 152 one since it doesn’t come off as smooth and the shadows are more pronounced.
My decision based from far away was for the bottom picture; but for the top one, I had to get closer to decide.
I really enjoy that Blender gives us the ability to do things like this since saves us from doing the textures from scratch.
Thanks for sharing~
@James_Ran Thank you! The result is TA-DA:You are right sir, the right is the low poly:) you won all the unneeded vertices 
1 Like
OK here it is, my first try baking normal maps. It’s pretty obvious witch one is the low poly version with the normal map applied and witch one is the high poly version. Don’t know exactly how to raise the quality and get more detail in the low poly version.
UV-Image Editor:
NormalMap:
Node Editor:

Going to give it another try!
1 Like
OK the second try had an unexpected outcome. I guess this is the correct behavior of Blender do.
Because Normal Maps contain direction information and not height information. It can not distinguish that the faces are lifted or lowered. So maybe to get the desired result I have to bake height maps. Is that even possible?
Rendered result
The baked Normal Map

UV-Image Editor

Node Editor

1 Like
Hi Bram, did you try change NormalMap node strength value?
1 Like
I think you are right. And what we are looking for is: bake diplacement map.
2 Likes
Hi Richard, I tried it after you told me. Check the result bellow. the top of the cube is still not quiet what I was hoping for.
NormalMap strength value: 1.500

The shadows in the circles on the top face of the cube are still to strong and look a bit fake.
After I Baked a displacementmap in BlenderRender and applied it

The left cube has now a NormalMap and a DisplacementMap applied. Because of the subdivisions surface modifier the faces getting a little curved near the edges.
the Displacement map I used, generated with Blender render

2 Likes
I also made a Displacement Map for the second cube I had difficulties with my Normal Map.
Render result: Both the Normal Map and the Displacement Map are applied

For this render I left the Normalmap strength value untouched. After I applied the displacement map, the edges of the cube get a deep line and the extruded cubes (inwards and outwards) both are coned shaped now. 
I still need some more practicing and experimenting before I get the hang of this I guess
the Displacement Map i used (generated in Blender render):

Thanks again for all you tips and help so far already. 
I leave it as it is for now and move on to the next chapter of this lecture.
More tips and advice are always more than welcome btw
2 Likes
@Bram_van_Vliet
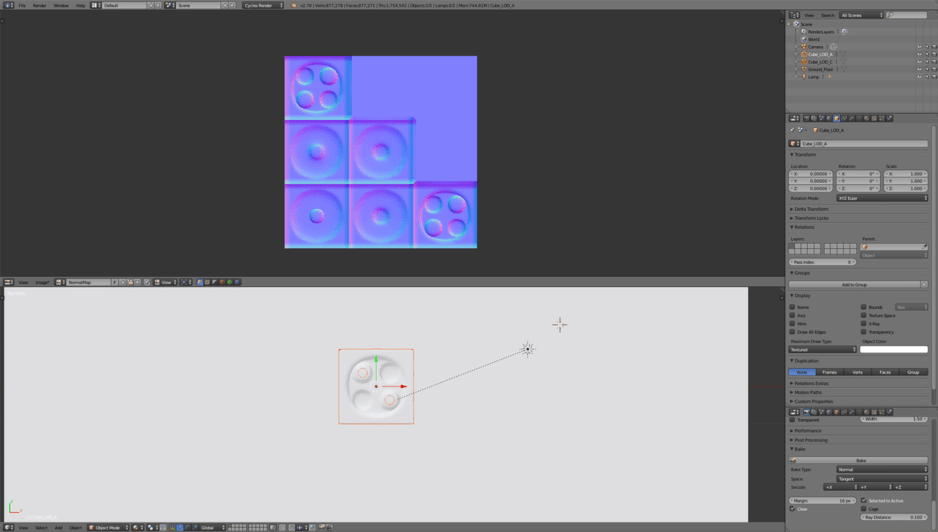
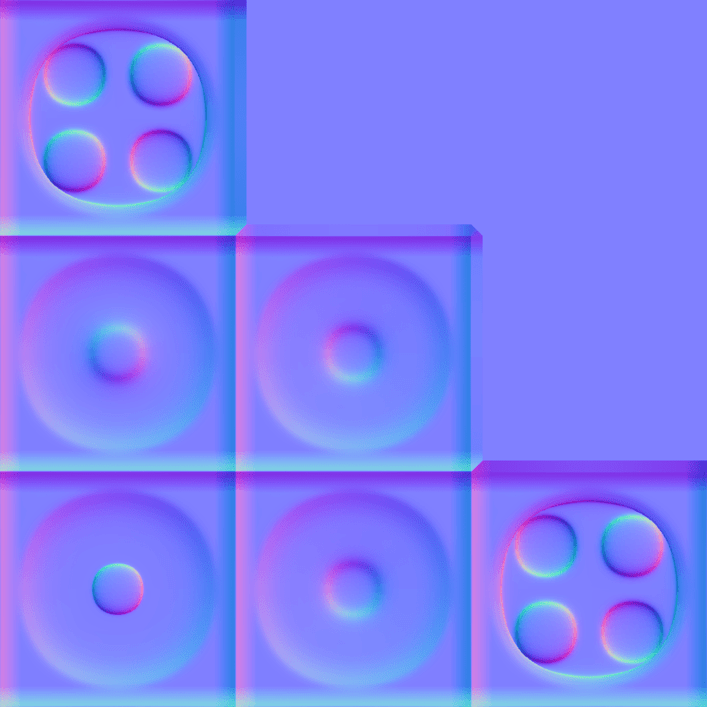
Hi Bram, of course i didn’t saved the normal bake scene, so i redone it and documented it, maybe you can find what you did different. I had also much pain with smoothing edges when subsurf is present, but i think i’ve found a good method to handle it.
Here are the two cubes, the right one is LOD_B with subsurf.

I added 2 loop cuts to every face. Make sure “Display modifier in edit mode” is on.

Then select a pair of loops and scale them on the according axes, for example on this pic these two only on y direction. With these we can set the sharpness of the outer edges

Then select a face you want to detail and subdivide it couple of times.

And just extrude some of them. Remember if you pull some faces outwards you will need to set some ray distance when you bake.

Now back to LOD_A a bit. We need to make it bit smooth. Go to front ortho view, and press z for wireframe and zoom on one the corners.

We need to carefully bevel the edges, select them all and play with it to get the desired shape.

And now we need to make proper UV for LOD_A with seams. It can be mindbending

Unwrap and make 2048x2048 NormalMap image

From here its the normal bake process. However to not to get the “Circular dependency…” warning when you bake, you need to disconnect the Image Texture node during baking.
*One more important thing, set the texture image to Non-color data!

I hope this helps. Cheers!
3 Likes
Good afternoon @Richard_Vekony, thanks again for your very clear and thorough answer .
It was very very insightful. I walked trough every step of the process ones again, and check carefully every step I made with the backing process according to your steps.
It turned out I didn’t miss any steps, or do anything differently.
I guess it is just a lightning issue.
Maybe you can test my file with your lightning setup?
Bake_Normal_Map_D.blend (904.8 KB)
The tip about the Circular dependency was very helpful.
Regards,
Bram
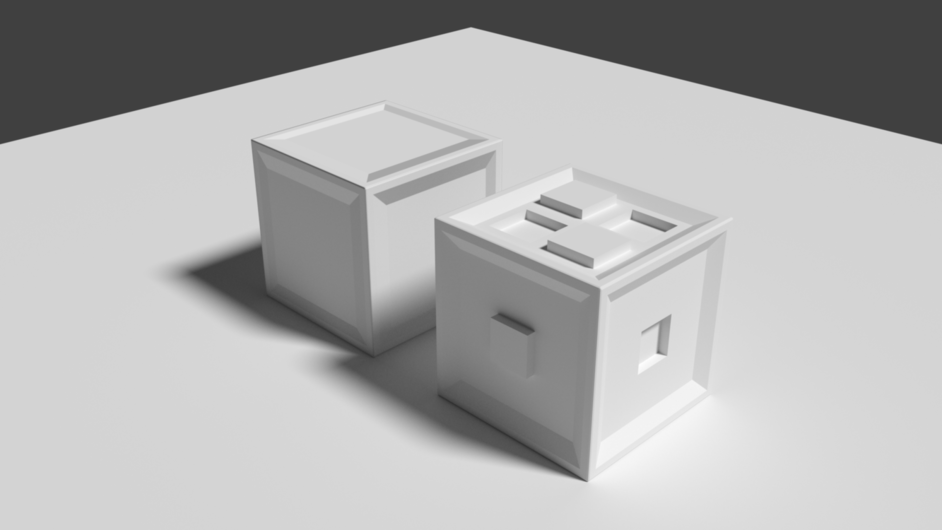
@Bram_van_Vliet Hi Bram, i checked your scene, i think we just can’t recreate a so deep dip with normals, just smaller details.
Without touching anything, just moved them apart, it looks like this:

However i had some artifacts on the smoothed edges, i checked your UV and i made a little fix on it, look at the new seams on the mesh. I baked a new “NewNormalMap” with a little more Ray distance, and it fixed the smoothing.

Bake_Normal_Map_D.blend (6.1 MB)
2 Likes
@Richard_Vekony Hi Richard, I see the differences now. Such subtle changes for a better result.
To conclude:
Use smooth shading for softer edges in the normal map
Also, mark seams on the corners
Use environment lighting (HDR image).
Two renders:
Without HDR environment lighting
With HDR environment lighting

Thanks again for all the help so far.
The learning journey continues.
2 Likes