An eye ball to begin with

After seeing Michaels solution, I liked his solution. Because he is using a Blender generated texture to paint his blood veins. Clever idea!
I did not thought of that, I’m used to “hop in to Photoshop”.
I used two bump maps, one for the eye (no flawless sphere…!) and one on the blood veins. Added some 4 ‘window’ look-a-like lighting emitters to reflect on the eye. Added some noise to make the eye less white. And of course, colored the iris.

Source eye.blend (801.8 KB)

8 Likes

That looks really nice.

I would say do whatever is easiest and most efficient for you. That… while monitoring the resources being used to render / utilize your model(s).

The blue color reminds me of the floating eyes from Mario 64. So -smacks the eye- :triumph:

I see you are back and working hard, FedPete. I might become motivated to make something if you keep this up!

LOL this looks kinda creepy with the veins running through it and the way the light is shining on it. It looks very realistic to me.

Just a curiosity question, are you creating your normal and bump maps in Photoshop, Crazy Bump, or elsewhere? I am always curious what other software people are using in case I need to update my arsenal.

Depending on how realistic you want to get, you might want to have a look at medical illustrations. You can find many detailed ones on the web. LOL but be aware some of those illustrations or photos can be unsettling.

Keep up the good work!

1 Like

The veins bitmap came from the internet. That’s why I liked Michaels solutions, he just did it with Blender. I forgot such solution. The media is then more under control of Blender. But that is a lot of node configuration and I find that still a difficult aspect of Blender. I’m used to Photoshop.

I used the same bitmap as bump map. It was a quick solution. You don’t need Crazy Bump for this.
The veins are negative. Not a bump, but an indent (should be bump). And my feeling says, must be slightly bigger.

I know … reference material :frowning: Didn’t do … should have …

But that is the problem, tweaking and tweaking. From minutes to hours. Every lesson now, takes a lot of tweak time.

So, why don’t you show some render concepts of your projects?

Thank you for your feedback, I appreciate it!

1 Like

LOL yes, but you like tweaking!

No, was just curious if you used Photoshop for any of your maps. It can be useful, but I like Crazy Bump as well. You can the maps to be raised or lowered in Crazy Bump so is a handy quick tool to have in your Blender arsenal.

I haven’t been working on anything new and haven’t for months. Has not really been in a creative mood. Currently, is taking the Unity class and learning how to do some scripting and use Unity to create games. I figured it would give me a better idea on how it all works so when I do make some assets they will work better in Unity.

WIP work-in-progress !

" I have a cunning plan …"

I scaled the eyes, but the texture scaling stayed the same … bump map more visible now. I leave it like this.
It make it more creepier.

3 Likes

In the eye of the beholder. WIP

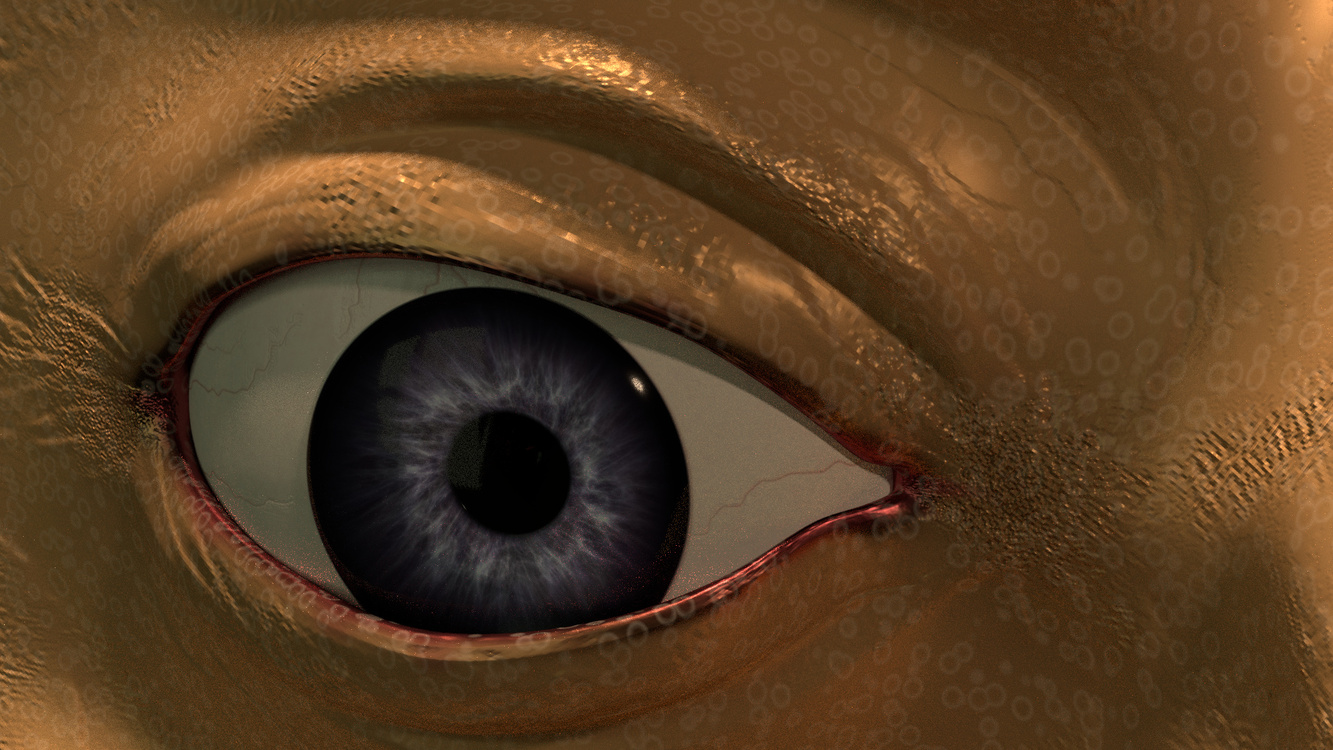
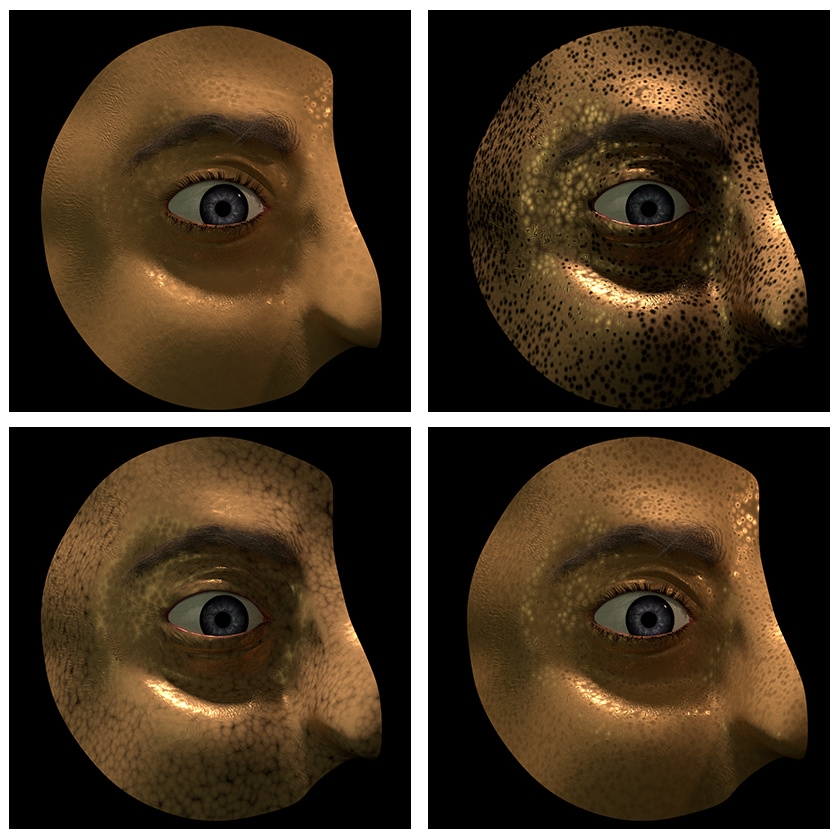
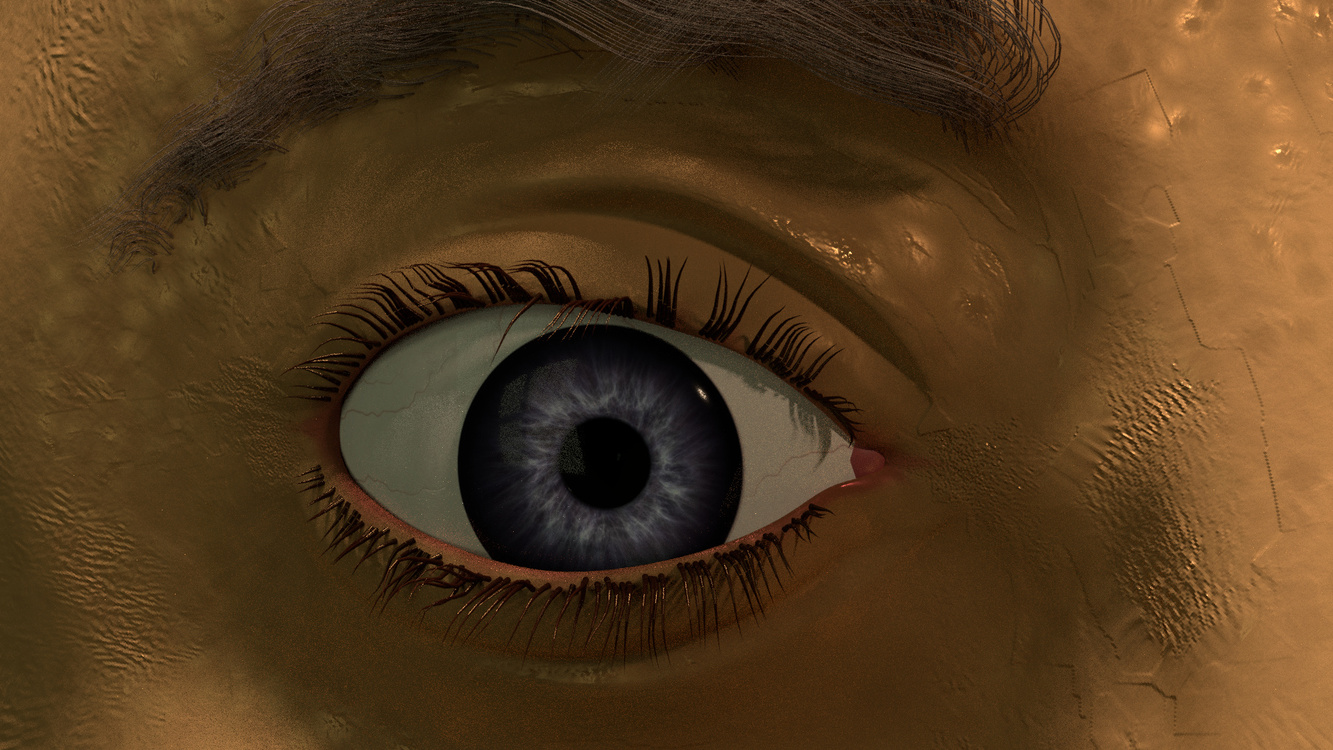
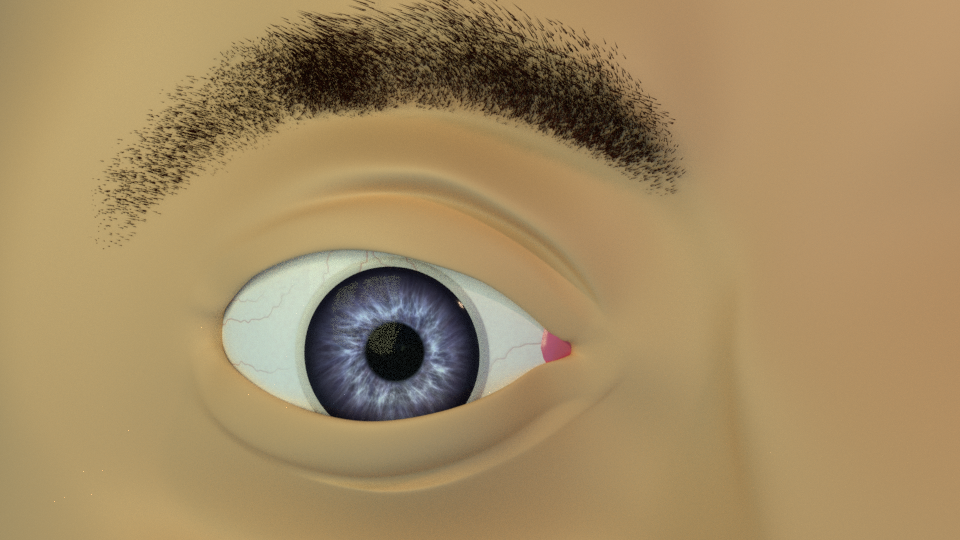
I didn’t create an human face for this course. But only an eye, is also creepy. So I decided to start a small project to give the eye a facelift … I searched for reference material. Found a nice female example. But, as you can see, It’s more an male eye.

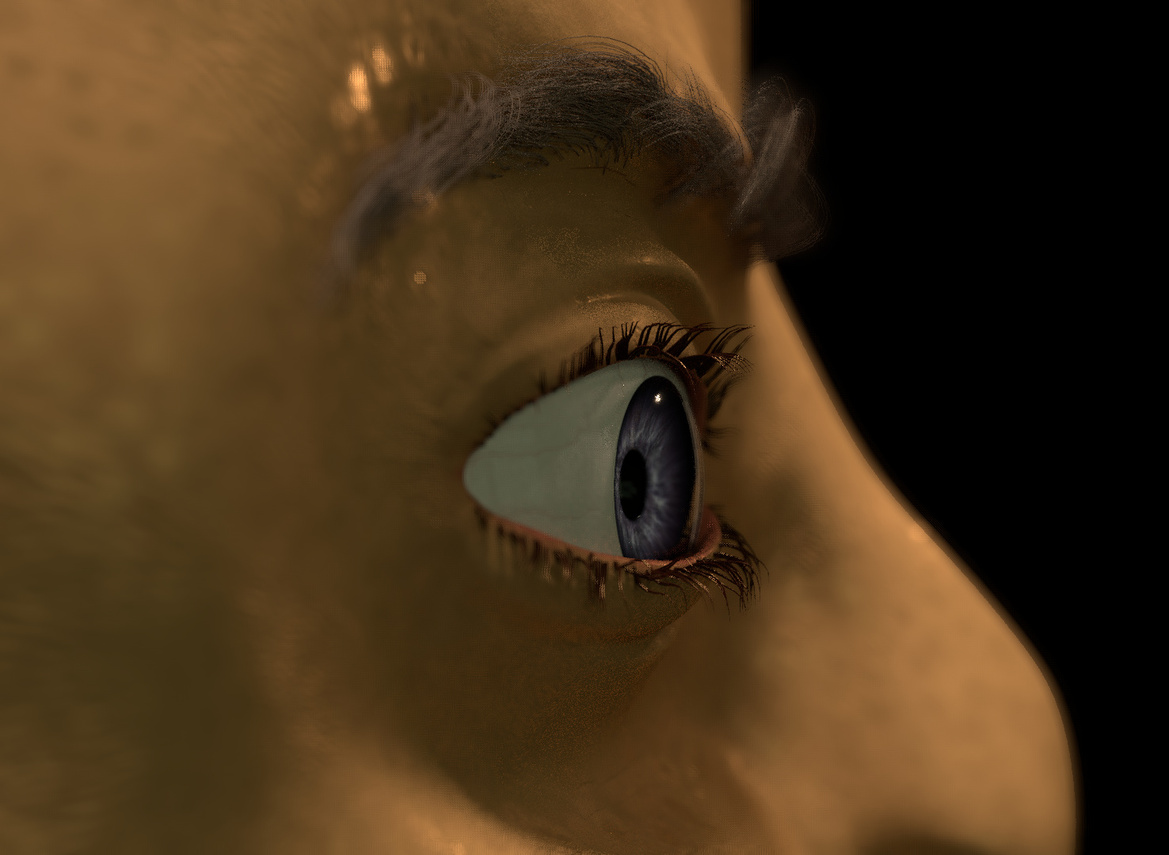
The hair particle system, is still a mystery to me. I spend a lot of time, why the hair didn’t show. So if you are working in the particle editor, instead of the default object mode. You’re in trouble like me. Hair isn’t visible.

An other annoying thing is that in the editor, the hair is like 2 cm long. But when rendered these are small stumps.

The face mesh is completely build in loops. I thought it would be handy, but somehow, it gave me a lot of problems. I do not understand why. Two neighbor vertices, with a short distance in between them, are like magnets. If you move one of them, they will merge. (auto merge is off)

Hot keys, they are nice. But is you forgot in which mode you are, and try some thing. Or accidentally you try a random key combination. And you don’t know it, unexpected behavior can be expected.

For example. Key commands like Scale number, Rotate number, doesn’t work in this project. Or Scale with mouse. Nothing happens. Why? If you know net me know.

Happy rendering.
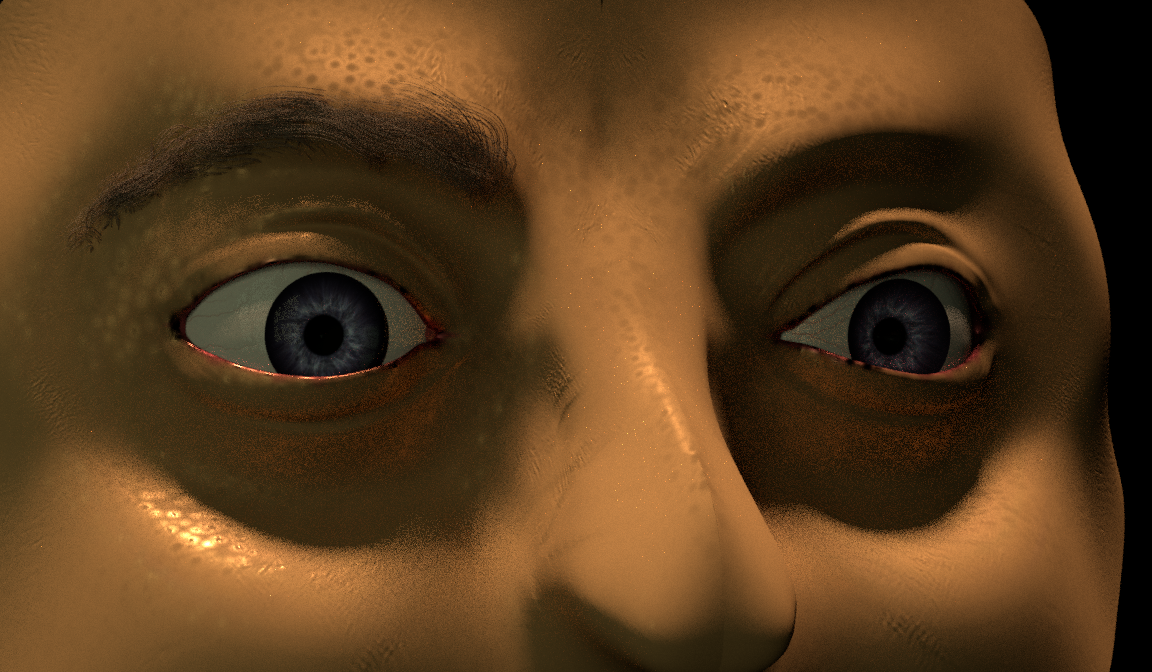
(yeah, yeah, I modeled only one eye.)

1 Like

LOL you only need to model one eye, FedPete. :slight_smile: 
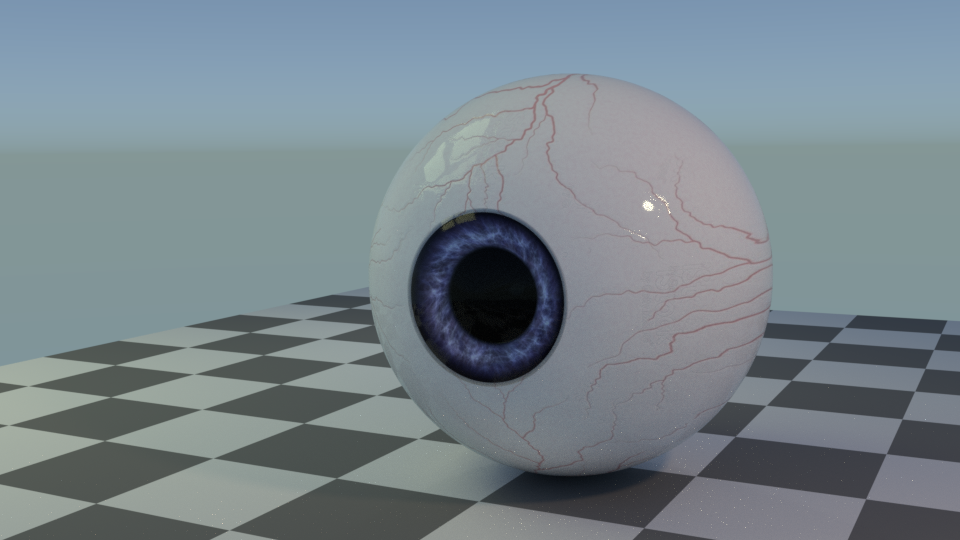
And, it is quite a nice eye at that. Create 1/2 your face and mirror it. Mirror modifier and duplicate are very close friends of mine when I do actually model.

1 Like

Nice eye FedPete! Good job!

Cheers, Jax

Yeah, I am working on it. Too much glossy, strange skin illness …

WIP.

Difficult terrain here. I wanted to merge two normal maps in Blender. Can not get it to work (yet).
I want to use / merge the baked version with face cracks, and a noise map to create some small face bumps.

I did a quick mirror. Strangely or not? The particles did not mirror also. Which is no problem.

Finally I solved my hair problem (no personal hair). I used also a weight paint map for hair size, that’s why is stayed so small at first test runs.

1 Like

Nice job! I really like the blotchy skin effect on your model.

This was and still is a big NODE mess …
Amazing effect (if you are looking for an alien …). Here are some render trial runs.

Texturing, more or less, in acceptable ranges. I want to close this section “Human face”.
I used camera blur, to hide some texturing imperfections.

The light spots, is a result of the node set up. Where some part became very shiny, so glossy is max. I couldn’t find a -easy- solution for this. But it looks like a sun spot.

2 Likes

Details … doing this I got a lot of new ideas to work on this model. Does it ever stop, the tweaking, the tweaking …

All I could say is preparation, preparation. If you are planning to do a close up. Be sure the texturing is capable of that.

2 Likes

Awesome post !

I find it really good looking, I must say that you are inspiring me to go one step further everytime I see one of your post :smile:

And it also remind me that I am still a beginner in blender :stuck_out_tongue:

Keep the good work up ! Cheers !

1 Like

Privacy & Terms