A Ride Went Wrong (Lamp Animation)

The video (only took me 19 hours afk overnight to render in Cycles):

It’s been a while. I resumed with course around mid July, but didn’t sync the progress to the discussion which in retrospect I think could be more helpful.

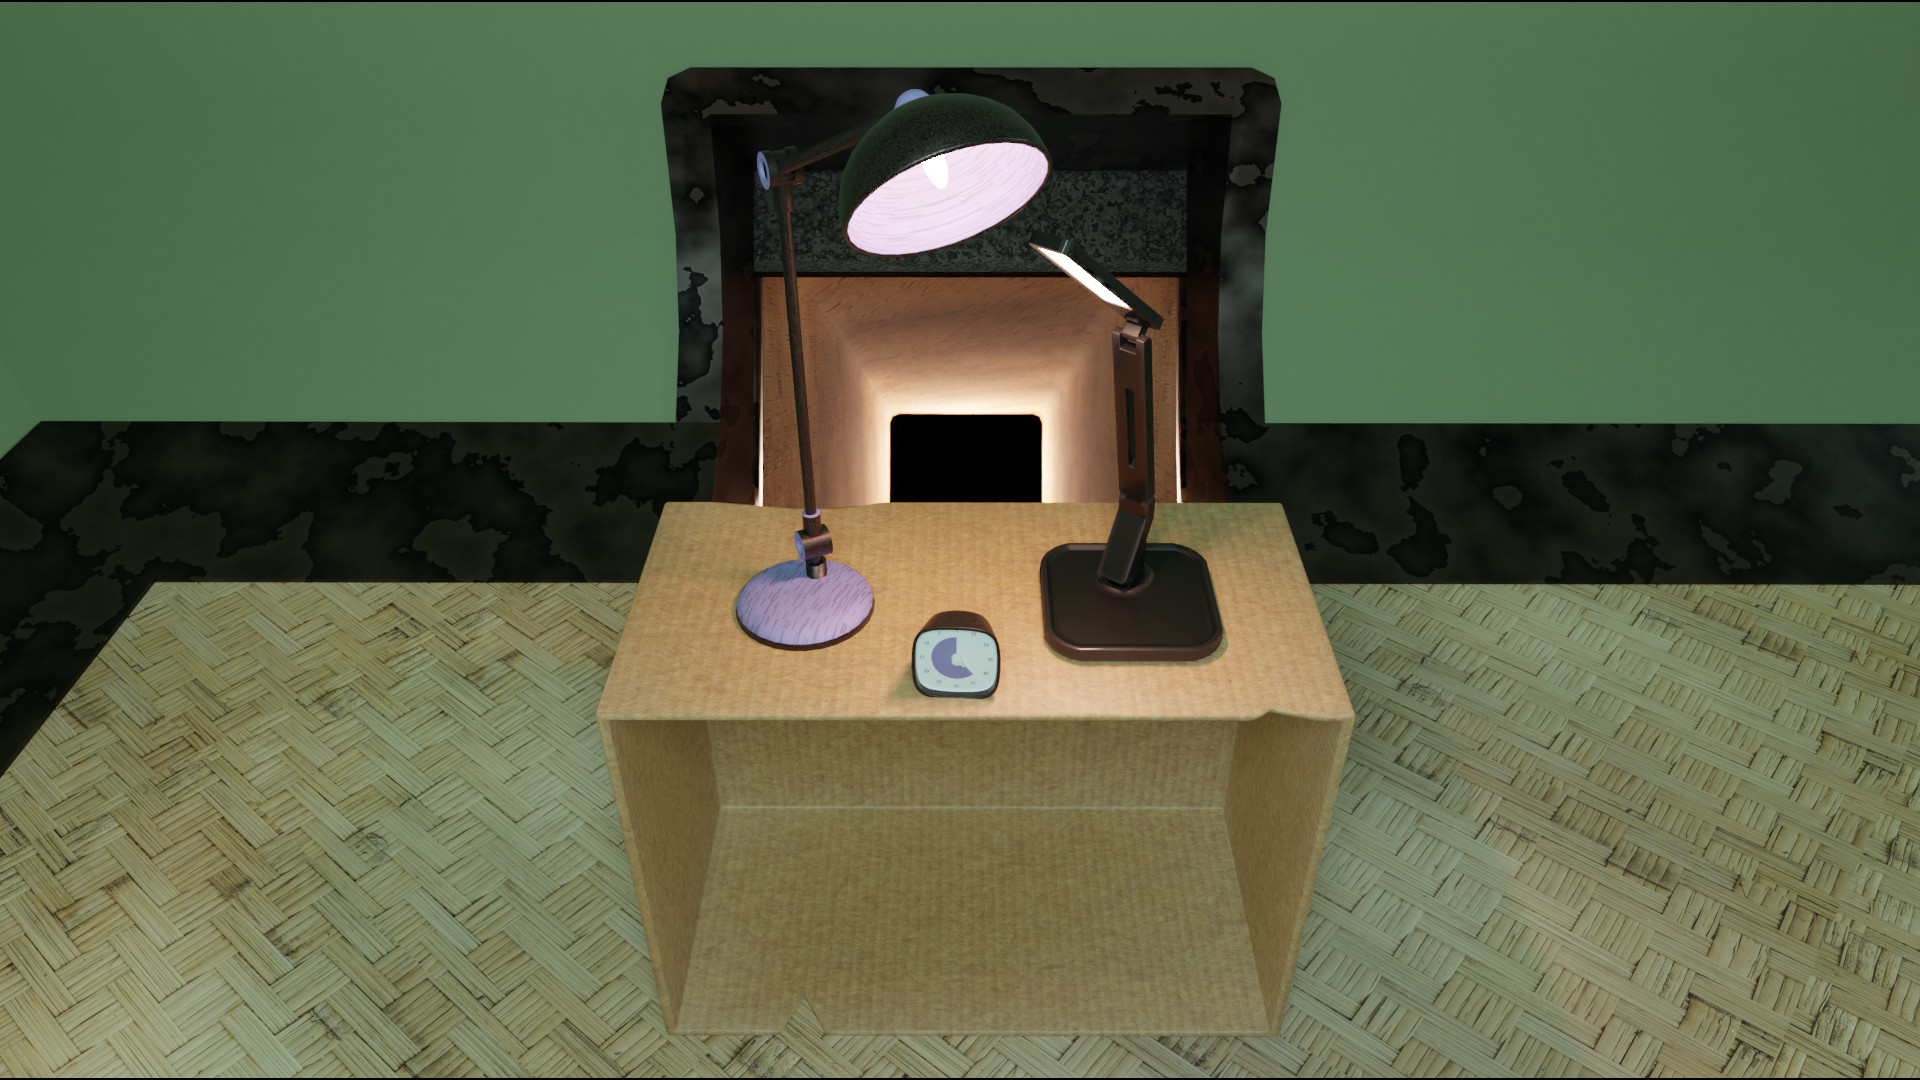
I made my own lamp first, then the thought of more closely following the course occurred so I built another one and put it to use. That’s partly why scripts turned out wildly different from the storyboard planning.

The other part is I came to feel that my visions were too high for a first-time 3d animation. I didn’t know how to do the cord nor more flexible tote bag. So the cord was omitted and the bag was replaced with a box, from where the renewed plot later derived.

Asset Showcase:


Armatures:


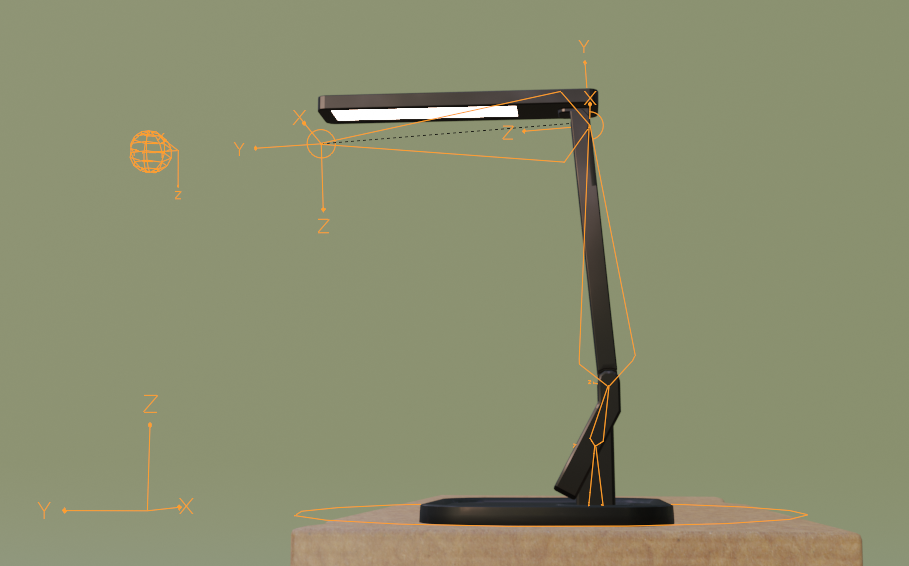
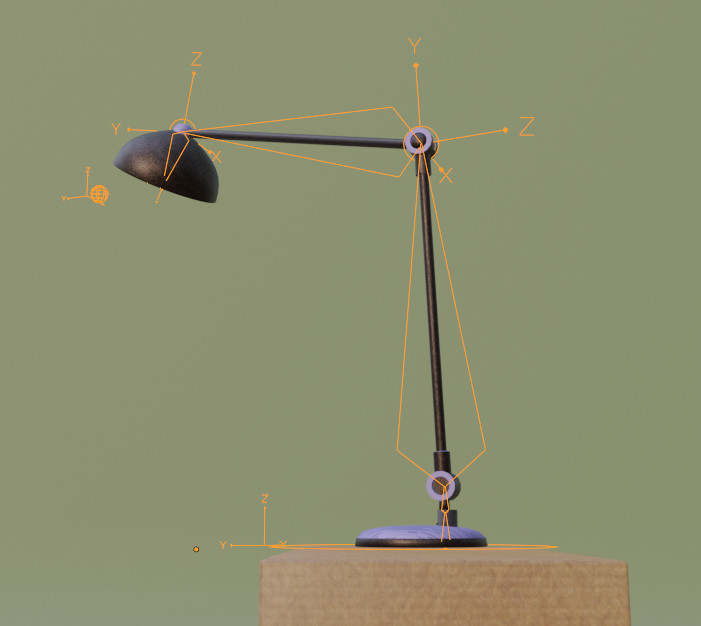
While animating the box and the timer, I realized not all animation entails an armature, and even modifiers can be key-framed.

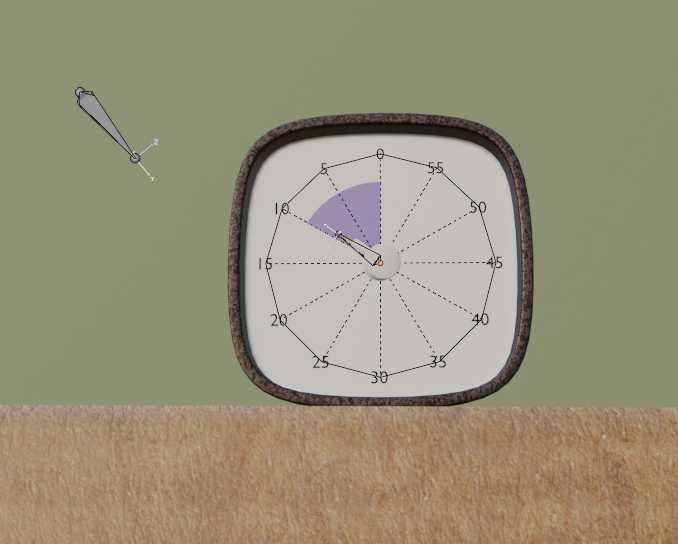
I used a screw modifier on a line to make the disk of the time. Unfortunately I didn’t find a way to bind the rotation of the pointer and the disk, so they’re actually manually done in separate.

—————— Reflections ——————

1
During this project, I have come to understand the importance of good topology better, because I turned on smooth shading, which I did not for the chess projection.

Quads seem to enable better subdivision and bevel modification, which is good for splitting planes (which has its own modifier). I found myself doing re-topology by dissolving edges, connecting points, and knifing around a lot…

2
It feels great to finally be able to plot objects and camera in action.

Although, sometimes I did run into problems where I couldn’t get a limb to be at the angle I want through just inverse kinematics using the control bones — if only I could mix directly key-framing the bones and the control bones better…

3
Another thing is that, I didn’t find a way to key frame all the pose-able components (i.e. control look and control base) at once, so every now and then only after I posed the character and moved on the timeline did I realize I only timed one of them and the other one got lost. I tried A select all and key-framing but it doesn’t seem to work that way.

4
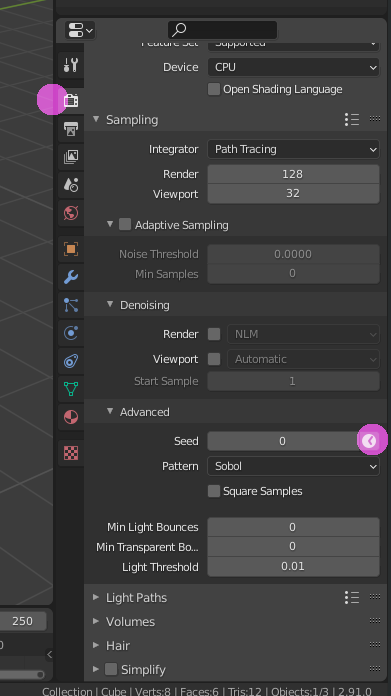
I rendered the animation in 720p and turned on denoising, but as the video shows, there seems to be some sort of blotchy artifacts going on… I wonder whether this is the inevitable substitute for noise.

5
Additionally, while looking around on the web, I also happened to notice character animation the armature of which is tied to one single mesh seems to rely on something called weight painting. I do would like to delve into that more.

5 Likes

Great video!
Not sure why there is a timer but you have it working well. The lamps are very ‘human’ in their looing out down the hole.
Very nice materials like the box.

Render times always a bane when done in proper Cycles. But it being done overnight is not too bad.

Yes all sorts can be animated, but you are going beyond the course which slows you down finding other bits out. Which is great so long as you are happy to do so, and you do not get frustrated.
Topology is important, perhaps especially for animation where things want to bend, like arms and legs on humans.

2 Likes

I’m really liking the video as well. A good job, well done. :slight_smile:

3 Likes

Thanks NP5!

The timer was sort of a left-over item from the previous plot arrangement. I thought it’d be a waste to not put it to good use, so I used it to start the scene: namely, when the time is up, the tunnel hatch opens so the lamps could subsequently enter.

I was rendering with a gtx 960m that’s the preinstalled gpu on my laptop. If only there wasn’t a global gpu shortage and price surge I think I would’ve upgraded ^ ^;

Glad that you can tell I had fun with the acting aspect of the animation xD. I am starting animation school in September, so I thought this could be a good warm-up / preparation.

One problem with topology that I frequently ran into is with beveling — beveling always create n-gons. I wonder whether this will a constantly present thing to be tackled with in the modelling journey. So far I’ve learnt from Youtube to mold a quad into isosceles trapezoid to branch one quad into three arrays, and into right trapezoid to branch one into two arrays. Nevertheless, there seems to be a thing called edge flow on top of this with which I am yet familiar.

2 Likes

Thank you Miss B! :smile:

1 Like

Great story. Good animation. I like the camera points. The camera cuts are well done with good story flow.

Yes, show also the process steps. I know you want to amaze everybody with a slick 3D animation. But as a beginner, that will be difficult. Learning is the goal! And showing your workflow, give other students also more info on how to do things. See errors or mistakes. And can tell you on beforehand, if it’s a good idea.
We all are learning here.

We all have been there. After the first lessons of dragging vertices, the world is ours … :wink:
But, 3D art is a difficult one. With lots of techniques and solutions. Practice is the key, short projects, and many projects.

Yes. But that was the goal of this lamp challenge.

You can use an animated GIF for this. Each Blender render frame will use a different GIF frame.

Yes, always try to get QUADS. Bet at render time, Blender will break quads into triangles, because how the final render process works.

Professional 3D animators, use less inversed kinematics. Because of the unpredictability.

Blender has the NLA editor. To merge animations together. But not really in-depth explained here in this course. Basically, make a walk cycle and a run cycle. Let Blender repeat the walk cycle. Then let Blender do the transition from walk to run. But those are advanced animation skills.

Yes, due to Cycle and denoiser. Cycle renders are based on random samples. But each frame has the same random seed. Denoising makes some part blurry, which are on the same spot for each frame.

Yes, other challenges. Or do the Grants Character course here on Gamedev. But weight painting isn’t needed for hard surface objects, like a lamp. It is used for organic modeling. A different technique, with different problems.


So show your work regularly. Just to set you on the right track.
Make a Work in Progress (WIP) thread, as I do sometimes.

2 Likes

Great plan find a use for old work!

Ngons beveling all relate to topology I suspect it is always a thing you have to fiddle with somewhere rather than quick fixes.
Animation school sounds good, you will have a flying start! Then can stay on here and help and advise the rest of us!

I am in a similar boat, had meant to upgrade the computer last autumn then the cards dissapeared and all chips effectively, unless willing to be ripped off. Looks like it will be a couple of years to get back to some normality. :sob:

1 Like

Thank you Pete for the very thoughtful reply!

I had some rudimentary experiences with storyboarding, so I paid special attention to what camera arrangement tells about actions on screen, I’m happy to know that you took notice of the effort.

When it comes to documenting, I agree with you. Sharing not only clarifies problems and directions, but also consolidates understanding and gives a sense of solid progress. Extra points for receiving feedback and providing records for fellow artists for reference.

I think my personal challenge to do it is more so about pacing of a project. Unlike with the chess section where I took small steps everyday and documented daily, I rushed through the section a bit, and documenting on top of prolonged work session evaded my my mind and I settled with this one concluding post. Nevertheless, I will seek the way and strive to do it in the future for all the benefits that are mentioned. Good suggestion of using a WIP thread, that should take the pressure off making full posts in the end… Thanks!

That’s interesting, I should look into it in future projects…!

Guess the reduction of artifacts is the only way to go then… If I tune up the resolution, the blotches should accordingly decrease in size…?

I was browsing the course overview and I do have that intention actually. It’s a great next step. :wink:

Again, thank you Pete for the suggestions and discussions!

Cycle has a randomize option to solve a bit of that problem. But better to increase samples. Or use Eevee, that is my solution.

1 Like

That’s good to know. :sweat_smile: Seems like the way to go is to hone up an intuition for retopology.

Yup. Hopefully it goes smoothly. I will need to make a transition to Maya for that route during school time when the software fee is covered. I think blender will be that sweet bud I can come back to time and again in my personal time.

Until then, overnight rendering shall be my friend. :joy:

1 Like

Thanks for the information…! I will check that option out.

Meanwhile, well said with using Eevee. That somehow slid off my mind. With all the detailed configurations in Eevee, there must be lots to be learned.

1 Like

Privacy & Terms