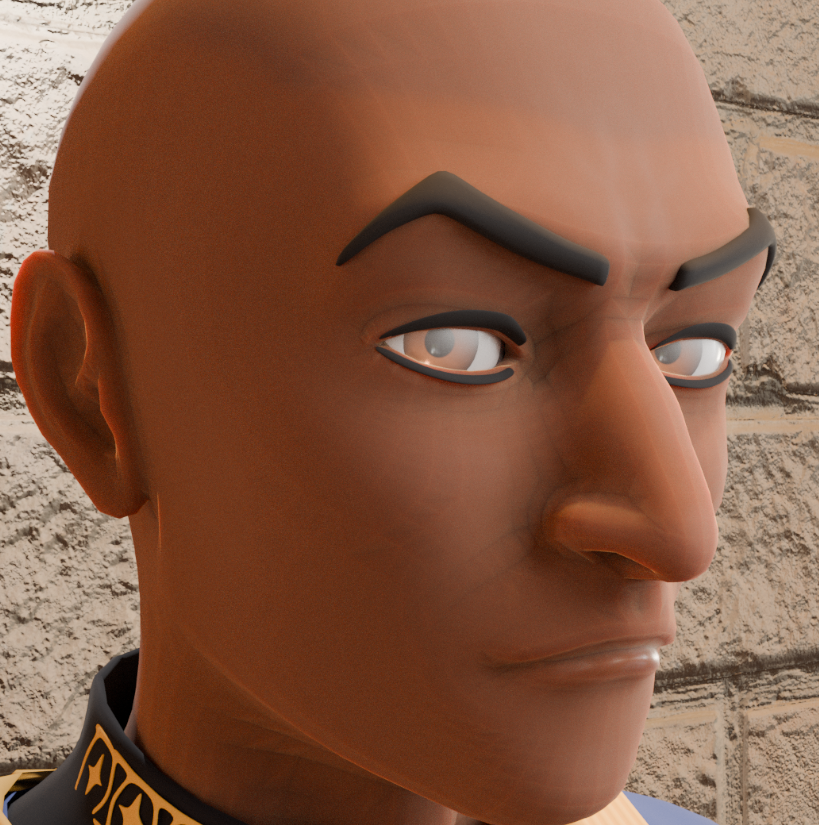
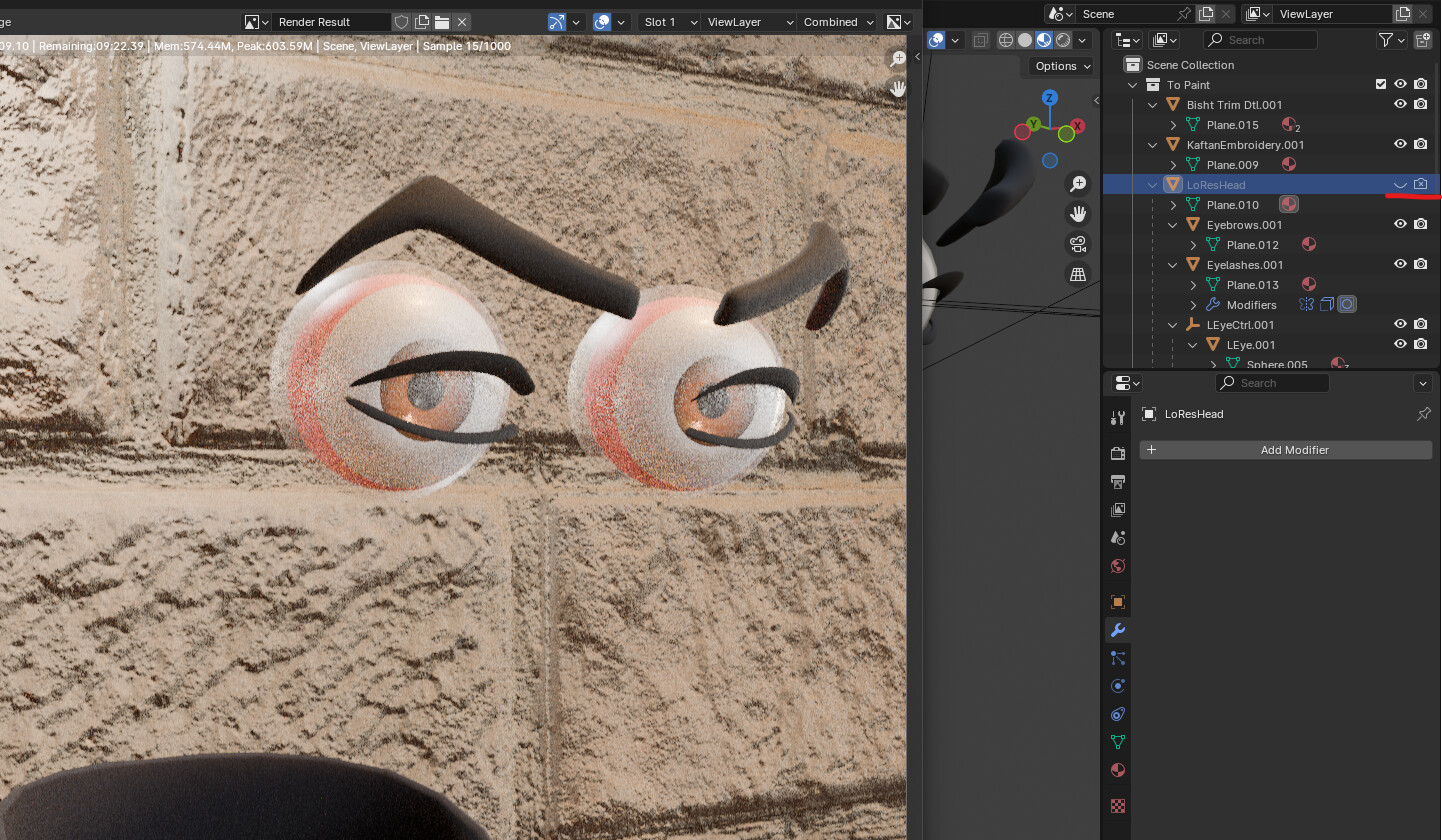
These appear in Cycles, both CPU and GPU mode. All objects are shaded smooth but only the head mesh seems to be affected. Unlike the others, I recently retopologized it by hand, so I suspect I did something wrong, but I don’t know what. Notice the black edge lines at the brow and bridge of the nose.
Edited to add:
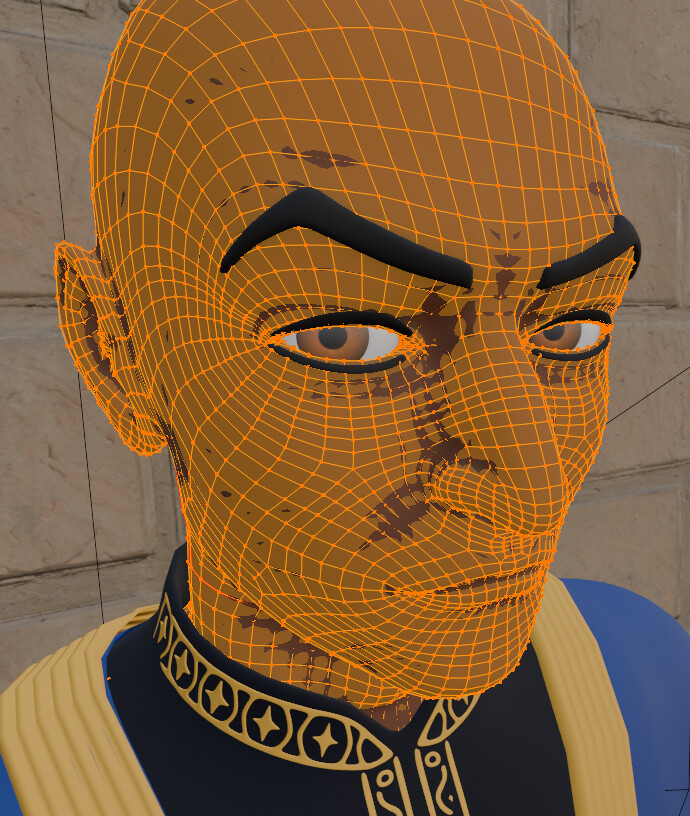
This happened when I added a subdivision surface modifier as an experiment:
It makes it seem like there are two meshes here, but when I hide the head mesh, everything disappears, there is no lurking second mesh that I can identify. Also, no matter how many “Levels Viewport” I tell the modifier to create, it only ever shows the base mesh.
It only gets that weird doubled-up look when I add a subsurface modifier with the cage off. Raising or lowering the Levels Viewport seems to have no effect at all.
When I remove the modifier it looks normal except in Cycles, where the same edges that seem to have interference in the modifier show up as dark and visible.
To test the idea that a hidden mesh might be visible in the render but not in the viewport, I made my LoResHead invisible in the render, but nothing else showed up.
Is it possible something was added while in Edit Mode? That would fly under the radar of every test you’ve done so far, since that would all be considered one Object. If you select some faces and temporarily delete them, you’ll know quickly if there’s something lurking underneath.
That’s just my own stab in the dark though; chances are it will be something more involved than that.
My thinking is if this effect is not on anything else, something is making it display differently. You could also do a full proper render of the area, as if it is not showing in that it might narrow it down to a Viewport Display parameter.
Have a look at the Object Properties tab, (orange Square icon) Then the Visibility and Viewport Display drop downs for anything out of usual. (You can add a new object to use as a comparison.)
Is it just me or does this problem seem to be localized to sharper angles? Look how the nasonobial crease and the eye surrounding is marked, yet the cheek and forehead are fine. Could this have something to do with the new Smooth By Angle?
I do not think so or it would be on other objects as well. Plus that new smooth by angle adds marked sharp edges wherever it deems needed, and there are none showing.
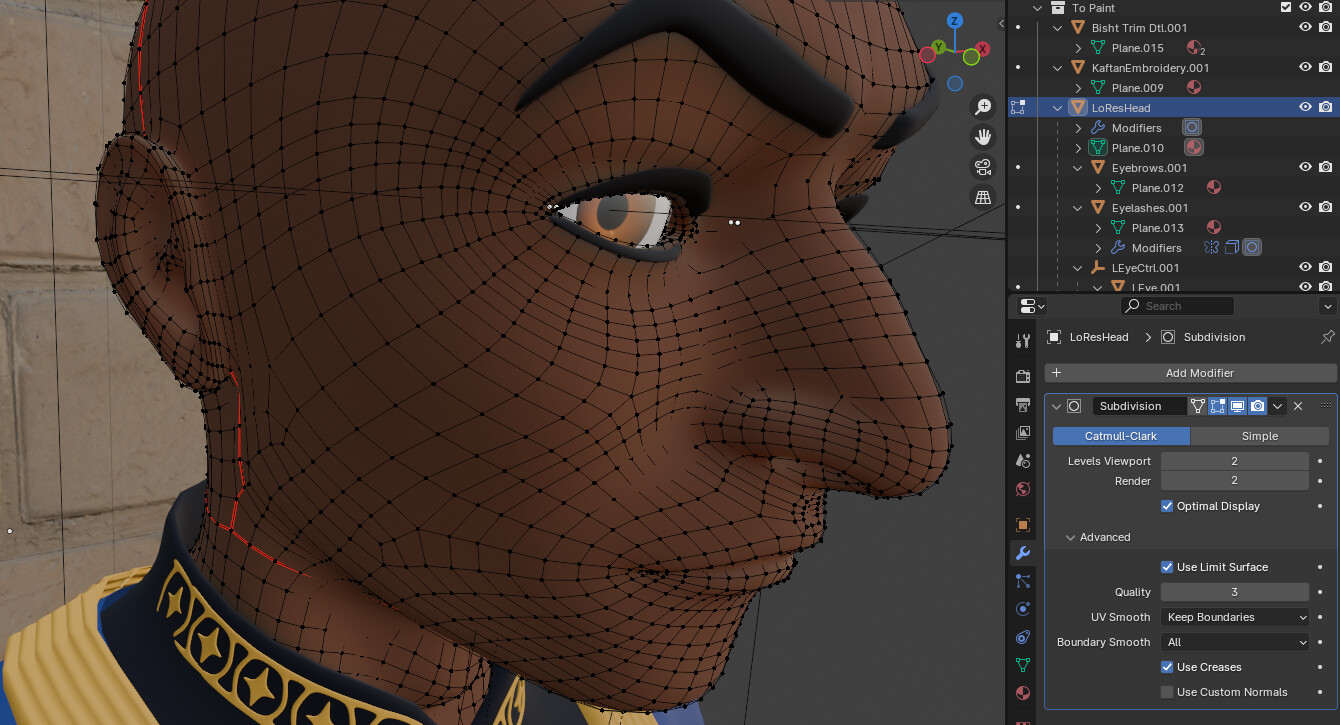
I did try looking at Visibility and Viewport in Object properties and saw nothing that wasn’t identical to a newly created UV sphere, fwiw.
I also tried deleting all shader nodes besides the default two, the principled shader and the display. The problem was still present. I was wondering if it had something to do with the UV unwrapping process because I’m very new to that and I tried to do it without following notes directly.
Also it’s sort of hard to notice but I think that all the edges are visible, not just in the problem areas. It’s just that the edges in the problem areas are dark instead of light colored. But as far as I understand, none of them should be showing because I have “shade smooth” on.
It was a driver problem (the crashing). I was confused because it was new, I hadn’t had any crashing problems or problems with Cycles before. I did update the drivers, though, and had no further issues of that type. But the edges are still appearing in my render (the above screen cap is after the driver update).
I started with a UV sphere and worked in sculpt mode, periodically remeshing at higher resolutions and sometimes turning on dyntopo for portions where I wanted to use the snakehook tool a lot (like pulling out the neck and shoulders, etc).
Once I had a sculpt I was happy with, I retopologized it by starting with a plane and using a mirror modifier and a shrinkwrap modifier, and using the magnet mode to snap all elements to plane surfaces. I extruded vertices and edges until I had the entire head retopologized.
Before I did the manual retopologizing, I did test the QuadRemesher add-on, but I didn’t like how it handled the mouth so I deleted those meshes and made my own.
I don’t have a lot of experience with blender, but I have done this particularly activity once before and had no problems - but in that case I was following the course very closely, whereas in this instance I was trying to test my memory about how things worked and trying to follow the coursework only loosely. I’m not sure what went wrong, though.
This was also my first time designating seams for UV unwrapping rather than letting it unwrap automatically. I’m not sure if that could make any difference to how it renders (especially with all my additional shader nodes deleted).
Any luck with this?
Perhaps try a completely new material. Start with a plain colour and then gradually alter the other aspects one at a time and see if one thing is creating it like subsurface scattering.