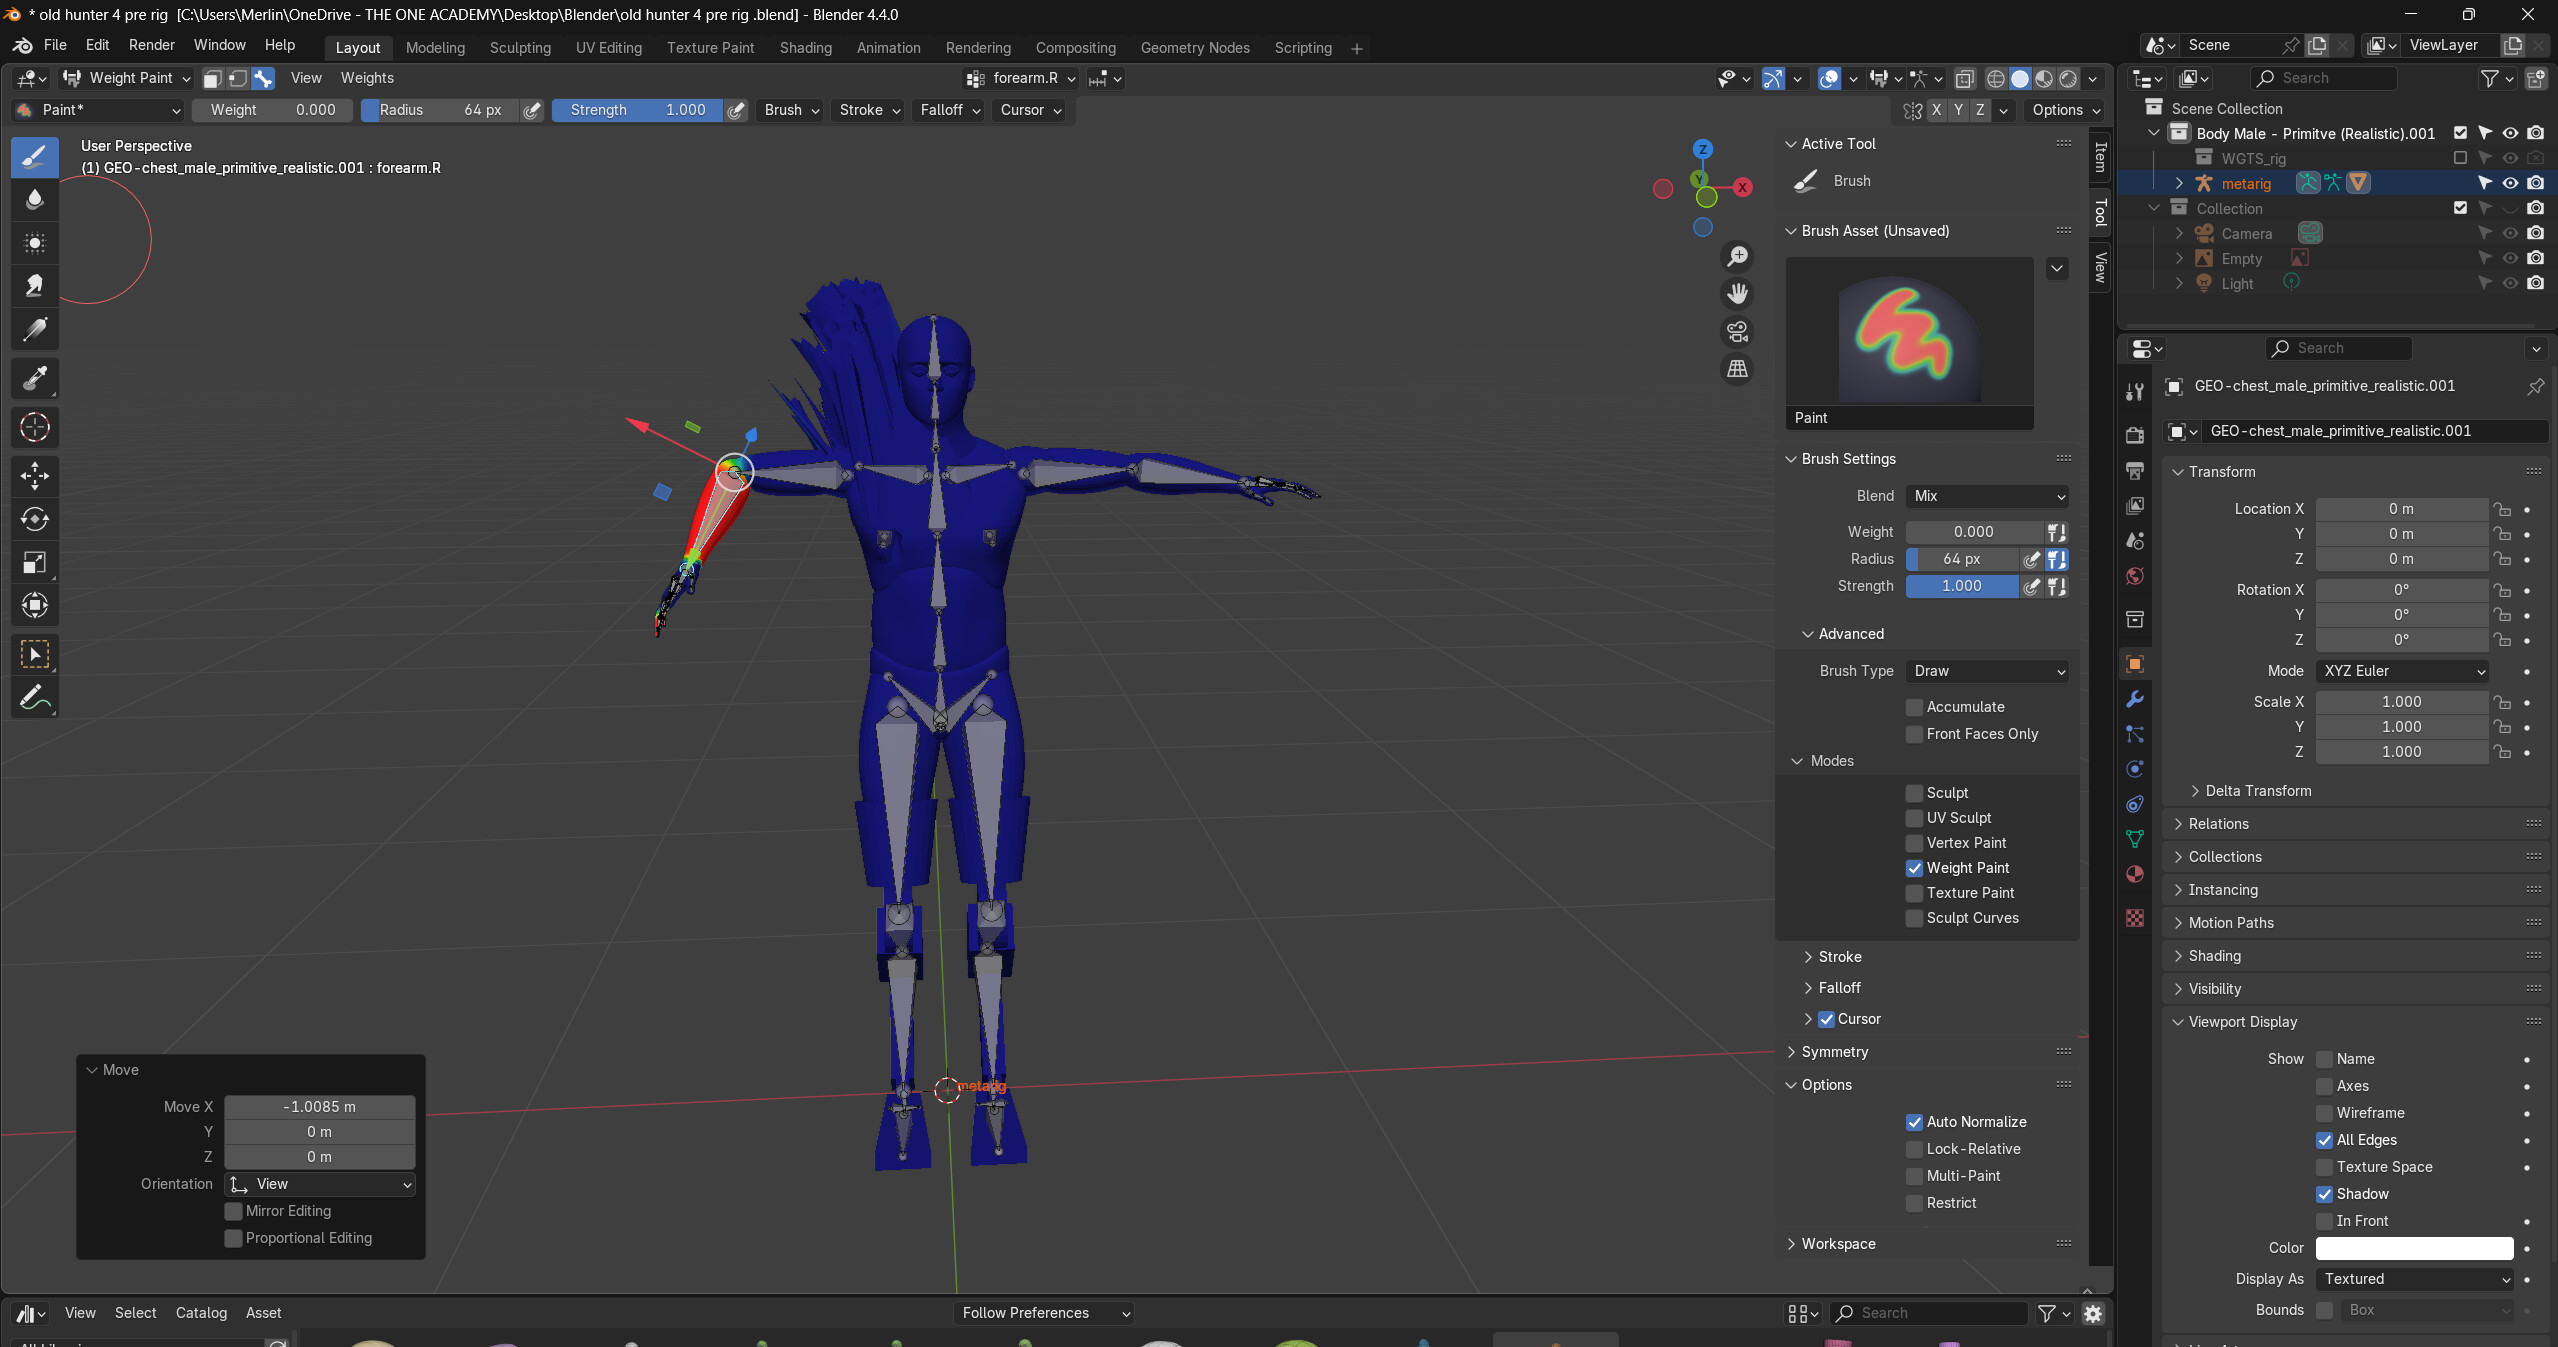
As the title says. The blue areas are still affected by the movement of the forearm even tho there is no red on the front nor the back.
What does work is if i paint from another bone with auto normalize on.
I have set the weight of my brush to 0 but it does nothing. And ive looked for a substraction brush but it is not within the default brushes in the library for some reason.
Even if you think it’s blue, weight paint effect = 0. It can be so that the it is slightly blueish with a weight factor of 0.002, so it will be influenced by the bone! But it looks blue.
Checking all of the bones and checking all of the hidden faces in usually the biggest issue I have with weight painting.
I can’t exactly tell - but it looks like you have multiple meshes making up this character, the inside faces are possibly still weight painted, try selecting some of the faces you can see in edit mode and pressing H to hide them - they stay hidden while you’re in weight painting mode so you can get them all.
I always wish I could remember how to toggle weight paint thru all of the faces you can and cannot see that your brush hit.
I hope one of those things might help, good luck.
First, while in weight paint mode click weights->clean. Then in the adjust last operator panel in the bottom left corner expand it and change the weight to 0.1. This will remove vertices that have a weight of 0.1 or less from all vertex groups.
Second, make sure you are using Paint brush. Click brush on the tool settings(Second row of the header). Make sure Blend mode is Mix and brush type is draw. Check Front face only so that you don’t paint thru everything under the brush. Make sure weight is set to 0 and set strength to 1 or the amount you want the stroke to adjust by. Then in bone select mode(3 or the bone icon on the header) select the arm bone(Ctrl+shift+Click). Paint the spiked parts. If it has problems painting them then change weight to 1 and hold Ctrl down while you paint. Holding Ctrl inverts the weight amount. So a weight of 0.75 would then paint 0.25 while holding Ctrl.
You can see what the weighting of a vertex is by doing the following.
Leave the bone bent. Go to object mode and select the mesh. In the modifier tab on the armature modifier click the 2 greyed out icons on the header of the modifier.(A square with verts and the upside down triangle.) Go to edit mode. select one of the vertices of the shoulder/back that is spiking up. Open the n-panel and expand the Vertex Weight panel on the Item tab. This will show all the vertex groups/bones that have influence on that vertex.