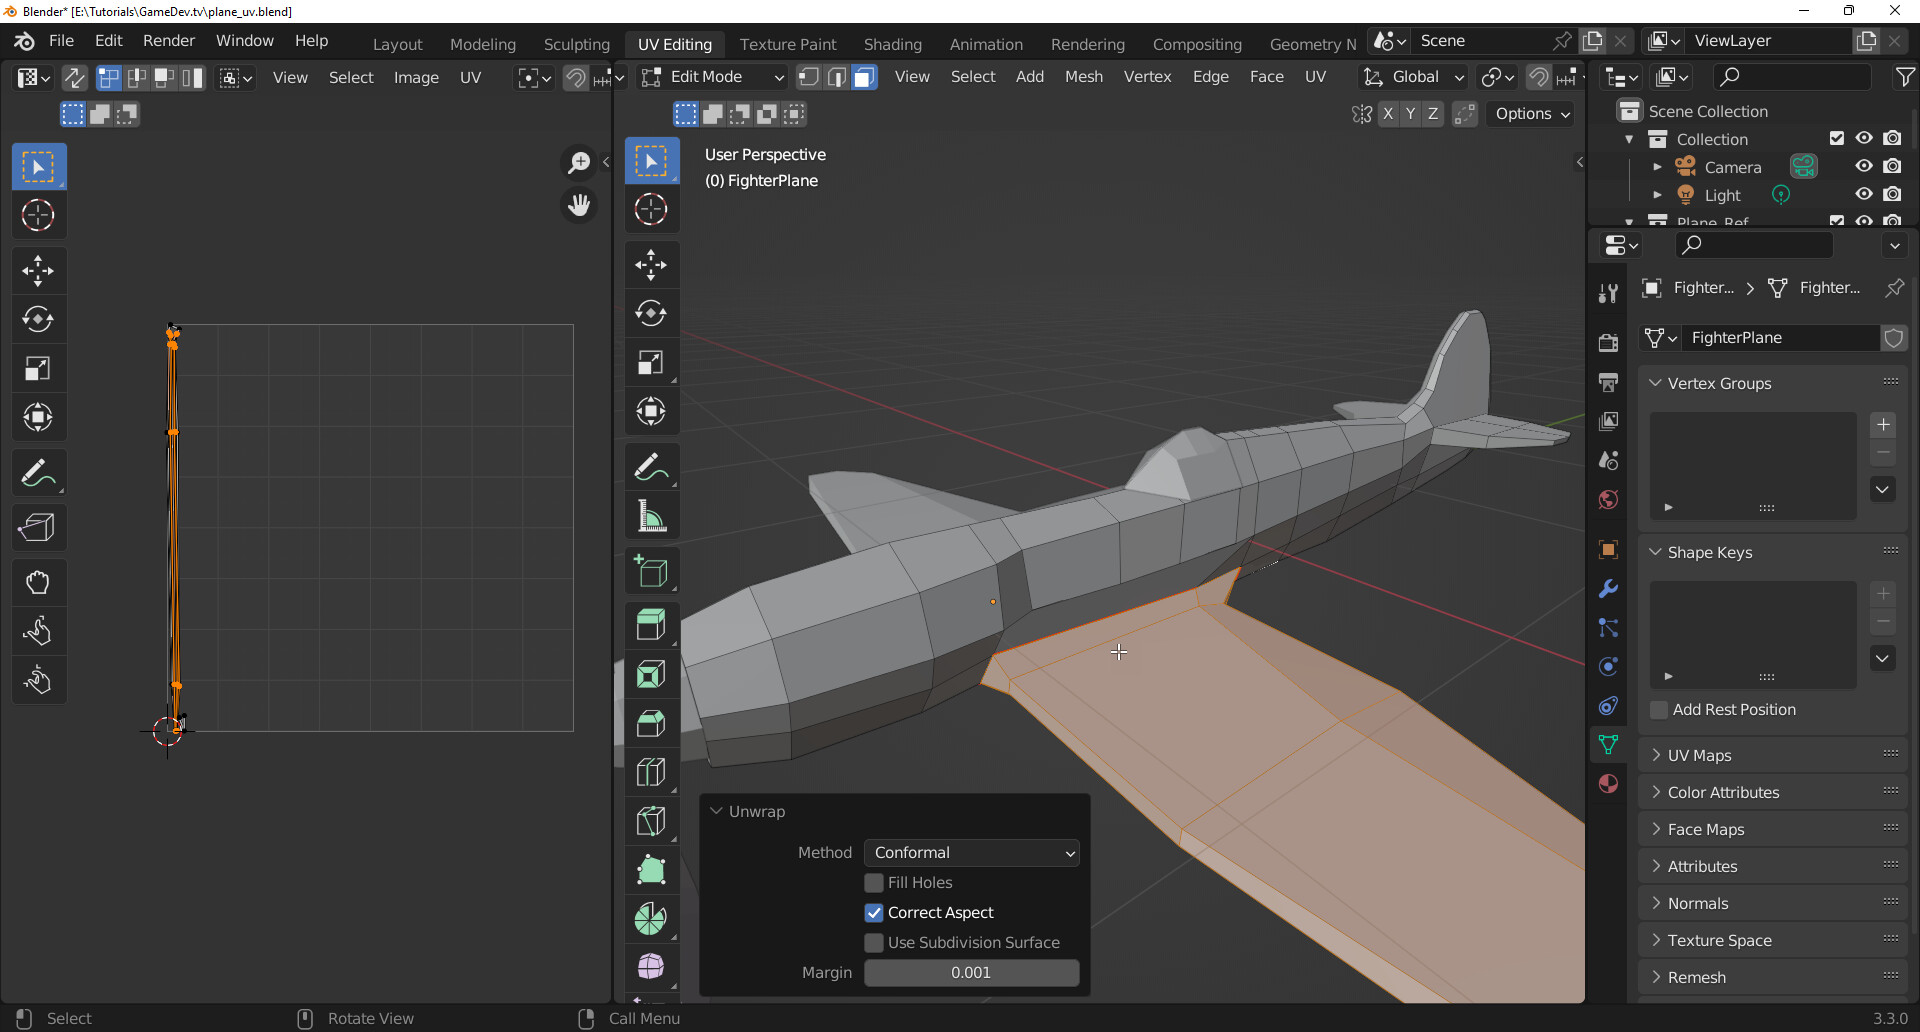
I was trying UV unwrap the plane mesh that I had created. But the outcome is not what I expected. I know there should be some kind of scaling, but I forgot.
1 Like
It can be anything …
- First apply the scale to all objects of your model!
- Be sure you have placed the seams around the wing. Or the seams are connected. If don’t separate meshes correctly then they keep gluing together in the UV-map.
- Be sure all your normals are pointing to the outside.
Have fun!
3 Likes
Yes, the apply scale works. Thanks!
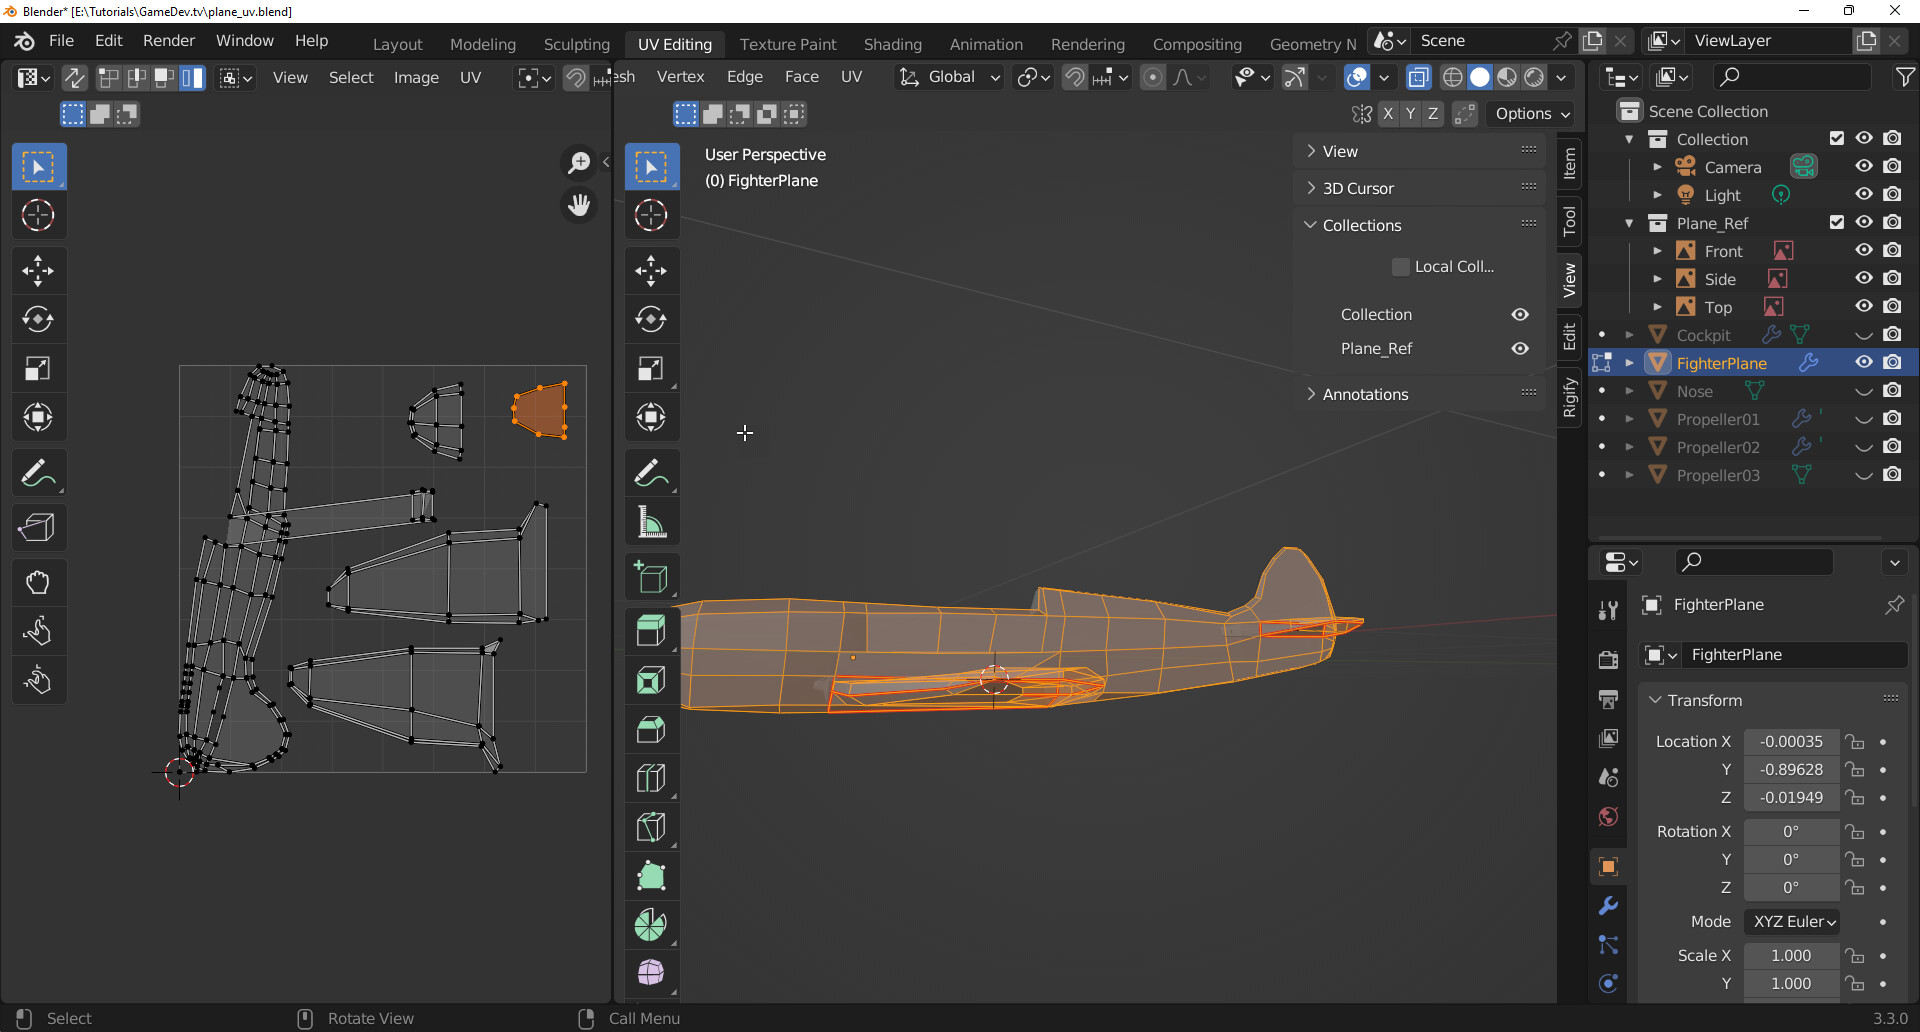
Question though, in the screen capture, my mesh is all wonky. (See screen capture.) I am wondering how can I know where to fix these mesh abberations?
1 Like
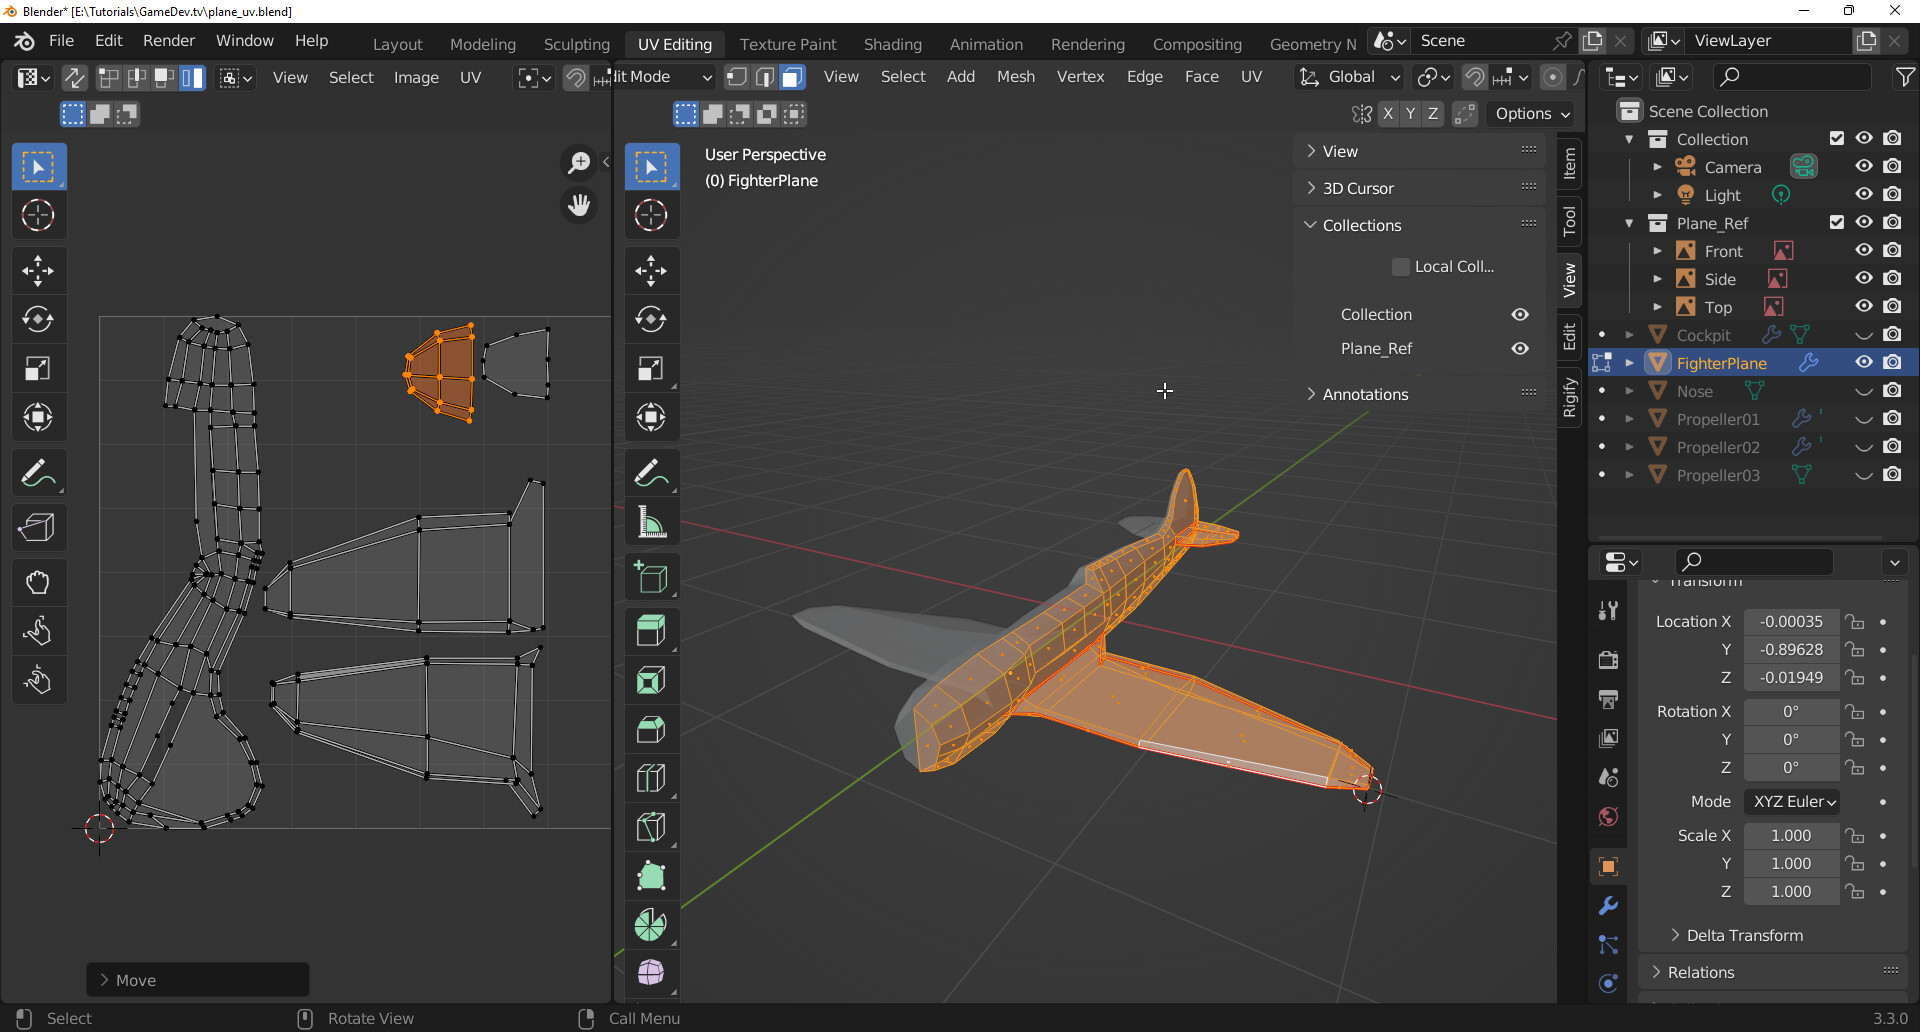
So putzing around with the meshes I have this. But is there a way to make the UVs better proportioned? Like the wings look fat and the main body crooked? Do I just play with the vertices of the UVs to make it look more sense?
1 Like
I have not taken this course, and what is explained is a first step in working with UV maps.
But the goal of having good uv-maps, is the amount of stretching of the texture, due to bad uv-unwrap. Maybe at the stage of learning it’s not yet needed. The teacher keeps it simple to start with.
The scale of different uv islands is not important, because the image texture is drawn, and mapped onto that scale. But Bigger islands, the more pixels you can place on them, the sharper the image will be. Not important for just painting, but more like texts, icons symbols. This is also the issue with UC island stretching.
So you can scale move (but not stretch) uv islands, to optimize the uv space on the bitmap texture.
Blender will do the best guess based on your unwrapping with seams, adding more seams will ease the stretching. But also introduced also a new problem of matching images to faces that are divided by seams. This is the reason for the teacher to keep it simple and do small steps on a big subject like UV-unwrapping.
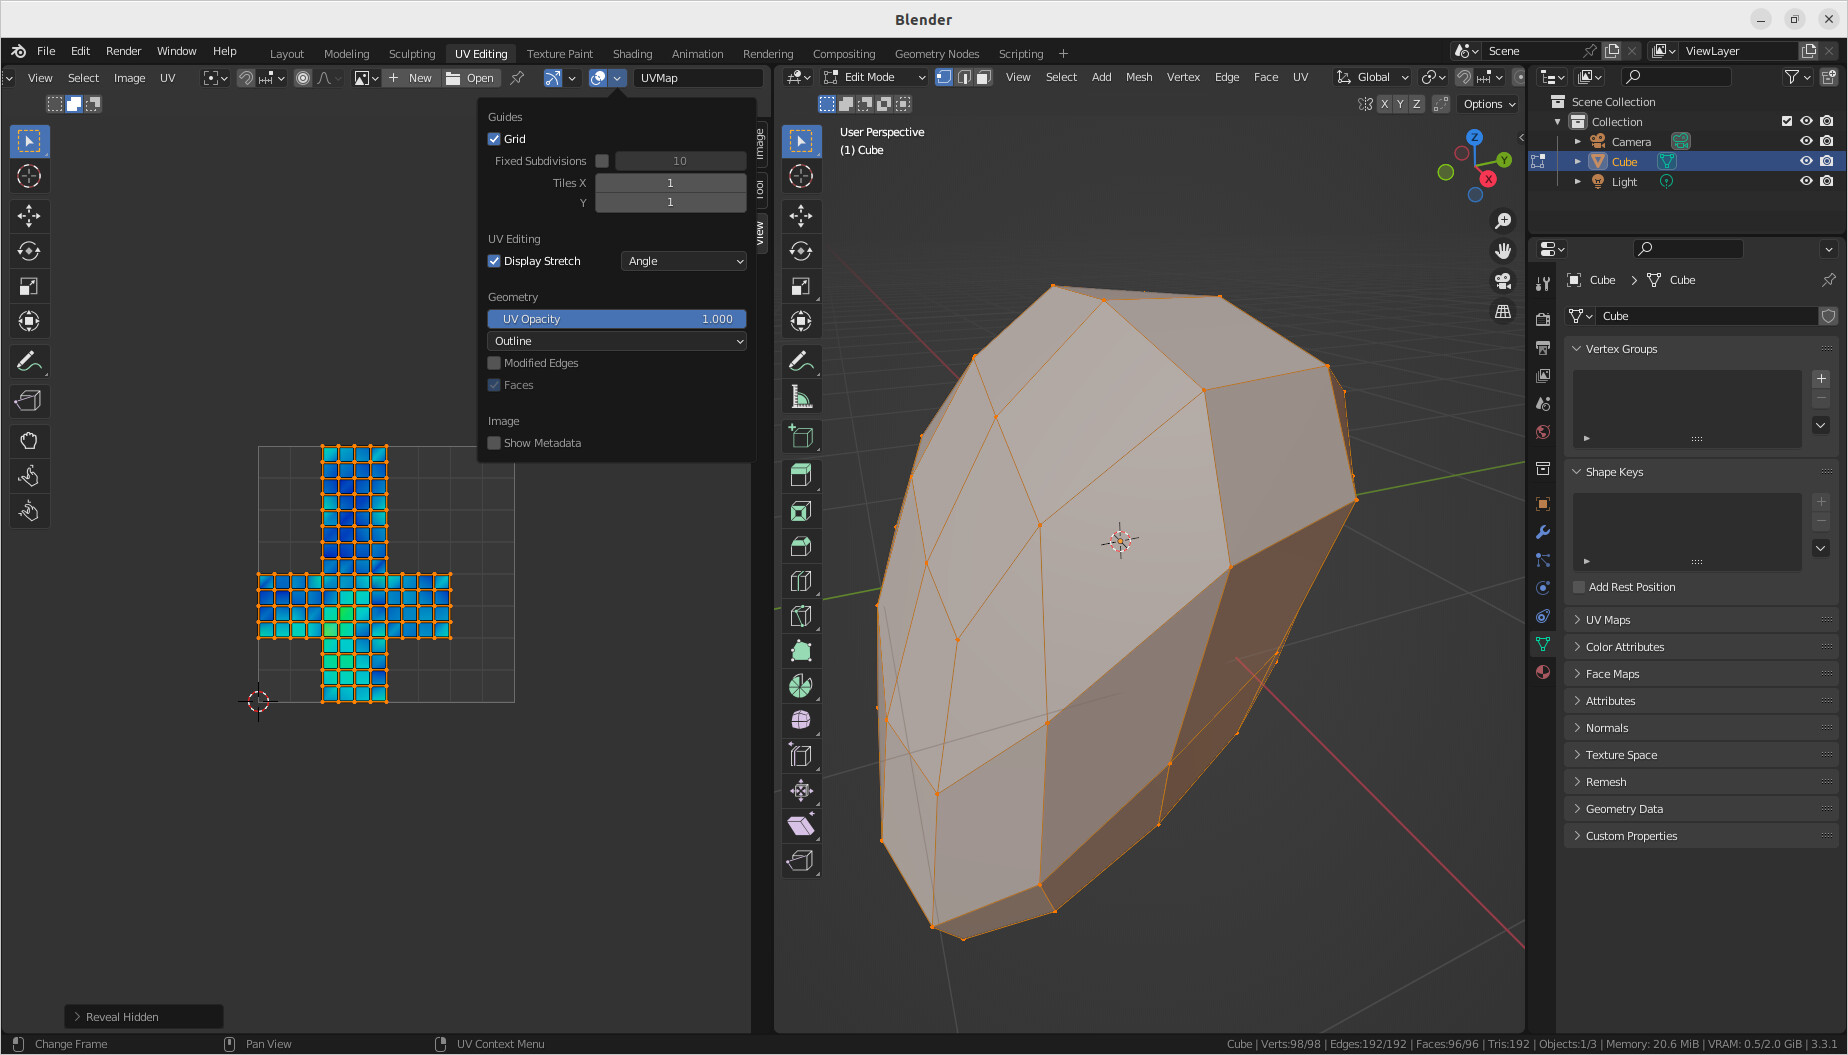
Blue means no stretching of the texture bitmap.
Green still good, but a bit stretching.
Red is bad
But that explained, it still hugely depends on the texture you use AND the way you placed the seams.
1 Like
I noticed in the first post image you used ‘conformal’ that is not standard. Angle based is default. That may be distorting the UVs a bit.
2 Likes
Did you figure out the bent plane? I had your wing issue and applied all transformations (not just rotation) and after that everything including the body came out easily. I’m sure you are not the first to struggle with this as the tutorial should probably state that applying transformations can fix this issue, but maybe I just built mine a little differently, making this application necessary.
2 Likes