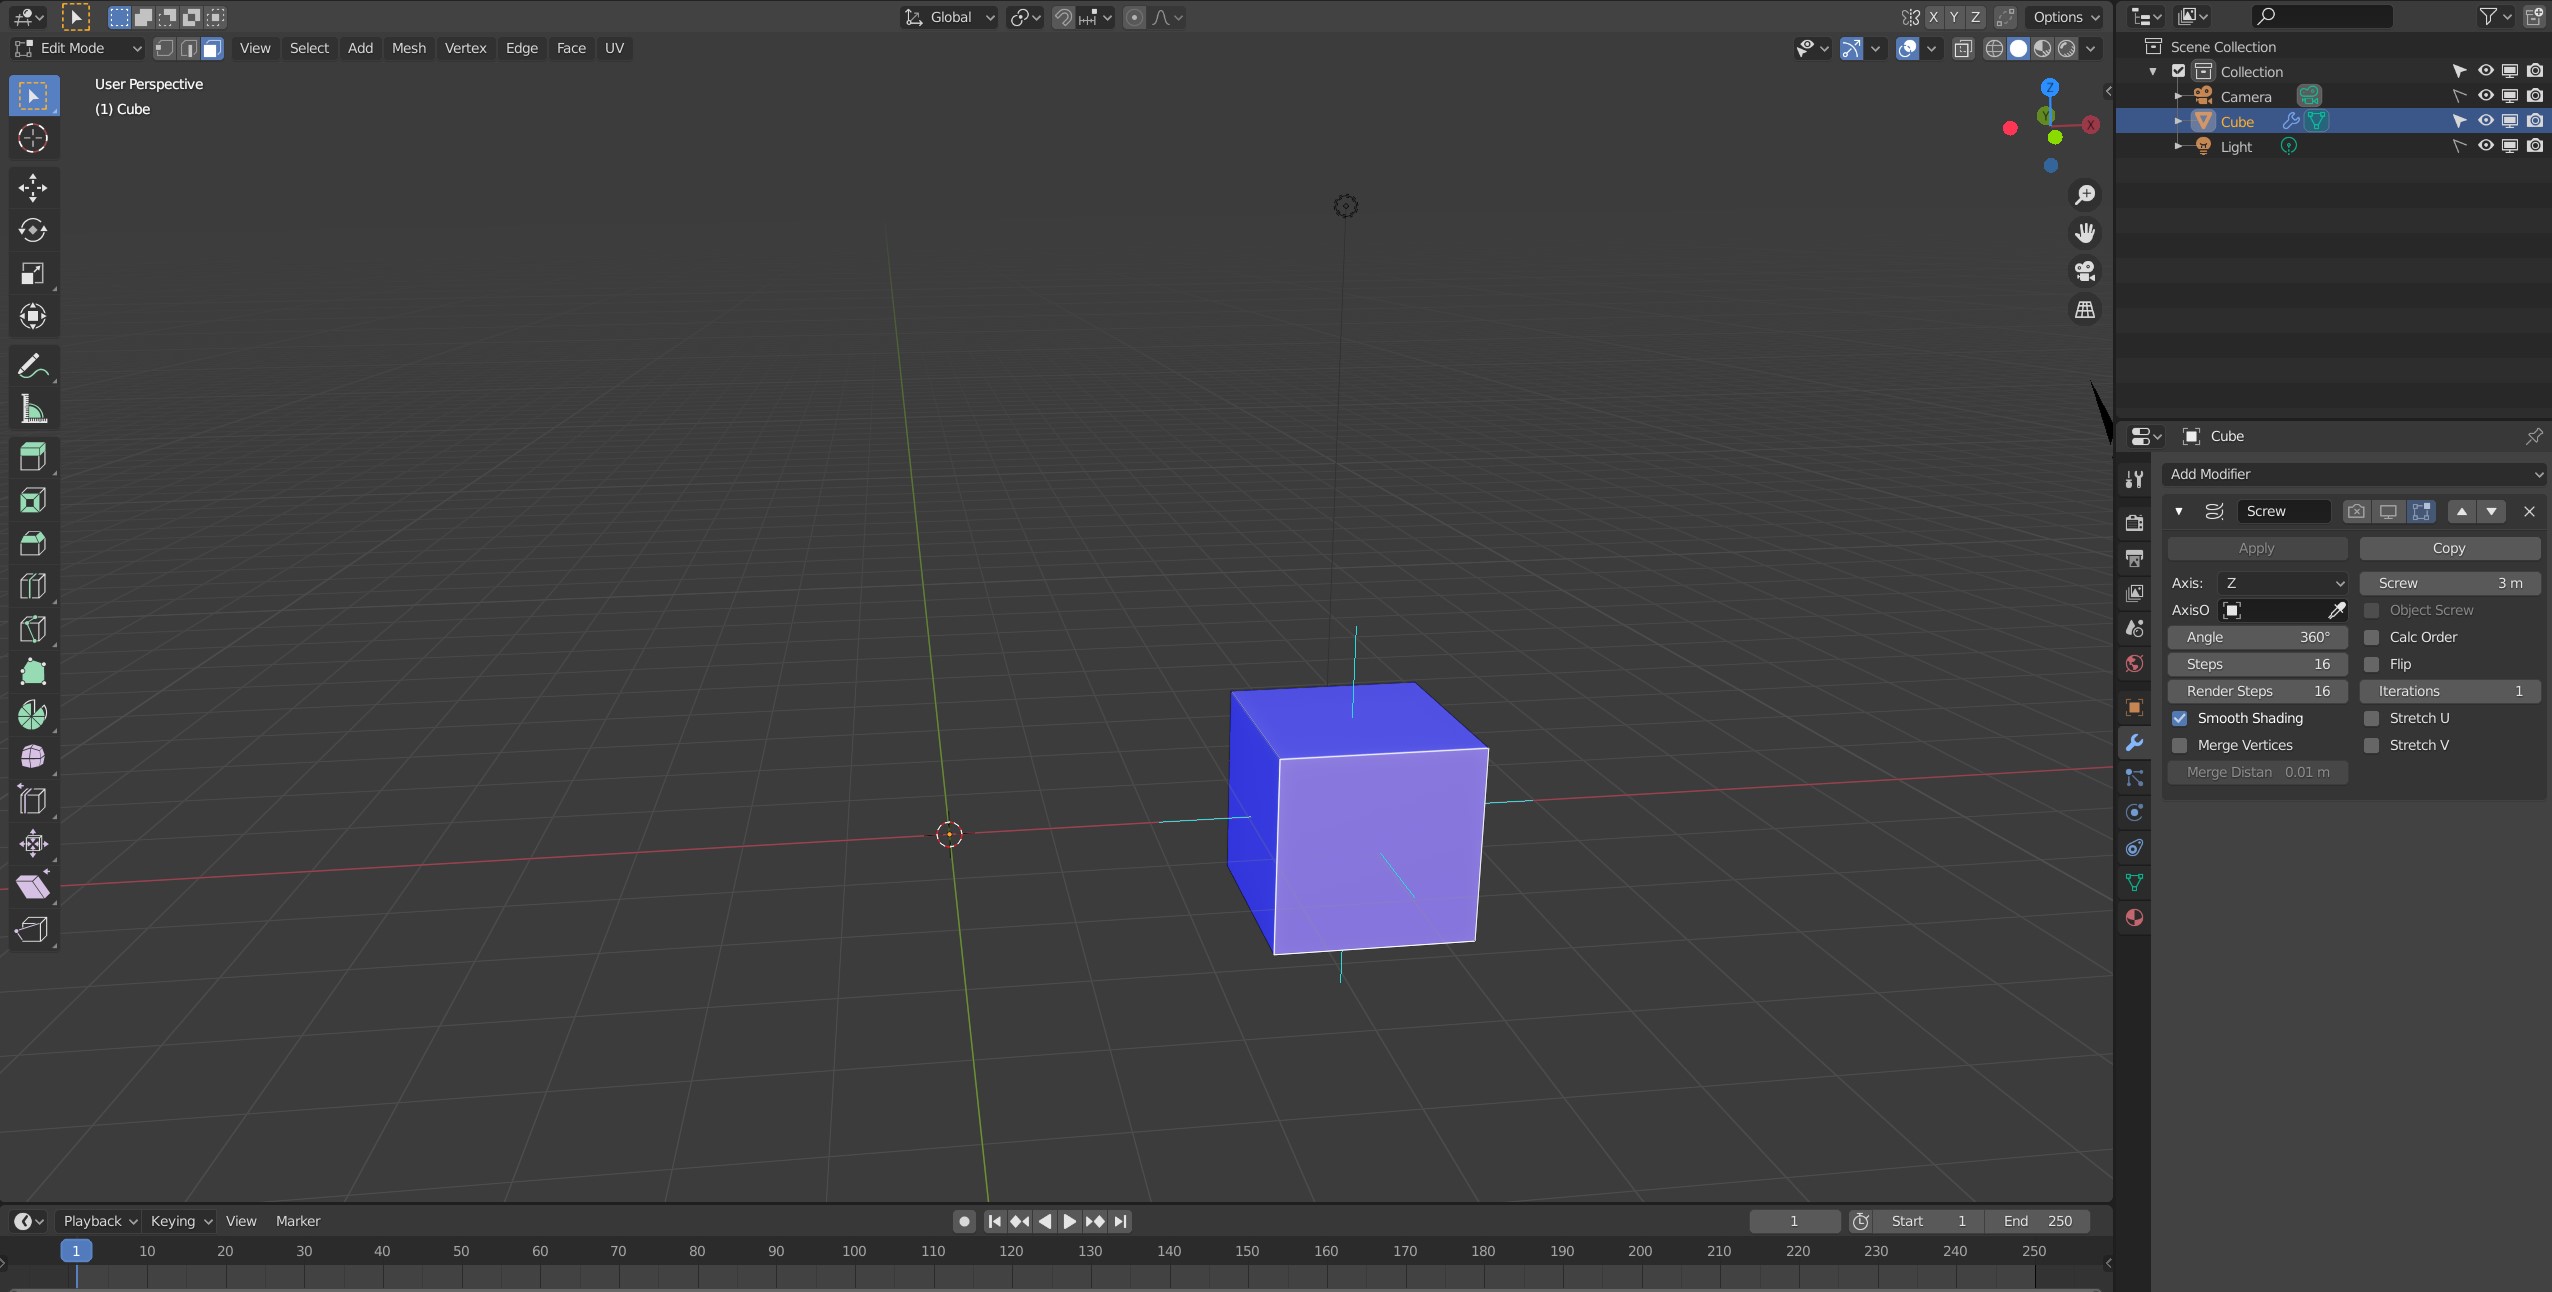
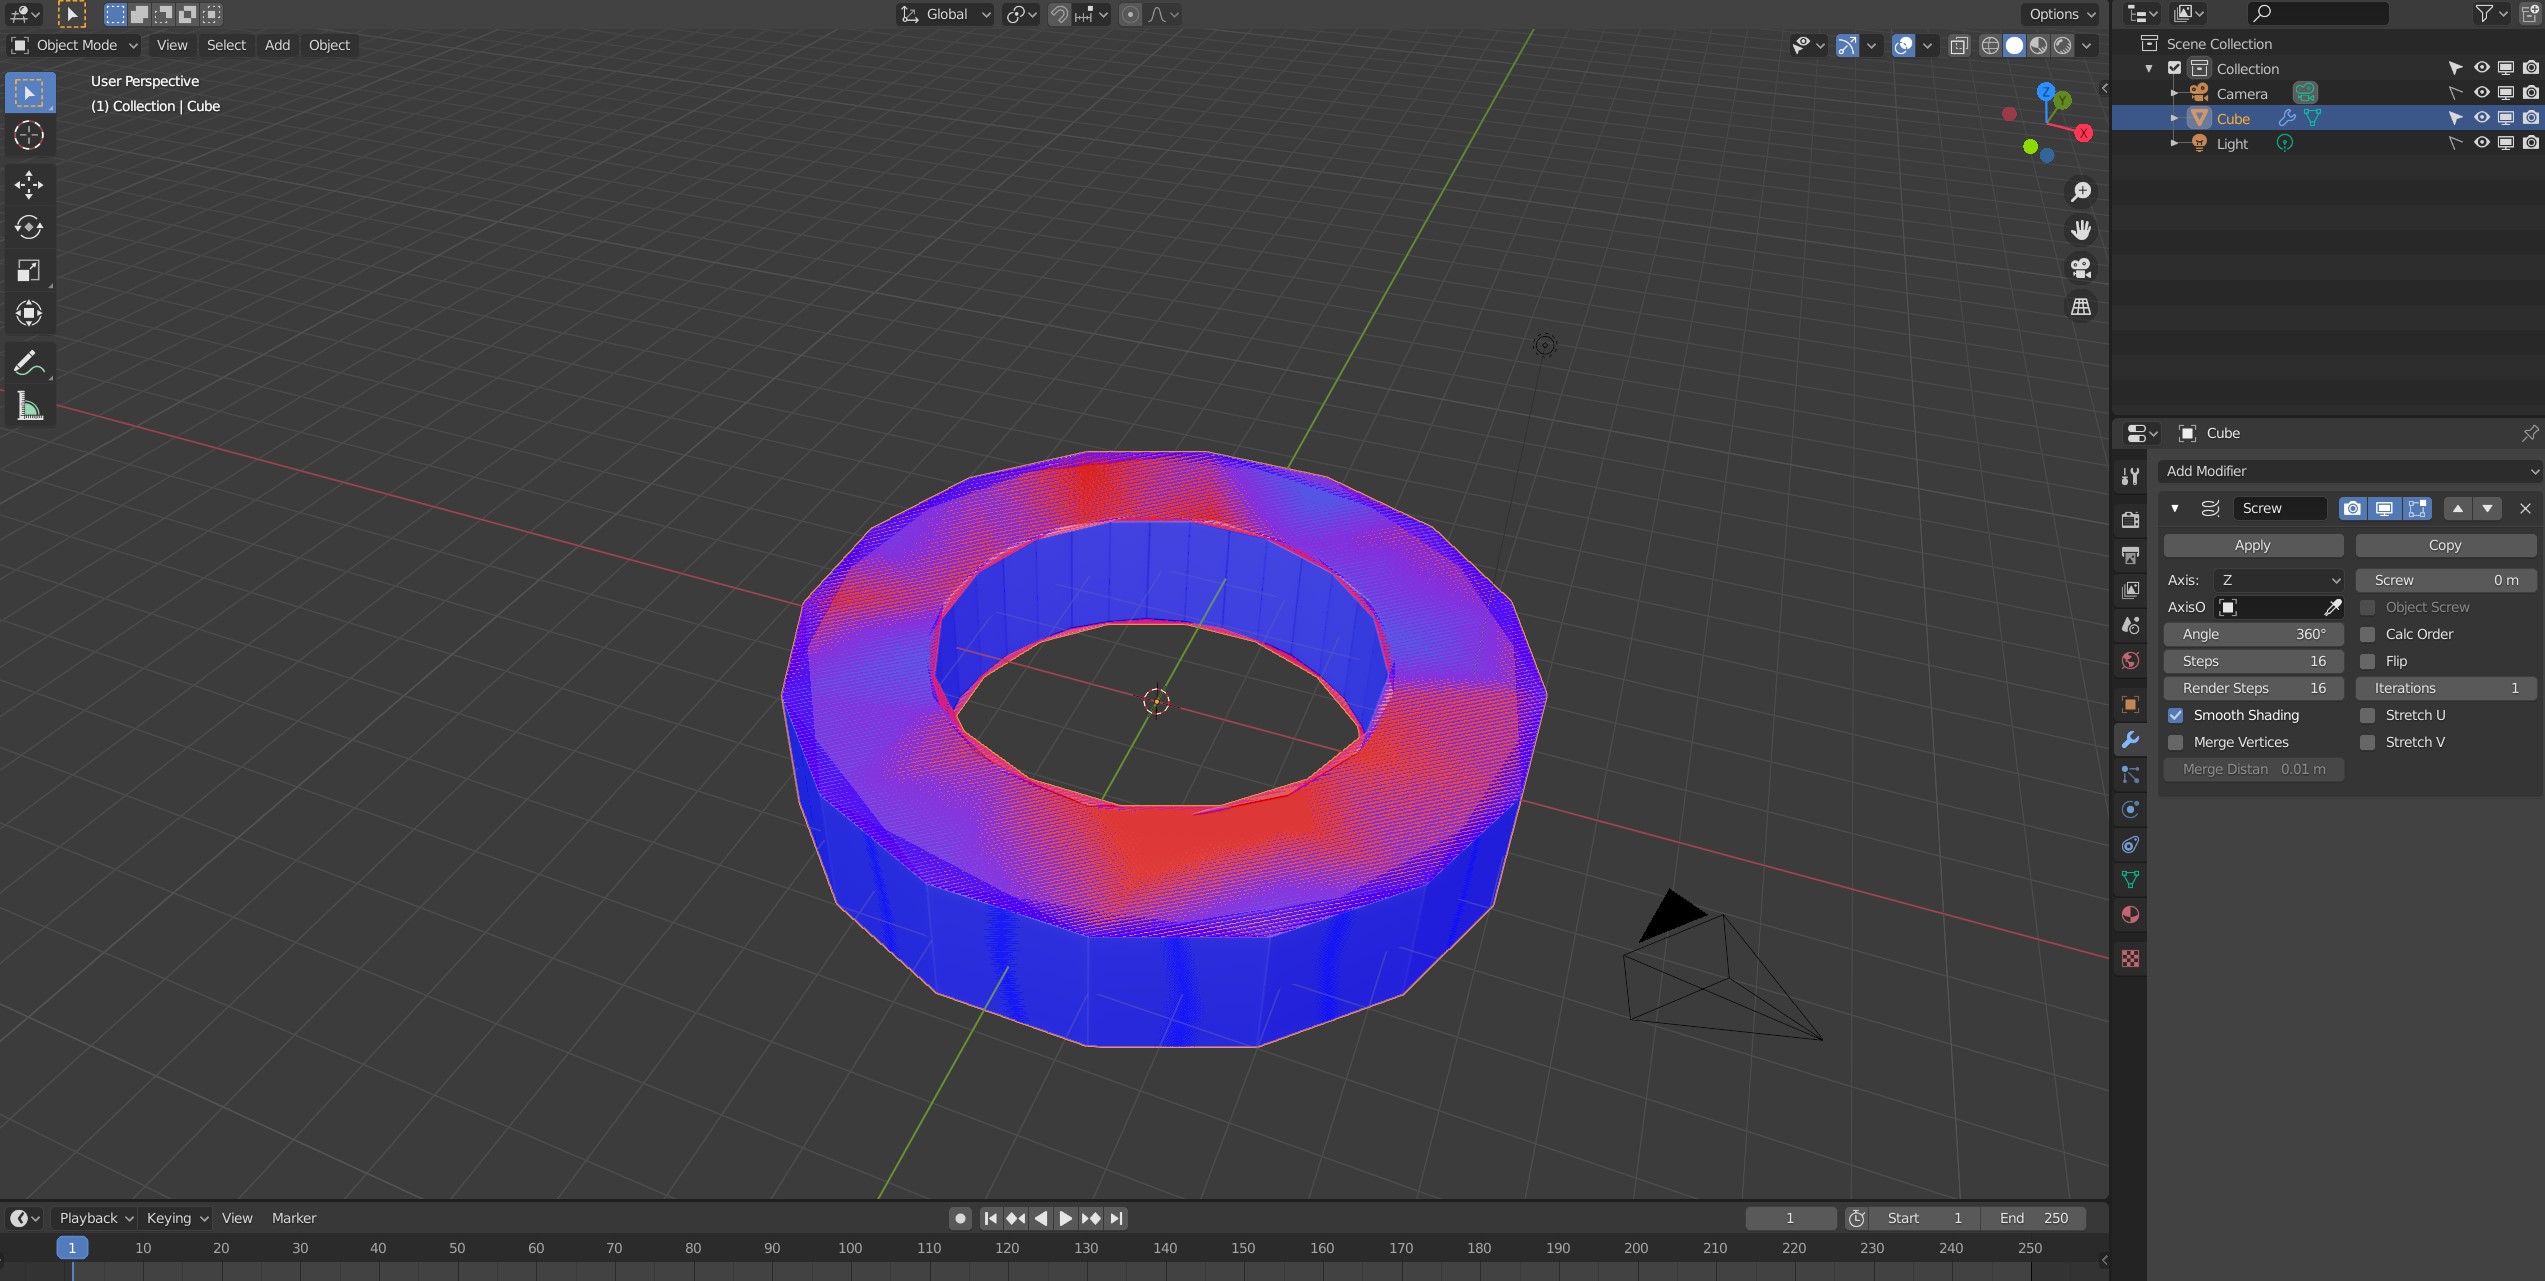
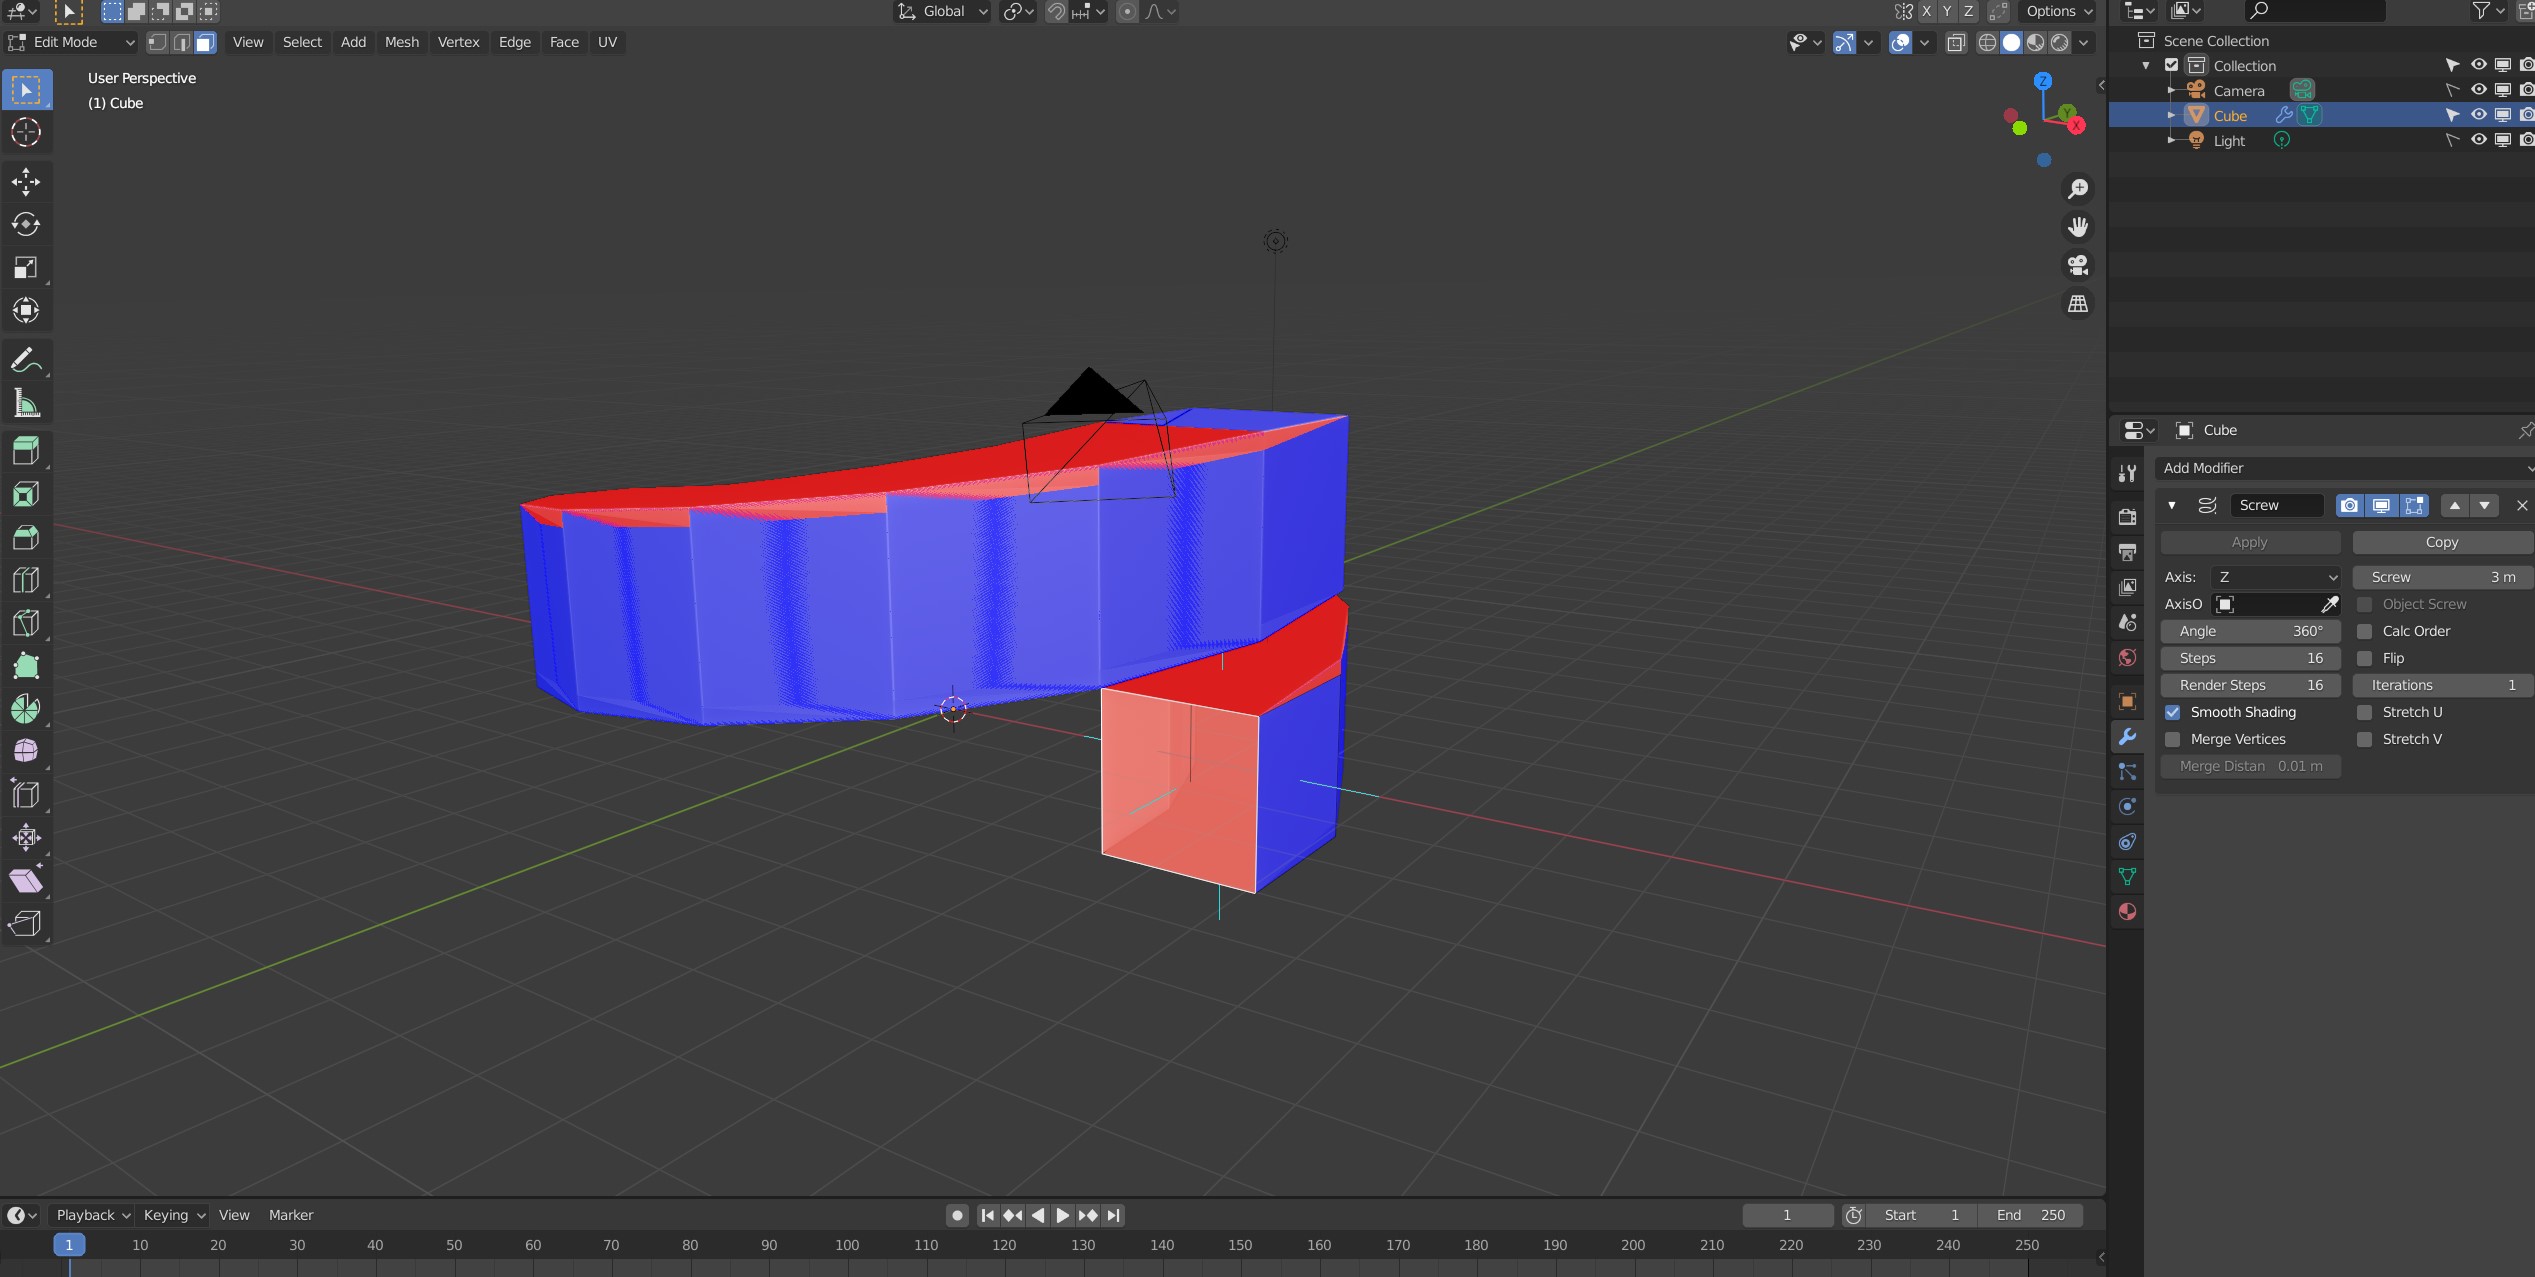
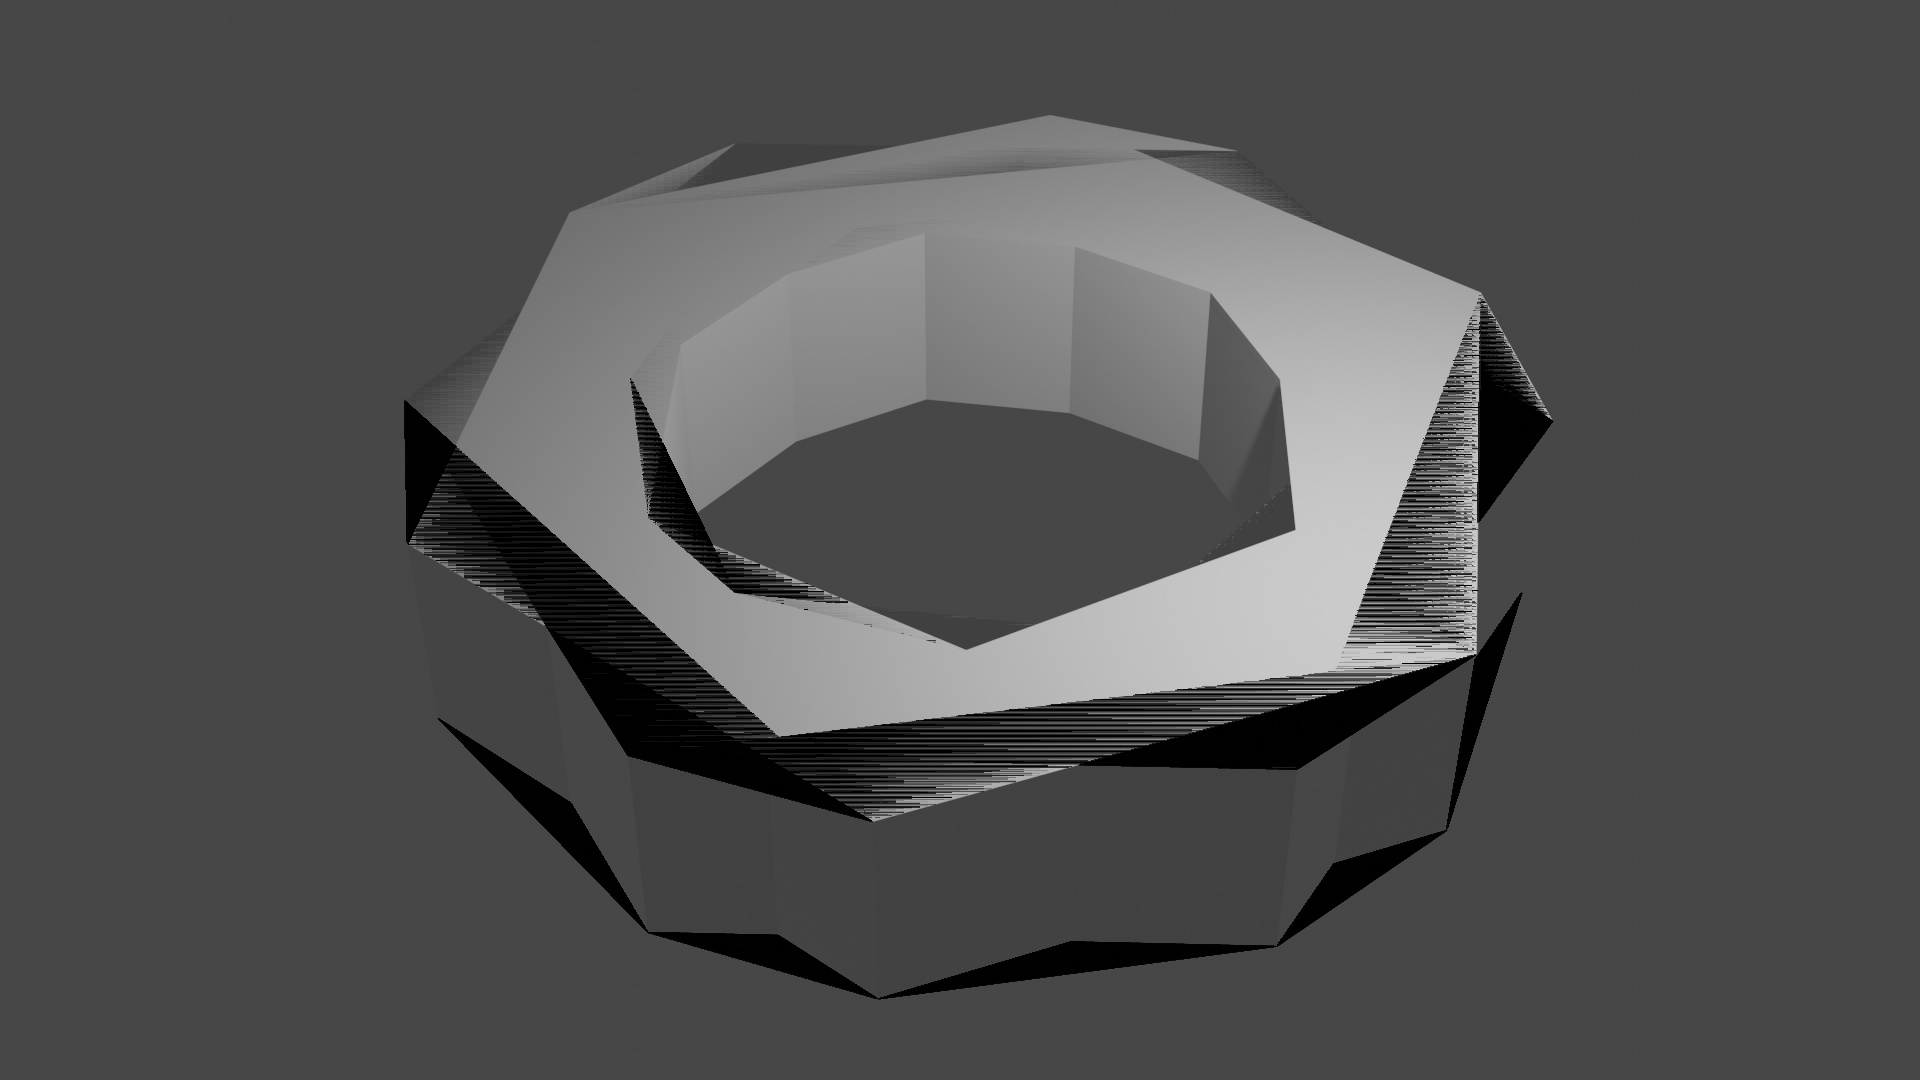
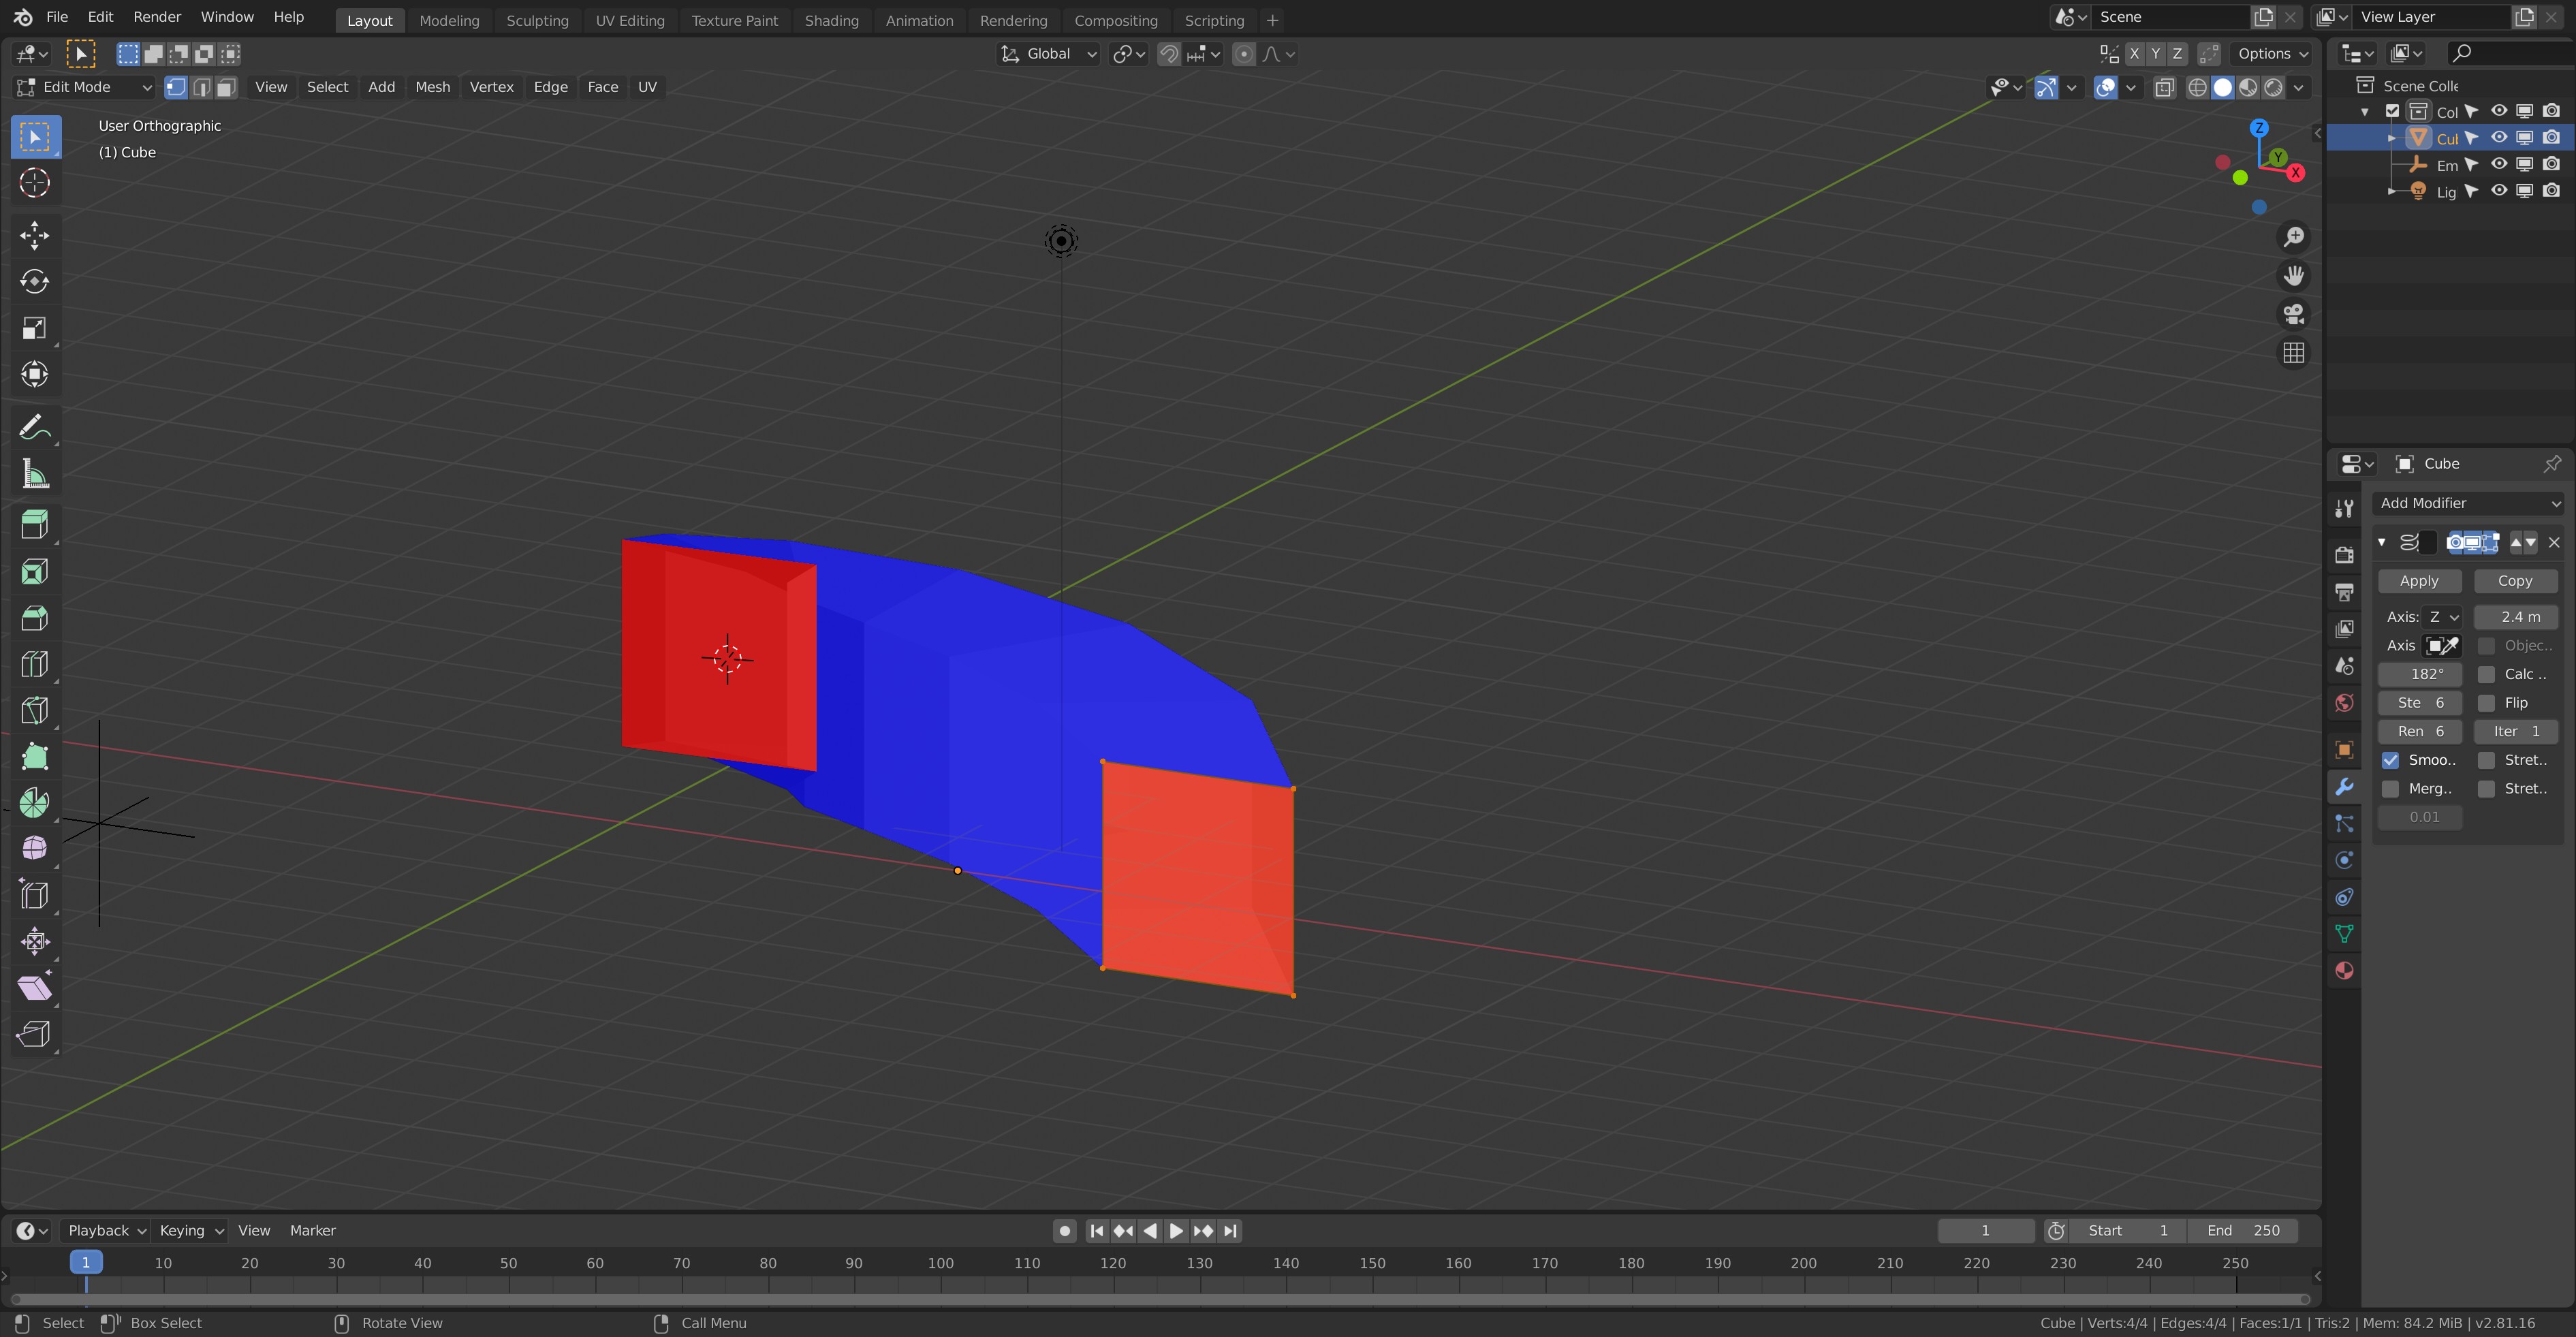
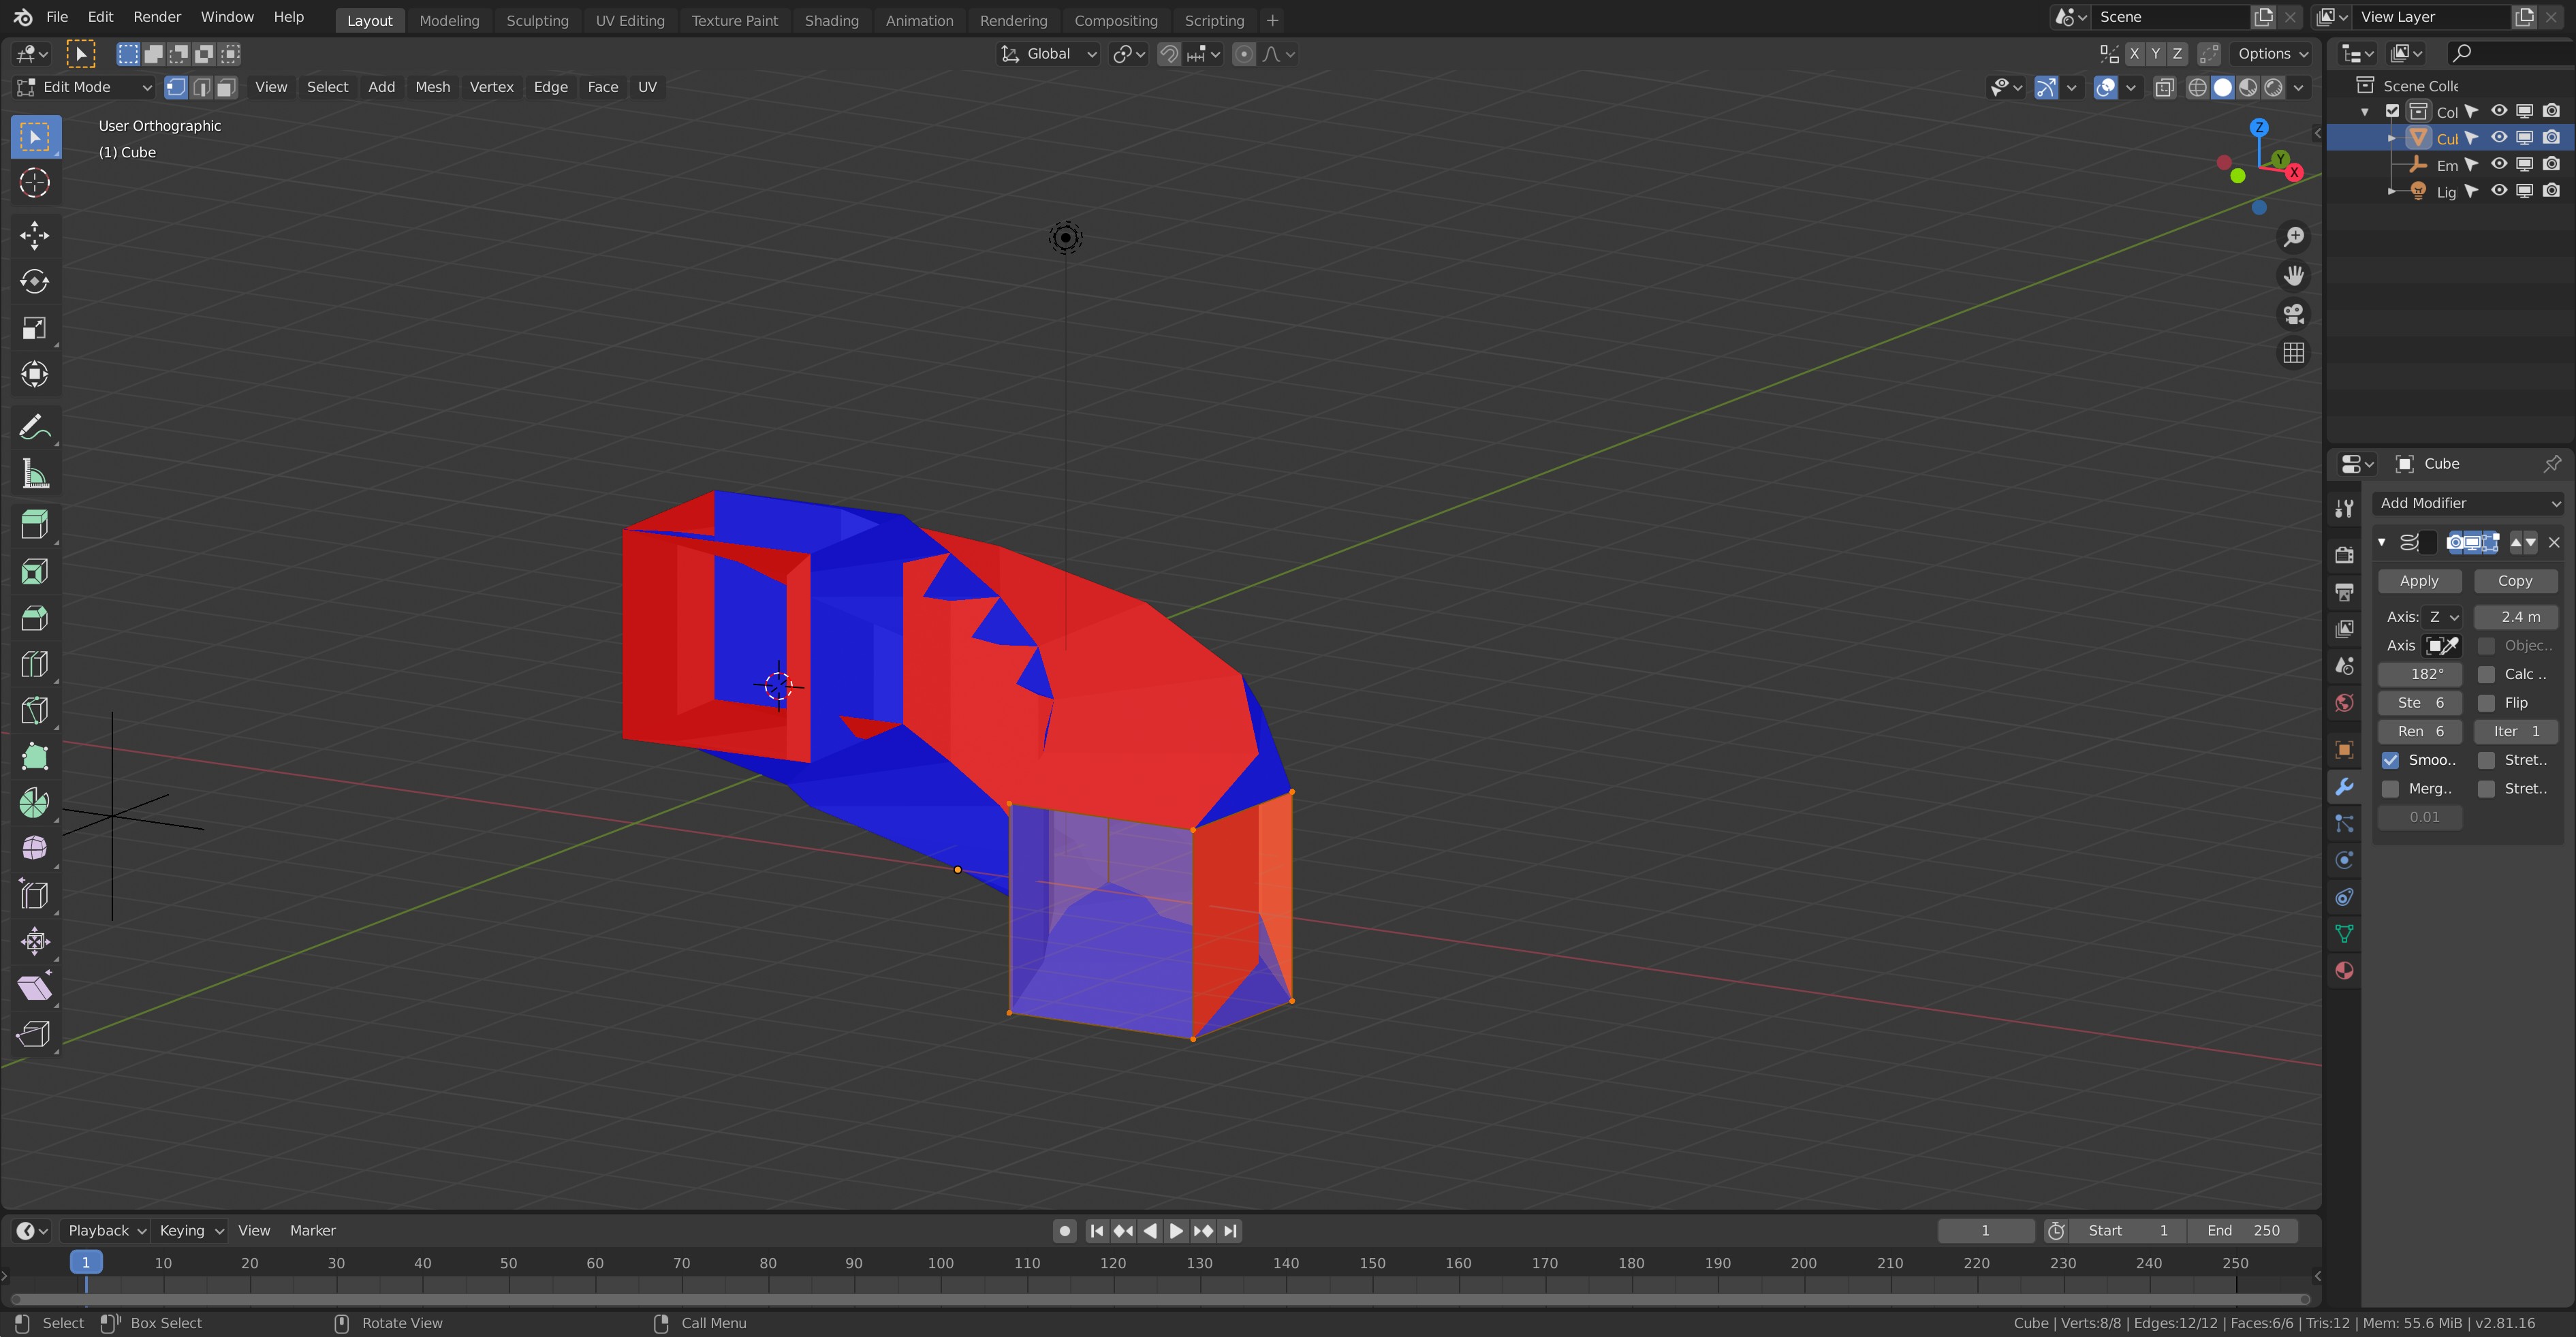
My screw modifier is not producing the same results as in the lesson. Seems like using the modifier generates additional phantom geometry. Here are a few images to illustrate the problem. I turned on face orientation as I suspected there was a problem there. Without the modifier, everything seems okay. With the screw modifier, it seems to flip the normals but I’m not sure how. Normals direction is outward so I’m not sure what other setting I may have missed.
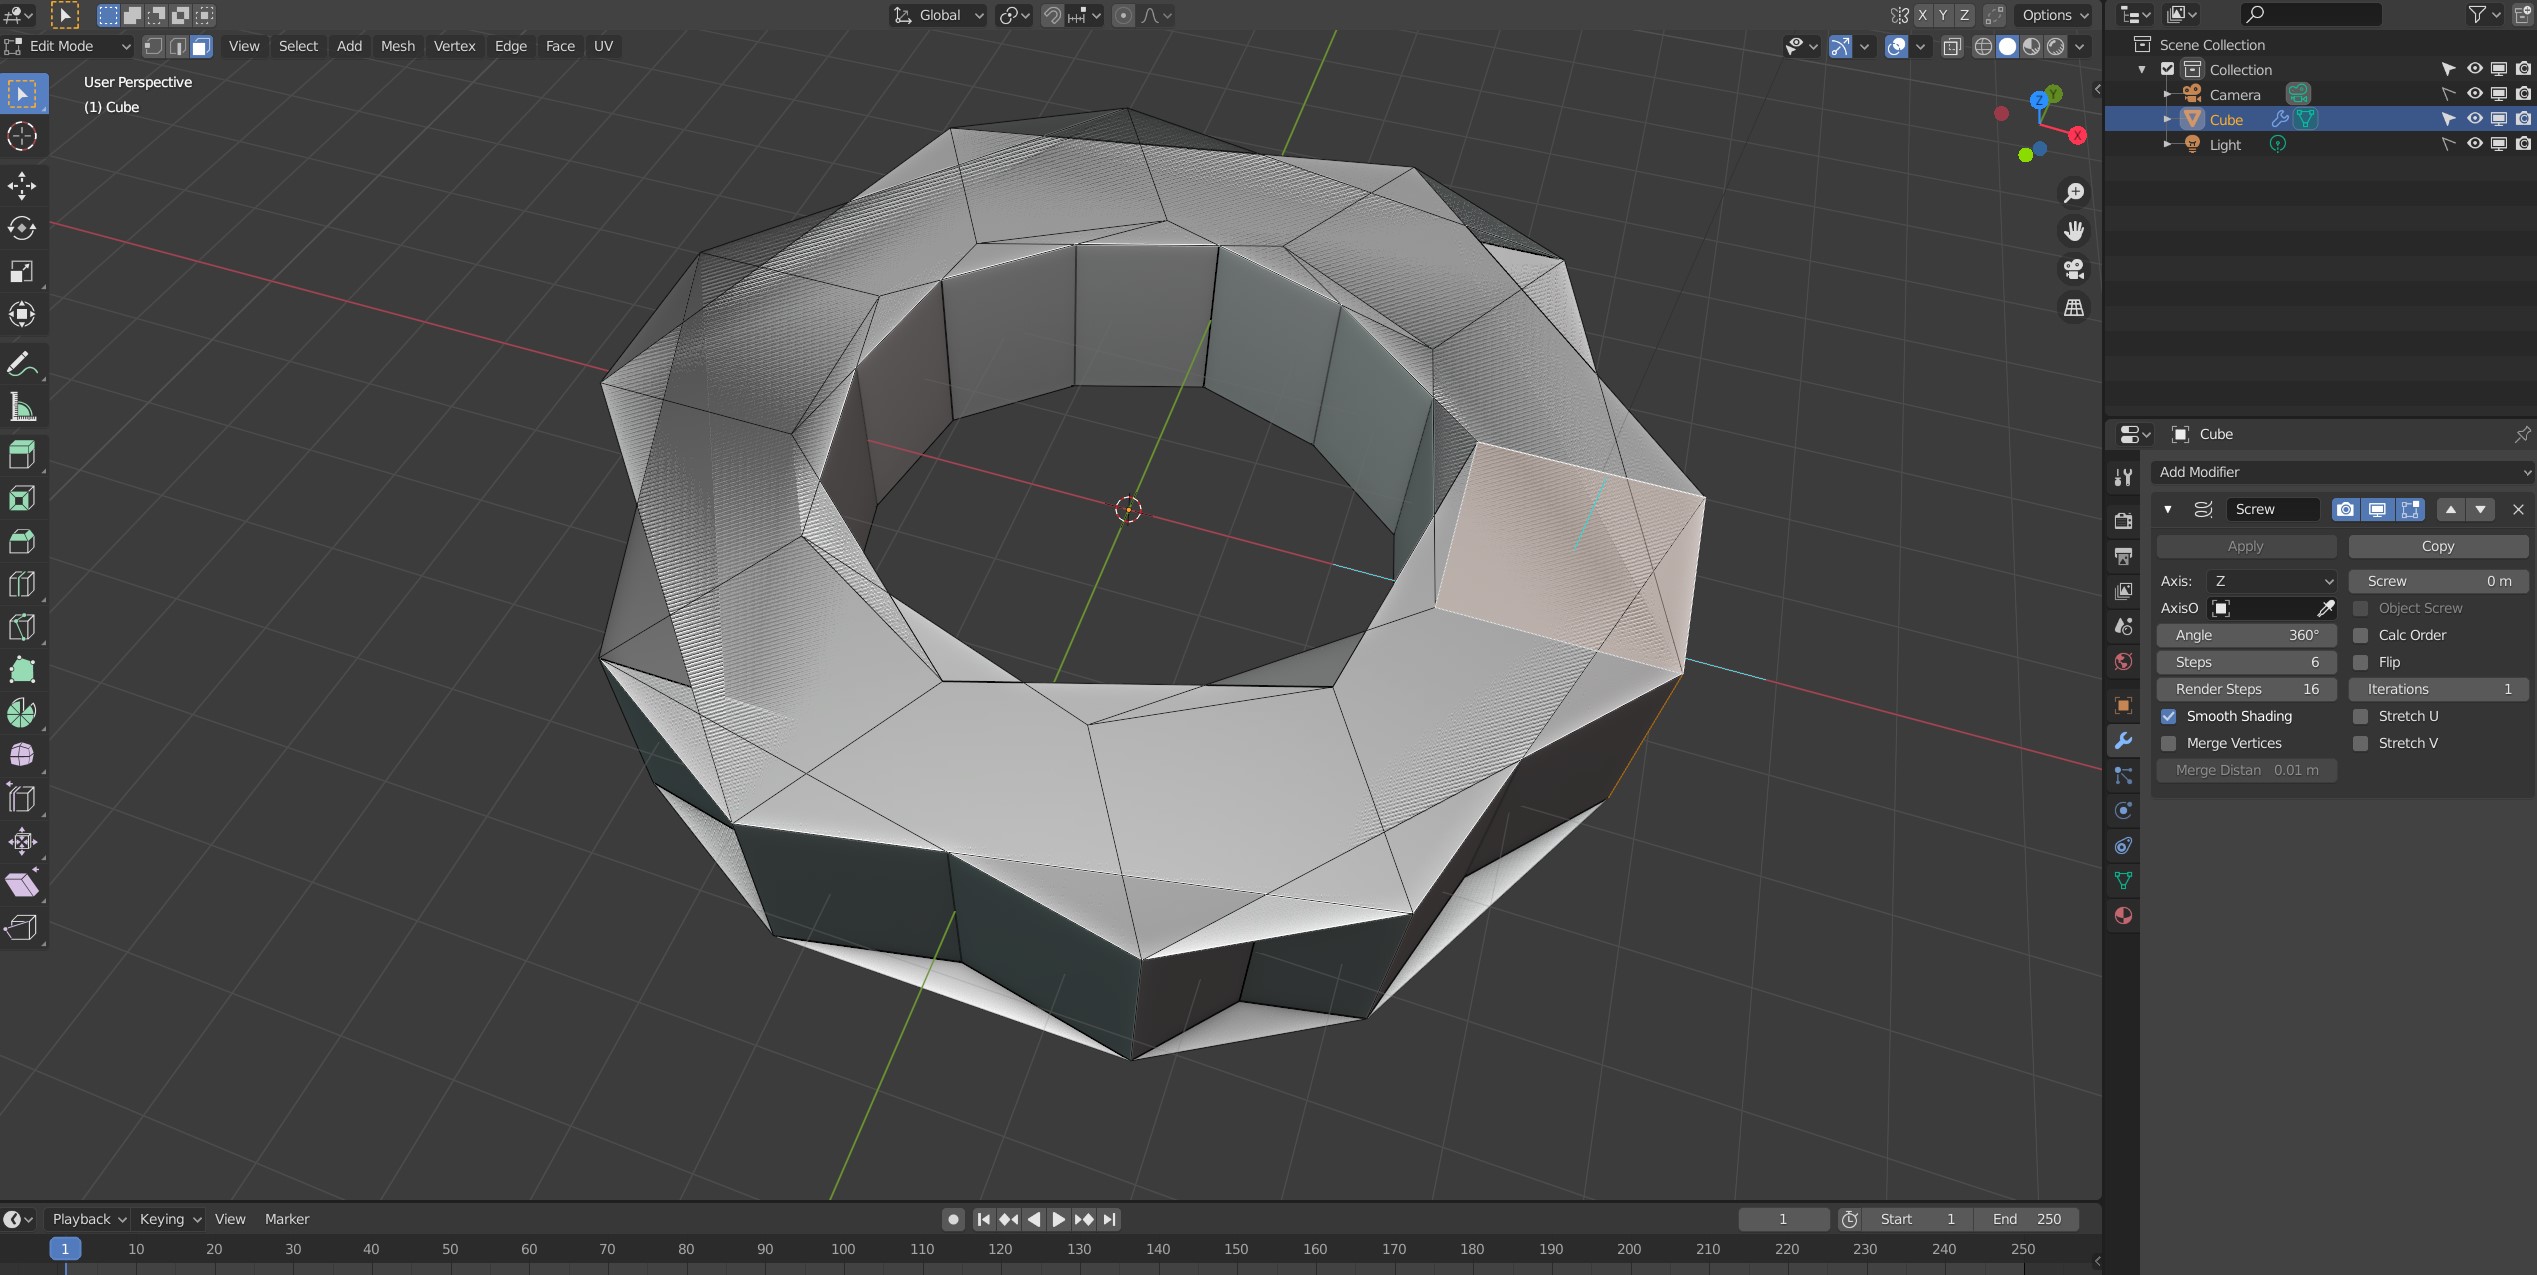
By the way, no amount of fiddling with the steps make a difference. To be clear, there is only one object in the scene. The last two images are with Steps reduced to only 6 to show that weird geometry (very last pic is the render).