
To fix this problem procedurally, could we use the normal direction of the faces? I noticed the math node has a comparison operator - if the Z direction normal is positive could we change the Y rotation to zero?
1 Like
Hi ohookins,
I havent tried this personally but its worth trying it out and see what the results are that you get.
Please do let me know if you work anything out as there is always more than one way to do things 
1 Like
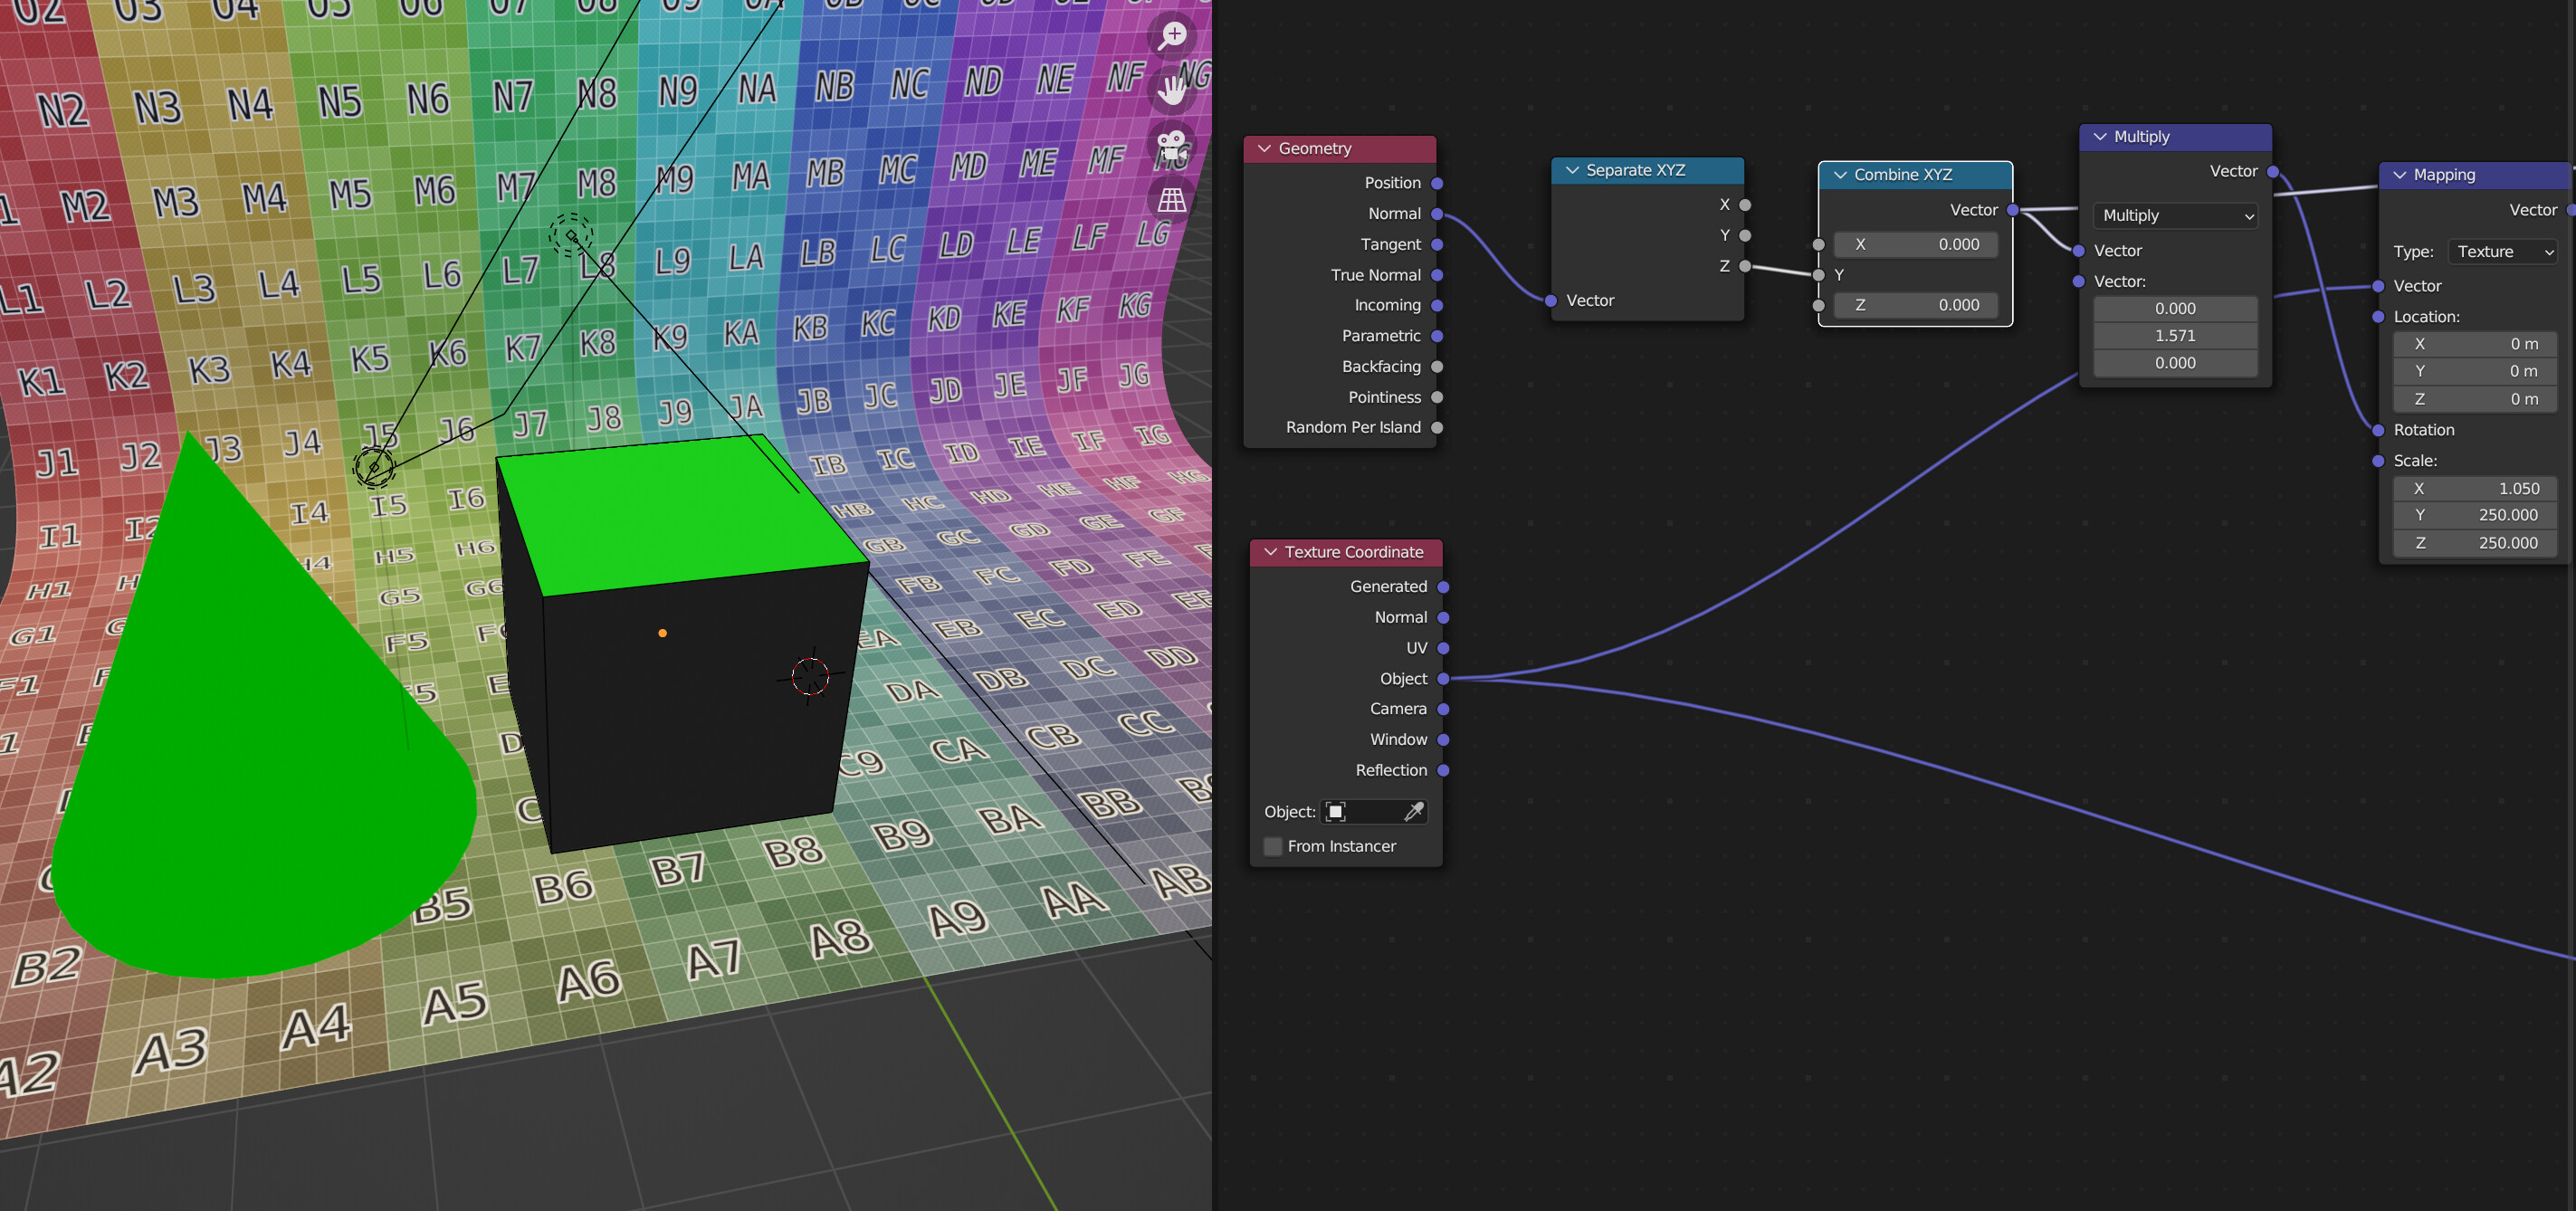
Well as usual it seems easy in principle but I’m struggling to make it work. We can get the upward facing faces that we might want to rotate the mapping of with a geometry node, taking the Normal:
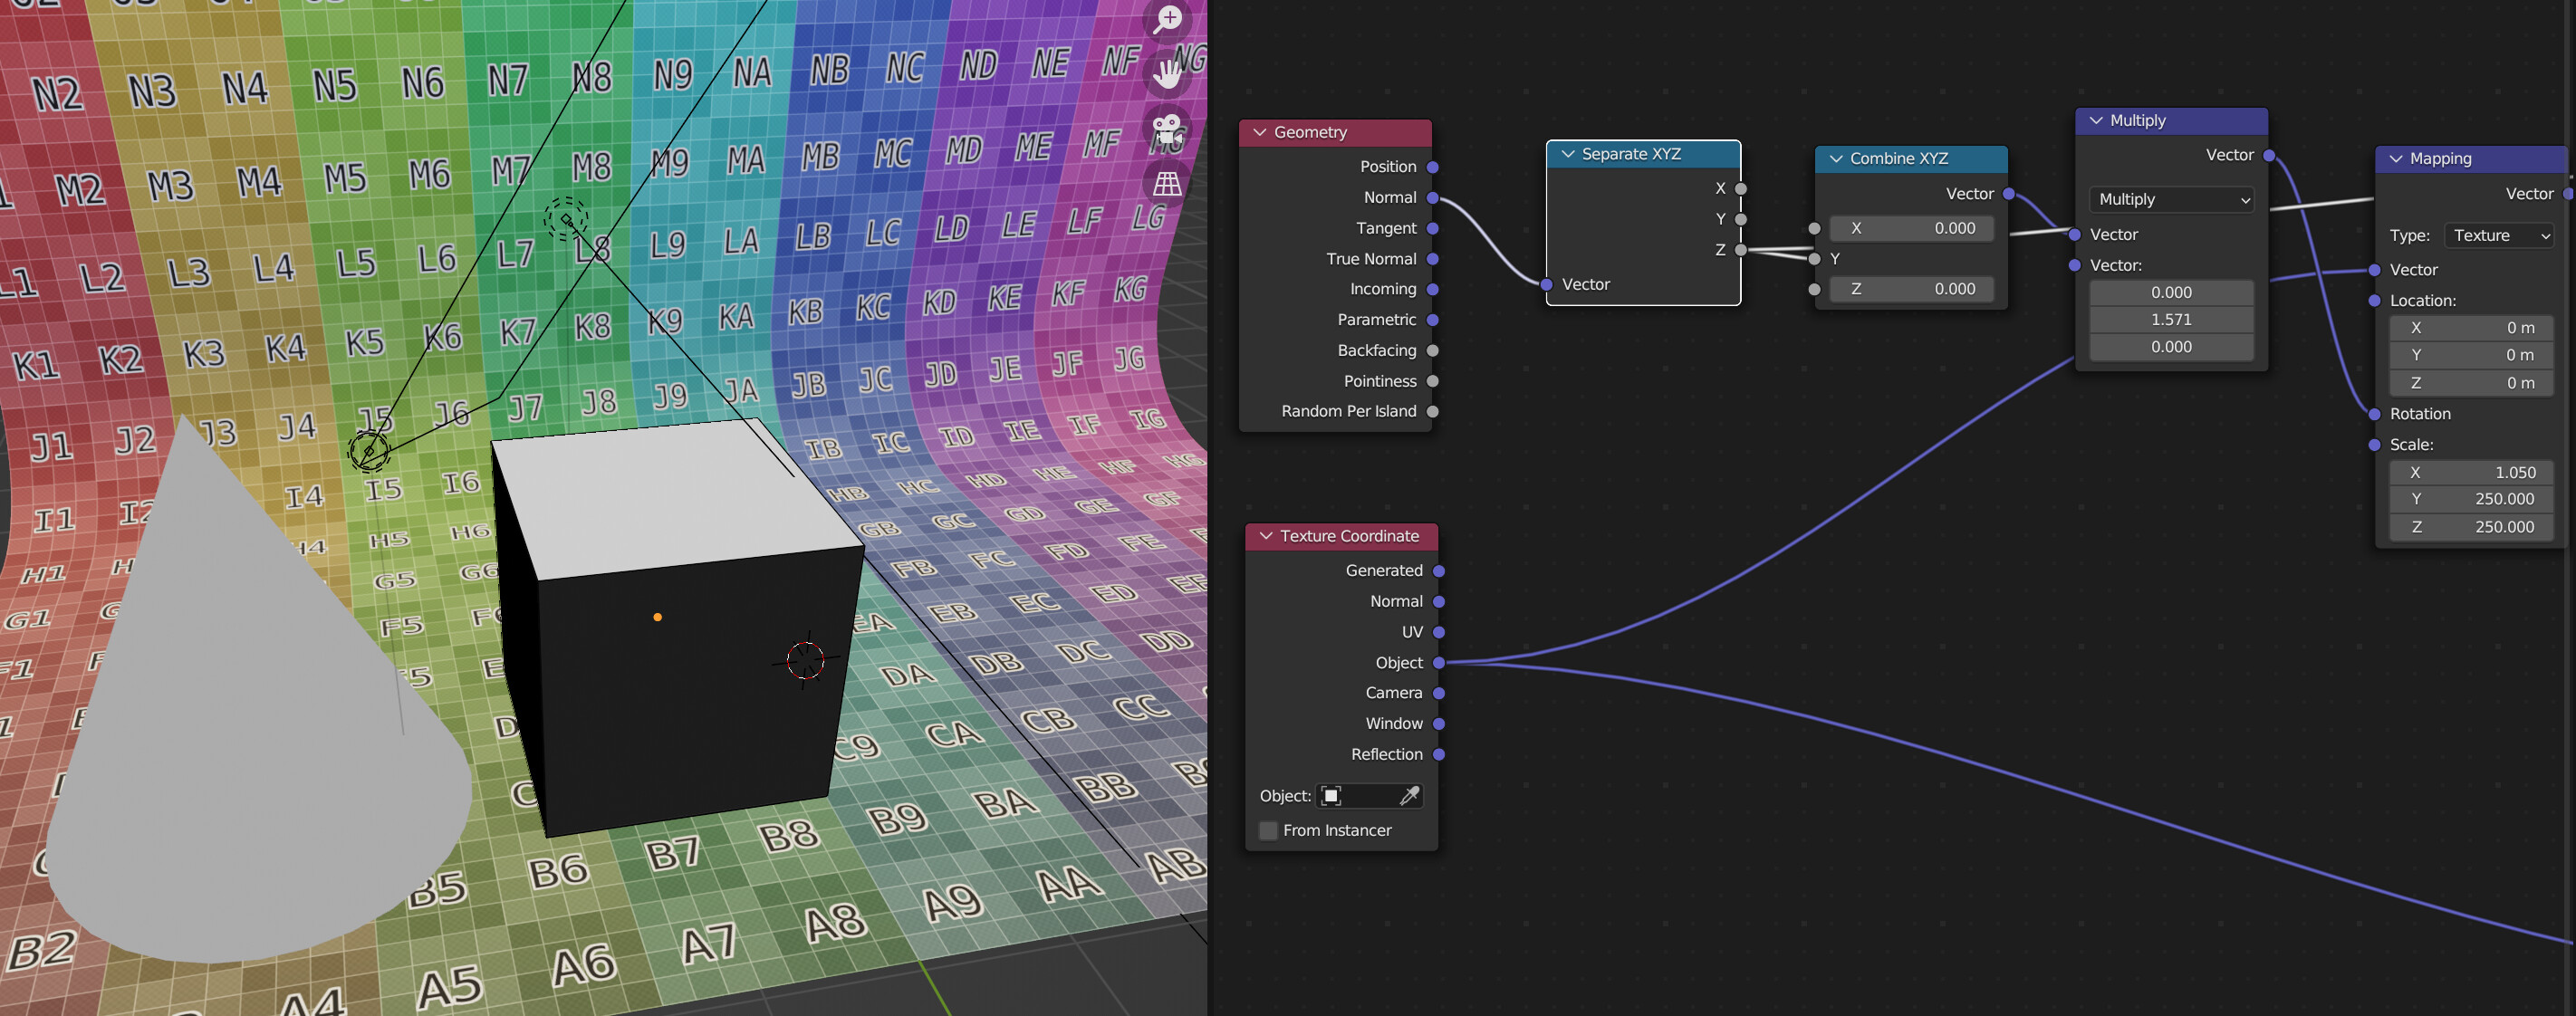
However, once we start separating and combining things are already going wonky:
If we look at a 90 degree rotation vector, it seems like these are internally expressed in radians, so that should be 1.5708 radians. Using a math node to get that, I still get something a bit weird. Maybe they are not really in radians?

Something weird going on, for sure.
Oh I guess the rotation is applied before the scaling in the mapping node, and actually I want after (I think). This will take a bit more thought.
1 Like
Ok, so if I understand the problem, you want to rotate the mapping on specific faces based on their normal direction?
(left to right) The Geometry node outputs the normals, the Separate XYZ lets you output a 0-1 value for any of the X, Y or Z directions. I’ve chosen the Z direction, so the top face will be 1, the rest should be 0. I use this value in the factor of a mix node, this outputs either 0 or 3.142 (typed in the field as ‘pi’).
The object’s 'Object mapping is then rotated by around 4. The math here is weird since the value in the vecot rotate is shown in degrees, but when you pipe a value in, it will consider it to be radians. whenever a pixel on the top face is evaluated, its mapping is affected by the rotation. There seemed to be an issue with scaling too? I’ve just added a vector math>scale node this doesn’t affect the rotation amount, everything scales uniformly. The checker texture shows that the top face’s mapping has been rotated, but the uniform mapping on the sides is unaffected.
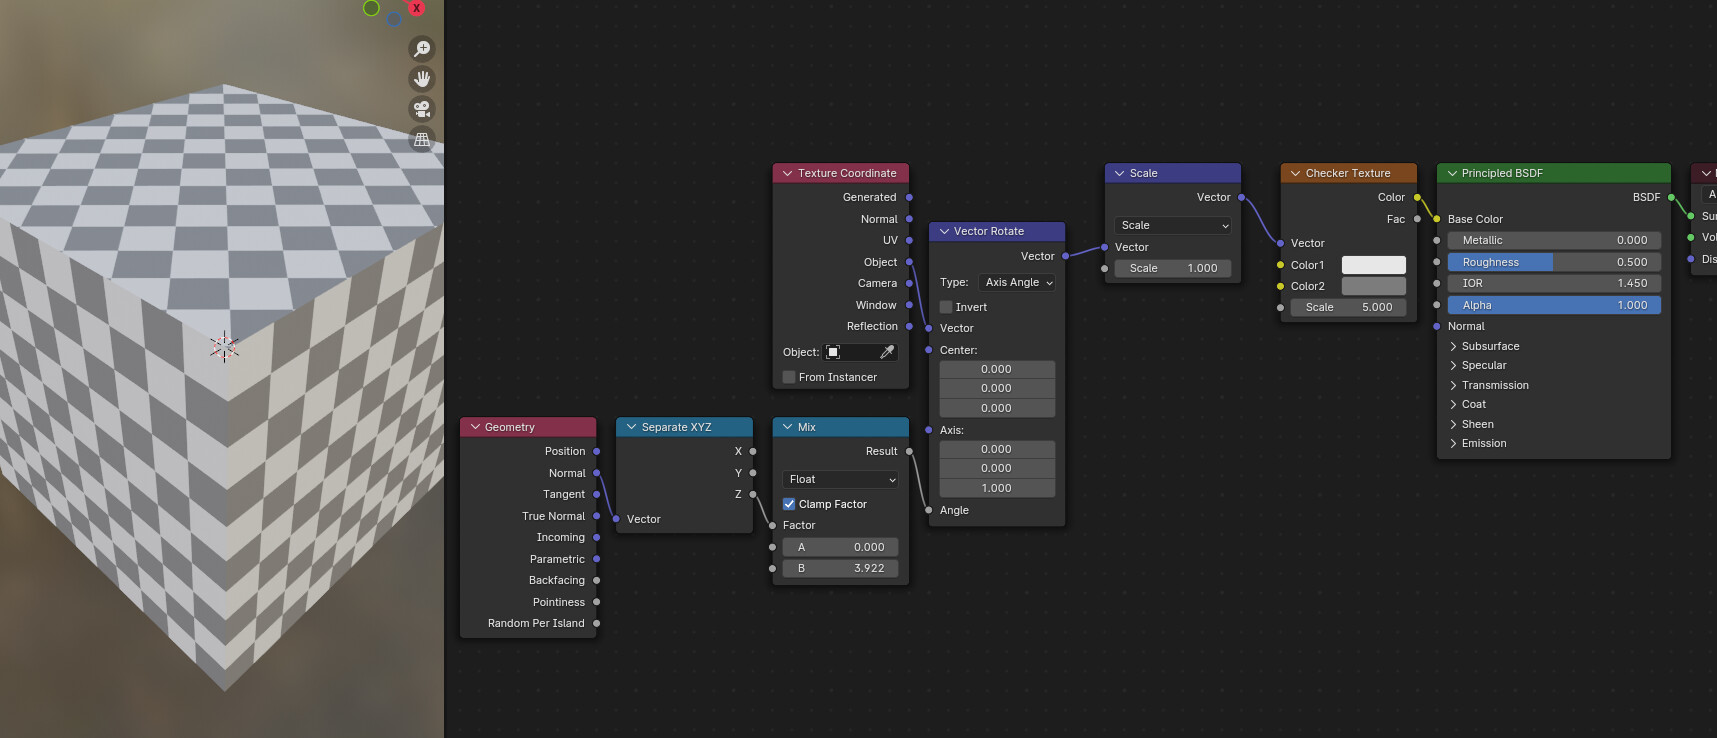
This same set-up could be used to scale to transform the mapping on a face based on normal, use a ‘Mapping’ node instead of vector rotate. And in that case the values in the mix node are 1 (for its original scaling) and 2 to double the number of checkers don’t he top face

1 Like
@ohookins I hope this explaination is useful. I think the main issue is caused by using the mapping node to do the rotation, best stick to vector rotate instead and address each requirement seperately, rotate then scale, instead of both at once.
1 Like
The explanation is useful, thanks! I was mainly trying to see if we could get that brushed metal texture applying to the top face of the cube without making a separate material with a different rotation. Your version is more complex but seems to get the job done. I’ll test it out and let you know if I have any more questions. Cheers!
1 Like
Eh, it doesn’t really work on the brushed metal. I’ll keep fiddling though as you’ve given me more ideas.
This is my node setup to slove the problem with just one shader:

This article helped me:
and of course Stephen’s answer was given me some ideas.
3 Likes