
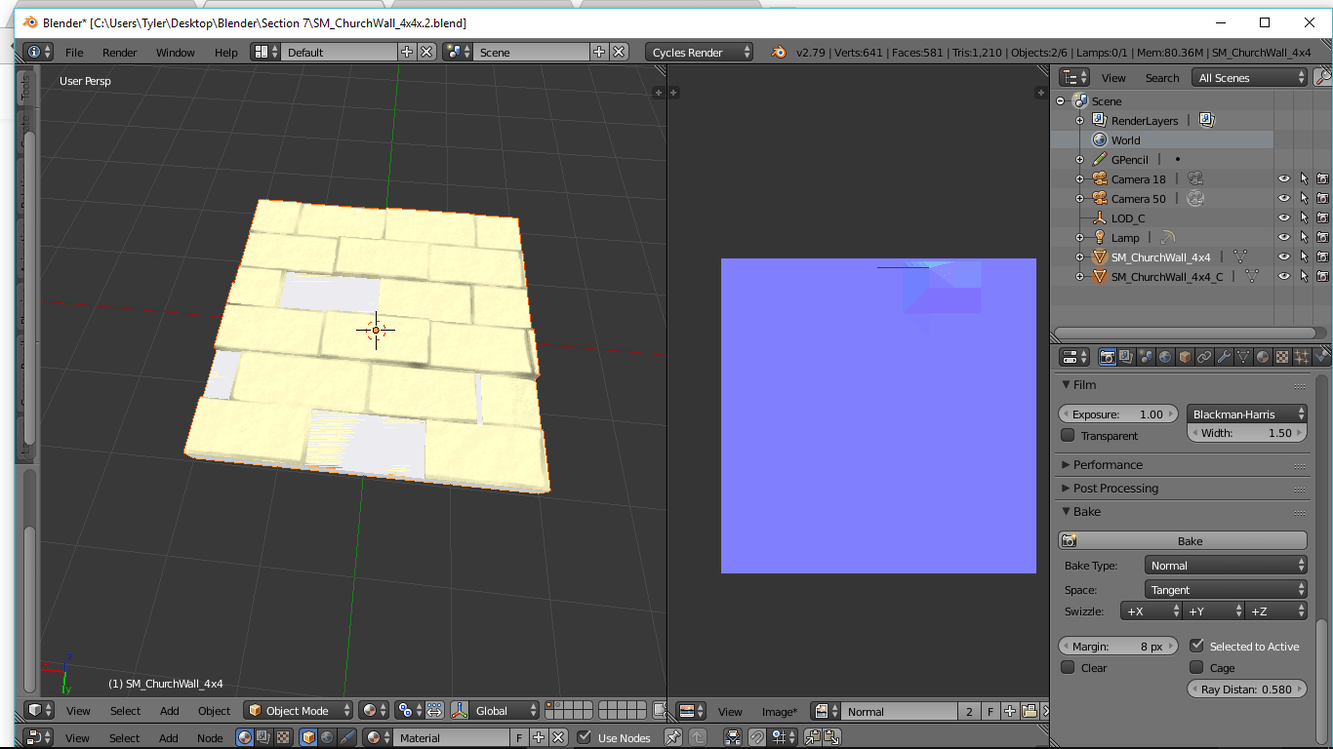
I have been working on making a normal map where I project it from a high poly to a low poly mesh. I have tried cages, adjusting margins, adjusting ray distances, basically everything and I’m still stumped. The best I can get my normal map to come out to is attached below. The low poly is gray for the material that I had to add (to put the normal map image onto the image texture node) and the high poly is that tan object you see. What’re your guys’ thoughts?
Hi @Tyler_Dahl,
Can you share your .blend file so it’s easier to take a look what might be wrong there? Also is the problem that you have only some of the normals baked in the map and most of them are missing?
Cheers, Jax
Just a few ideas:
-
Did you apply scale?
-
Also make sure the origin of the target mesh and dimensions are in the exact 3D Global Space.
-
You might want to just unwrap the top surface of your target low-poly mesh where the top surface detail is from your high poly mesh and later combine and edit everything in GIMP if that works. It might be that the ray tracing is hitting the underlying surface which I assume is completely flat.
-
Check normals facing the right way.
-
Check if there are any errors shown at the top on the task bar.
-
Make sure you have the image node selected in the node editor of your material. (I don’t think it bakes if you don’t have it anyway).
I’m sure I’ve had this problem before but I can’t remember what I did to fix it.