Hey guys,
In the lecture Spooky Corridor UV Unwrapping of the course Blender Environment Artist: Create 3D Game Worlds Grant uses image textures from Textures.com. This is just a quick thread to let you know that textures.com no longer provides 15 free credits per month apparently (as multiple other threads have pointed out). You can go ahead and register and download textures for free at Polyhaven.com, like this concrete texture I used for my wall: Wall Bricks Plaster PBR Texture.
Now this is not an image texture, but a PBR texture. I was having a rough time finding image textures on polyhaven, which was likely because I was not searching correctly. If you find your self in the same spot and you want to use a PBR texture instead of an image texture then follow along.
When downloading a PBR texture, your download content will look something like this:
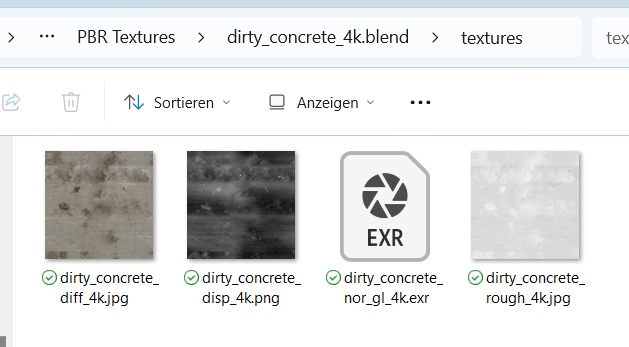
Now Im sure Grant will go into detail which of these maps do what later in the course (he did so in the complete character creator course where we created the orc), so I will just skip ahead and rush you through how to apply them in blender.
- (Optional Step) Enable the Node Wrangler Add-On in Blender under Edit > Preferences > AddOns
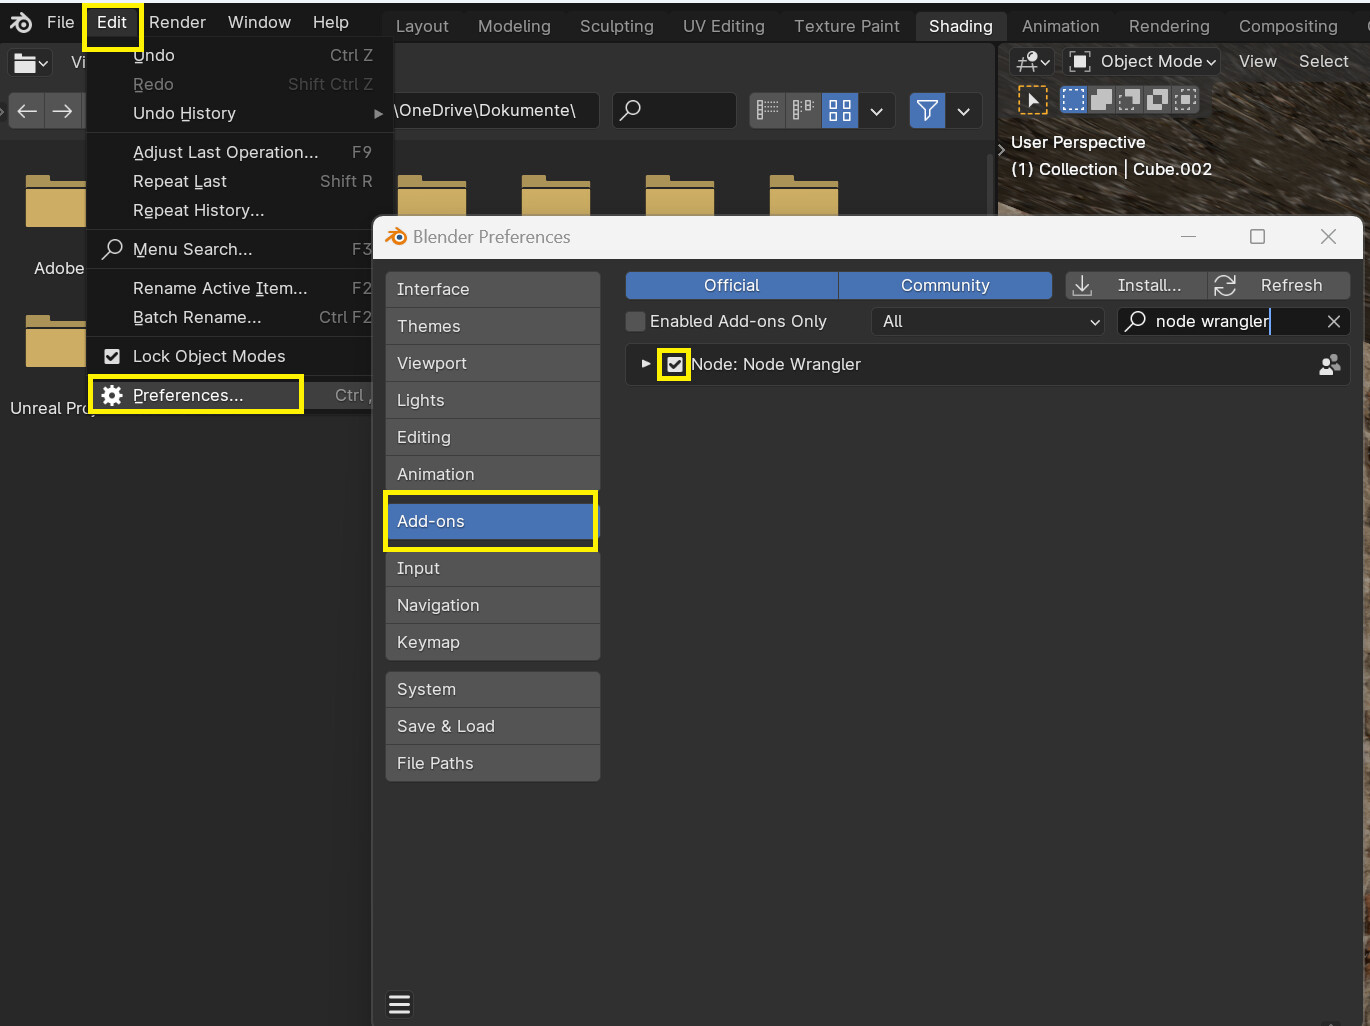
This step is optional and you can set up the material nodes manually, but its just faster to use the addon.
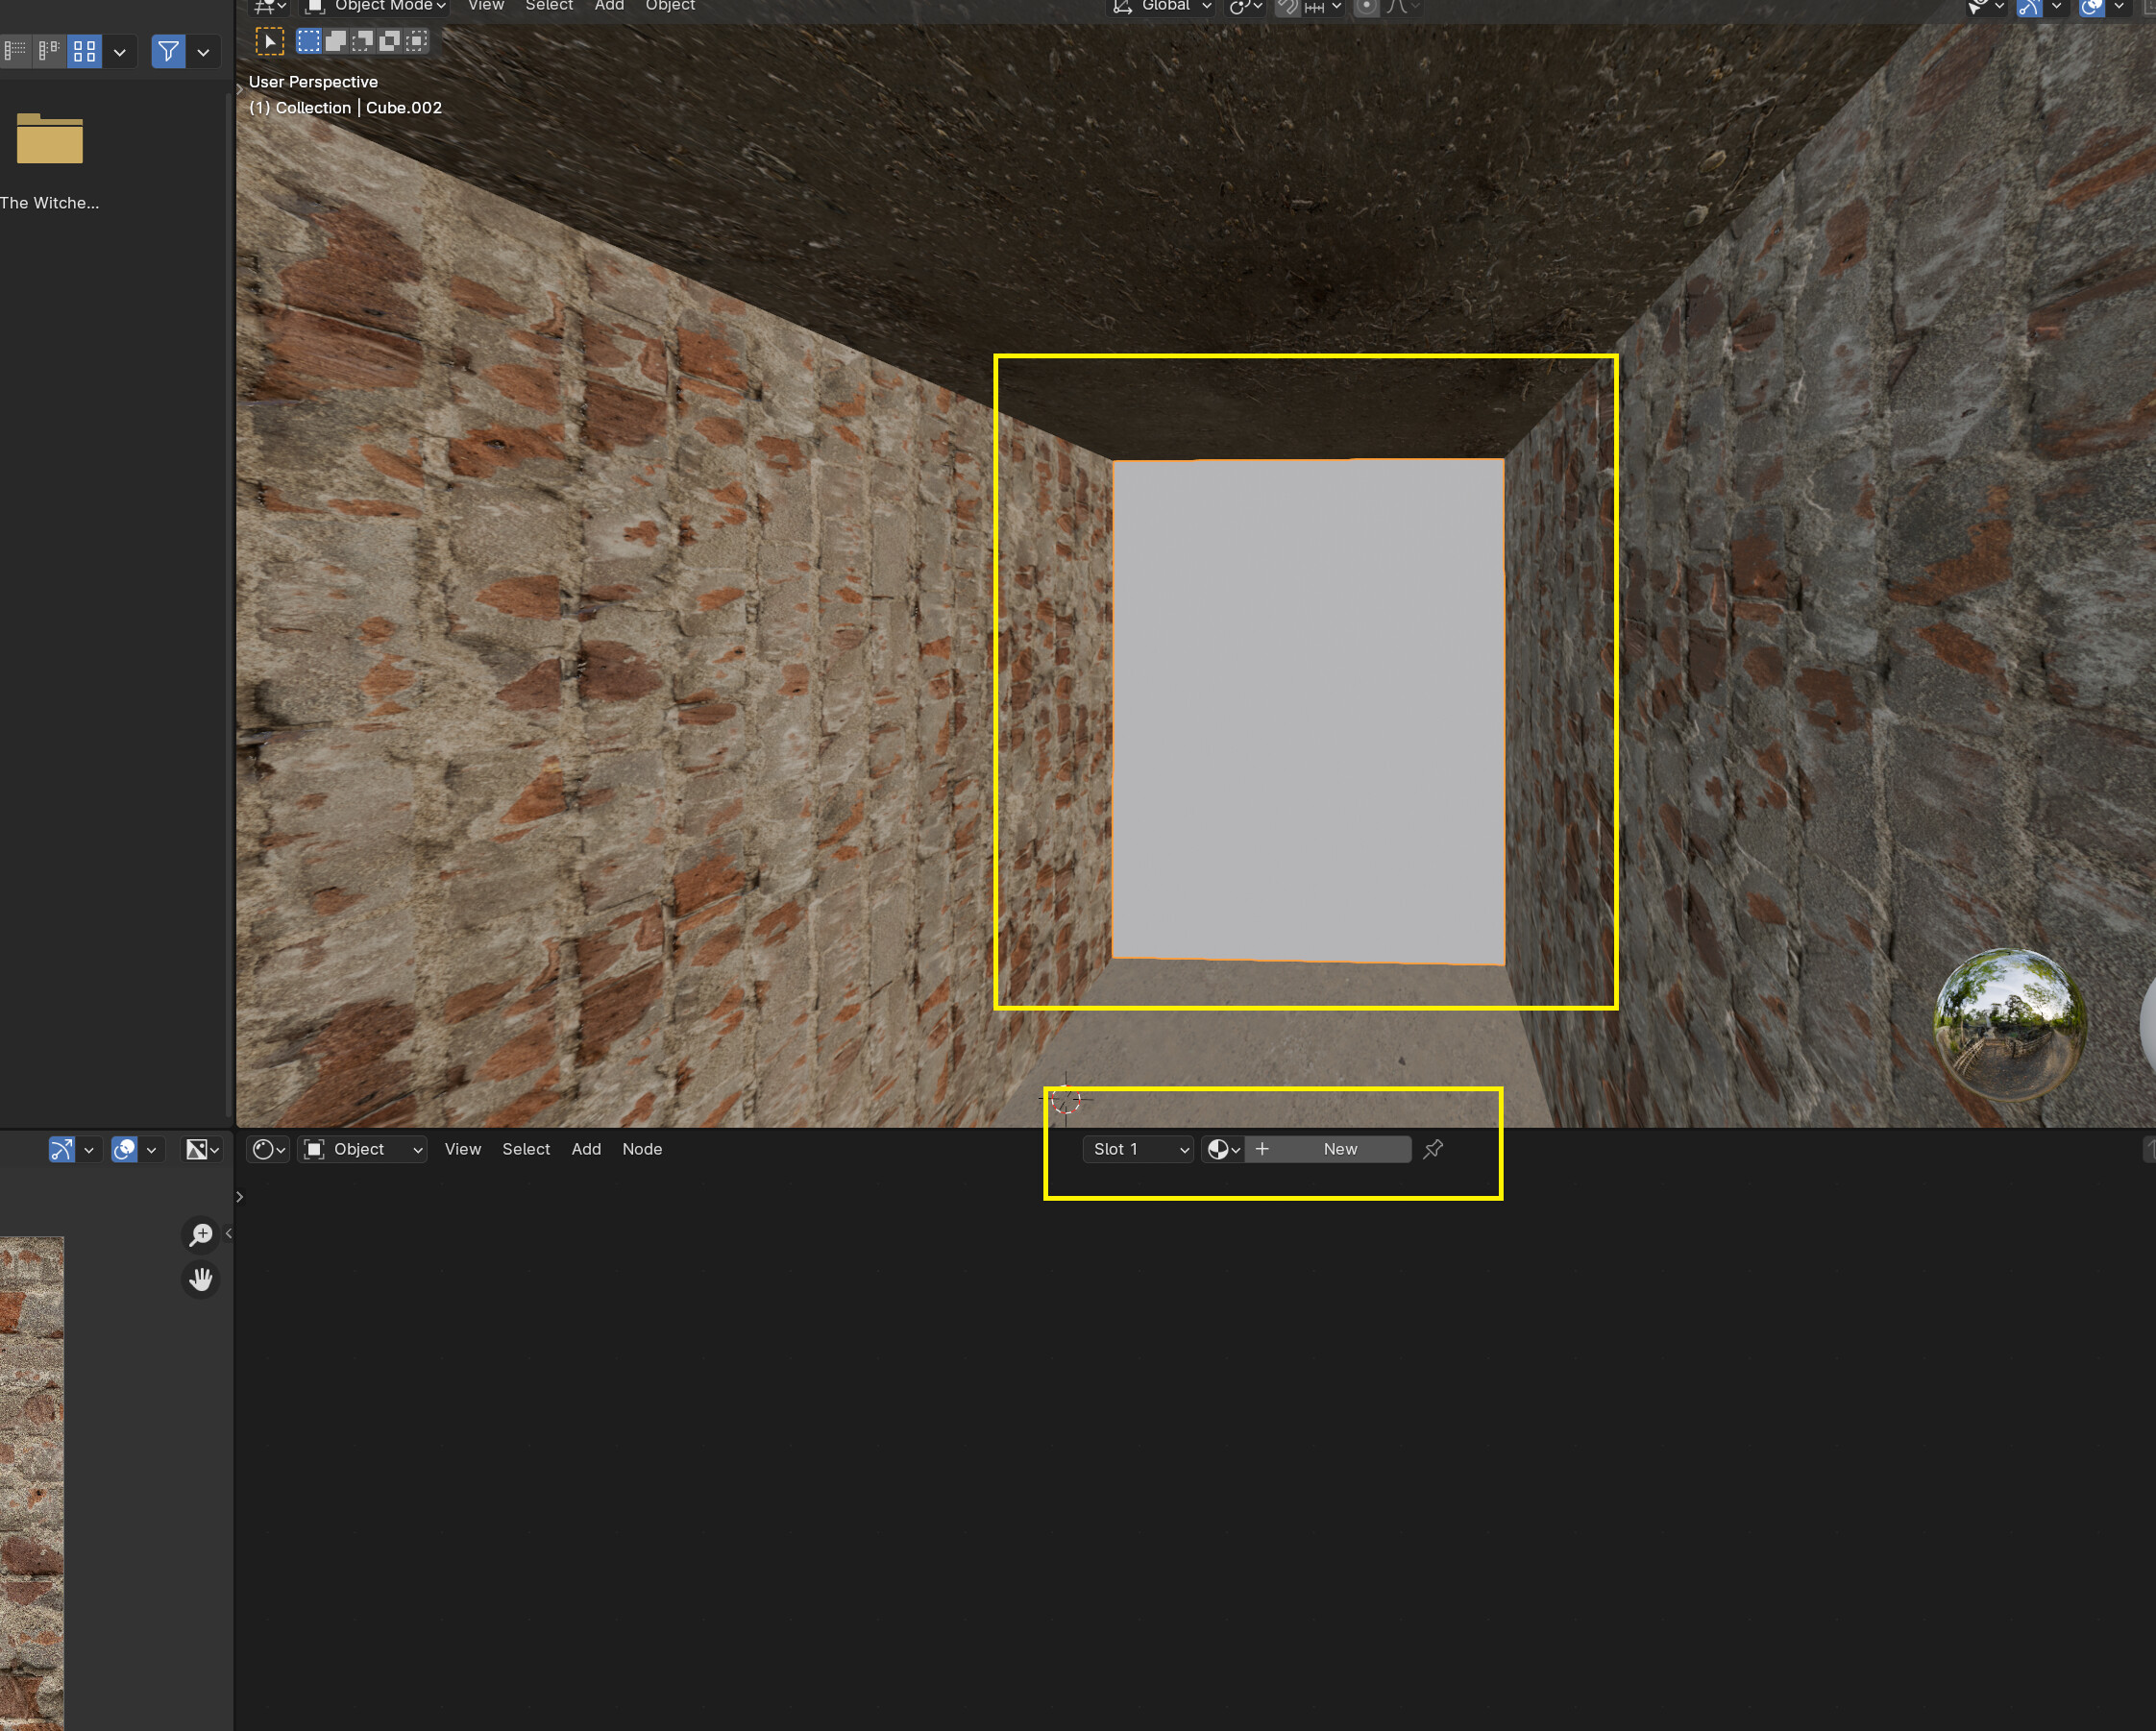
- Select your wall or the ground in the viewport. Then create a new material:
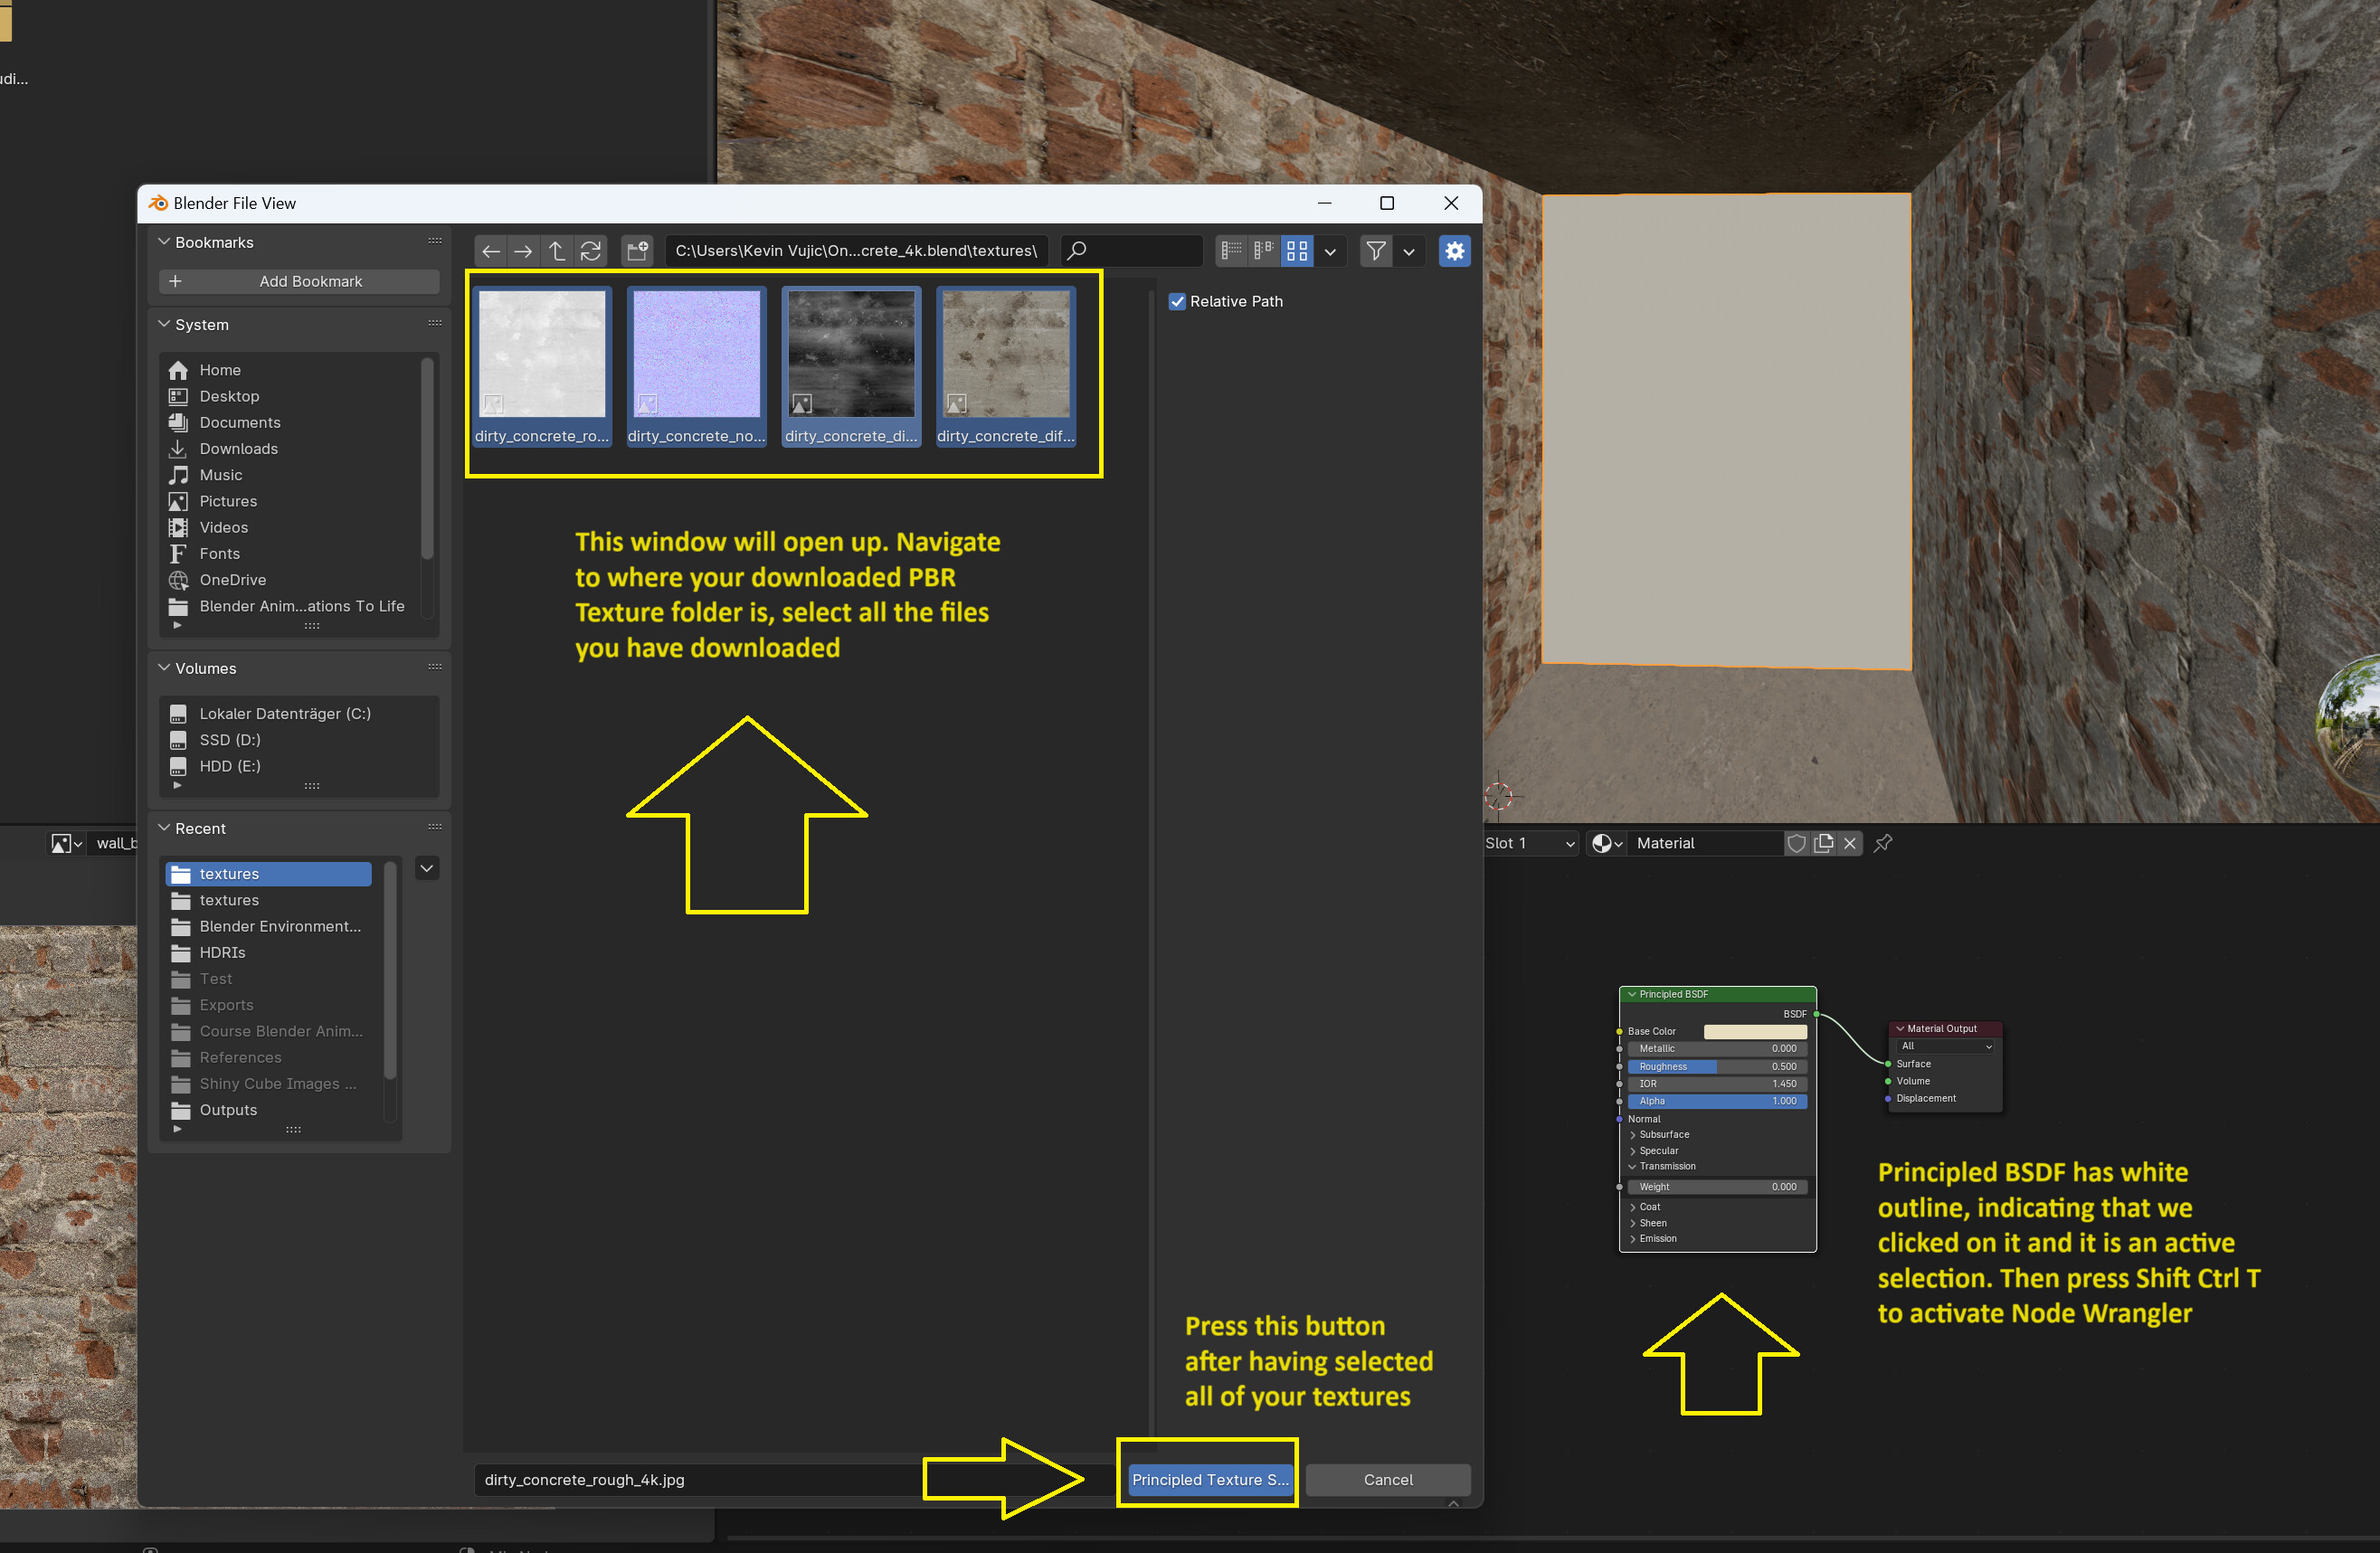
- Select your Principled BSDF Node in the Shader Editor and Hit Shift Ctrl T, which will activate your Node Wrangler AddOn. Then select all of your downloaded textures and press Principled Texture Setup down below.
NodeWrangler will do its magic and your material should now look like this:
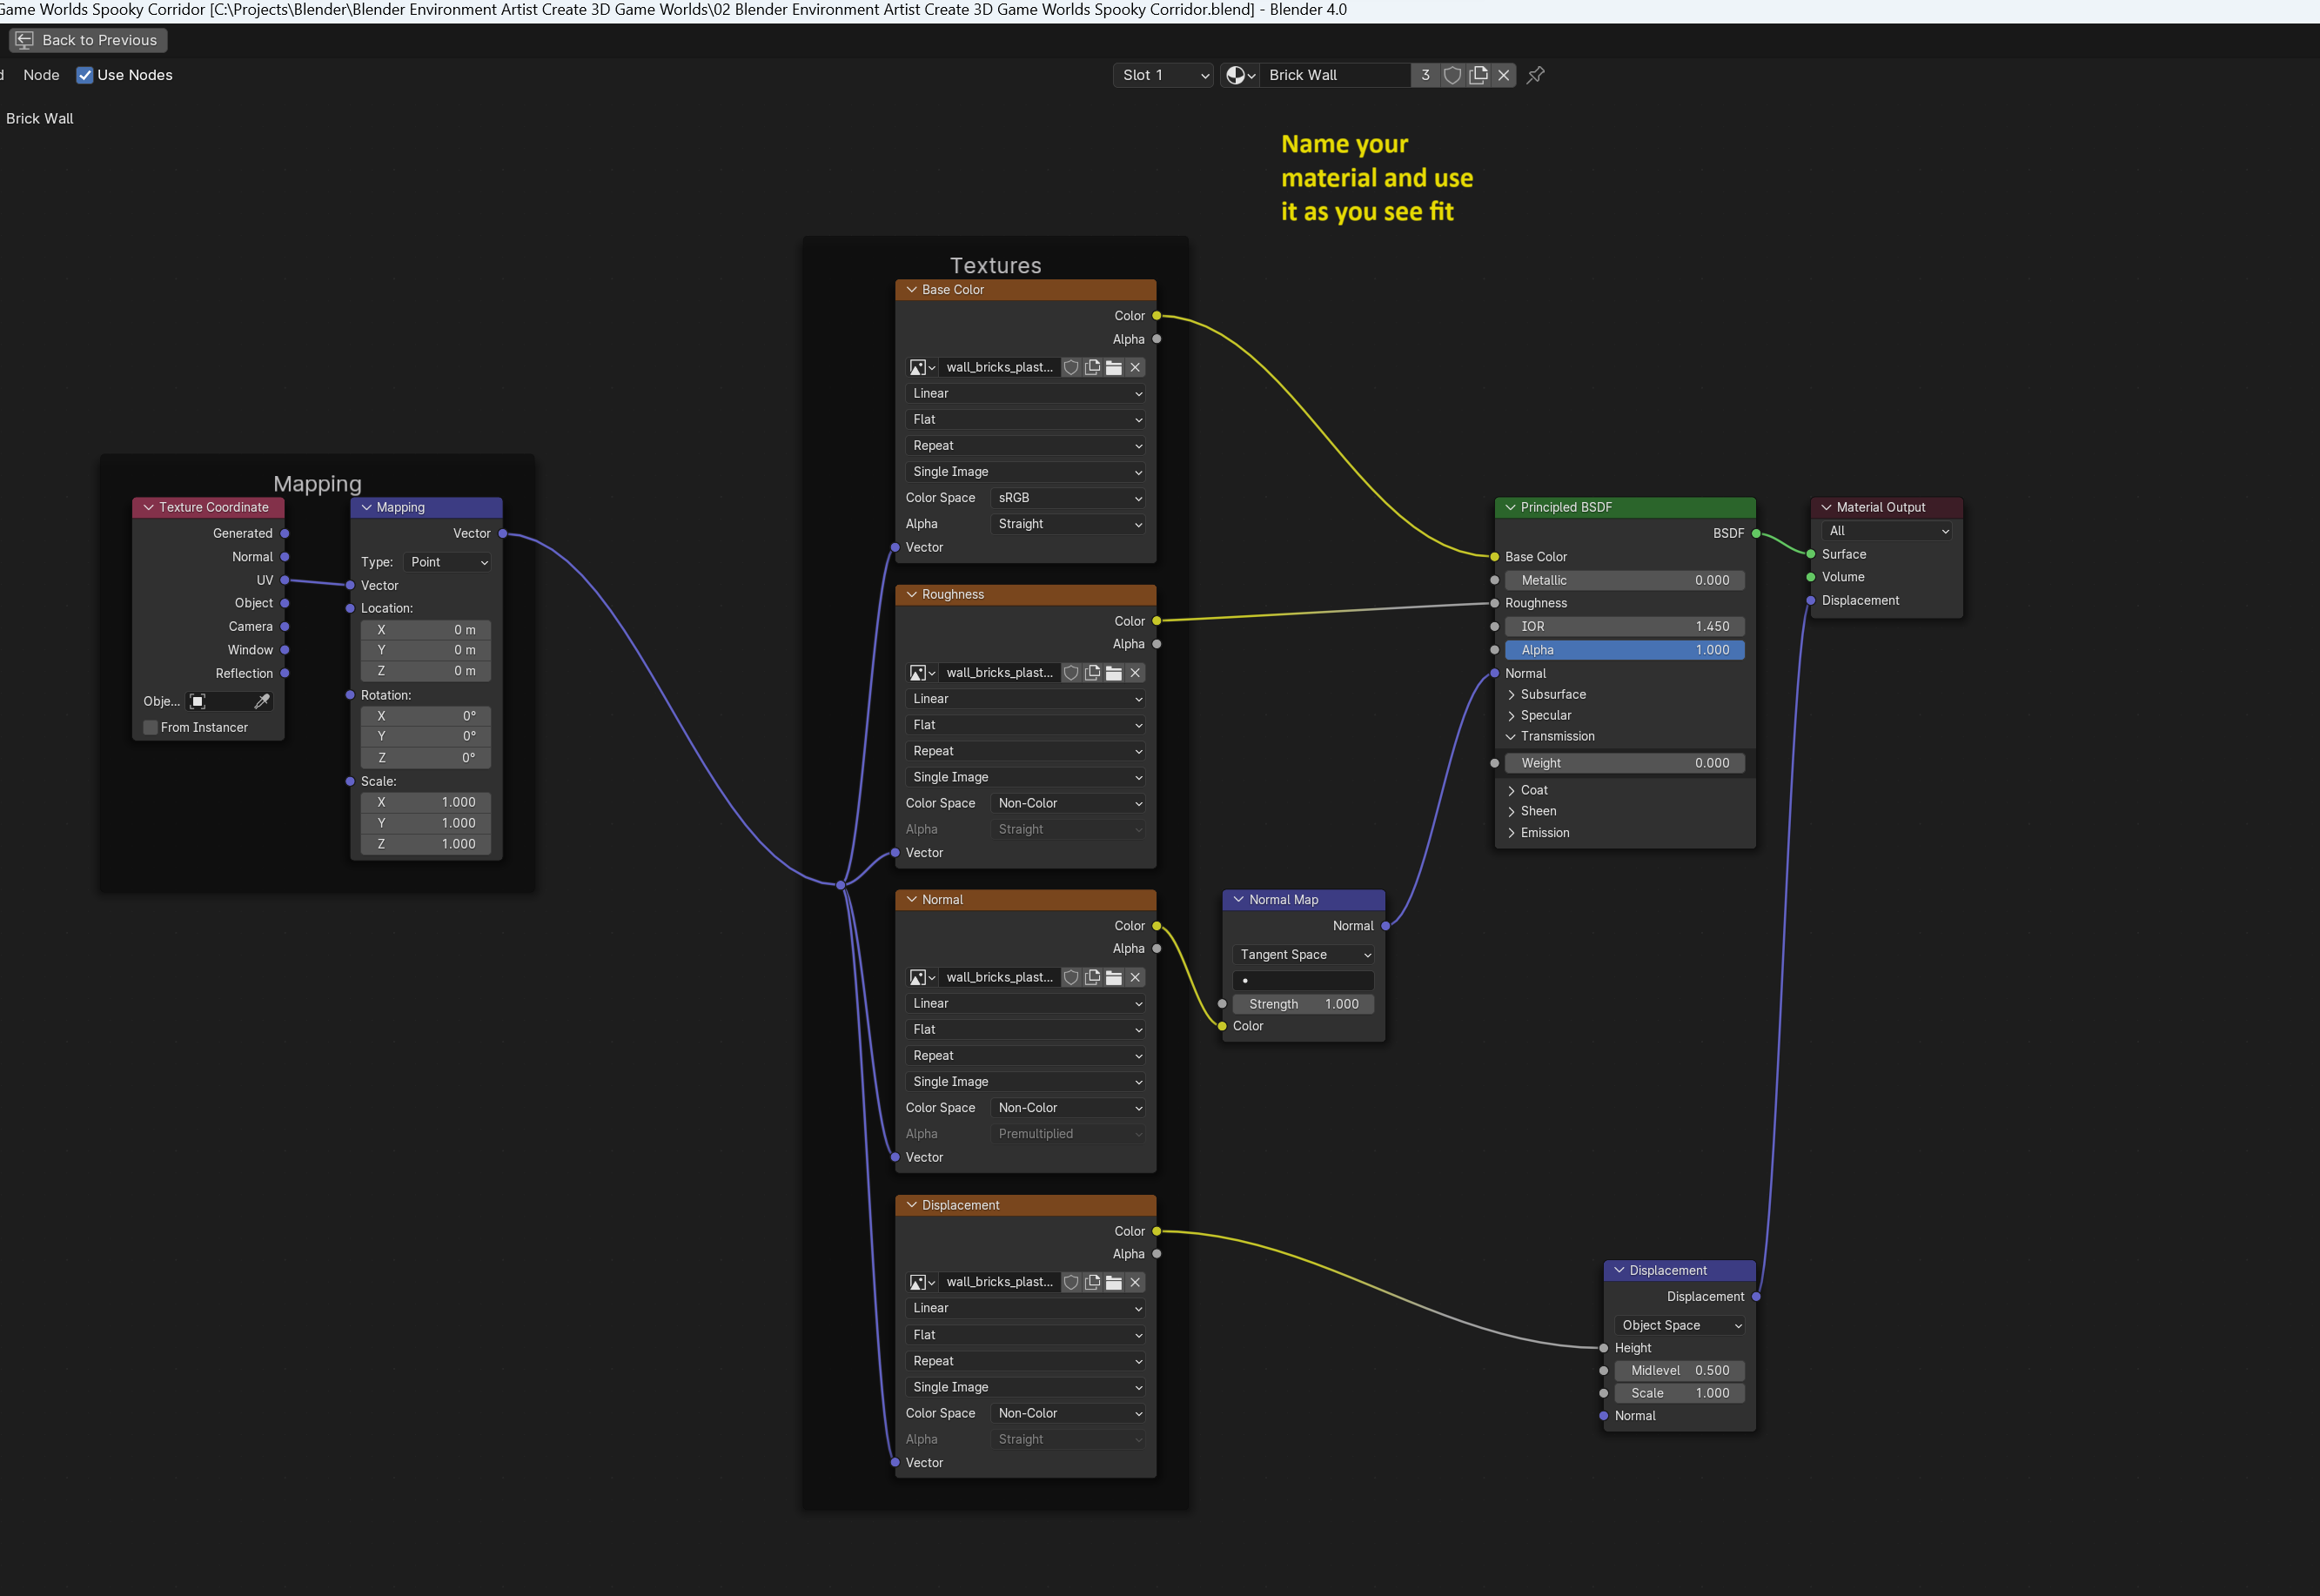
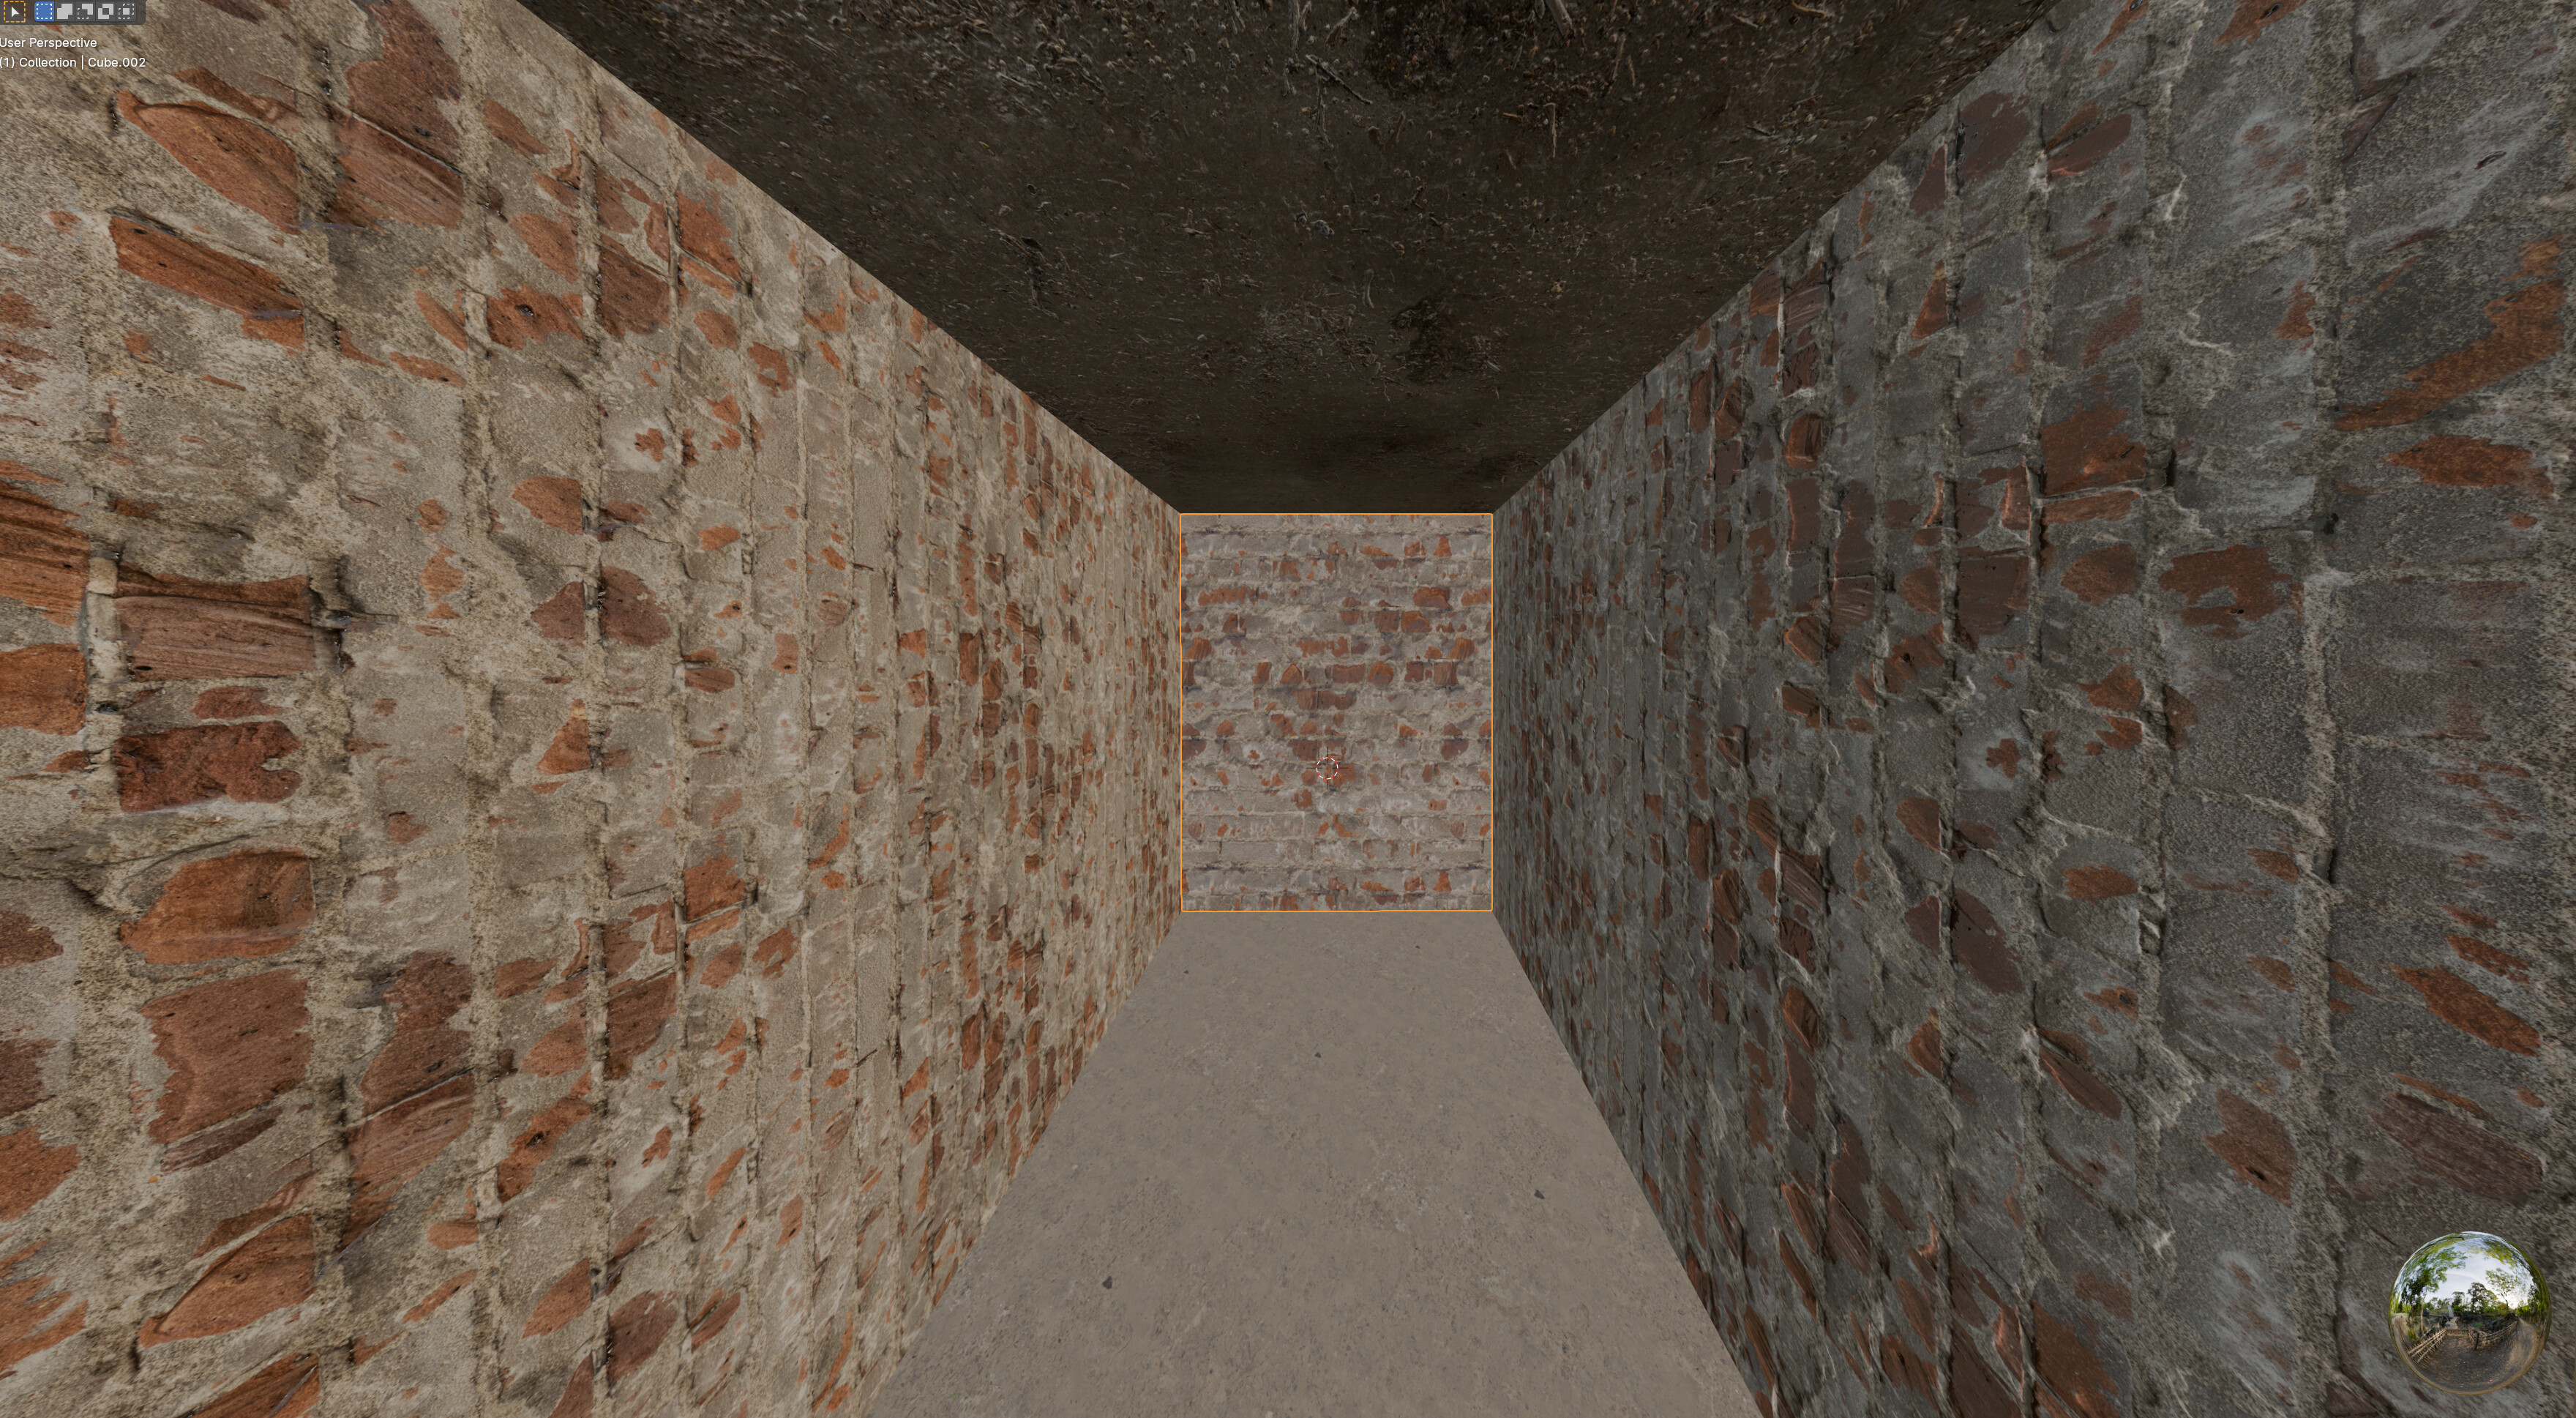
You can repeat these steps for different PBR Textures and create different materials for them. My corridor currently looks like this:
 . But good to know for the future