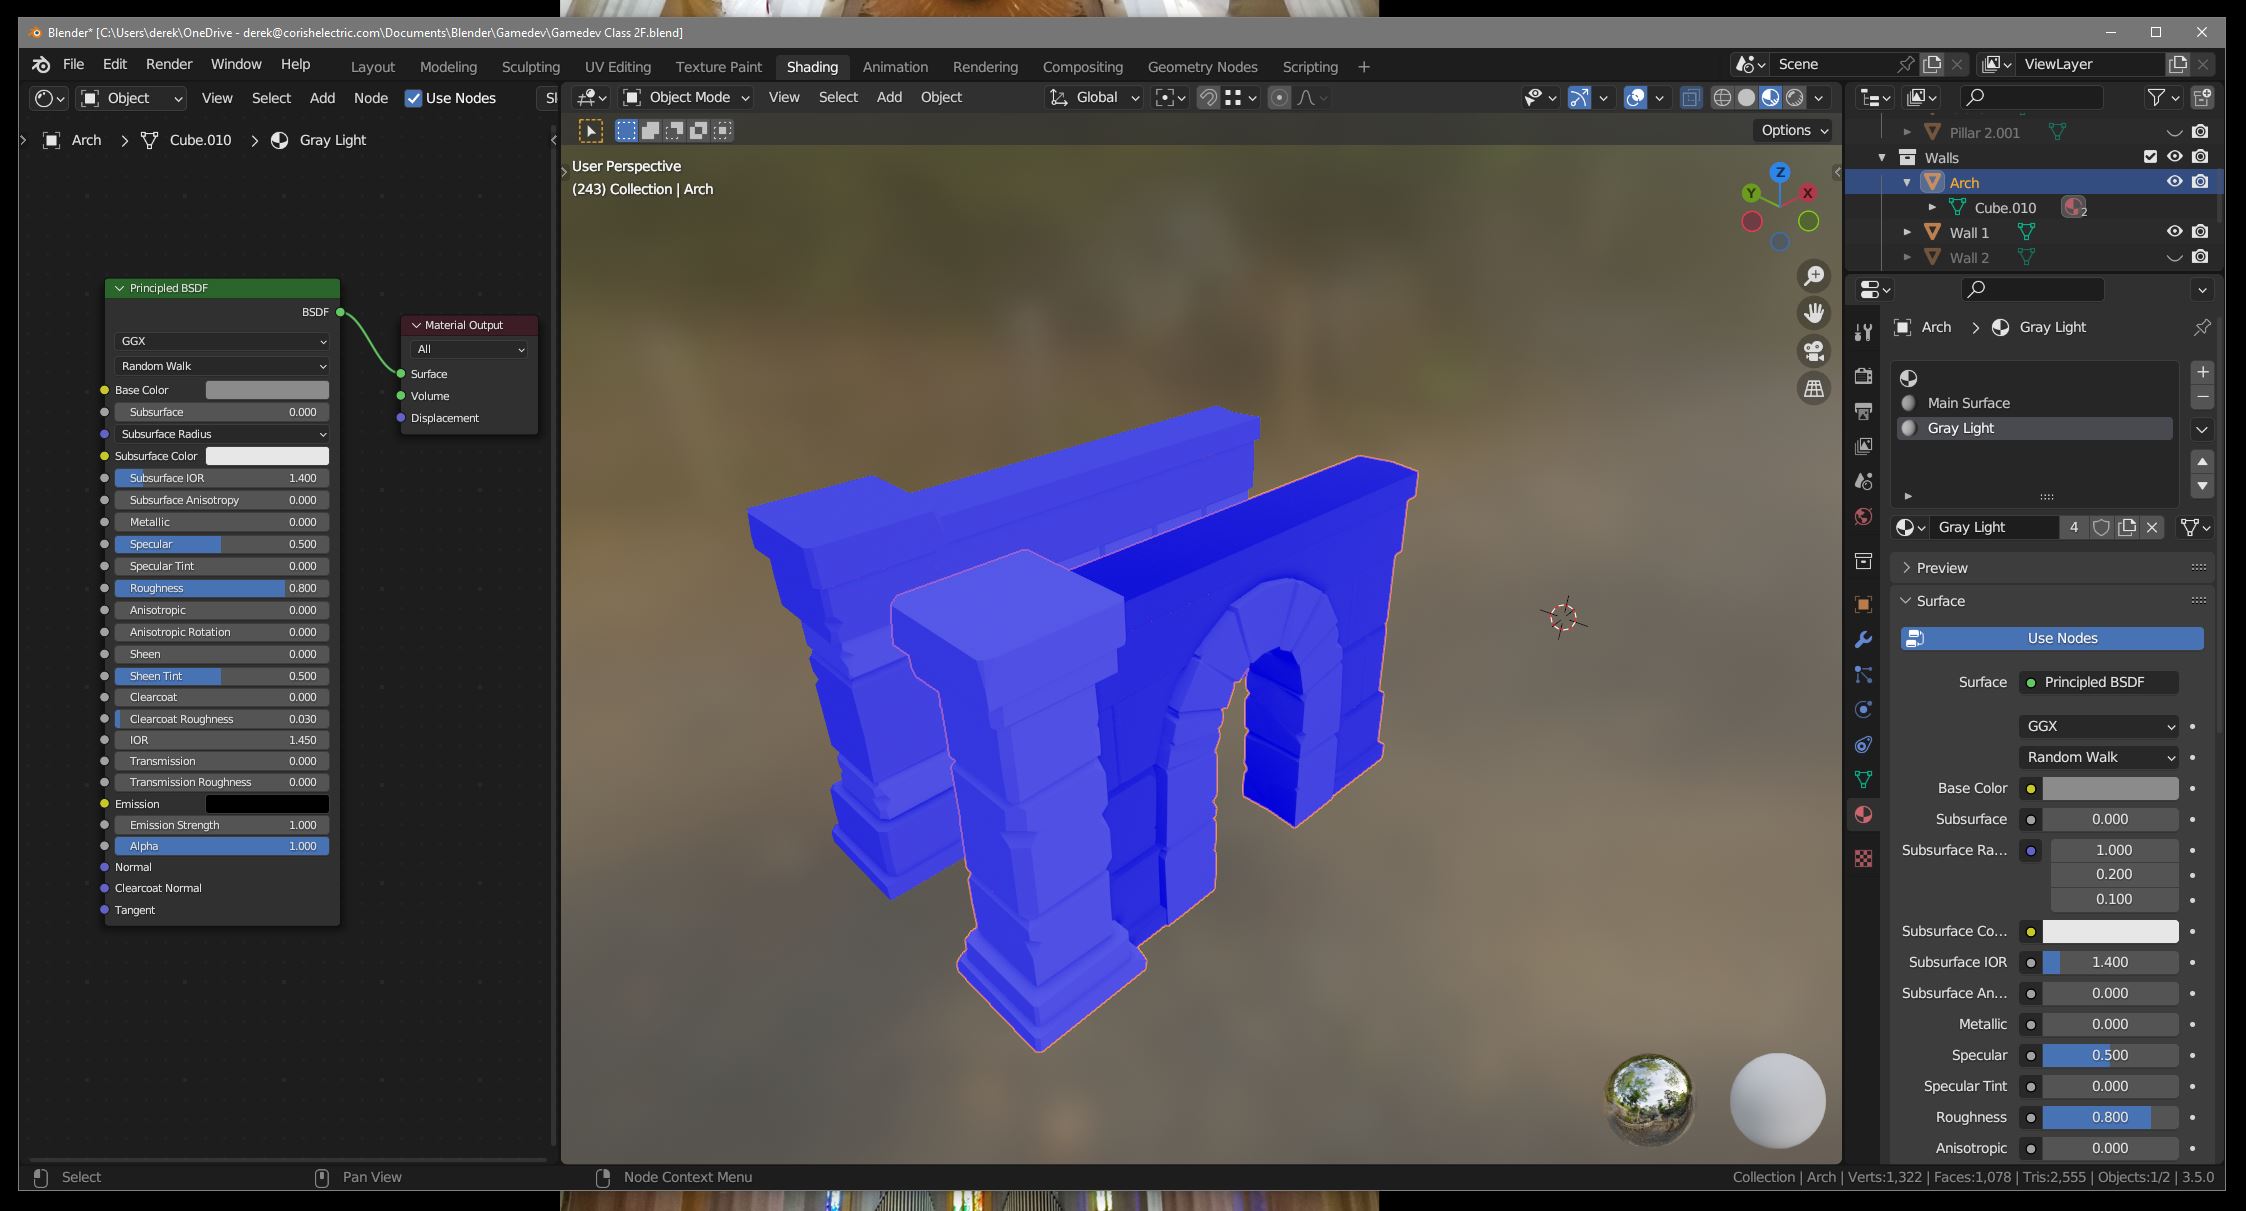
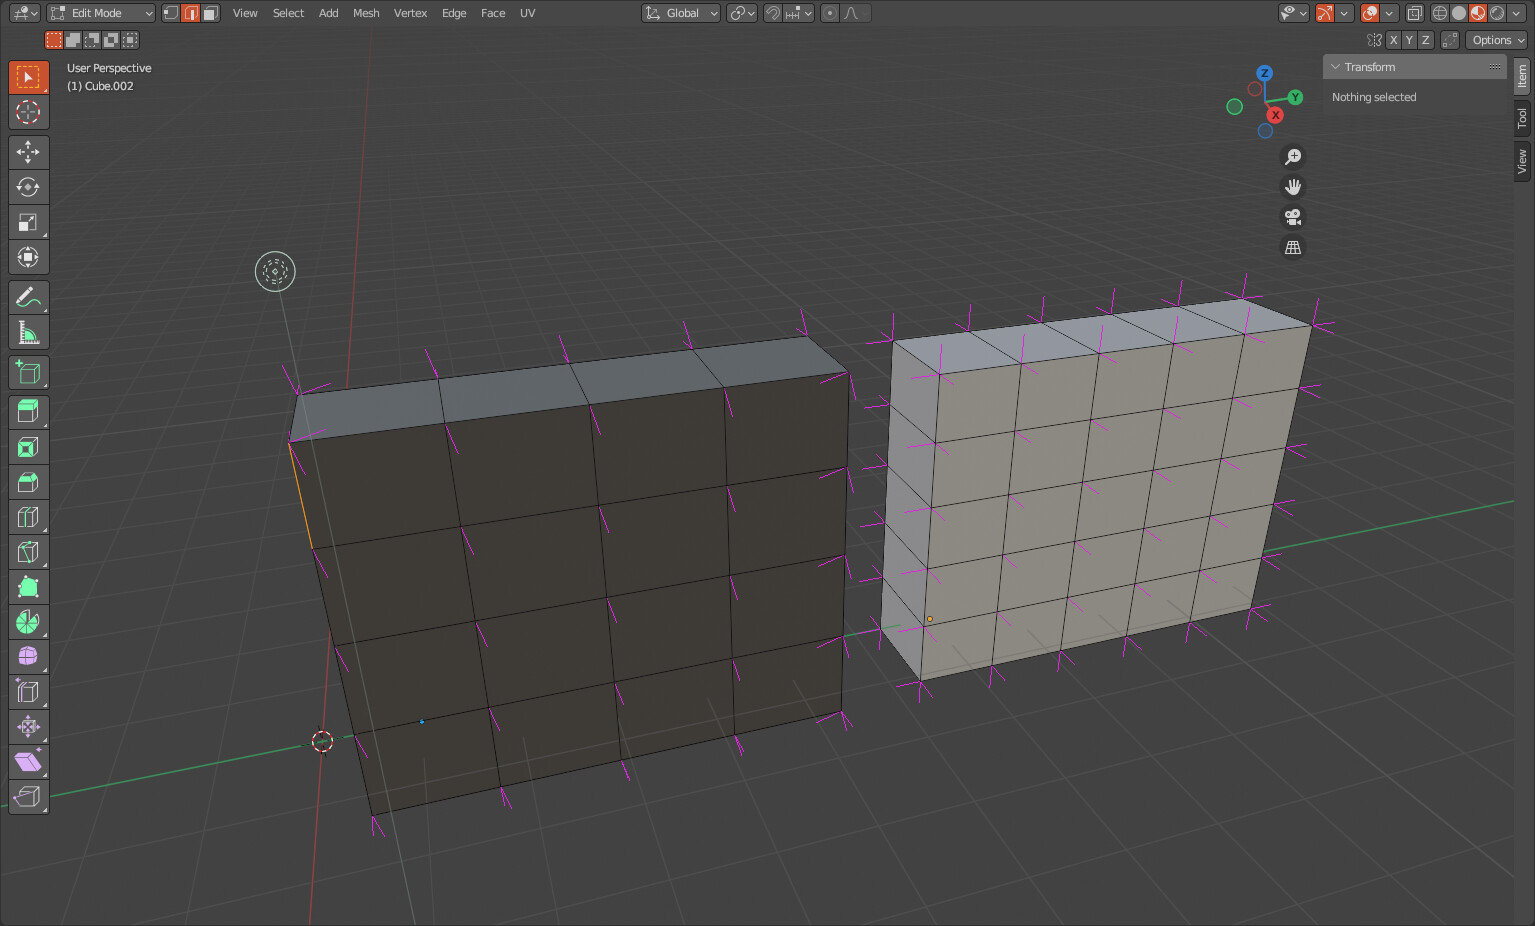
I ended up with a rather odd set of colors/textures on my wall with arch. Three photos are attached. I have the same material (Gray Light) in slot #2 applied to the entire pillar, arch, and wall in the combined object “Arch”.
However (as you can see in the photos), I am getting different colors and even some reflectivity on the top of the wall. I tried deleting all slots/materials and-re inputting them from scratch, but even with no materials assigned, the different portions of my combined object look different. I checked normals and they look correct.
This was easy to fix, I went back to a prior autosave after I had joined the objects into “Arch”, and had no problems after this, but I really want to figure out what I did to cause this issue (and how to correct it) in case it happens again in the future. The combined object Arch was created correctly and a uniform color. What could I have hit when adding slots/materials to cause something like this? Thanks.
Do you still have a savefile with the odd behaviour?
I can’t really think of what could cause this off the top of my head and even if I did give some possibilities it wouldn’t be anything definitive. The only way for me to figure out what caused this with certainty would be to look through the file.
Edit:
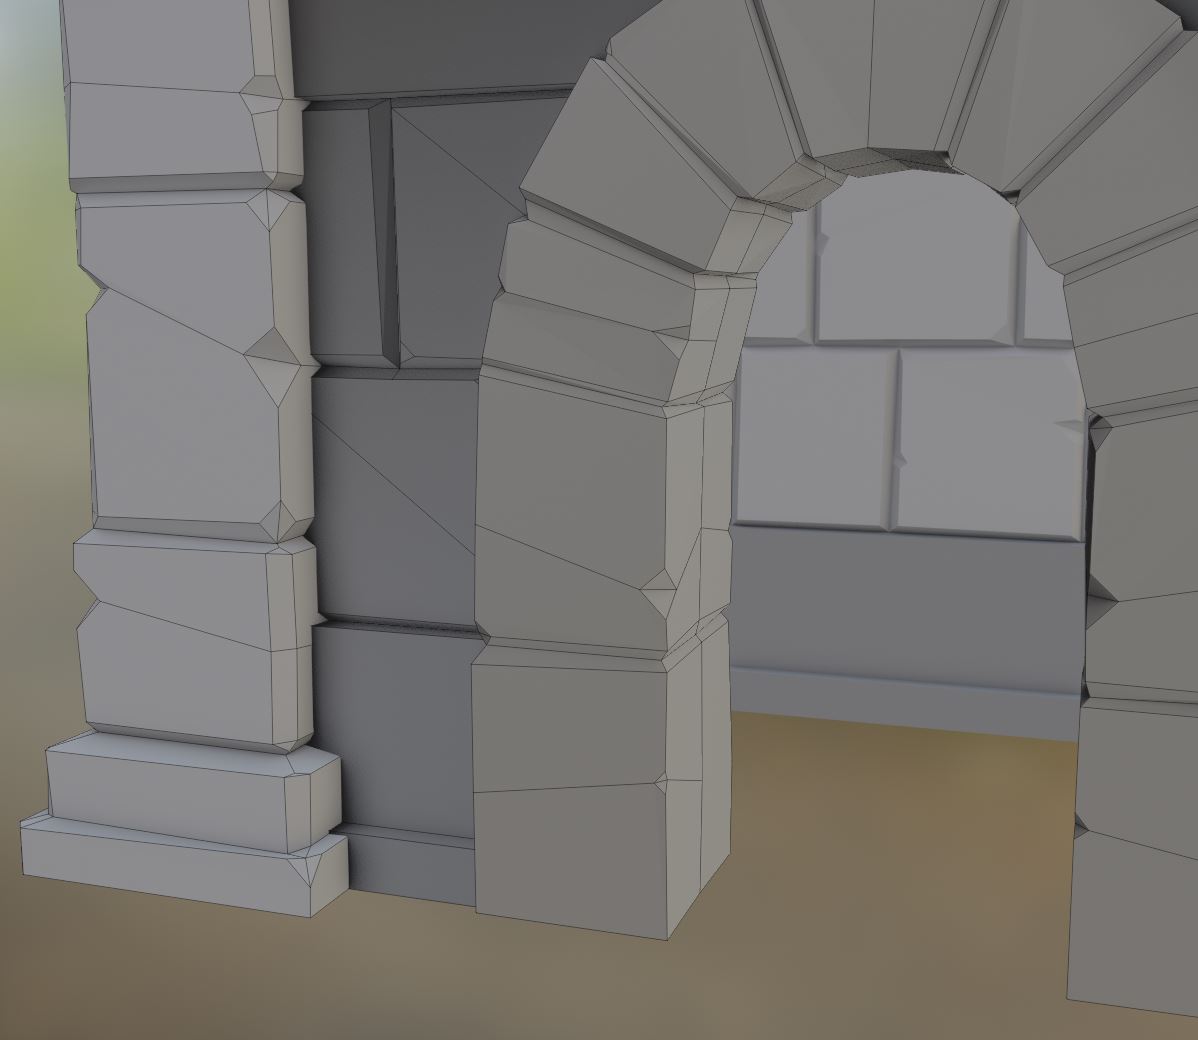
My initial thought was that split normals are screwed, especially with the way the colour shifts on a different angle. You said you did check normals but I only see you show the face orientation, which has no bearing on vertex normals.
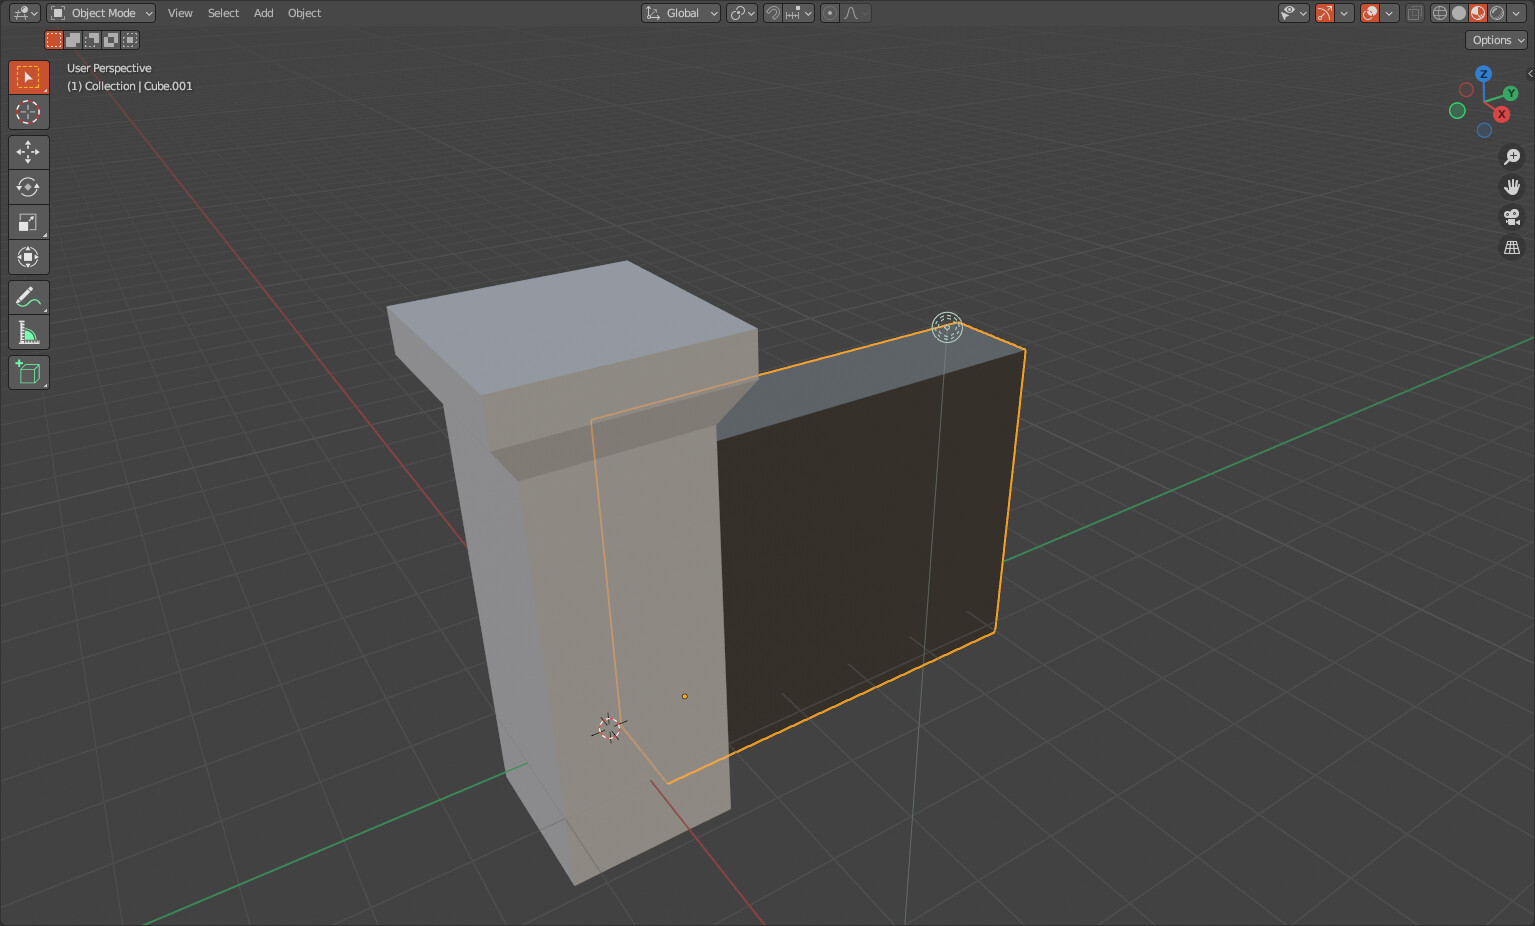
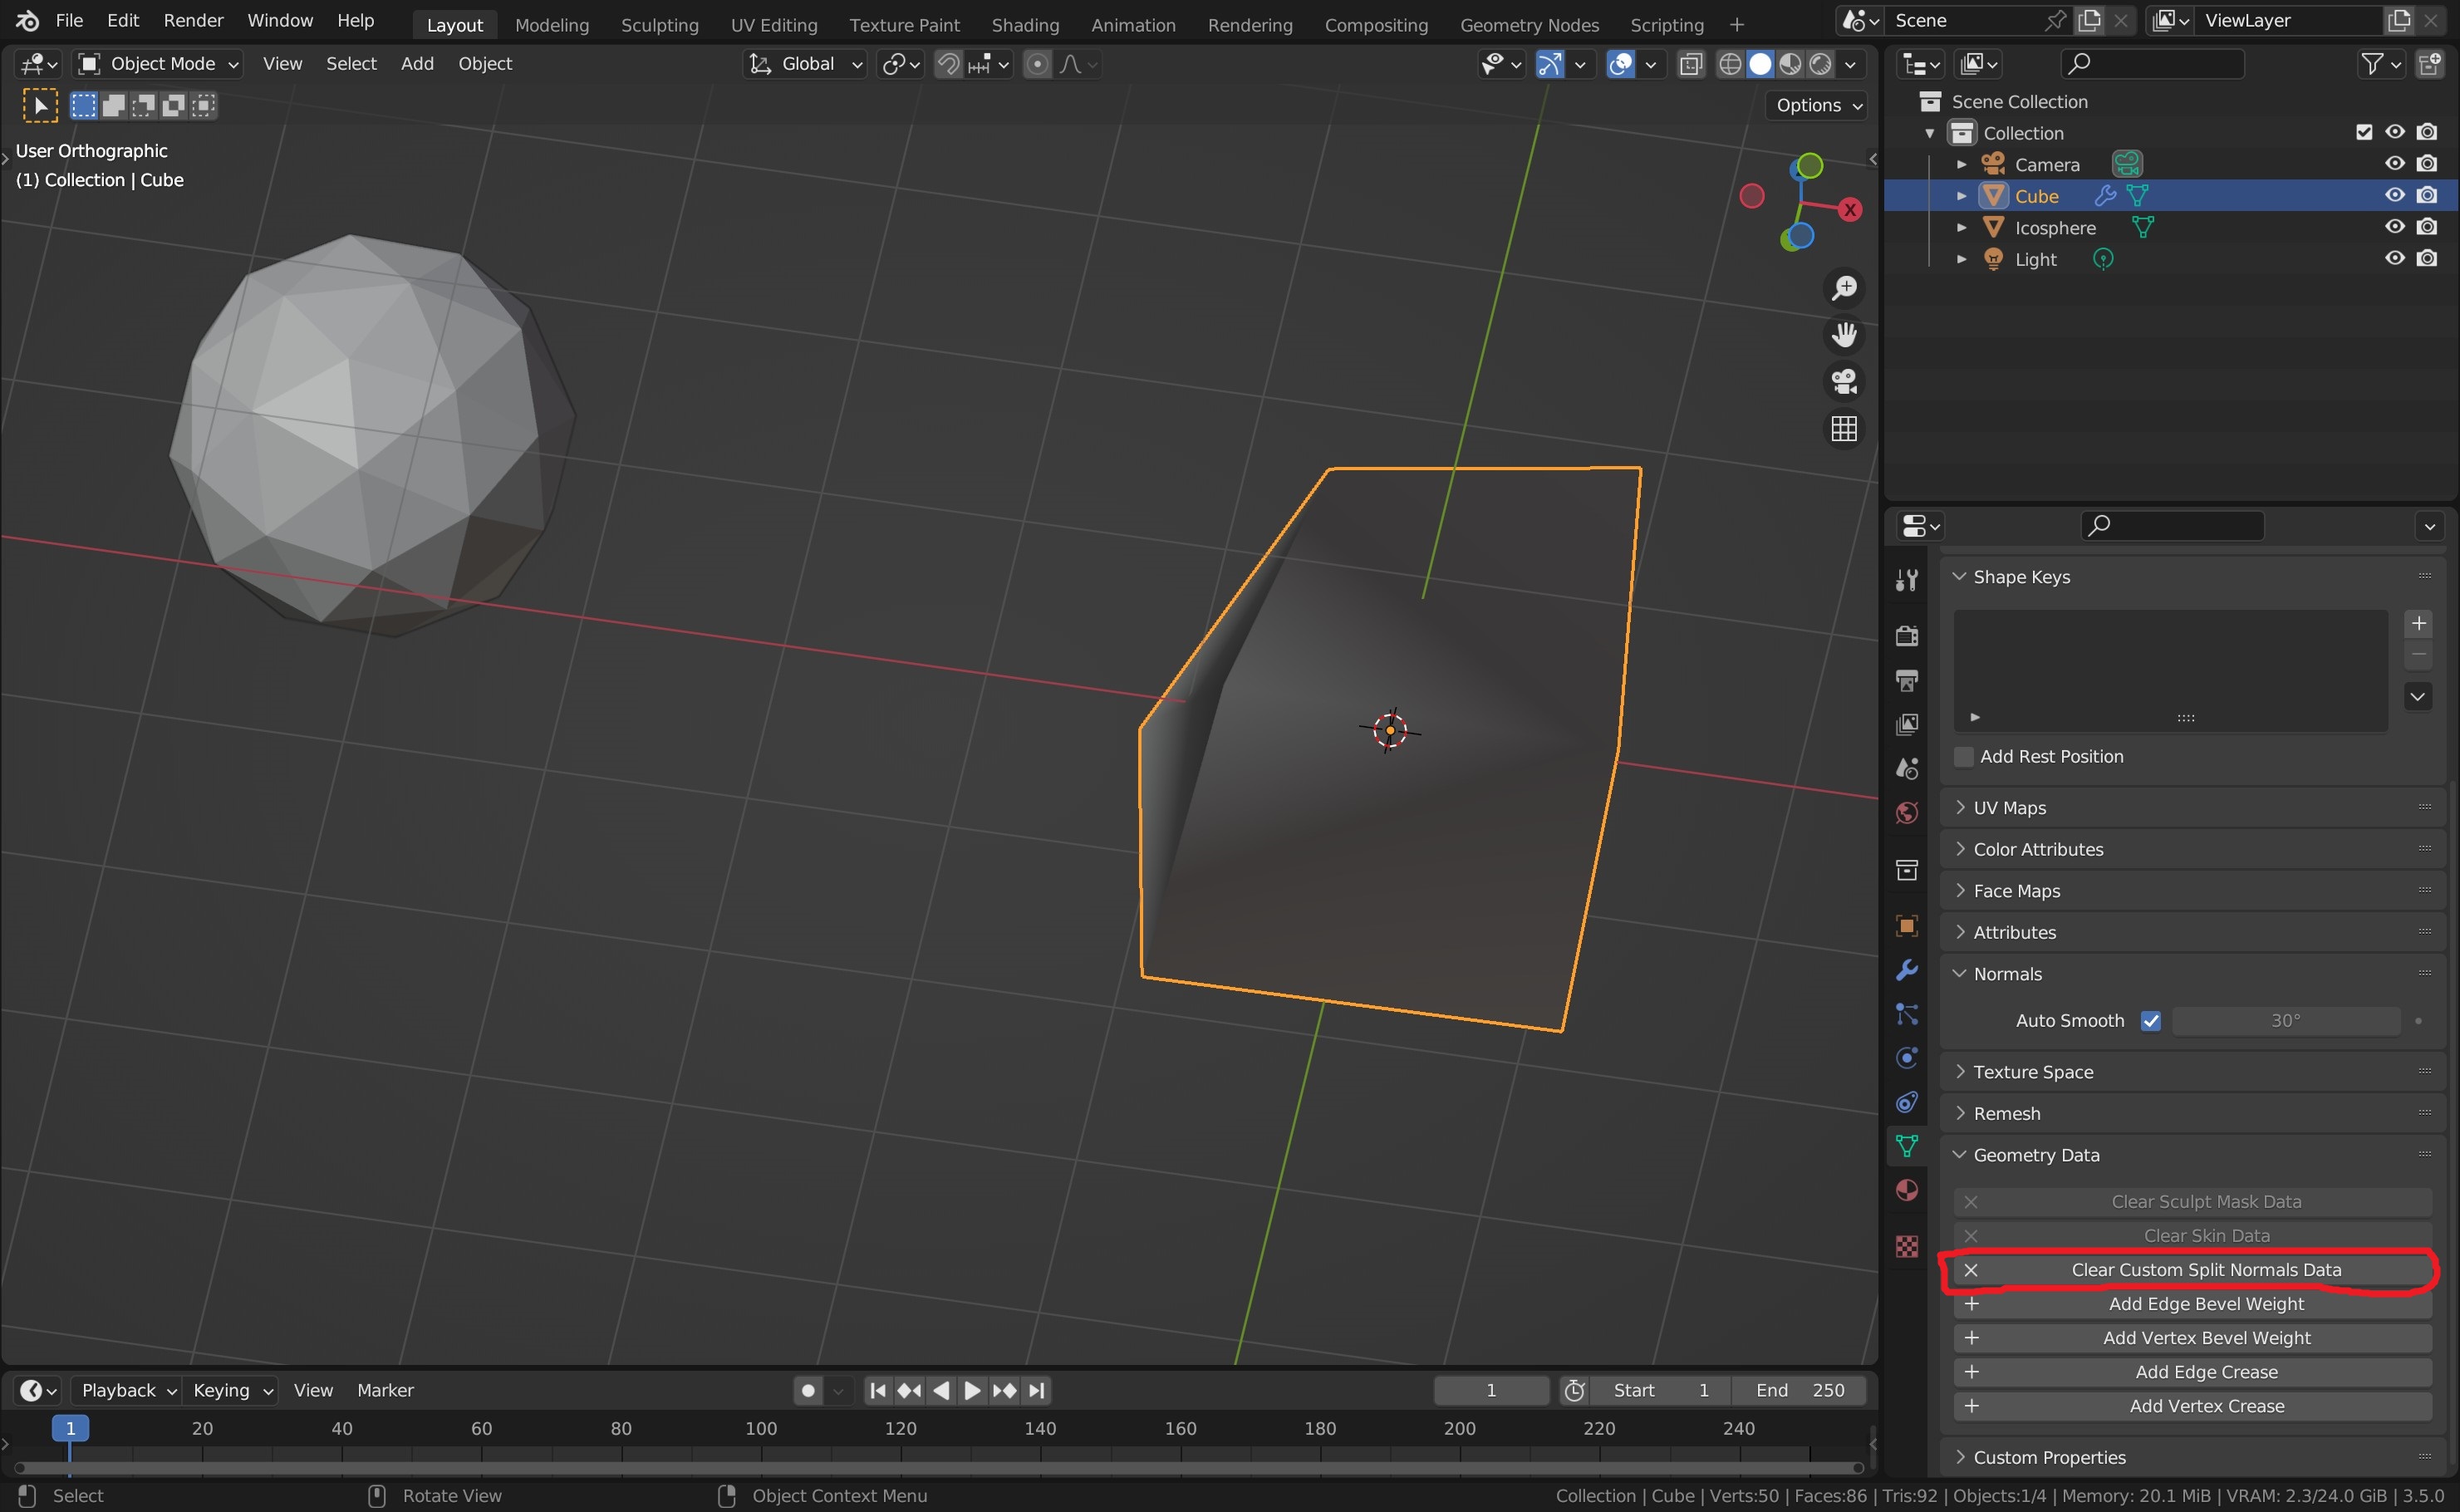
Here is what I got after a quick mockup and rotating split normals:
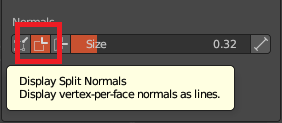
Another check after face orientation is To see if you are offered ‘Clear Custom Split Normals’. It is in the Geometry dropdown in the Mesh properties data tab (green Triangle)
It is a rarer issue but does crop up sometimes for no known apparent reason. Some random key press probably.
Aye, you rotate split normals by simply pressing N after R which can be easily done by accident, and because the overlay for split normals is not visible by default there is no real feedback so it’s easy to commit a change without even knowing.
Another way to reset them is to select all in edit mode then press Alt+N and select “reset vectors”
Split normals are not something you mess with often but can be useful for Anime/Catroonish workflow when you want shadows to appear on angles not consistent with real life.
Thank you for the quick response. I did save the messed up file. You are absolutely correct. I’m glad this happened in a sense as I will always check Split Normals in the future.
I have run into an issue with Split Normals when joining and then separating meshes before, so I should have learned from that. I checked the color normal display, face normal lines and vertex normal lines and they looked good, but since those two looked correct (and it was a really simple task), I never thought to check split normals, and sure enough, they are rotated (and differently for different objects). “Reseting Vectors” fixed it.
Based on the possible shortcuts, I think I figured out what I did. When selecting and hiding portions of the object, I must have hit ALT-L (point normals to target) instead of L at some point. It looks like I did it twice. Damn.
Interesting little corner of Blender where that has some use. I have never heard of anyone rotating normals deliberately! Sounds very plausible accidental shortcut presses too.