Test level design

Here is a screenshot from my first level.


image

Notes:

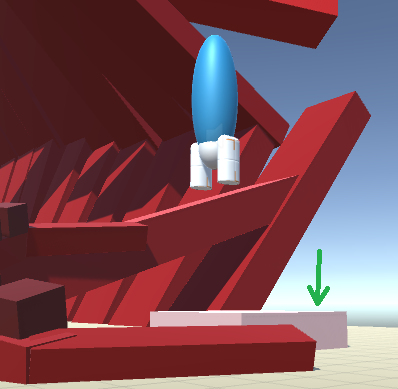
  1. For my launchpads, I made a script that changes the material when a game object tagged with “Player” begins or ends collision with them. This gives the effect of the pad lighting up on contact

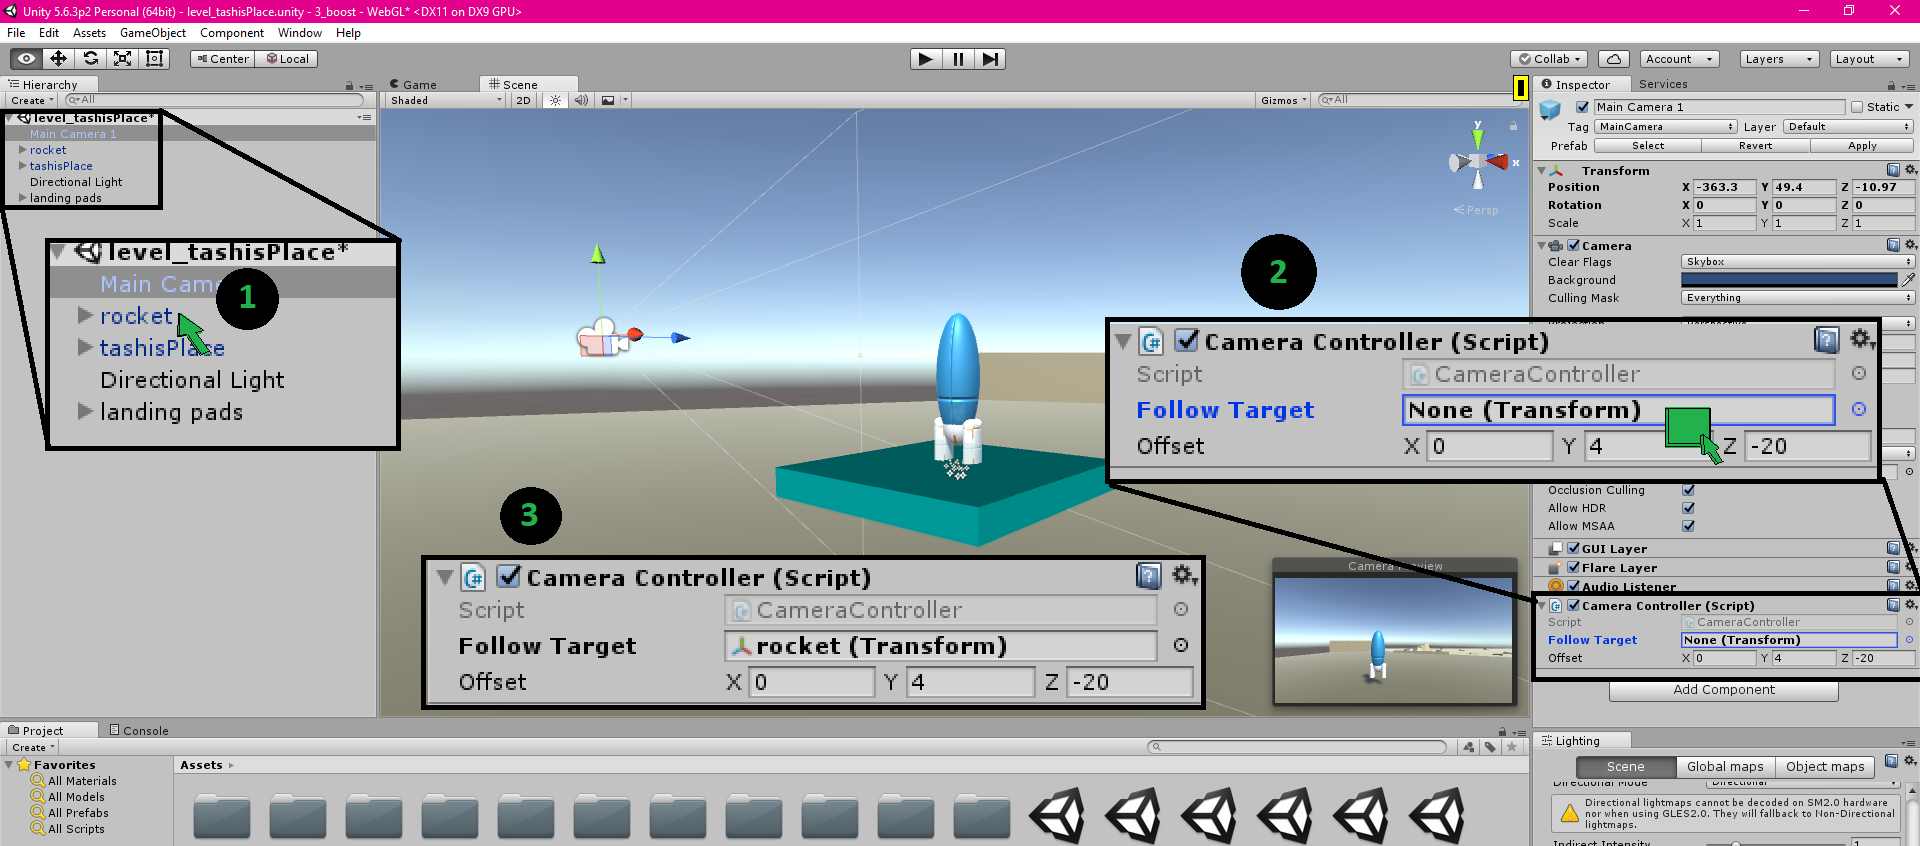
  2. For the camera, I made a script where the camera just syncs to the position of the player, modified by an offset vector. It doesn’t sync rotation, and it’s about as simple as can be for a camera controller

    [SerializeField]
    Transform followTarget;

    [SerializeField]
    Vector3 offset;
	
    void Update ()
    {
        this.transform.position = followTarget.position + offset;
    }
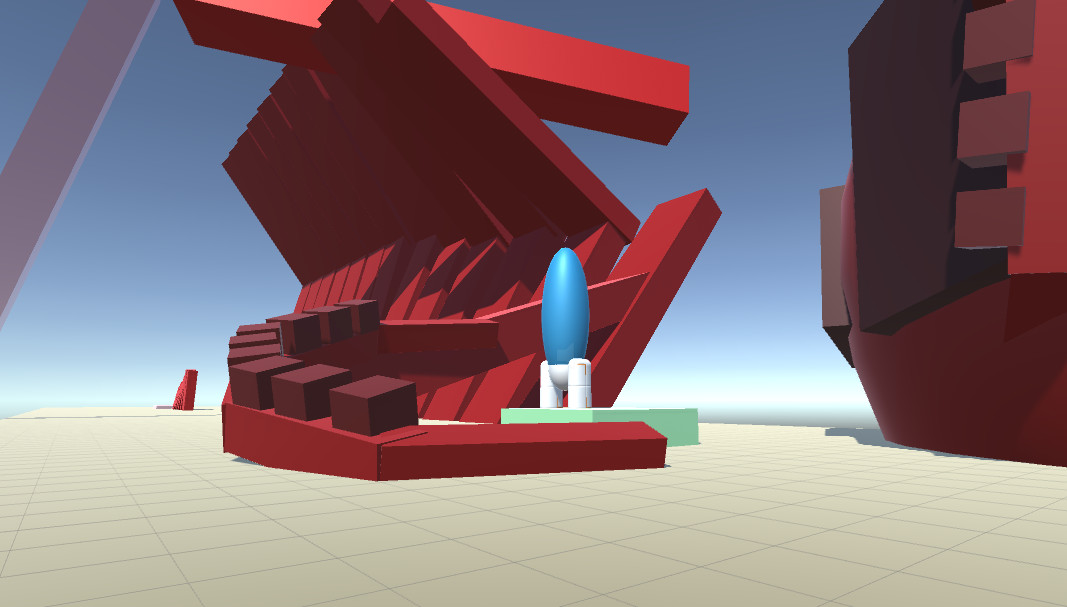
  1. I’m trying to take this concept of “changing lands” and “ground weather”, and turn it into something that seems palpable. In this level, I’ve tried to mock up a skeleton, where you fly through the rib cage, and land in the jaw. That counts as an “interesting moment” to me, at least.
3 Likes

Nice. How did you assign followTarget to rigidBody so that Unity would recognize the target?

I attached the camera as a child of my ship, which did the same thing, but the camera makes quick nauseating moves. So if I can attach the camera without the extra moves that would be great. Furthermore, I could then make a larger scene.

When you expose a variable in the editor, it leaves a spot so you can drag-and-drop an object on it. (IIRC) this is unity’s version of obtaining a reference to an object.

In this picture

  1. Click on the game object you want a reference of

  2. actually drag it to a slot somewhere
    a. the slot I use in this example is an exposed Transform variable in the game script

  3. Drop it in, and if you see the name update, then the reference took. If you try to put something in that won’t fit, you won’t see it update.
    (For example, if you wanted to use a material in the MeshRenderer of this game object, so you had exposed a material variable

[SerializedField] private Material material;

And then you drop something that is just a position, or else doesn’t have a visual representation, so there is no MeshRenderer or material on the game object, then in that case, nothing would happen. But it just kind of works, if you’ve got it set correctly)

My camera does not rotate, and that helps a lot.

If you’re trying to make a camera move more slowly, then you’ll have to come up with something more complicated than the script I’m using here.

As far as I understand it, problems with “moving too fast”, are really problems with changing speed too quickly–problems with acceleration.

Try and copy just the position of your object, and don’t copy the rotation. See if that fixes your problem.

Oh, and my camera does not have a rigidBody, or collision on it. I just update the position each frame, using the script shown

This is great. Thank you for taking the time to explain it. I had not attached the script to the camera. Now it works. Thanks.

I’ll have to figure out how to maneuver the camera with the mouse so I am not stuck on the x, z axis and can move in all directions. It is easy to open up the maneuvering, but without a rotating camera you can’t see the different perspectives of the obstacles.

1 Like

you can do it!

Privacy & Terms