
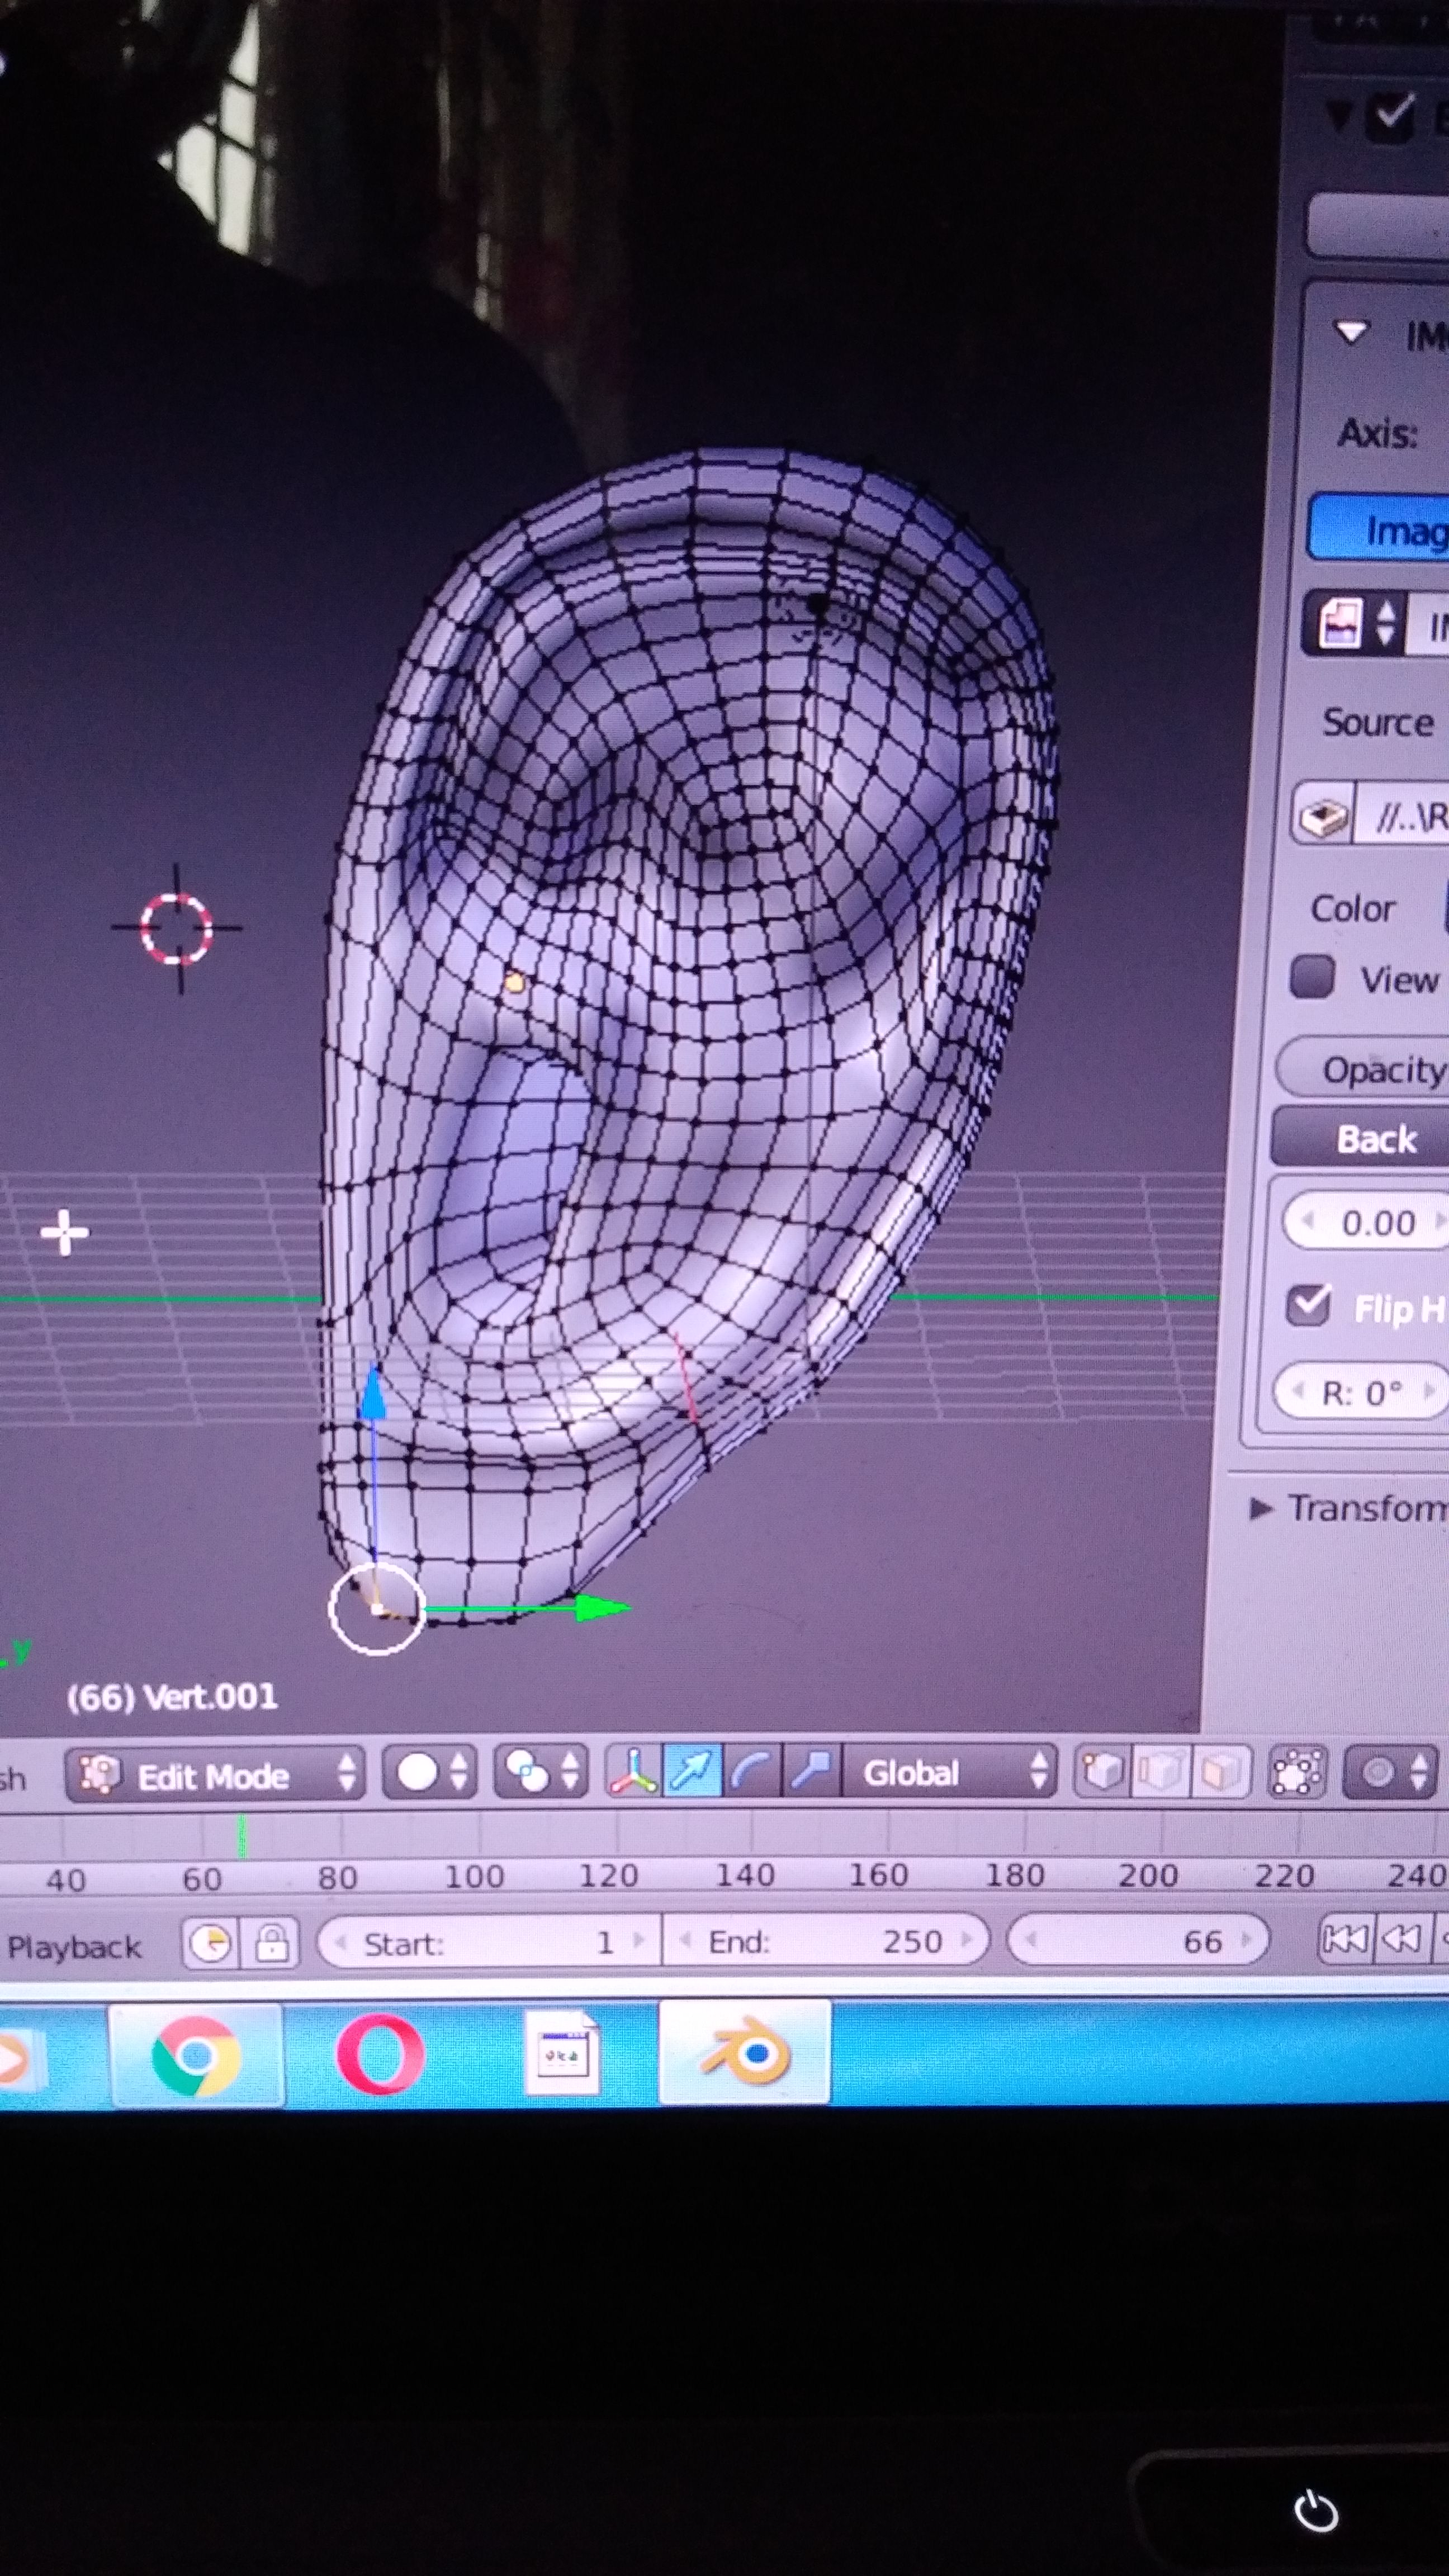
I am absolutely new coming to human head making. It’s very tedious and I am struggling. I have made ear model. But somehow I end up having ngons and Tris. I got dense mesh flow in the end I couldn’t get low poly. Anybody out there can help me in suggestions and tips?
Below is the image
Ngons and Tris can not to be avoided, most of time. Especially on organic modelling.
The trick is how ever to model these Ngons and Tris on places where they are not part of the main flow.
Blender has modifiers to lower down the mesh (less vertices), but at a cost.
High poly’s can be used to bake normal maps. Which translate high definition mesh (poly’s) data, to be used on low poly mesh. In other words, a low poly mesh can look like it is a high poly mesh. Especially for speed rendering as in games and animation, etc.
So do not throw your high poly model away. You will learn in the Blender course how to use this method. Be patient.
2 Likes
It looks not too bad, I find the topology okay at first glance.
1 Like
Hi, thanks a lot it gave clarity pretty much!
Hi thanks… it became high poly when i applied subsurface modifier!
Undo?
But save frequently and use different names. Or use GIT (version control).
If you want get a lower poly mesh, you could try the free software “instant meshes” . If you tweak the settings you could get a decent result 
But as Jada mentioned, at first glance your topology looks fine.
An a bit tedious way to reduce your poly count would be, if you delete every 2nd or 3rd edge loop and space out the others accordingly.
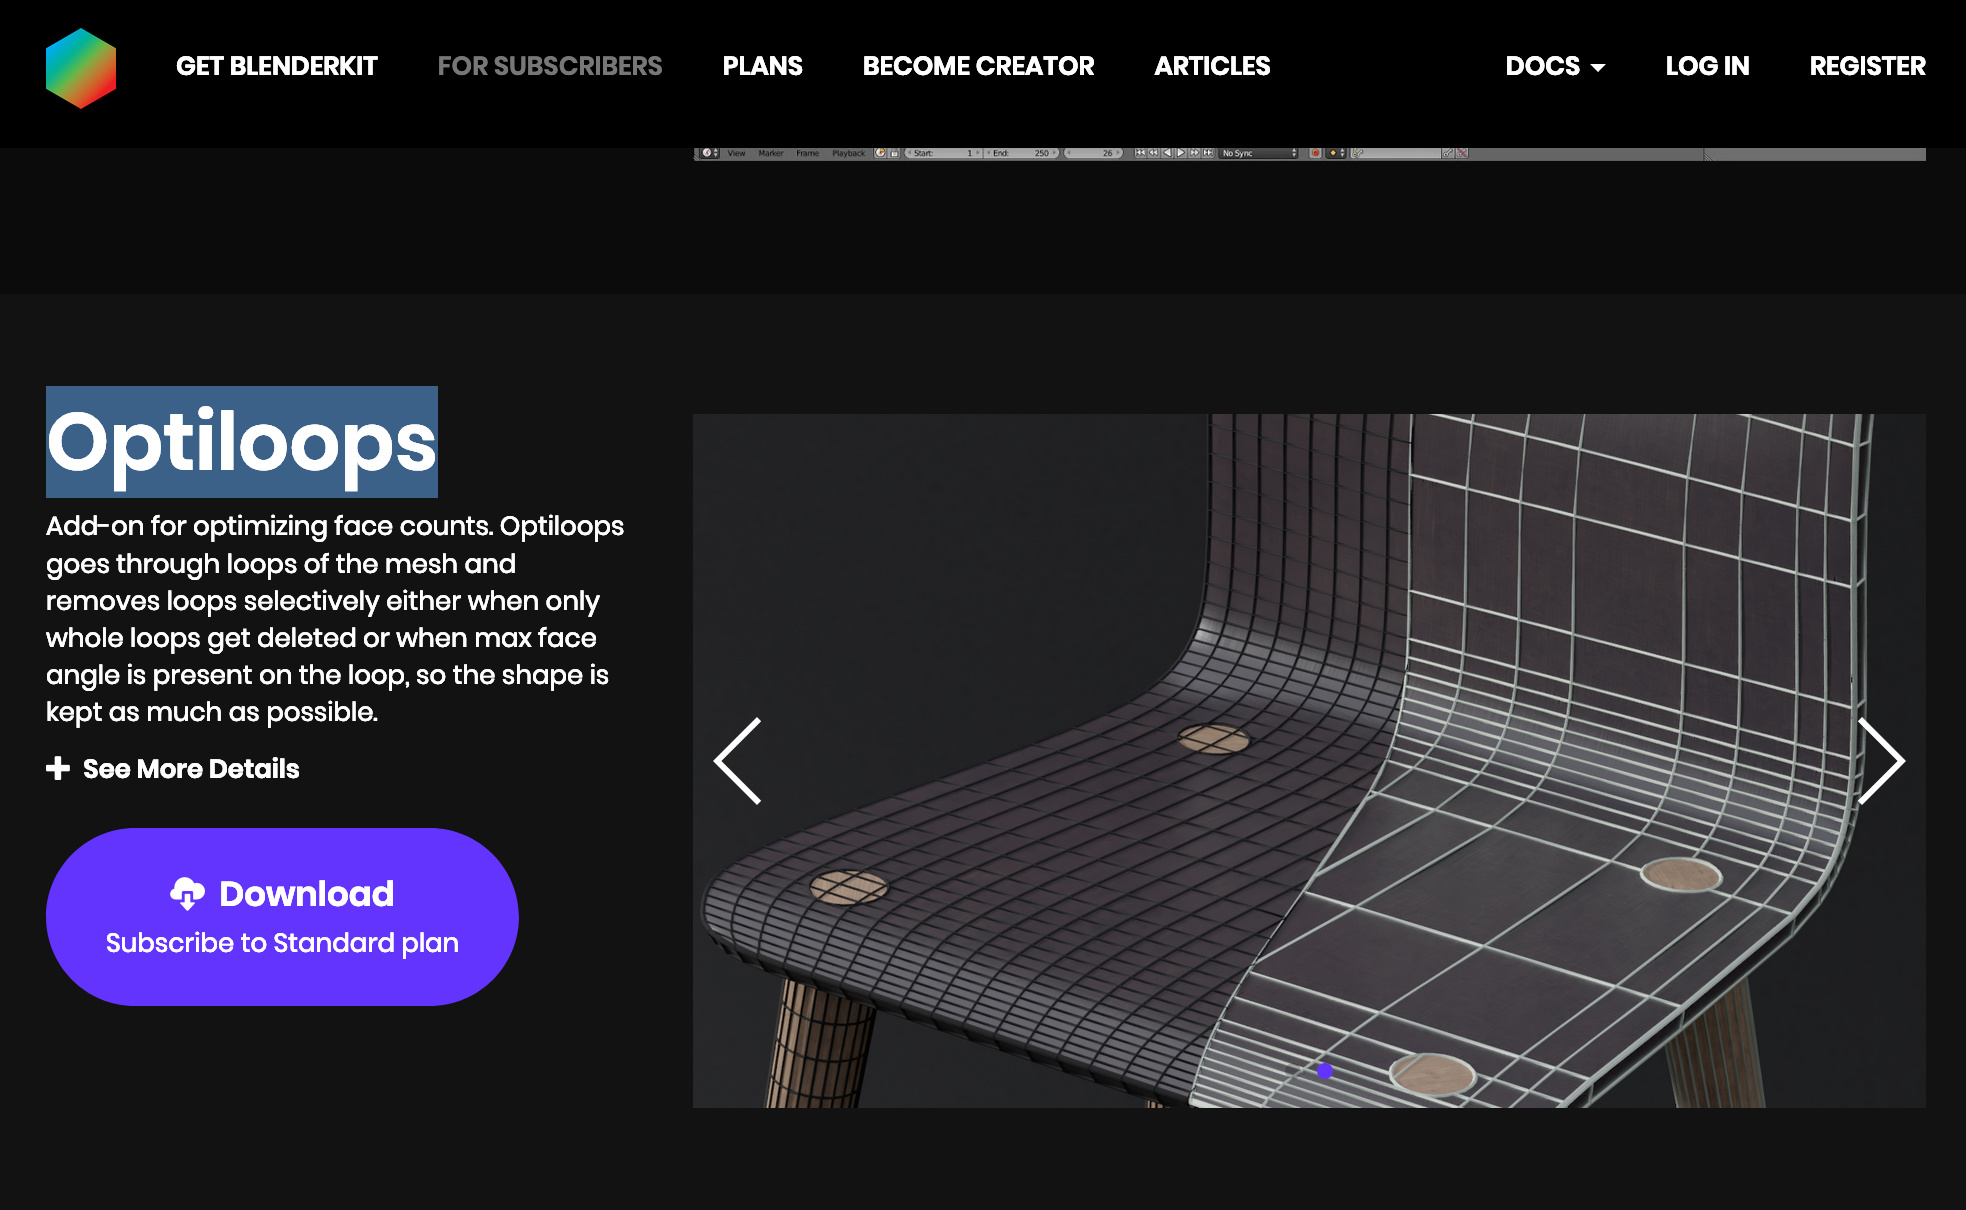
Another maybe useful Add On is Opti Loops :
2 Likes
interesting information, thanks, Manu. 
2 Likes
Thanks a lot for the info! Optiloops is cloud?
There is also a downloadable free version of it