
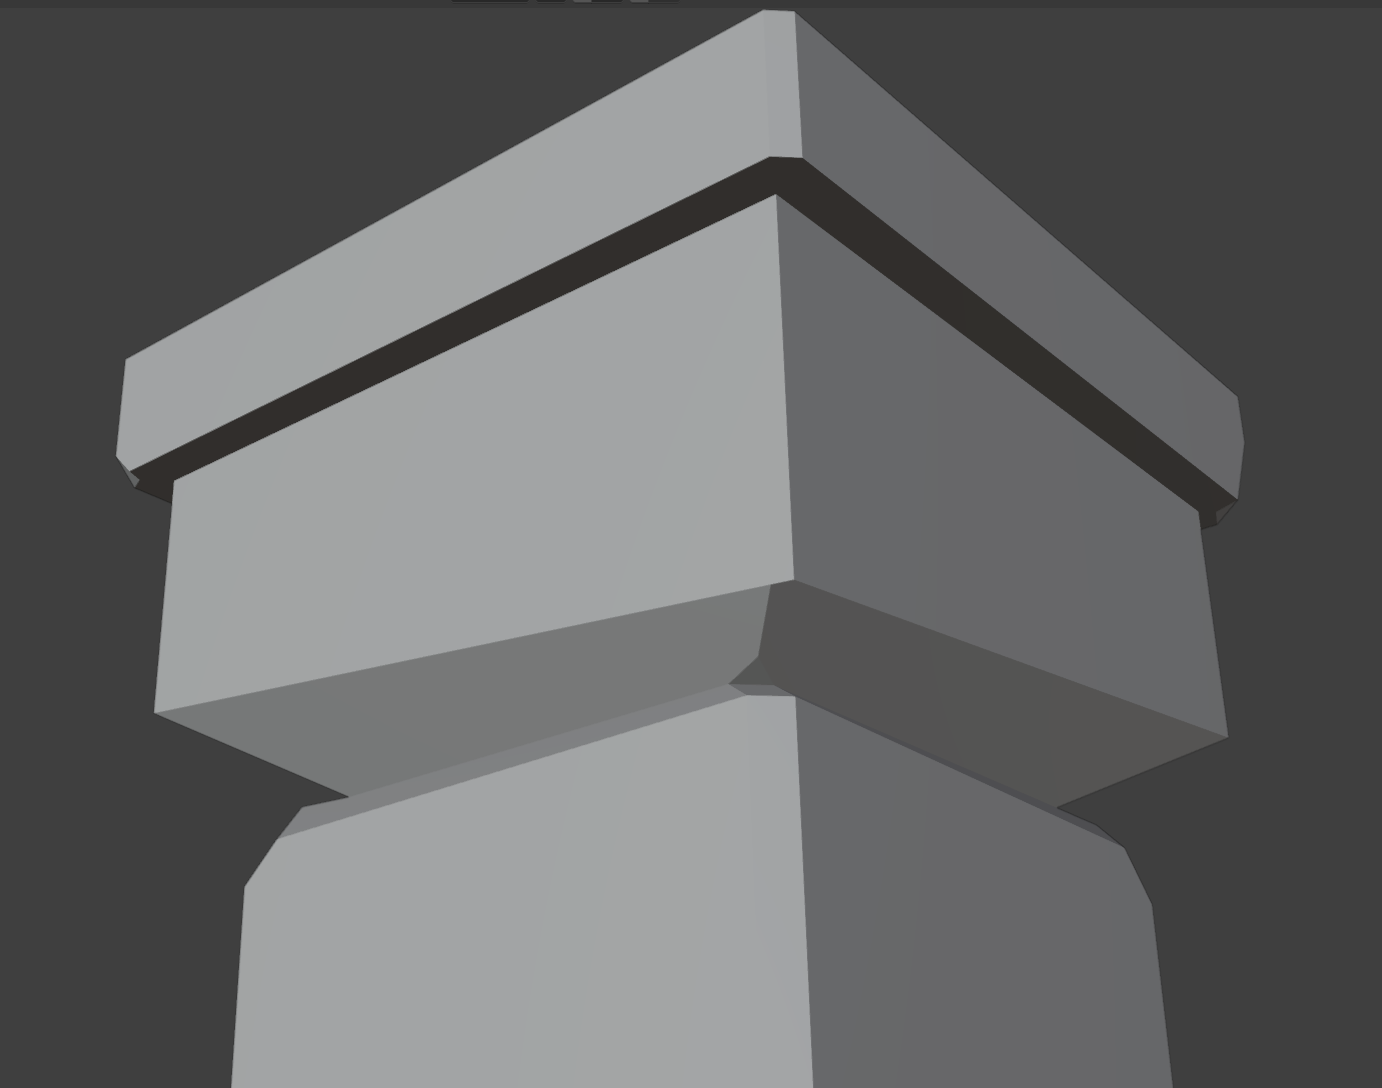
Hi! I followed the tutorial, but feel like i did something a little bit earlier. The issue on the corner cannot be fixed in edit mode, mirror option is also was applied. Is there any chance to fix it?
1 Like
Almost inevitably with this common point students come up against it, is double geometry.
Rather hard to see what you expected and what is wrong, but before moving anything, try selecting all with A and Pressing M, By Distance.
General Q&A note
Help us all to help you.
Please give FULL screenshots with any questions. With the relevant panels open.
Also, include the lecture time and name/number that is relevant to the problem/issue.
The screenshot can be done by Blender itself, via the ‘Window’ menu bar top left hand side.
On that menu drop down is ‘save screenshot’.
Close ups additionally where they help.
3 Likes
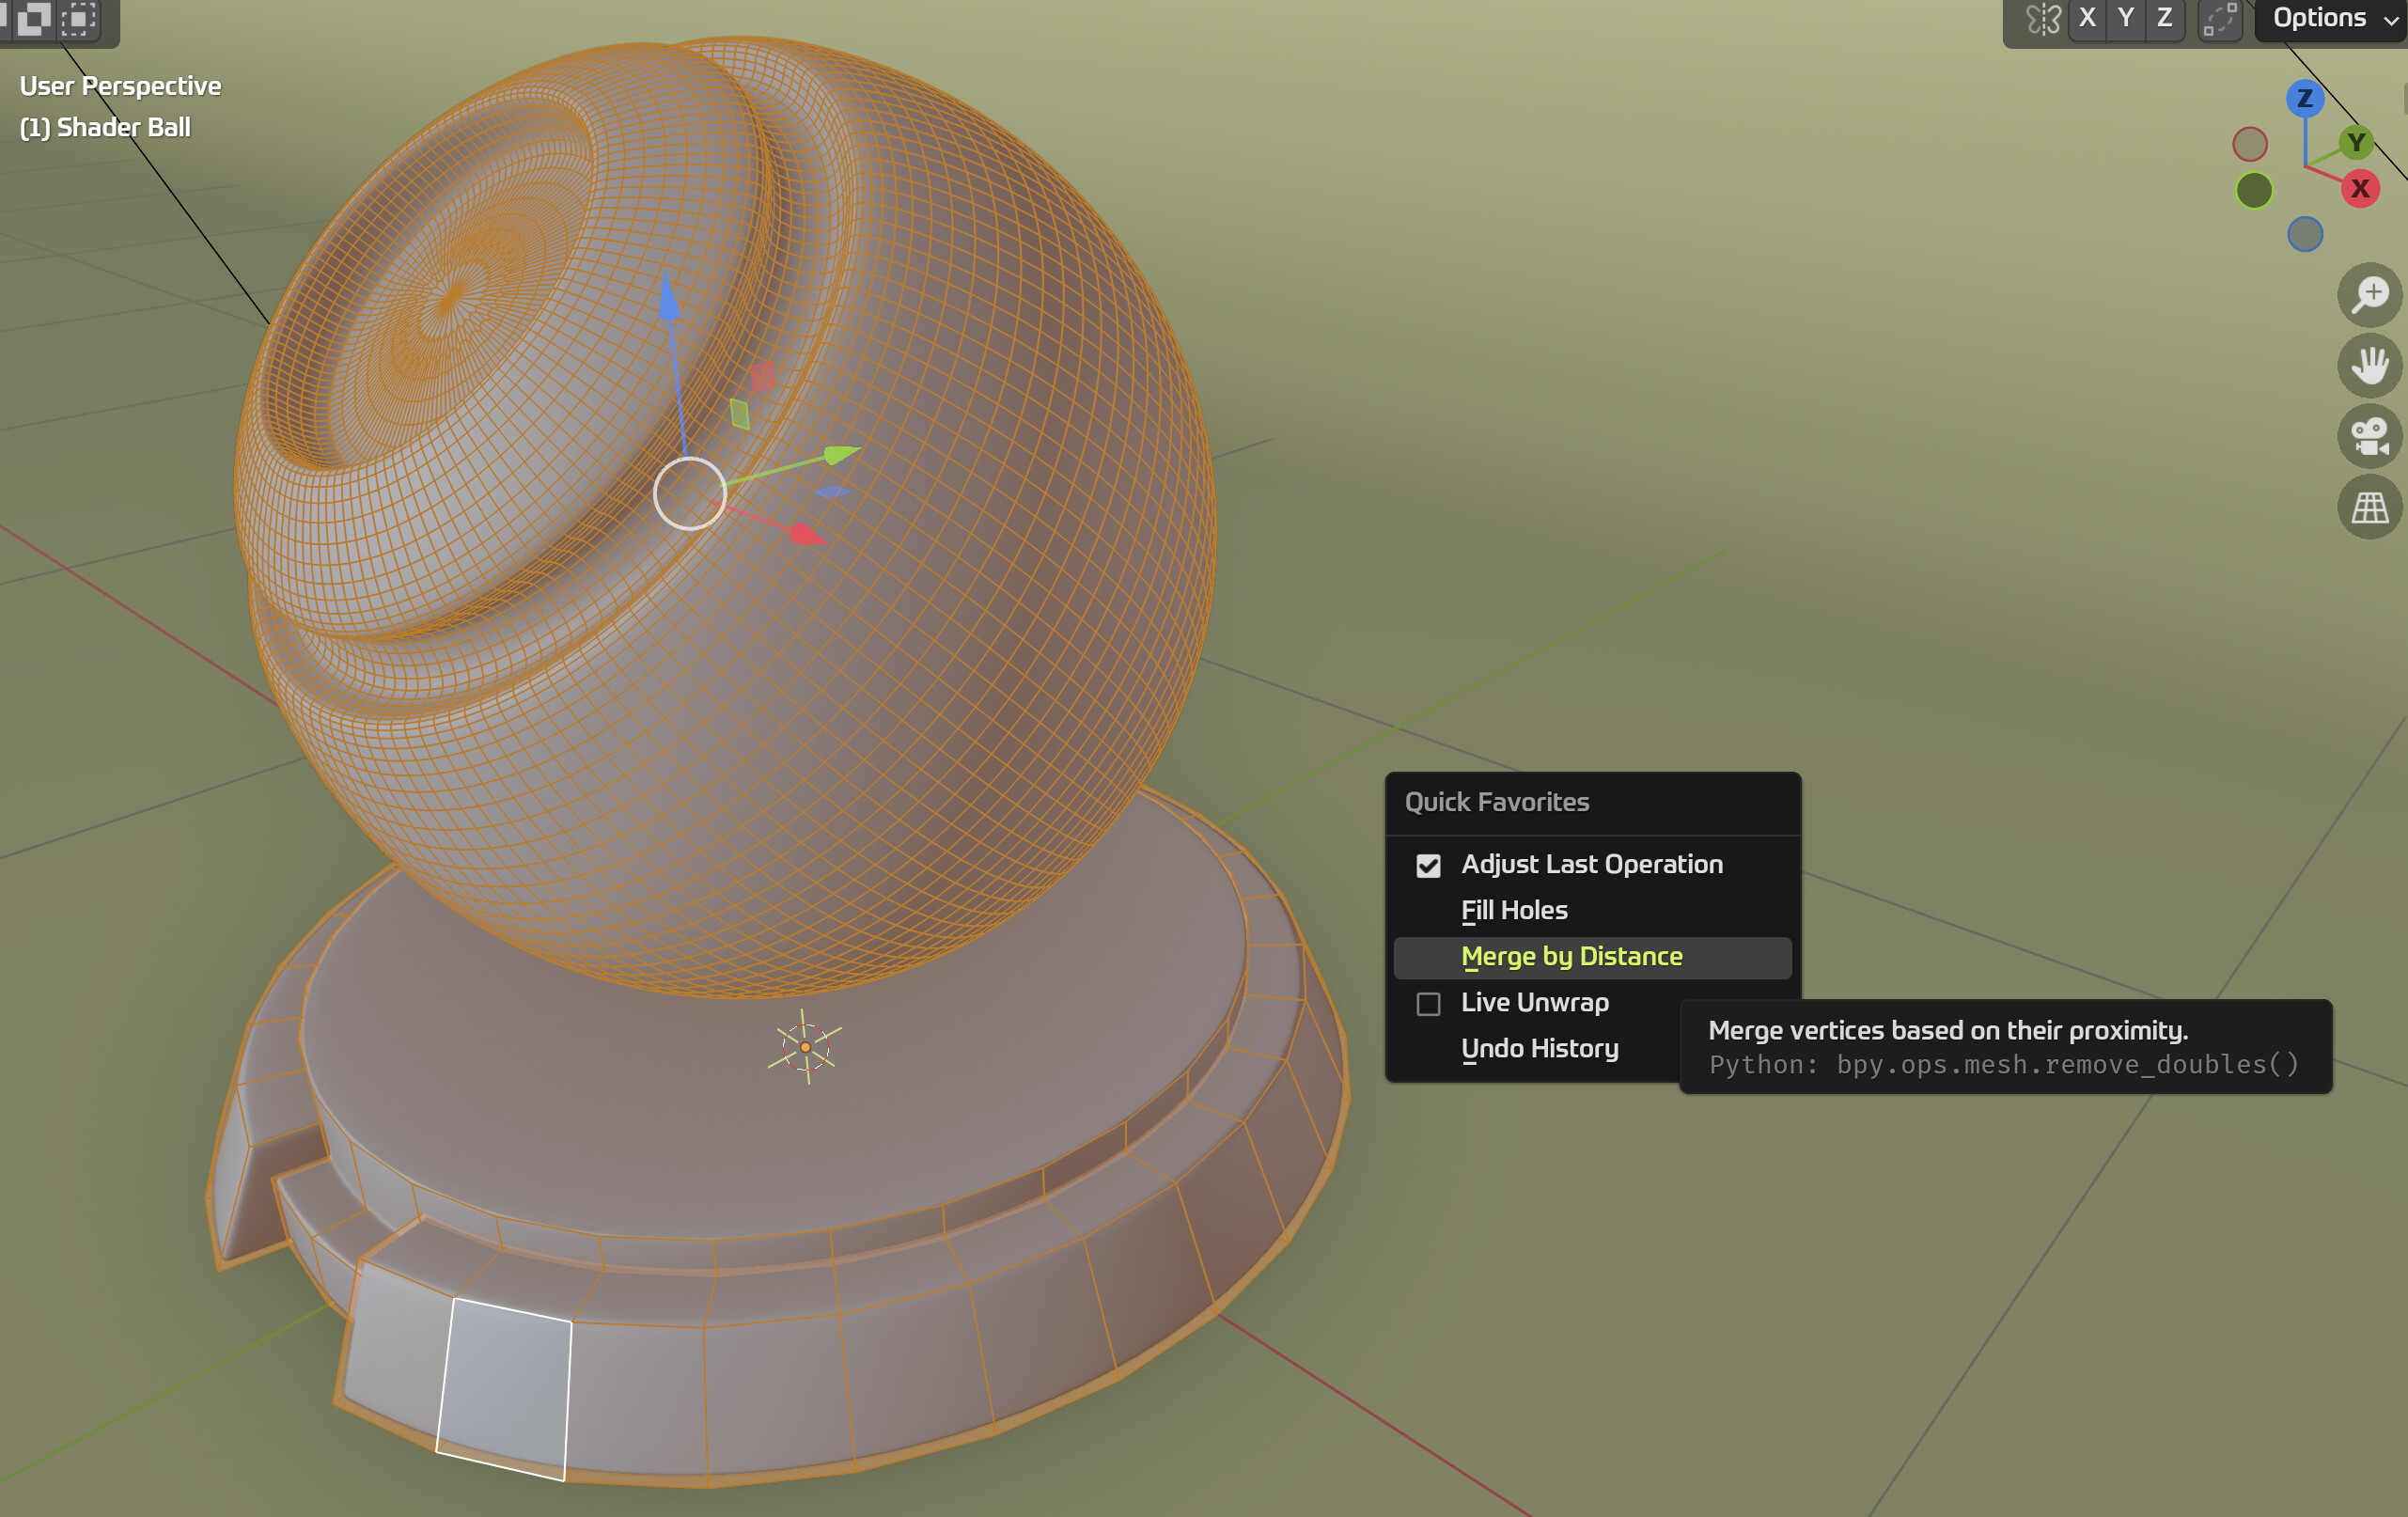
Good idea, must admit I do not use that quick \Fav at all. Never got into the habit.
1 Like
Hi! Thank you for the answer and Q&A advice!
I did what you said before, but it didnt help me 
1 Like
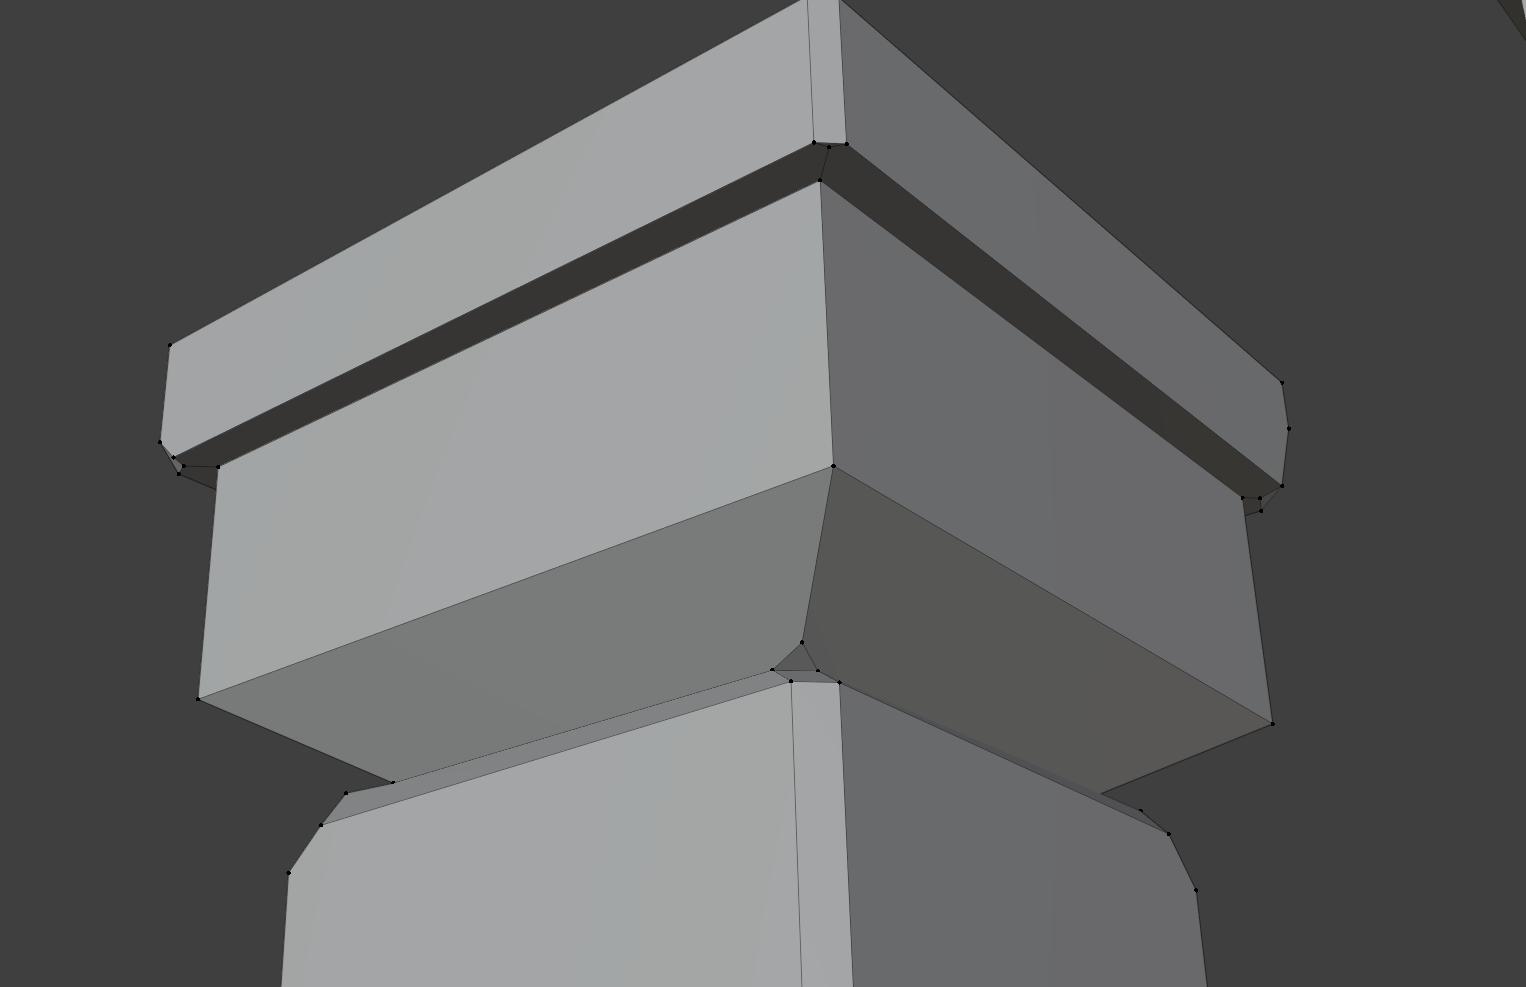
Because you mentioned that you applied your mirror, my best guess is that your second screenshot is showing the opposite corner, what it’s supposed to look like, and your first screenshot is showing your issue.
Something isn’t right about this…
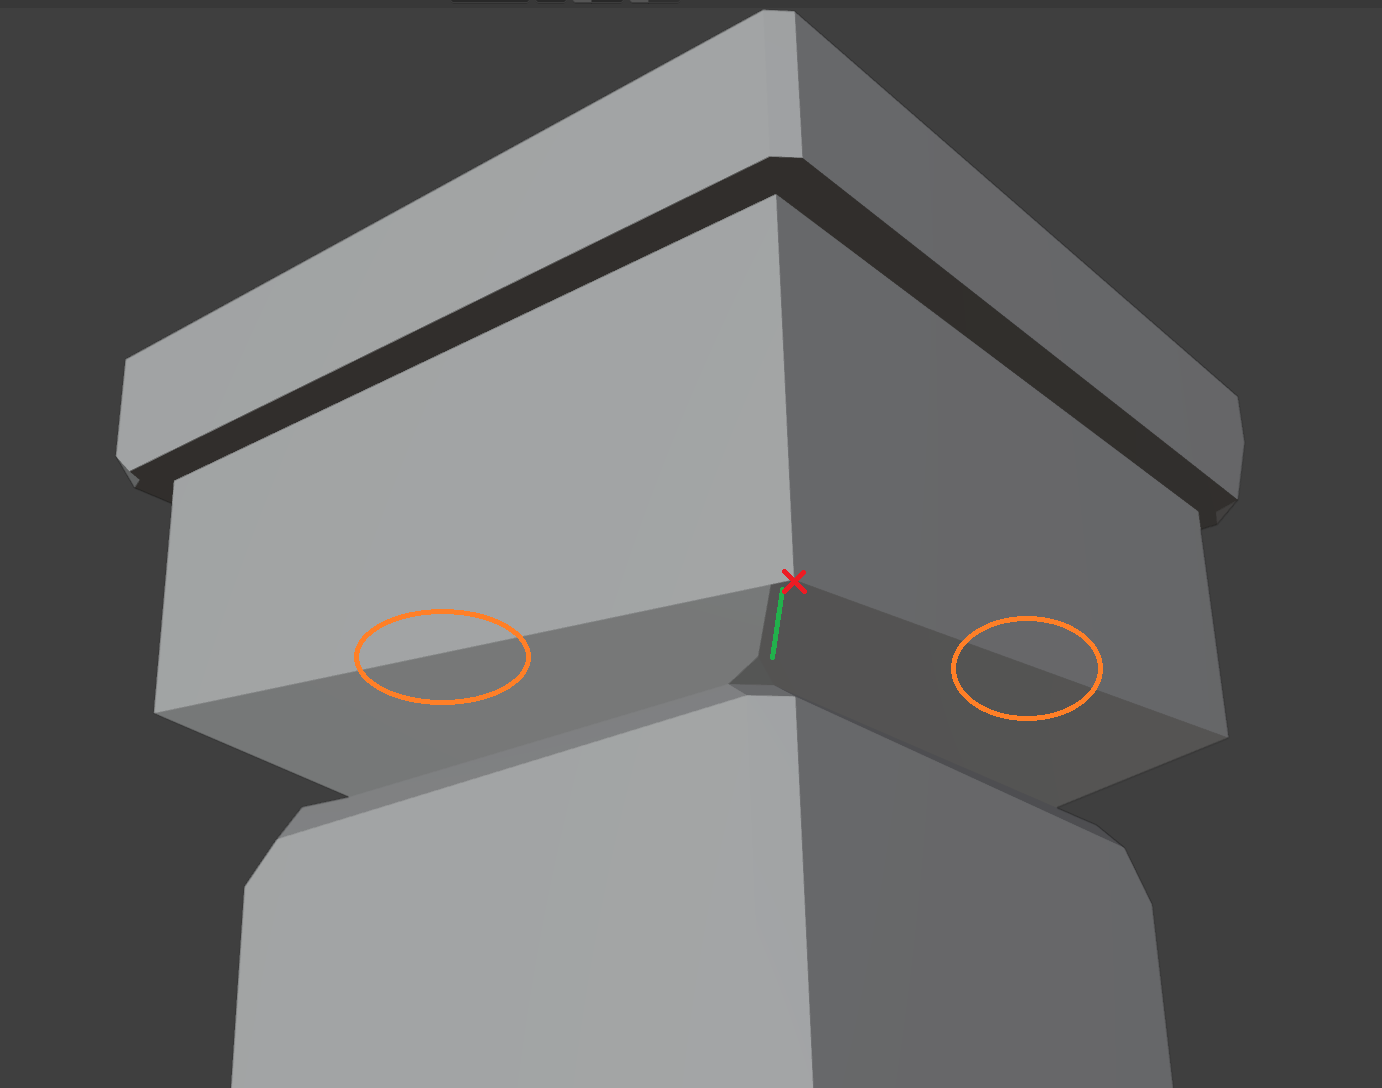
These orange edges are angled downwards in this first screenshot, but in the second one, they’re level. More interesting than that, the green edge seems to be in the same position and angle in both screenshots; however, in the second screenshot, it lines up with the vertex at the red X, but it clearly doesn’t do this in the first screenshot.
I have a funny feeling you have duplicate faces there; even though you might not see any z-fighting, that doesn’t mean they aren’t there. Duplicate vertices don’t get deleted by merge-by-distance if you use the default distance of 0.0001m and you’ve moved the duplicate vertex from its “partner” in some way, thinking there was only one vertex there to begin with, and it looks like that’s what happened here (otherwise the green edge would not exist and blender would render this area as a non-planar N-gon). I think that’s the only reason why merge-by-distance didn’t fix your issue. I struggled with the same thing when doing these pillars because I didn’t understand that RMB is not enough to cancel an extrusion - that only cancels the transform of the extrusion. It has to be followed up with Ctrl + Z to cancel the extrusion itself.
If you turn on X-ray mode with Alt + Z, you should be able to trace along your edges and see where you can edge-slide one vertex onto another to fix the problem. Once that’s done, perform a merge-by-distance as described by @NP5, and that will get rid of your duplicate faces.
3 Likes
hi! Thank you for reply! Before i just created a new pillar, and that one i hide as Broken pillar :D.
I just checked in X-ray, there are no hidden verticles, faces, vertexes or anything like that I hope once i`ll find a reason oh this fail.Thanks for the help!
1 Like
Cheers =)
I’m glad it didn’t keep you stuck; good for you for carrying on and continuing to get better! In the name of trying to learn what happened, there’s one other thing you could try to be absolutely certain there aren’t any duplicates.
In the Viewport’s Overlays dropdown, you can toggle Statistics to see a count of faces, edges, and vertices, among other things. The first number is what you have selected, and the second is a total.
Because this is a low-poly model, it’s easy to count the number of vertices in this small corner by hand. In X-ray mode, if you box-select vertices around that area (and you’re careful not to select anything from behind), the first number in the Vertices part of the statistics should match what you counted by hand.
If that doesn’t turn up anything unexpected, locally merging-by-distance with an increased distance (just drag the slider around and see what happens) doesn’t work, and you don’t accidentally have another pillar rendering exactly on top of this one, then I’m all out of ideas and it’s a lemon, lol! XD
I guess if you really wanted to, you could delete the head of the pillar and rebuild it from scratch for some manual geometry-building practice (that’s how I fixed mine when stuff happened). Not the best workflow of course, but on a nice square model like this, it should be pretty straightforward to do that evenly, even without the mirror modifier.
Have fun with the course!
4 Likes
If you can upload the file somewhere we can get it, then that will let us have a closer look.
1 Like
Hi! There is no need anymore,at least for now  i just deleted the top and made it again! I think sometimes its better to remade it again, instead trying to fix it myself with my poor knowledges
2 Likes