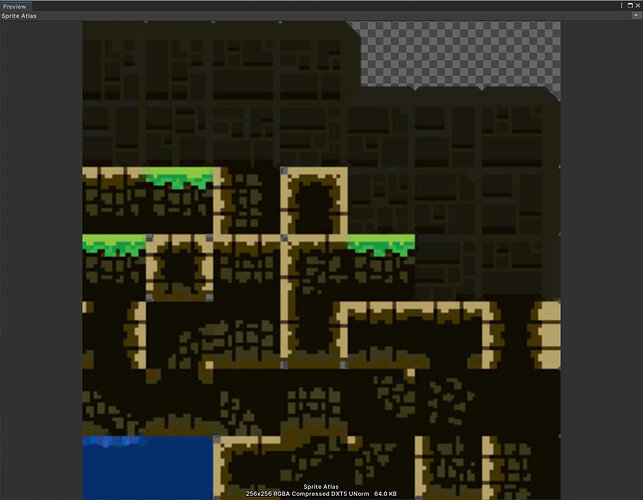
You may have noticed the fine lines between tiles. An answer to a question on this topic suggests reducing the sprite size from 32 to 31, which does visually “fix” the issue, but it might not be the best fix because it’s actually using an incorrect value (the sprites are 32x32 pixels after all).
I’ll describe the cause of this visual issue and present an alternative solution.
Firstly, it’s caused by the application of pixel filtering to each sprite. Because each sprite is surrounded by empty pixels, any filtering on the edge pixels takes these empty pixels into account. This results in a kind of light “halo” around the edges of the sprite, since the edge pixels are “diluted” by the empty pixels nearby.
So one way to fix this is to set Filter Mode to Point (no filter) for your Multiple sprite files, keeping the size as 32x32. This disables filtering and displays the sprites as unfiltered pixel-accurate sprites.
If you like the look of bilinear or trilinear filtering then a possible fix would be to manually edit every sprite and add duplicates of each edge pixel and all four corner pixels to the surrounding area. This would mean each sprite is really, say, 40x40 pixels if you add 8 each side, but only the inner 32x32 are used. This ensures that the filtering picks up the correct colour of pixels around the edge. However this is time consuming to do unless you have a graphic editing program that can do this “bleed” or extrude for you, and it will mess up Unity’s automatic sprite slicing.
So the best solution I have found that seems to work correctly is to tell Unity to pack the sprites into something called a Sprite Atlas. This ensures that Unity takes this edge-filtering phenomenon into account and creates a storage format that automatically “bleeds” the edge pixels into the gaps between the actual sprites. After you create the atlas, take a close look at the resulting image and you’ll see how Unity has smeared the edges outwards to ensure the filtering works correctly.
Creating a Sprite Atlas in Unity 2020 is very easy - just right-click > Create > 2D > Sprite Atlas and then select the resulting Asset. Click the “Objects for Packing” list and add an entry for each Multiple sprite you wish to add. Although the lines may remain in the Scene view, when you run your game you’ll see that the lines between tiles disappear because the filtering is now working correctly.
