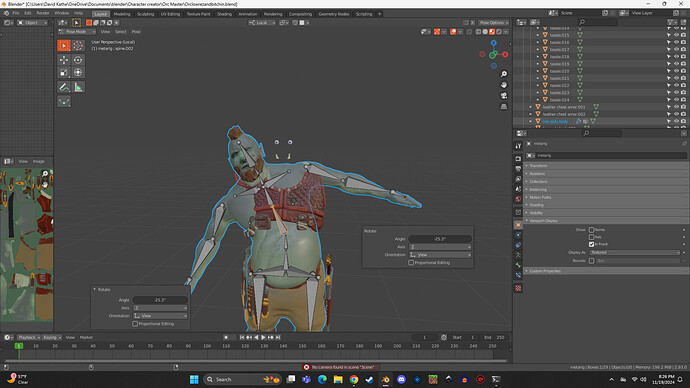
In the vid the teachers accompanying objects move but don’t stretch with the modeling movements. I’ve
tried grouping and parenting the objects to the core ogre body but the other objects always stay where they were. How do i get the amor and extra items to follow the main body when posing and animating
You need to parent them to the bone. Select armature. Then switch to either pose or edit mode. Select the bone you want the mesh to follow. Go back to object mode. Select mesh. Then shift+select armature. Then press Ctrl+p->bone.
This will connect an object to a bone, which is a solution.
But the Orc body is probably configured to have a weightpainted connection.
This should also be applied to the objects. But can lead to imperfections in movement.
Most simple solution is to merge (join) the extra object into the Orc mesh.
unfortunately the joining didn’t work, i had to separately parent the extra objects. However, if i wanted the sword and scabbard to hang and bounce realistically, would i have to create a separate bone for the sword?
Yes, if you want to wield the sword, you need to have at least one bone.
Connected to the wrist bone or else (depends on your animation).
Depends. If the sword is only going to stay at the side and not be manually animated then I’d recommend parenting to 3 vertices on the hip of the Orc mesh. If you want more control of the animation then adding a sword bone wouldn’t be a bad Idea. If you plan to have the Orc use it or want the option to leave it laying somewhere then a separate rig with at least 1 bone(more if you want to flex the blade). Then use child of constraints to swap from hip to hand to nothing. The thing to remember with child of constraints is that it changes the reference point. For example: it’s at 1, 2, 1(XYZ) laying in the world. When you set the influence on the child of constraint for the hand from 0 to 1 it will move the sword to 1, 2, 1 from the hand bone. So just before you switch influence keyframe the influence and the transforms. Then on the next frame set influence to 1 and clear the transforms. Then keyframe them. When you are turning the influence off click the x next to the influence. This will set the influence to 0 and set the transforms to its current position in relation to the world origin. If you’re just switching from hand to hip then you can just key the change in influence from 1 to 0.


