Painting light texture repeats on several parts of the image by itself

Hey there,

I am currently trying to paint the light texture for the windows as we did in the lecture Window Lights. I am however stumbling upon a problem, which is that my window light texture repeats over my image apparently. Thus, when I start drawing the emission on to the window center, it will also draw at other parts of the image too:

My problem now is if I scale the uv map to fit the window light texture, it will also distort the actual window texture behind it, resulting in a kind of zoomed in window. Is there a way around this? What I kind of wish to do is scale the window light texture so the UV map of the window is enclosed in it, but I think there has to be another way.

I played around with a mapping node, scaling the UV map by .5 on each axis. That worked in so that im no longer painting on several parts of the window at once. I do however end up not painting where im actually painting. In other words I paint on the lower left corner and it ends up painting at the middle right edge.

Does anyone have an idea how to approach this? Thank you so much for your help in advance!

Cheers,

Kevin

2 Likes

From what I can see, it looks like it could be that the UVs are outside of the 0 to 1 range, or object coordinates are plugged into the mapping node.

These are just two things for you to check, because I can’t see anything wrong with the nodes that are visible.

3 Likes

Not sure how you got that white box round the image.
However the problem is clearly the image is tiling based on that white box.
The image should fill it, or it the image I suspect.

Never happened to me, Just open an image and it does not even show that box but perhaps you recall how you created it?

edit oh hang on you are in tex edit. Will experiment more barely ever use that.

Convinced the issue is as described even with Tex paint.
Still cannot separate that white marker box from the actual image size as you have.
See image below where I ticked tiling, it will probably show yours tiling the image smaller then the white box size.

Perhaps others know how this can get misaligned

Option, make a fresh material and image file to paint on.

3 Likes

Alright folks, im sorry for the late response. I posted this question and then all hell broke loose in terms of meetings and appointments, but here I am.

I reproduced my mistakes and will elaborate on how i tried to fix it (and also somewhat failed), then how i fixed it for real. What you will see is me reproducing the mistake on a new general startup file, using a plane as my window.

The initial approach which led to the tiling of the light map:

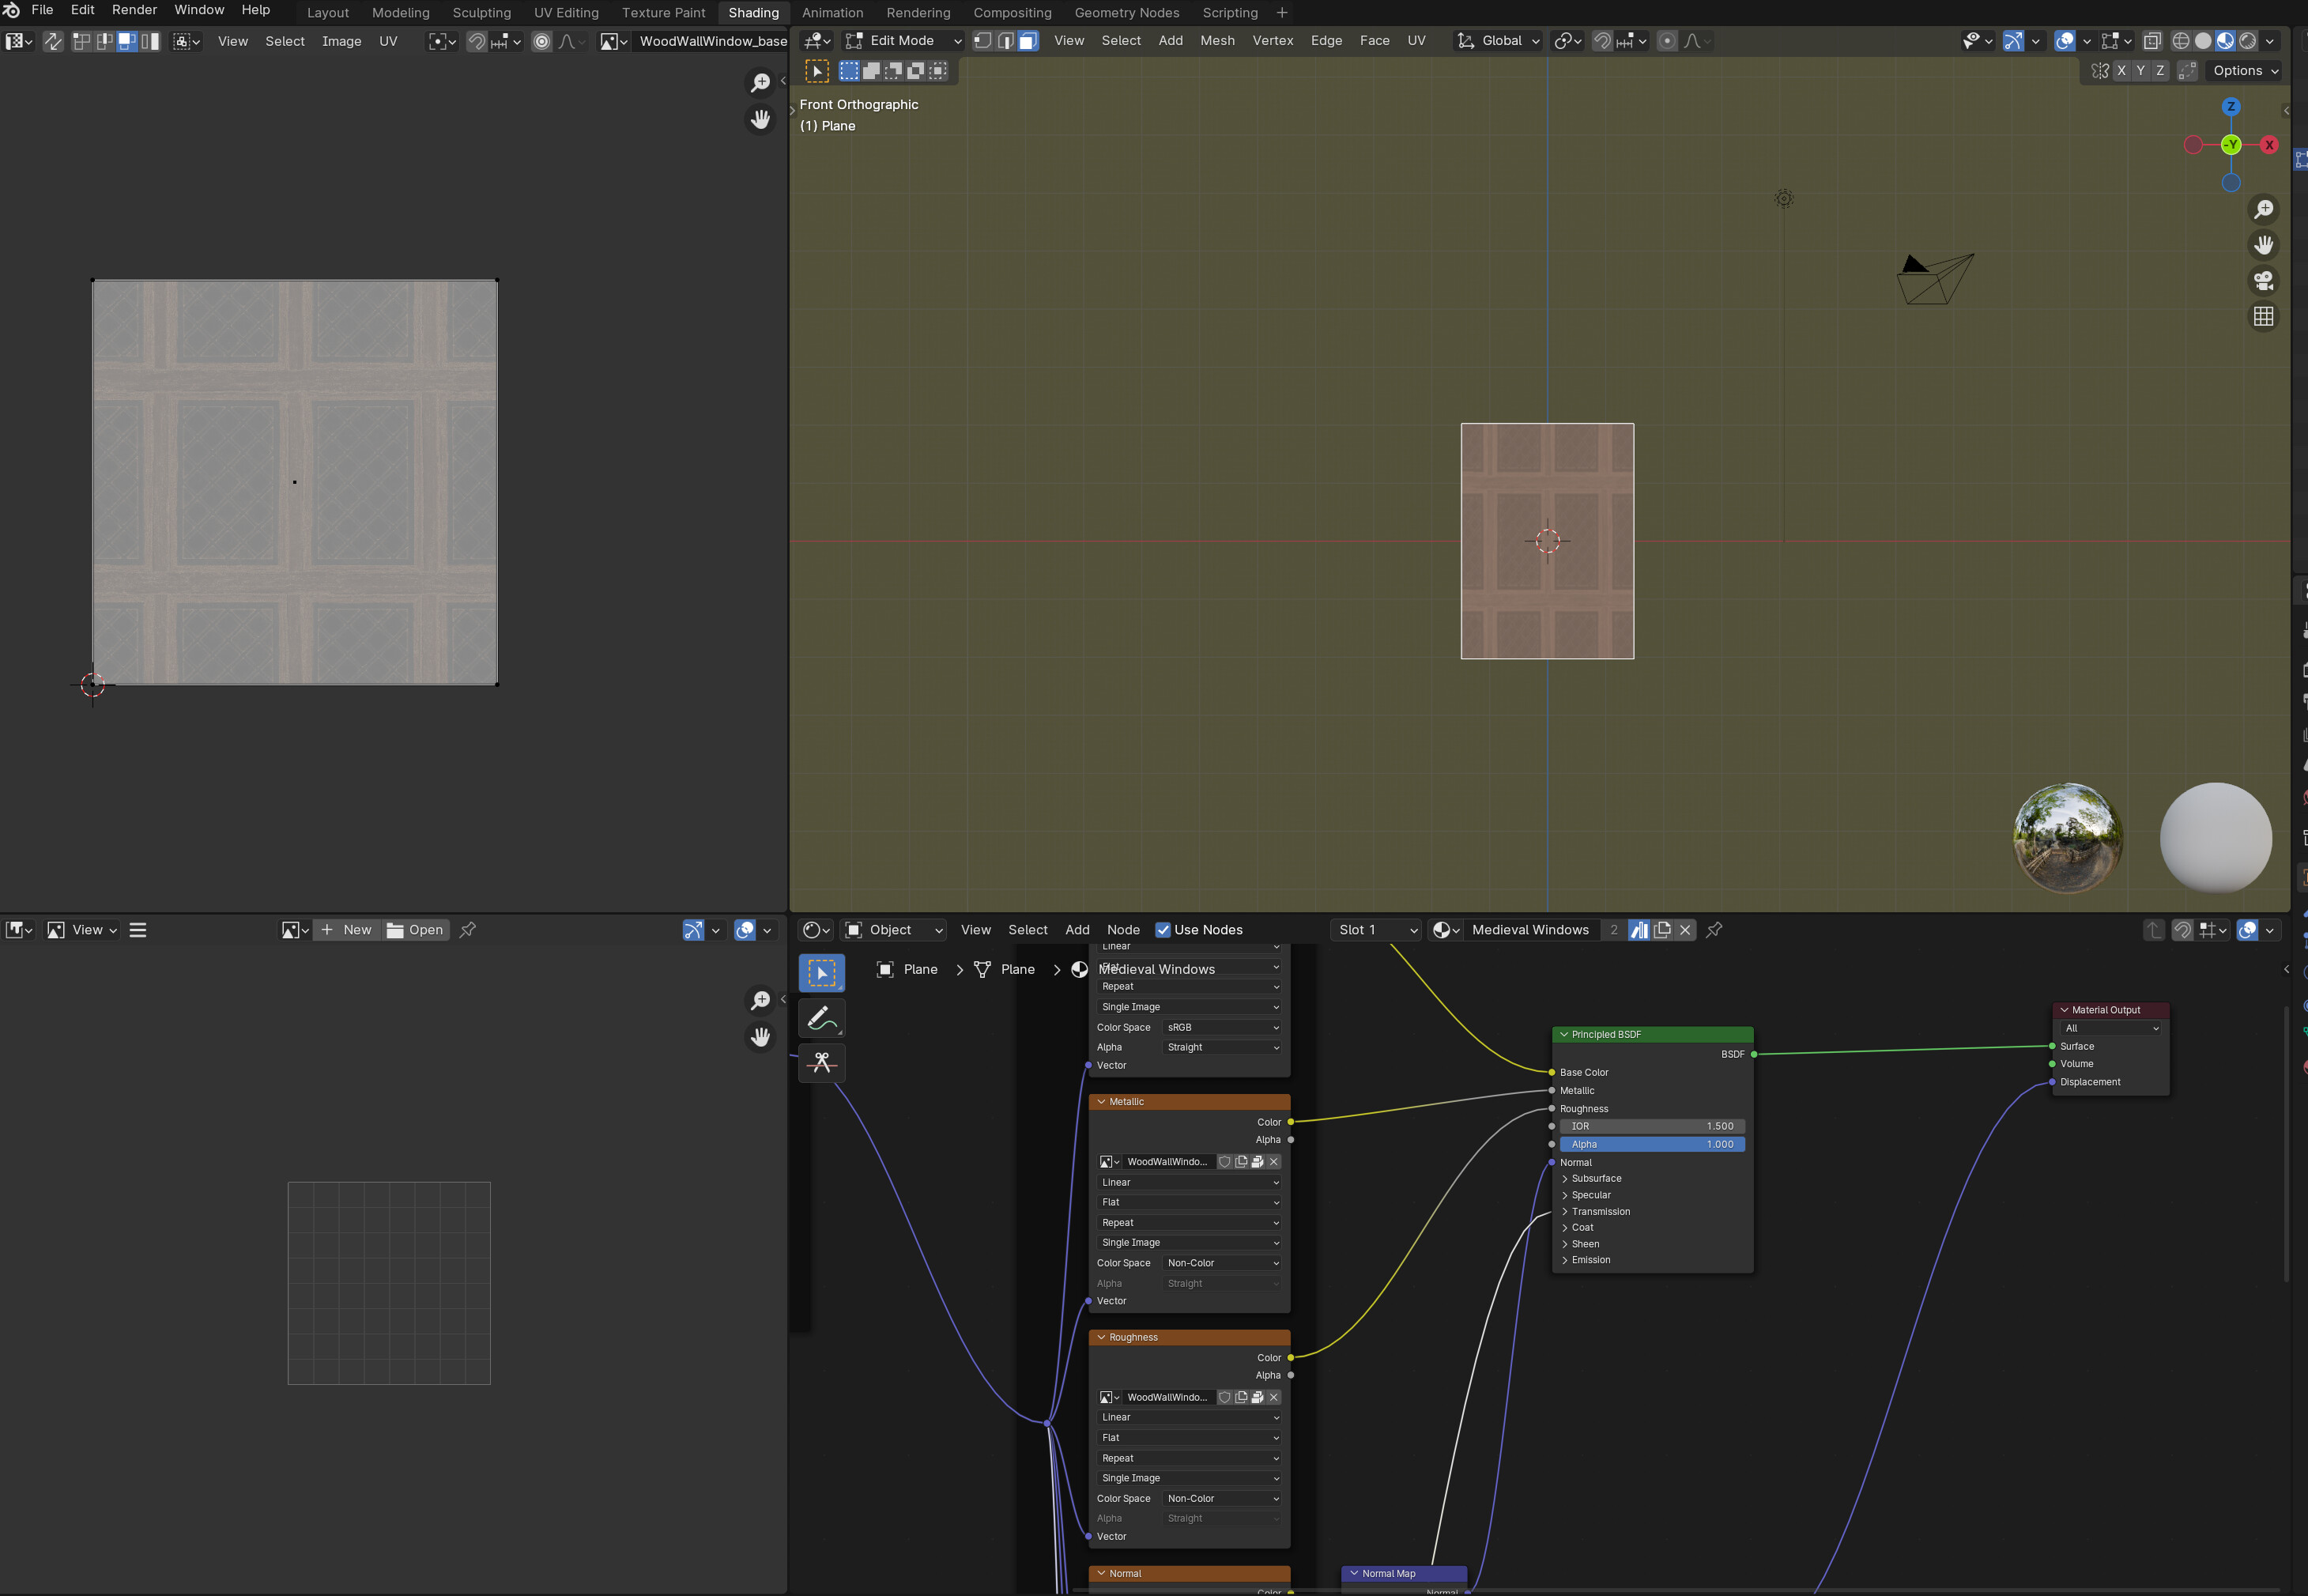
So i started by using a PBR medieval window material I got from the blenderkit addon and using a plane. This will look like this:

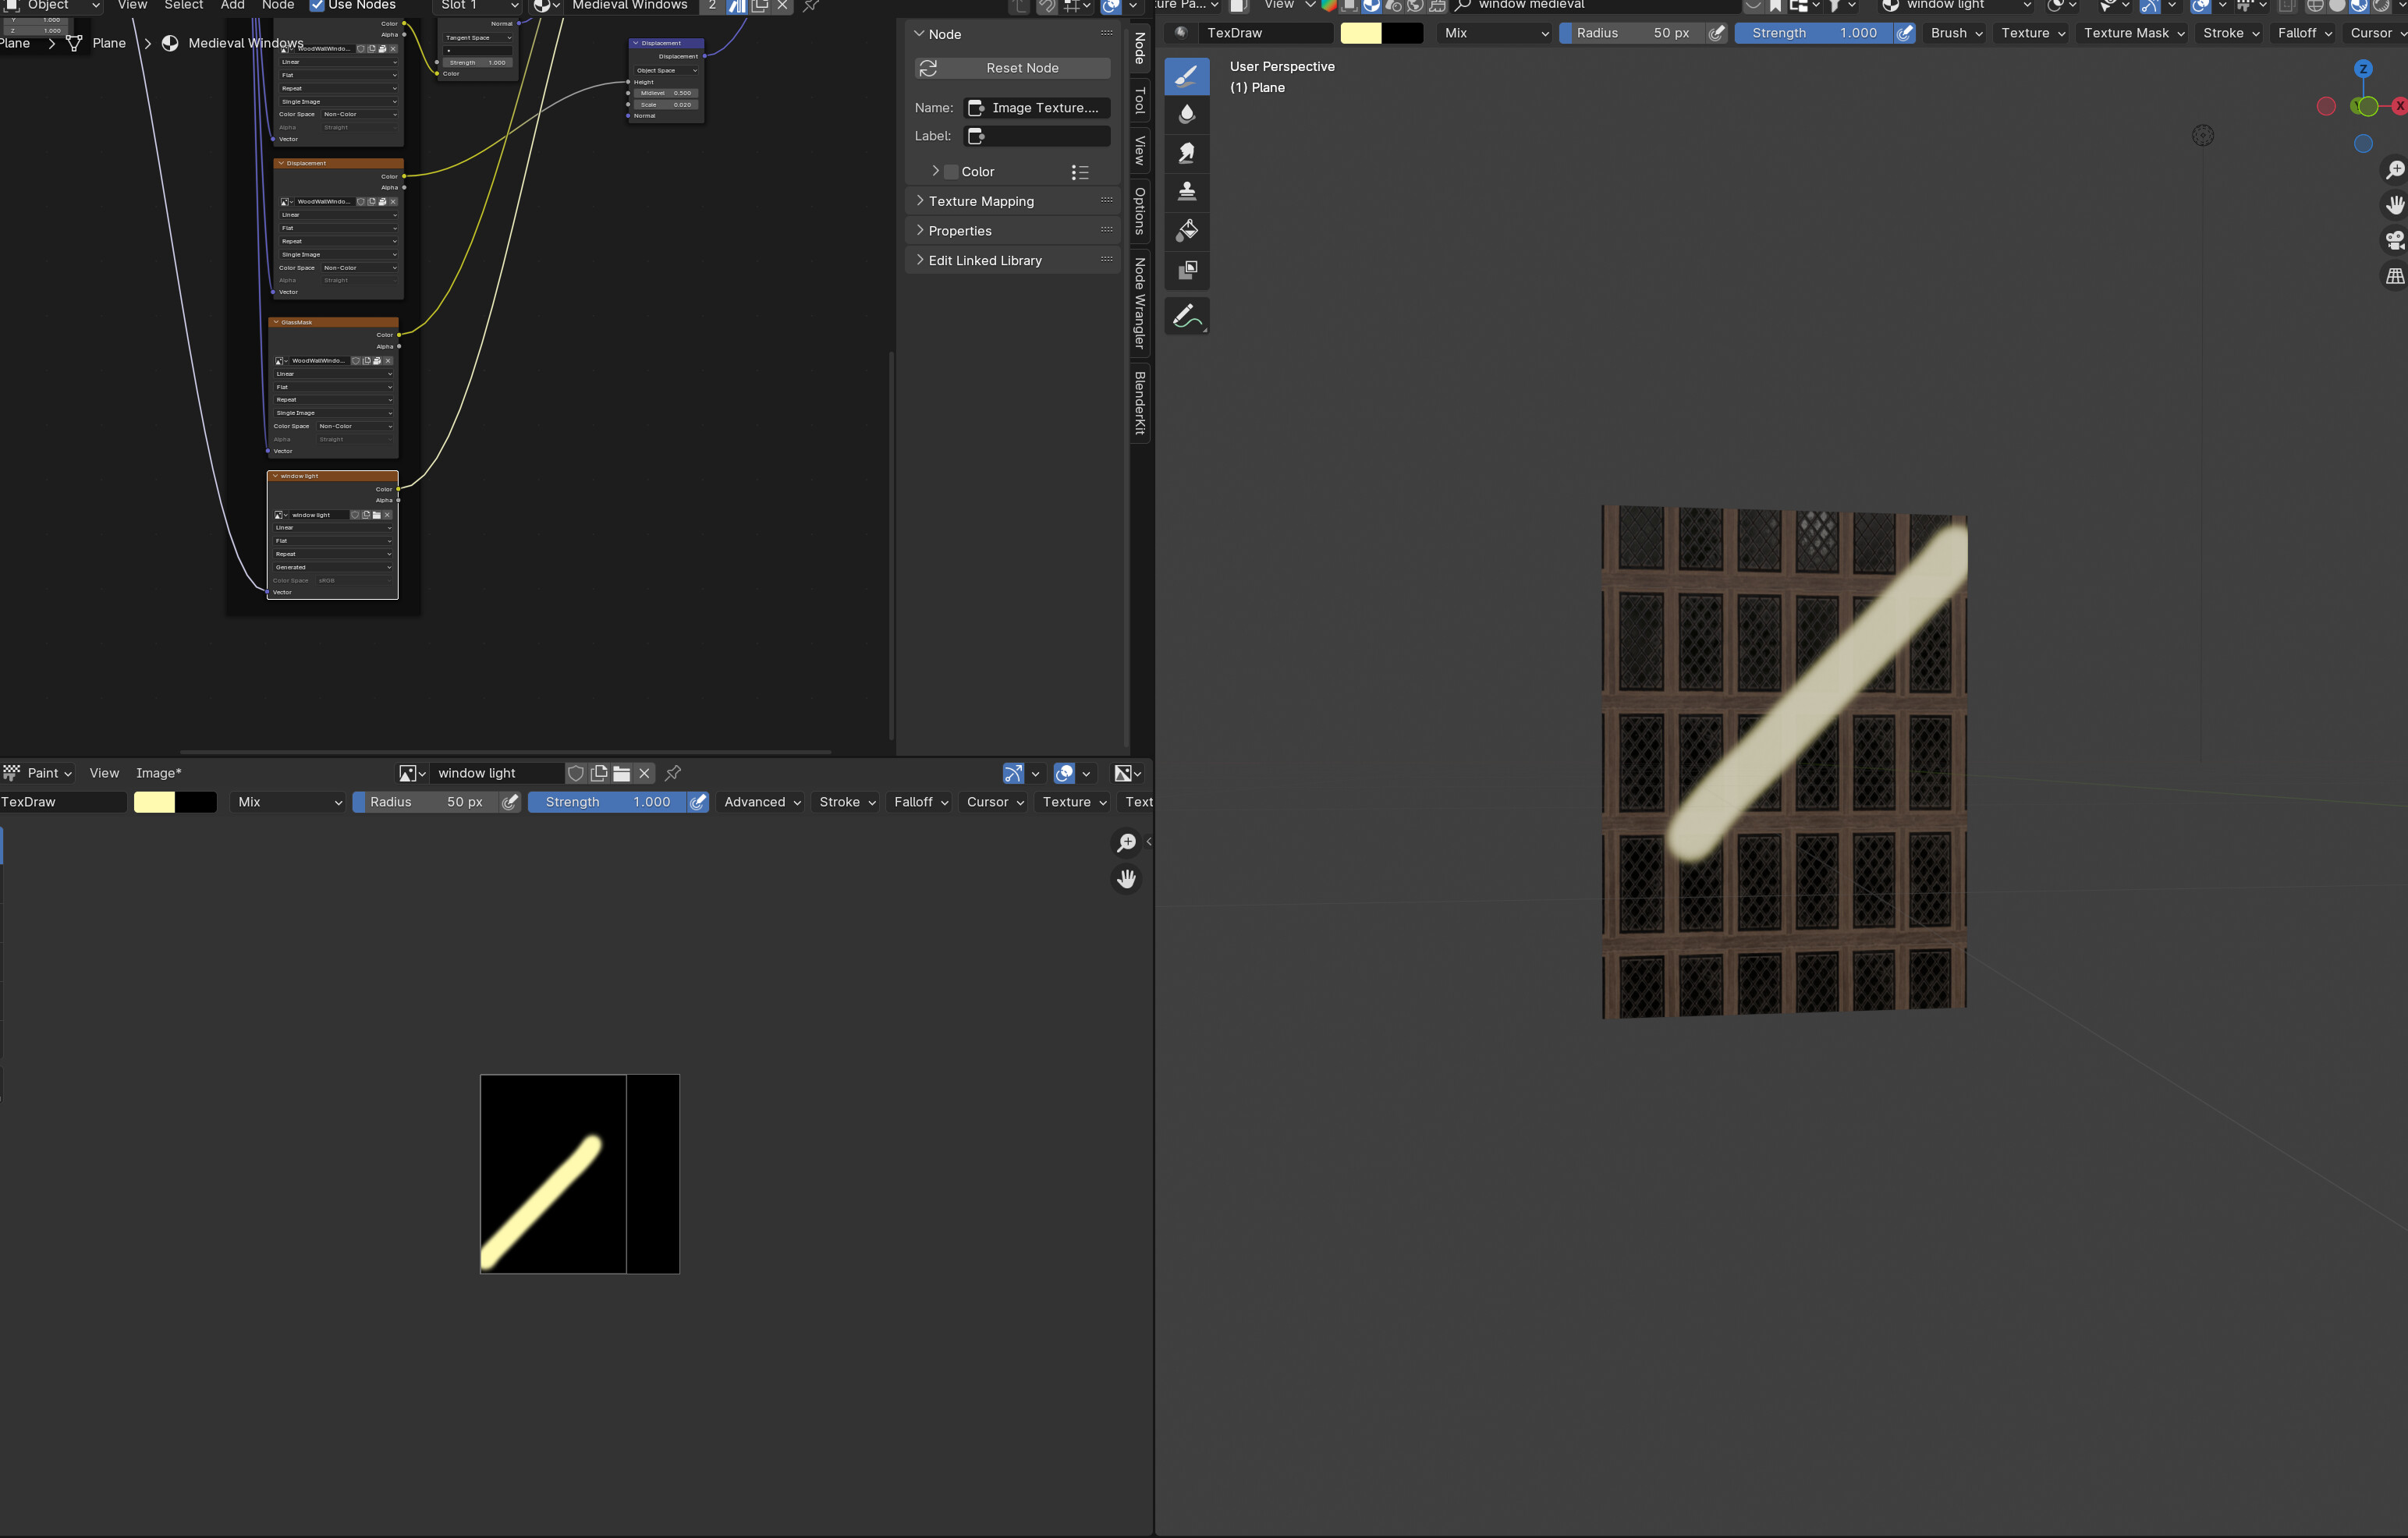
Now the window material actually looks fine as is, but it didnt look like this on my landscape file for the course. I wanted a bit more segments to show of the window. Now what I did to do so (and what was my error) is I scaled the UV Map of the window, while having the texture nodes of the window material set to repeat. This will result in more segments, like this:

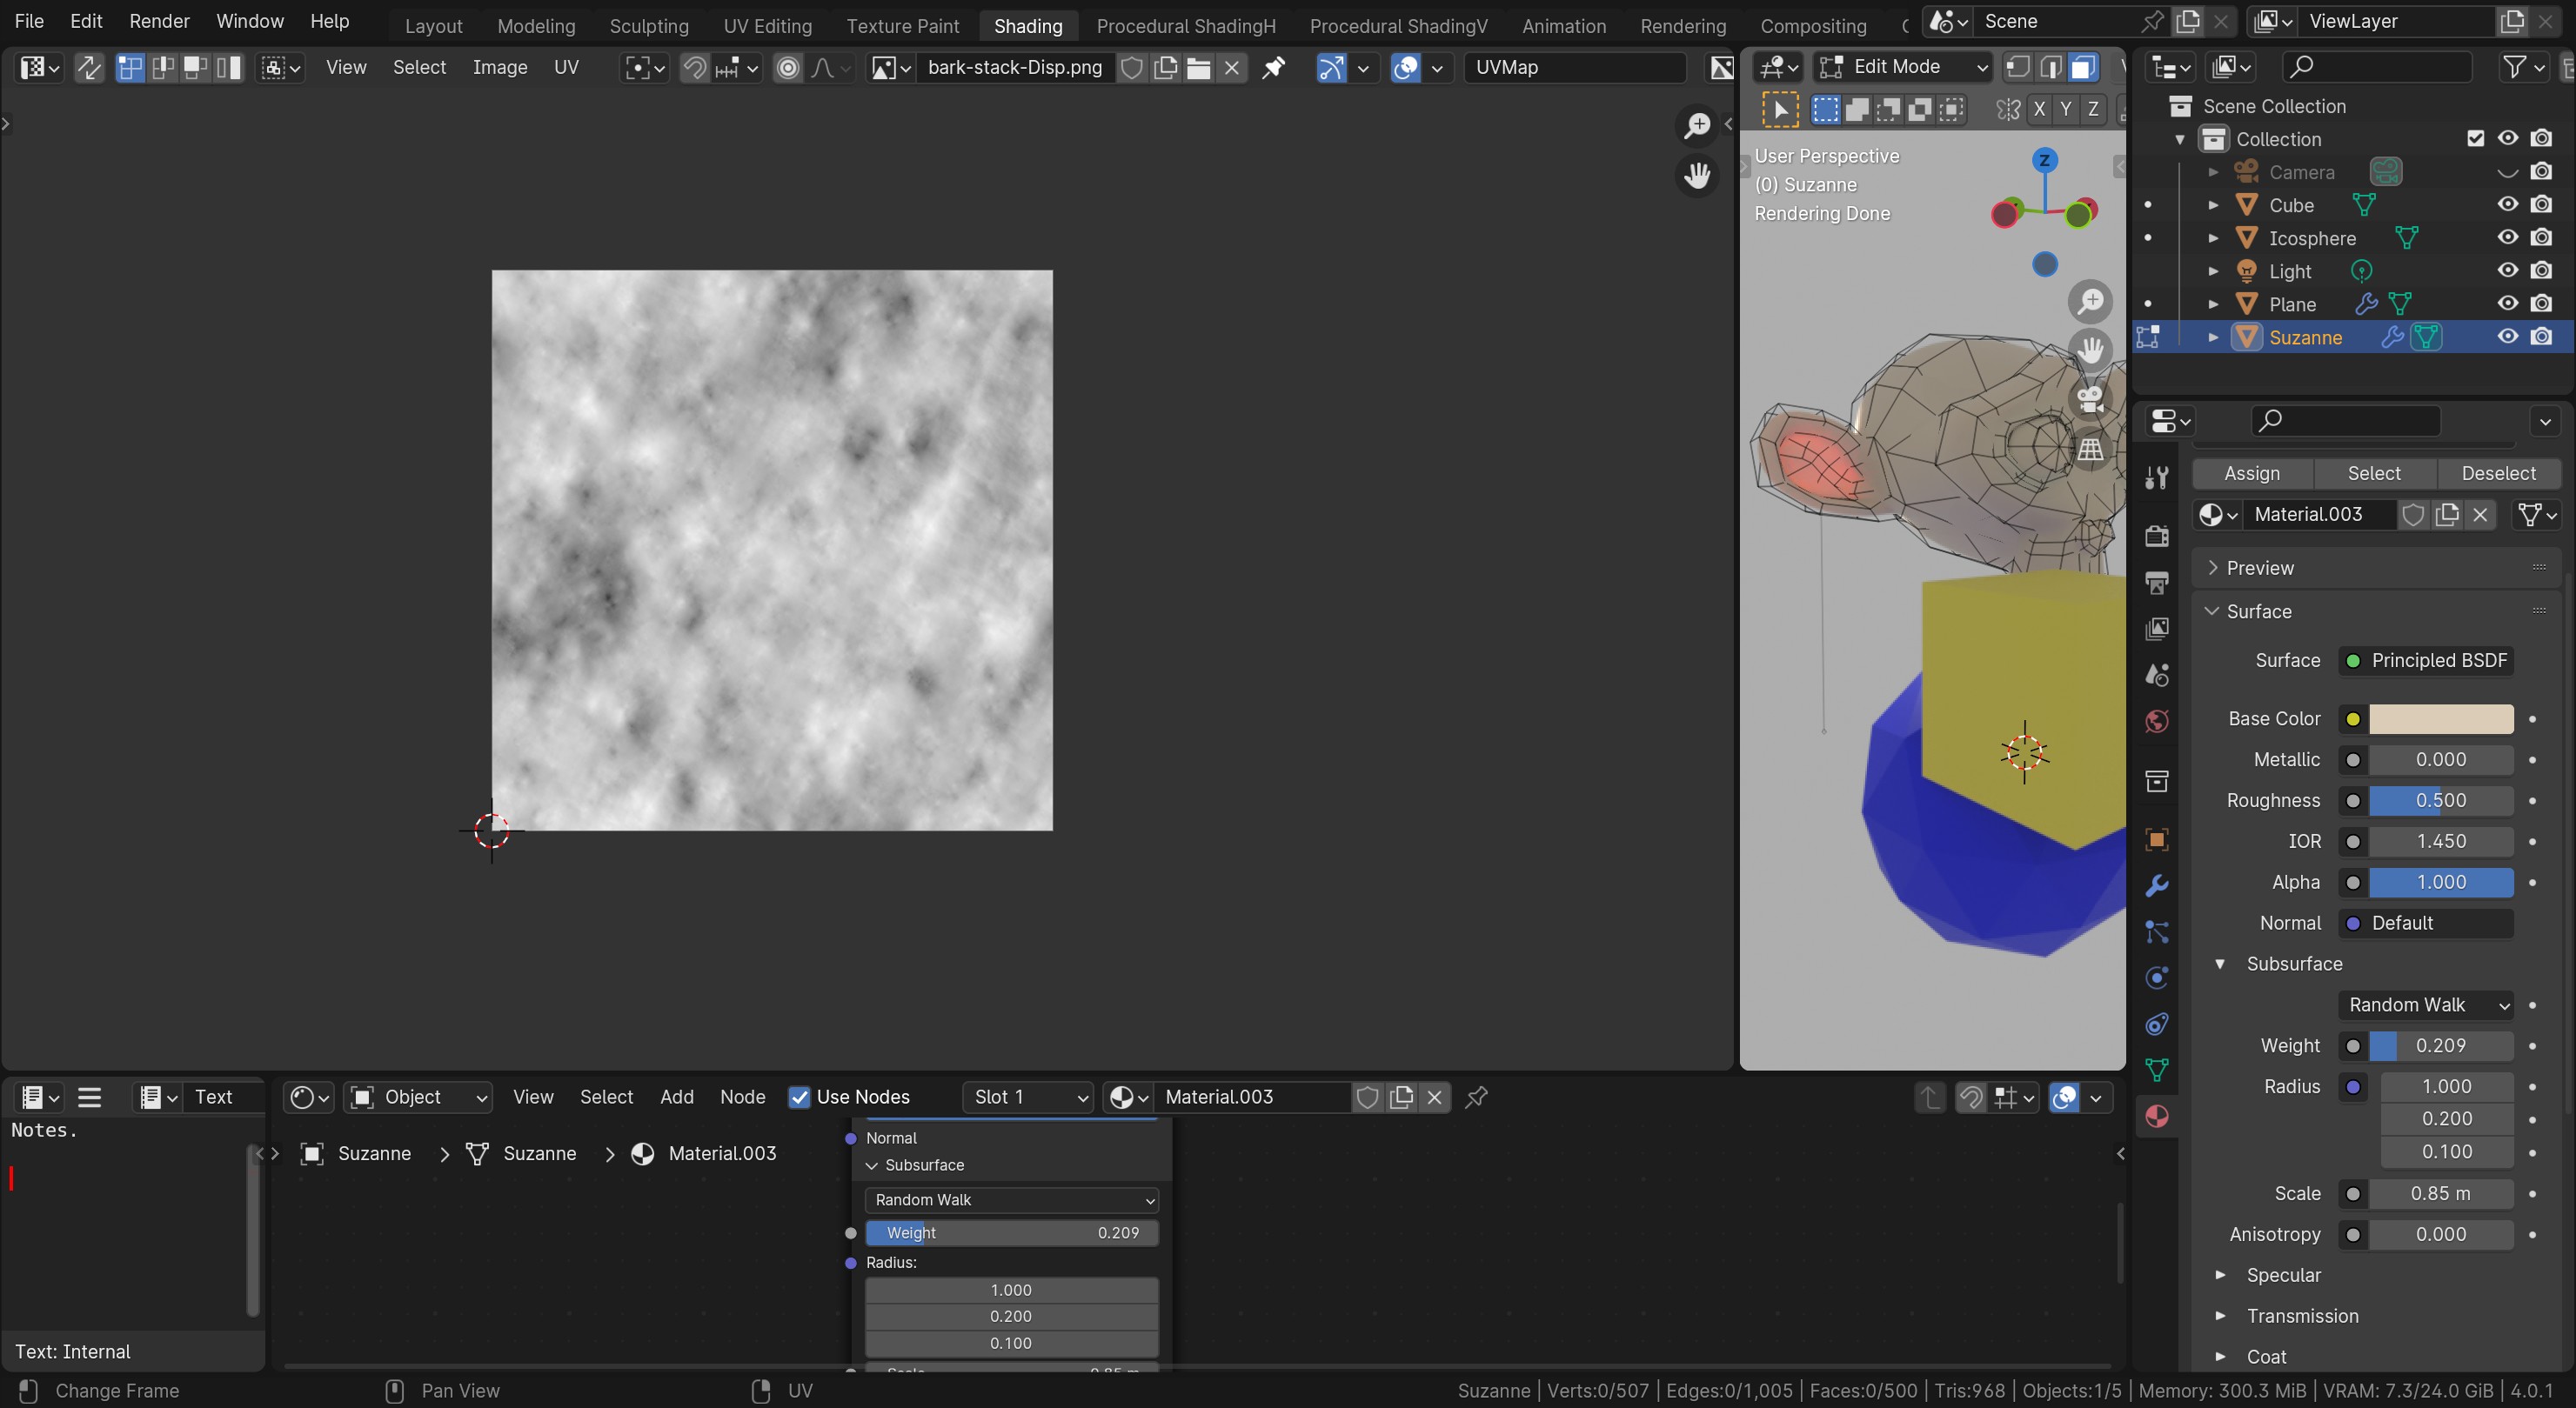
Then I went ahead and created the lightmap for the window with Grants settings from the lecture:

And hooked up the light map into the emission pin of my medieval window material:

Notice i forgot to add the pin here for the mapping node. I fixed it in the actual file, but didnt want to recreate the image so this text notice will have to do. The next step was painting the light map just as we did in the lecture, BUT since I have scaled the face of the plane in the UV map of course my light map will also tile like this:

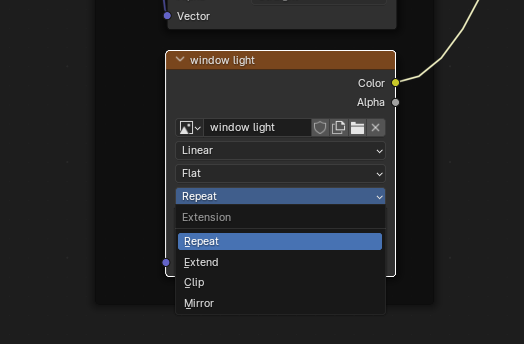
Scaling it back for the light map would of course also mean I would kind of zoom in on my image color and get back to the very first uv map i showed so this was not an option. I also played around with some extend options of the light map, but nothing really helped:

06 Texture Node extend options

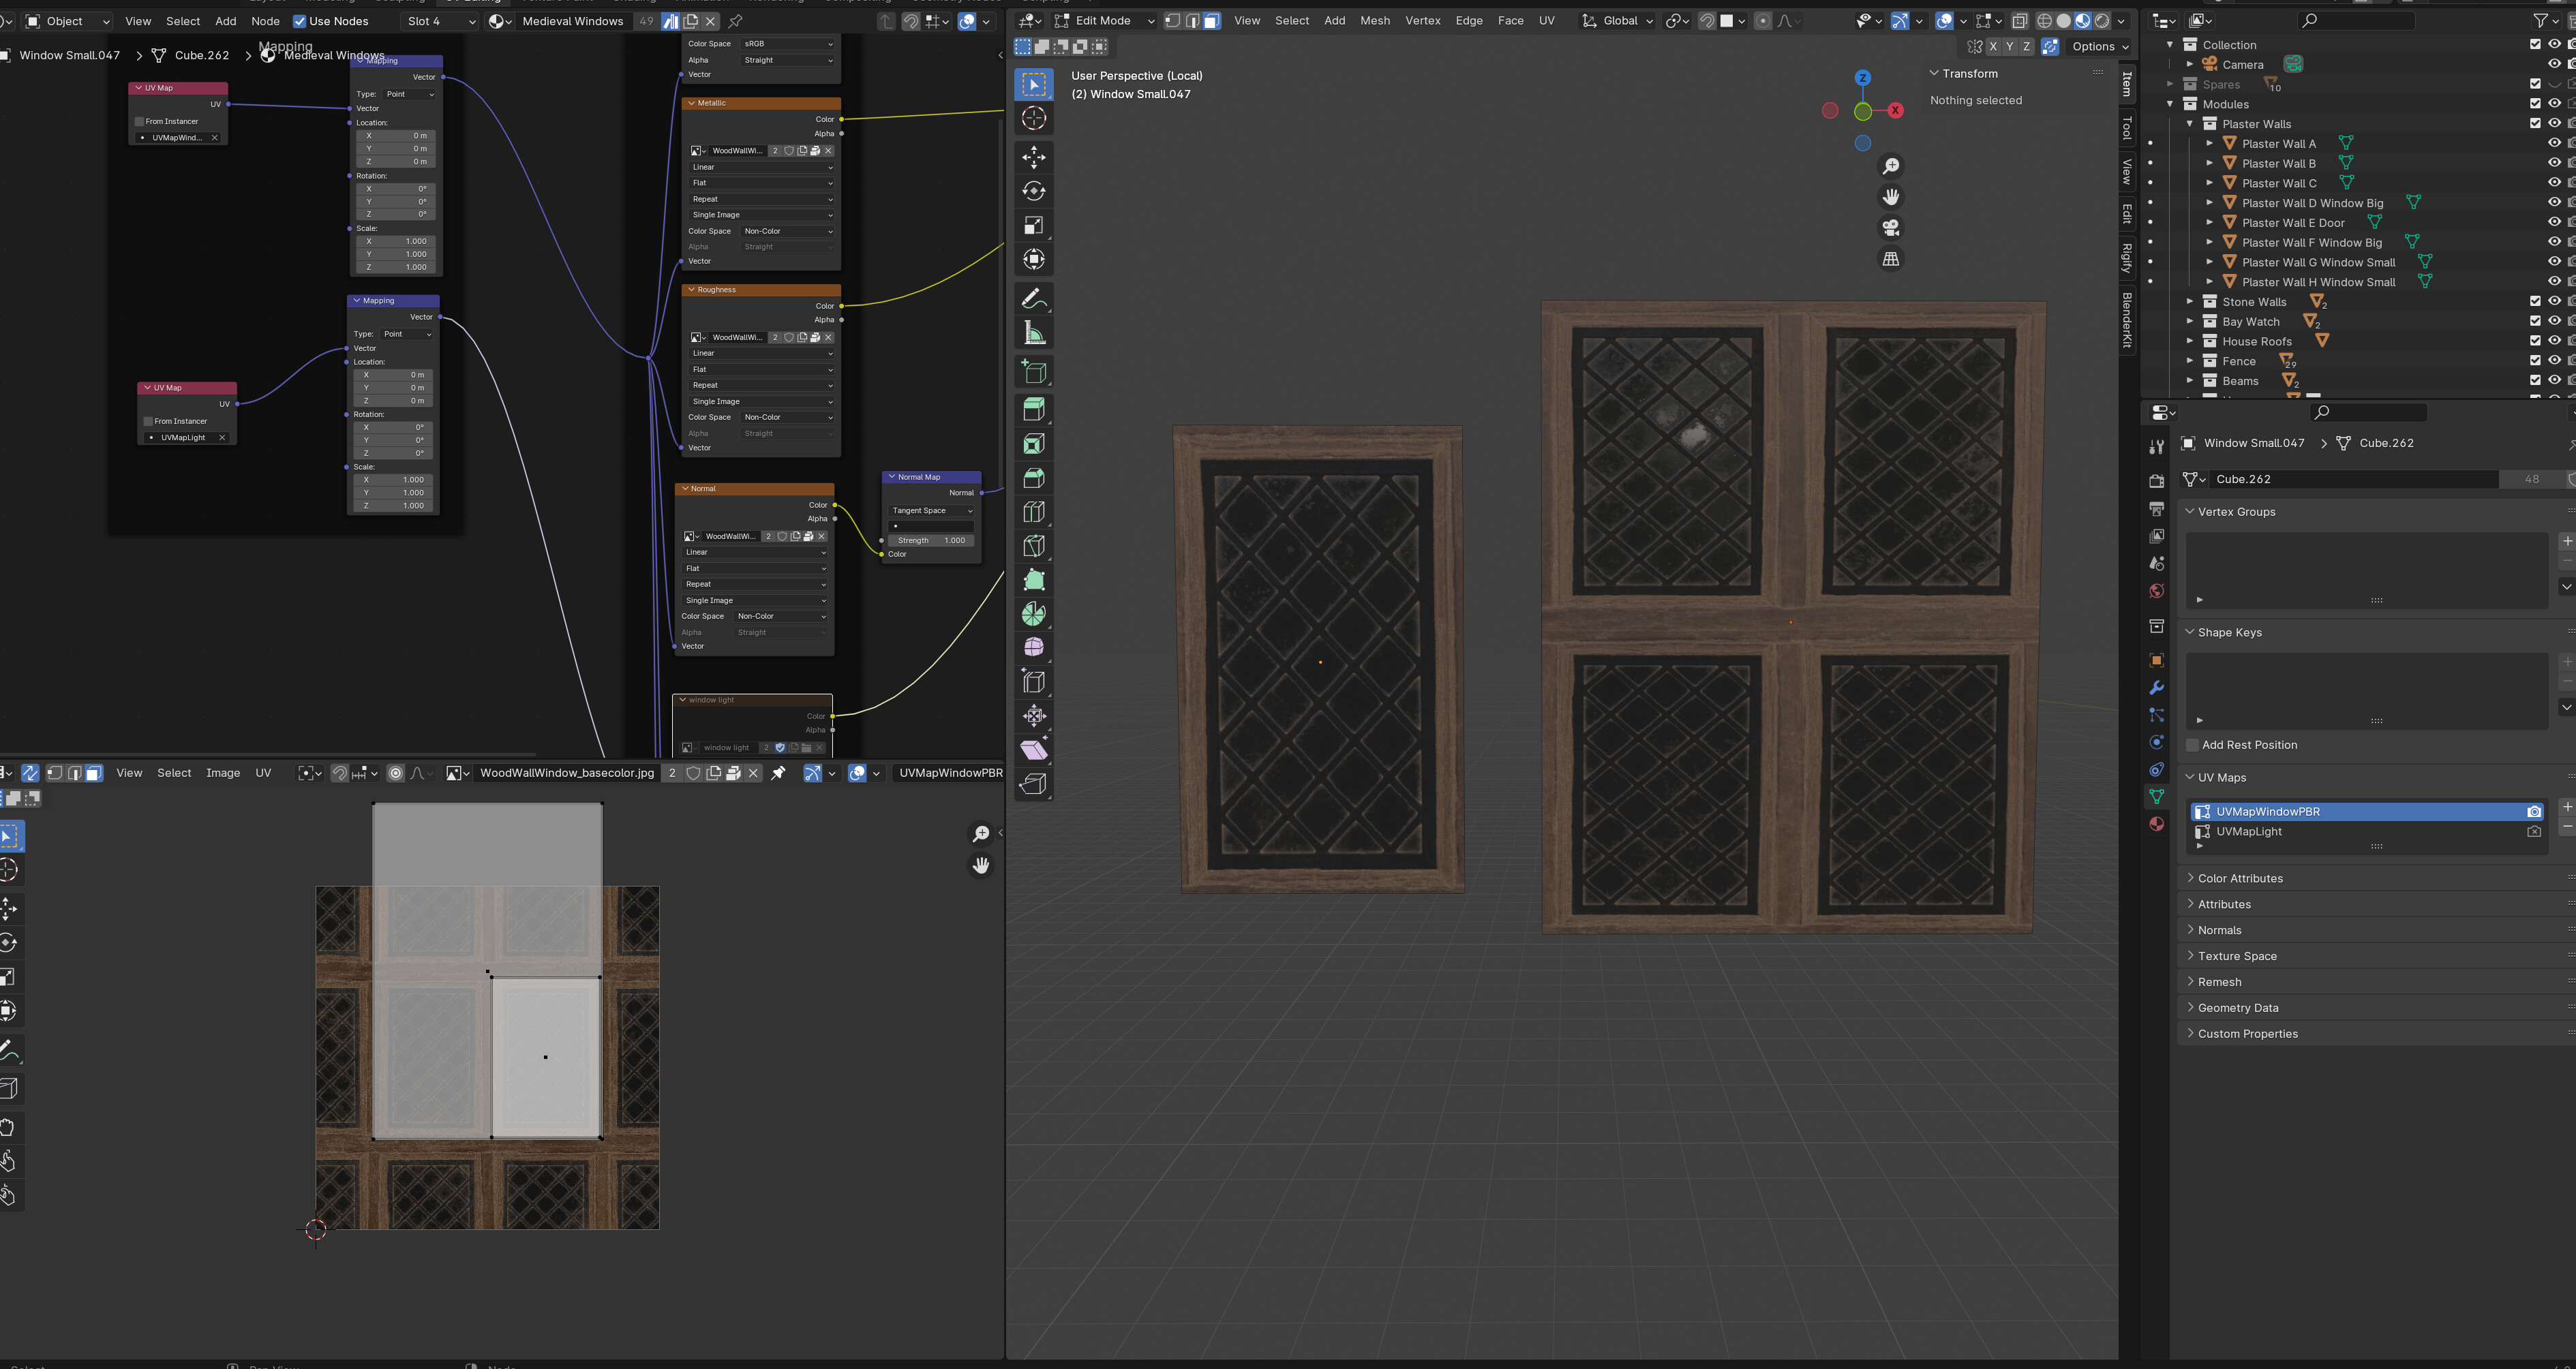
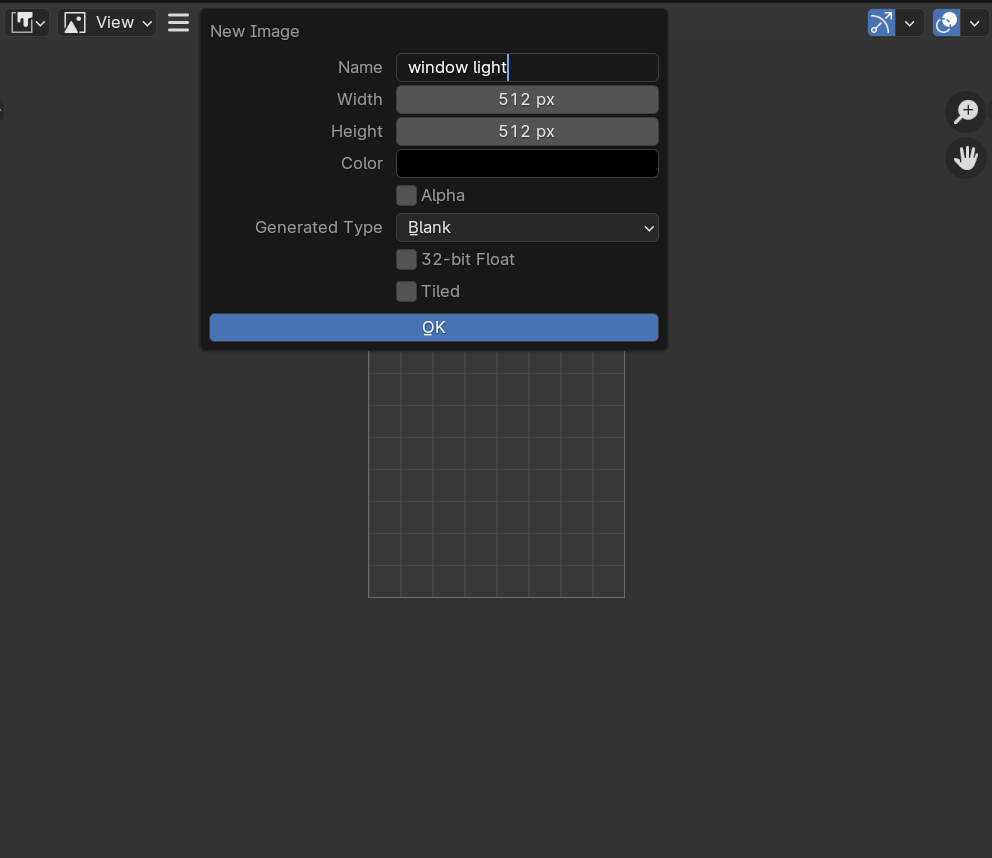
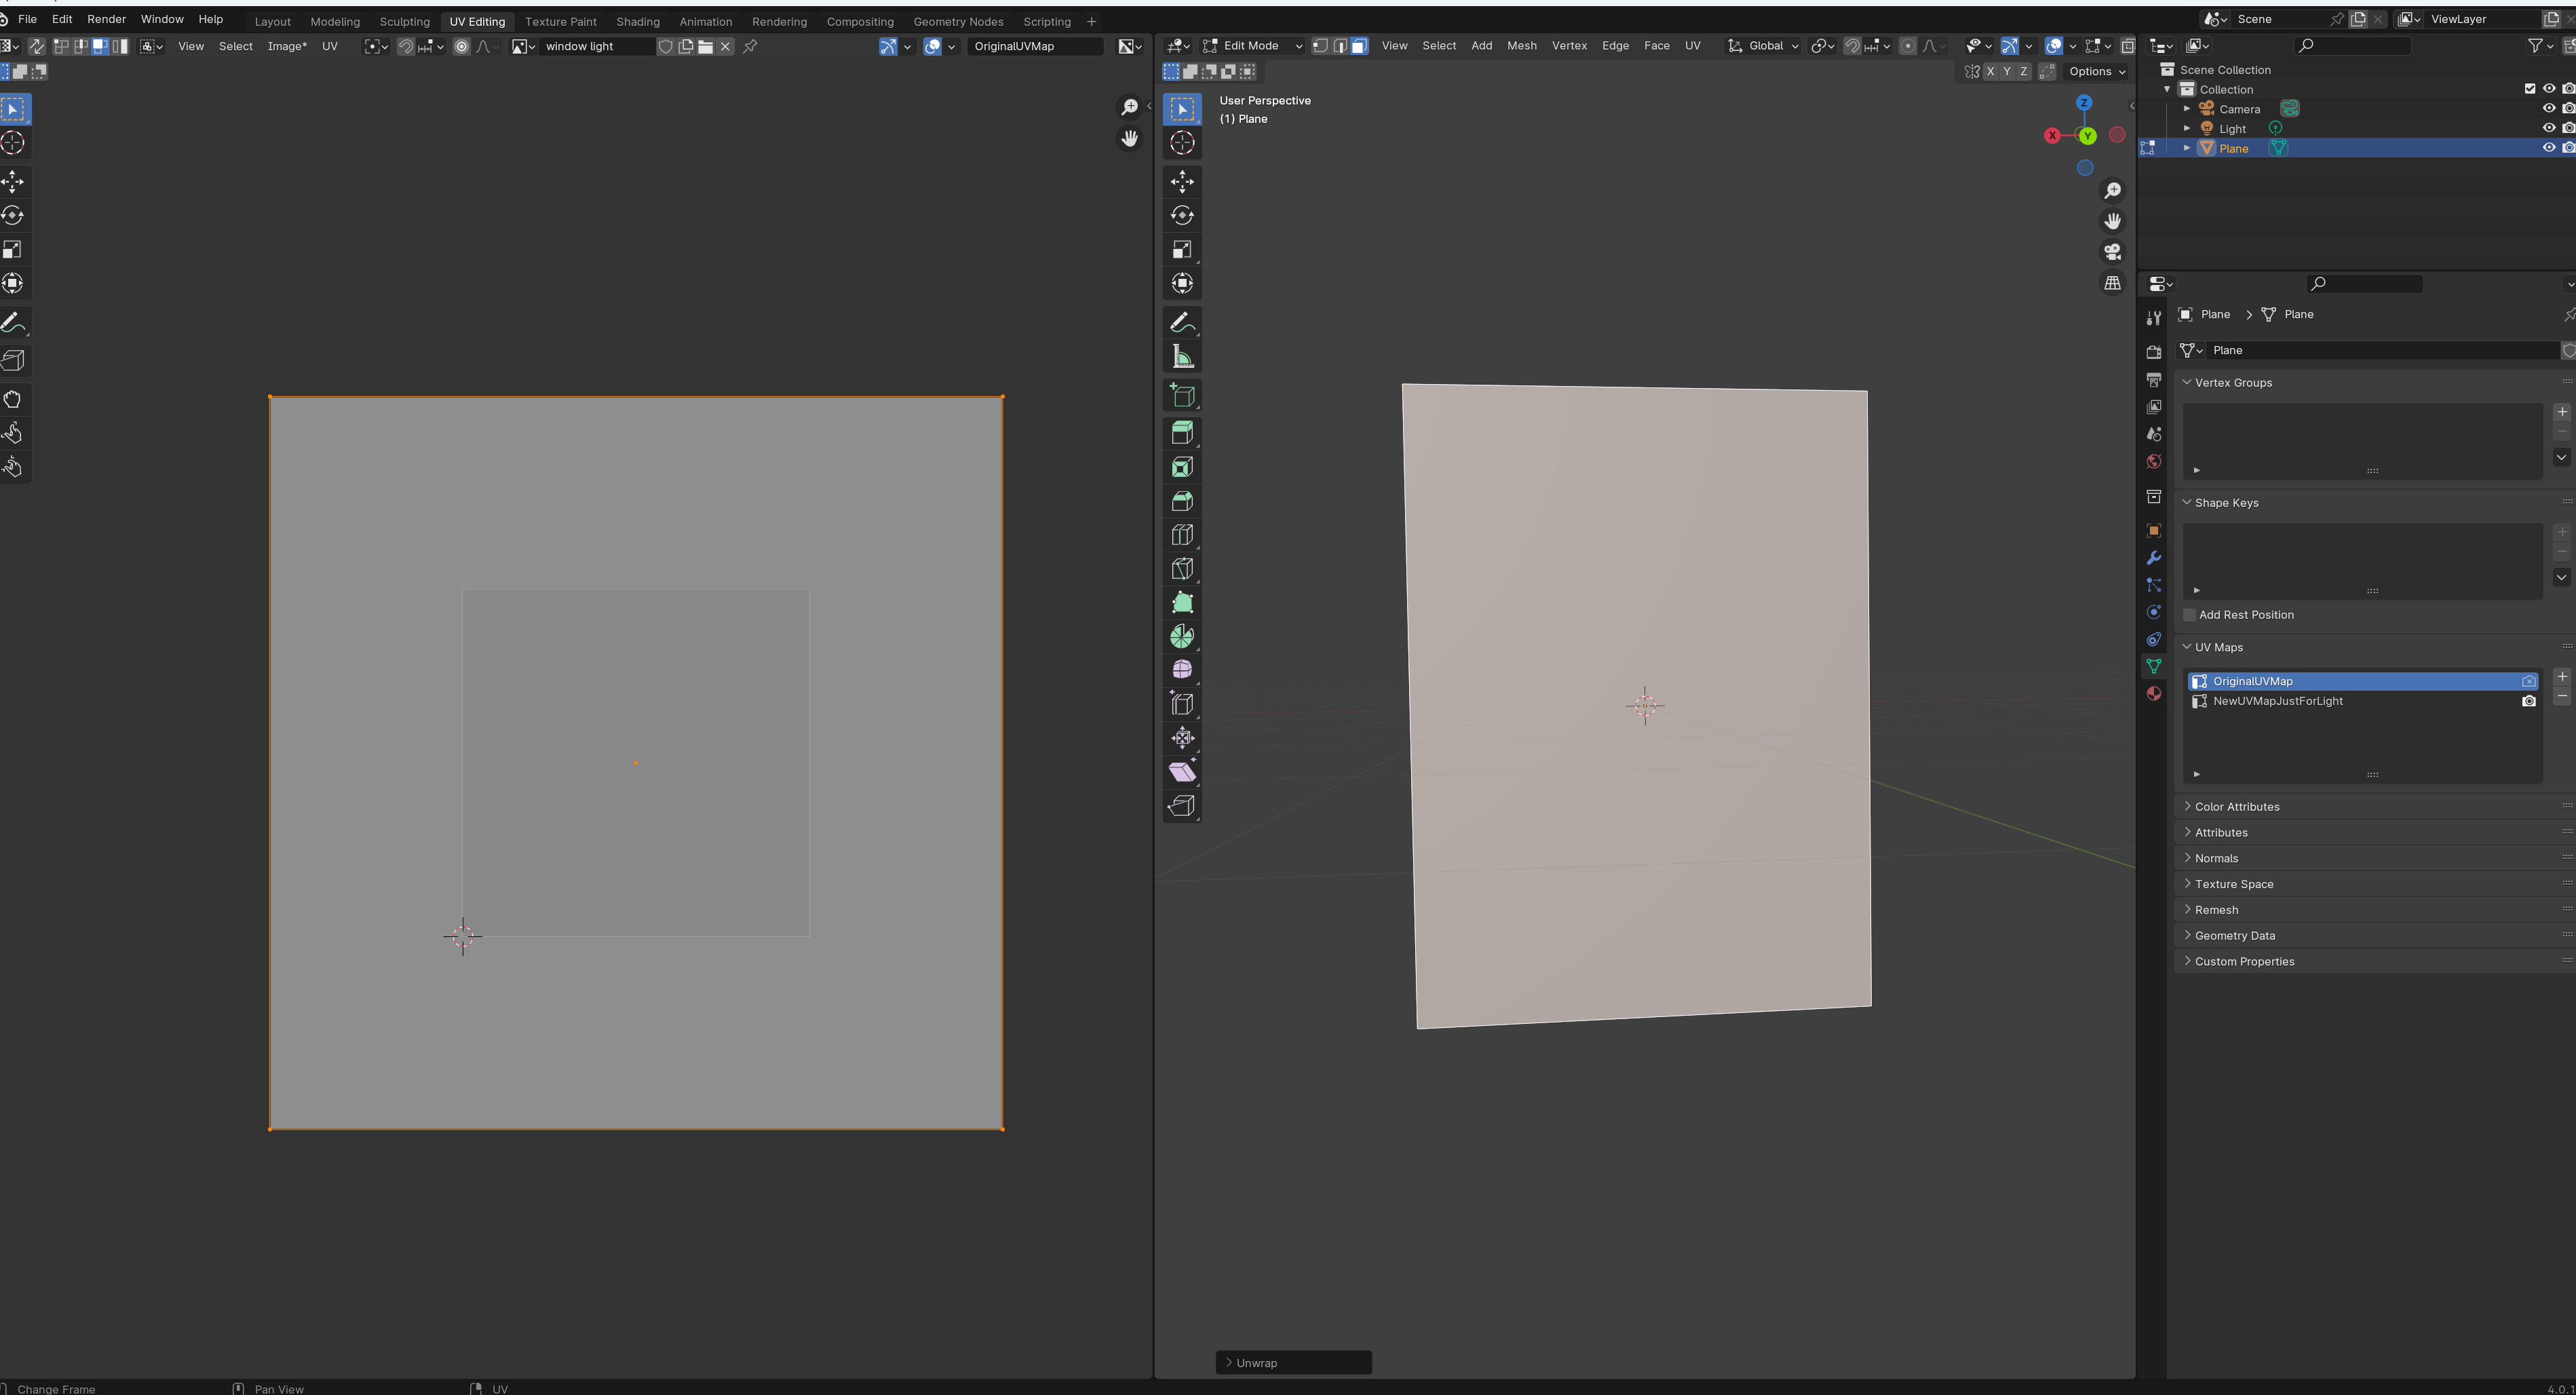
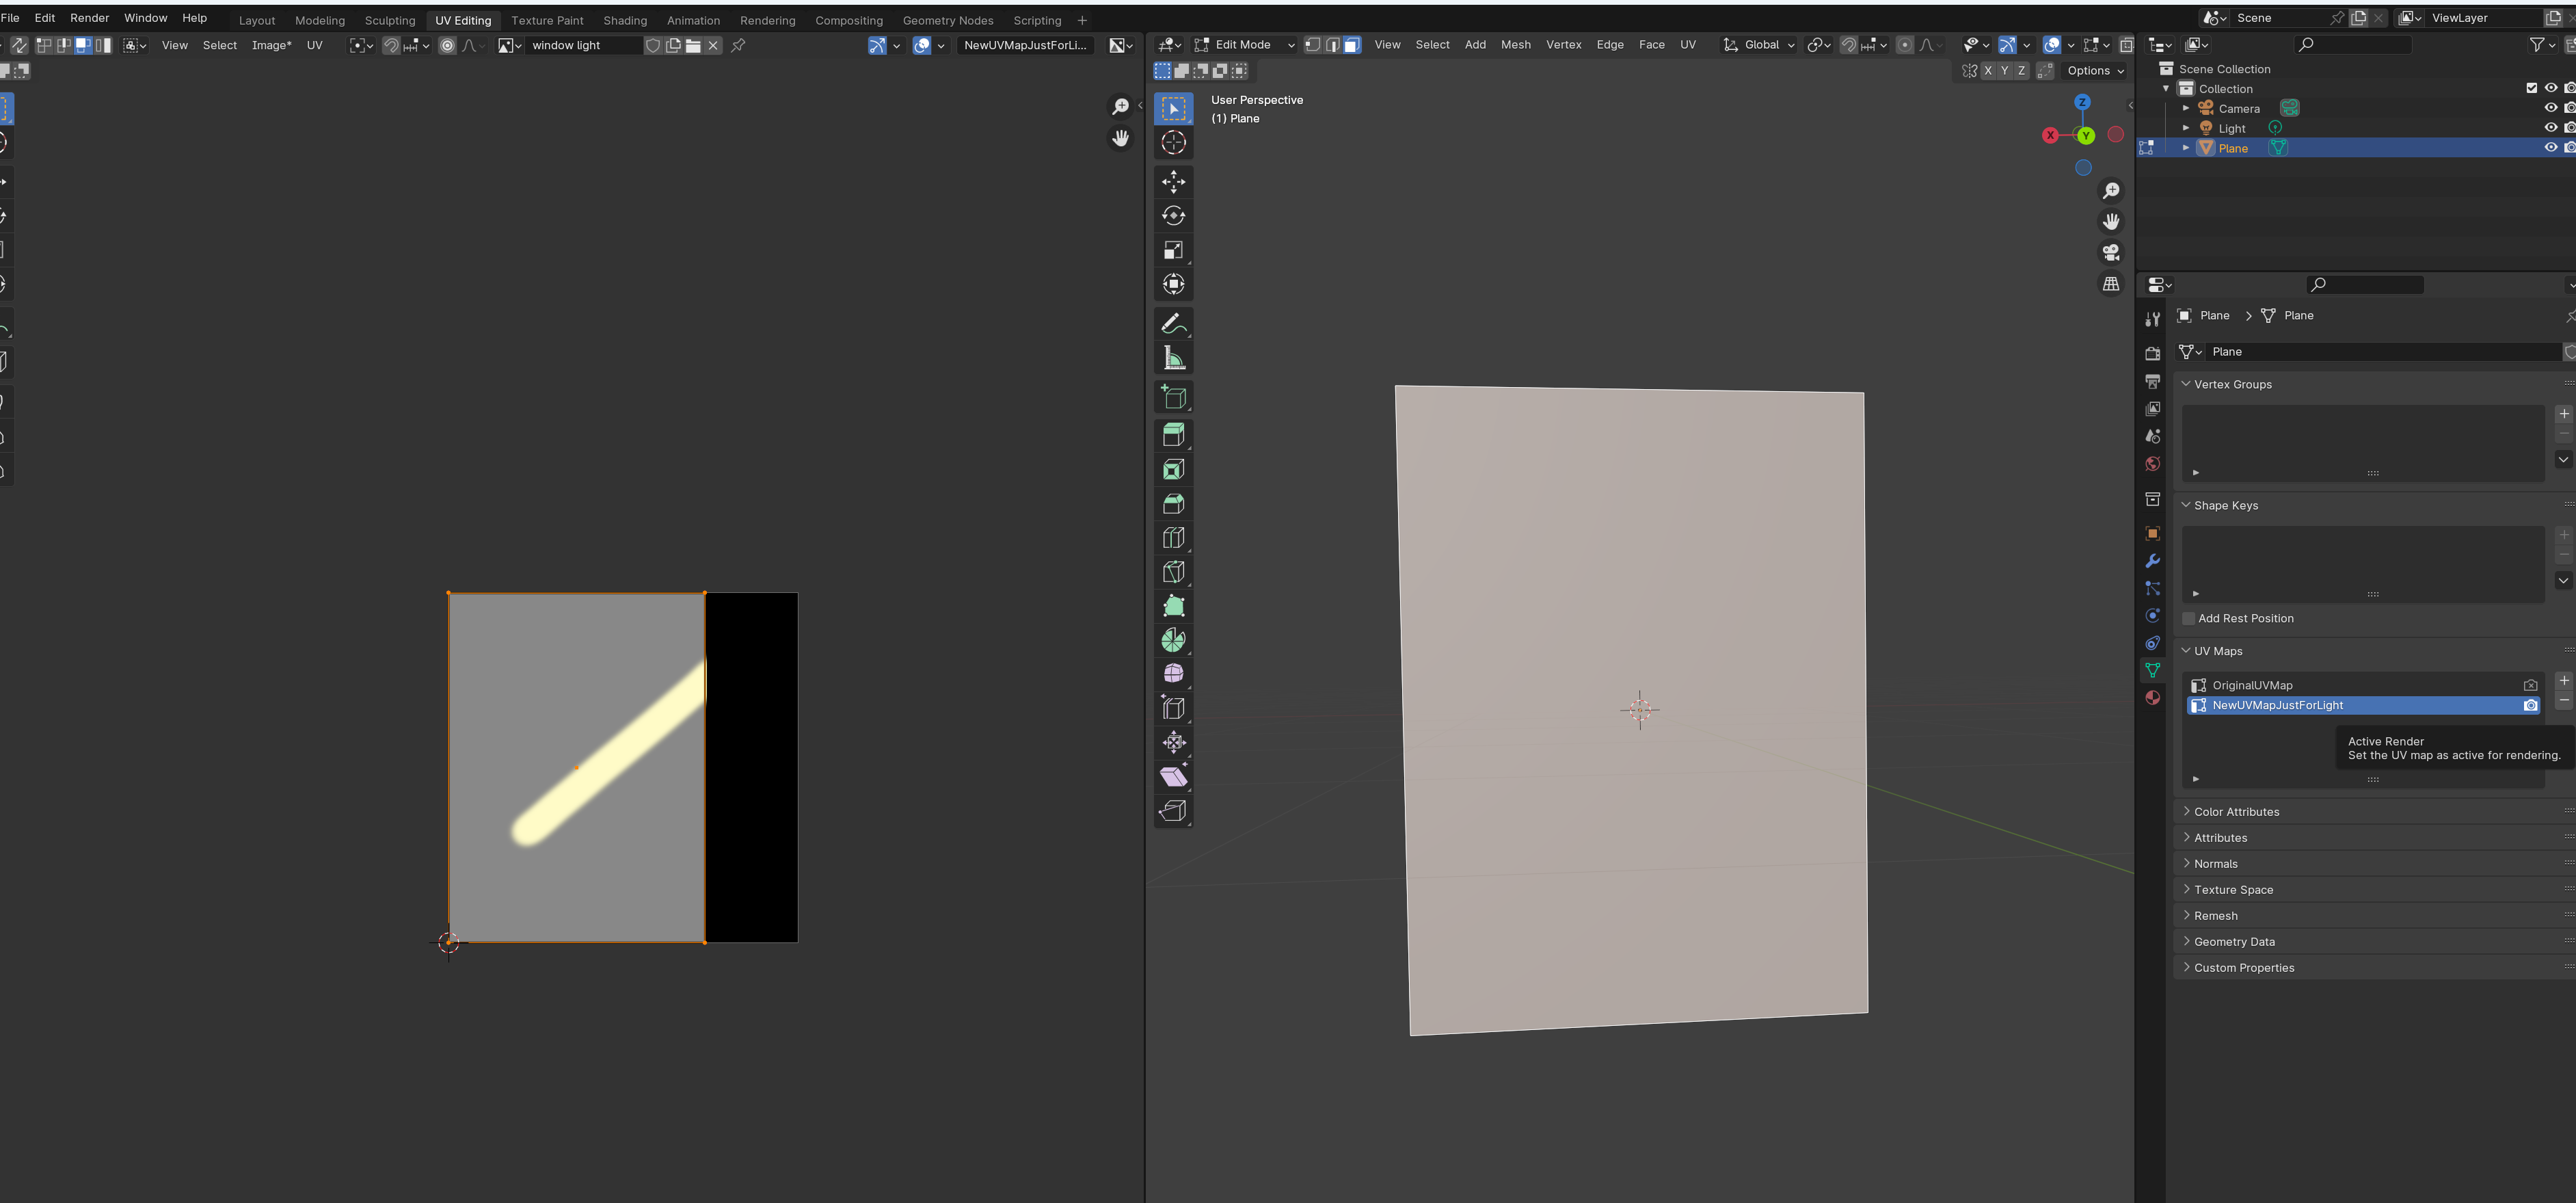
What I tried then is using multiple UV maps for the material. Made sense at the time, since the UV Map for the pbr wont do, i need a separate UV map just for the light. So I created another UV map on the window:

The original UV map with the scaled face looks like this:

The UV map for the light which I unwrapped anew looks like this:

I then went ahead and adapted the medieval window material to use the 2 different uv maps:

Now if I paint on my light map it actually does what i want since its using its own correctly sized UV map:

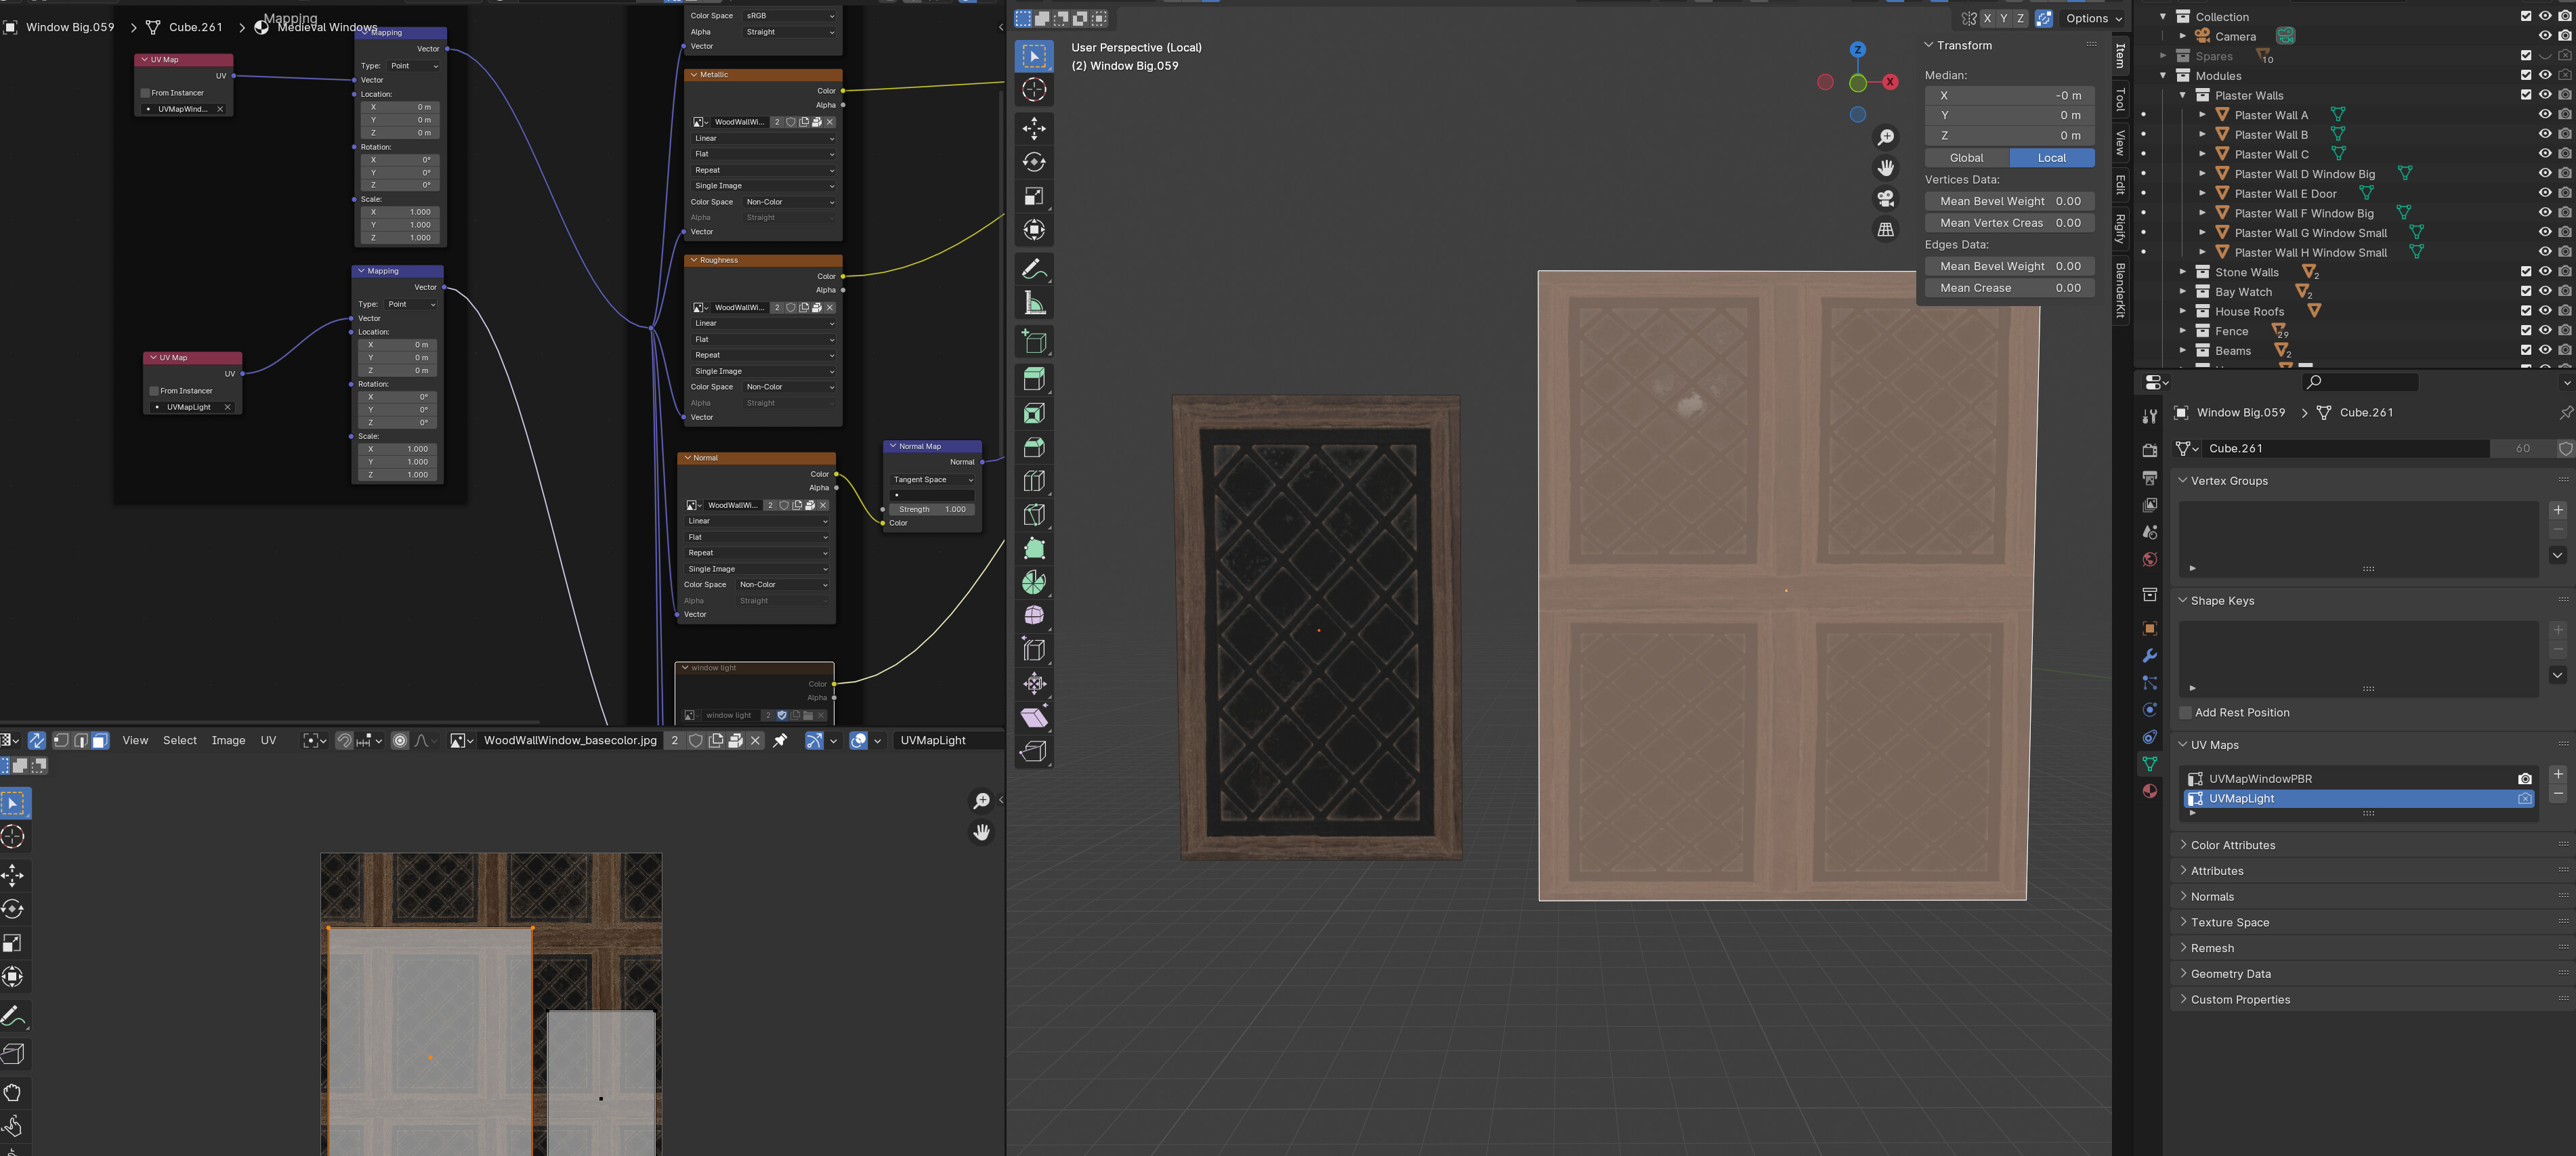
But then I noticed while hovering over the UV maps I could only select one active UV map for rendering:

If you activate the other UV map, the light UV map becomes inactive for render and thus be useless. If you render it with the light uv map active, this will be the render result:

As expected, it doesnt show any of the pbr material since its uv map is not active for the render.

EDIT: You can render with 2 UV maps it seems. Apparently it only allows for one render UV Map active while in the UV Editing workspace. See my second answer below in case you are wondering how to utilize 2 uv maps to get back to one uv map, but with correct scaling.

THE SOLUTION:

So now how to fix this. My initial approach was wrong. Instead of scaling the face of the plane on the UV Map so it tiles, giving me more window segments, instead I should leave the UV map as is and adapt the mapping node of the material and use 2 different scales for the pbr material and light map. Let me walk you through:

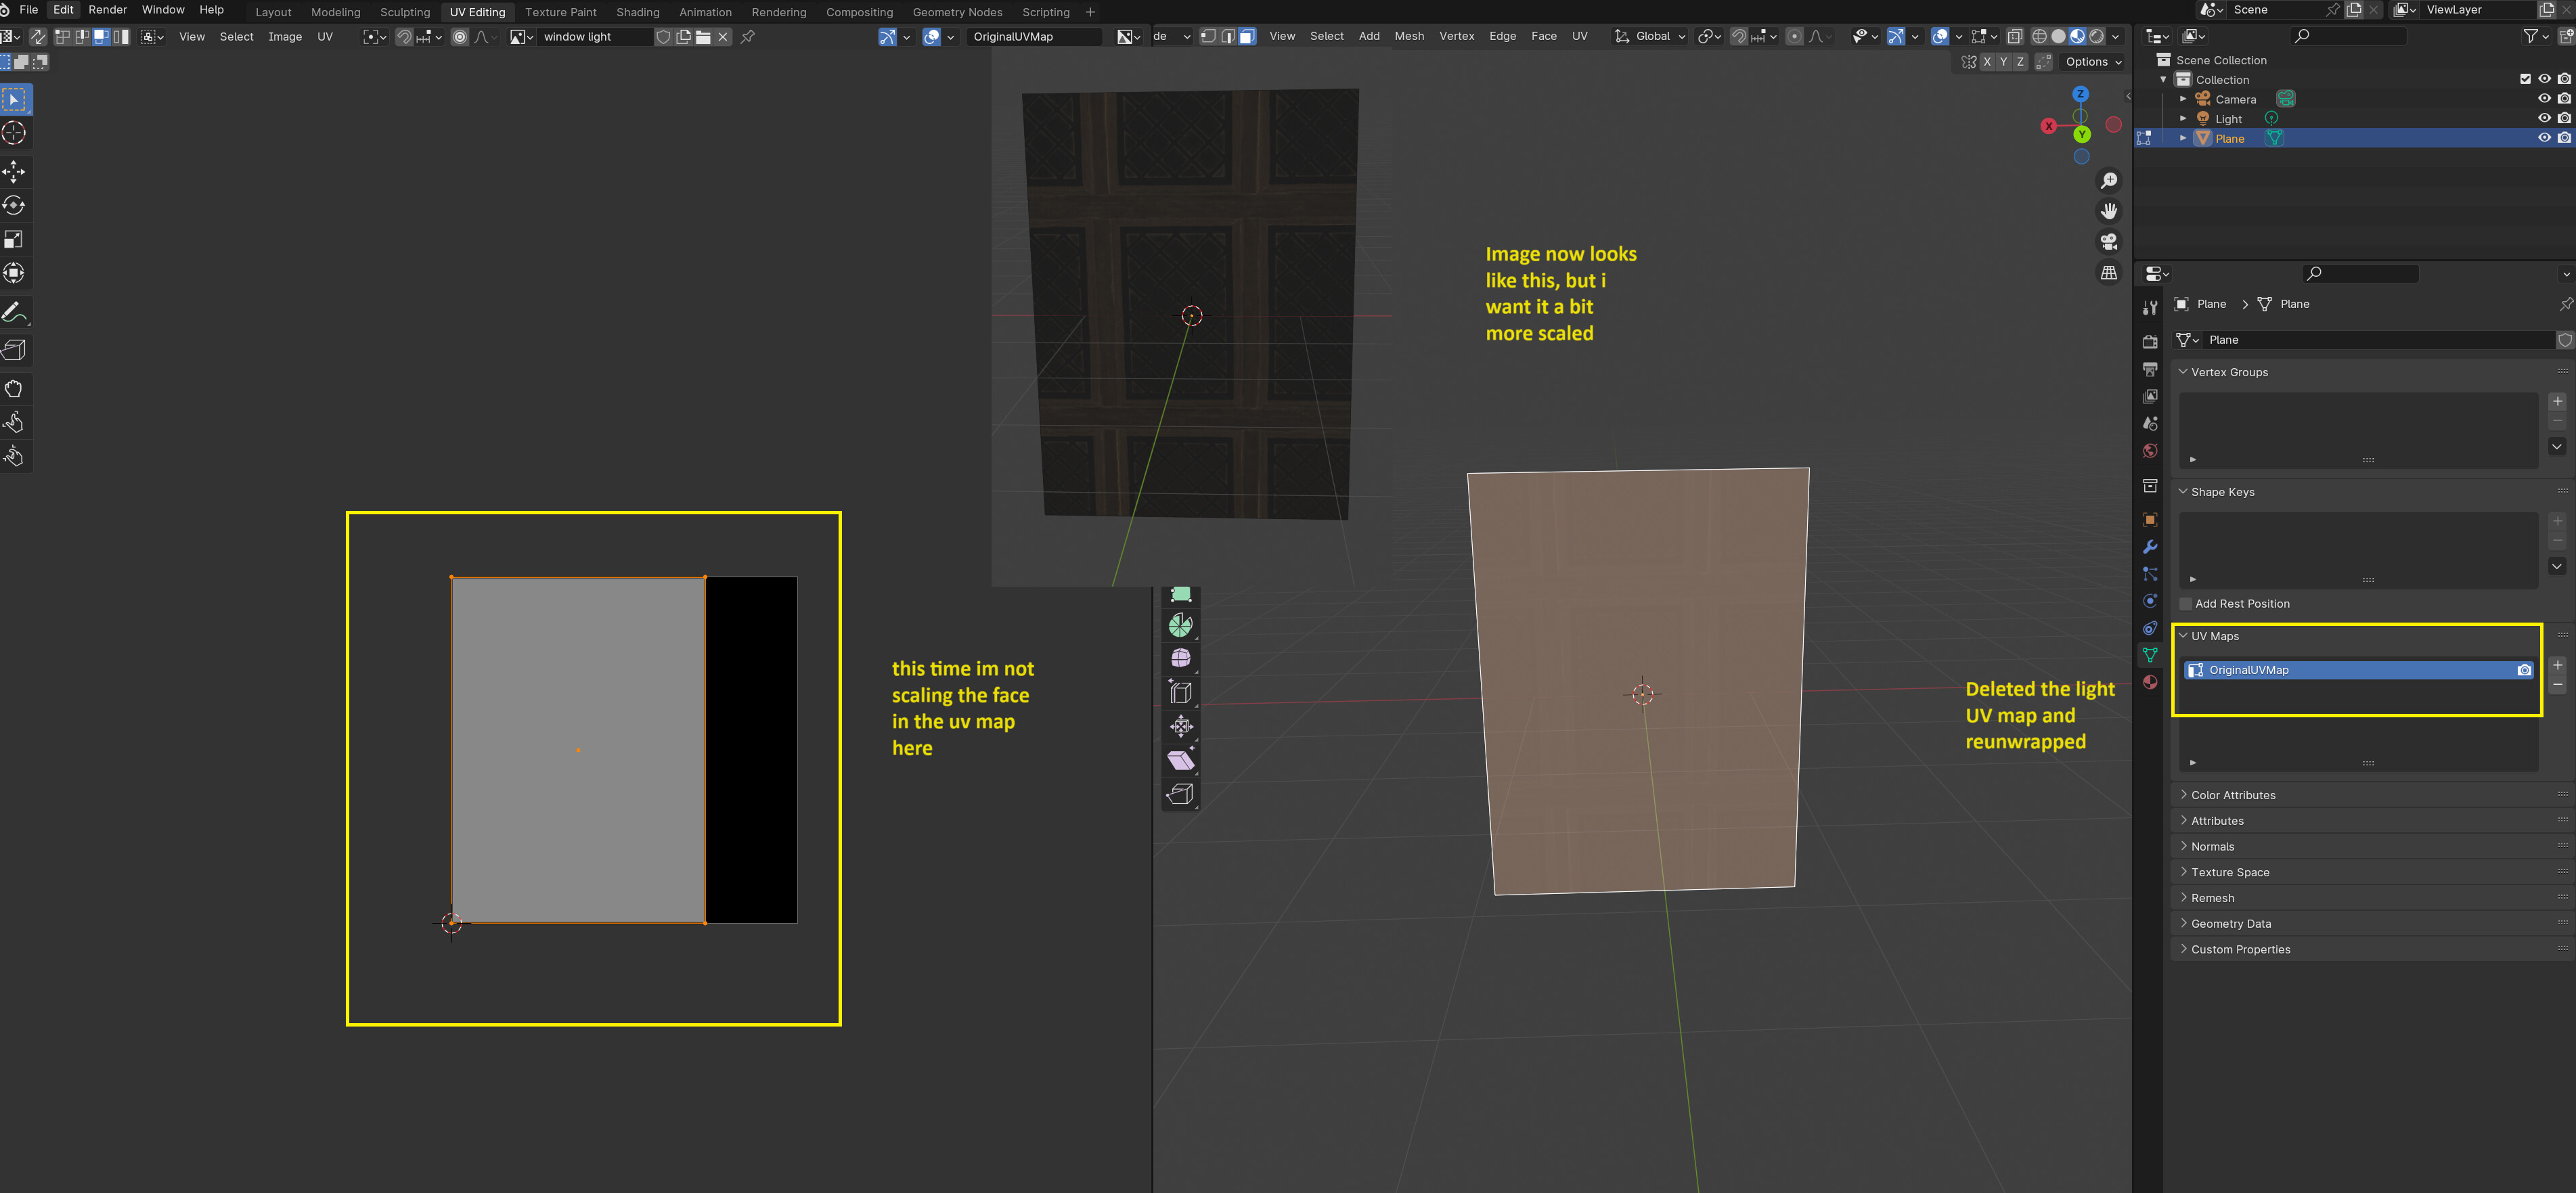
First I adapted the Window UV Map back to a single UV Map and unwrapped the plane again. This time I did NOT scale the face, so it fits nicely on the texture:

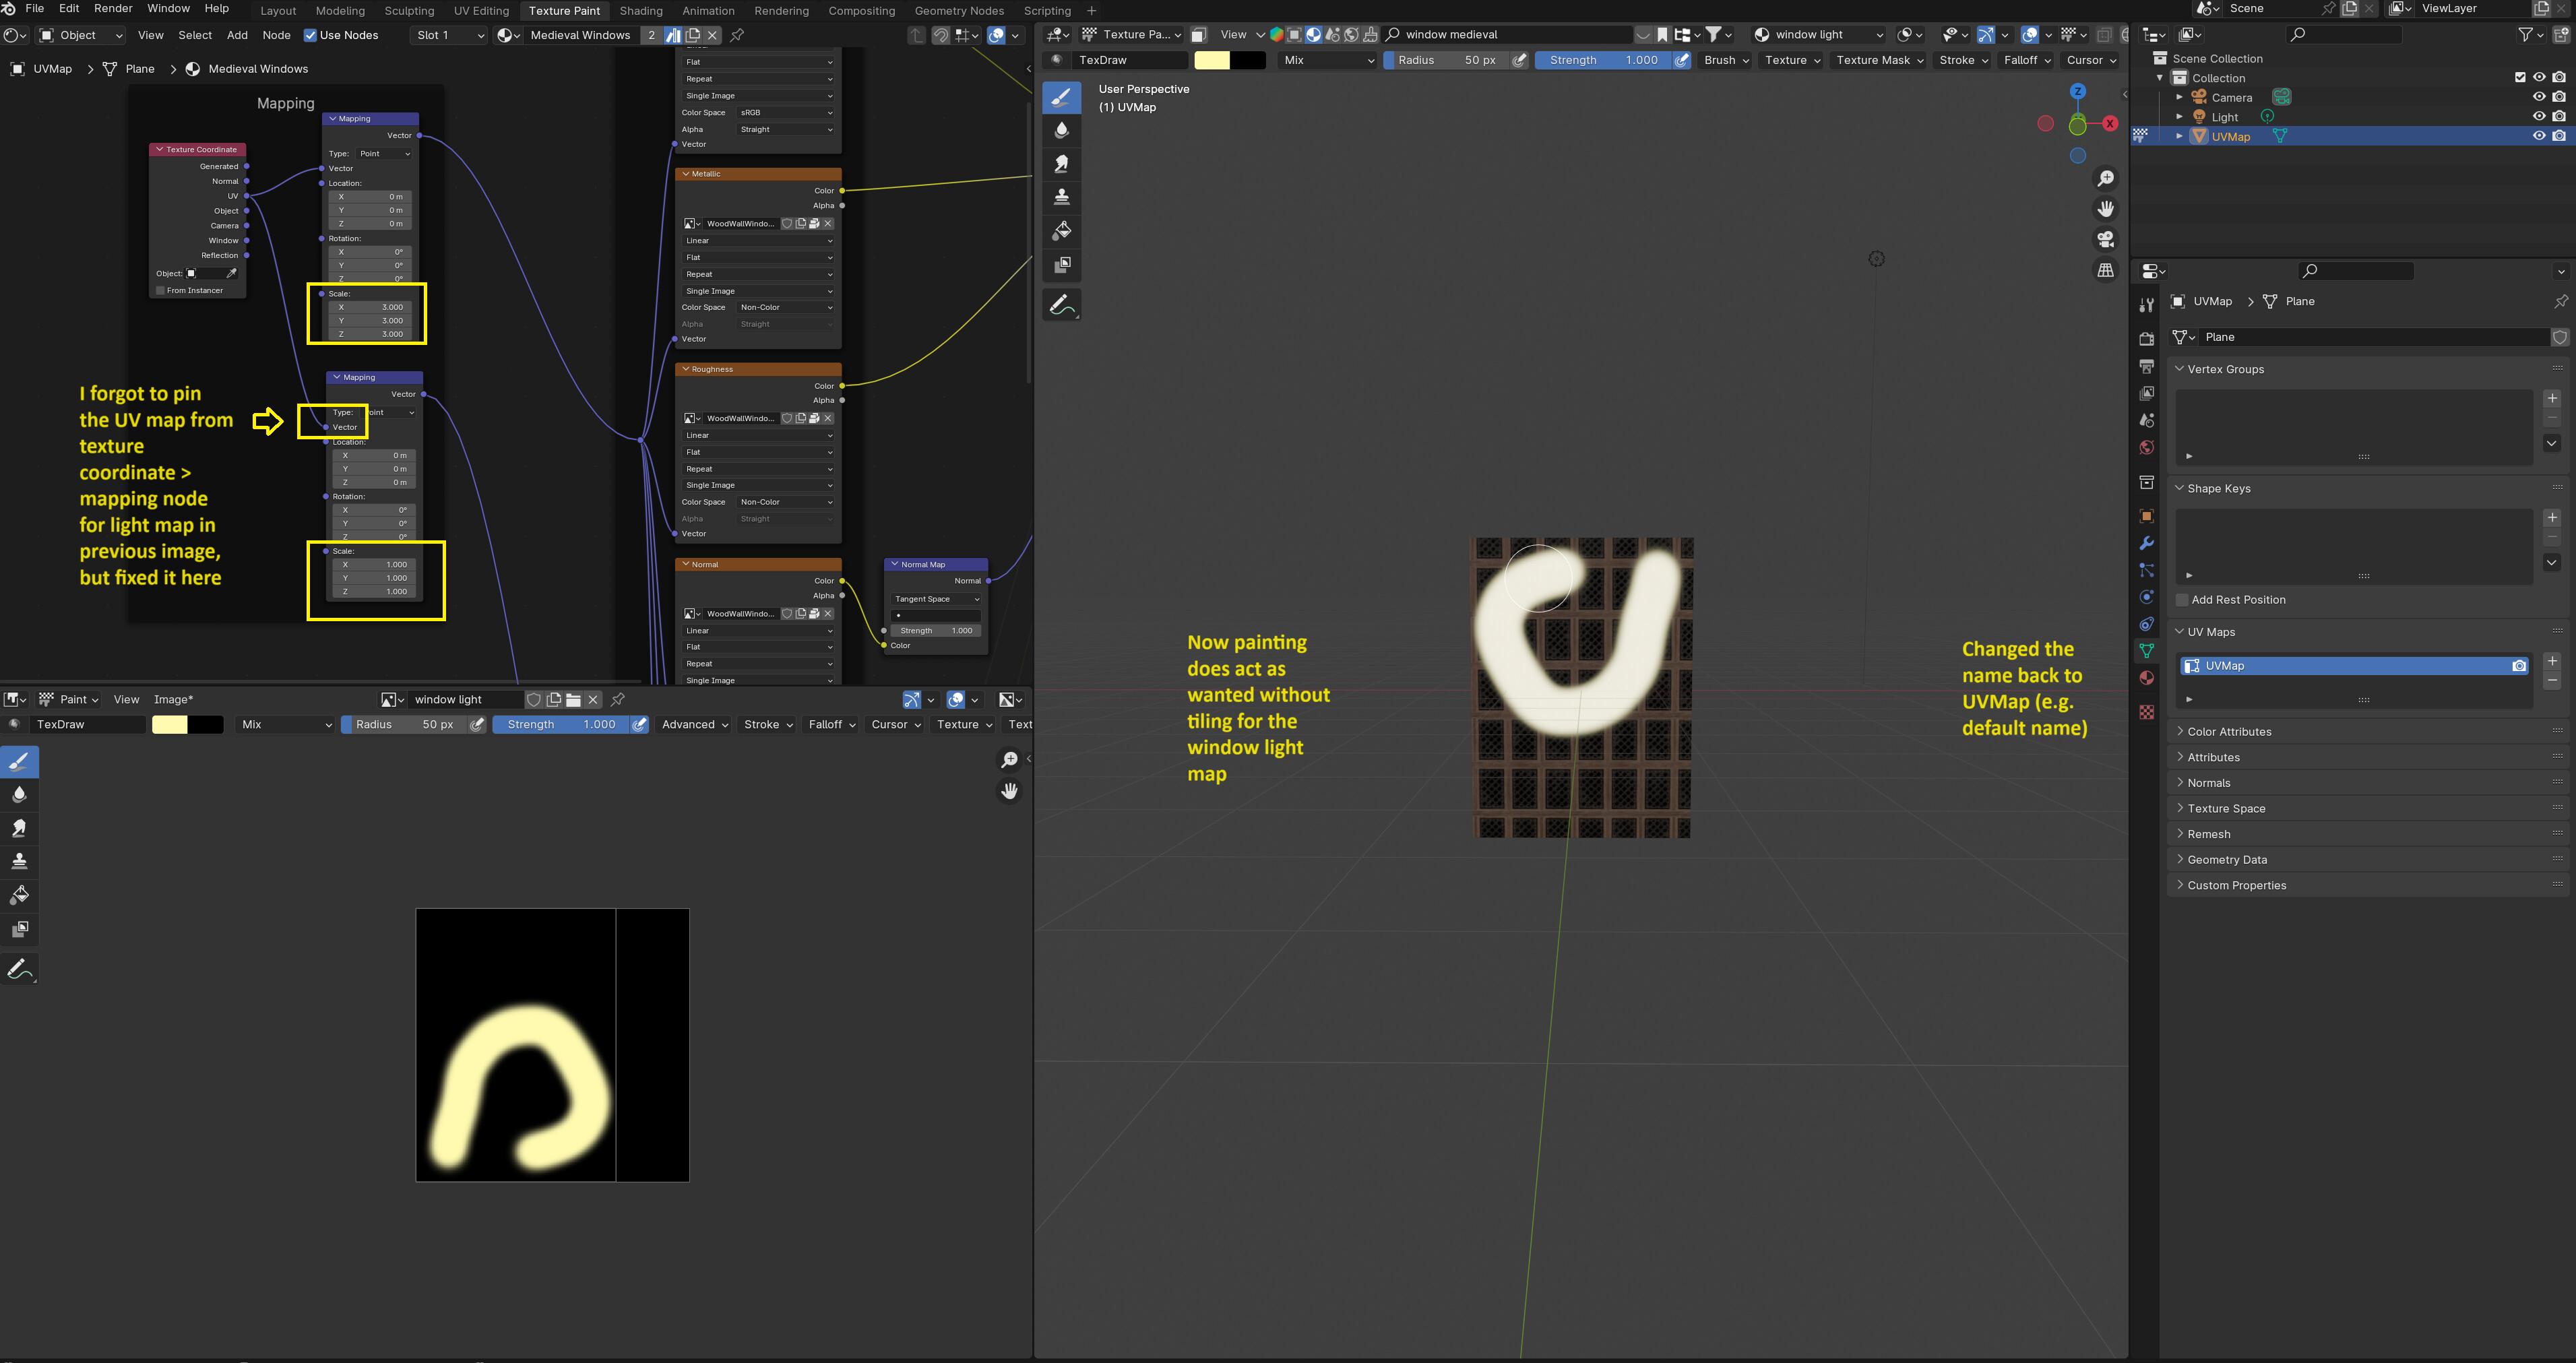
Now I adapted the window material back to use a single UV map with our good old texture coordinate node. I now use 2 different mapping nodes, first one scaled x3 for the color so we get more window segments, the second one with scale set to normal so the light map doesnt tile. Notice I forgot to pin the Texture Coordinate UV Map pin on the second mapping node, but I fixed it in the next image.

Now if I start painting the light map it works as expected:

It was a long journey and at the start I wasnt really sure if I should bother fixing it, but Im glad I went for it as I learned a lot! What I want to do is lookup how rendering multiple UV maps would work, im sure theres got to be a way. I will try to do so tomorrow and add another comment here.

@zeRgenTa & @NP5 thank you both for taking the time and adding your input! I should have added more information on the UV maps from the get go, but you both made good points with the information at hand!

5 Likes

You can rotate the UV-map island to get the same orientation as in the window.

3 Likes

Thanks for the full explanation of how it all happened.
Along with the solution too. As I was reading it I thought use two mapping nodes, then that was what you did!

2 Likes

Thanks!

Was a bit nervous at times, but Im glad I thought it through and managed to come to the same conclusion as you! Also, I think this shows that the GameDev Community and Courses are really teaching. I did not know a thing about blender when I started and now after 3 courses Im more or less able to work on problems that occur somewhat independently, thank you so much for that!

I did however return to the 2 UV Map approach momentarily, can you believe that :smiley:
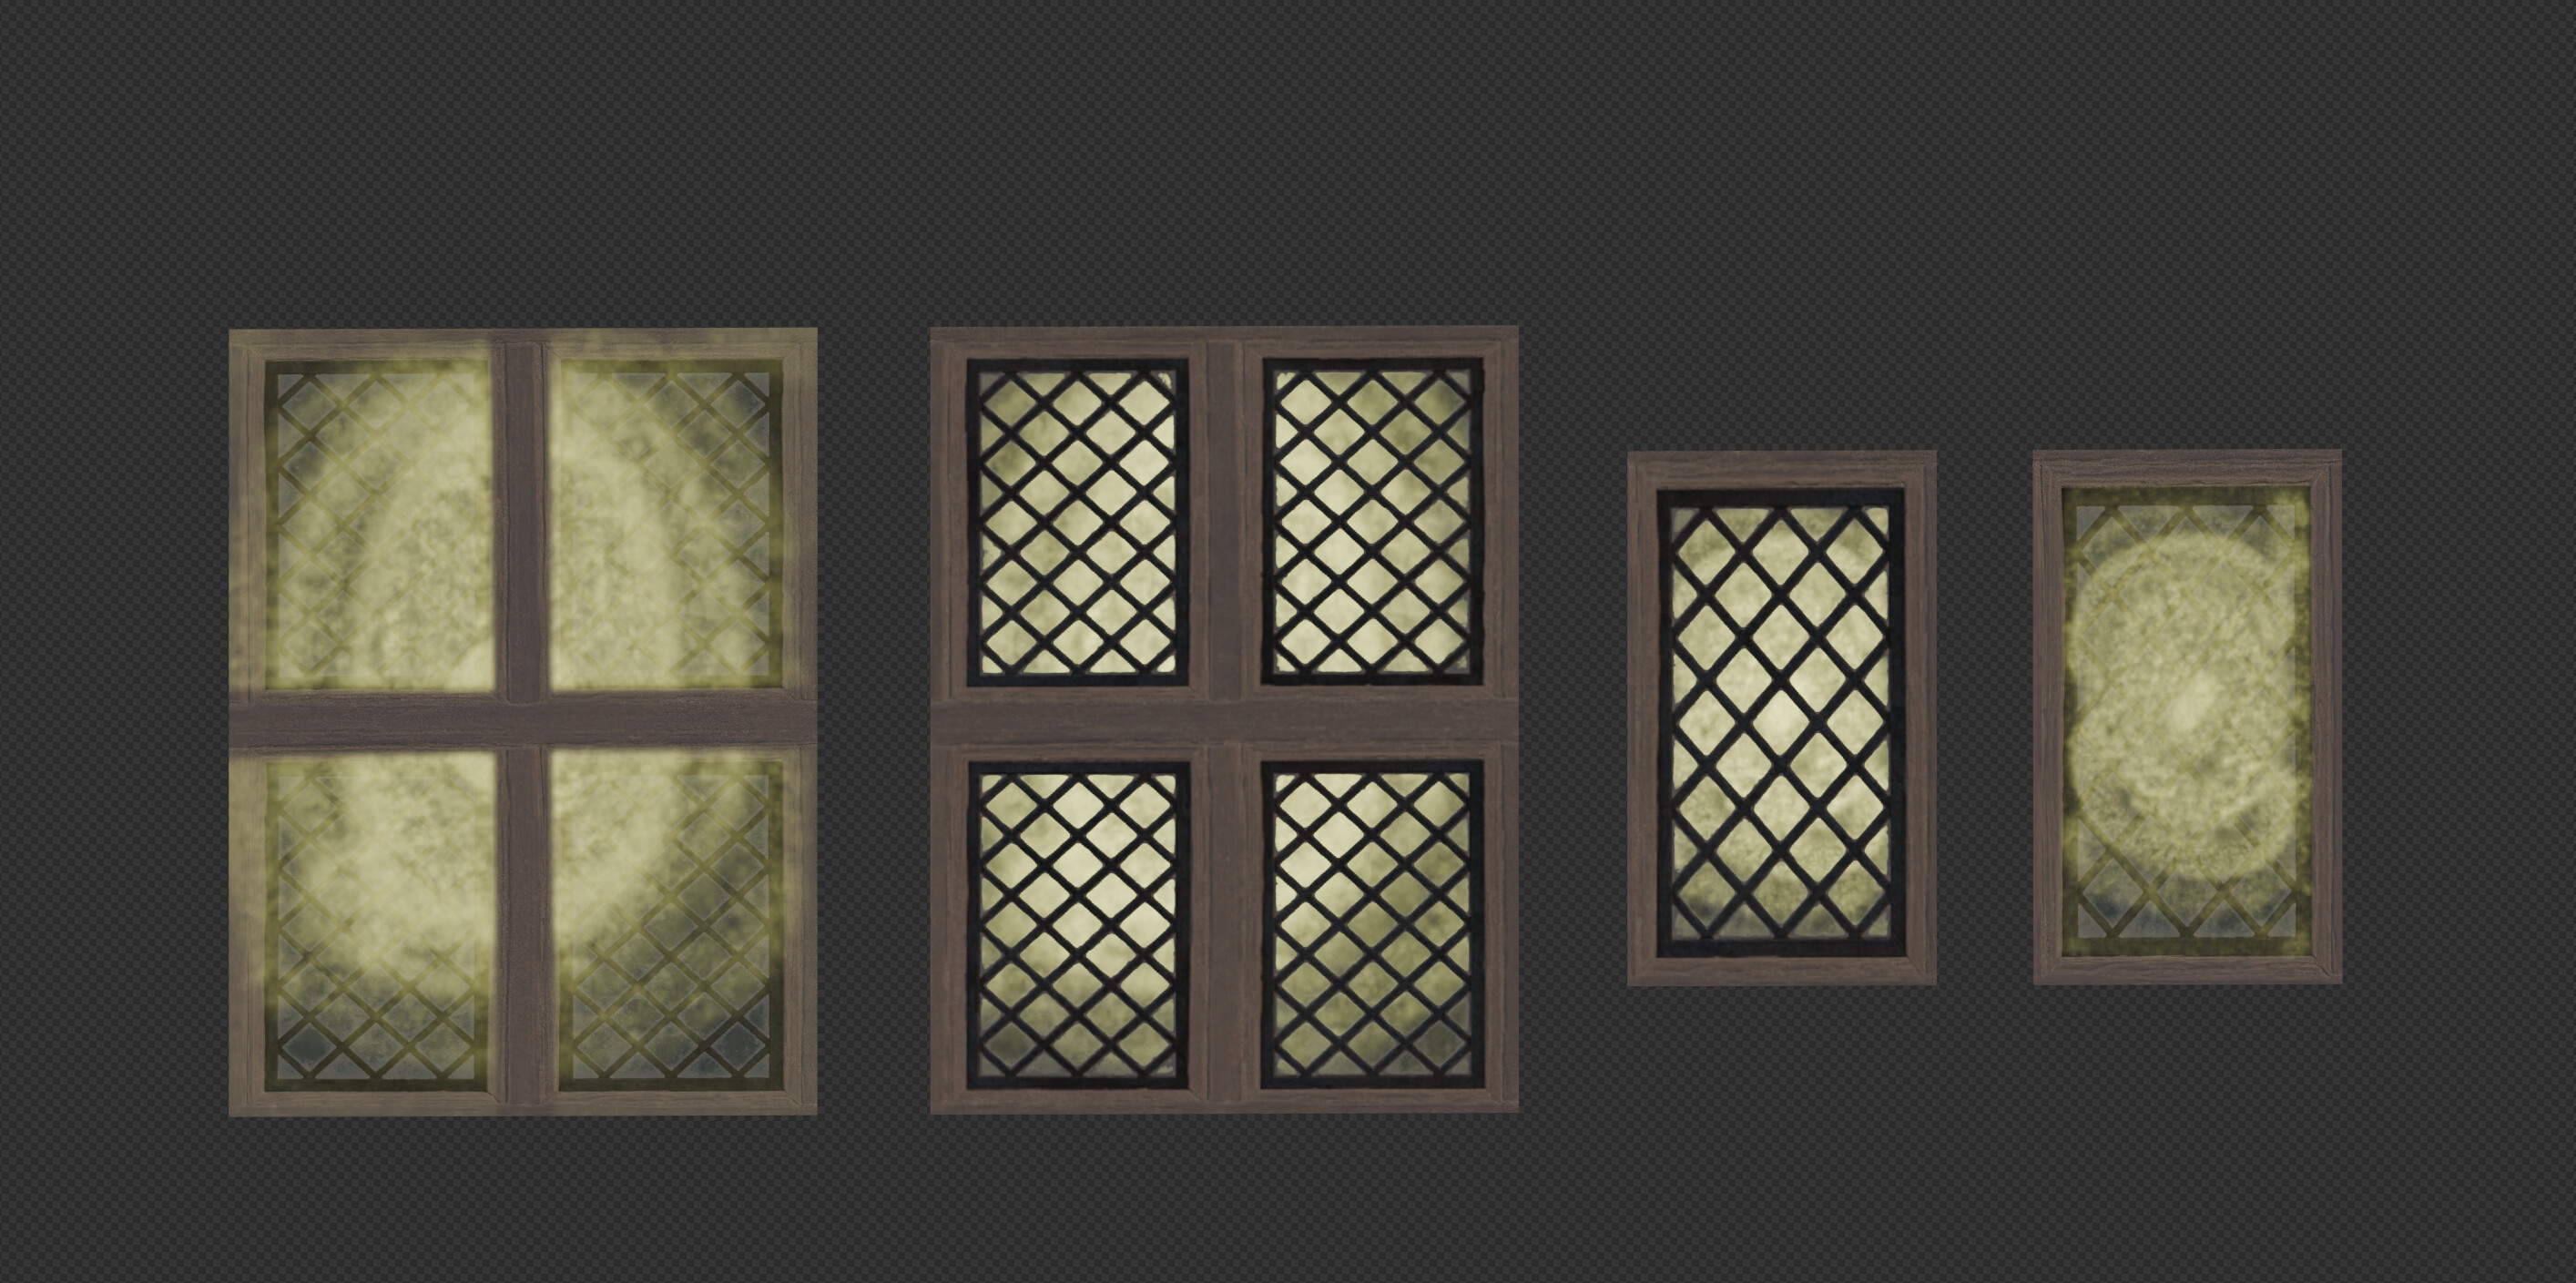
. This is how I want my windows to look like, the small and big window:

I personally think the texture isnt cut out that properly with the left and right side showing half of a window. Its kind of tricky to position the UV Maps of the small and big window so they both look the way I wanted them to look (as seen in the image) without overlapping. However, if I have the faces overlap on the UV Map as seen here, texture painting (for the light) will be out of the question, because if I paint on one window, it follows that I will also paint on the other window as they share the same texture coordinates.

So I went back to 2 UV maps, preparing the light UV Map like this (similar like I did in my previous answer):

At this point I thought, “why not make my own textures that work properly with a single UV Map”. So I duplicated the big and small window unwrapped them just the same as the light uv map seen in the image above and baked the textures from the original windows to my own window material. As I did so, I noticed I could use the glassmask texture to mask the window light, so it only shows light through the glass parts of my windows, After baking and playing around with the glassmask texture, this is how I ended up:

The material is setup like this:

I think the comparision really shows it drasticly improved. Especially since I can now play around with the color ramp too:

I wanted to add this comment on this thread so others that may come across the same problem may find a clue or two here to lead them to their own optimal solution.

Also as I said at the beginning, being able to transfer things ive learned in this and other courses, as well as the community really shows. Thanks so much!

1 Like

This topic was automatically closed 24 hours after the last reply. New replies are no longer allowed.

Privacy & Terms