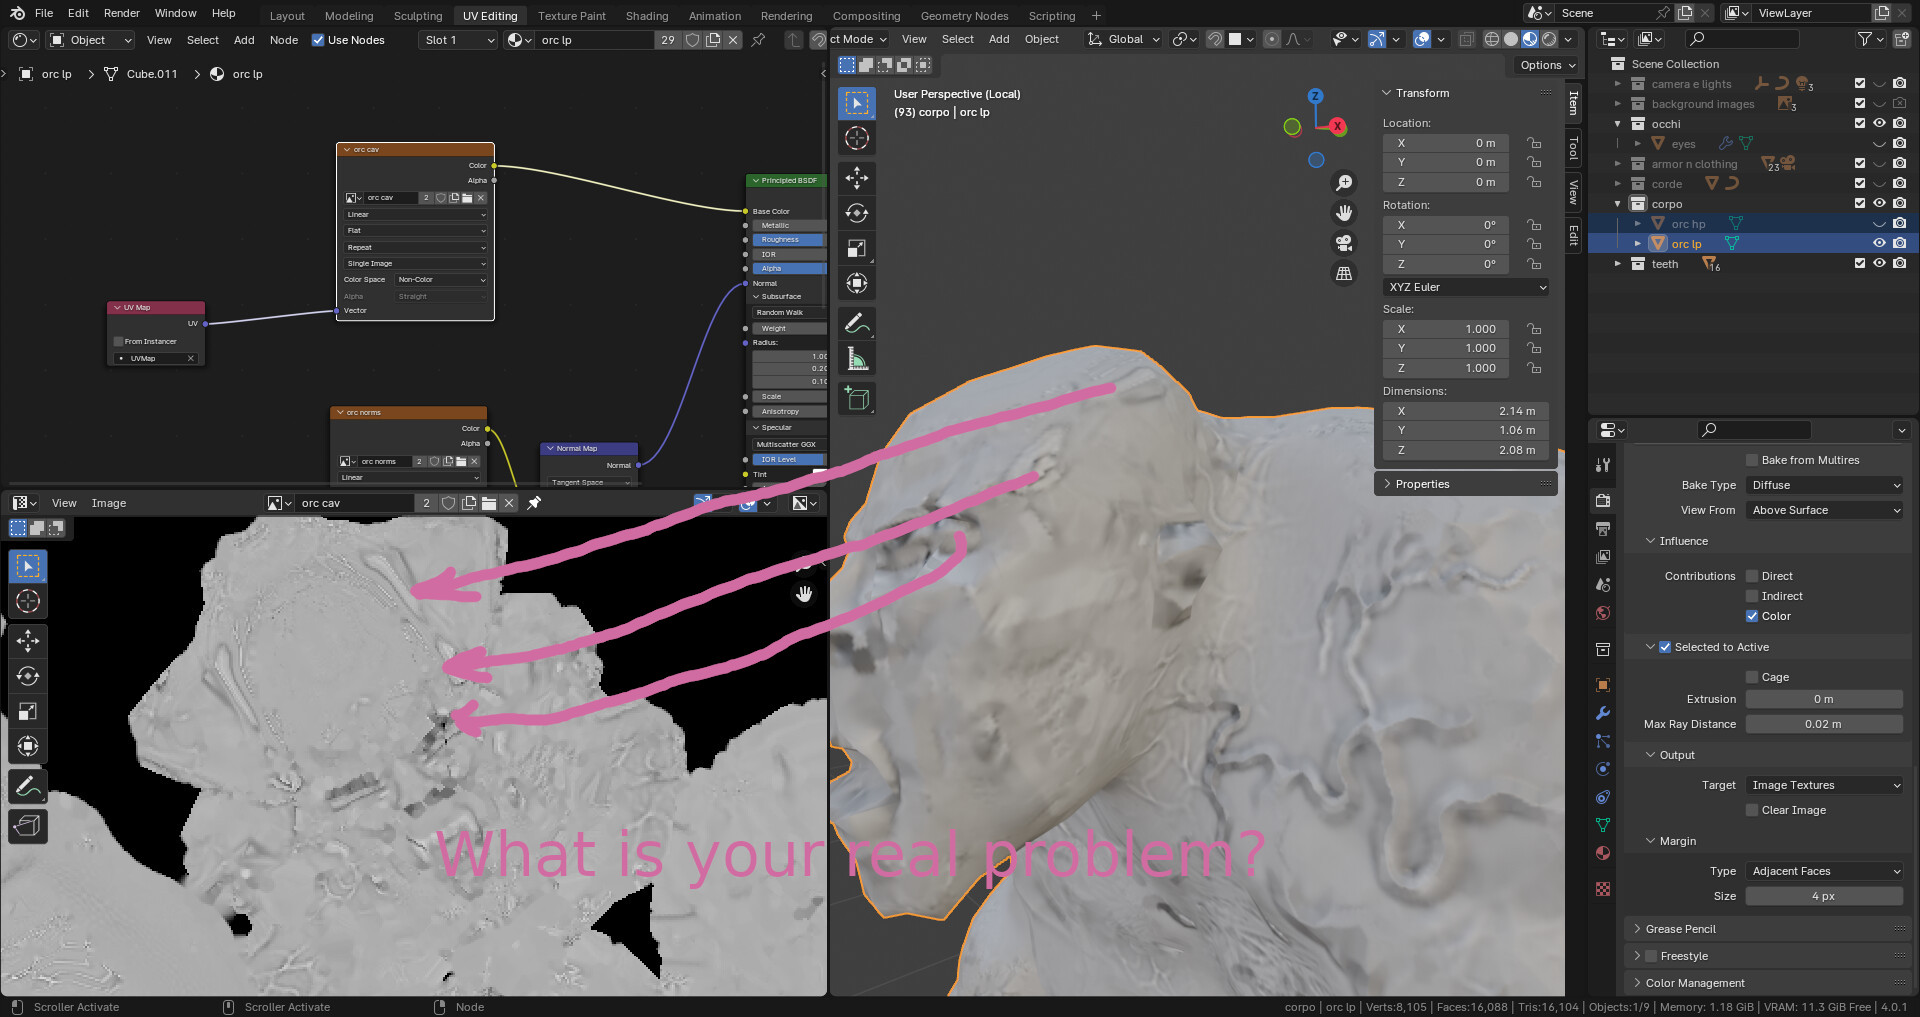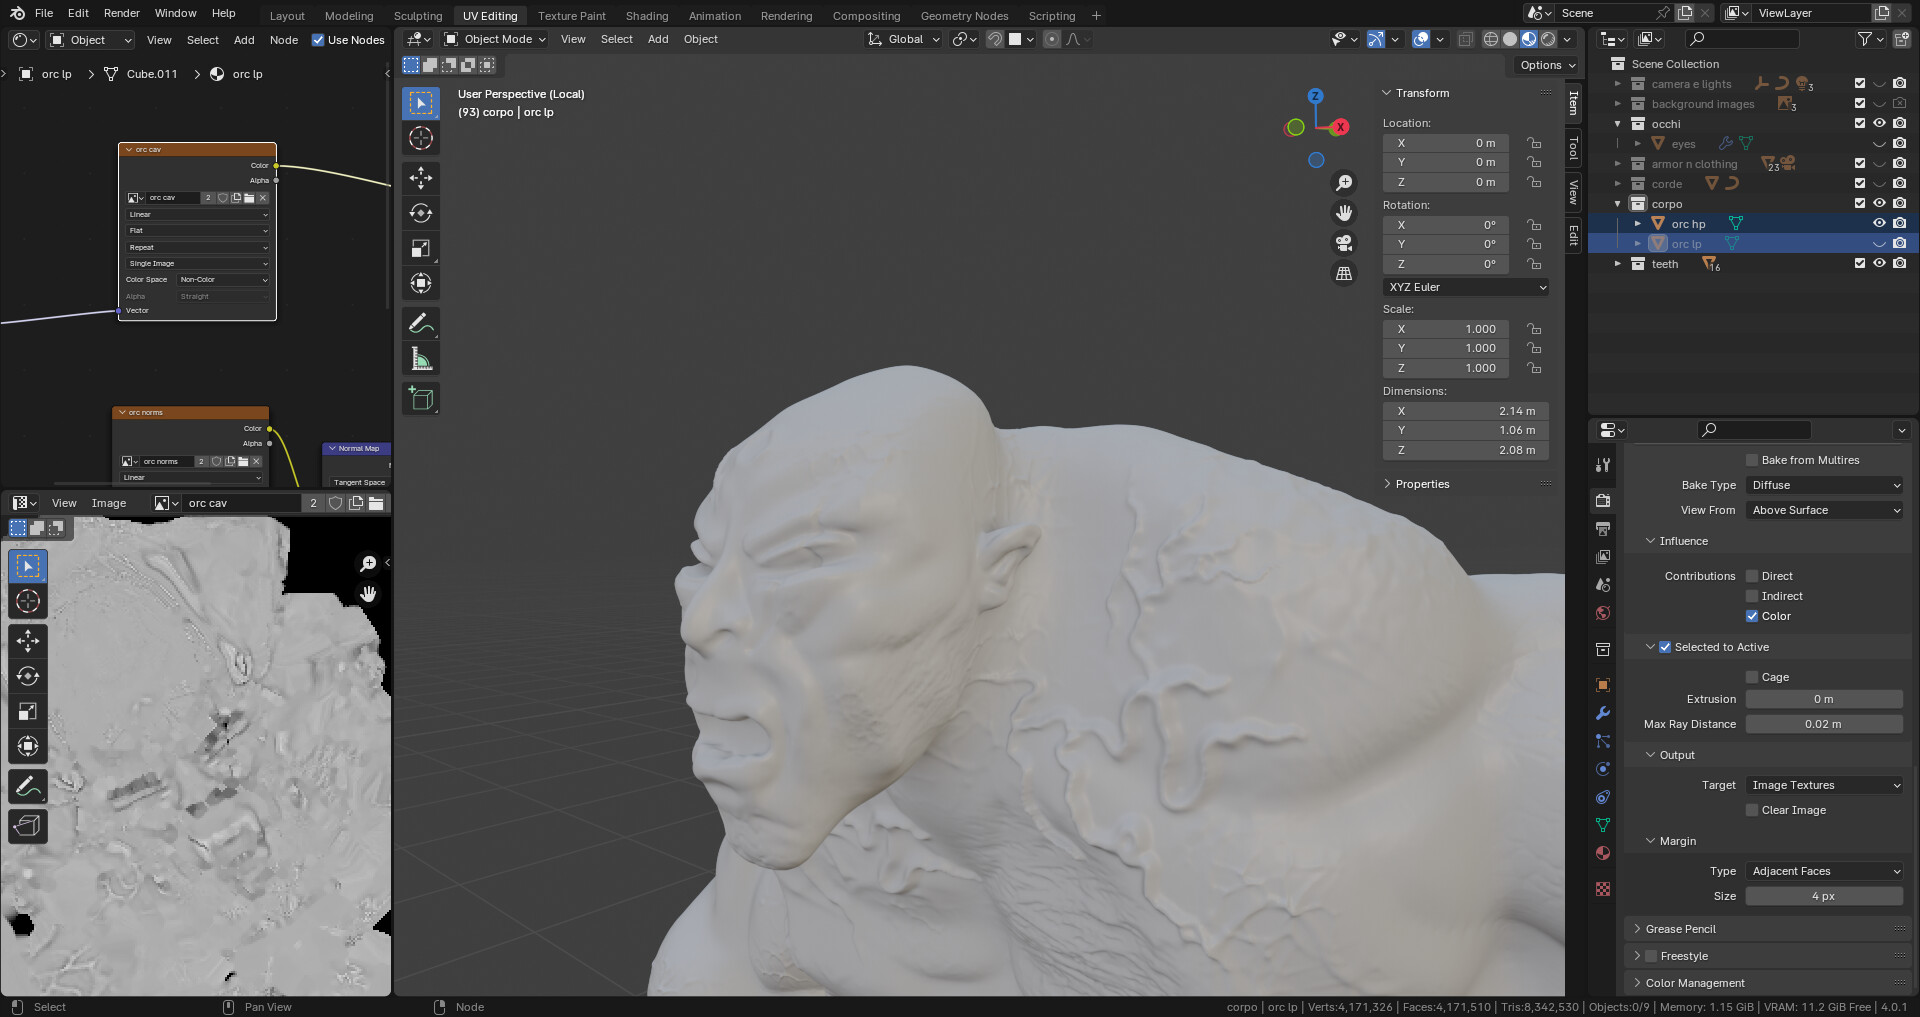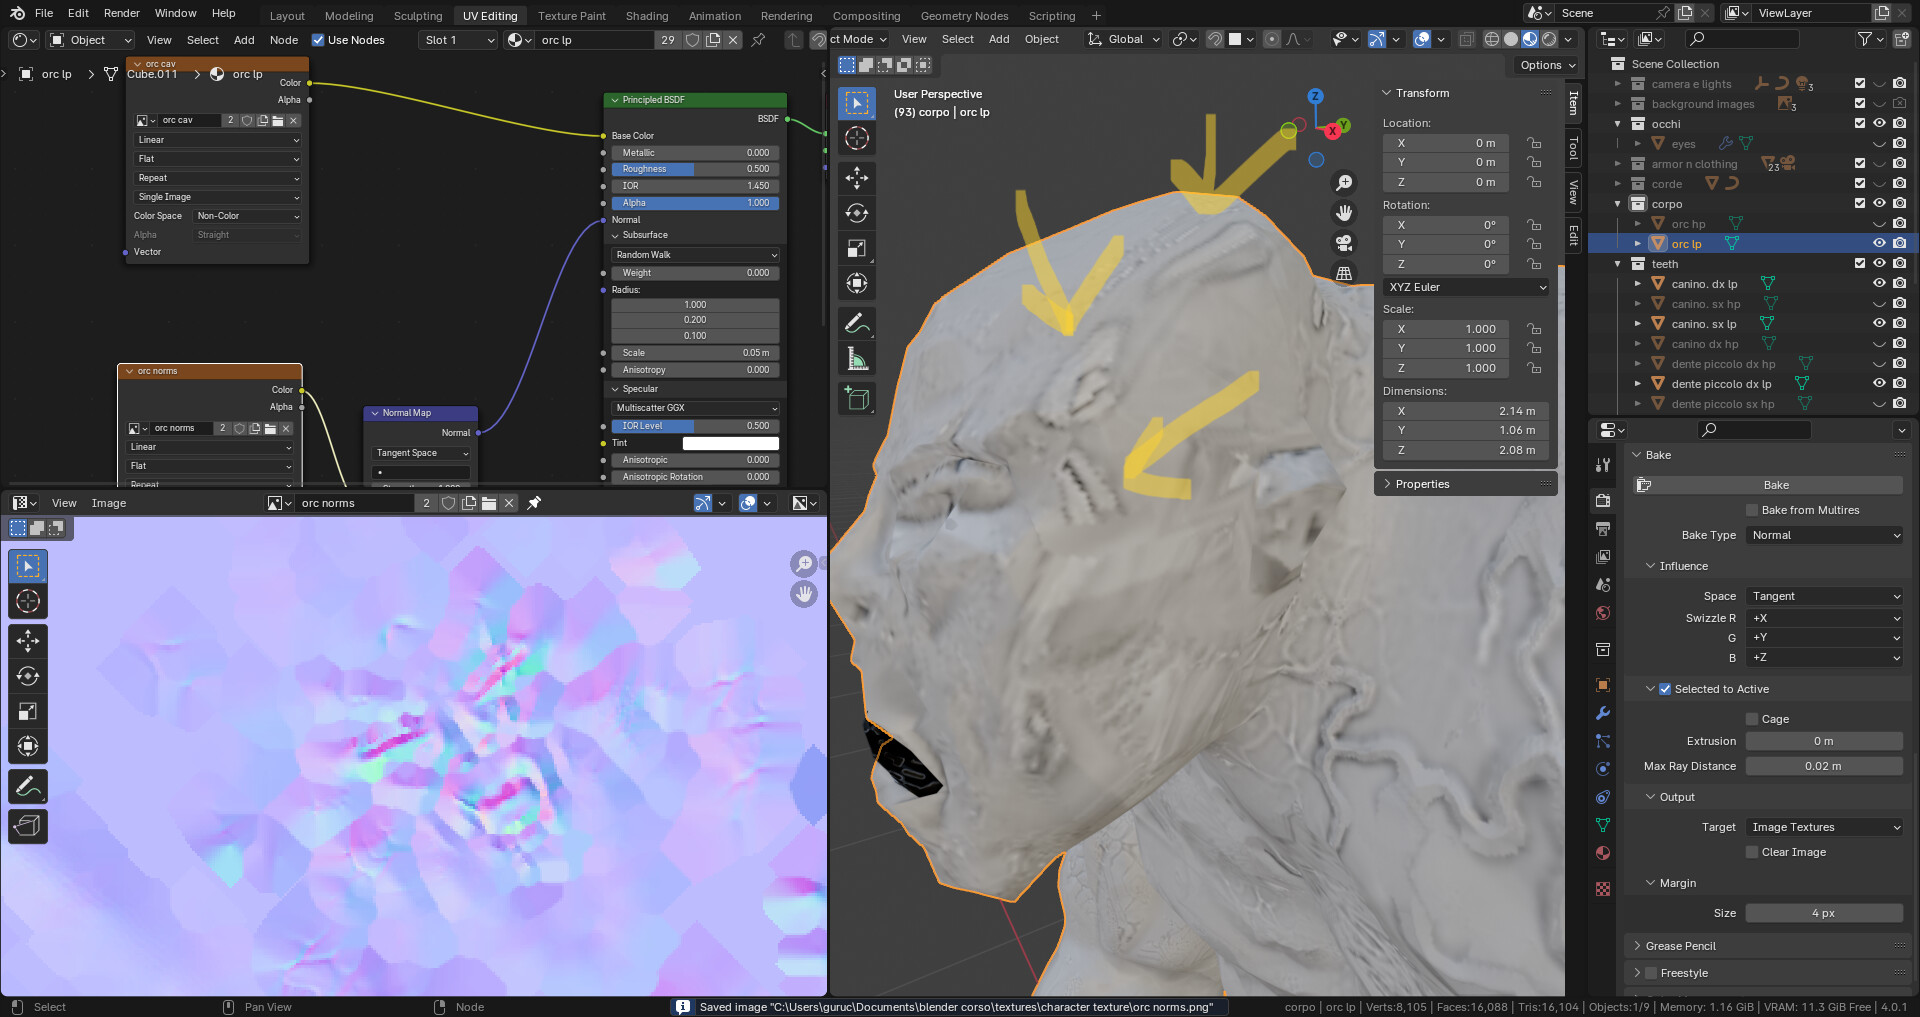
Hello, I don’t know how to get rid off these strange things (I don’t even know how to call them).

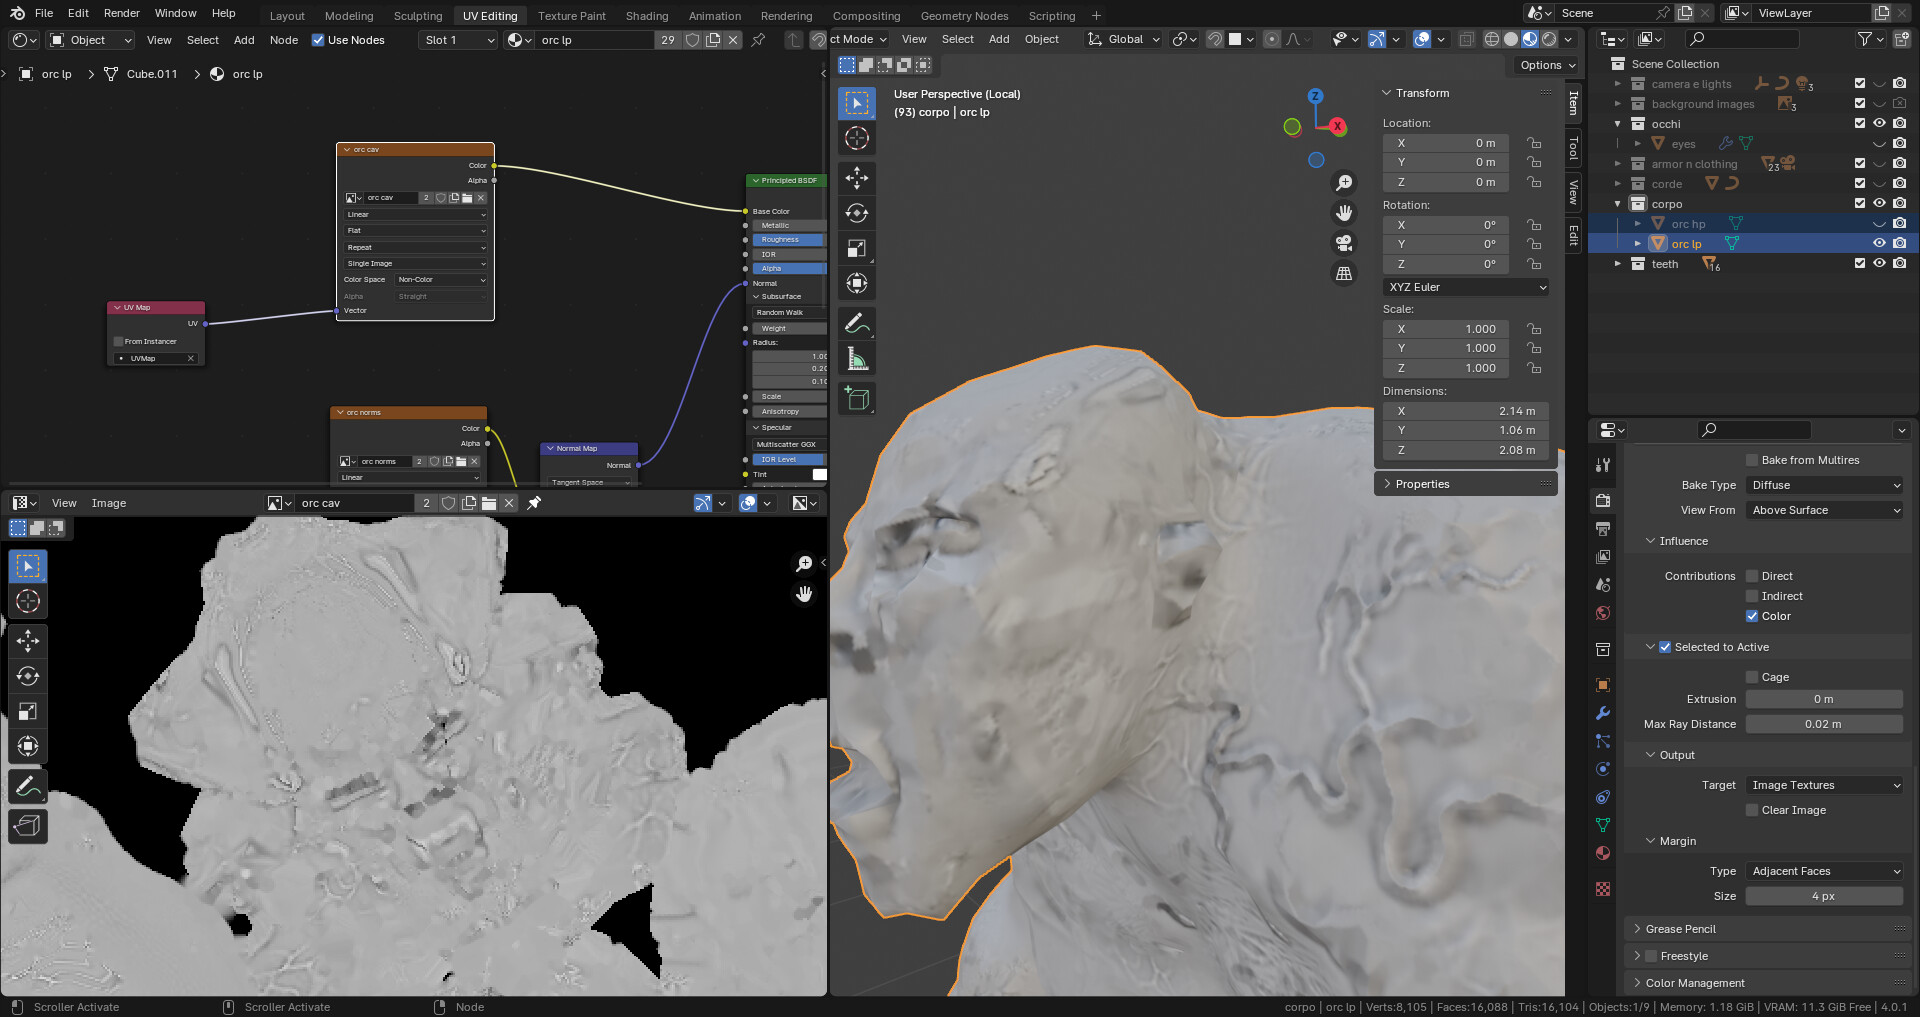
Lesson: Baking the orcs body

Lesson: Baking the orcs body
Probably overlapping UV maps?!
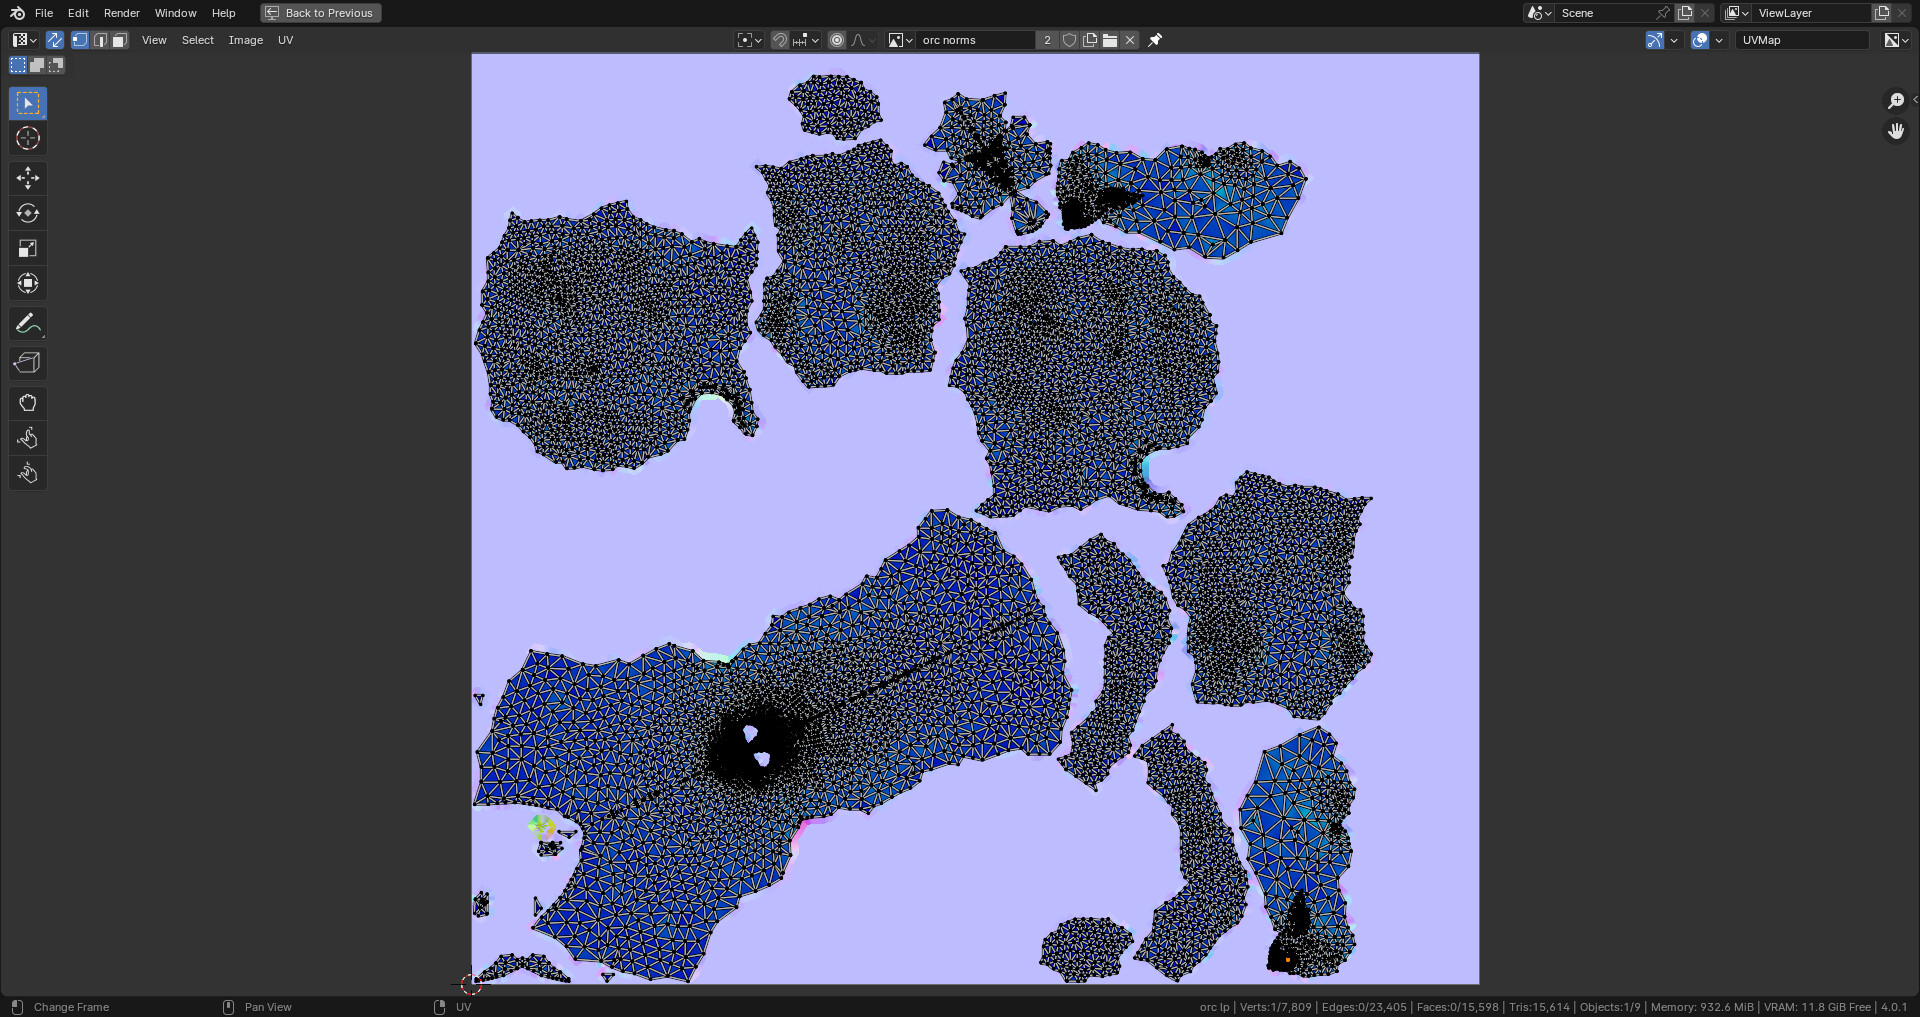
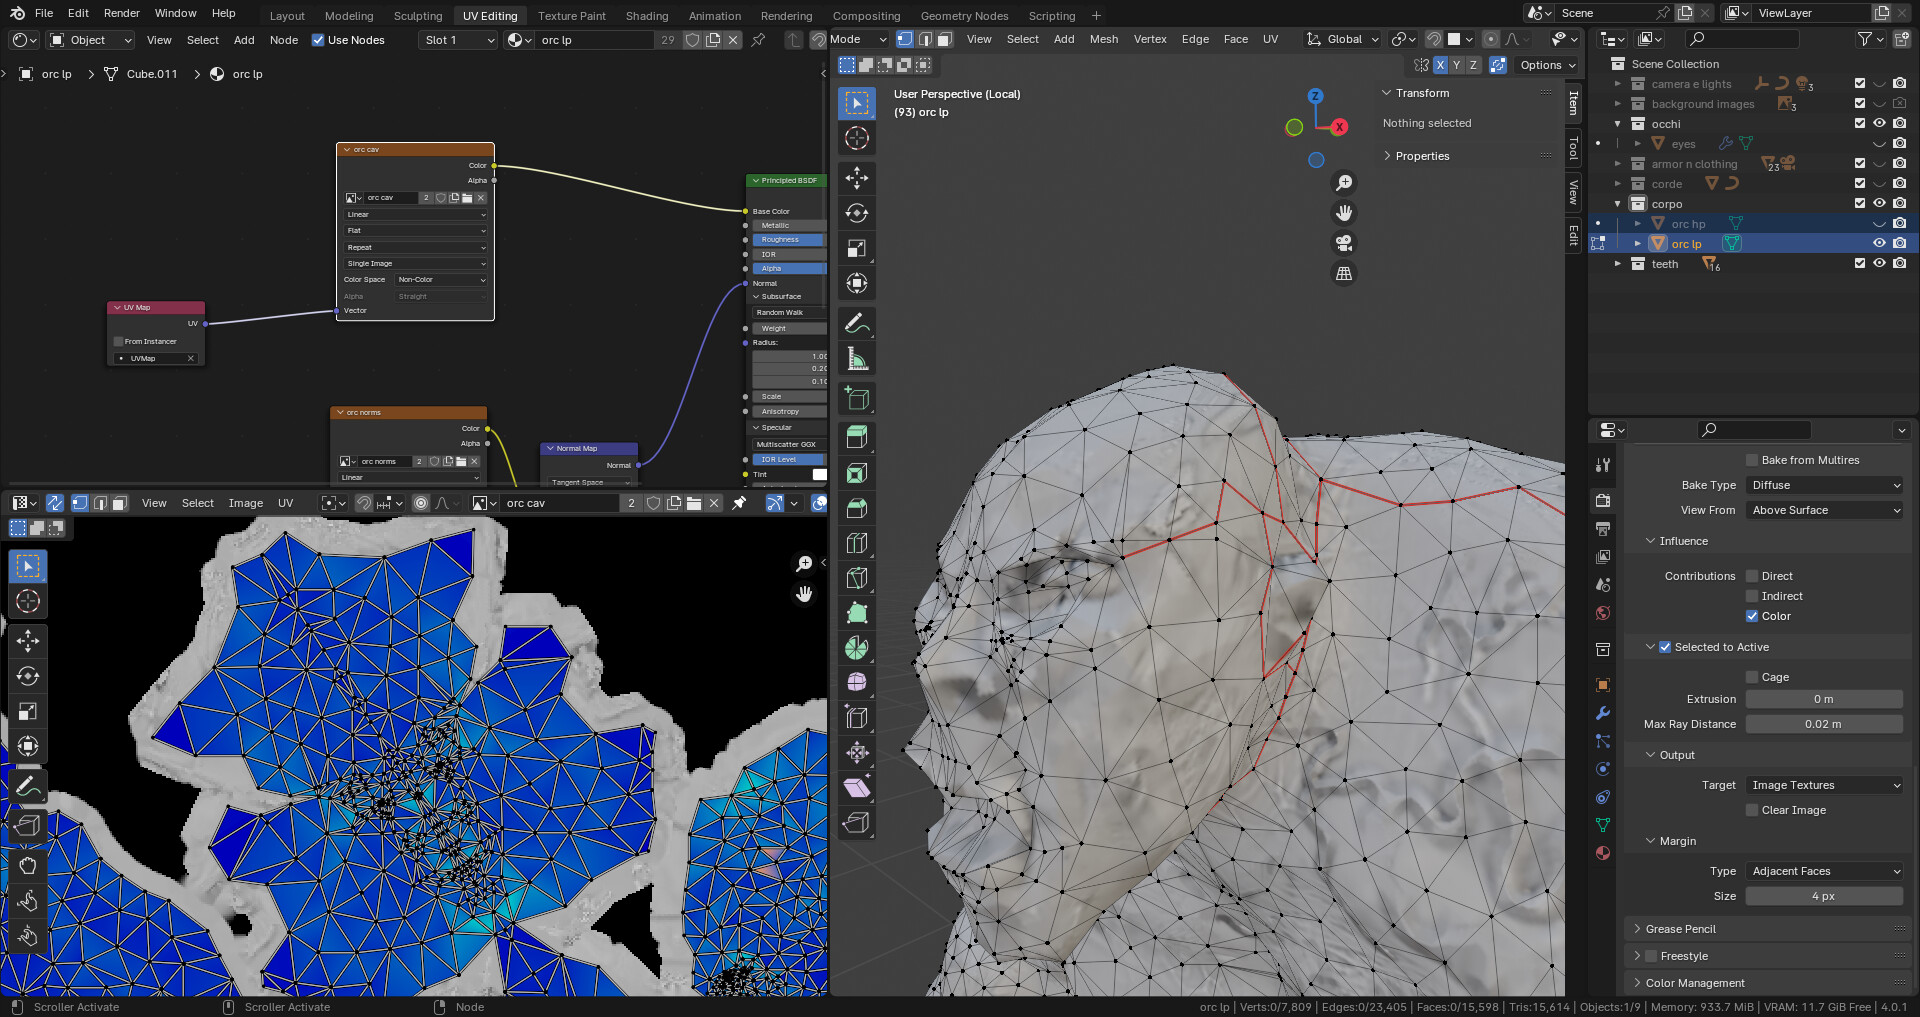
Show UV-Maps
Were both models high and low poly smooth shaded when you baked it?
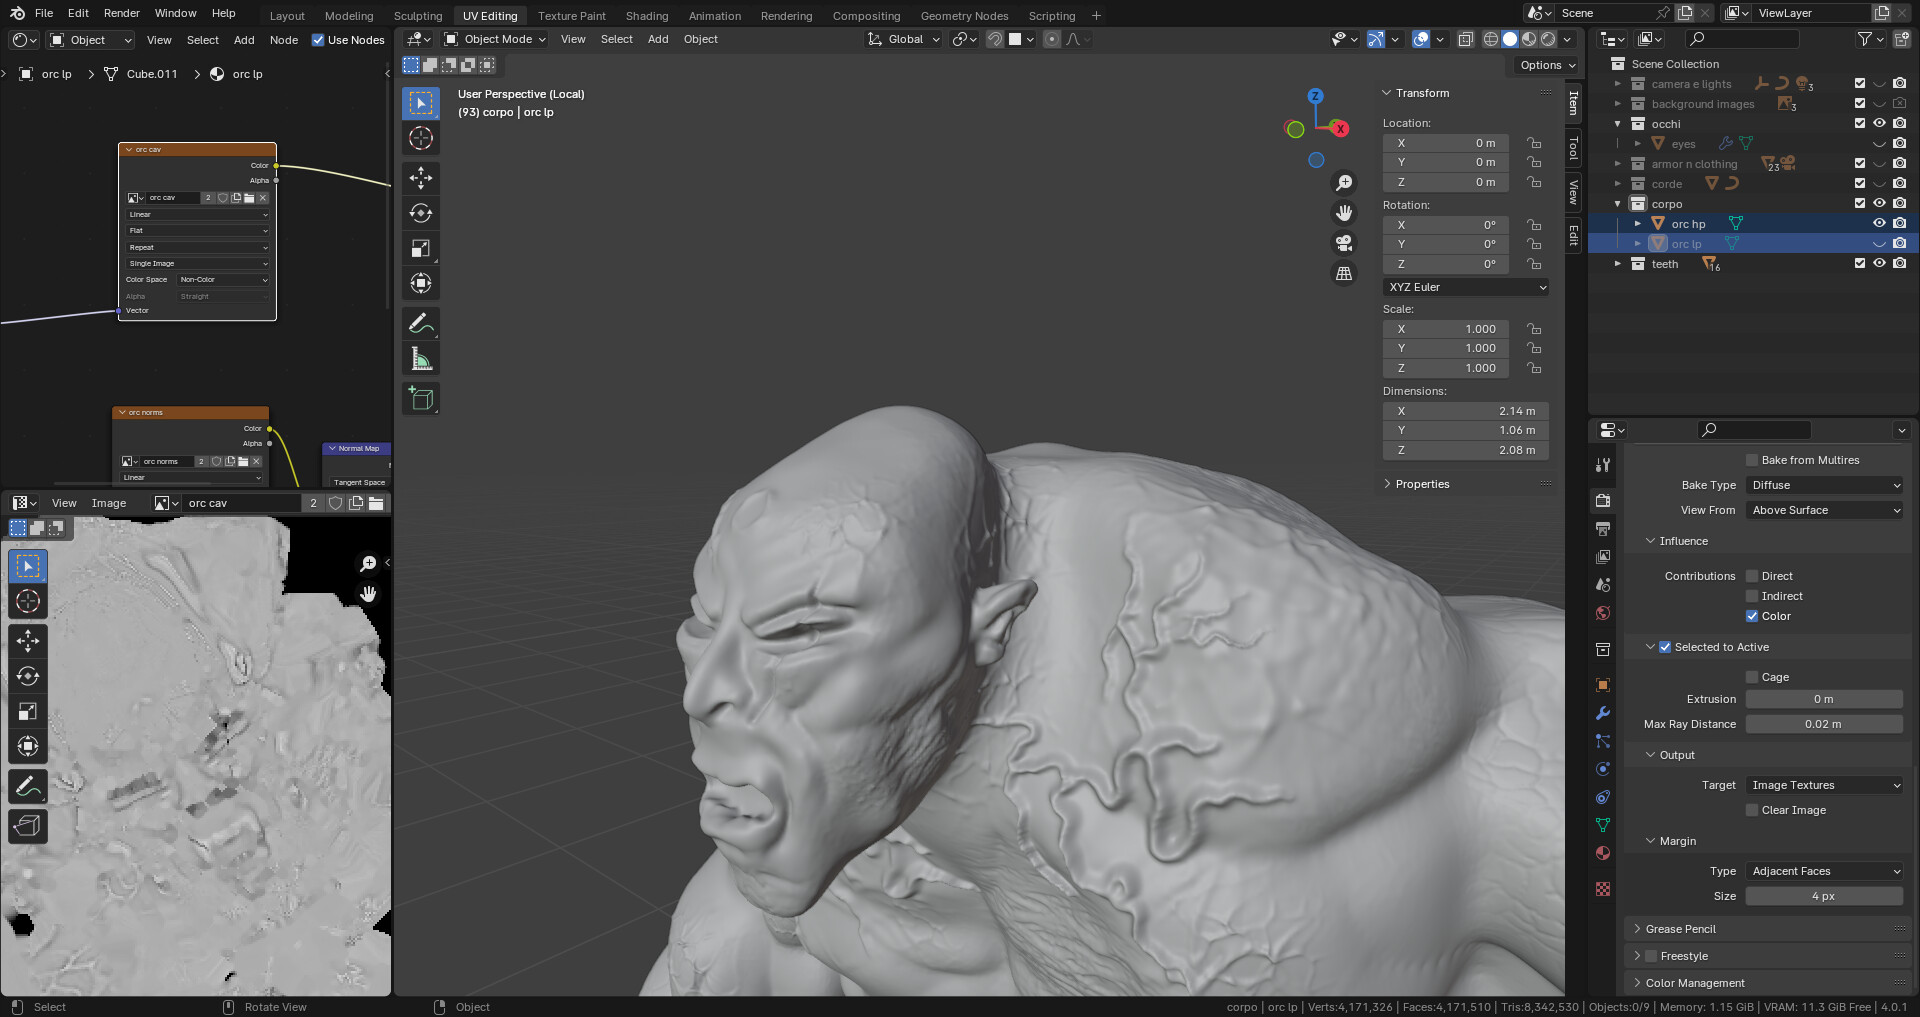
The mesh looks good.
The IMAGE NODE (when baking) must not be connected.
Did you use the correct LP-HP selection order for the baking, see comment NP5
Do the islands have the same scale?
Why is your Orc mesh triangulated?
What I noticed:
Were both models high and low poly smooth shaded when you baked it? yes
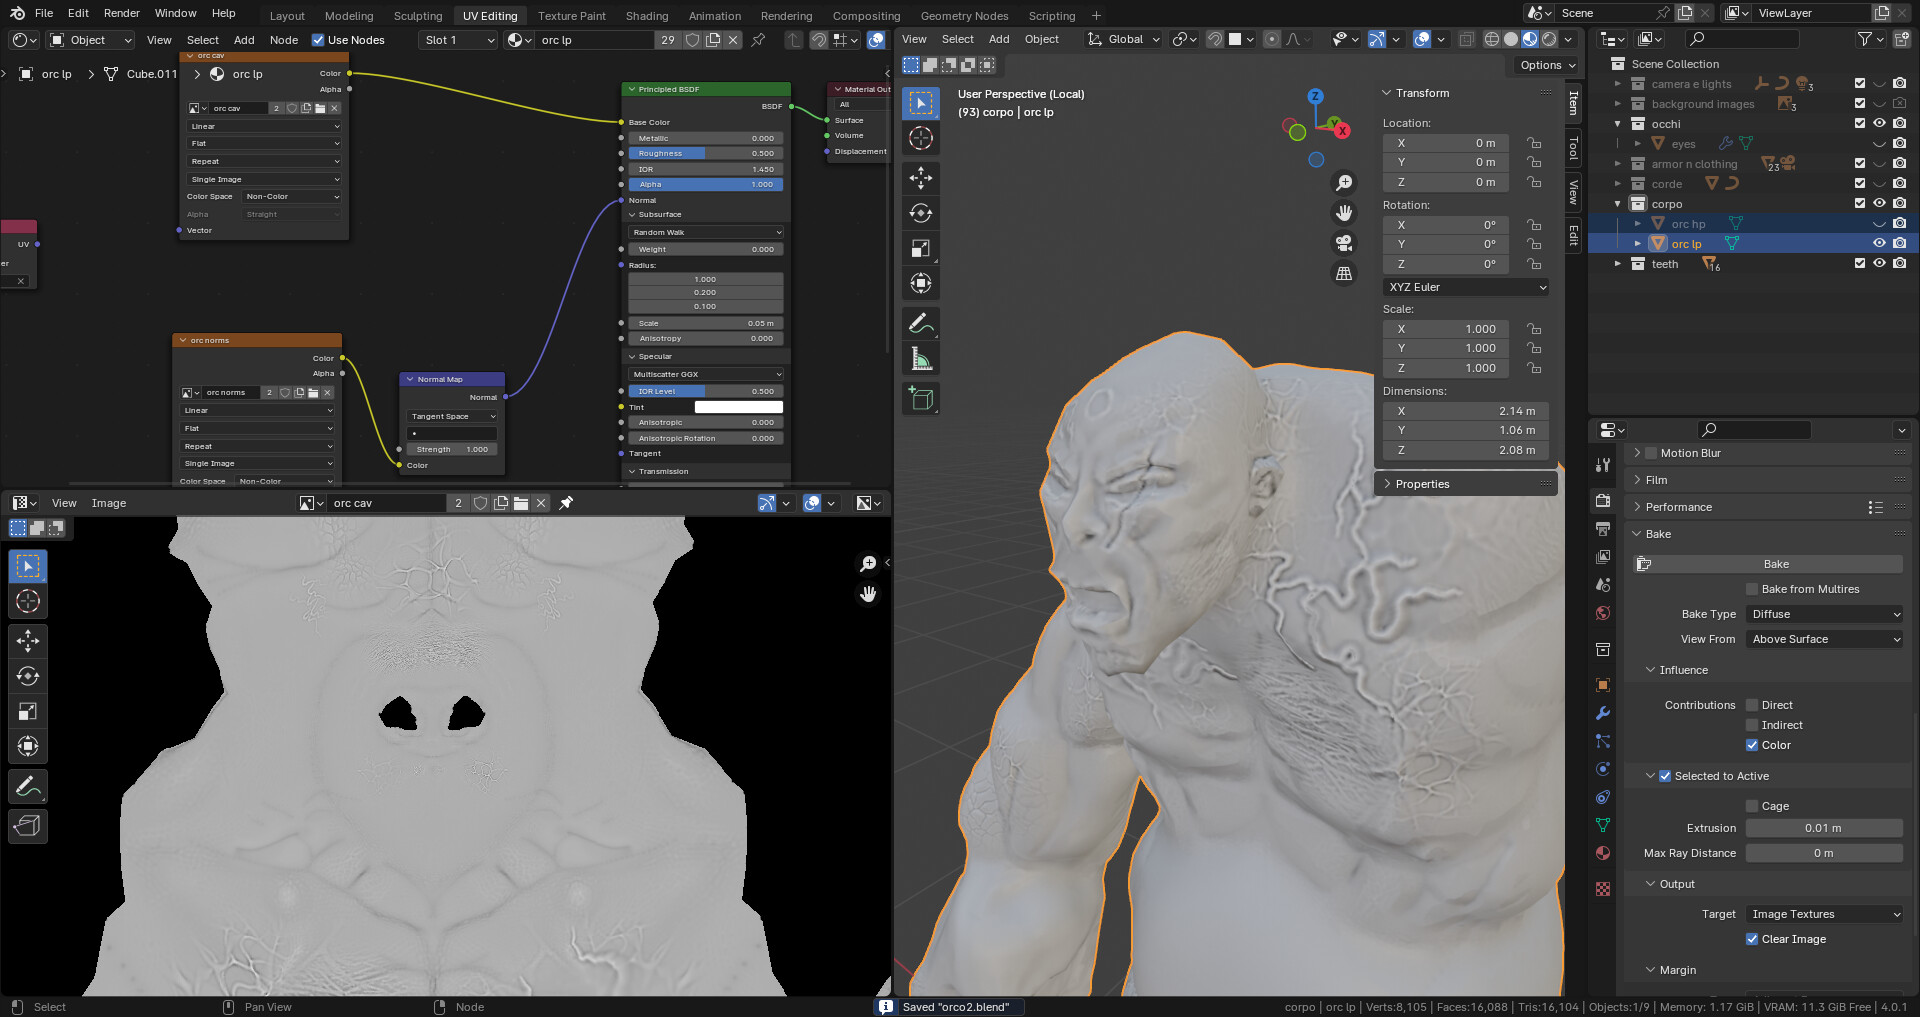
The IMAGE NODE (when baking) must not be connected.: it was not
Did you use the correct LP-HP selection order for the baking: yes
Do the islands have the same scale? I don’t know
Why is your Orc mesh triangulated? I don’t know
I noticed that the problem come from the cavity map
In your first image, the yellow arrows. Can it be that we see the Low and High poly in one view? resulting is strange effects?
Your image node has a vector to get info from the UV-Map. But it isn’t connected.
It is important for all image maps to use the same UV-Map.
I’m sorry, I don’t get what you mean
All images need to use the same UV-MAP.
It can be that Blender uses the default assign UV-Map.
Each default object (cube, sphere), has its own internet uv-map.
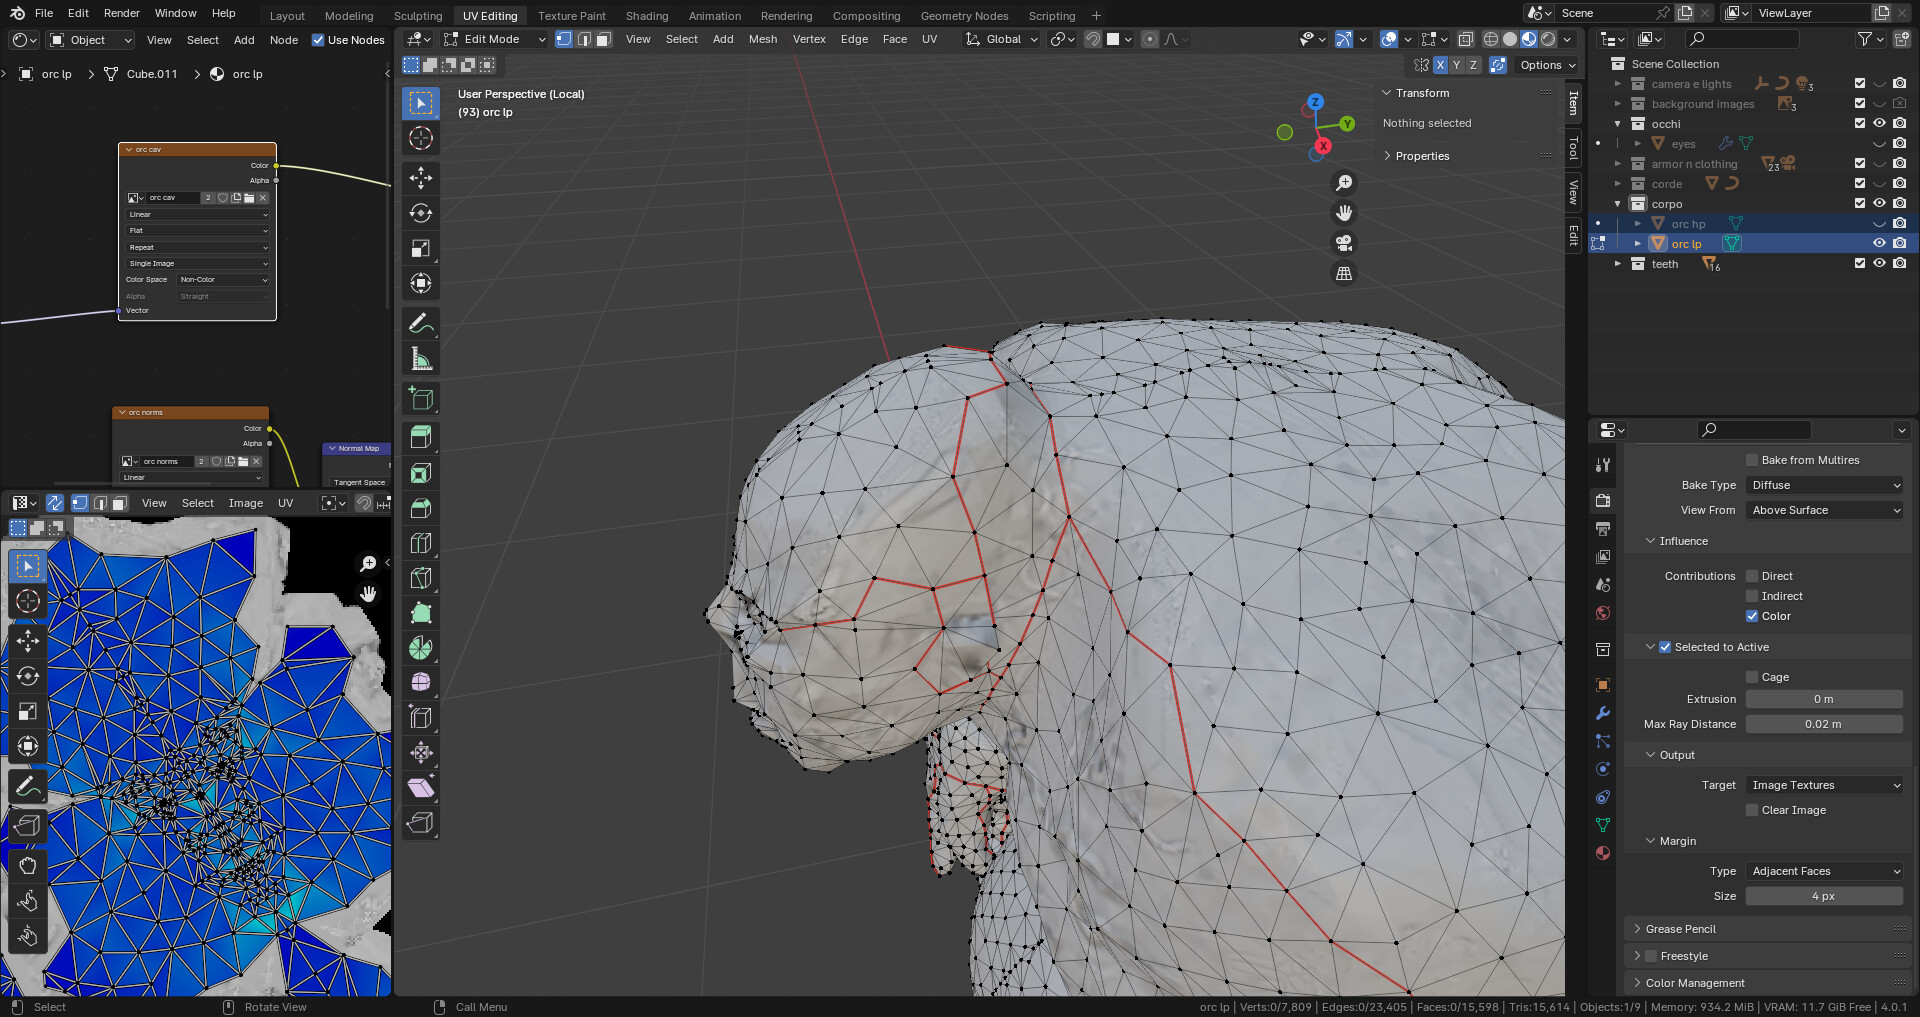
Show the Low Poly model Edit mode so we can see the marked seams.
May help to see what the High Poly actually looks like, so what the marks you highlight are on the original.
As these odd marks appear to be close to the seam, my suspicion is the distance of your margin is overlapping in the UV, this is where there is a very small gap between the rendering parts of the faces.
I would consider joining the seam across the brow such that the top of the head becomes a separate island. This should clear the way for there being room for the margin not to overlapped with other parts of the UV.
Obviously this means making a new unwrap and bake. Do it in a separate copy of your file and see if it works.
Hello, I tried but nothing changed
That is great.
The weird thing is that is standard advice, on here many times, but the problem looked completely different to the usual reason for explaining to use some Extrusion, and start with zero Ray distance.