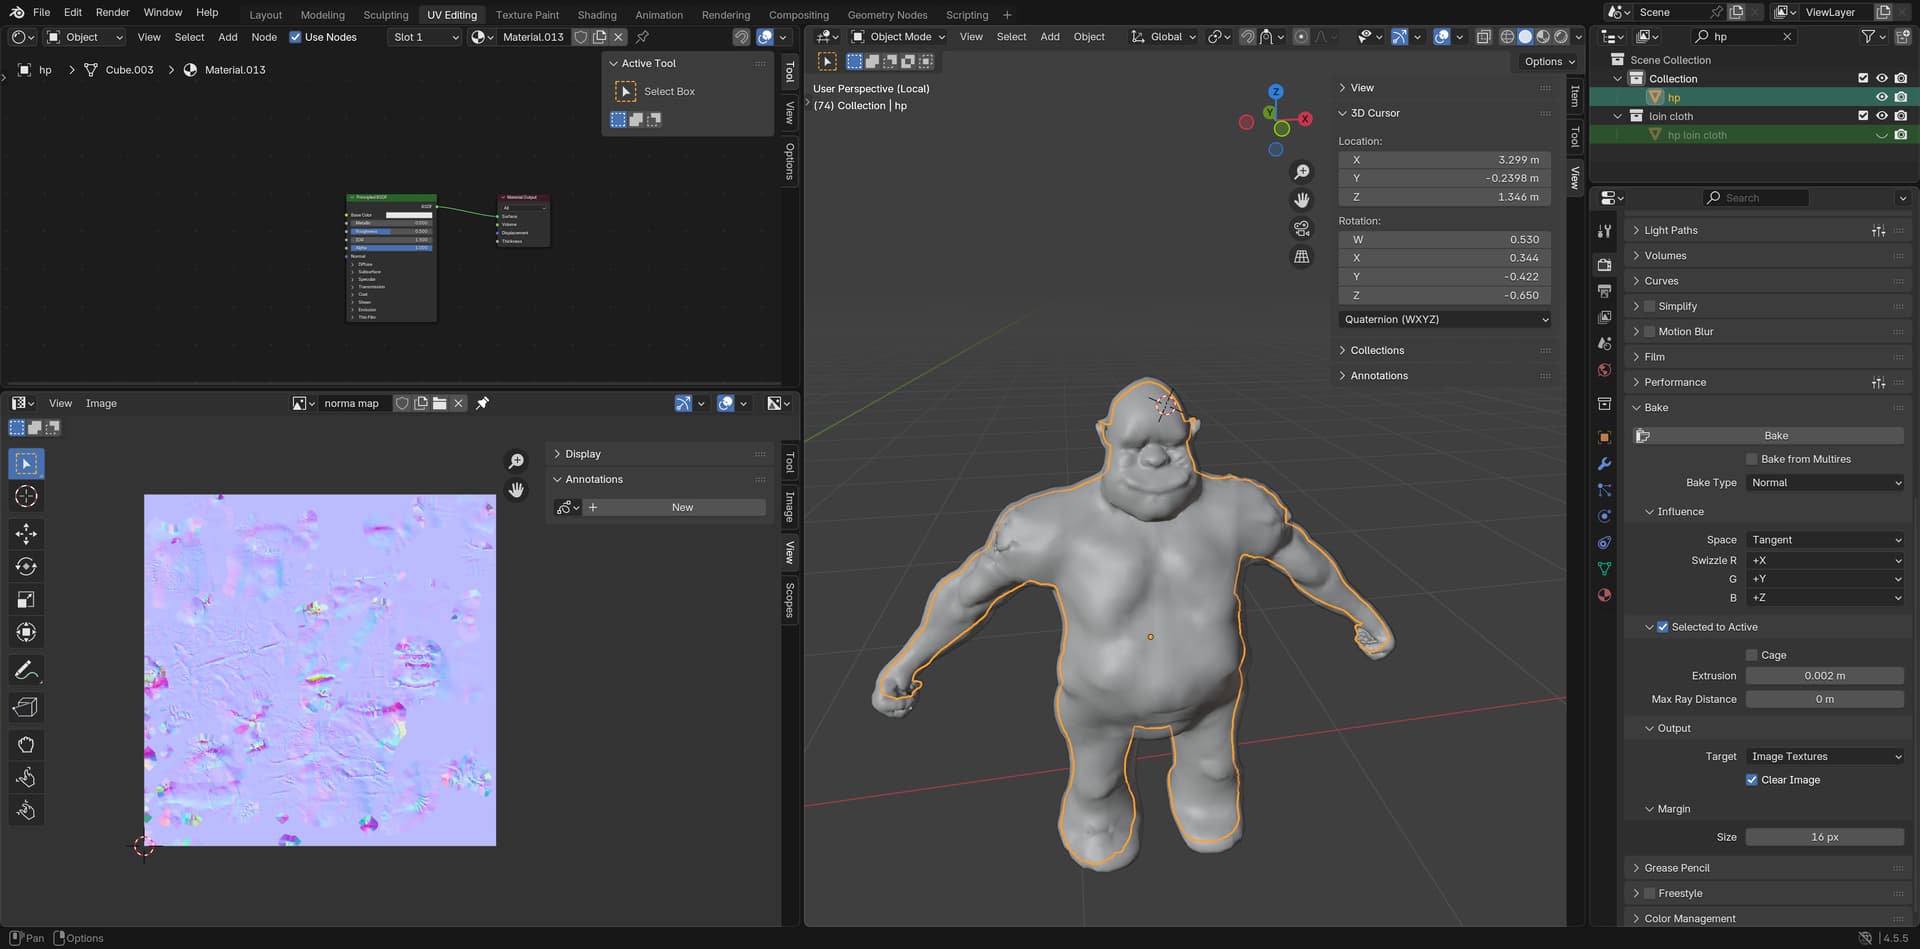
Hi guys, I;m struggling with the baking section . I have changed the extrusion value multiple times and I don’t seem to get a clear bake. I tried changing it to a high max ray distance and low extrusion value and it got worse. Do I need to align my high poly model a little bit more?Currently, i have the extrusion value at 0.02 and the max ray distance at 0.018 . Also, what is the purpose of the max ray distance and extrusion value, because I m not really sure what they are used for?
3 Likes
You use only one of them not both at the same time.
3 Likes
Max ray distance and extrusion value are important settings in Blender for baking normal maps, especially in retopology. The max ray distance determines how far the baking process can “see” into the high-poly mesh, while the extrusion value controls how much the low-poly mesh is inflated to capture details from the high-poly mesh accurately.
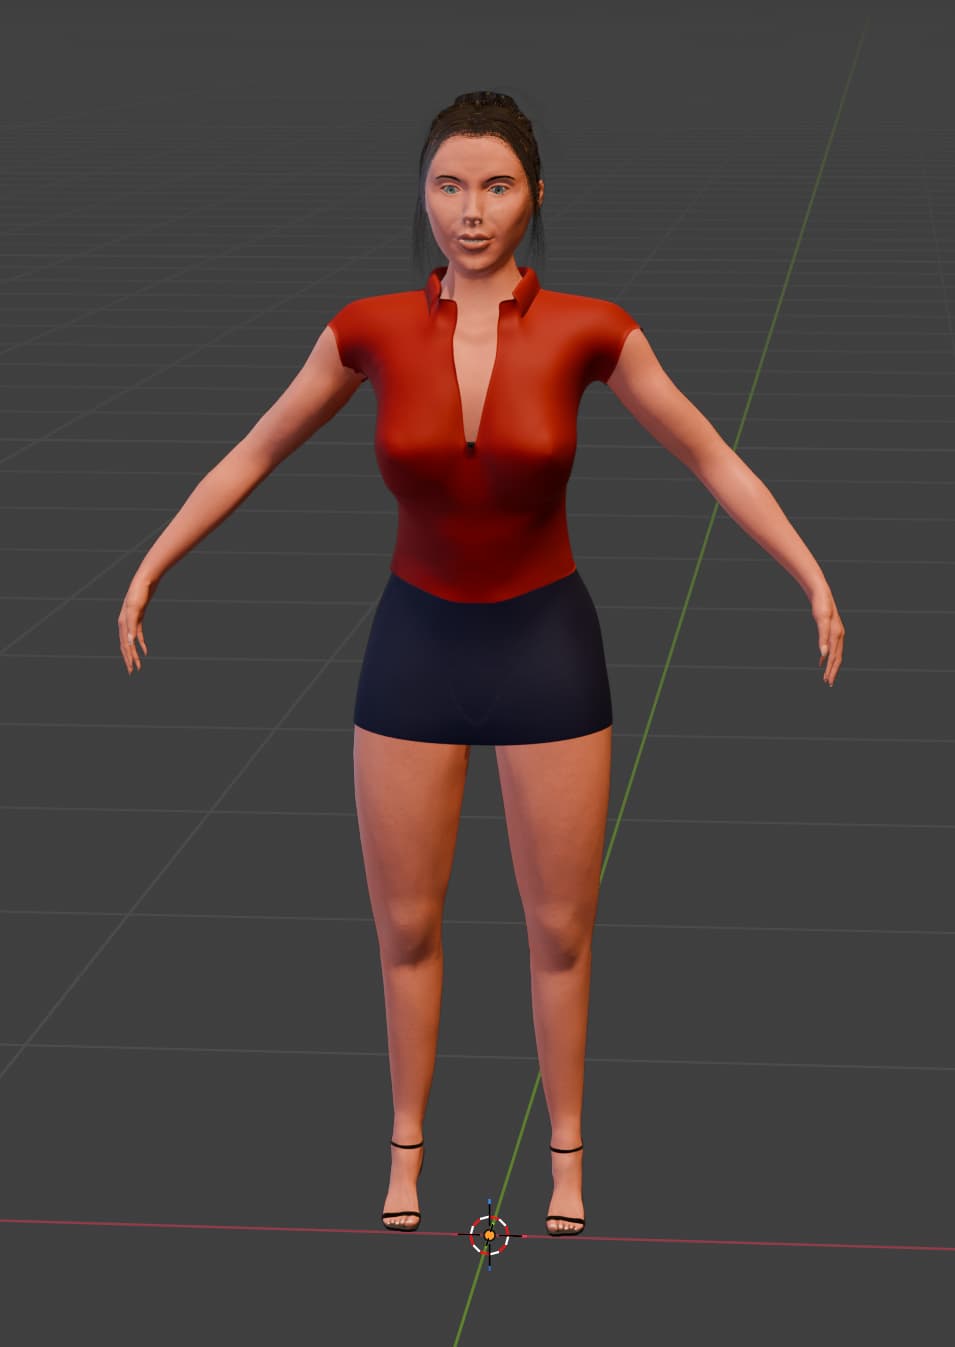
Has been a while since I baked my ogre, but I think I played around with these values until it worked.
4 Likes
Thanks for the feedback. I did select the high poly and then the low poly. I wanted to know if the uvs for the low poly suppose to be showing when I select both of them?

2 Likes
Yes. The low poly is the one you are baking to so that’s the one that should be seen. Change the extrude to 0.04 and max ray to 0. Apply scale(Ctrl+a→Scale) on both objects. select the highpoly first. Then Shift+Select(3D viewport) or Ctrl+Select(Outliner) the lowpoly object. Then bake it. Note: I’m not sure, but if you have a mirror or shrink wrap modifier you may need to apply it first.
3 Likes
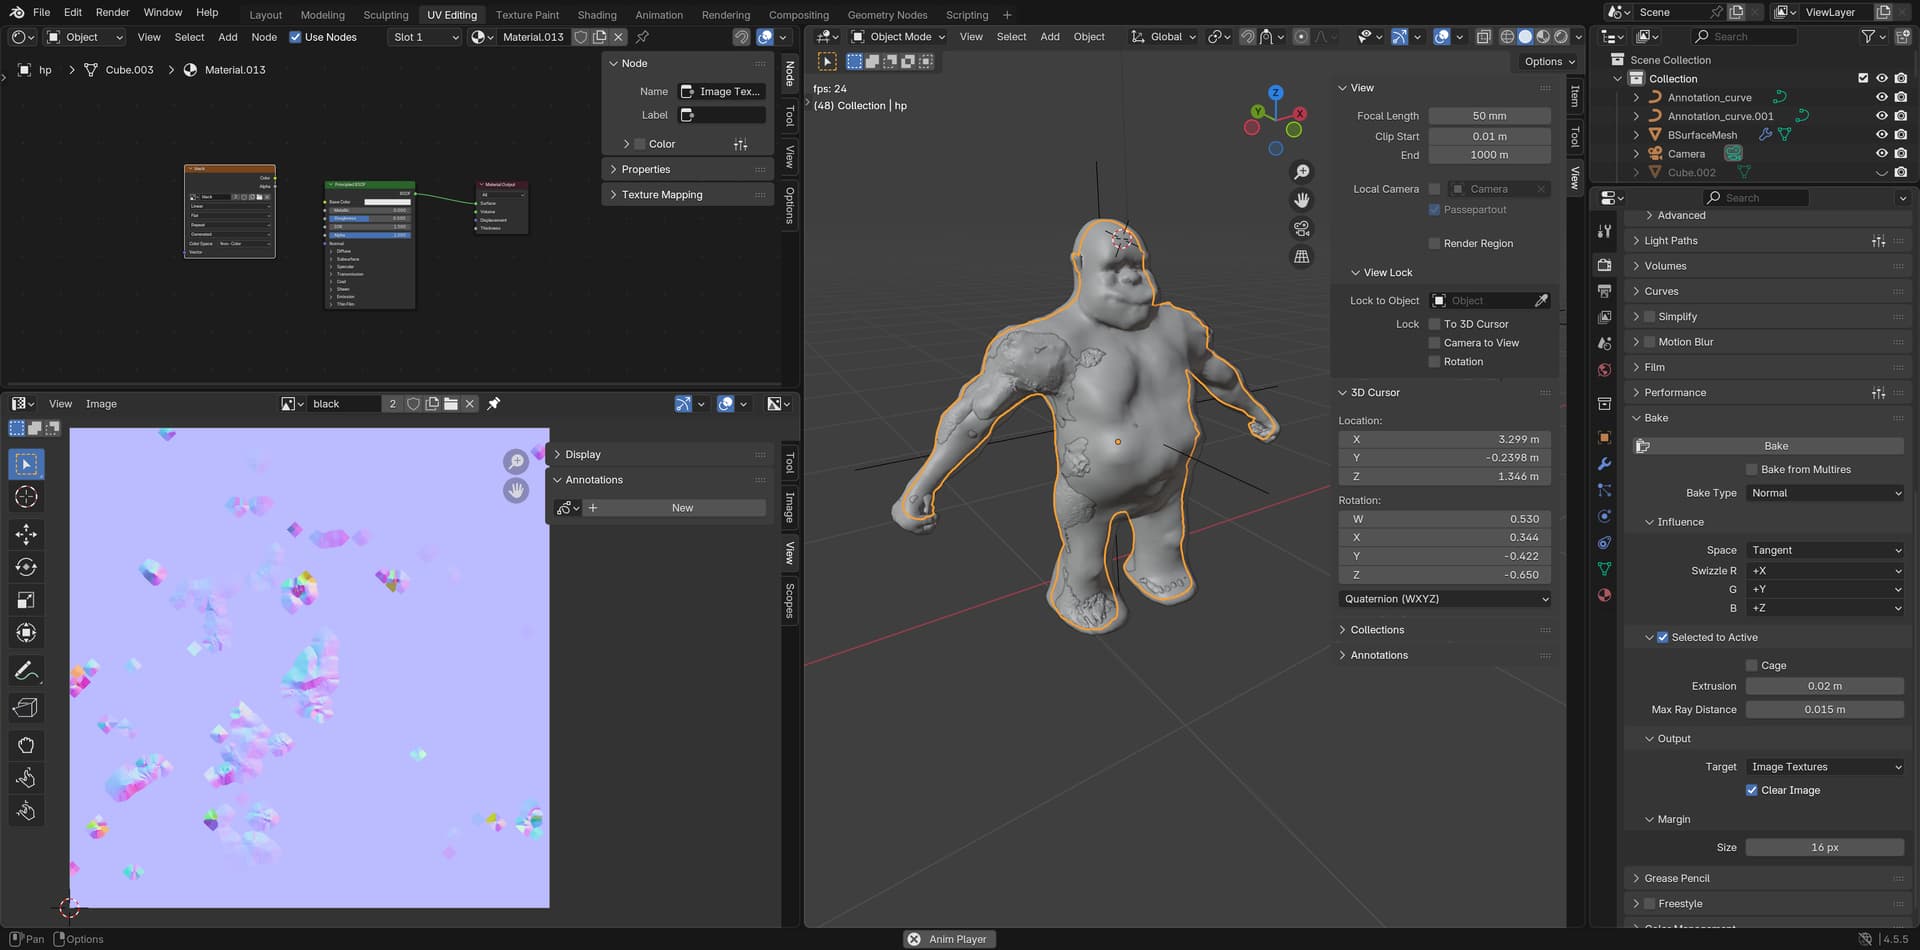
I had to used the extrusion value of 0.04m and the max ray distance at 0 and it crashed my computer twice. I did try to use the extrusion value of 0.05 and max ray distance of 0.008m. I still did not get a good bake.
Given the large disparity in the versions it may well be you need larger Extrusion factor and possibly Ray Distance.
3 Likes
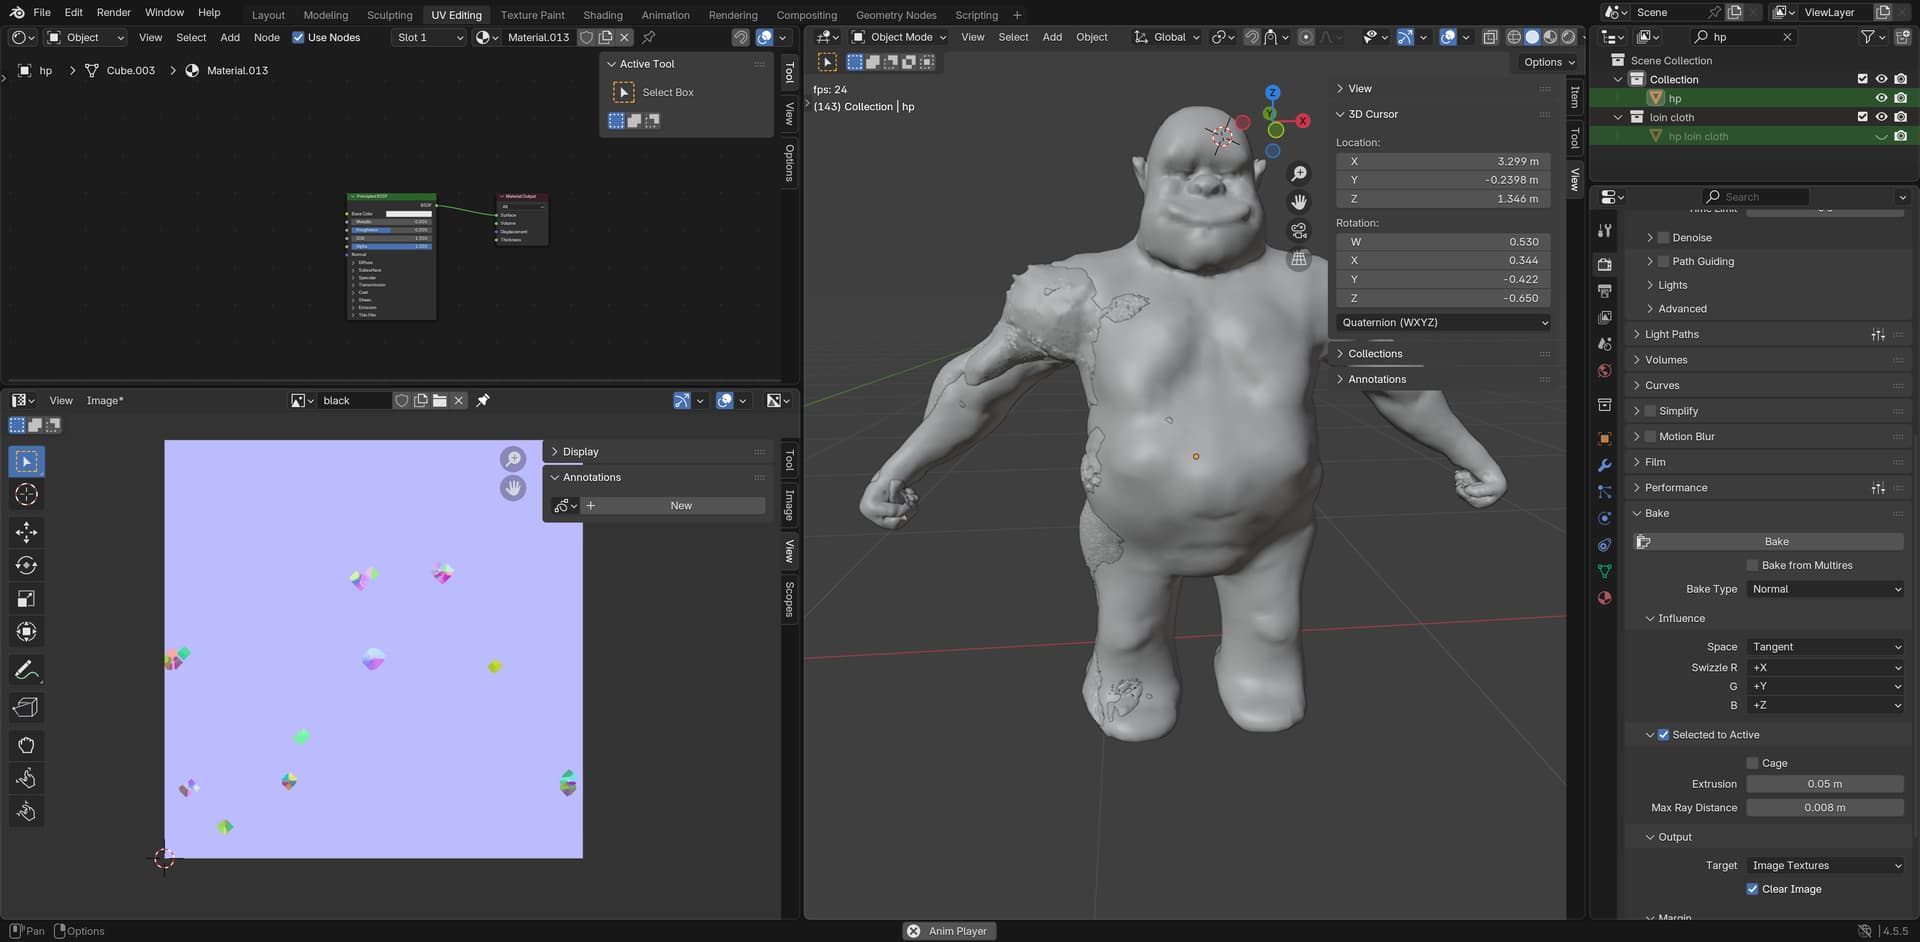
Hi, I tried to raise the ray distance to 2. And, I put the extrusion value to 0.06. Every time I would raise the extrusion value to 0.1, I would get more artifacts on my uv map. When i raise the ray distance to 3, it crashes my computer. When I leave the ray distance at 2 and change the extrusion value to 0.02. It also crashes my computer. But, I just wanted to know if this bake is decent so far. Or, do I need to adjust an extrusion value and ray distance a little but more?
2 Likes
How, high res is your High-poly?
Because, it looks like a problem an memory consumption problem. Maximizing what your machine can handle?
I’m not sure if you’re still using multires modifier?
- Save you project under a new name
- Apply all modifiers (low and high res model)
- Retry baking process.
The comment about applying scale is an important one!
Check if all objects have scale 1!
1 Like
easy fix ~
Apply a shrink wrap modifier on your low poly first use
-project
-outside surface
-check box: Negative and positive values
- apply all modifiers and ctrl+A (alltransforms)
- duplicate your low poly (do this first create a back up too just incase, create a new scene collection call it (back_up) )
-rename it orc_cage
-go sculpt mode inflate it and completely cover the high poly (all you should see is the inflated low poly not excessive like a balloon but enough that you inflate over both high and low poly.)
-bake settings:
*normals - in your image texture make sure the colour is set to non colour and discconect it from the normal map node select the image texture node so it has a white border
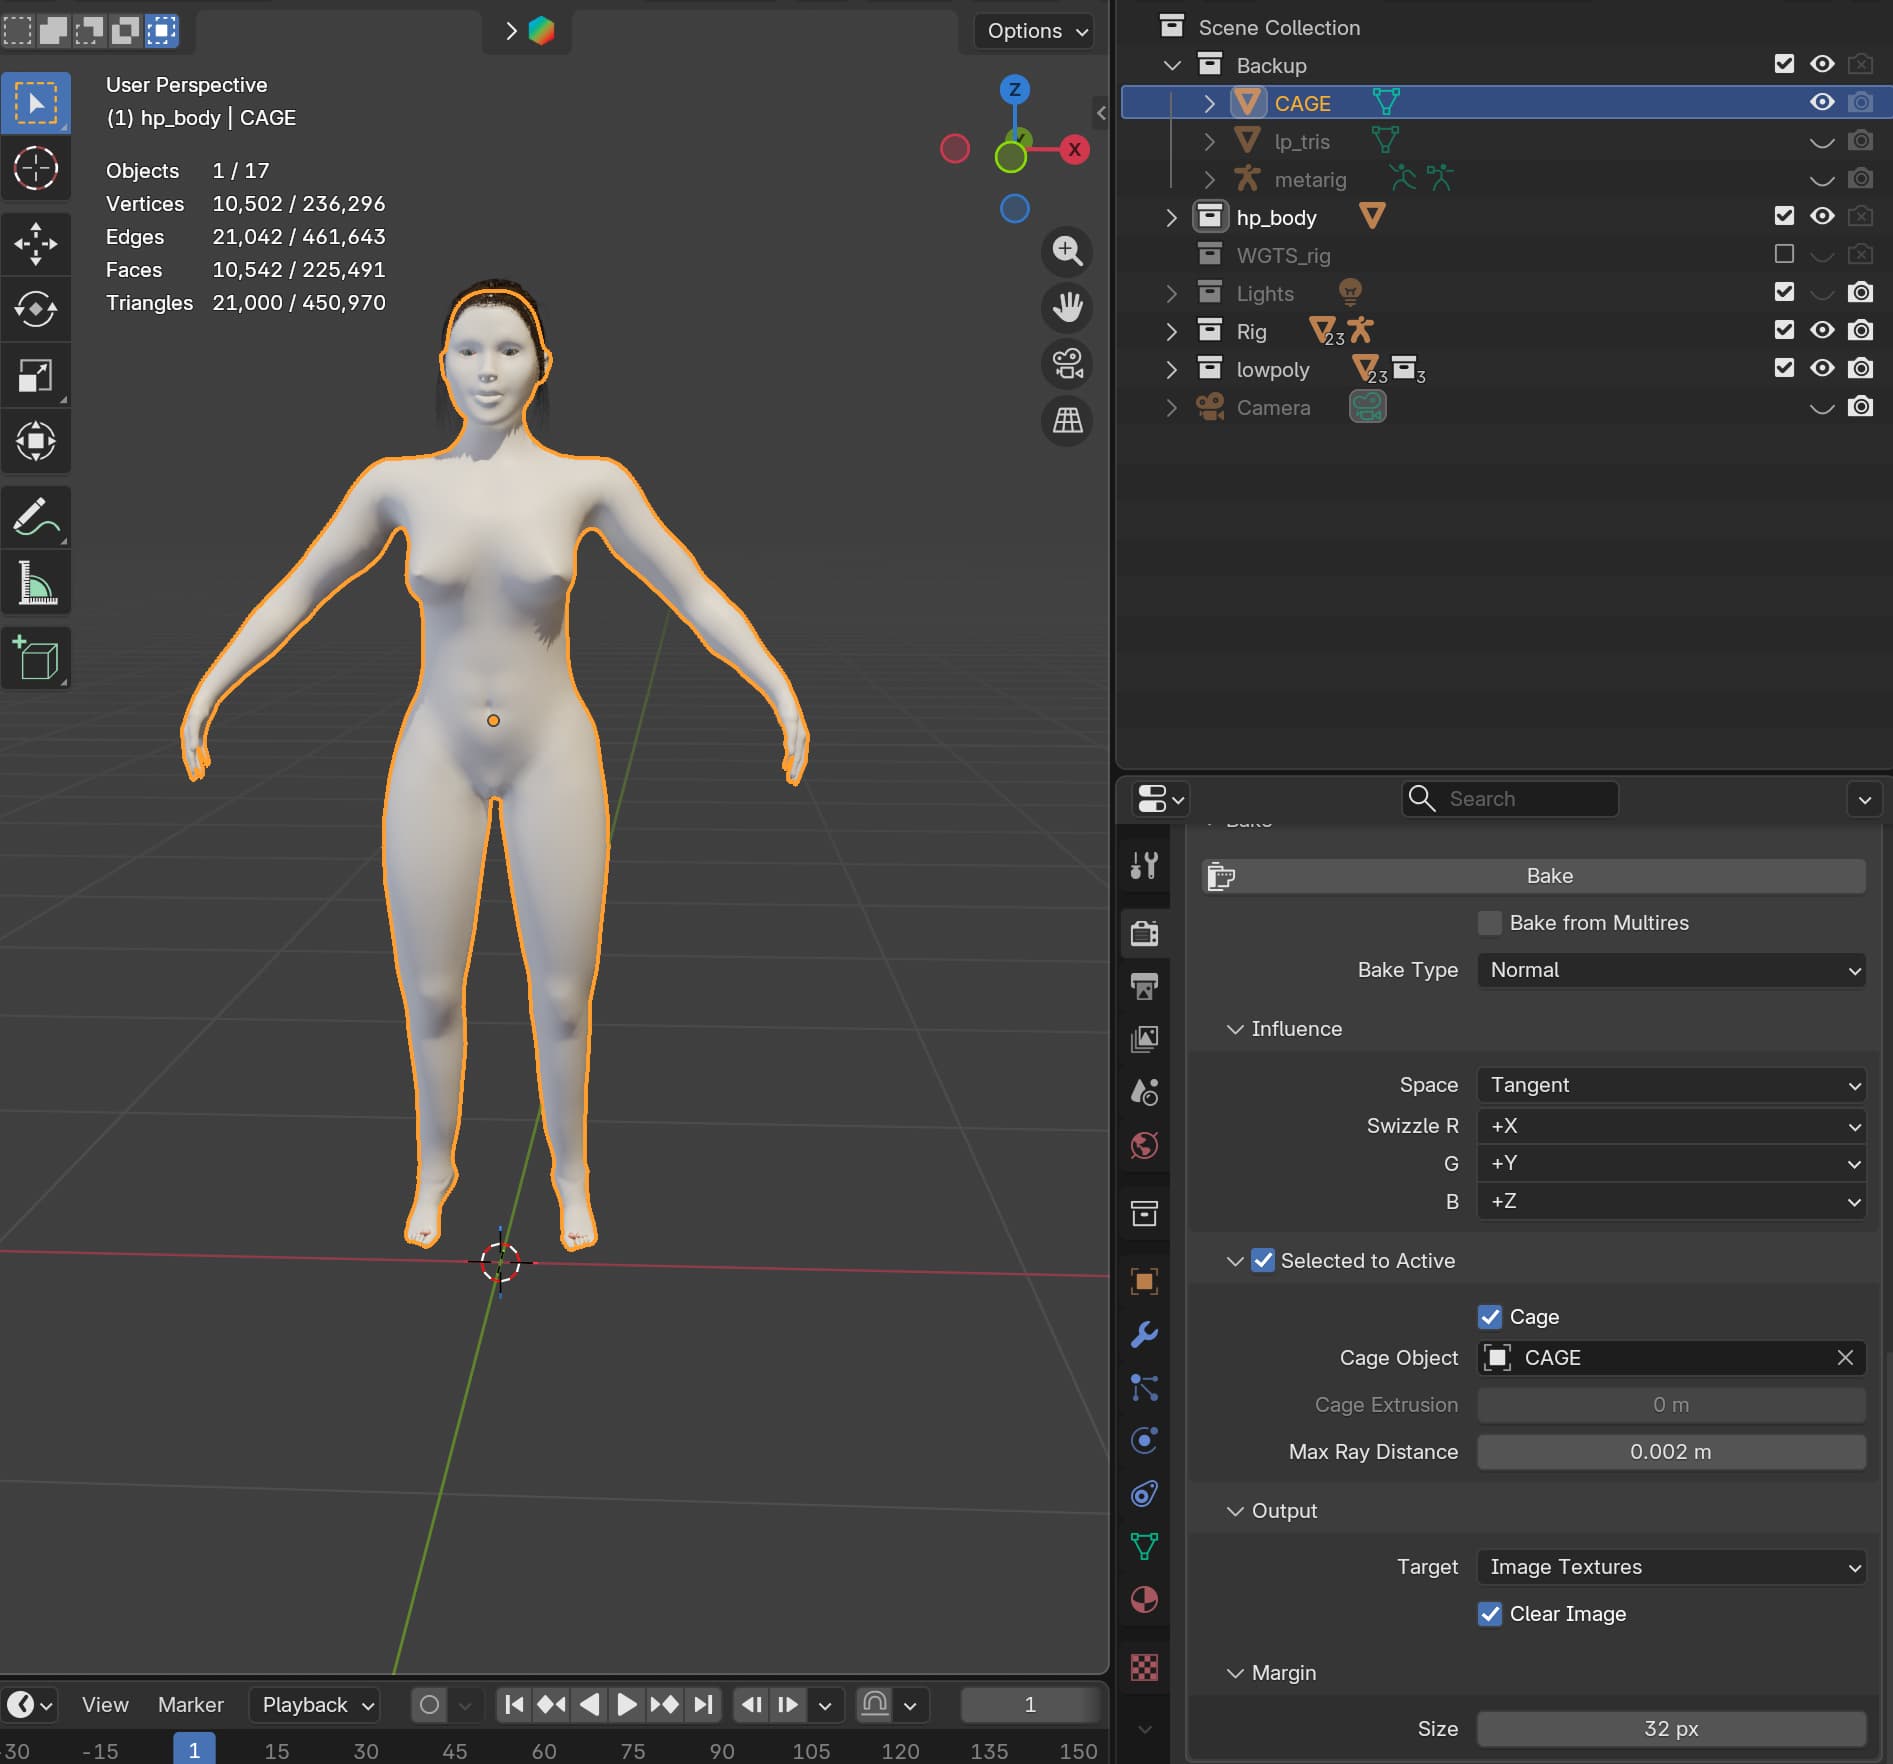
*in settings select the (use cage✅) option and select your “cage” object as cage
* max rays 0.002
hit bake
connect your normal map nodes to your pincipled bsdf or whichever material output your using
3 Likes
Well you have got something there now at least. So yes it is about juggling those numbers.
However I repeat and others have mentioned your two versions do not fit each other well and is probably why the bigger numbers work, they look further.
I assume you did use shrink wrapping but the discrepancy makes it seem unlikely. It is fundamental to the process shown in the lectures.
1 Like
Thanks for all the feedback I just need some clarification on what settings do I need to use for the shrink wrap modifier? Do you set it to “outside’ or ‘outside surface’? When I set it to ‘outside surface’ the mesh becomes distorted. So, I put the setting for the shrinkwrap modifier to ‘outside’. Then, I selected the hp as the target and changed the offset to 1. Once I applied the shrink wrap modifier, I duplicated the low poly and named it. In sculpt mode, I used the inflate brush to cover some of the hp areas. However, I’m not sure what you meant by “inflate”? But, I did have major issues when I tried to use the cage function. Specifically, I wanted to know if you selected the high poly or low poly as the “cage object target?” When I changed the max ray distance to 0.002, it didn’t show anything on my bake. I had the high and low poly selected . However, I did try without the cage function, in which I set the extrusion value to 0.002 and max ray distance to 0. I got a better bake result, but I’m not sure if I got rid of all the artifacts.
To note : I did apply all the modifiers before I baked the object.
1 Like
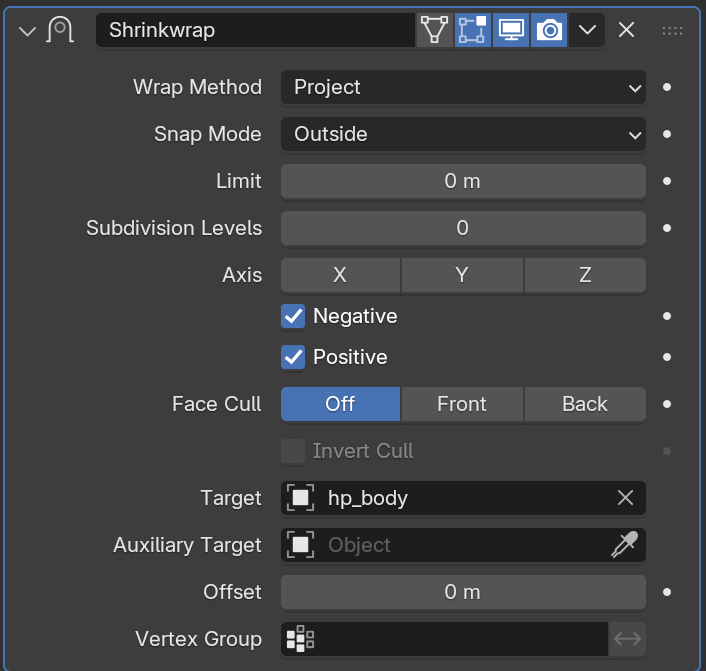
I have attached settings for shrink wrap , you need outside surface and tick both negative and positive values, hp as target correct no offset they need to be on top of each other think of baking like you trying to trace a high detailed drawing the further away the paper is the harder it is to trace.
next yes duplicate lowpoly rename it “cage” duplicate it again and name it “back_up_lp” duplicate your high poly rename that “back_up_hp” then make a new save this is your back up save incase anything crashes or you want to go back and change anything it will save you lots of pain in the long run.
then for the cage you just created go to sculpt mode and gently just little clicks with the inflate brush large brush with strength at aroun .7 ot .8 just click dont hold the button down to inflate but basically you need the cage to cover both the hp and lp so you can only see the cage ontop (think of that as your tracing paper)
then cage target is your cage not HP not LP, “cage target” is the cage itself its asking what object you want to use as the cage its not asking for target
you also need to make sure your LP is unwrapped then ray distance try between 0.001 - 0.005
how dense is your HP?
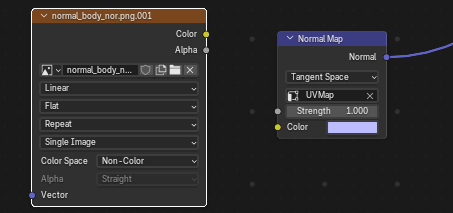
then in shader node editor you need to add Image texture node and a normal map node leave them disconnected but highlight the image texture node as see in the images attached this is where it will drop the normal map so that you can then connect it to the normal map node and that plugs into your normal input on the bsdf shader

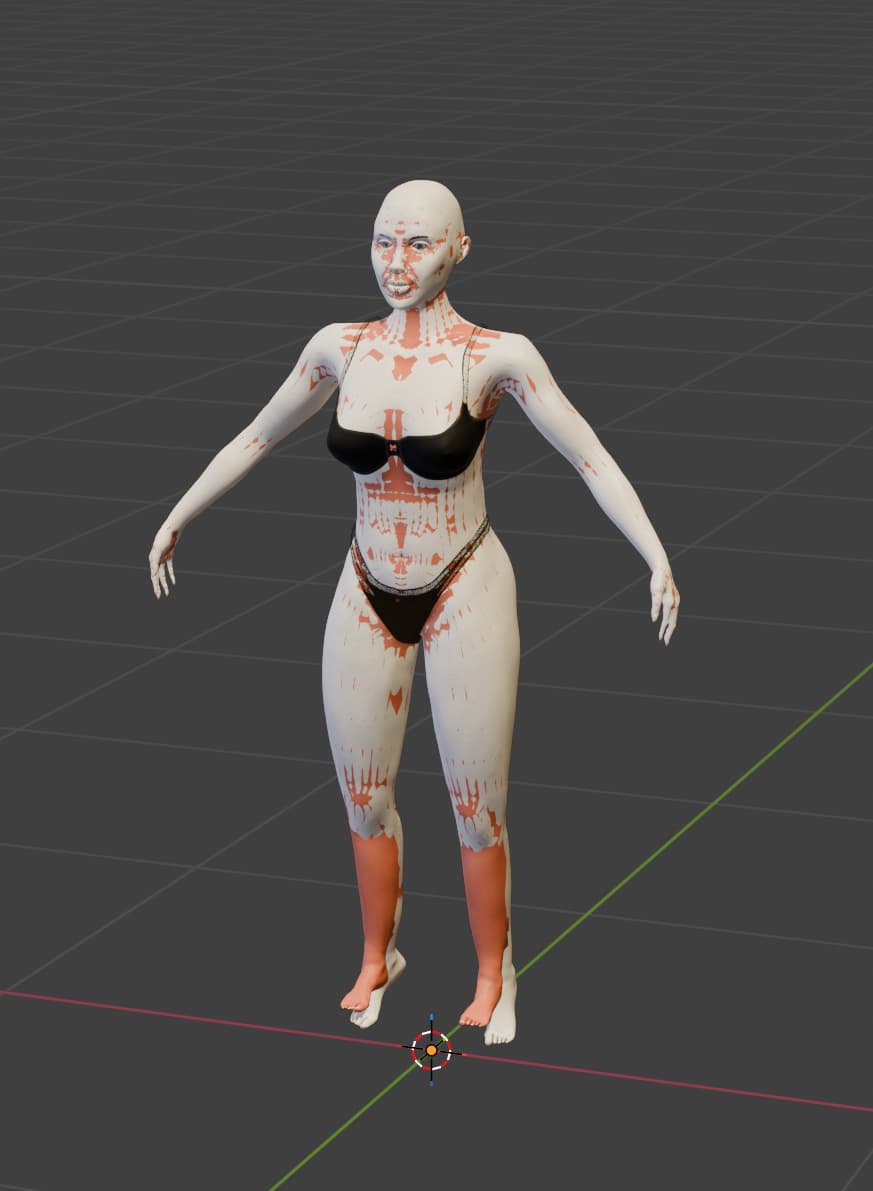
also added images to follow. my LP no longer matches my HP but I am done baking now so ignore that my LP feet dont line up with the HP they must overlap eachother thats why shrinkwrap and cage works best especially for organic models.
4 Likes