Normals, Auto Smooth

First of all, I would like to thank you very much for this and all your excellent blender courses!

Now I have two questions:

  1. Why do I get the strange picture marked in red with 30° Auto Smooth. When I set it to 20° it looks normal (green). The X-coordinates of the affected three areas are on one area (x = -1m)!
  2. The normals point inward on the green grass surface and on the brown ground. Why and what are the effects?
    In the case of the castle, the normals point “normally” outwards.


    Snag_ca01ce
1 Like

I can tell you about nr. 2 :wink: First may or may not be connected to normals pointing inwards - but I dont know.

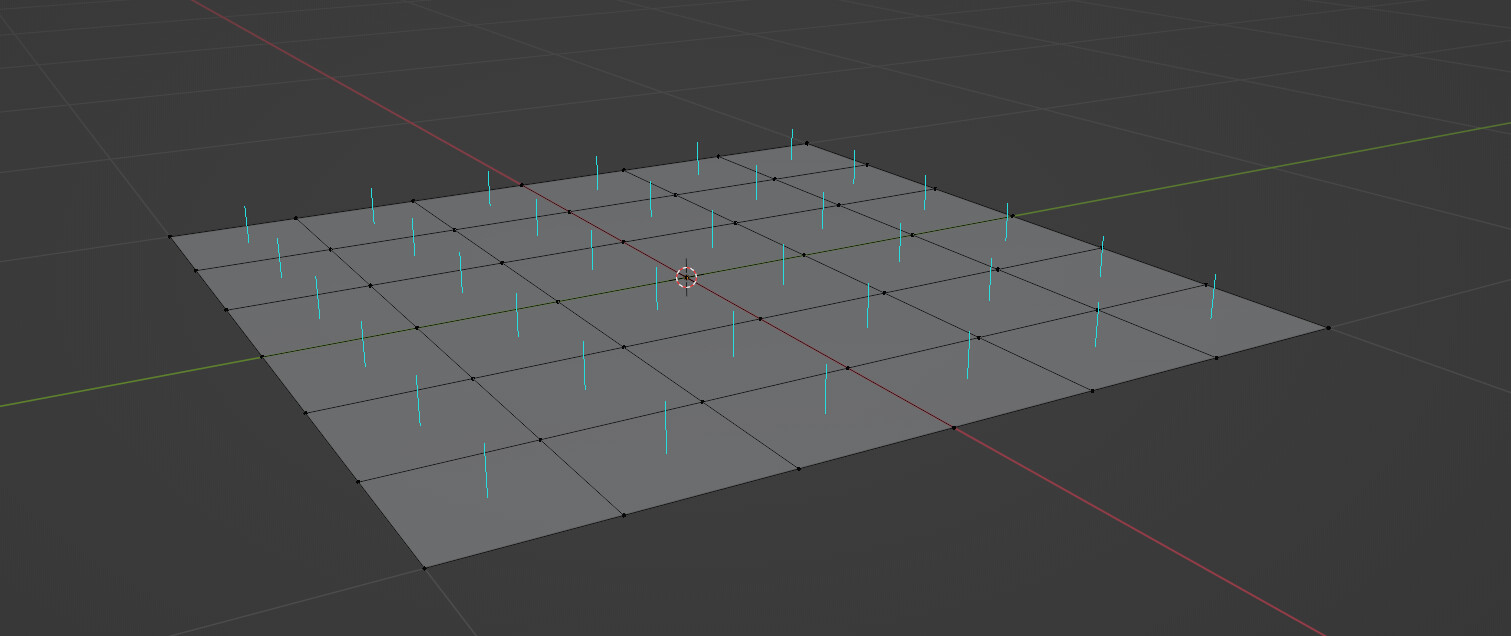
Position of nformals is dependent on which direction you make extrusion on plane. If you extrude it up, it has normals pointing outwards:


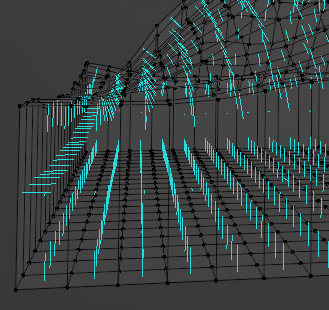
If you extrude down, it will have normals pointing inwards:

Flipping normals is easy (alt-n and and flip). (If you dont remember shortcuts its easy to press spacebar and type ‘flip’.) This example shows what is blenders logic behind it, as it may seem pointless to have inward facing normals :wink:
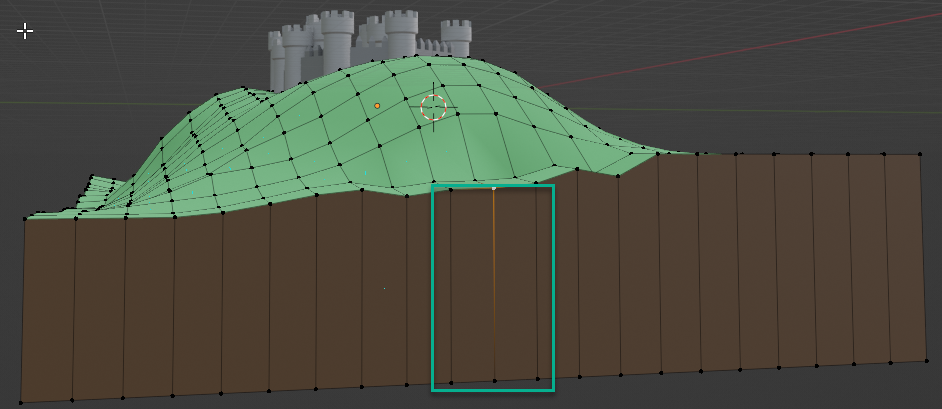
This is entire plane extruded dawnwards:

Effects for blender are not always drastic (in case of simple materials), but if you try to texture this, it will not look as you might expect, as you will see texture from behind. There is thing called backface culling which means, that many renderers wont show backs of the faces (blender does show them), so for example if you export this to Unity you will see very strange effect as faces from behind wont be visible (will be transparent) and color would be shown only on the inside of the ground mesh. So from above you wont see the grass but the ground, and grass will be visible from below, like painted on the inside of your mesh.
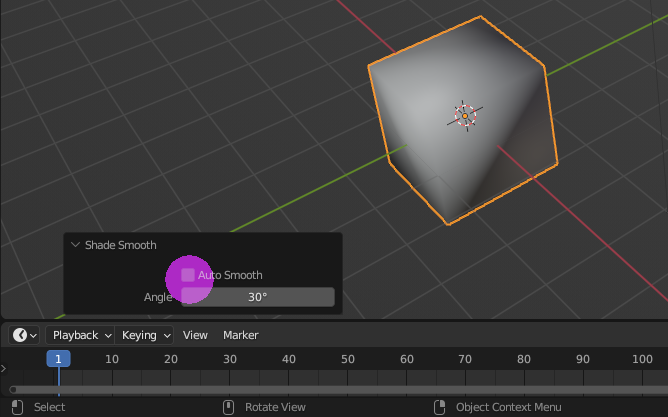
Normals are also used for calculations, and I think auto smooth also uses it, so having normals flipped might cause issues with modifiers.

3 Likes

Thank you for the detailed answer to my second question! With “flip” all normals are now displayed to the outside.
However, the first question remains after the normals have been changed.

1 Like

Now that Im thinking, it might be case of some overlapping geometry. Check the mesh for doubles. (Select all verts in edit mode and merge by distance (A, M, than by distance)
obraz
It will show if it removed something down there:

(Im sorry if you know how to do that, I dont know your level :slight_smile: )

3 Likes

I have already merged by distance, but nothing has changed. :wink:

1 Like

Select all brown faces on that side, then switch to vertices (all brown faces vertices are selected).

Then sx0 Scale along the X path scale all vertices to 0. Or Y is you are on the Y -ax.
YOUR pivot POINT MUST BE median point

1 Like

I have tried it, according to your instructions, nothing has changed.
(median point, select all brown faces on this side, select vertices)

1 Like

Do you have hidden faces inside?

and …

select object right click → “Shade flat”
select object again right click → “Shade smooth”

then left bottom “Shade smooth box”, activate auto smooth.

screen

2 Likes

Select a vertice on this spot and drag it away.
See if all faces and edges are still connected.
Then Crtl-z te restore previous situation.

2 Likes

I’ve tried that, but it didn’t do anything. Based on your suggestion, I then carried out “shade flat”, deleted the vertices of all affected faces, rebuilt the faces with F and “Subdivide”. Now I activated “Shade smooth” as you suggested, then “Shade smooth box” with “auto smooth”.
I didn’t really understand that, but what’s the point.
Many thanks for the support!

1 Like

If you have an object with the smooth-shaded option activated.
And add more vertices to this object (joining objects, etc), then not all faces (vertices) do have the state smooth-shaded.

By flat-shadingand then smooth-shading again, all faces do have the same shading.
By activating the shading-angle you van manipulate when this smoothing takes place.
It’s used to have hardsurfaced (flat) surfaces, but still smooth corners and angles.

Is it resolved now?

Otherwise, upload your file some where.


What can help also, is to APPEND you objects in a new .blend file.

Thank you for your explanation! It is solved now!!!

1 Like

This topic was automatically closed 24 hours after the last reply. New replies are no longer allowed.

Privacy & Terms