Can somebody help me with the weight painting in section 5?
I try to move the left leg; however, the body mesh’s shape is also moving.
It turns out that some weight painting in the back of the body mesh that I cannot delete by decreasing the weight from 1 to 0.
I have no idea what I did wrong.
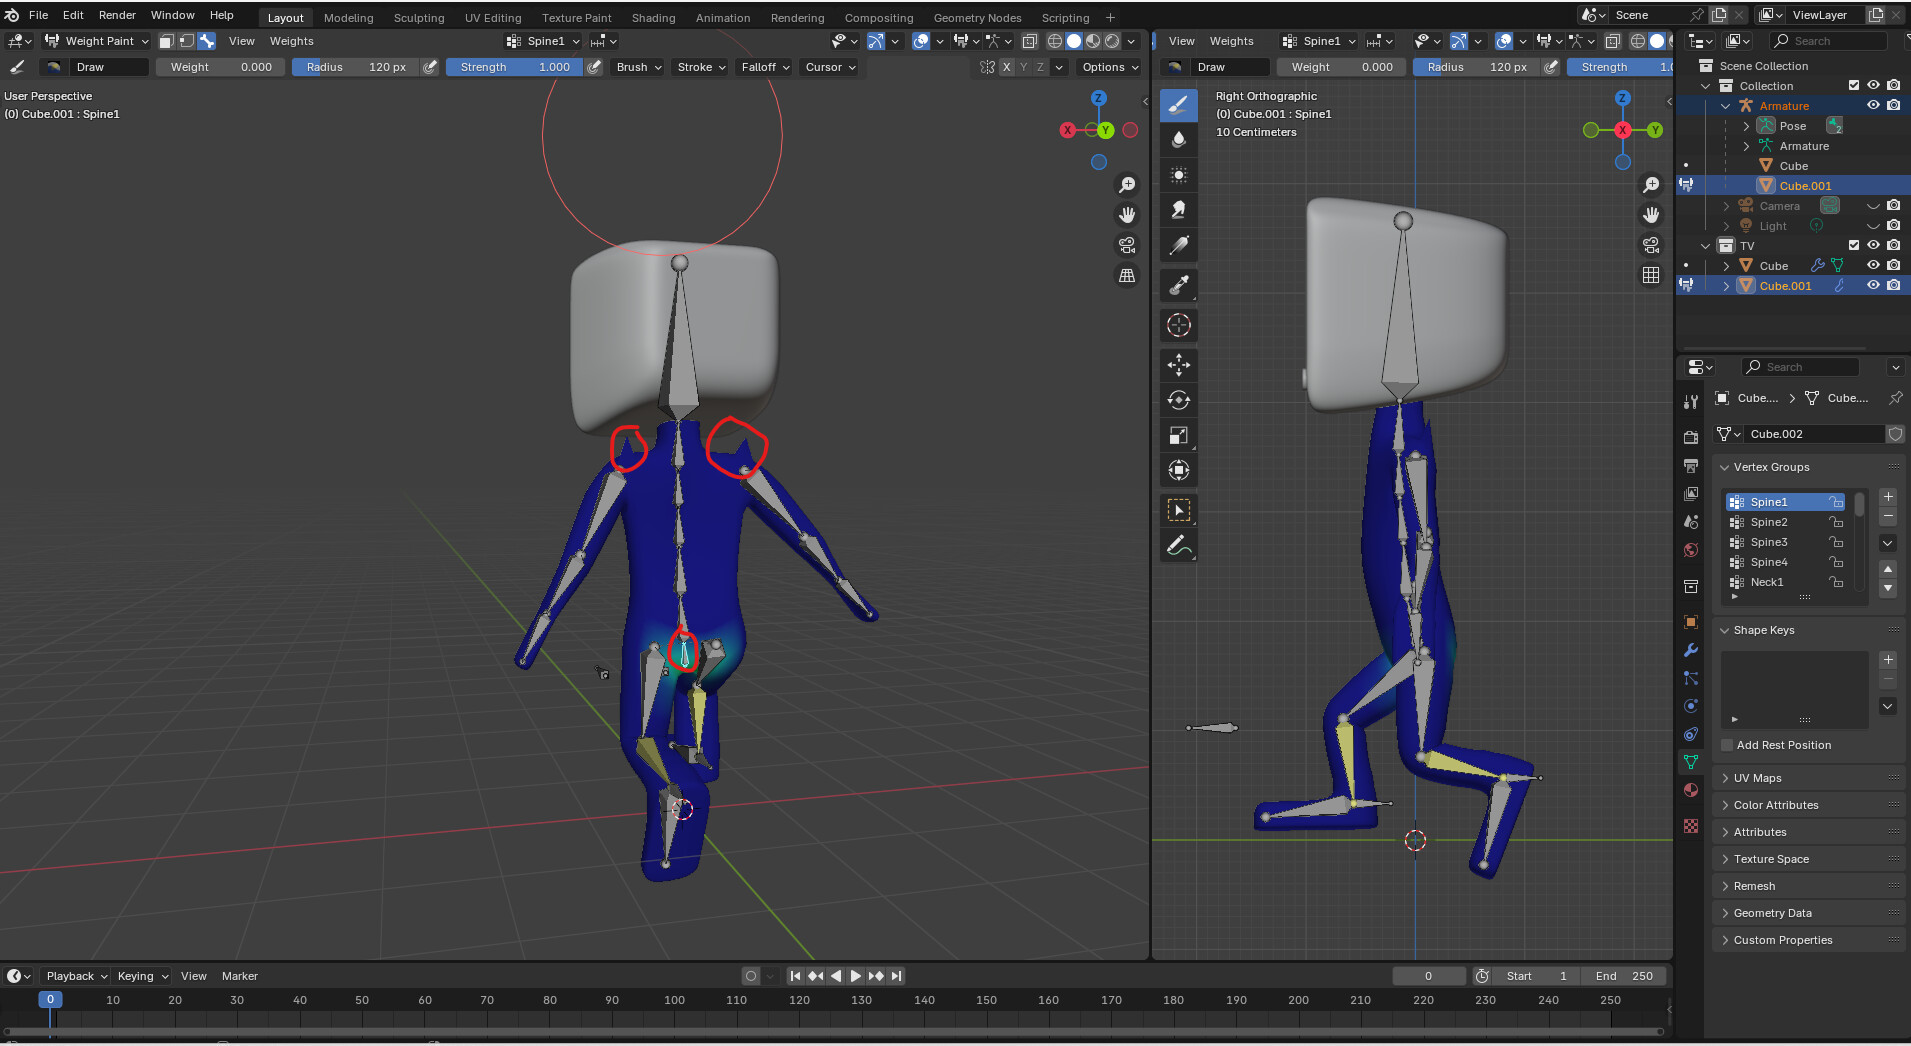
When I was animating the 1st keyframe, I found out that when I move the spine, the mesh is moving as well.
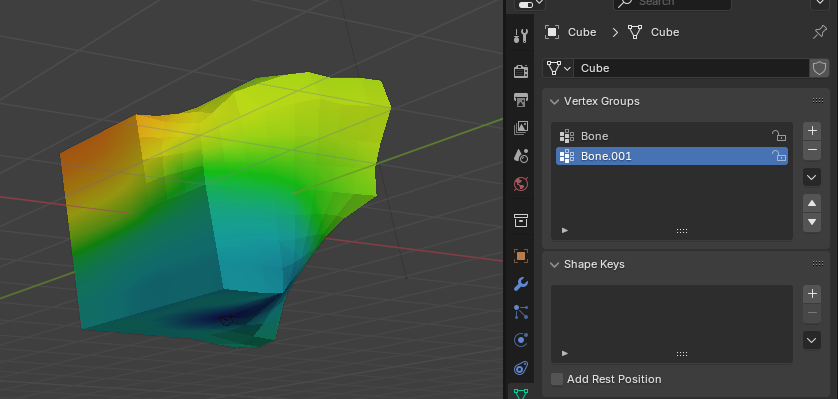
I checked the weight paint; it seems all blue and has no connection with the spine.
Can you help me with this problem?
I also attach the blender file if you have free time to help.
Maybe you should check the mesh, in case you have an unexpected vertex or a hole or something like that? BTW, are you having any other issues with your file? I was curious about this because I have had my share of weird behaviours, but Blender crashes while trying to open the file.
Yes, this strange effect does sometimes occur when working with automated weights.
And I mean one or two vertices sticky in space, when moving the bones.
I have no clue on how this happens. I have the same experiences …
But basically, the vertices involved aren’t part of the bone connection and thus weight map.
Check your mesh for double vertices (use the merge by distance option, and see what happens). Or cleanup bad topology.
Remove all the weight painted vertex groups and do the automatic weight painting again! This is destructive. So, make a backup file first!!!
or… never don this before …
Add the missing vertex to the involved vertex weight paint group… maybe a bit more advance or experimental. But we are in a learning process
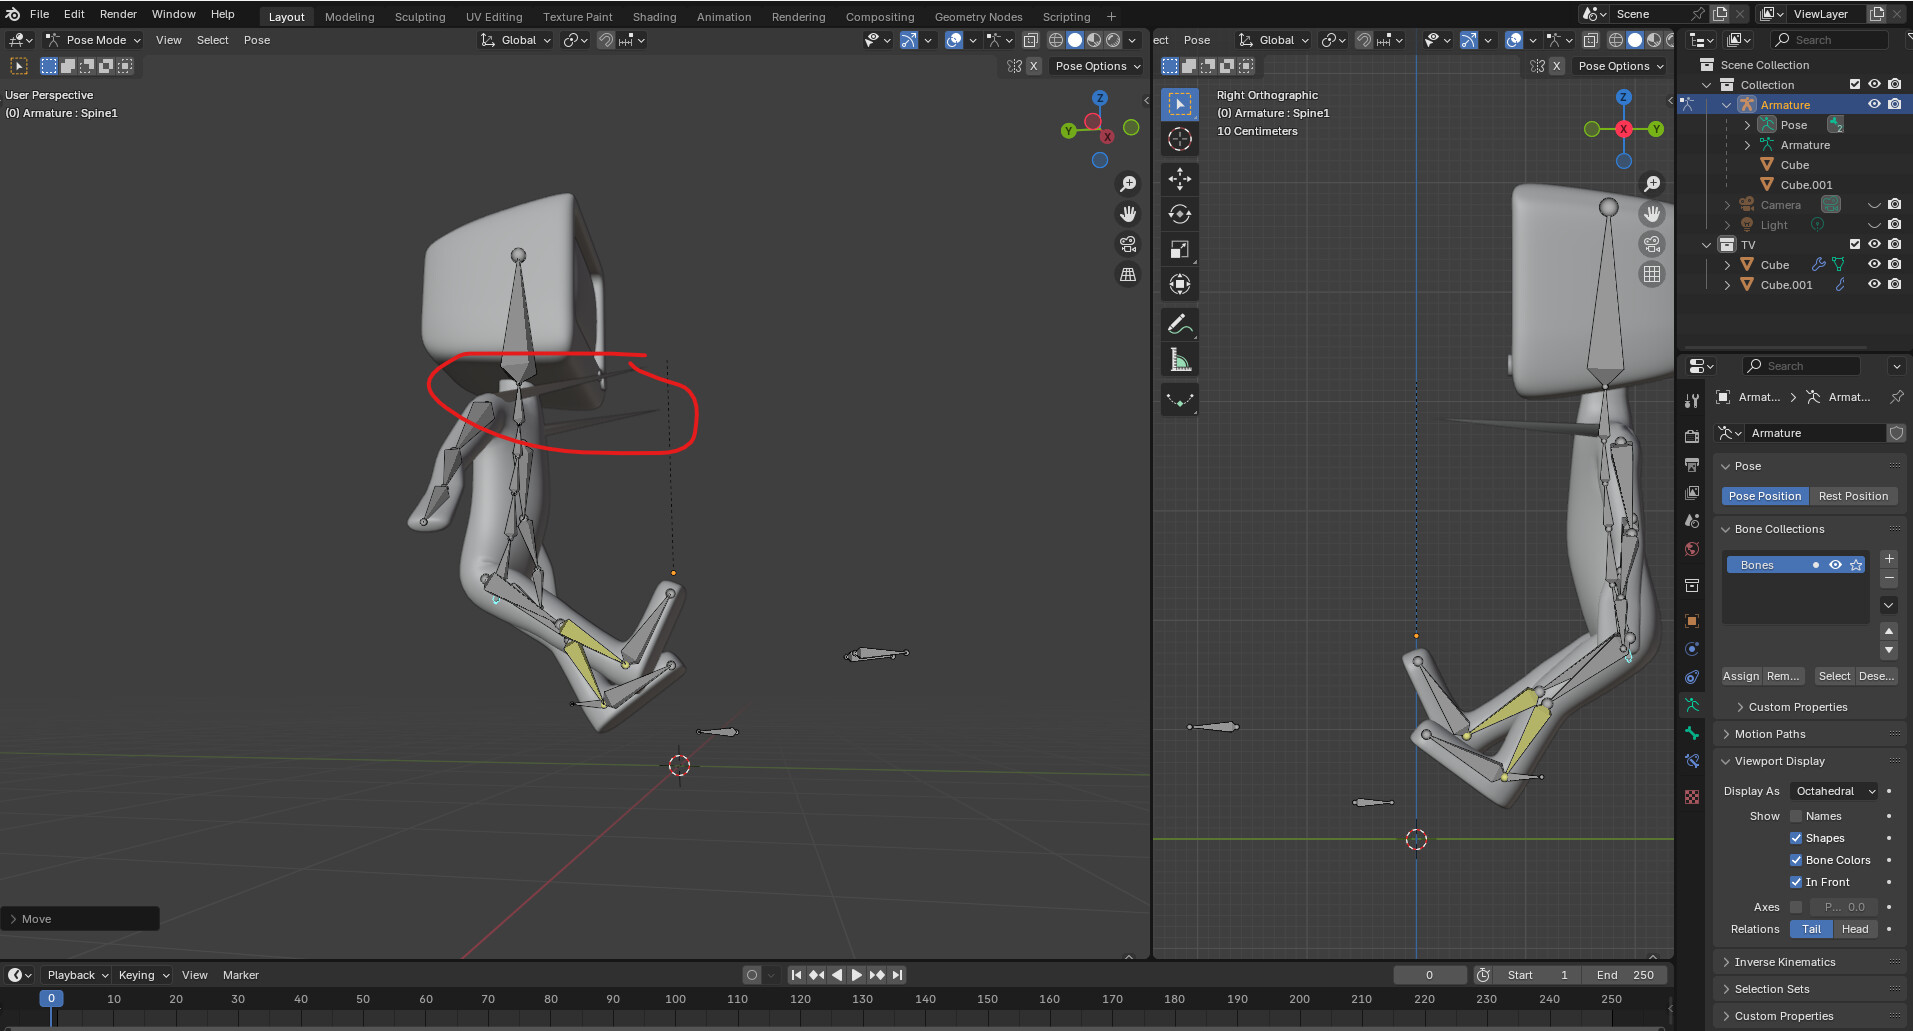
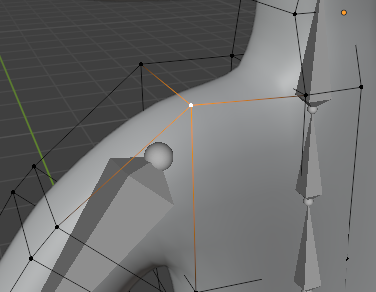
With the armature selected in Pose Mode, move a bone just enough that you can go back to the mesh (Cube1) in Edit Mode and find the bad vertex at the back of the shoulder, here:
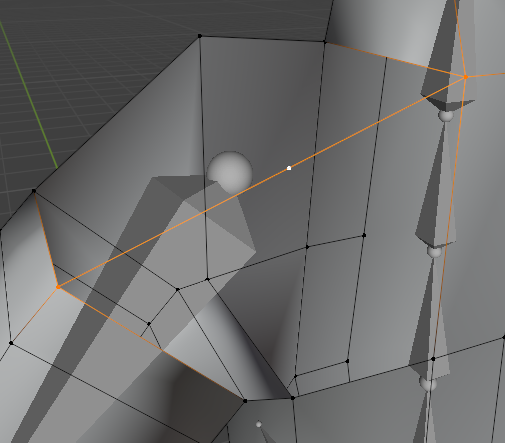
Delete this vertex. It’s going to leave a mirrored hole in your mesh, but we’ll fix that in the next steps.
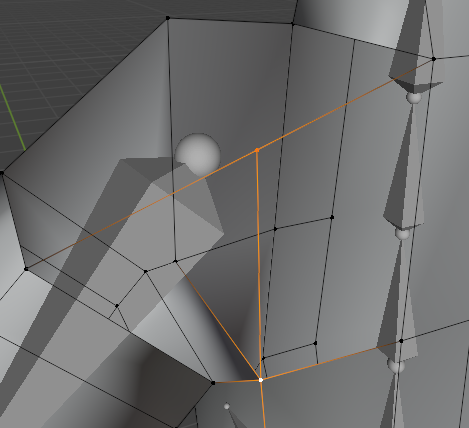
Select these two vertices and press F to create an edge between them, then go to the Viewport menu and click Edge–>Subdivide. It should look like this:
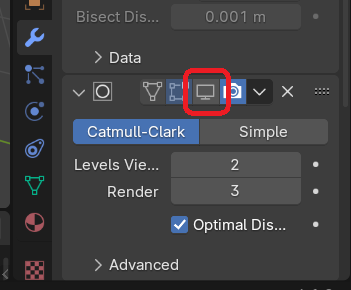
Now just select one quad of vertices at a time and press F to make a face between them. Be careful that these faces are only the quads they should be (don’t have any extra or incorrect vertices selected when you press F. You don’t want weird self-intersecting N-gons here). You may also want to grab some vertices around the shoulder and even things out, but that’s up to you; TV Man will work just fine now (I didn’t even have to play with weight-painting). Oh, and turn your Subdivision Surface modifier back on as well - almost forgot about that!
Indeed I’ve actually never seen this before (not that I’ve been using Blender all that long though). It didn’t appear to be a weight-painting issue and Merge By Distance returned nothing, so I’m not sure what could’ve happened. Ah-well, you should be good to go now anyway Tony =)