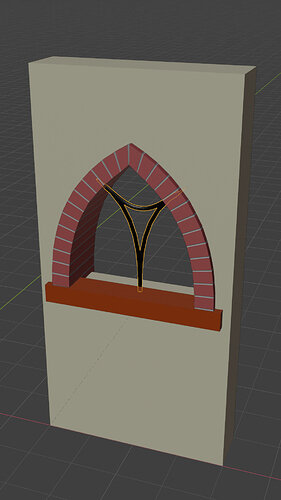
So here is the first of what I think will be 3 similar windows. (Note I’ll post pics of the other two on my showcase thread when they’re done.)
This is much further than I wanted to take it for the LOD-A level modeling but it is what the challenge called for.
My Process:
- Copy
Shift+Dthe Standard Door and related parts - Decide I don’t want to faff about trying to modify the door cutout object and curve to get the window shape I want.
- delete the copied cutout object and curve.
- Create a new curve for the window and use it to create a new Window Cutout object
- Re-link existing modifiers to the new curve and object
- Faff about with the brickwork modifier settings for a bit until I realize I need to extend the Window Arch path to both sides of the window.
- Extend Window Arch Path and delete mirror modifier from Brickwork (note to self: go back and do this for the Standard Door Brickwork)
- Use Bezier Curves to create the Lower Arches in the window (Pane Shape Path) and the profile for the Lead joints (Pane Shape Profile)
- Start with a Bezier Circle to create the upper circular-shaped pane but eventually realize it will be easier and cleaner to extend the Pane Shape Path and try to create the look I want. (Note: at this point Clipping tried to sabotage my work… always turn clipping off if you need to extrude a curve and one of the handles is against the mirror axis).
- Check to see if I have an “Old Lead” material in my material library (I didn’t).


