Hey there,
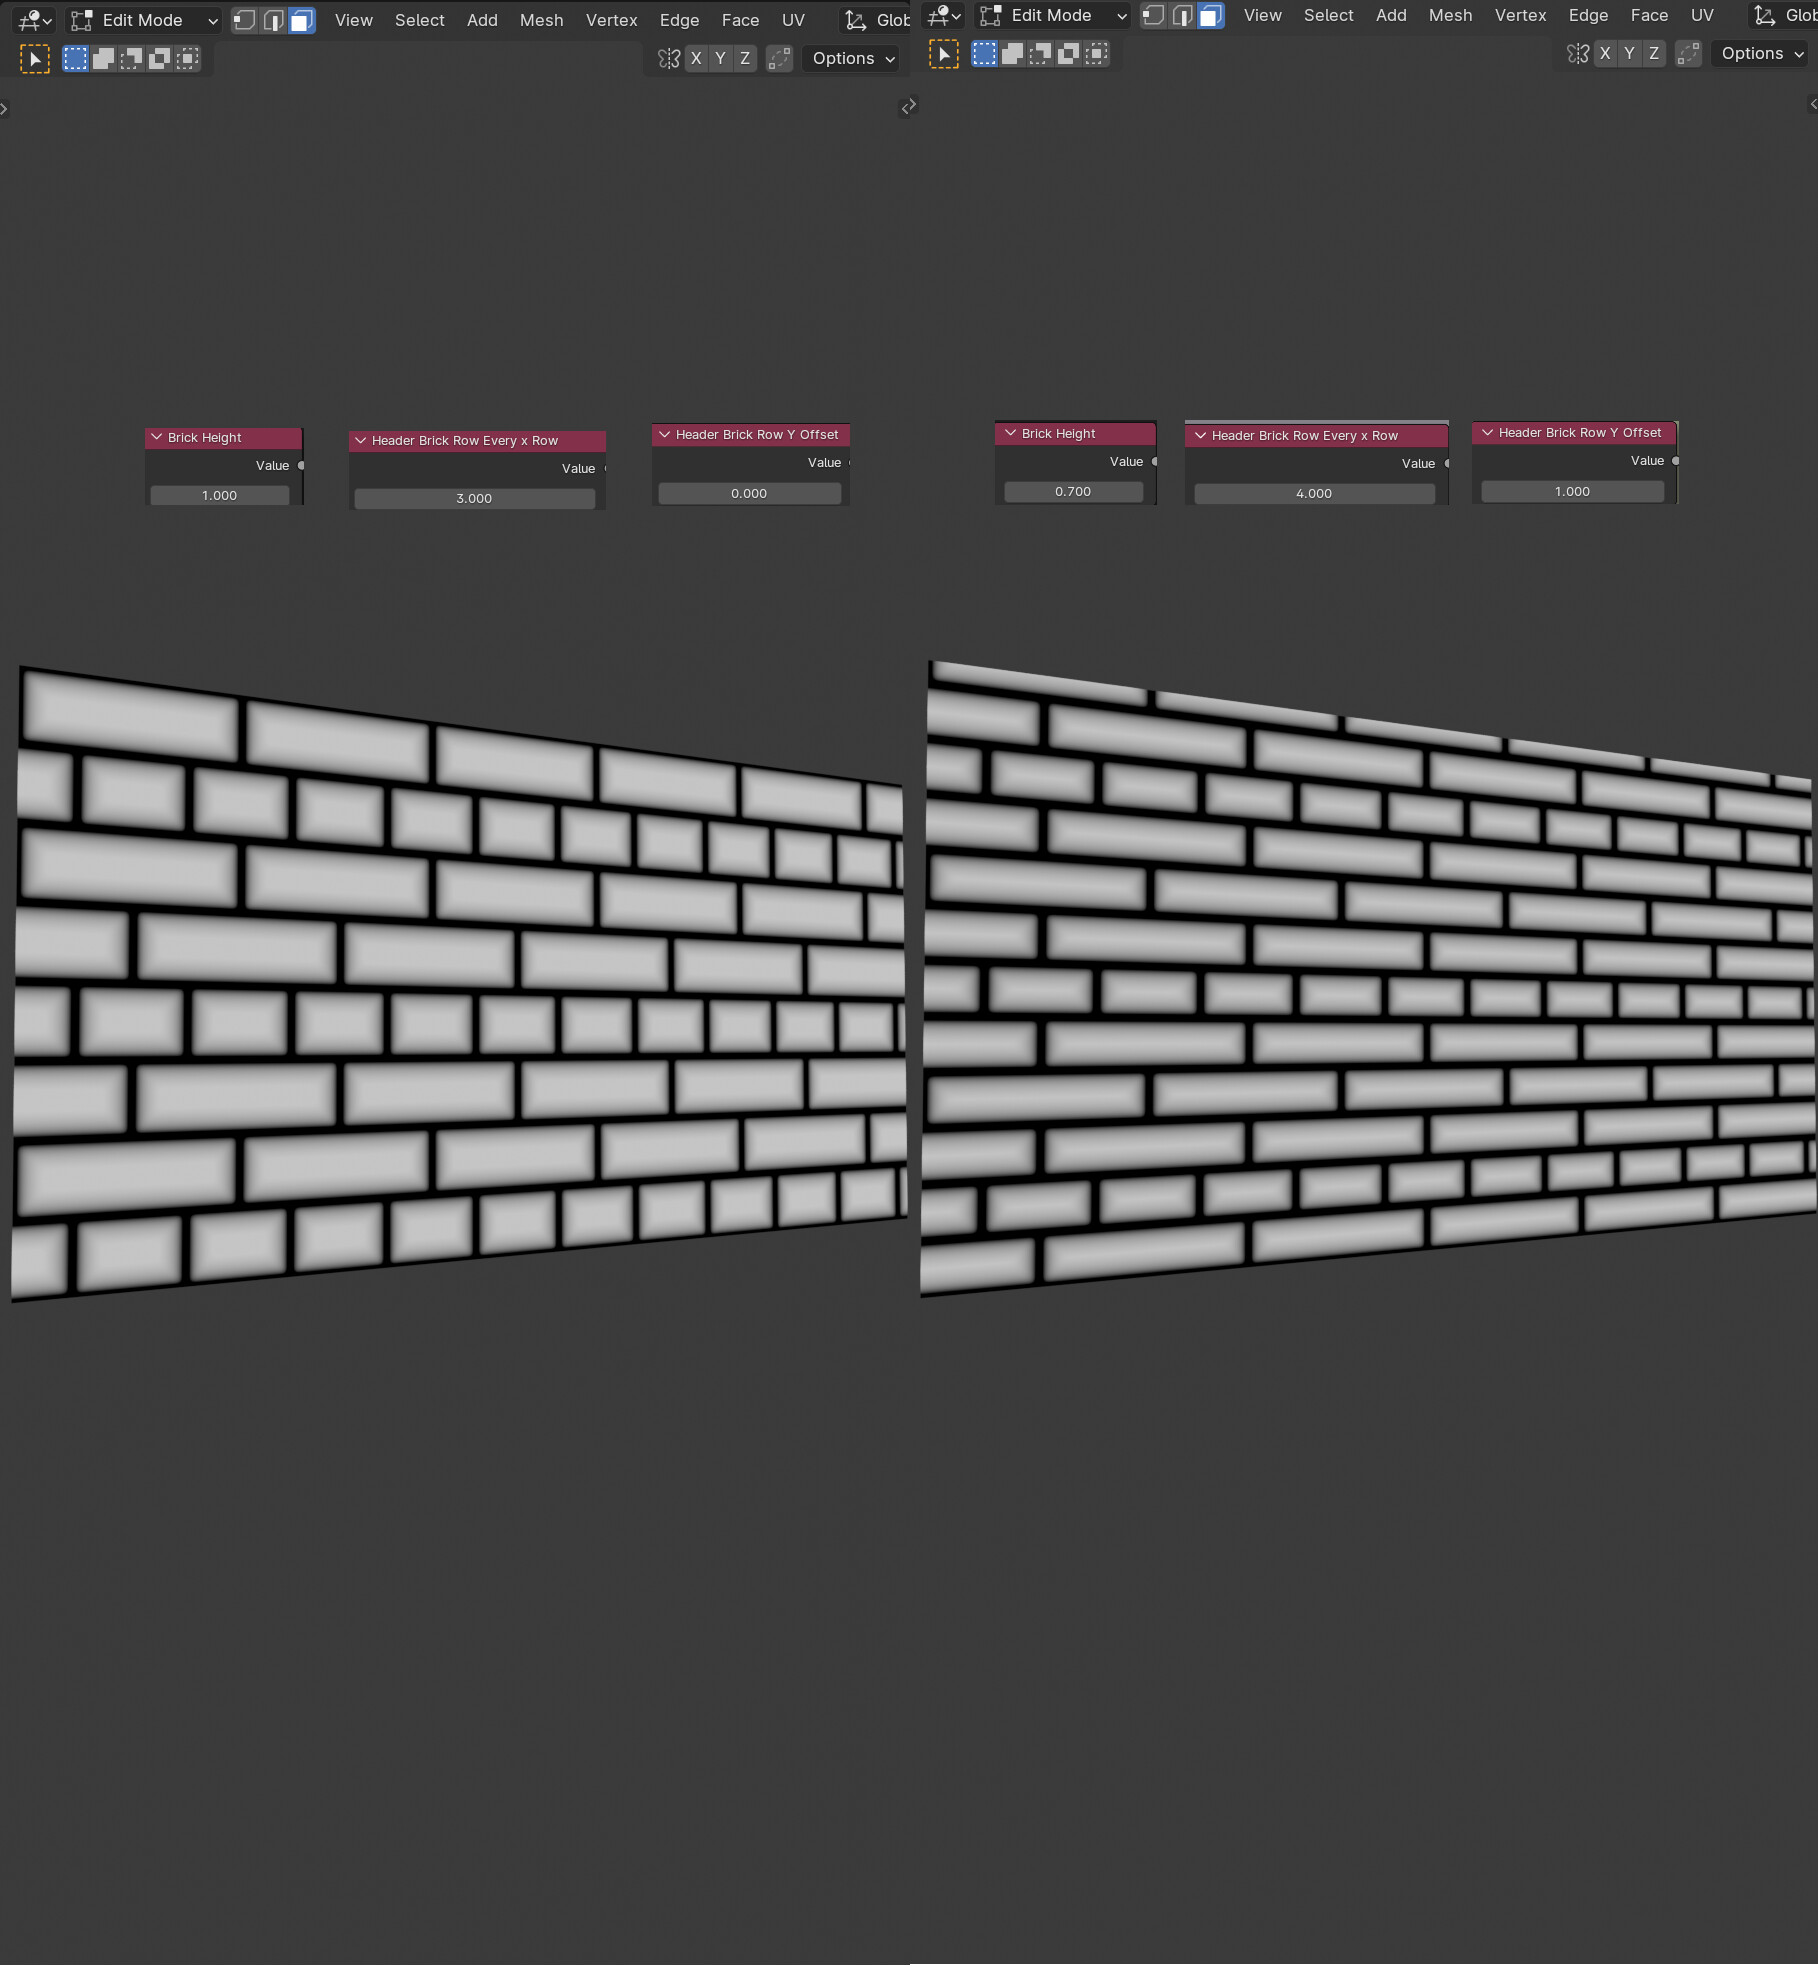
here is my result so far for the Procedural Brick - Header Rows lecture. I did some adaptions so I can freely control the size of the header bricks and their width offset.
Also the way we move the header brick rows on the y axis is a bit unintuitive I think and thats because we dont move the header rows up a row when setting the offset to one, but rather move it up by “header brick every x row” - offset. Let me explain:
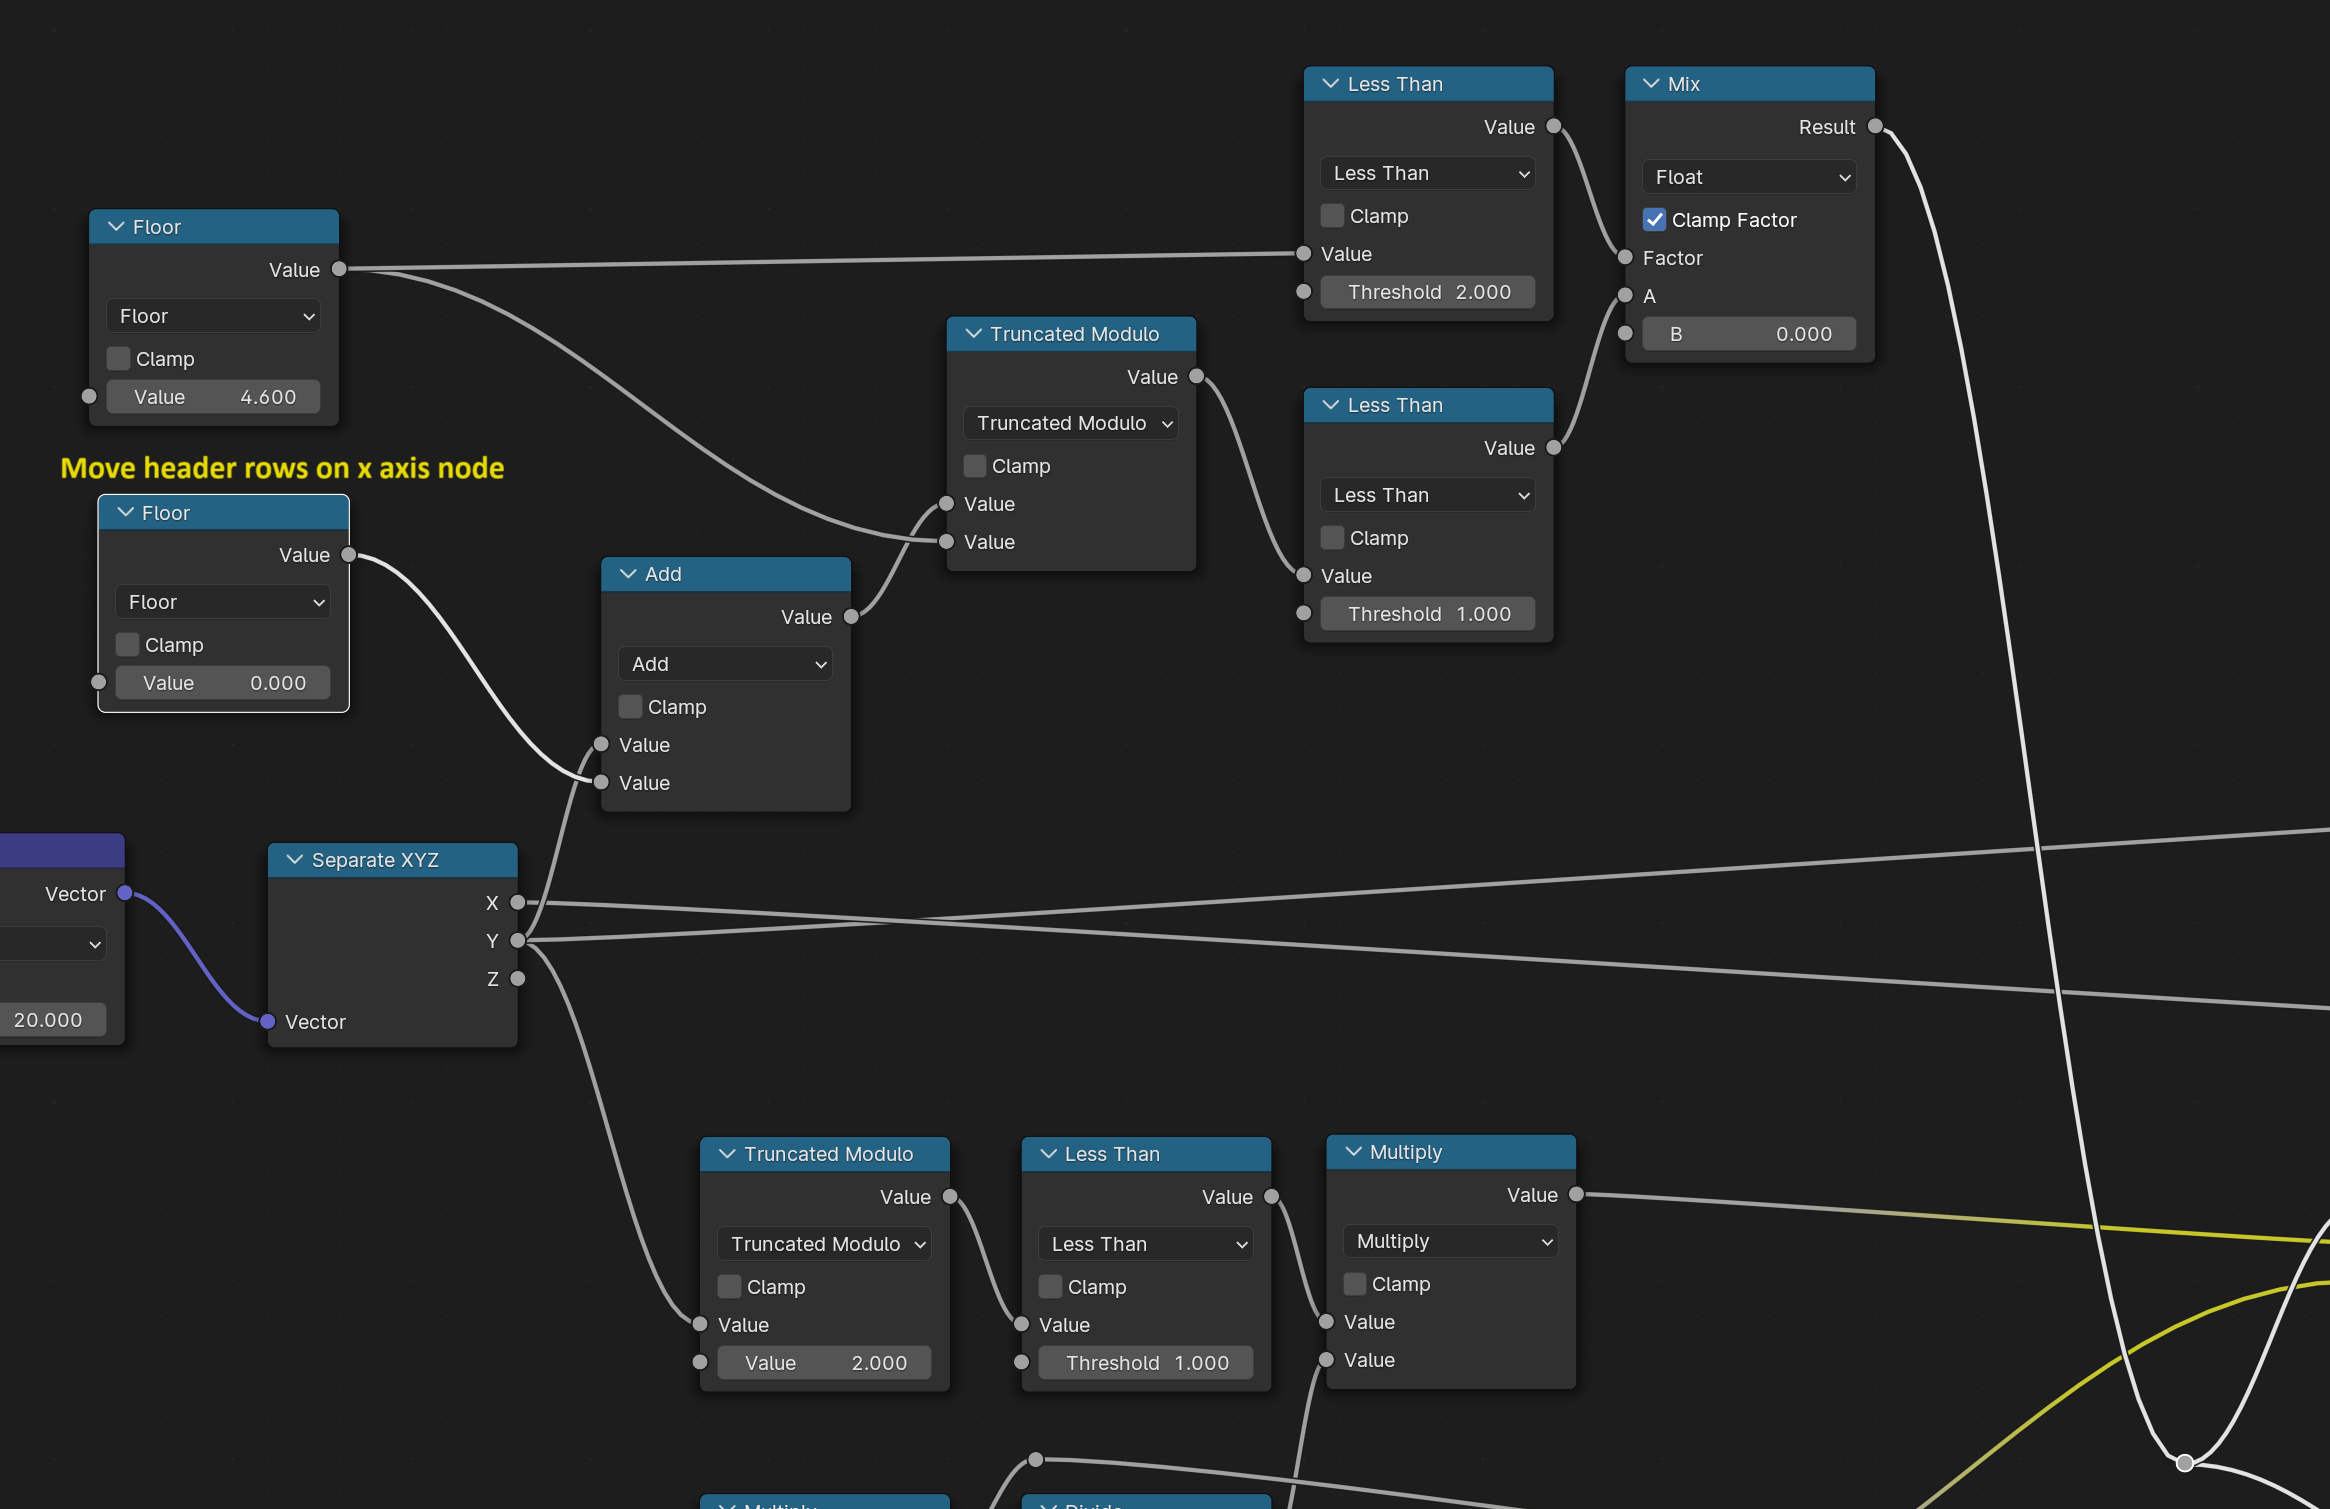
This is what we use to control the header brick row y axis movement:
And if you have the floor node which is set to 4.6 in the image to anything above 2 in value, moving the header brick texture with the beneath floor node (set to 0 in the image) will result in this:
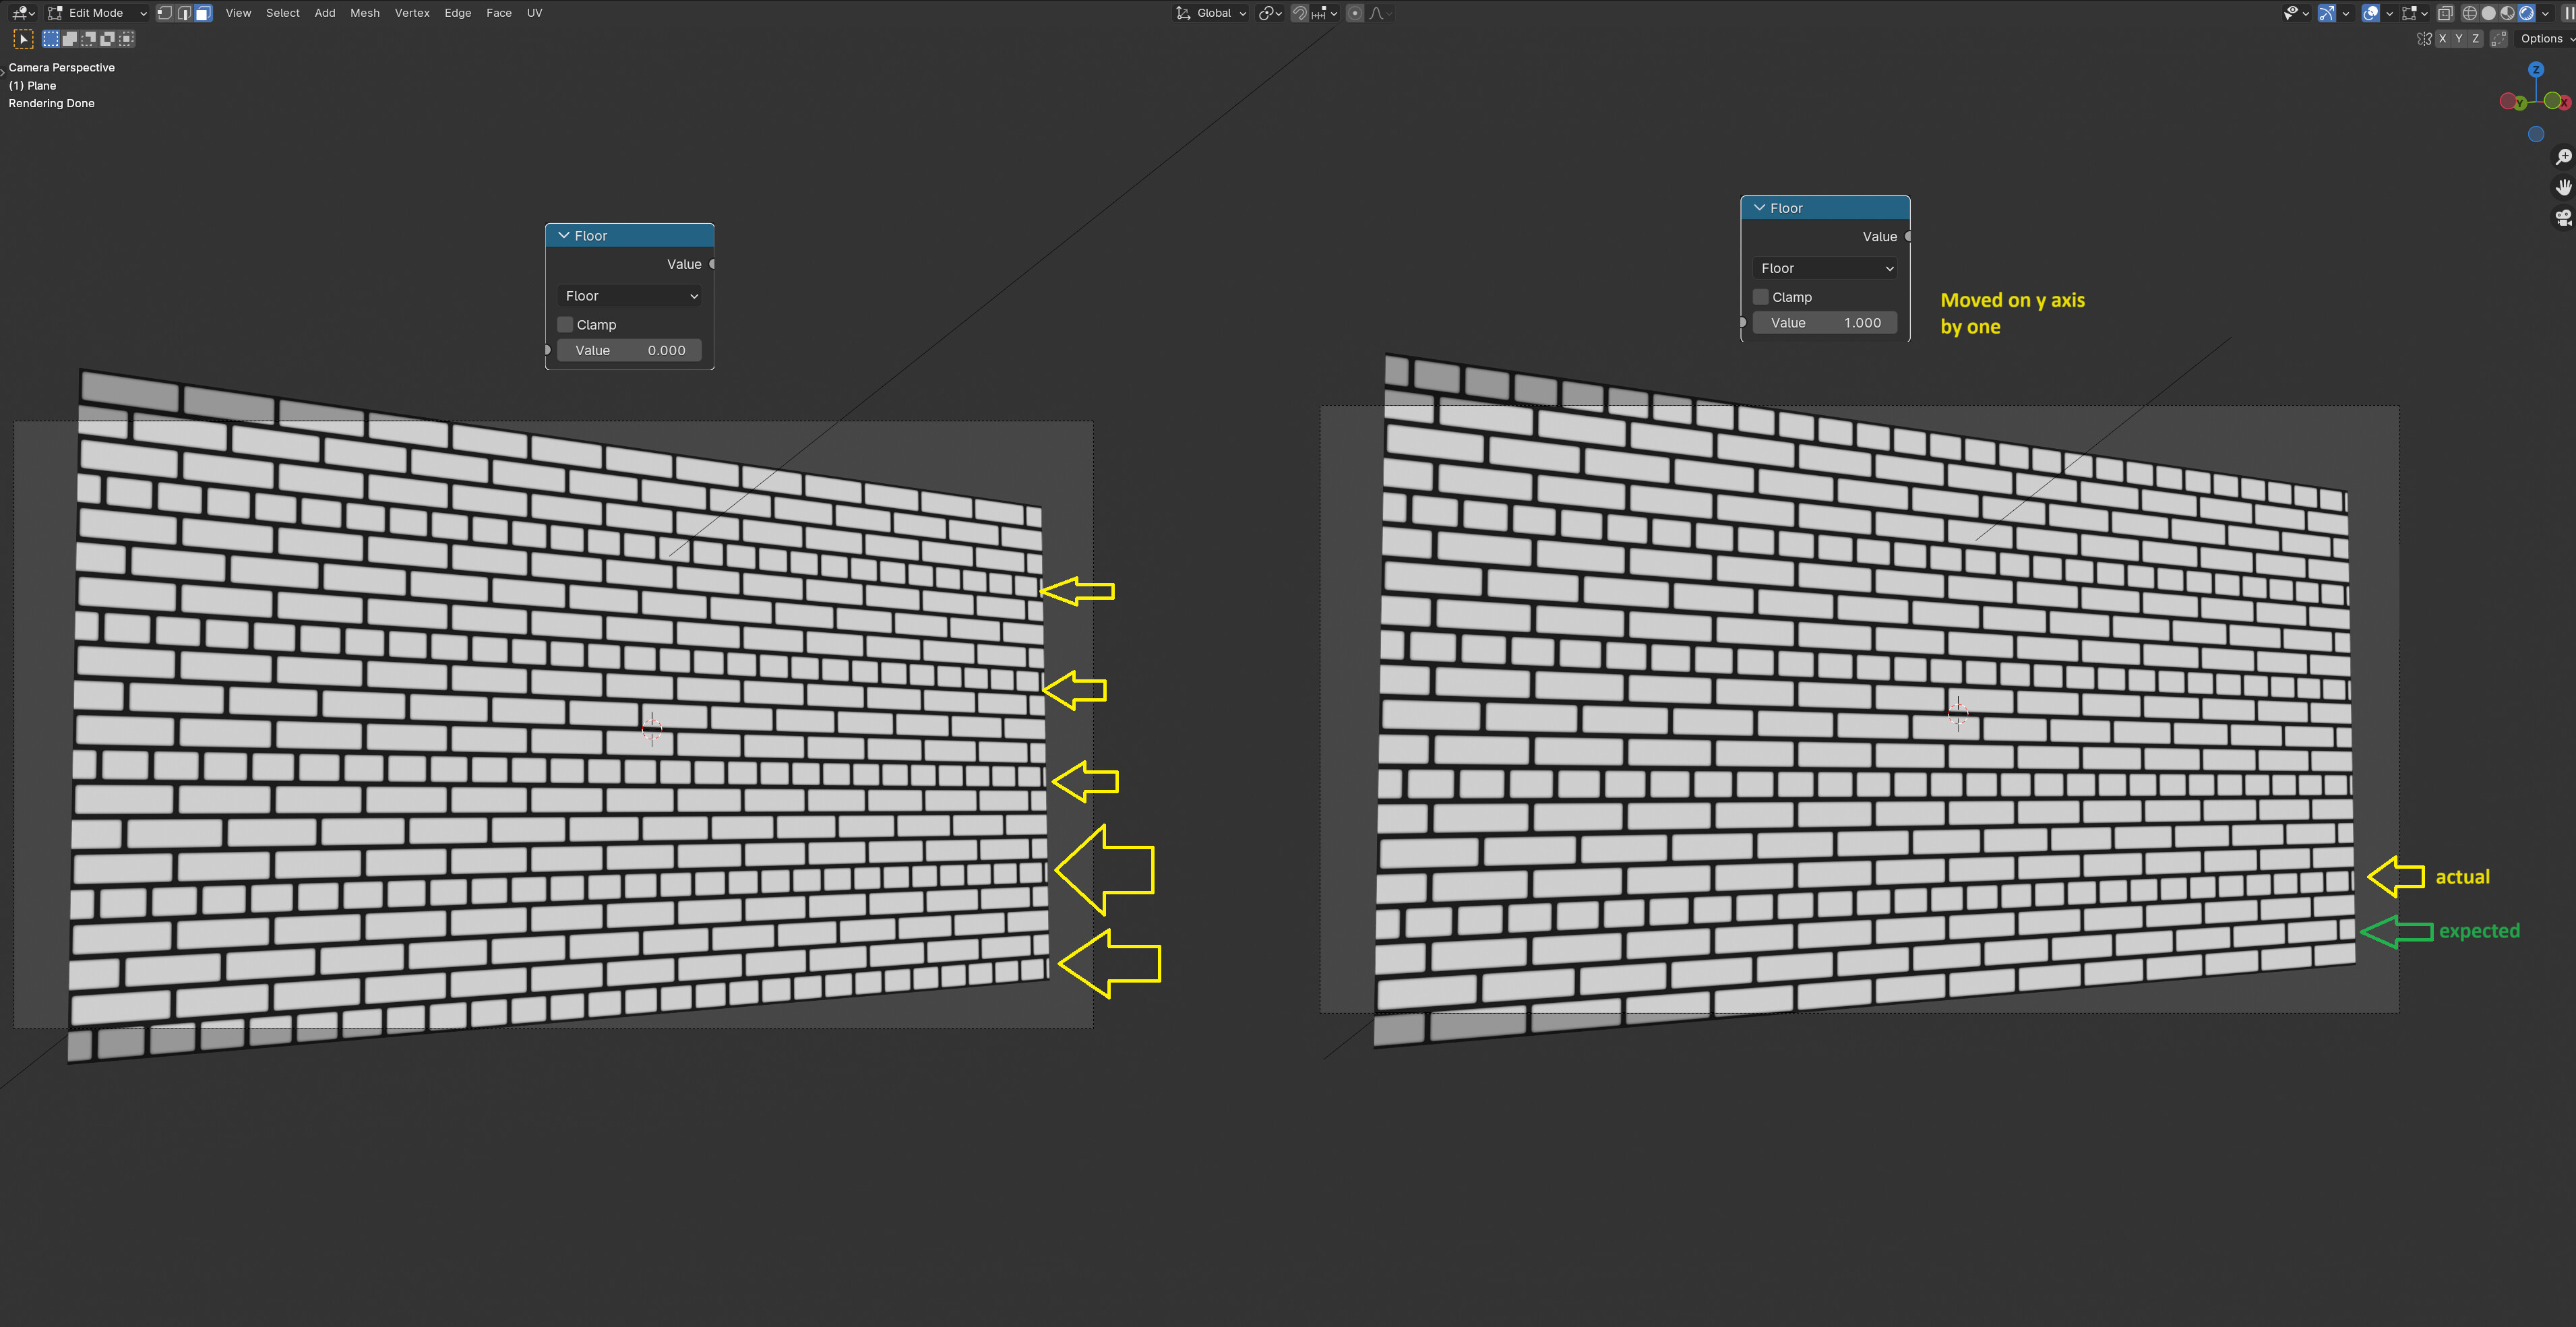
Thats because when we increase the value to 1 we actually move the complete texture down rather than up by one. But we can not subtract instead of add to the vector y axis, because if we subtract we would move the texture up, but we would get pure black values coming from the bottom from our brick pattern. Thats why adapted the formula to be this:
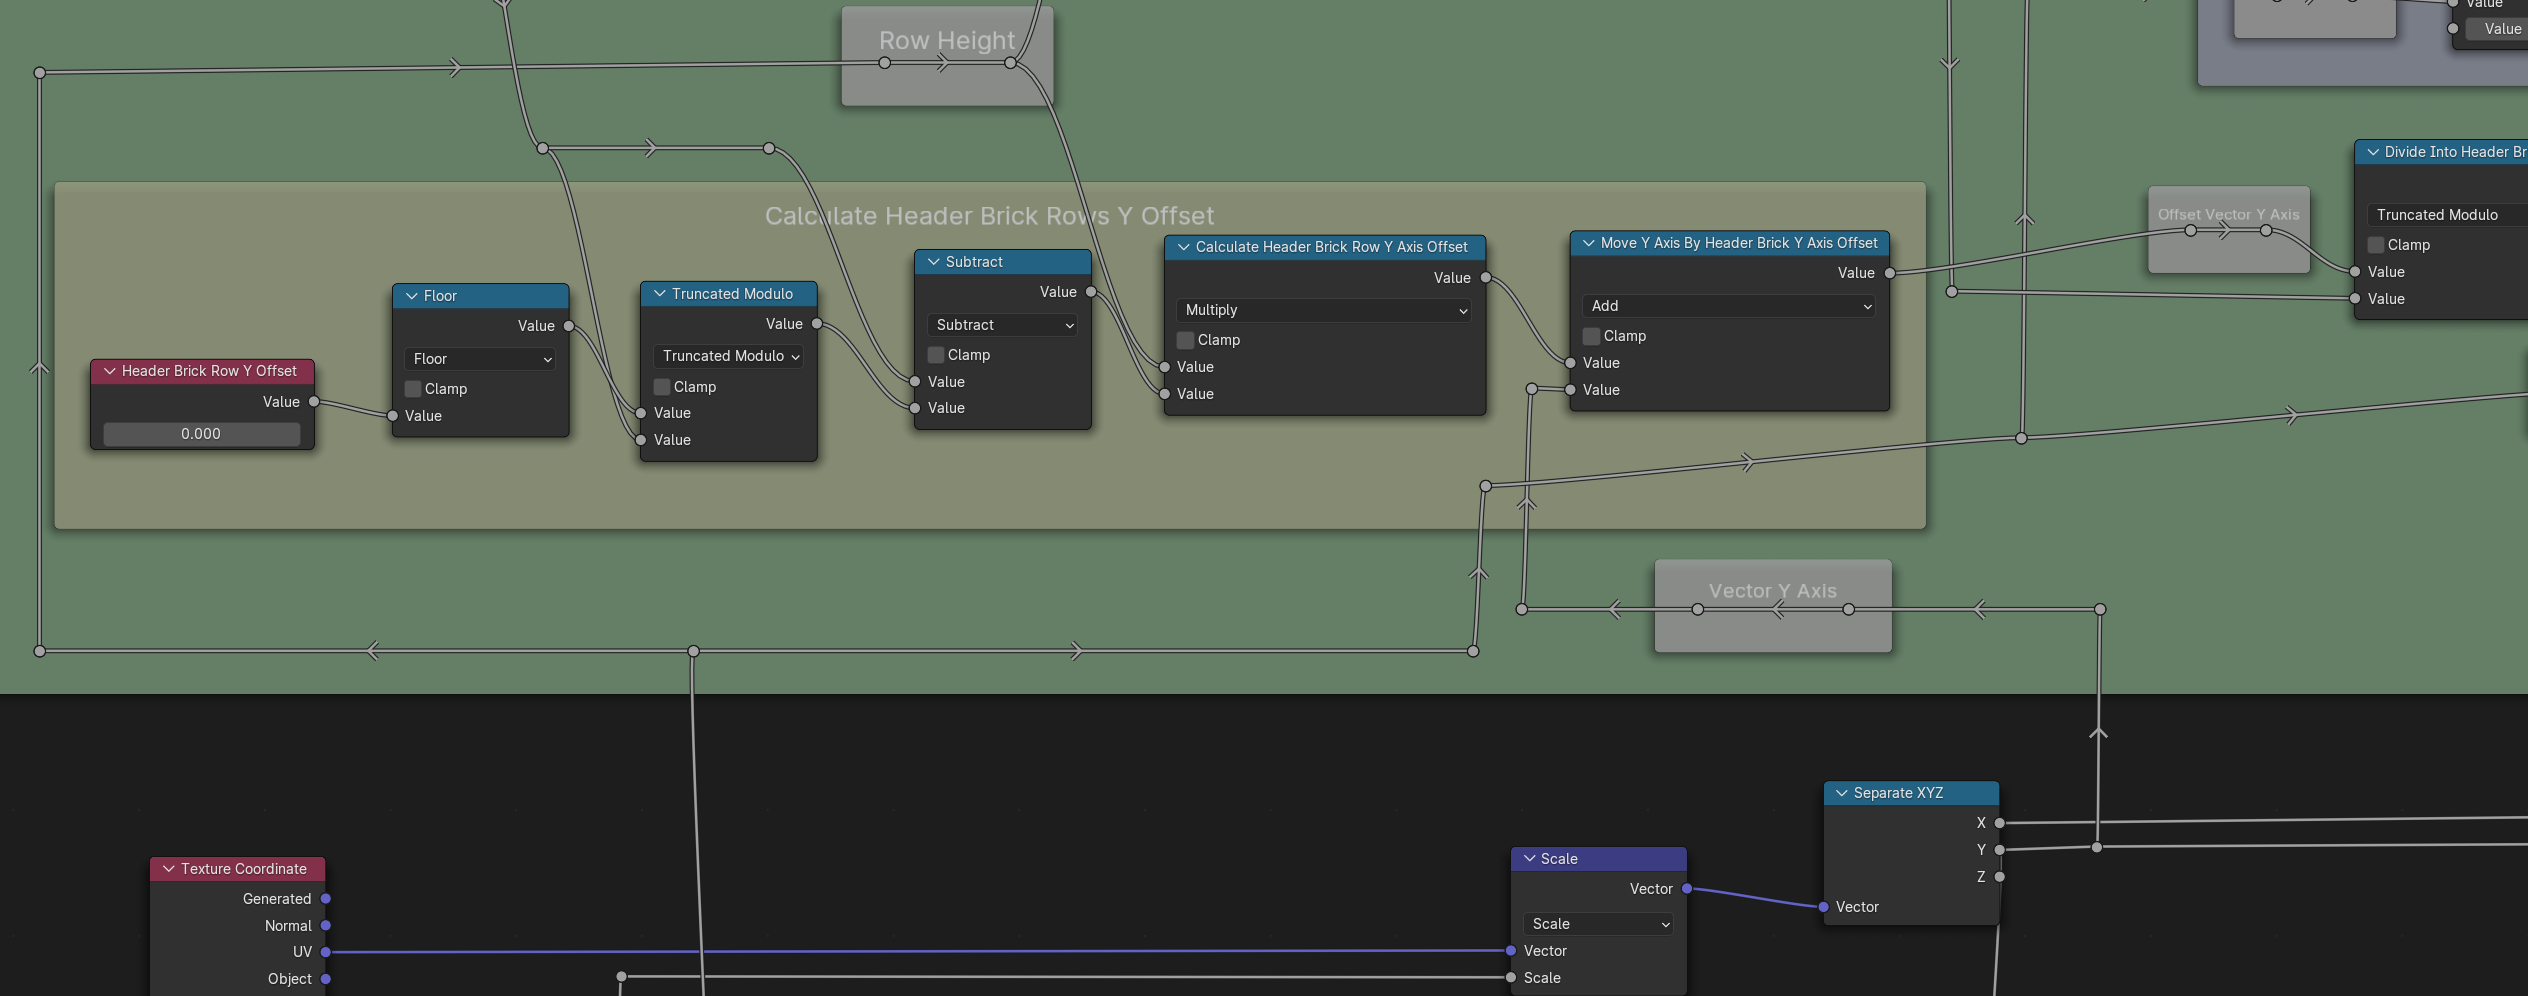
Now if I increase the Header Brick Row Y Offset value it feels like the texture moves up. It technically still moves down, but it will snap in place accordingly so it looks like we move the header brick rows up by one.
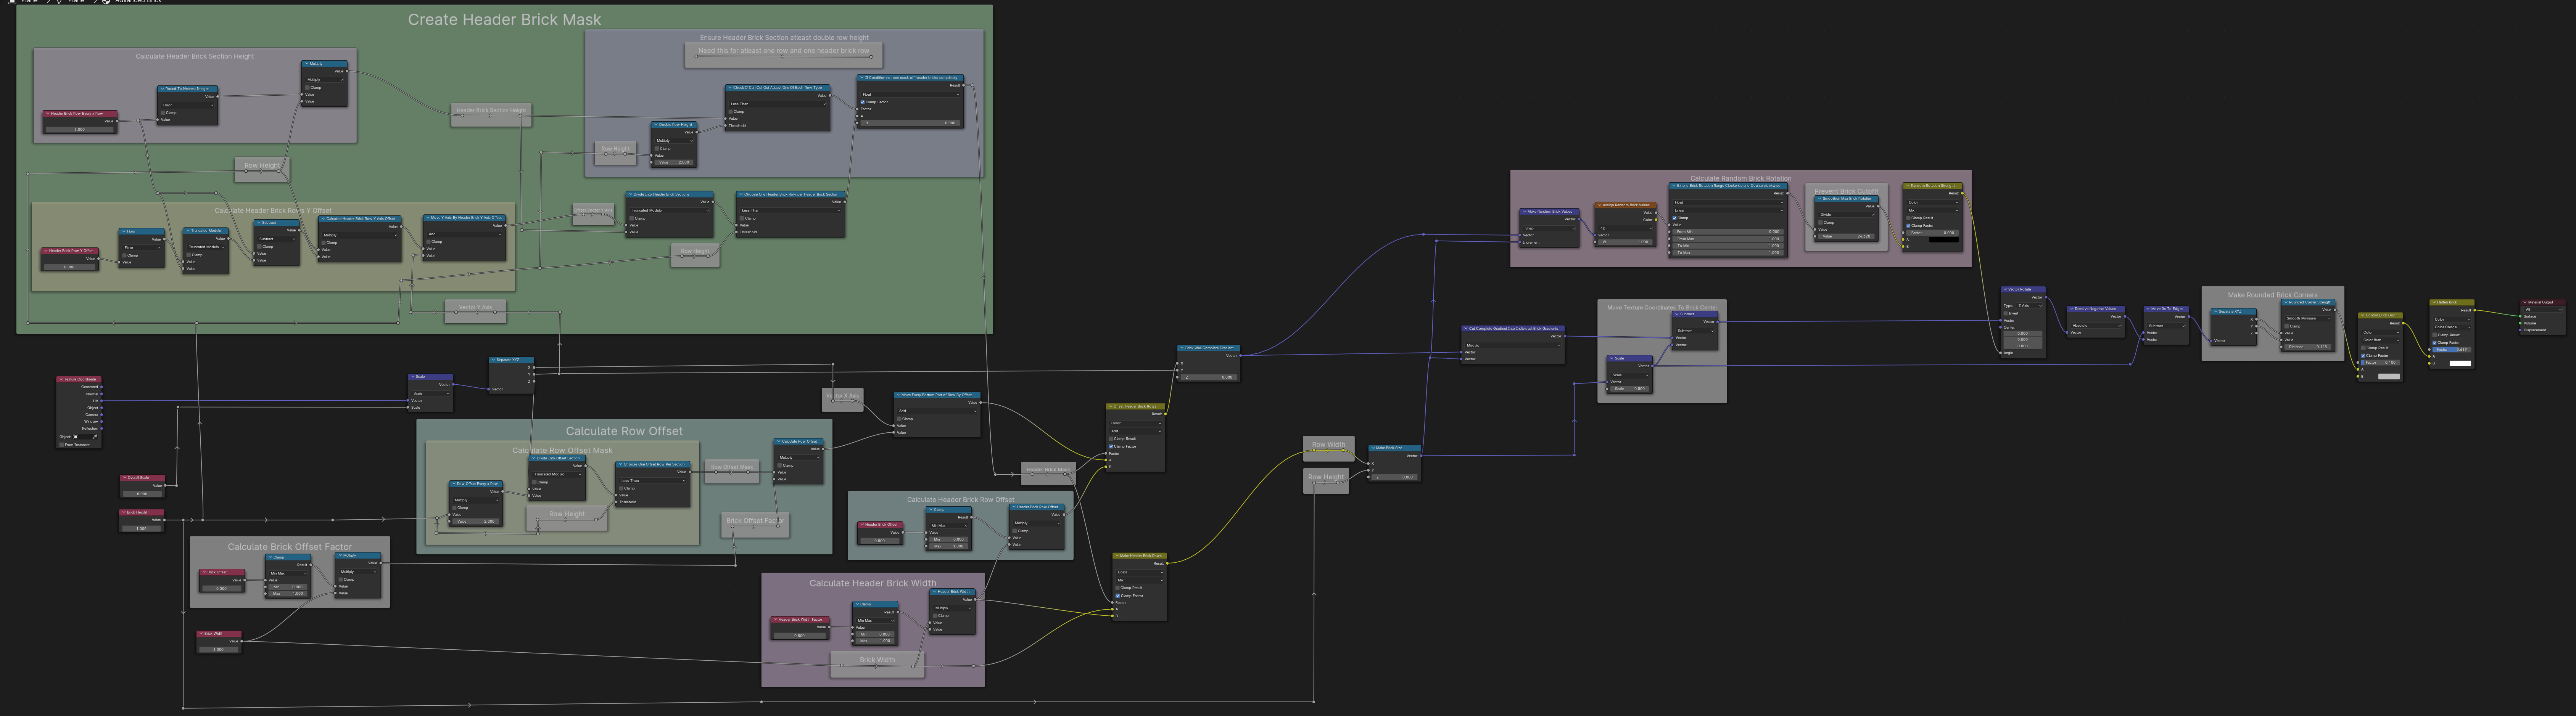
Heres my complete node graph so far (download it to zoom in):
And thats the result im getting:
Sorry for the heavy commenting using frames, but I found it helpful to keep track of what is going on and why, especially given our node tree size even only a few lectures in.
Im off to the next lecture, good luck to you!