My Ogre's butt crack has holes where it shouldn't

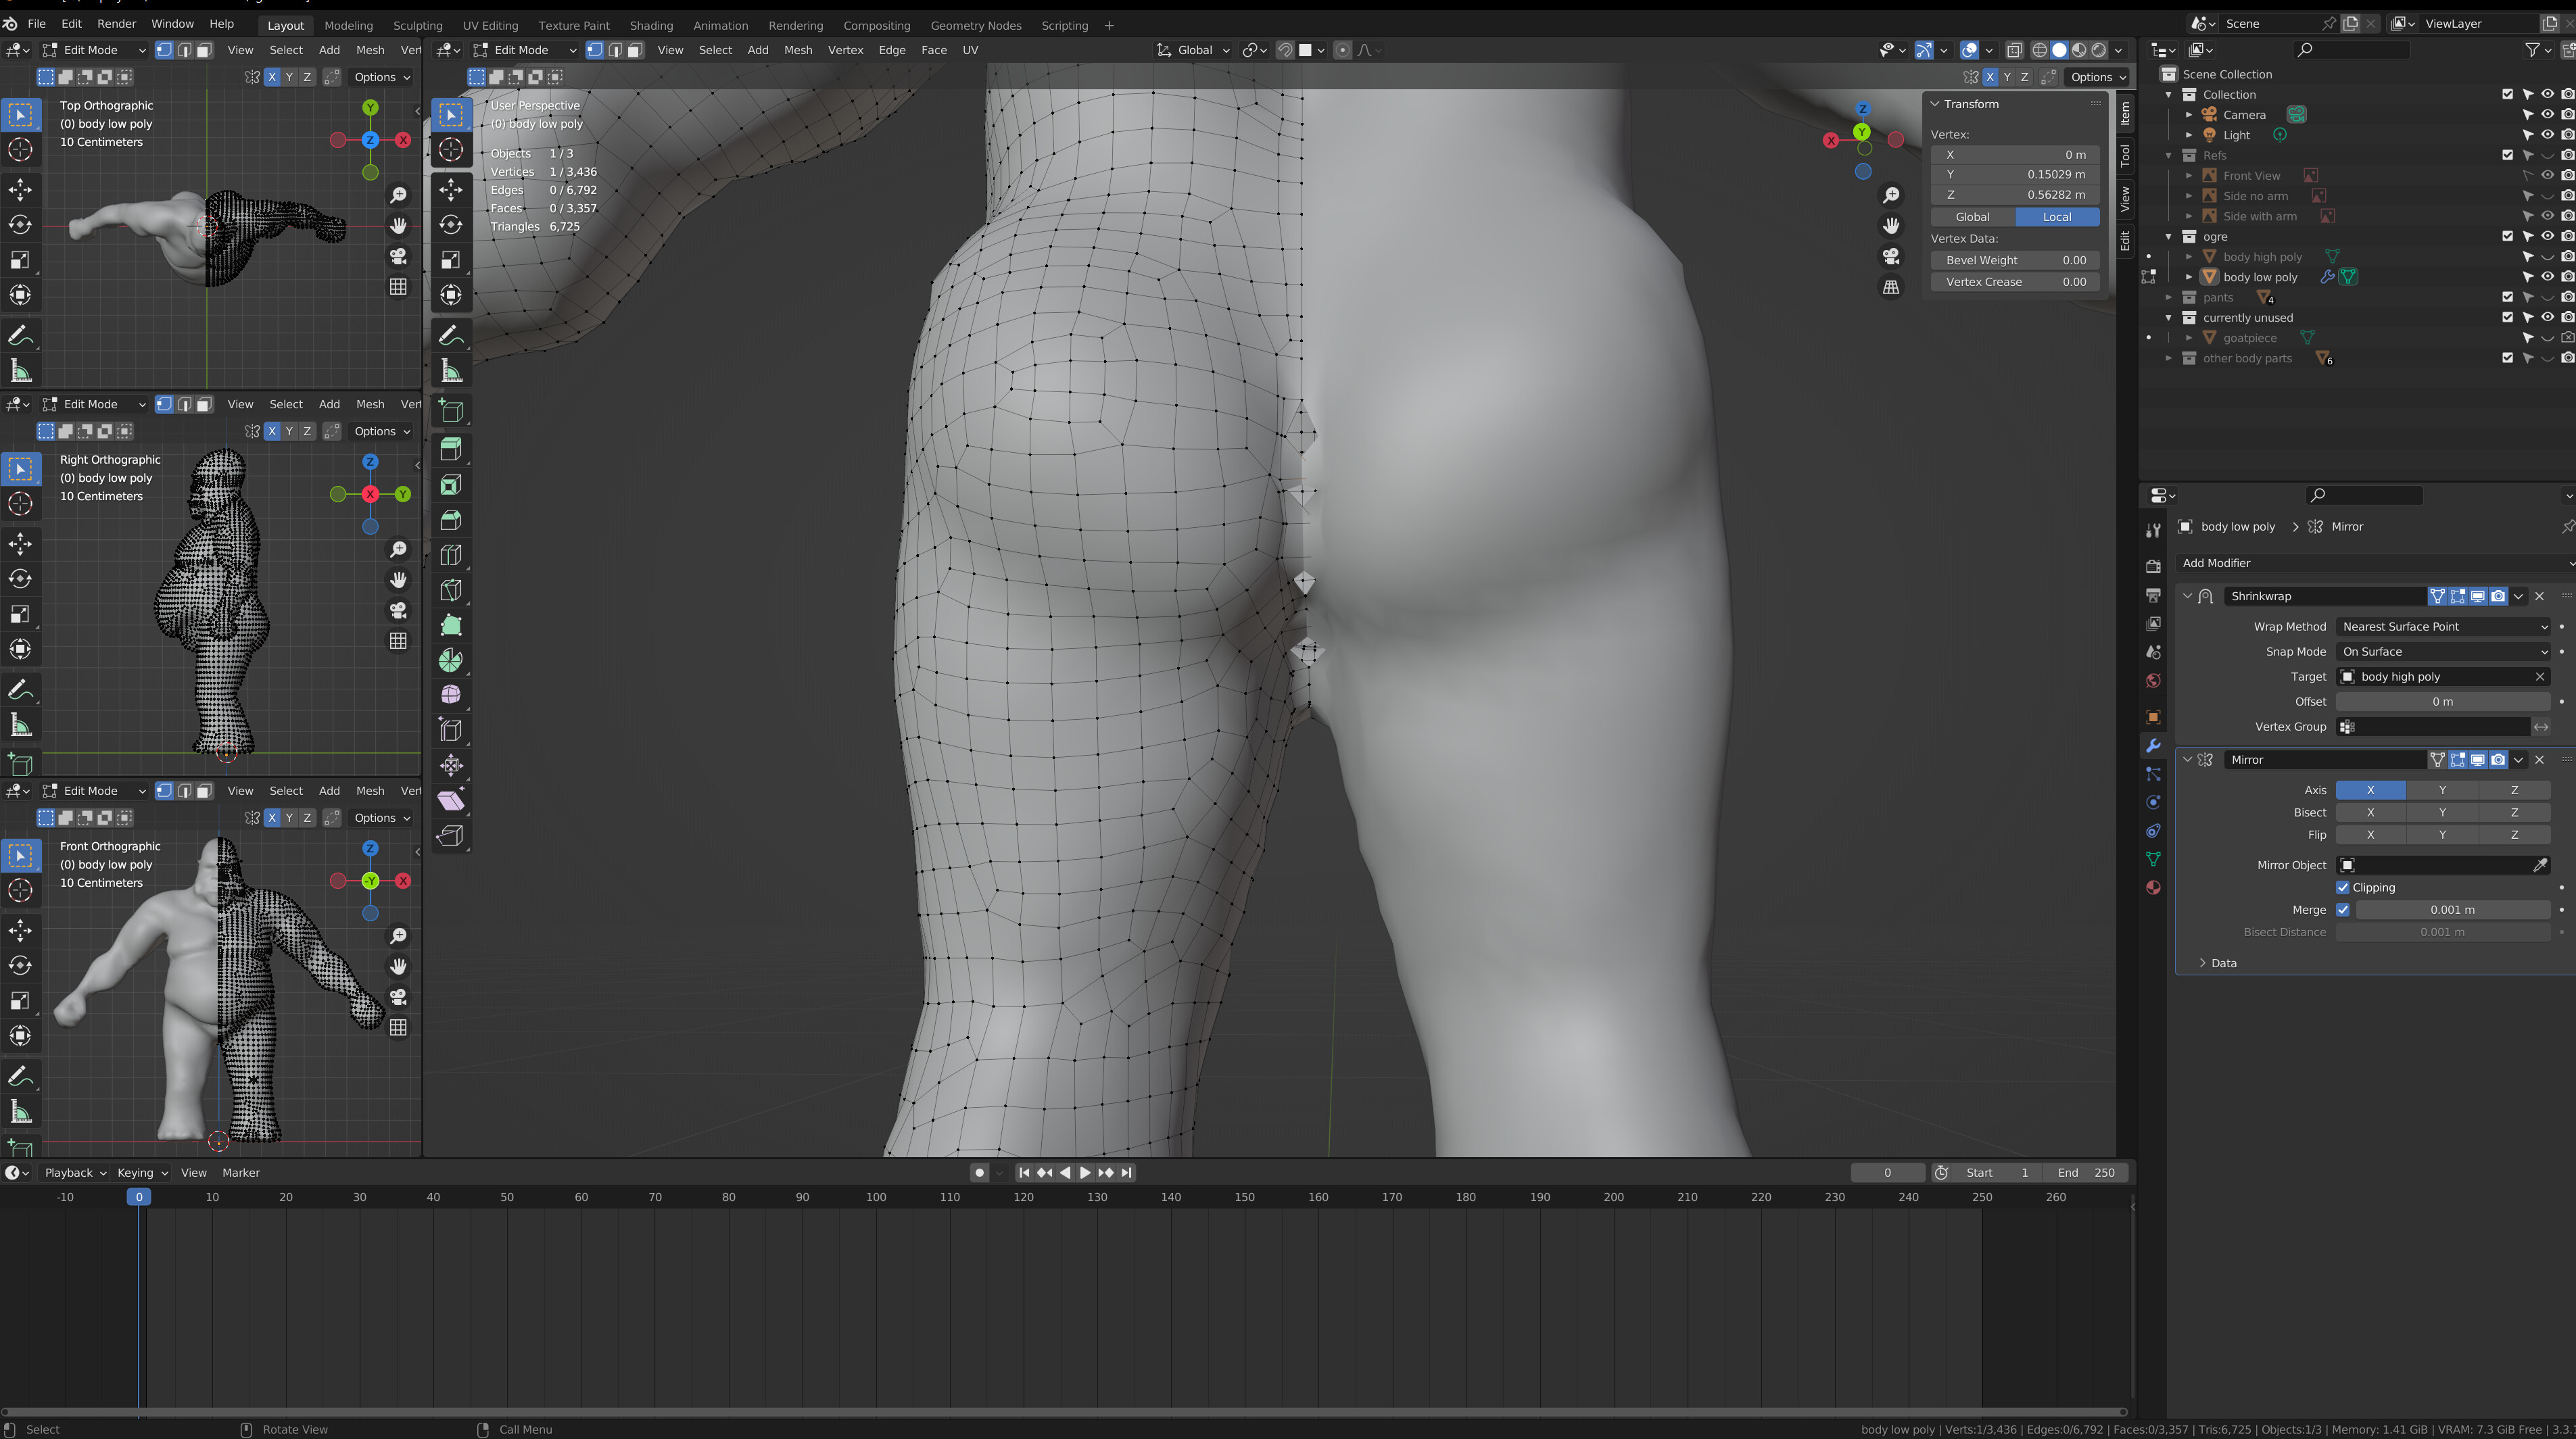
Now that my slightly immature brain has calmed down from the hysterical giggles over the post title (after about 15 minutes), I do have a rather serious problem, and I’m not sure what the fix is. I’ve tried adding additional cuts hoping that would help, but I cannot for the life of me get the vertices to snap to the right surface for the butt crack. If I try to move them, they snap all the way over to the mirrored side.

Shrinkwrap enabled:

Shrinkwrap off:

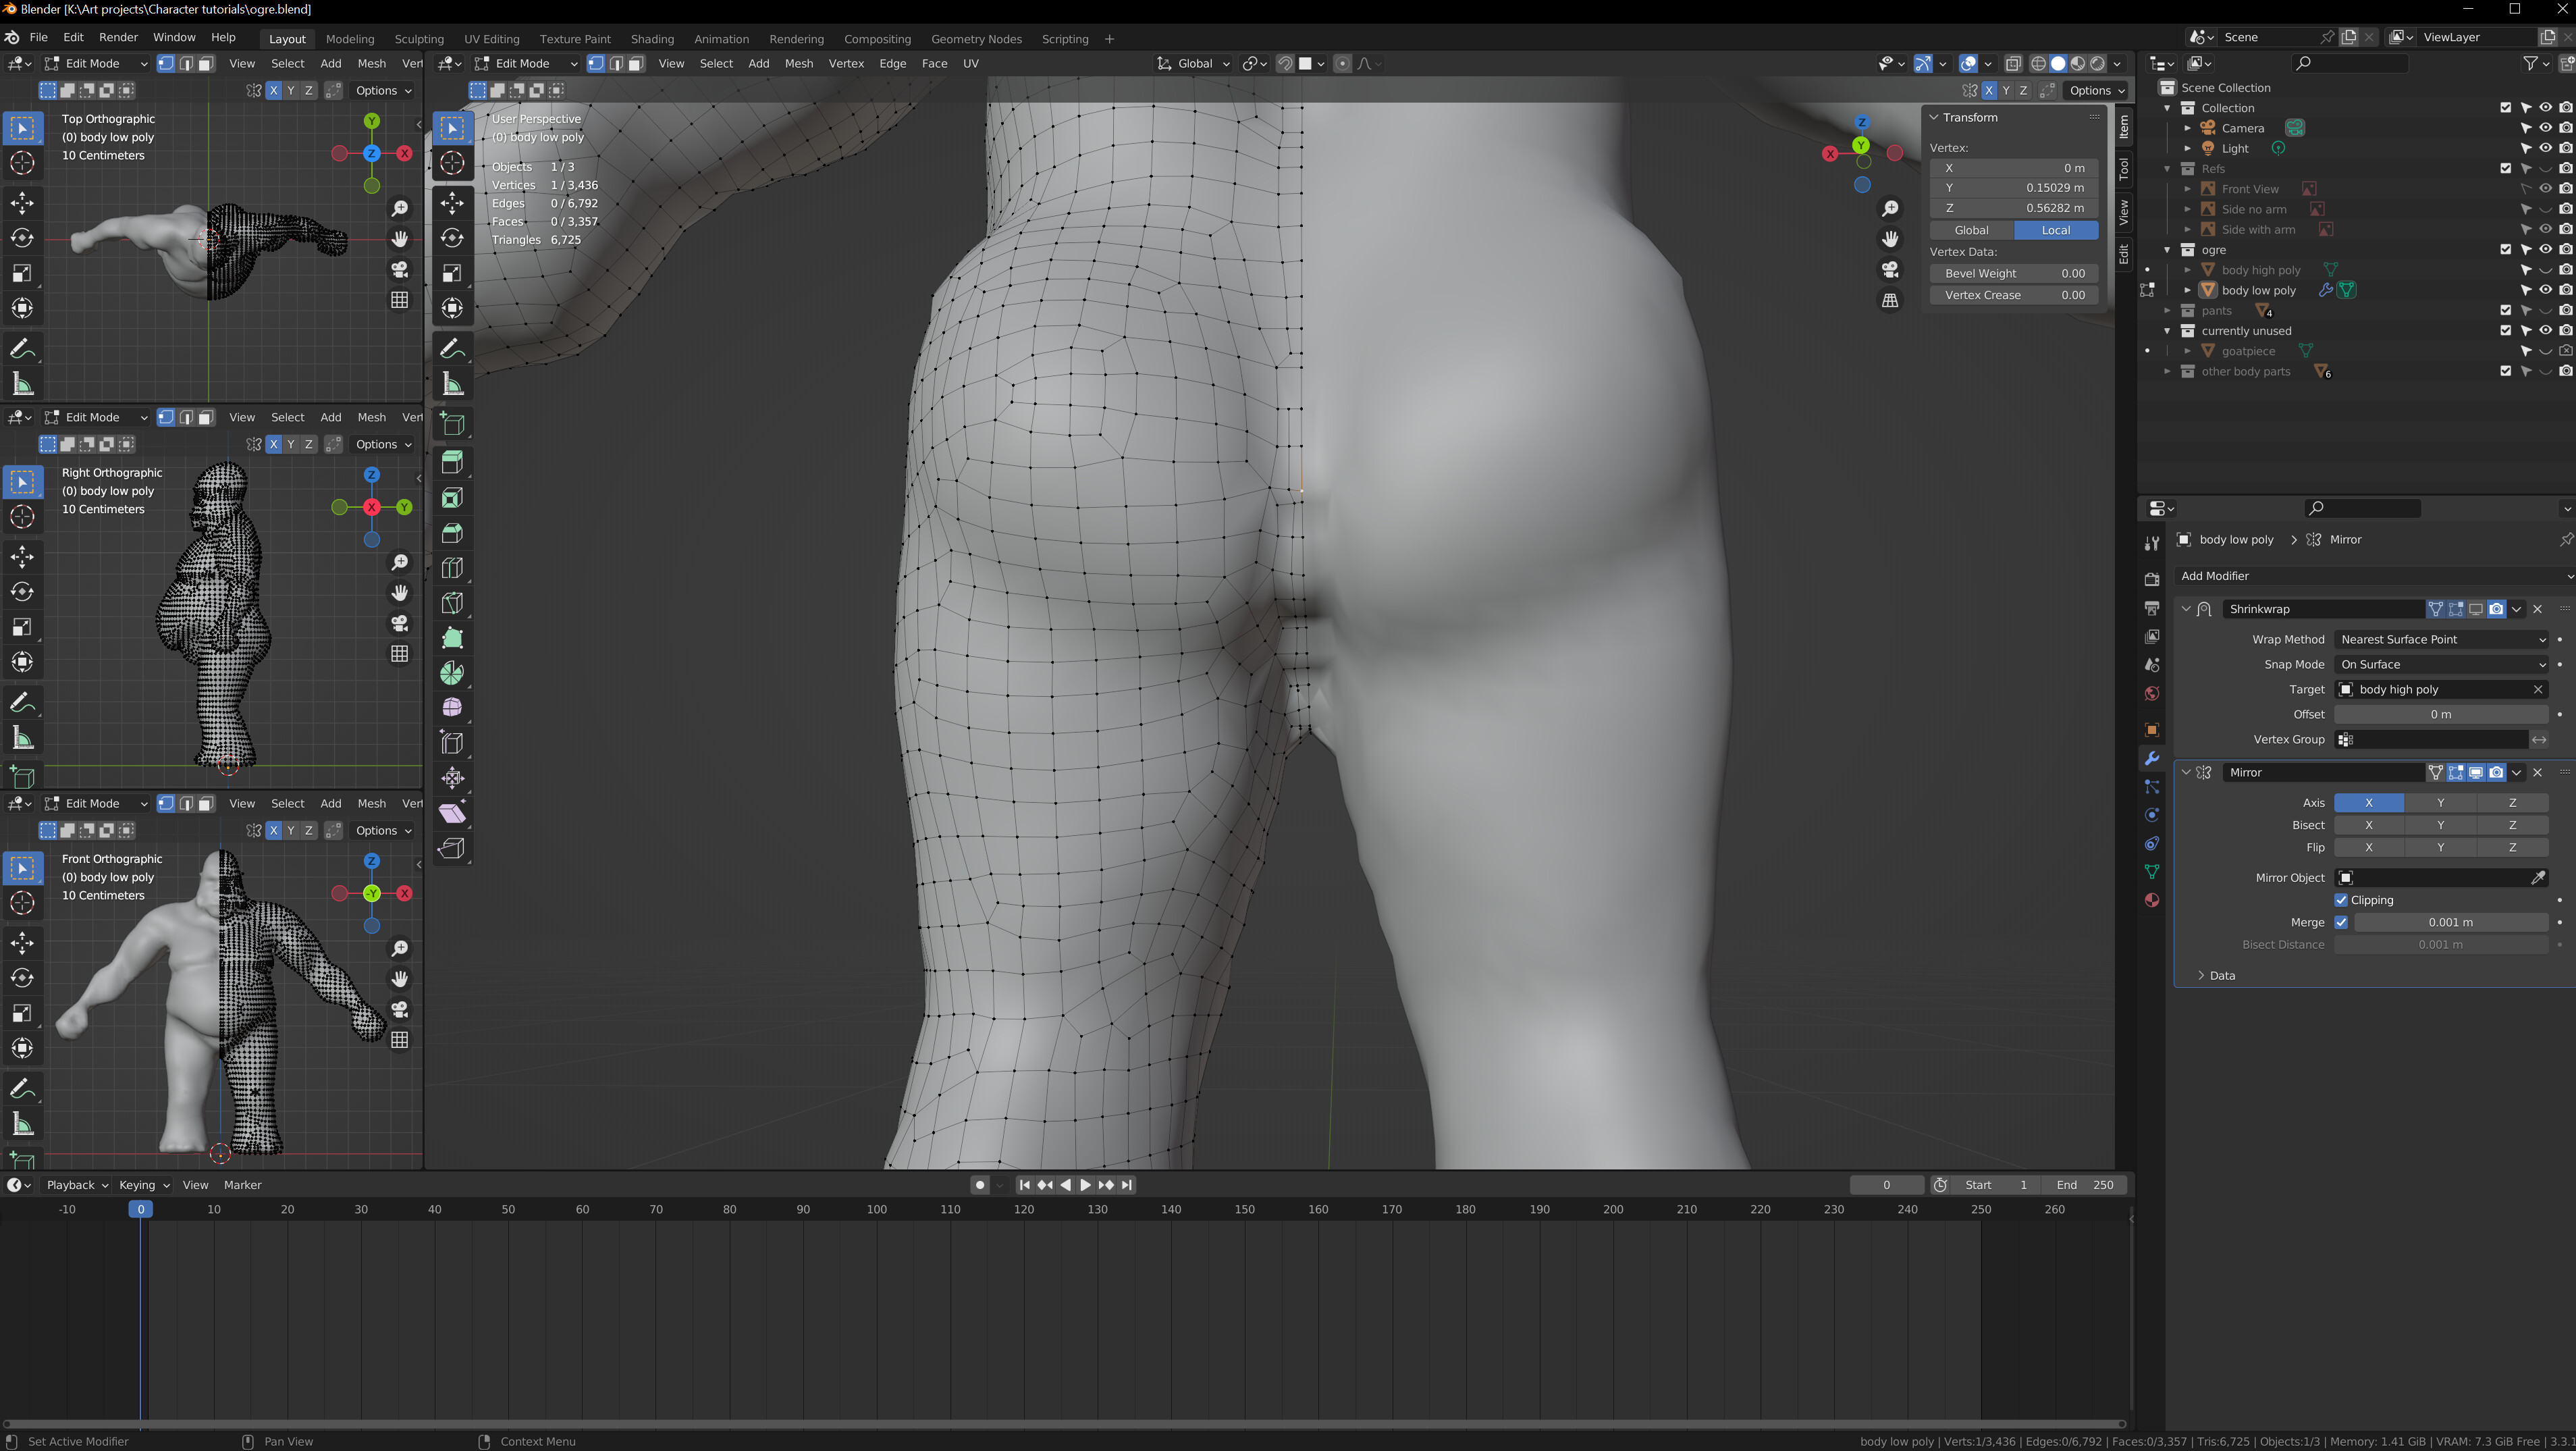
I’ve tried adding in a cut to increase detail. I’ve tried REMOVING a loop. And I’ve tried moving the vertices a bit with snapping off to see if I can get them a bit closer manually… But nothing seems to close the holes in my ogres butt when I turn on shrinkwrap… Does anyone have any ideas how to resolve this issue? I don’t have it anywhere else there are tighter creases, such as the manboobs, belly roll, armpits, or hands.

I was already tempted to try manually retopology, as that’s how I was essentially initially showed 3D modeling 10-15 years ago, so I am SOMEWHAT familiar with the method, including face flow and all that… So now I’m wondering if I should just “give up” and do it the hard way as I’m thinking that might actually be easier.

1 Like

I always use hand retopology it is just easy and better. Personally, I do not think students should be encouraged to take these supposed shortcuts and easy ways, they often have problems and do not end up with remotely good topology.

You could try the shrinkwrap mod below the mirror, order makes a difference sometimes.
You could apply the mirror mod and see if the shrink wrap then acts better.
You could apply the mods and fix this one area by hand.

2 Likes

I’ll try rearranging the modifiers, but will likely do it by hand. Watching him do the face, it’s more or less how I was taught to model long ago when I initially was learning on 3dsmax, (and the only way I even knew how to model before these tutorials and discovering sculpting) so it’s something I’m actually very familiar with. And having the sculpt to use as a guide and shrinkwrap… it should go relatively quick.

Also, given that one of the reasons I want to learn is to create animations for my own content, i feel like I’ll be able to animate a lot more, a lot better, after seeing the lack of flow in my current mesh.

Thanks for the input!

2 Likes

Yes it was how I first made such shapes. In effect 're’topology first! Very simple over a sculpt though. Still think it is the best way to create the model, then use multires to sculpt, keeping the topology in effect.

2 Likes

Select vertices (area of) and do “smooth vertices”.
You loose details which can be added later again.

Privacy & Terms