My OGR needs help. A lot of help

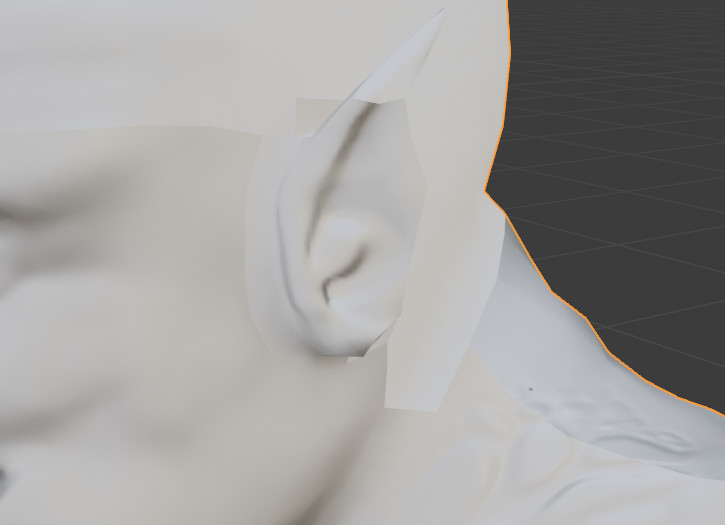
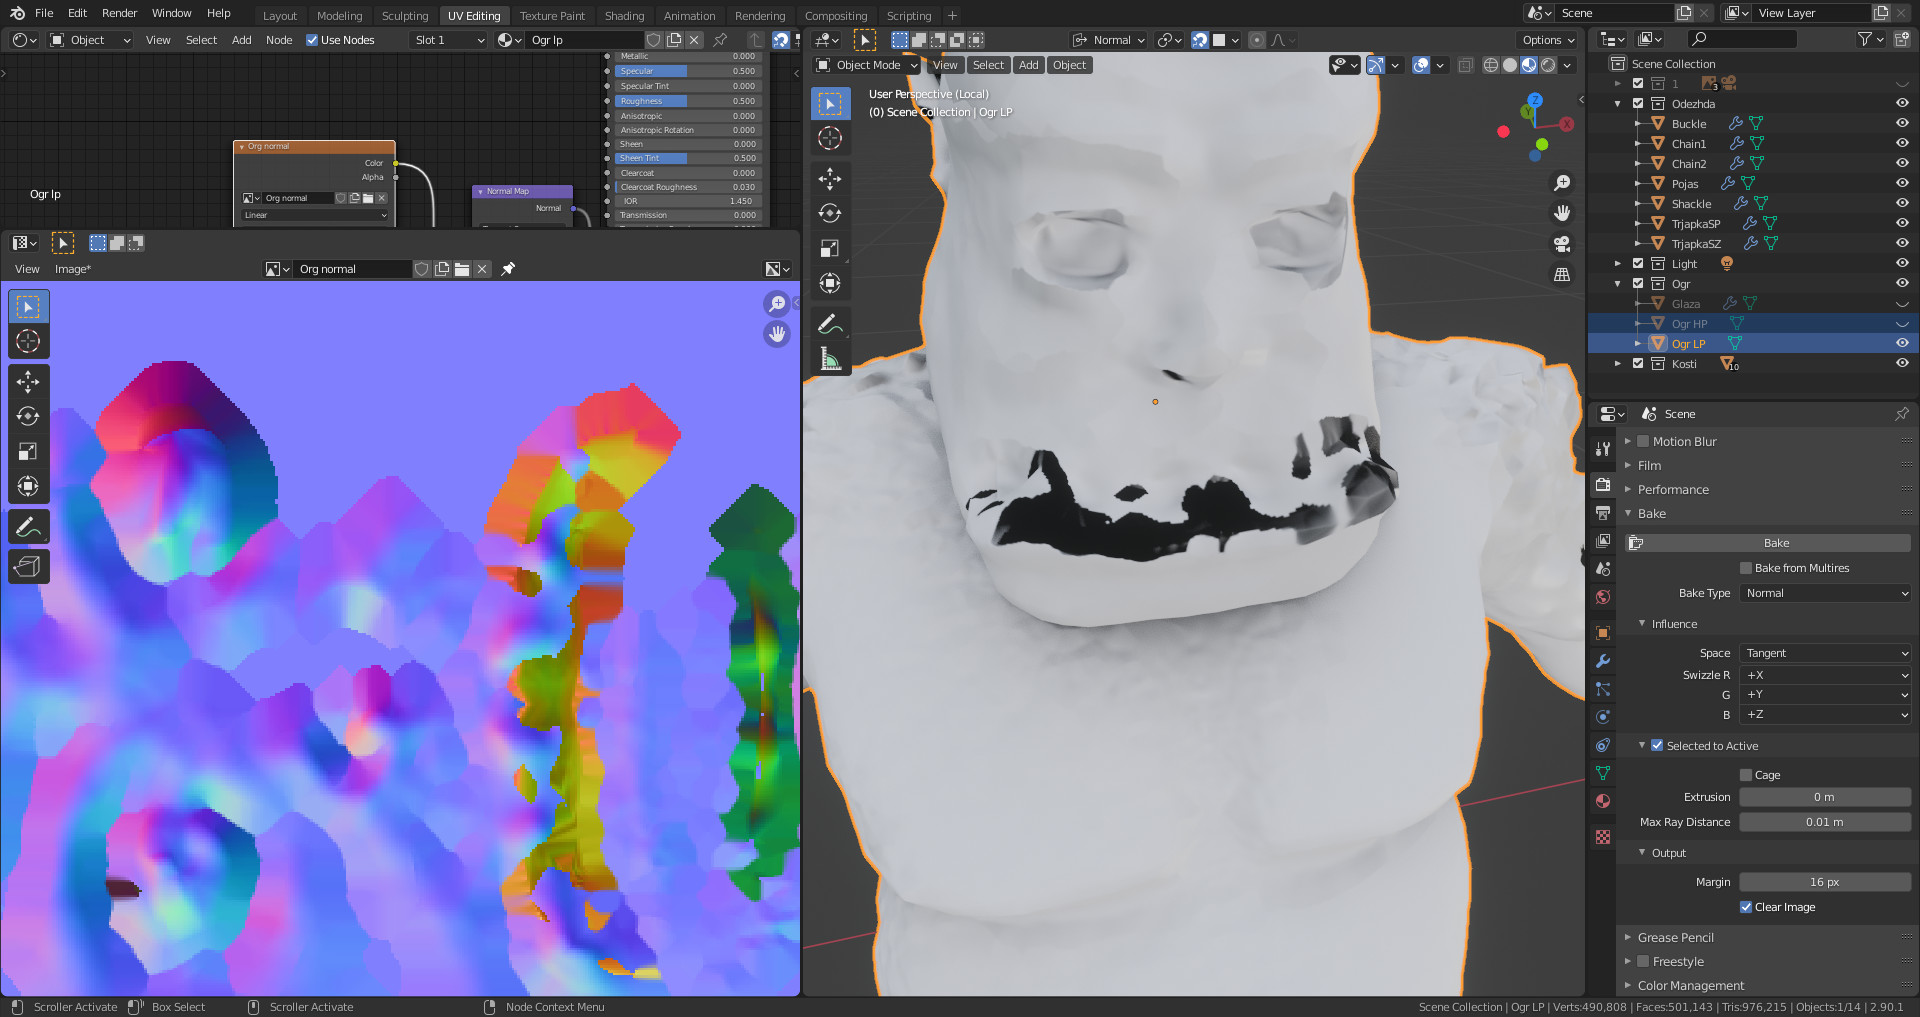
I tried to bake, and it turned out like those jokes expectations versus reality pics.

The problems:
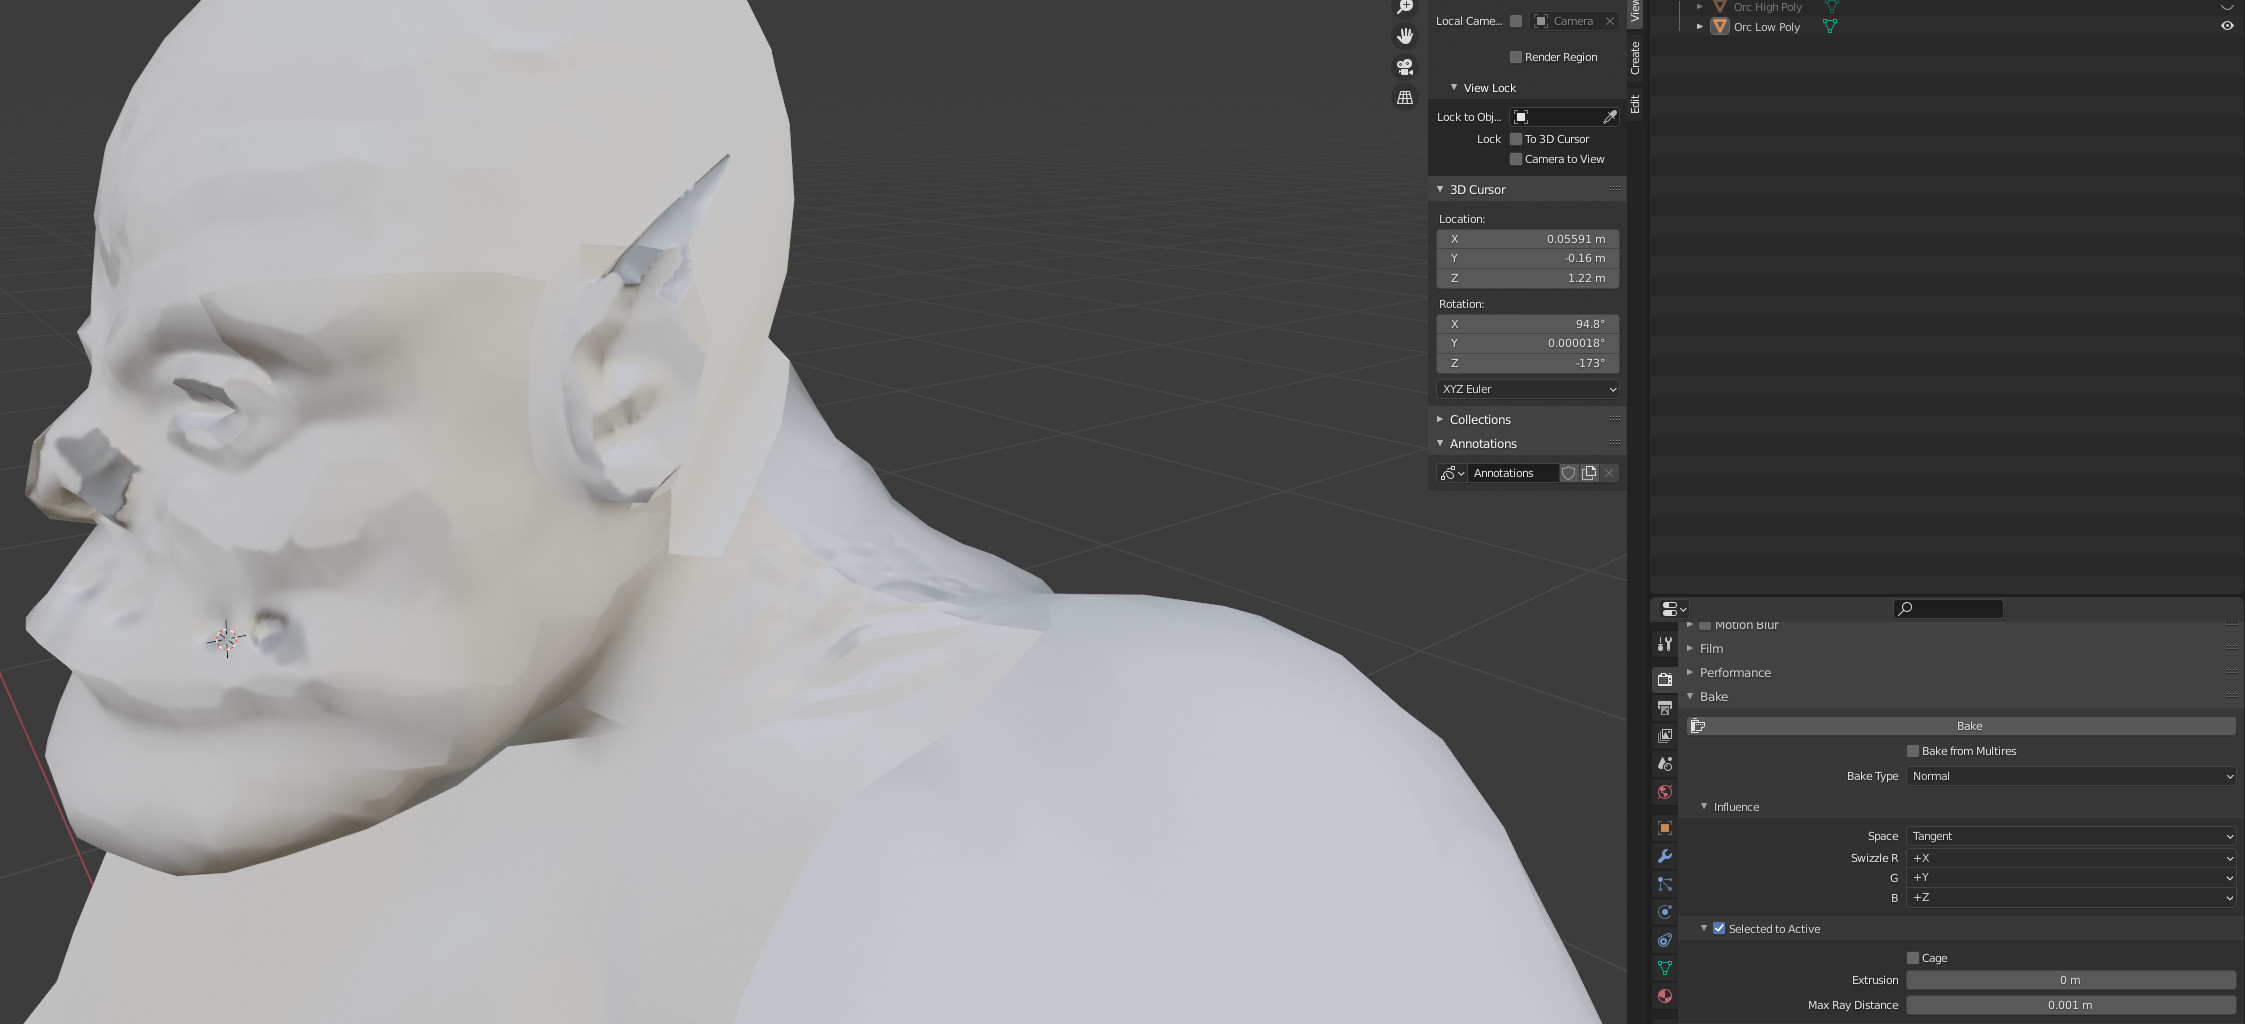
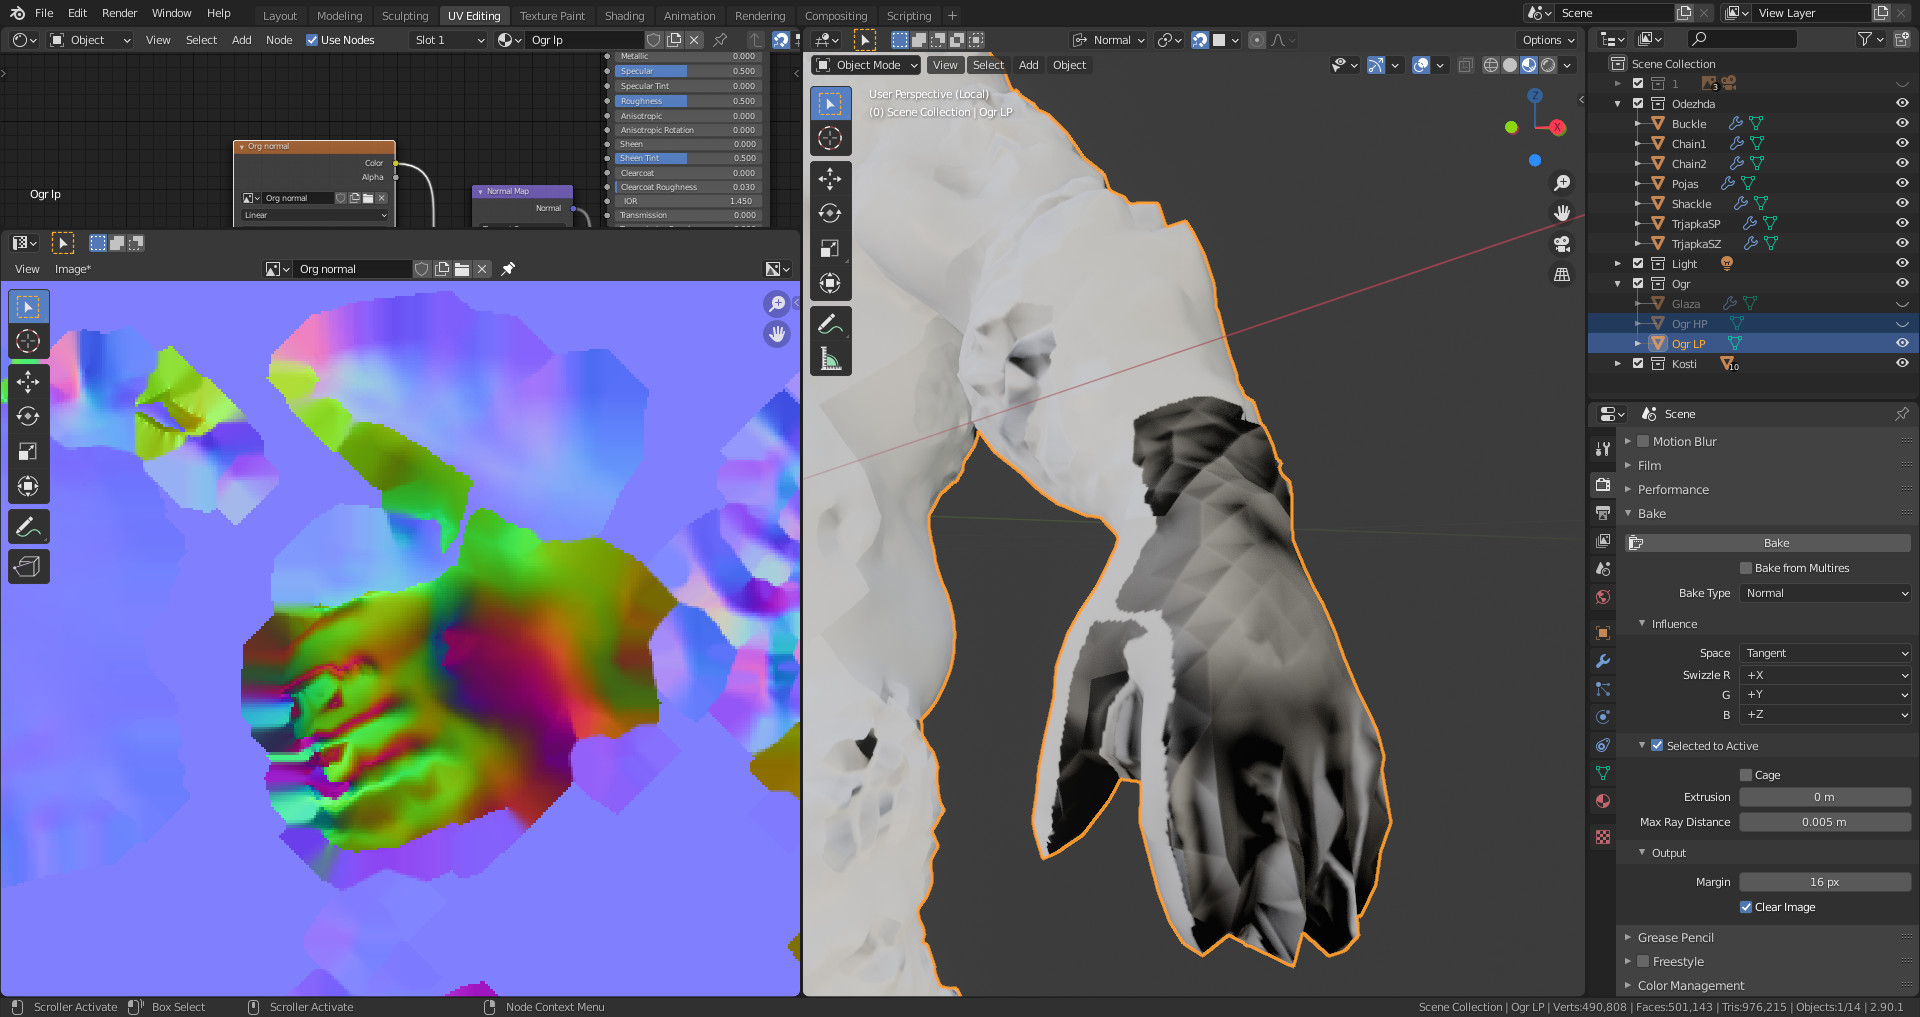
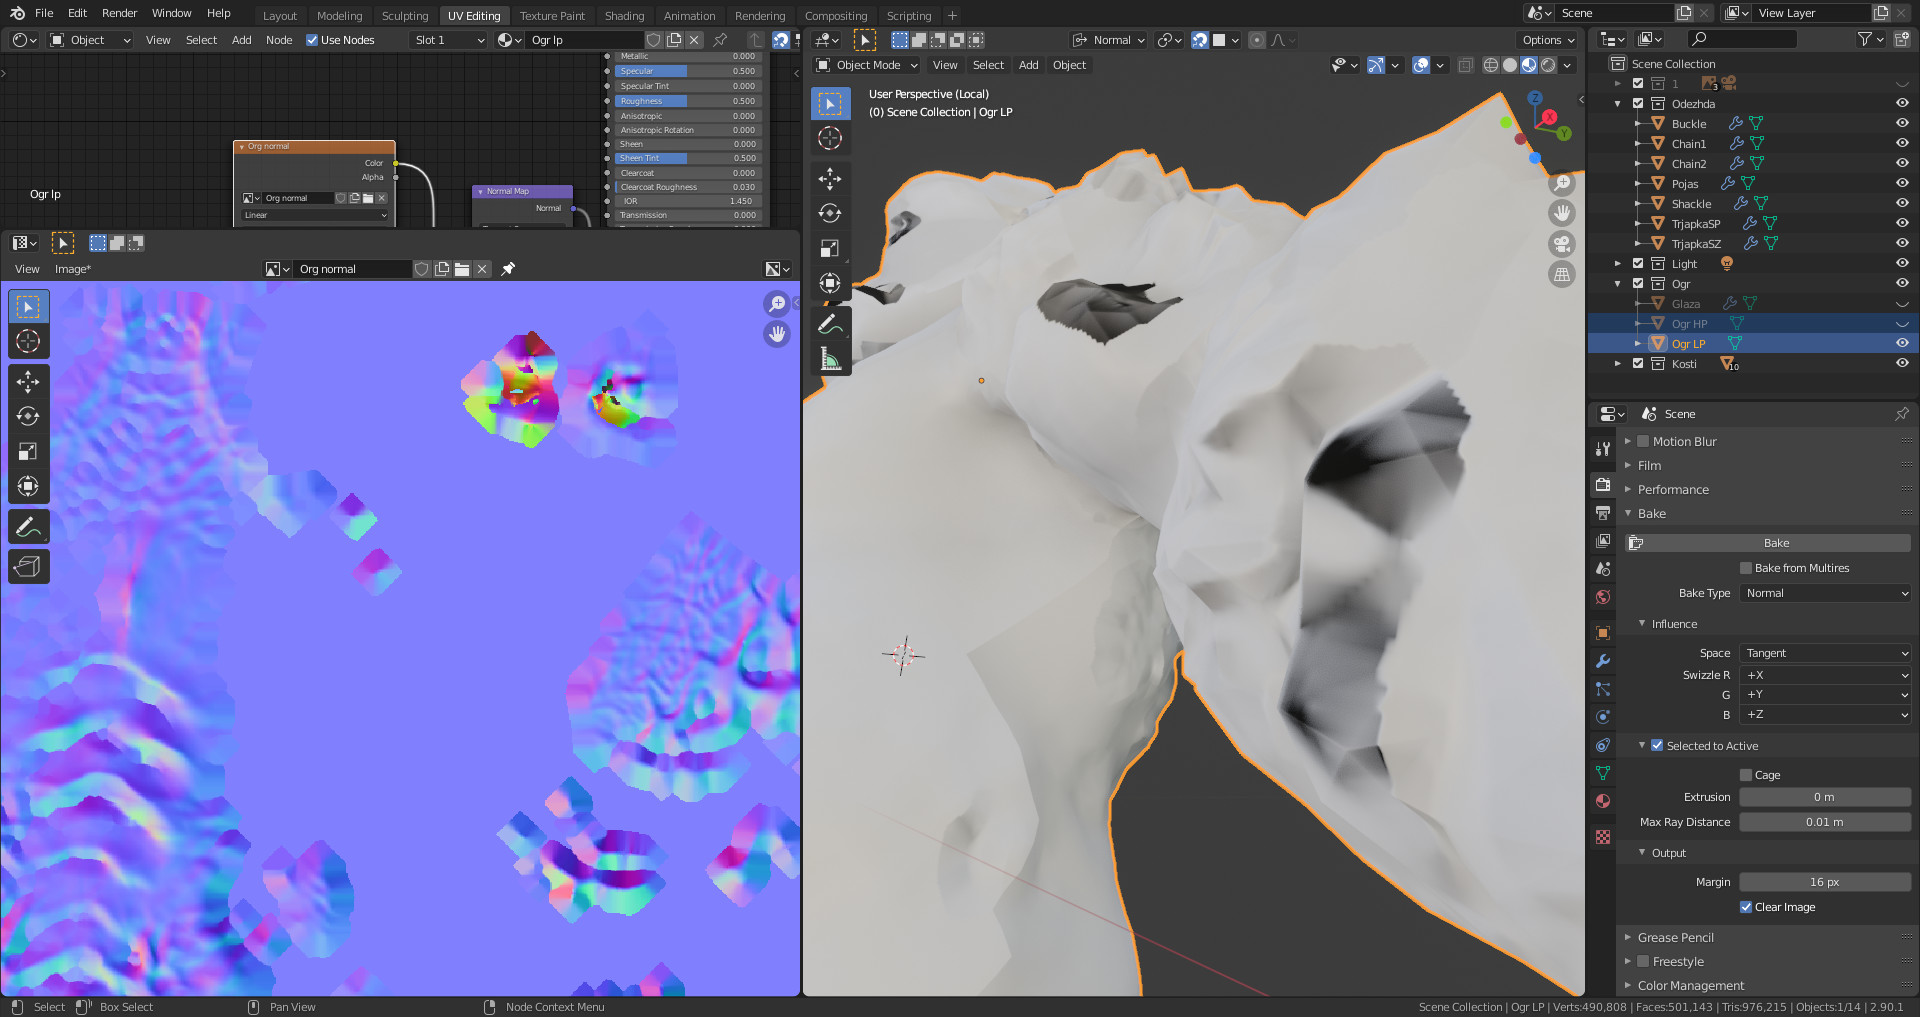
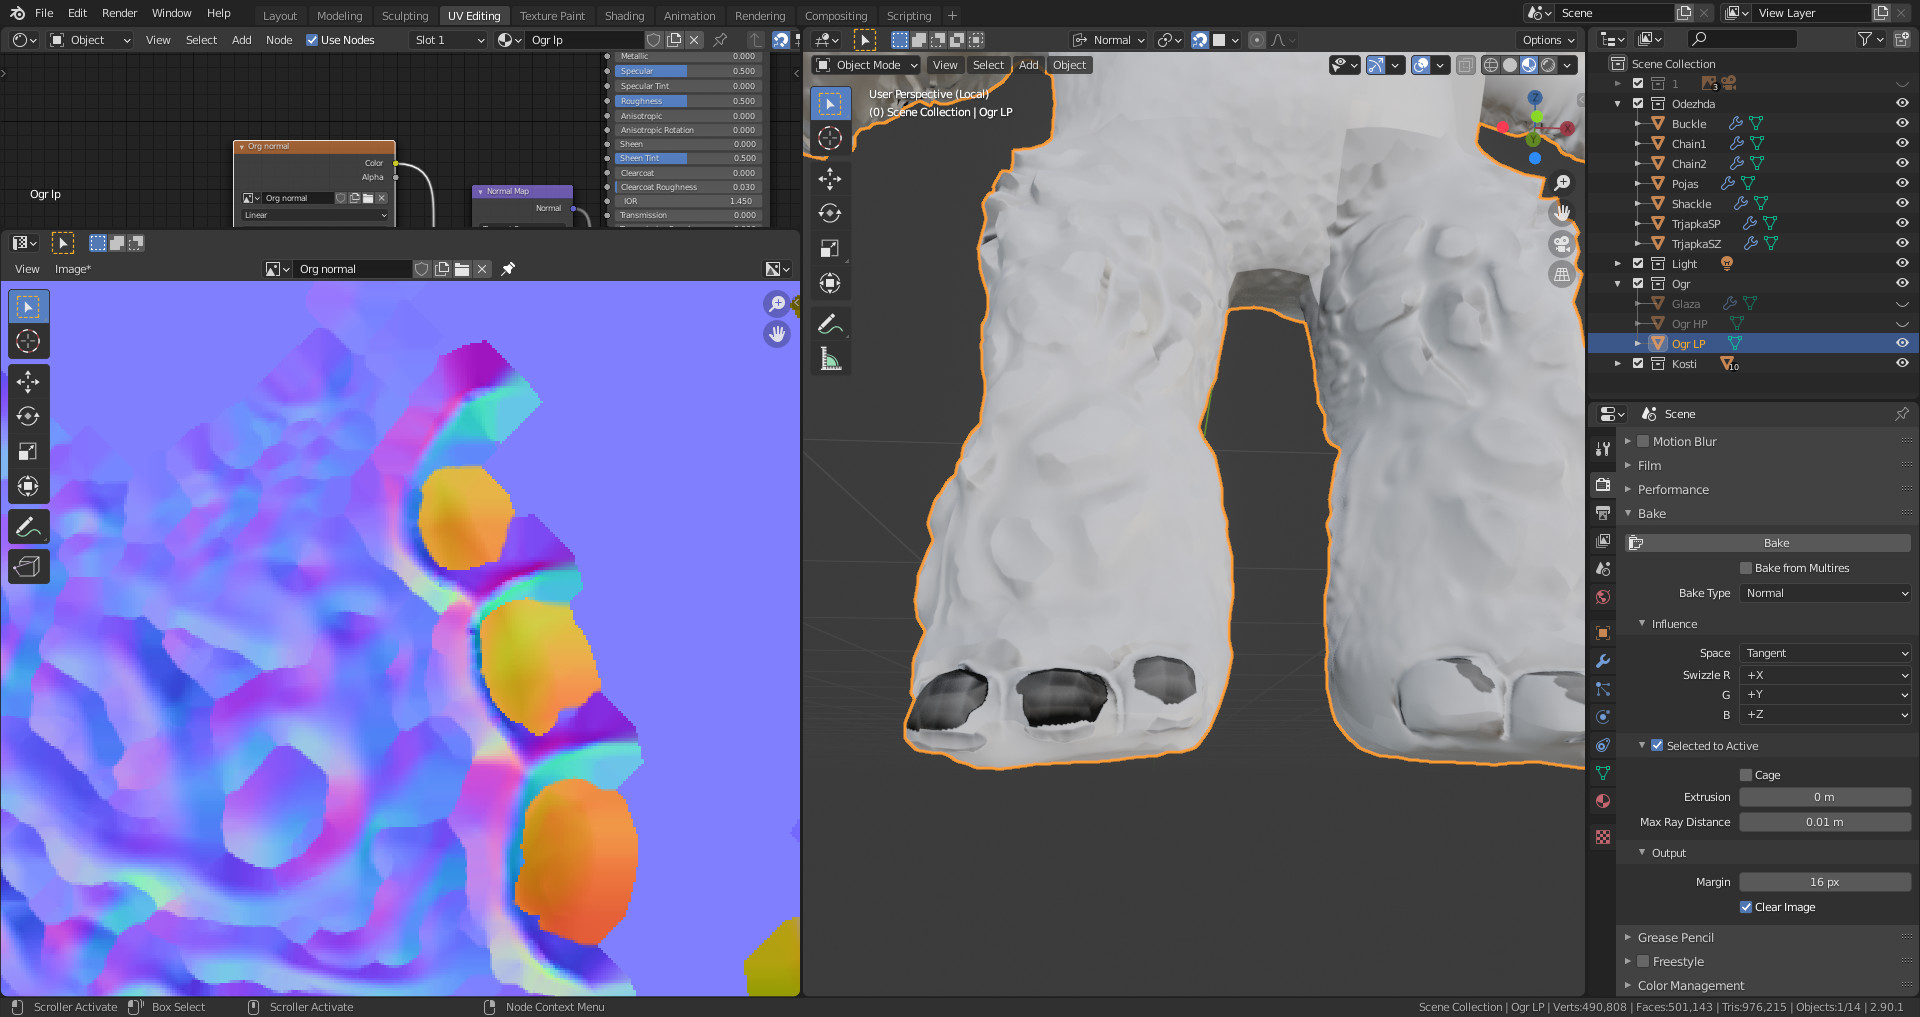
Hand and toes seems to have similar issues.
Everywhere there is UV a seem it has different tone.
The lip should not be that color.

I played with the Max Ray Distance, the current one is the least terrible.

Anyway to salvage it or better let it burn and start from scratch? Hopefully there will be a solution or hints, since i would like to learn what I messed up.

1 Like

My presumption is you have high poly mesh showing through the low poly causing those odd colours. Not an area I use much, others may well know better. If the mesh is not all contained I think you need to use the 'ray distance to ‘bridge the gap’.

1 Like

This problem occurs many times on this forum. Search for it.

Most common mistakes:

  • You didn’t select the correct high poly / low poly
  • Turn on smoothing
  • Played around with the Extrusion parameter. Set it the same as the Max Ray Distance.
  • Changed image node with the normal map to non colour data. It fixed the different tone on the seams.
  • Do you render the high poly one? (using the camera filter option in the outliner)
  • Low poly minor problems here and there, but I adjusted the low poly model slightly to better match the high poly model and that took care of that.
2 Likes

Try also adjusting the extrusion value there under the cage settings this seems to add an extra level of control to the baking.
It was introduced in a later version of blender so grant does not have this option in the course.

1 Like

I have exactly the same problem. No matter how much I tune ray distance the results are horrible. If I tune extrusion it’s better, but still lot of artifacts and as the OP is saying - when I plug in the materials there are some harsh transitions between different uv islands.

Without changing extrusion everything seems messed up (like in the OP post) no matter what I do with ray distance:

I’m really frustrated with this.

…and it suddenly worked :confused:

I’m not sure what I did. One issue was that I noticed that the texture node ‘switched’ from non-color to color (that helped with the sharp transitions between areas).

The other thing that helped is extrusion as Marc pointed out.

But I think there are some bugs in 2.91… I think that what really “fixed” my issues was quitting the blender, removing image from hdd. Opening it again and baking again. I’m confused.

I hope the above will help the OP as well. To reiterate:

  • check if texture node is in non-color
  • play around with extrusion parameter
  • play around with ray distance (those 2 parameters are dependant on each other)
  • if problem persist - quit blender, remove texture file from the disk and start baking again.
2 Likes

Btw. I noticed that when you start playing with extrusion option… then after certain point (in my case 0.008) there is no influence of max ray distance on the output normal map. I’m sure that it’s not how it’s supposed to work, but I am too new to this so I don’t know really what I’m doing wrong.

Thank you Marc_Carlyon and bOBaN. You both gave me the right hints, but sincce bOBaN gave me the solutions to both my problems I will list his answer as the solution.

Summary:

  1. Changed image node with the normal map to non color data. It fixed the different tone on the seams.
  2. Played around with the Extrusion parameter. Set it the same as the Max Ray Distance, that solved the hand, toes and lip problem.
  3. There were some minor problems here and there, but I adjusted the low poly model slightly to better match the high poly model and that took care of that.

Thank you again and good luck.

3 Likes

This topic was automatically closed 24 hours after the last reply. New replies are no longer allowed.

Privacy & Terms