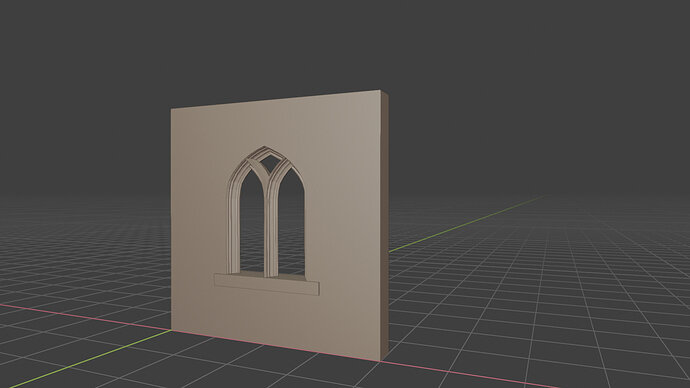
This turned into a bit of an epic Blender session, causing me to miss lunch and I have just grabbed a quick snack to keep my sugar levels up. I started at 11am with what I thought was going to be a fairly simple exercise of creating the basic gothic church window, basically an arch shaped hole in the wall with a bit of surround. Unfortunately, I got over ambitious and decided to put in some extra detailing, specifically the two inner arches, not too difficult I thought. So off I went down the rabbit hole, the work got progressively more complicated, with lots of intersecting geometry and fiddling to get things right. About 4pm Blender crashed and I lost most of the detail I had spent the past few hours creating, the air was blue with my curses. In fact this turned out to be a blessing in disguise, as I wasn’t too happy with the look I had created and I realised that there was a more efficient cleaner way of doing the job. After another hour or so I voluntarily chucked what I had just done as it turned out I realised that there was an even better way of doing things which resulted in much cleaner geometry. It turned out that had I started using this method I could have done the whole thing in about 2 hours. Still I think I learned a lot from trying out different things so the day wasn’t a complete loss.
The method I followed was:
-
I decided to create a separate blend file initially rather than work directly in the building materials file. I followed the method given in the course to create the arch shaped hole, the main difference being that I downloaded a reference image to get the outline right for the interior arches. This required a little bit of tweaking of positions and edges to get the intersecting arch block the right shape to match the image.
-
I followed the method of modelling with curves to get the interior moulding for the outer arch, I decided to make the outside of the arch simpler than the door and just set the curve profile to be flat against the wall. This went pretty well and gave what I thought was a nice effect.
-
To create the inner arches I copied the entire outer arch, altered the size and position to form a similar inner arch and mirrored it to produce two arches. This did not go well as there was lots of nasty intersecting geometry, and the interior arches didn’t fit well. For my next attempt I again used the arch path and reduced it as before but removed half the vertices and mirrored the halved inner arch, followed by a second mirror to create the second arch as before. Again this was somewhat unsatisfying.
-
I then realised that I didn’t need two entire interior arches, just two half arches back to back. In order to accomplish this I used the copied half path from my second attempt, but this time rotated through 180 degrees. I then adjusted the paths position so that the open end slightly intersected the outer arch, and mirrored vertically around the top of the outer arch. This gave the effect I wanted.
-
Finally I added a cube as the window sill. I also decided that the upper side of the inner arches looked a bit bare, so I added some extra vertices to the straight edge of the moulding profile to add a slight curve to the upper edge. I then moved the collection of objects into the building materials file.
Phew!


