I’m working through the Orc for the Character Creation in Blender Course, and I’m at the point of sculpting the multires version to add the muscles and tendons. When I first multiresed, it worked fine. But once I got to about the shoulder joint and moved on tot he chest, I noticed some long glitches forming in the face that werent there before. I tried smoothing them, but it was tedious, so I lowered the level. That reduced the glitches and made it easy to smooth. But the moment I went back up in level, the glitches came back, and worse than before. I tried merging based on distance to the base mesh because I saw a video suggesting that, but that didnt help. The topolgy looks fine as far as I can tell, because the only thing there that might be weird are two tri edge poles. No n-gons, and no poles with more than four edges. I’m at a complete loss, and I dotn want to have to go all the way back to multimeshing, and losing all the detail I’ve added. Any help?
Hey, and welcome! ![]()
Could you post som screenshots of your sculpt and the glitches?
Check for:
- face normals - inside / outside
- is it manifold (has it holes)
- sometimes vertices are to close to others, pushing them through the boundaries, generating spikes, when increasing the multires.
Thank you both for replying so quickly.
As far as i can tell, the mesh is both manifold, and the normals are facing the right way. I keep face orientation on so I can see the red when I’m making a lot of cuts or fill ins.
The detail level might be it, but its not having the same issue in similar parts of the mesh, so I’m not sure. Plus, I dont think I’m hitting that high of a detail level yet. I’m around what the instructional video says I should be for this stage.
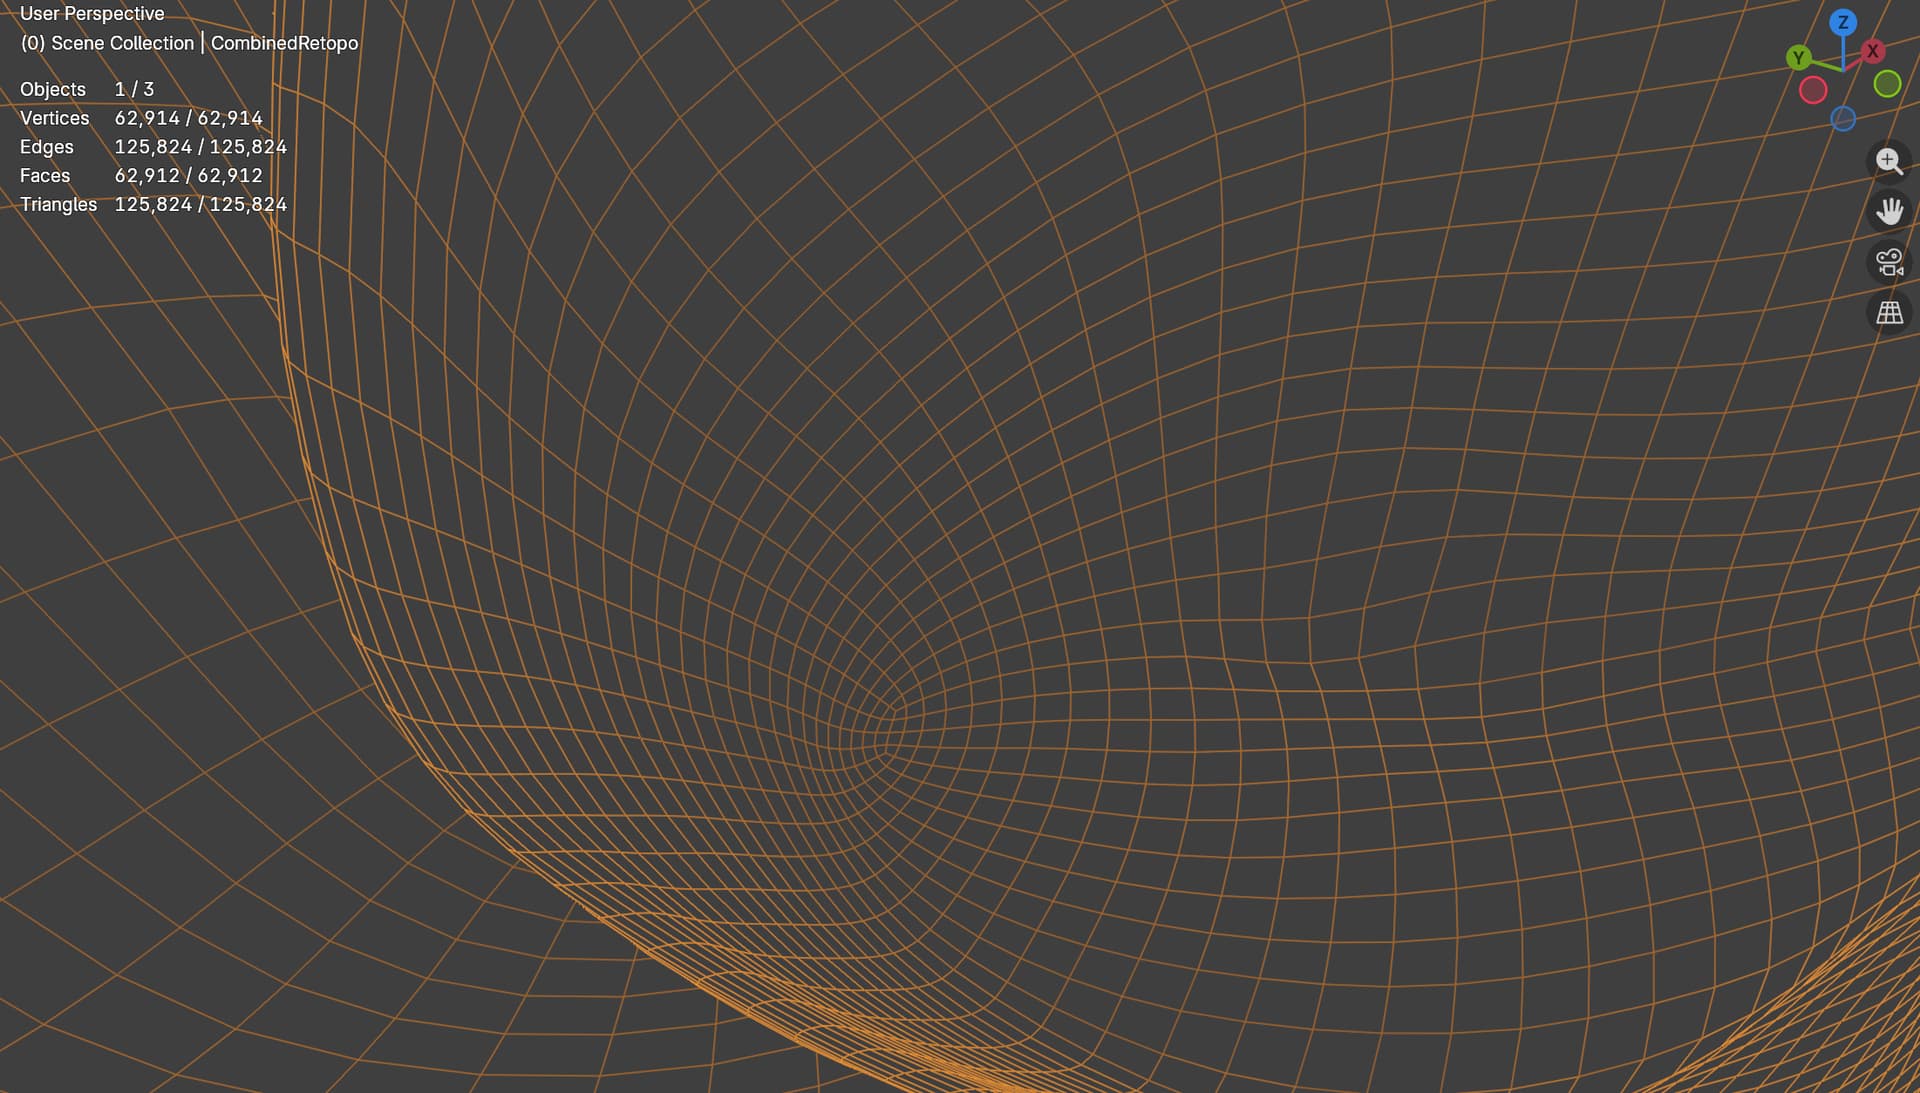
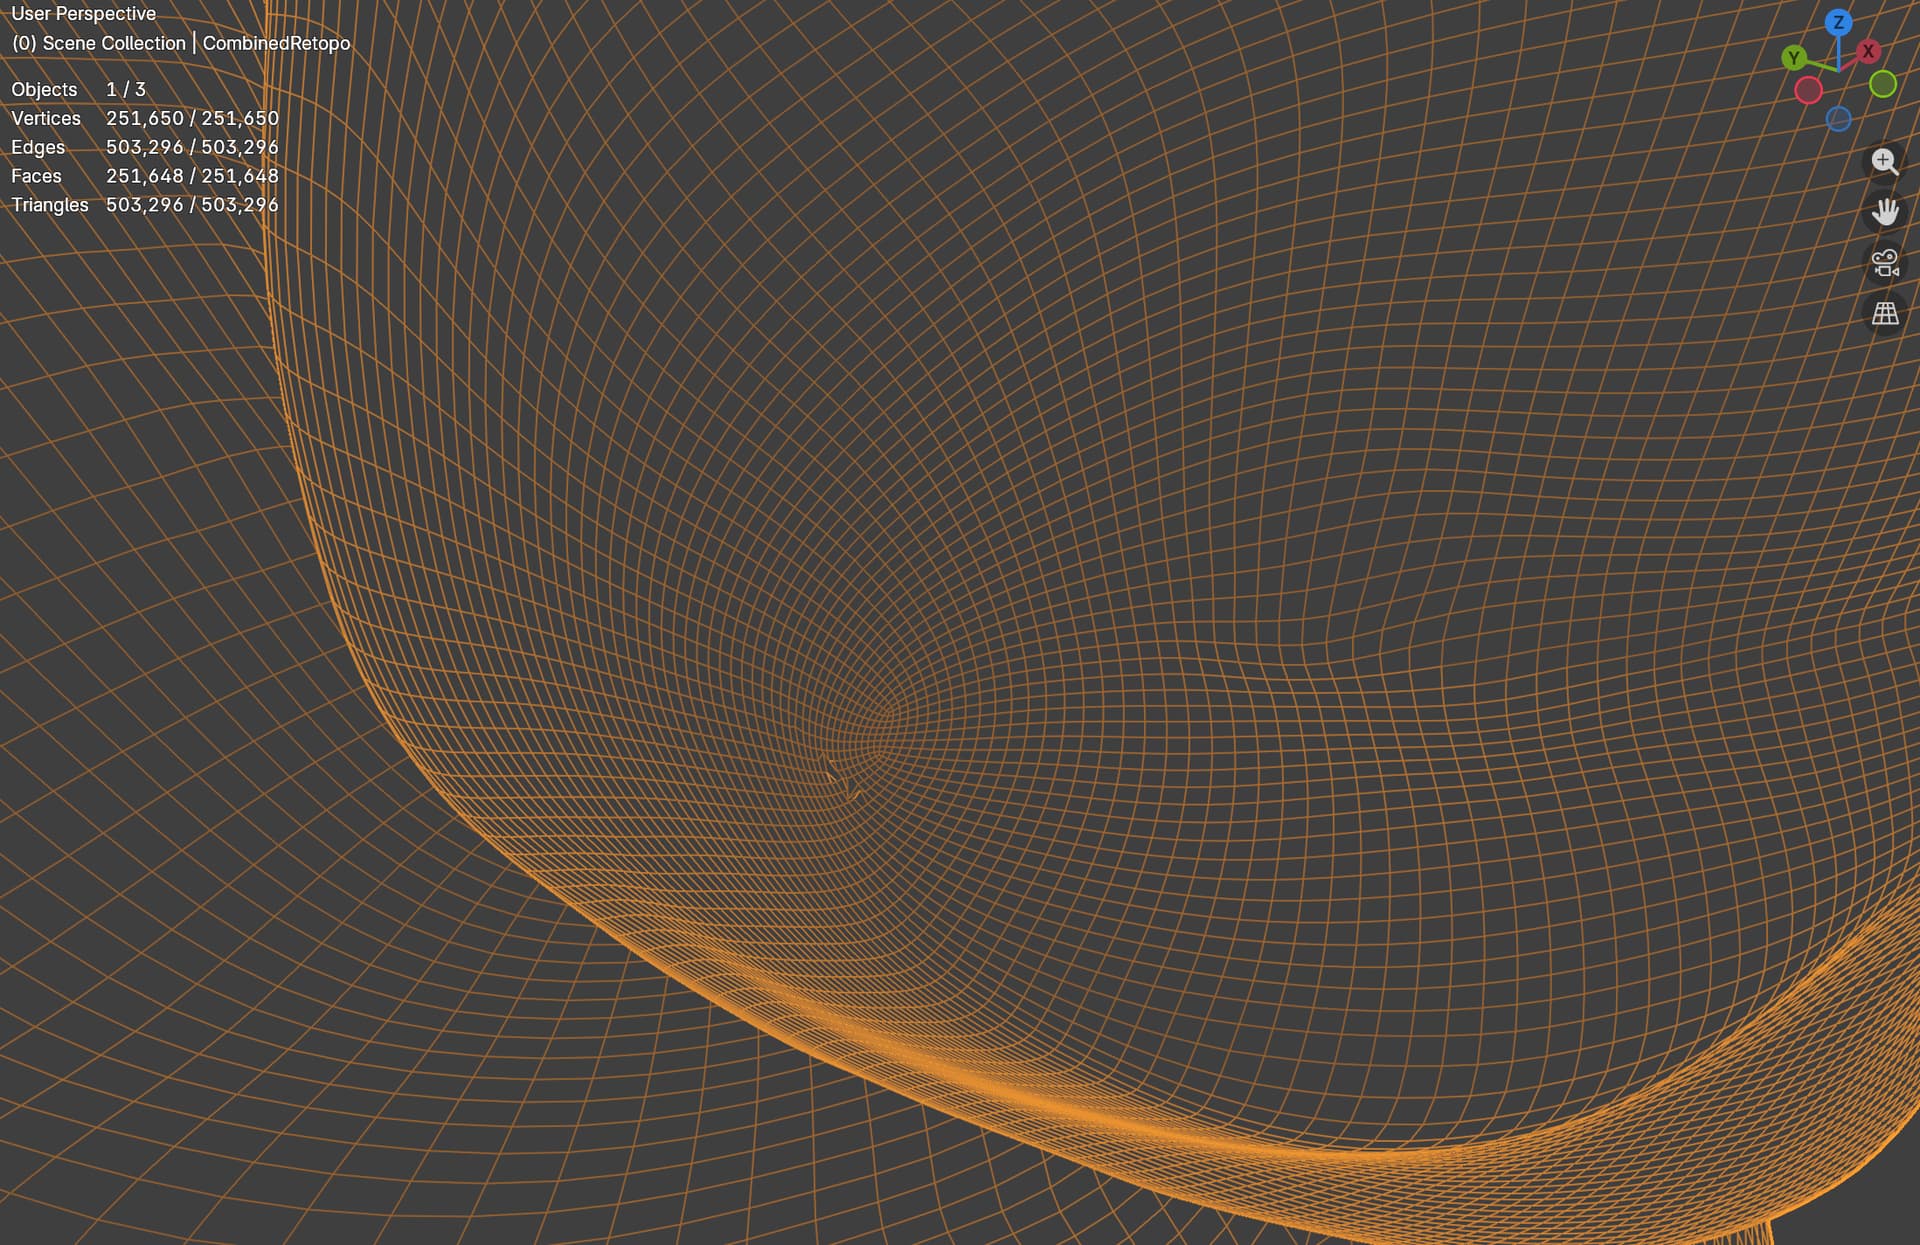
I’m including pictures with various stages of multires on, as well as different angles, and with multires off/edit mode on.
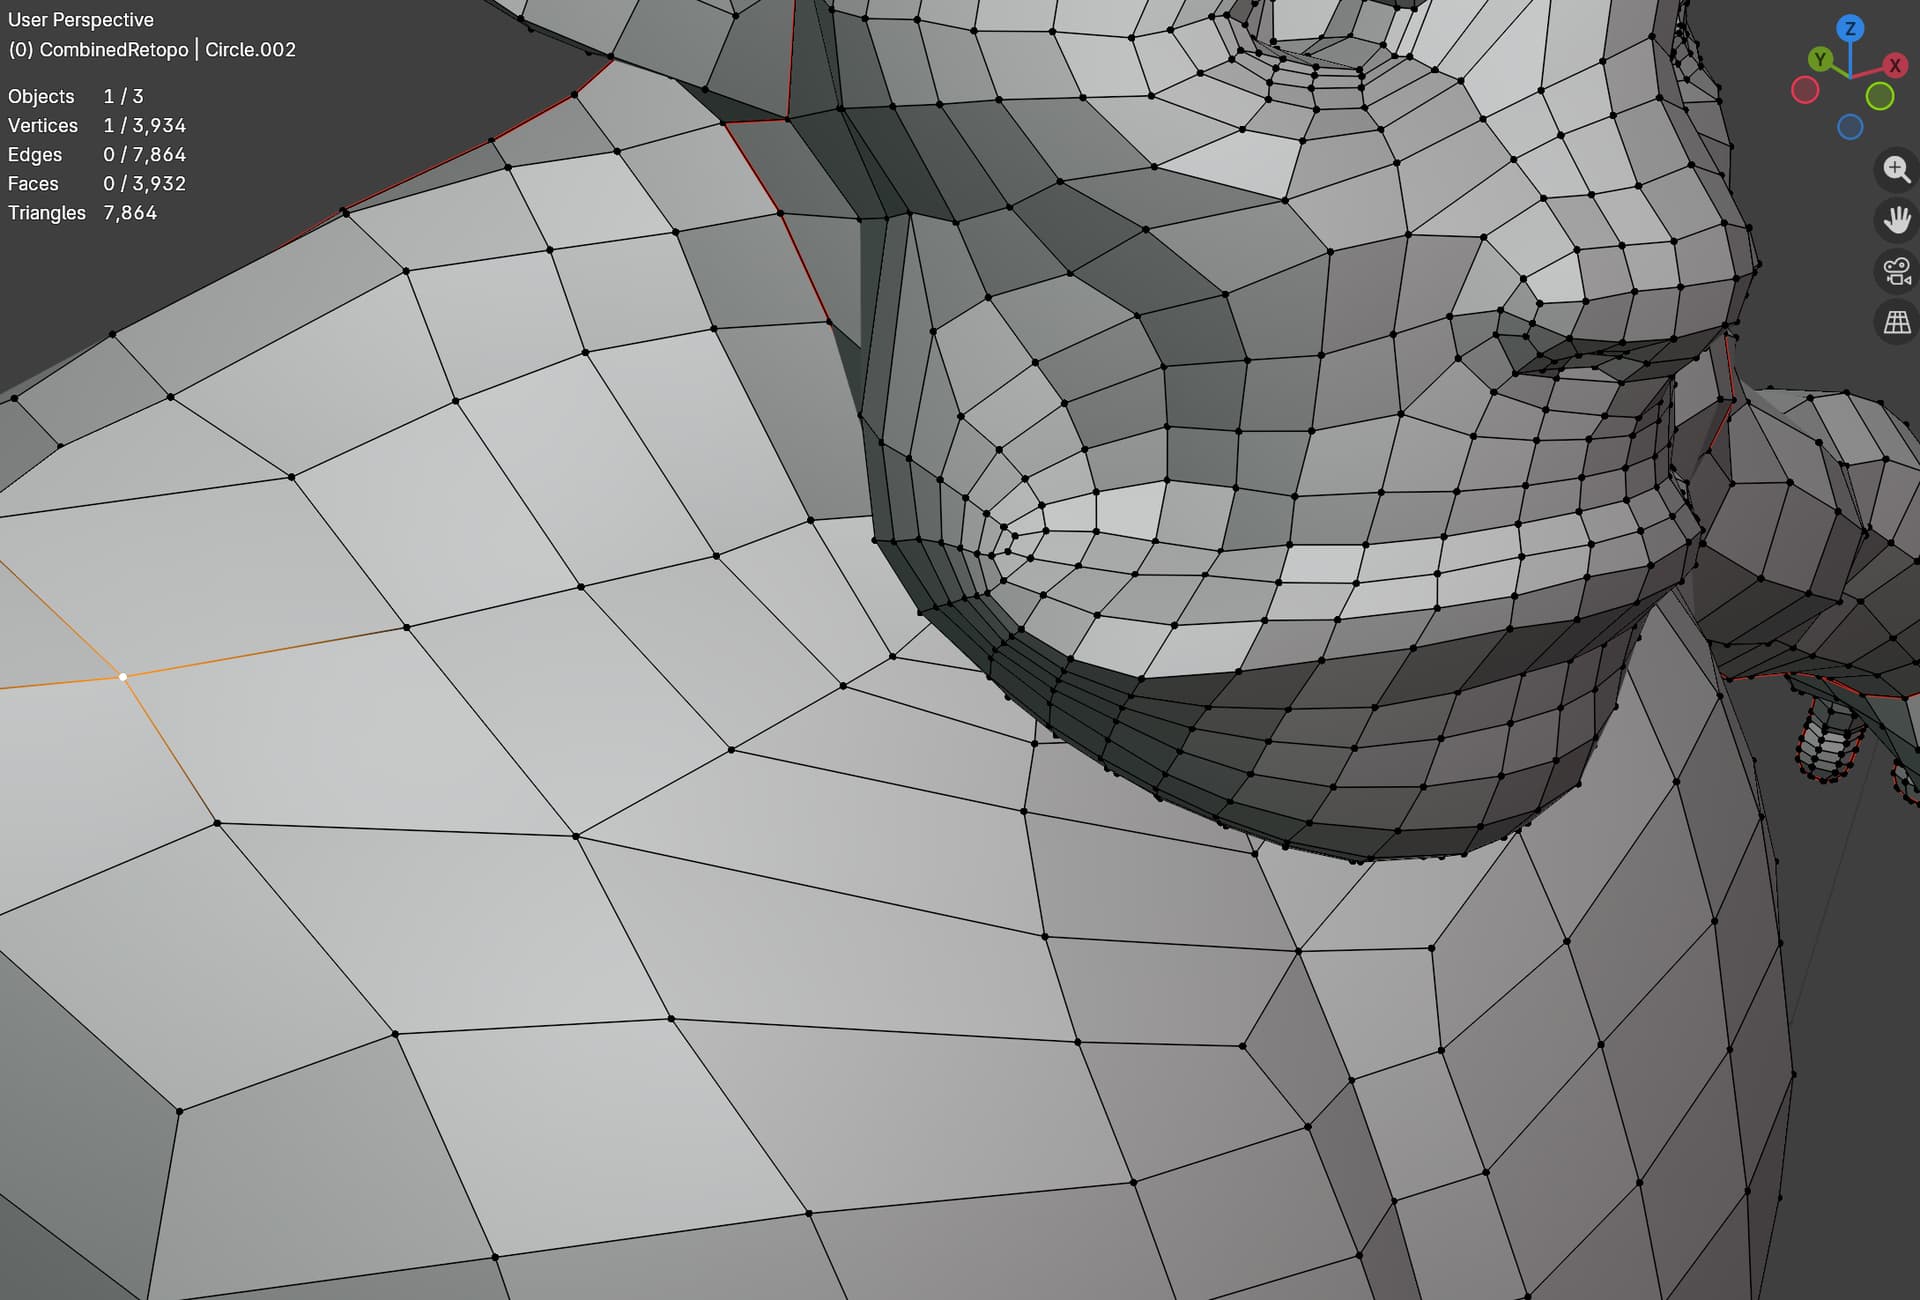

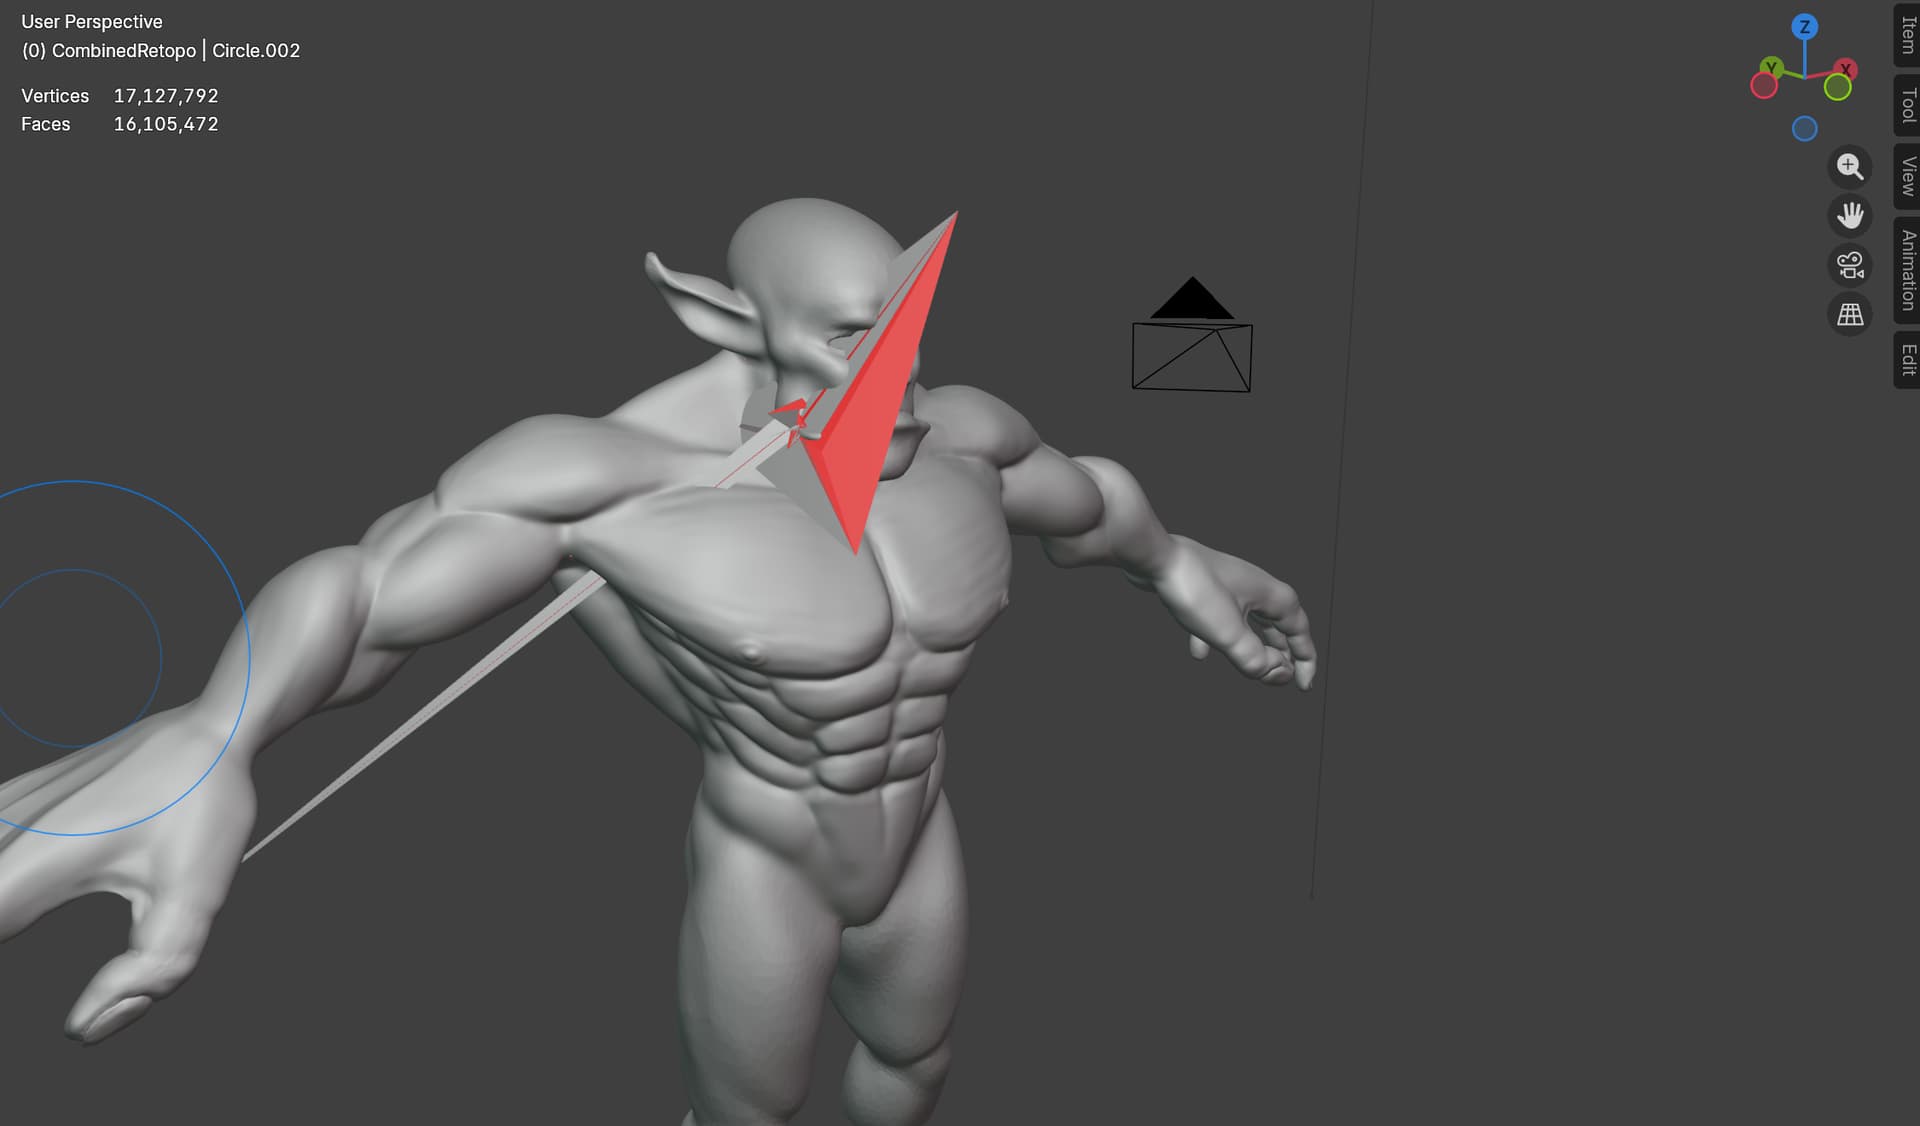
So that looks funky xD
What kind of modifiers are you using apart from the multires? Did you try switching them off one at a time to see if one of those is causing it?
I suppose it’s a bit early in the process, but do you have any weights painted on?
This is only multires. I applied the mirror modifier, I applied the shrink wrap. Those were the only two i had before multires. And it didnt have this issue immediately. It only came later. But so long as I go up or down a level, the glitch returns even after smoothing the lower level out. And i have not yet applied any kind of weights. There are no bones in the scene.
Did you figure out which vertices are the crazy behaviour ones?
If it is the multires, and smoothing lower levels isn’t working, you might have to delete the problematic vertices, and redo the area. I’m not sure if there is a better fix than that to a glitching multires, but someone else might have a better suggestion.
Just have a back-up before you delete any geometry…
So as far as I can tell, its only vertexes created BY the multires that are misbehaving. Any time i try to isolate a misbehaving vertex in one level and step down to a lower one, it has disappeared because it was part of the subdivision, not the original mesh.
I might desub the multires back down to the level that has no issues, and try to recalculate the high subdivisions again. Other than that, Im at a loss.
I really dont want to lose the work I have, only for the glitch to pop up again after multiresing again.
Then delete the faces below, where the issue is. It should get rid of the glitching higher res vertices.
But, I can’t stress enough, do it in an incremental save, so you have your work up till now.
Especially, if someone wiser in Blender comes around with a better solution.
Check if applying the mirror solves the problem ??
Because spikes a are emerging around the center
So the mirror modifier has already been applied. There is only one modifier: MultiRes.
Also, the spikes are not emerging from the center. They are emerging from the cheeks. In one of the pictures I posted, level 3 subdiv is when the cheek/lip vertexes start acting weird.
I deleted the faces in the area of the glitching, and that did seem to stop them from spiking. But now theres a hole I have to fill, in the hopes it doesnt spike again. This was done on a separate save file.
So I deleted the faces below, and then refilled the hole and cut the vertexes back in to restore the edge flow. But its still being weird. And there are other parts of the mesh that are starting to also act weird, that werent before. Its like every time it has to recalculate for the sculpt or viewport, it gets a little more inaccurate.
Going back to the idea of too many vertexes: What what be approaching too many for this sculpting step?
If it only glitches more, then go back to your backup. No need to make it more of a head-ache than it already is.
Multires used to do this a lot, but I honestly thought they fixed it. I’m not sure what else you can do. I don’t know any other work-arounds. It might be, as you’re touching on yourself, that the last resolution has too many vertices. It might be connected to the computational power of your workstation. I have no idea at this point.
What version of Blender are you on? Would an update possibly make a difference? Also, if you do update Blender, still keep a backup of your progress, in case you decide to roll back Blender. If it has no effect or makes matters worse.
I’m gonna keep assaulting this copy until something changes. Its interesting that this is a prior issue.
My computer is reasonably powerful. A decent gaming rig, but not a render powerhouse.
I’m using the binary version of blender 5.0 on linux. This was the version I could get to work using my gpu to accelerate cycles. I might install the flatpak or native version, to see if that fixes it.
This problem of multi-res exists already for many years.
It looks like a bug, but it’s because of how multires works.
Adding vertices in a higher level, without any influence (by the user) where they are virtually created. It is always related on the lower res topology.
If you delete the verts and spikes are gone.
And add the verts in the same way as before, and the spike return. That is a sign that the lower res topology isn’t in a good shape for a higher level of multires.
I had the same problems many years ago. It stopped me using multires.
I don’t see the real value of using it. Because you only need a low-poly version and a high poly version. Why would you need multiple low poly versions. Except in a professional production environment.
So you’re saying the original topology is too low a detail for the multires to work?
I’m new to blender, obviously, so idk how multires is supposed to work. But I went ahead and used regular subdivisions to reach the same poly count, and had no issues with glitching. I actually shrink wrapped the subdiv model to the multi layer to recover some detail, before focusing on just the subdiv version. Its been working great so far.
I can kind of see the benefit of multires, but if its gonna be unstable, i definitely agree using the much more stable subdiv version is better.
No!
but with each sub division in multires, vertices are added, so a problematic vertice (what ever reason) can be problematic (causing spikes) in higher levels of the multires.
so an added vertice in level 1, can cause a problem (spike) in level 3. While in level 2 it seams to be ok.
maybe one of your levels of details for eacht multires level to to big change.
Multires is meant to be used for small (tiny) incremental steps.
As a student, you are eager to add more details to see the Orc . Maybe these details are placed on the wrong level of the multires.
It’s like sculpting a statue. You don’t start at high detail of the nose for example. But working on the basic shape first. Adding more details for each step (layer).
I would say, apply multi res. Learn the process of making the Orc dance. Then get more experience by doing more projects. The Blender Collab is a nice learning experience for that.
So the tutorial jumps from low poly to 5 or 6 subdivision in multires. So I was going step by step with the instructions.
It does make sense to go up in multires as more detail is needed, but that workflow seems like working backwards from traditional sculpt→ retopo→bake. That sounds more like box model → subdiv(n) times while sculpting → bake.
I’m going to press on with finishing this project as best I can, so as to not lose too much momentum. Maybe my next project I’ll retry multires.
So I finished the fine detail work with subdivisions, and then shrink wrapped a mulitres version to transfer those details over. It took a few runs of shrink wrapping and blending to get rid of the artifacts. But now I have a stable, multires’d version of my high detail model ready to follow the unwrapping and texturing process. No progress lost, just slowed down.
I pretty much agree that while my edge flow was adequate, the topology was too aggressive for the multires to understand. This will be something I’ll have to look out for in the future. I’m just glad I was about to detour and get back on track.
Thank you all for your help.
This topic was automatically closed 24 hours after the last reply. New replies are no longer allowed.