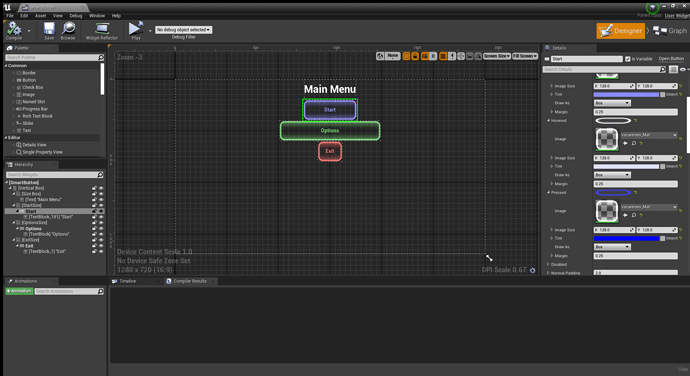
I’m assuming you understand the UE4 9-slice images for this post, the problem with 9-slice images is that this just allows you to neatly scale border effect images. But what if you want a shaped border around a tiled background, the basic 9-slice image doesn’t work. While I was looking at it however I found you can actually use, a material instead of an image, after a bit of experimenting I was able to create the following effect:
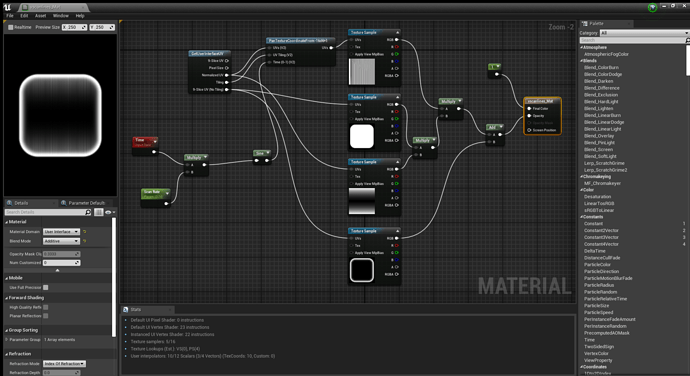
Here all the buttons are using the same material as using the box brush and the following shader
The trick is in the GetUserInterfaceUV Node, this allows access to the normalized UV (across the size of the widget), Tiling Information for Image Scaling Mode, and 9-slice UV maps, This means we can have some textures use normalized UV, others Tiled across the button and still include 9-slice textures.
For My Example, I Used a Tiled and Panned Scanline texture (first from top), which I then multiplied by two masks, one a button face mask samples as a 9-slice image, the other a fade effect samples using Normalized UV, these are just multiplied together for blending which generates my scanline effect inside the button, finally I add the border sampled as a 9-slice image.
The other trick in this case, is I used my textures as simple opacity masks and set the colour to white this allows me to set the button colour purely using the brush tint in the widget editor.
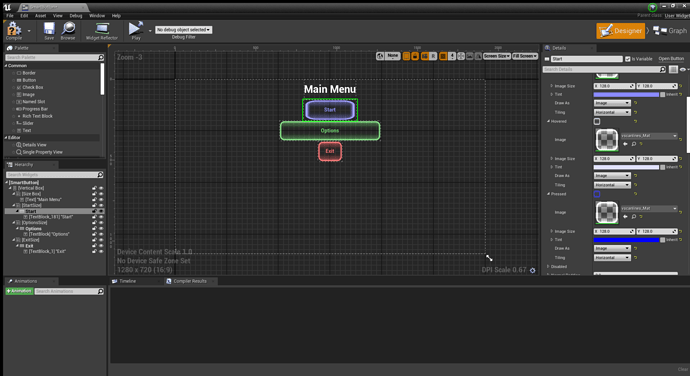
Important: When using the material you have to set the brush to image, and then tiling to horizontal, before switching back to box, and setting margins to 0.25, otherwise the scanlines will be stretched not tiled (See images below). You can also choose the image size that the texture is mapped to in screen space (you must recompile the widget for this change to render)


