Hello There!
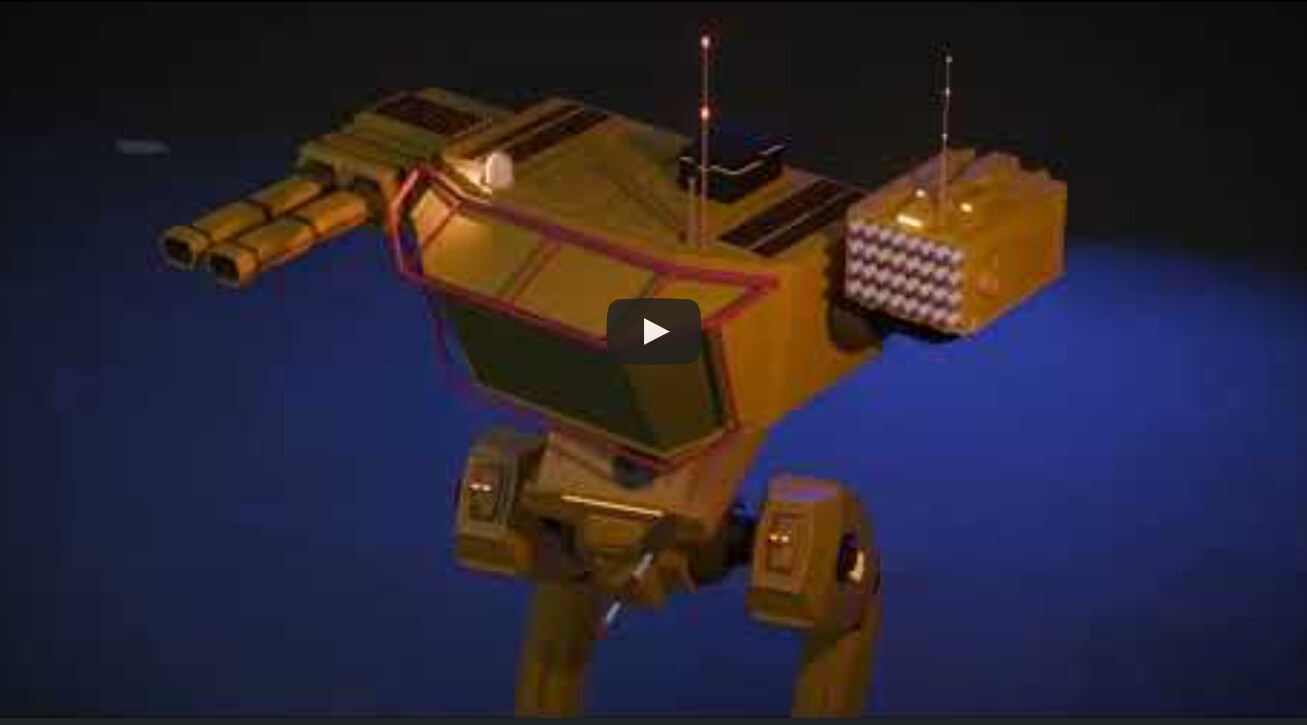
I finally completed the mech. 
Got carried away.
Video
Lessons learned:
- Have or draw a reference mech 1st
- Model the overall shape first before adding details
- Work on straight objects, before you angle them. The legs had been a pain (but I’m ‘fluent’ now with the ways to align vertexes, edges, surfaces)
- Ways of animating cameras - (edit) Used 5 in total
- Love / Hate relation with the mirror tool
- Loop Tools is your friend to tweak meshes, make circular holes or bridges
- The array modifier … what the heck! All glowing vents and the spinning vent uses it
- Using the cursor more efficiently
- There is always something to tweak …
- Final comp done in DaVinci Resolve
Cheers,
Ray.
@Grant_Abbitt
10 Likes
Dwayne
3
Great job. I’m curious what are the 5 ways to animate the camera? Follow curve, follow path constraint, and keyframe are the only ones I can think of.
2 Likes
Opps - I see. I wanted to say I used five cameras. And the methods you mentioned.
I also came across <Shift + `>, which allows to move the camera like a player in an FPS game.
I shouldn’t stay up until 1:30 in the night and post stuff. 1st thing now, coffee.
1 Like
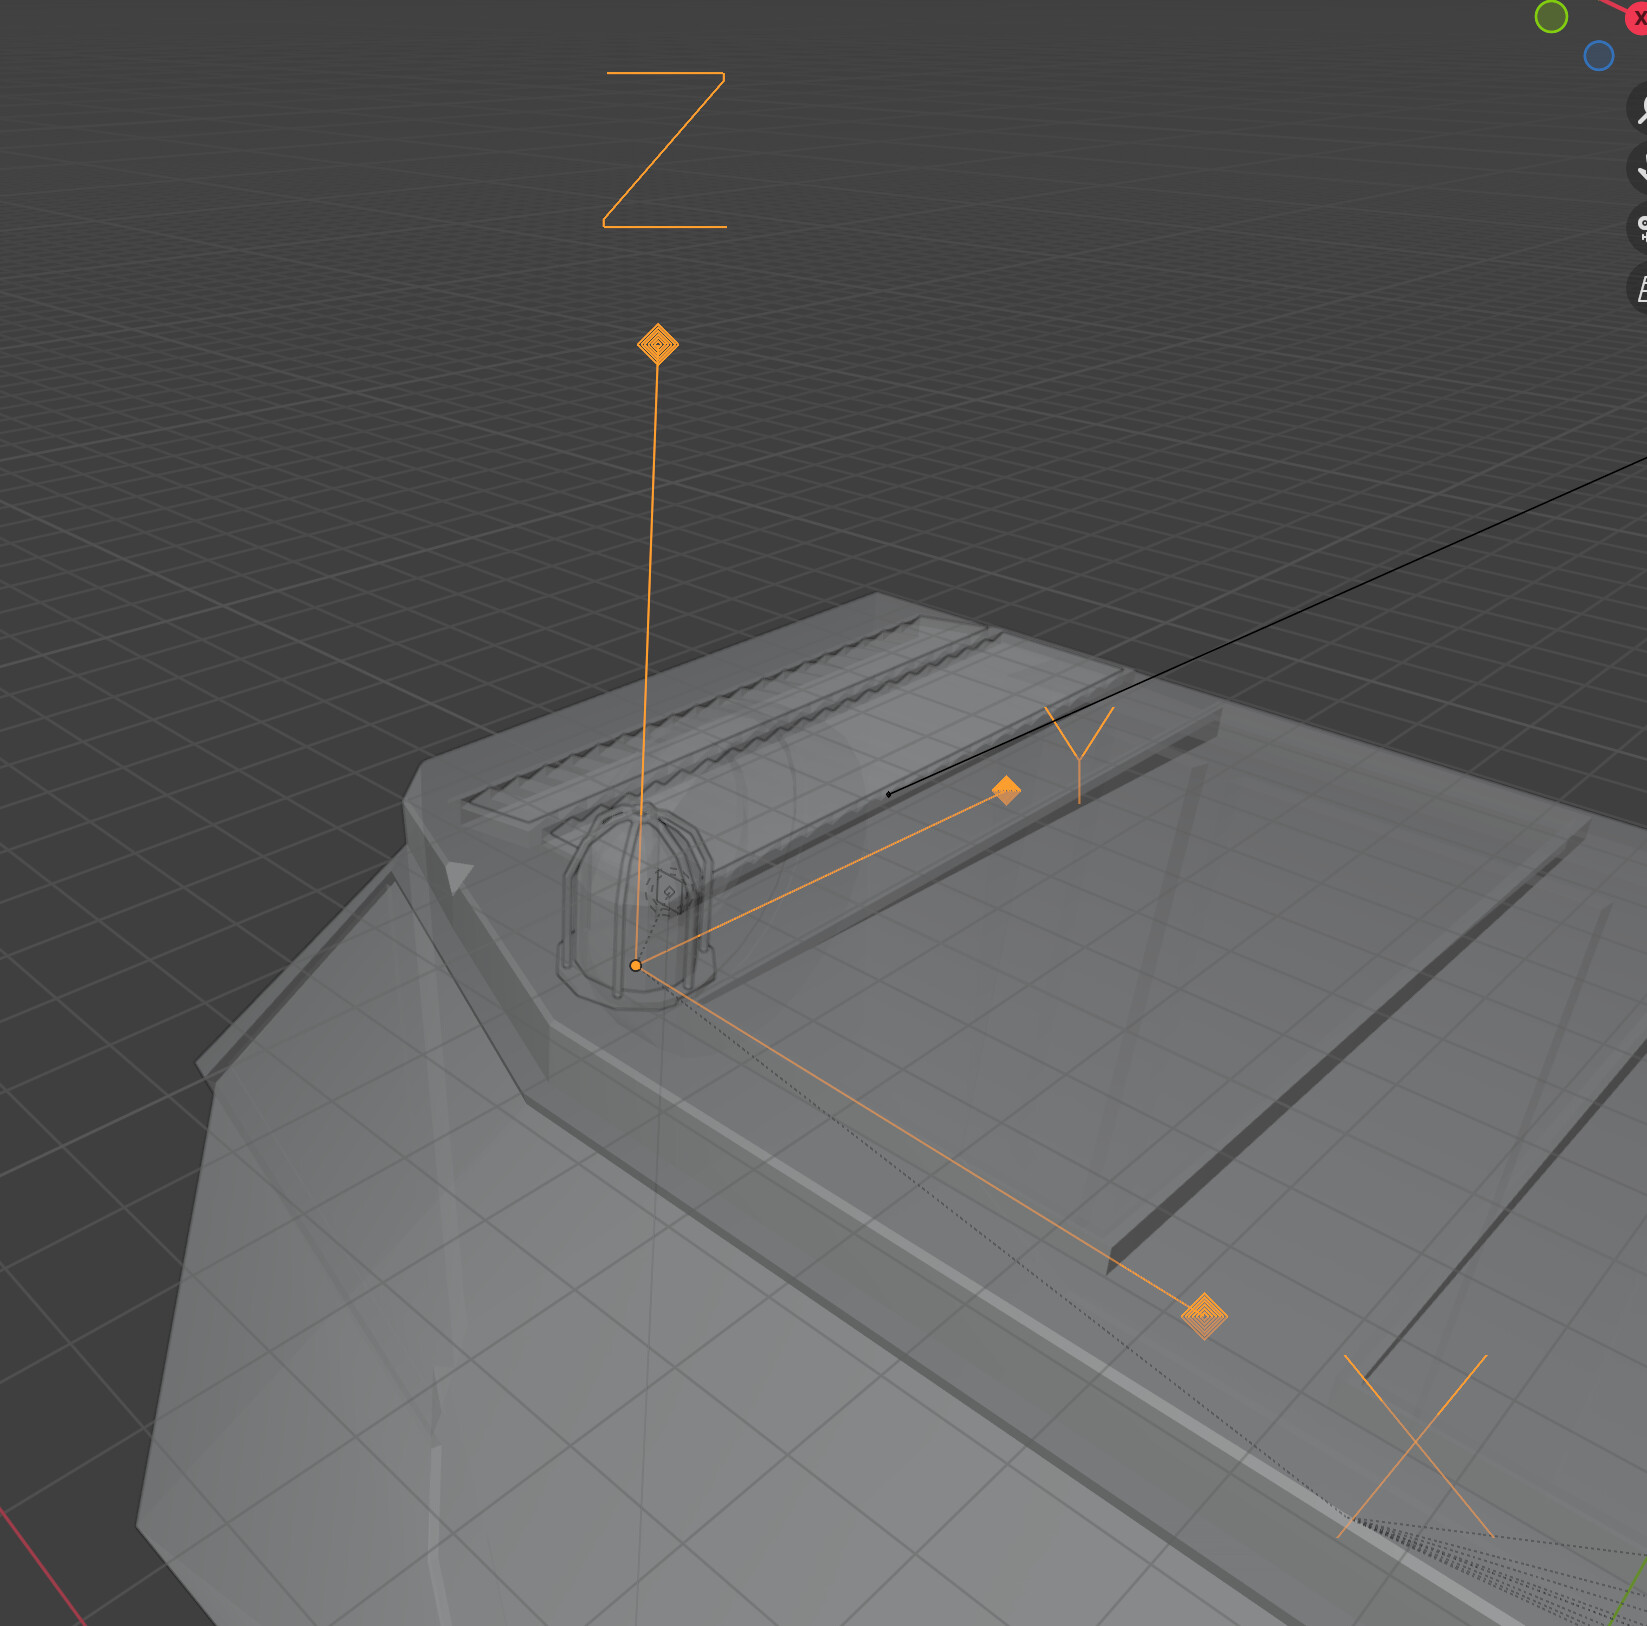
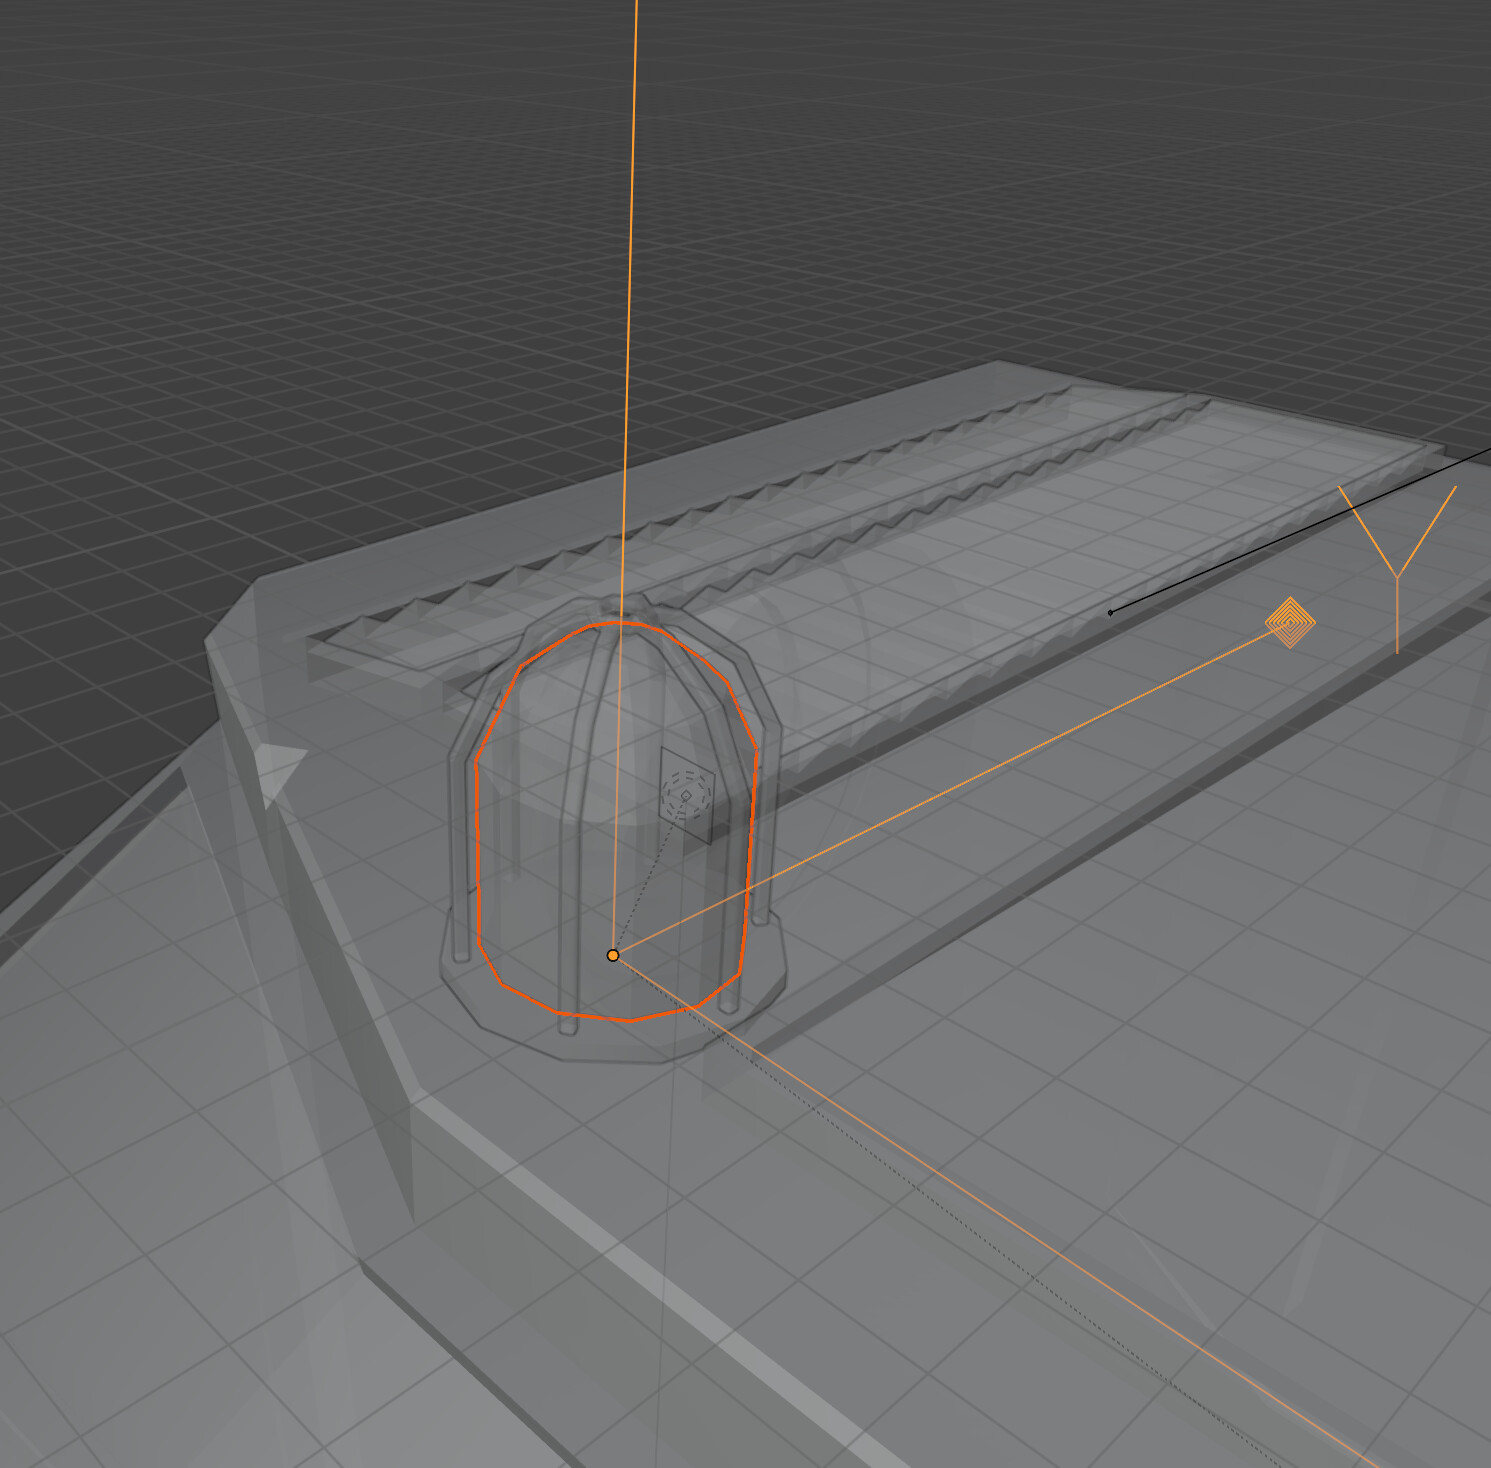
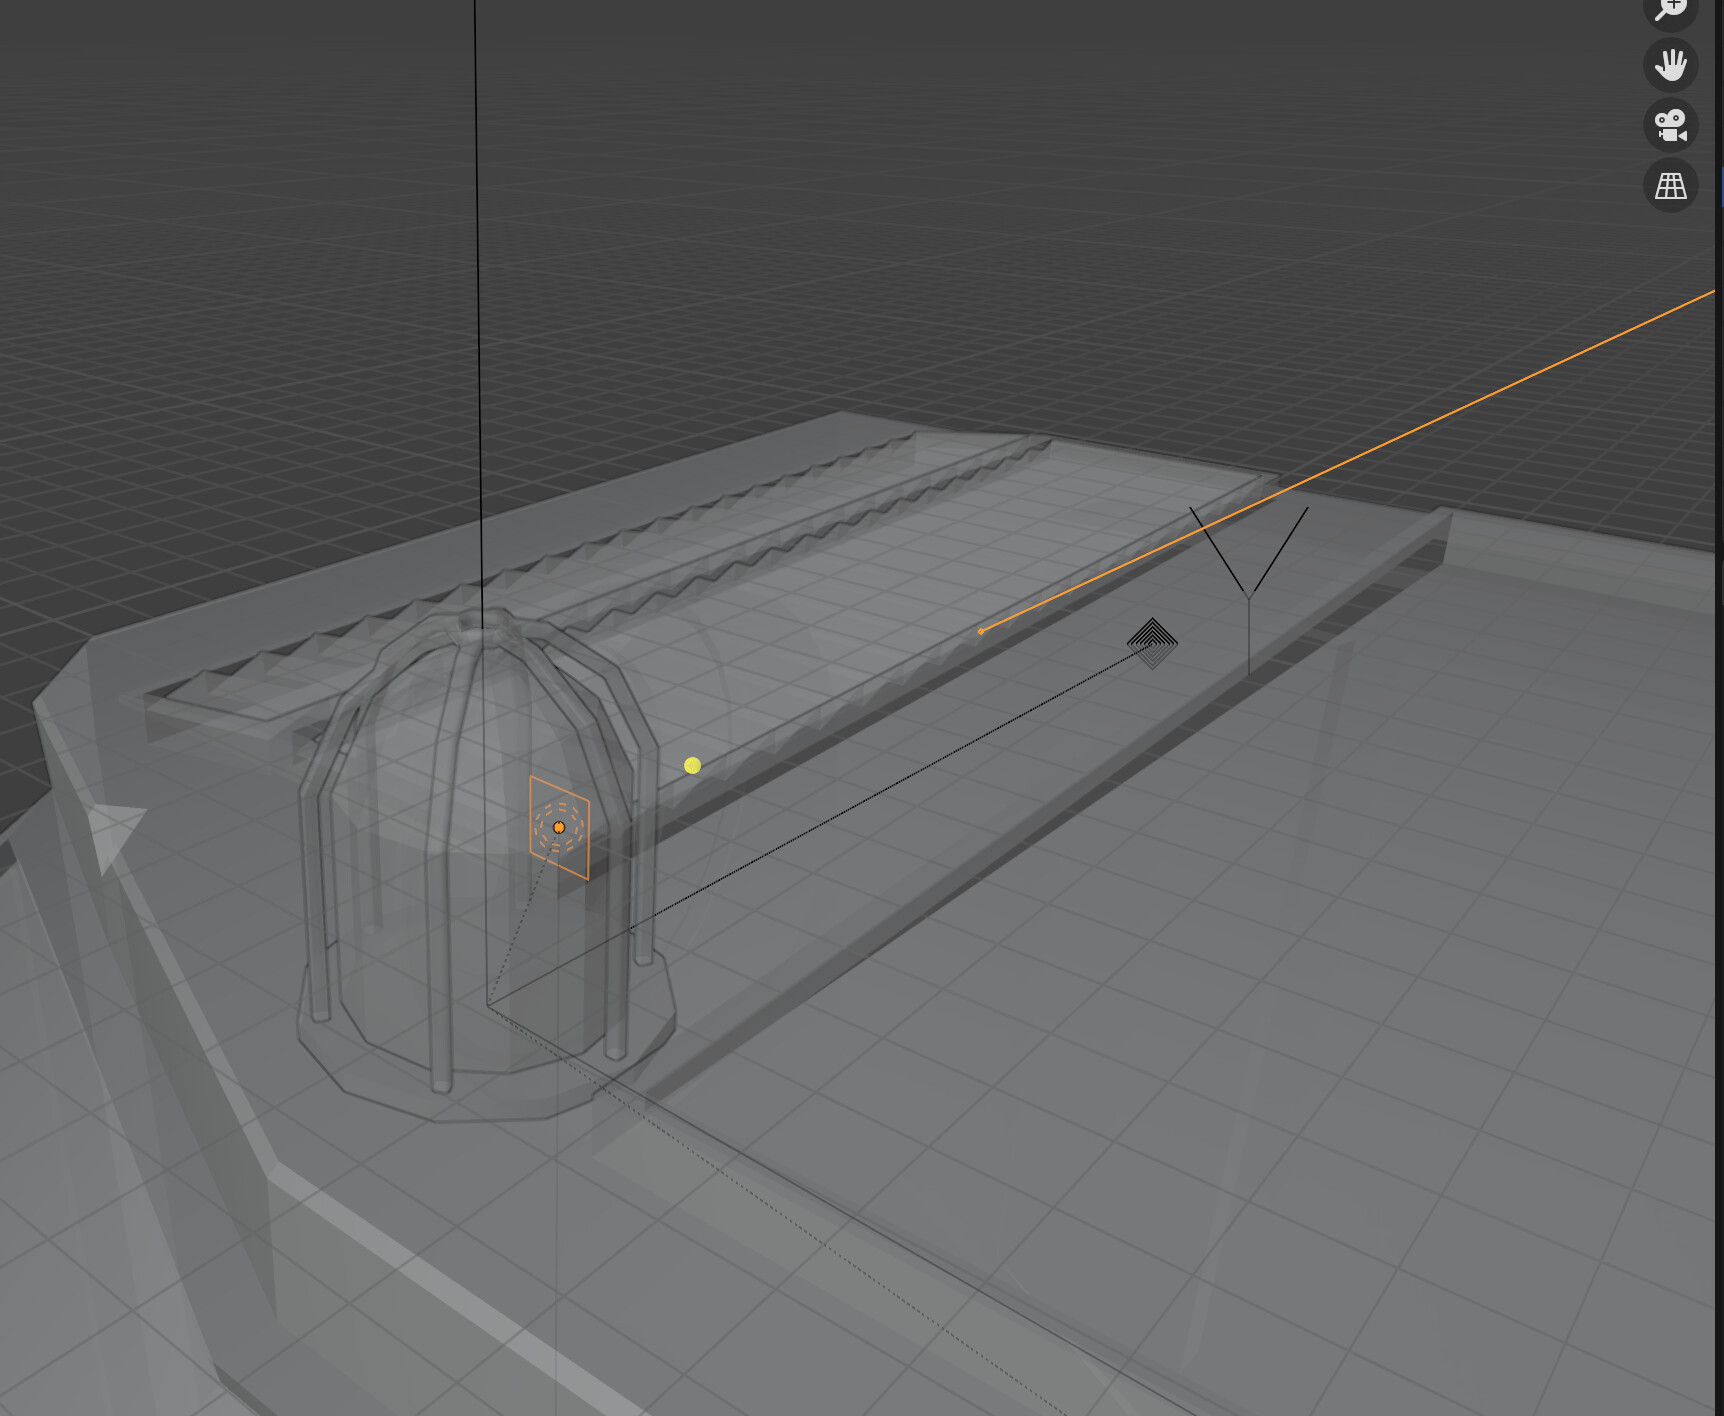
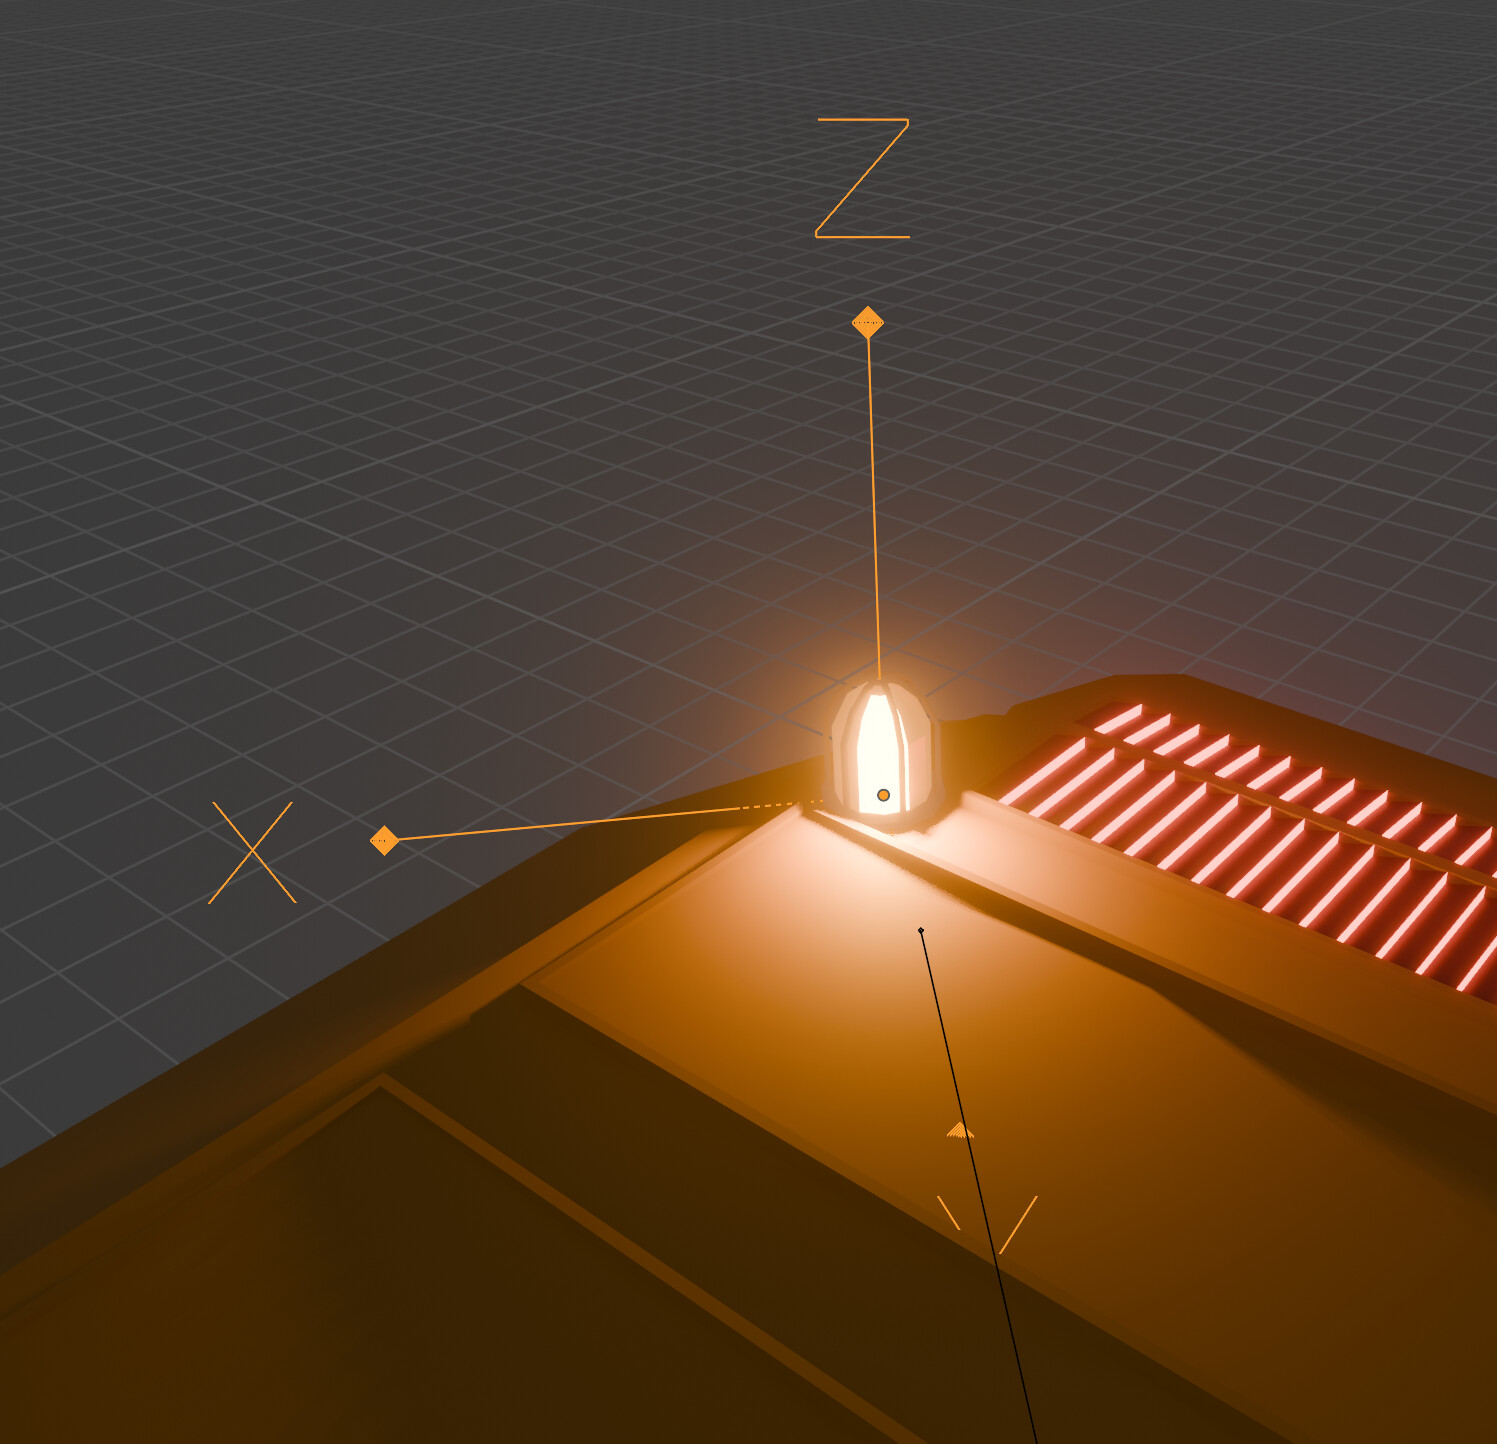
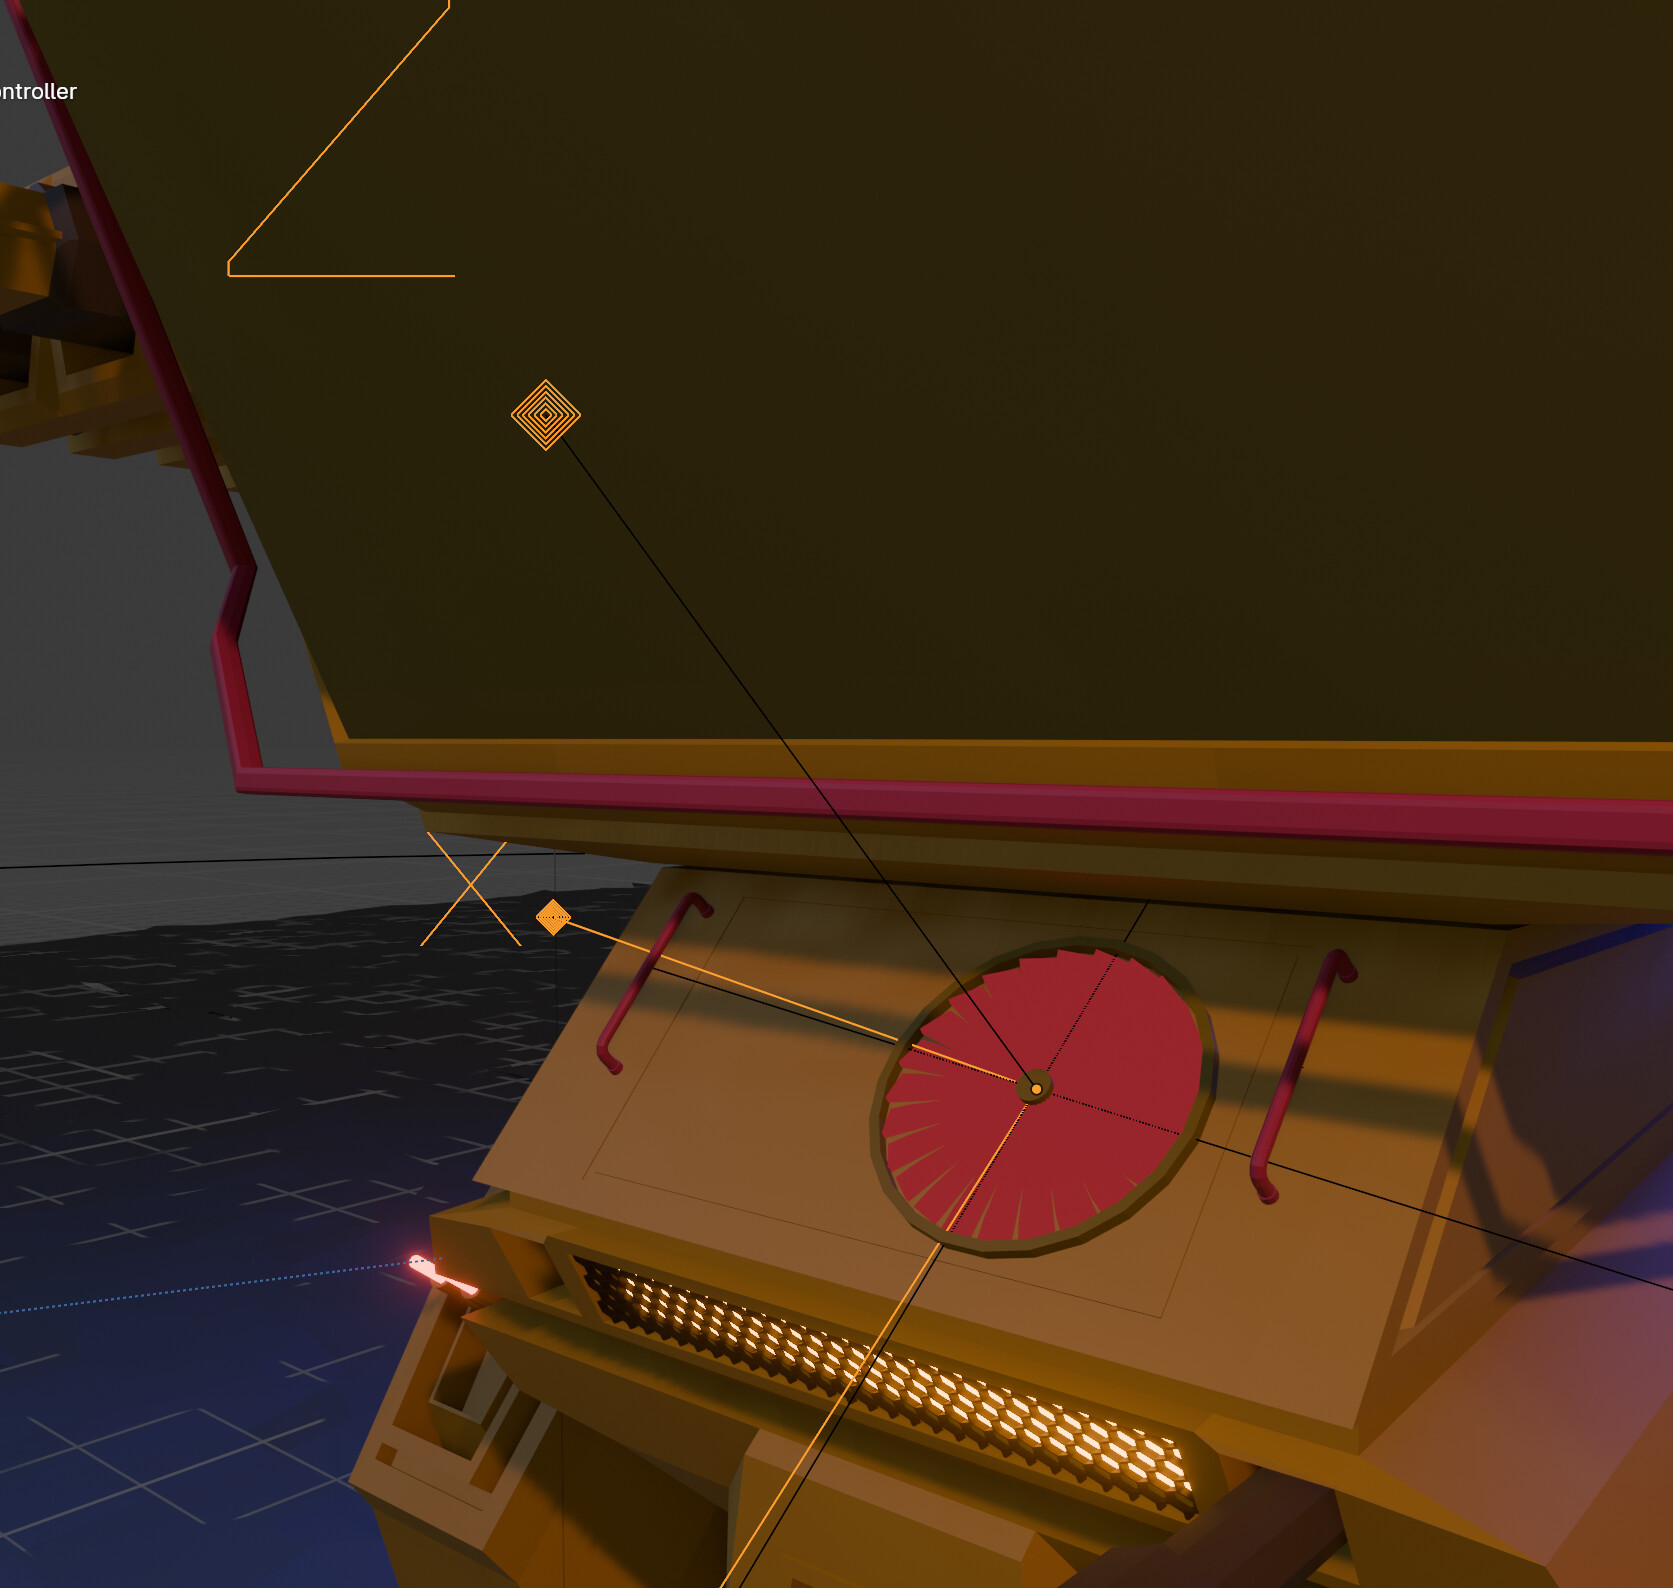
Looks great! How did you animate the rotating light on top?
2 Likes
Thank you 
Very simple approach.
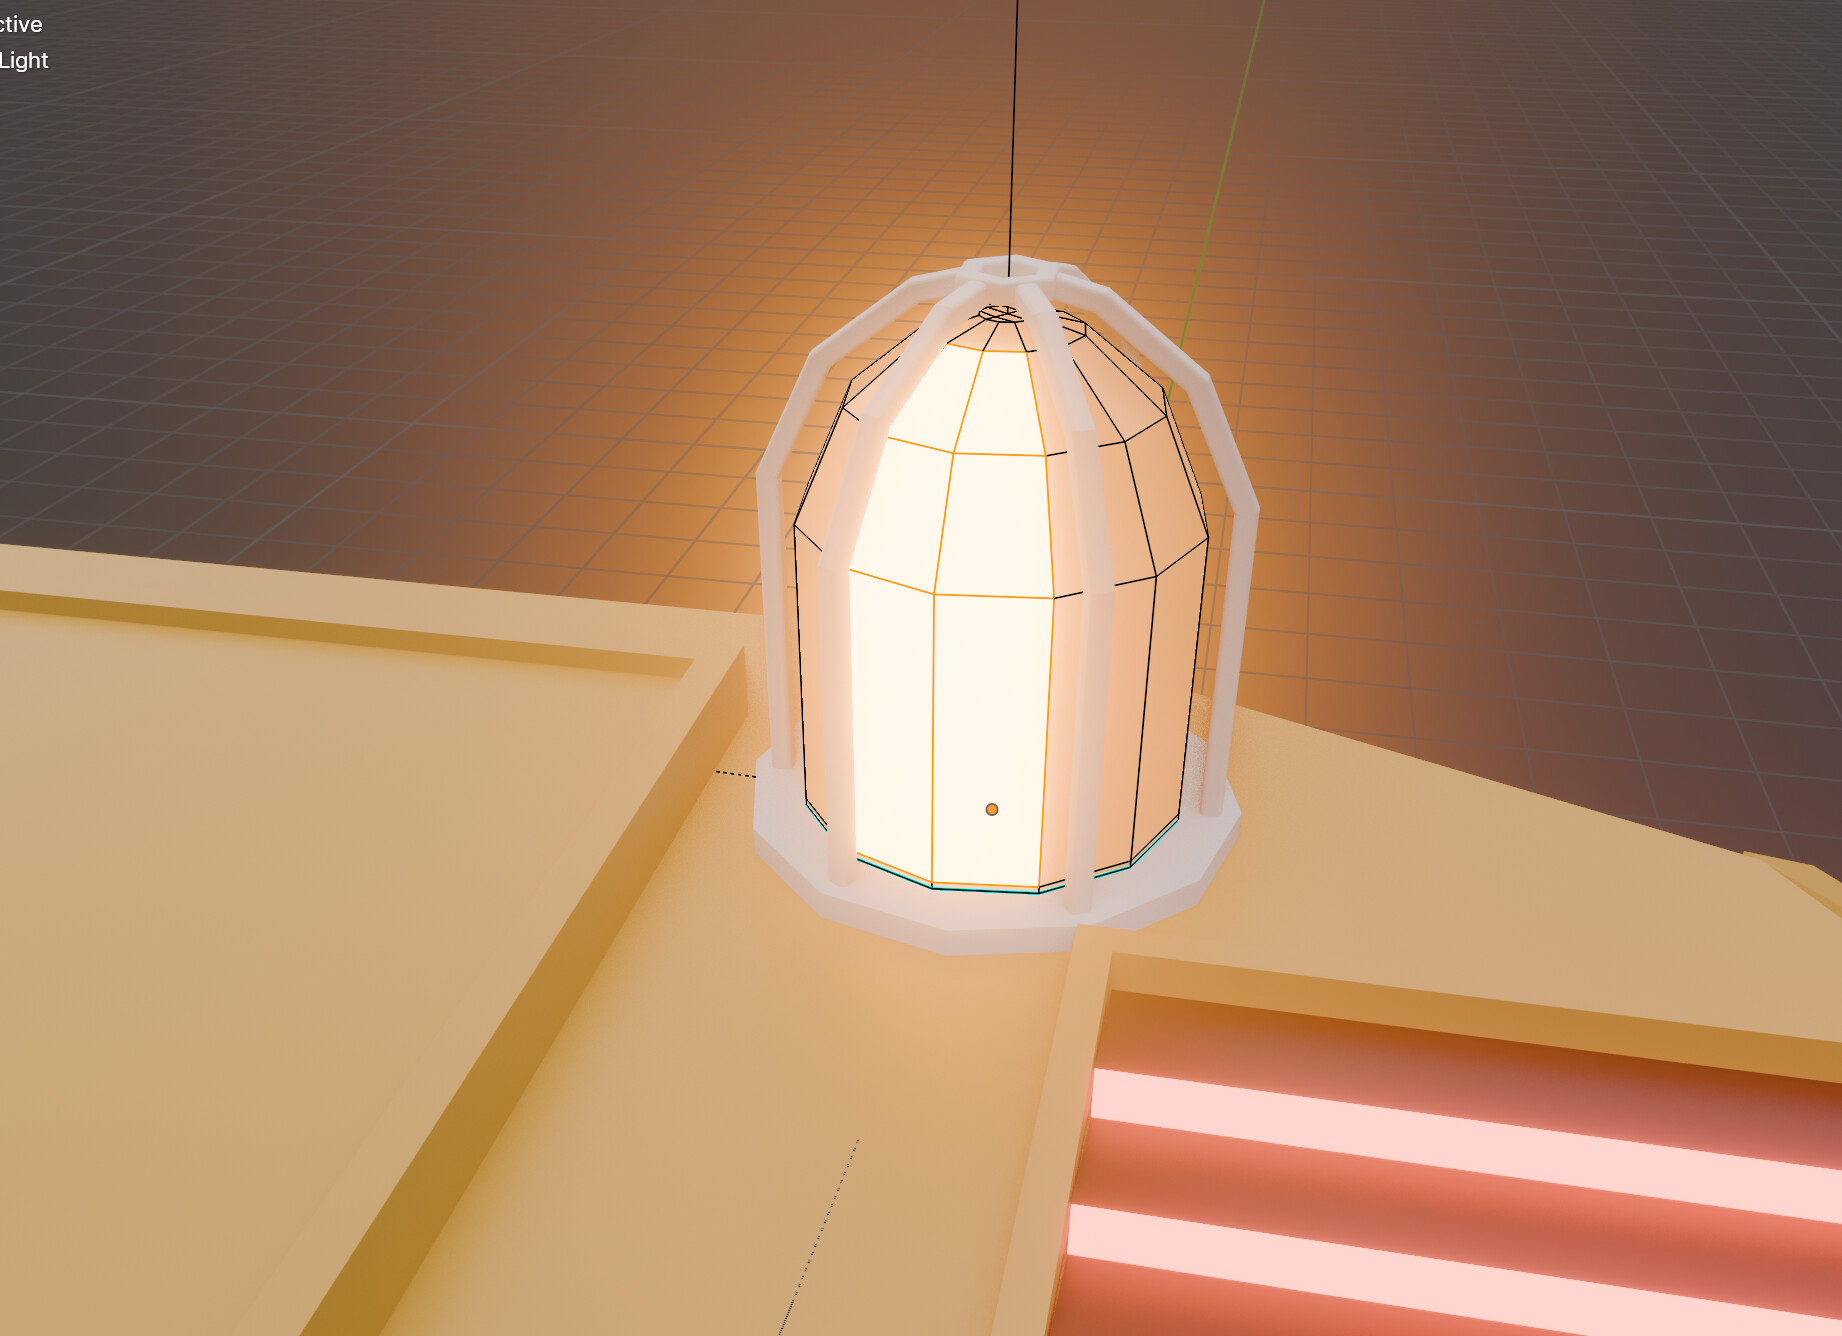
I placed an empty in the center of the beacon.
Then parented the beacon to the empty.
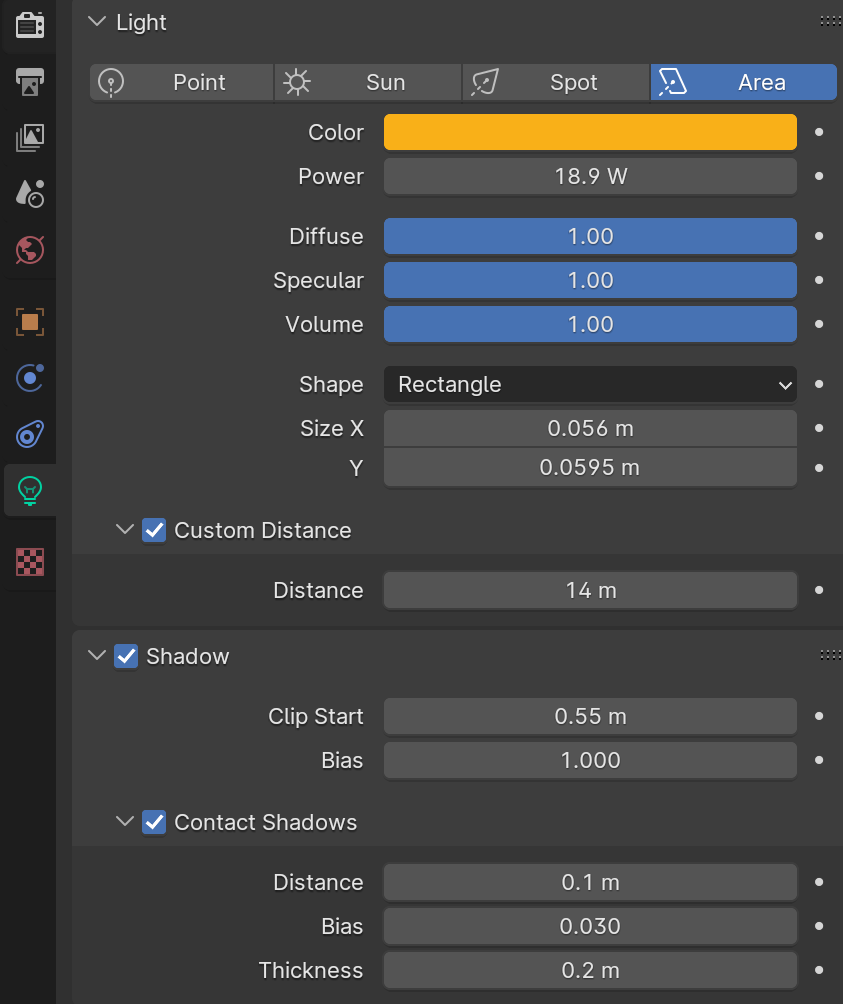
Place a small area light insight the beacon housing (?). And play around with the size and strength.
And parented the area light to the empty.
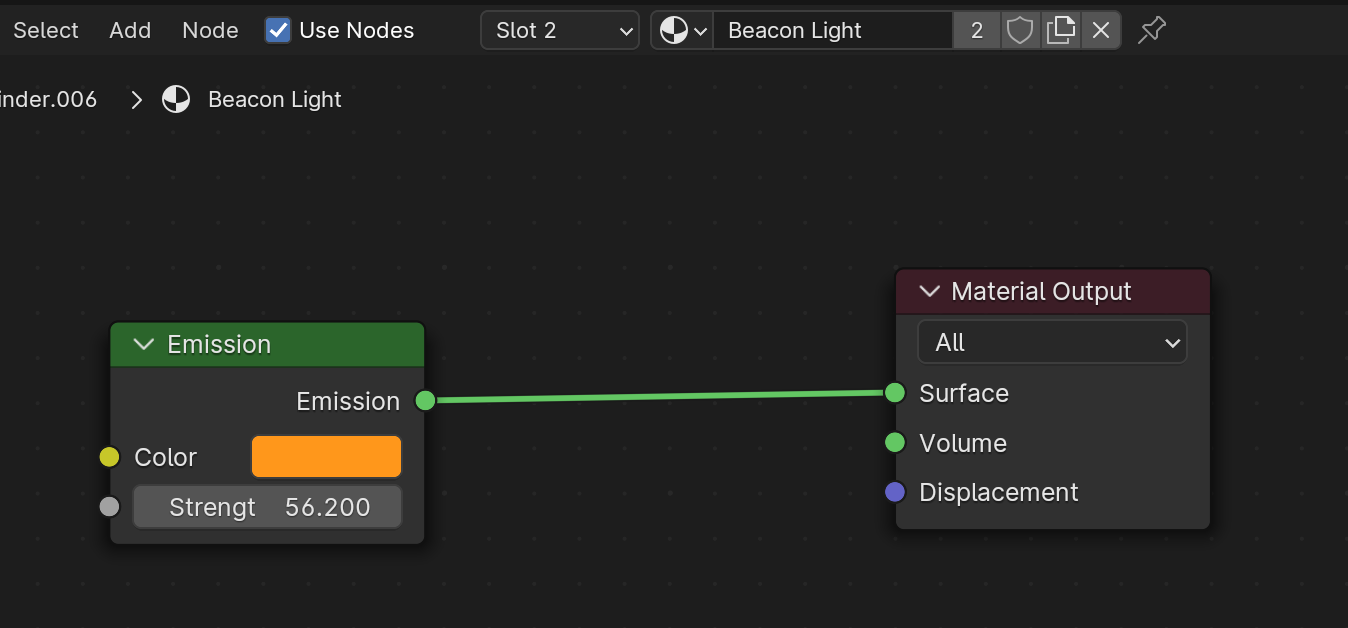
Because I don’t know yet(!) how make the beacon material behave like glass, I assigned a few faces a new material slot with an emission shader.
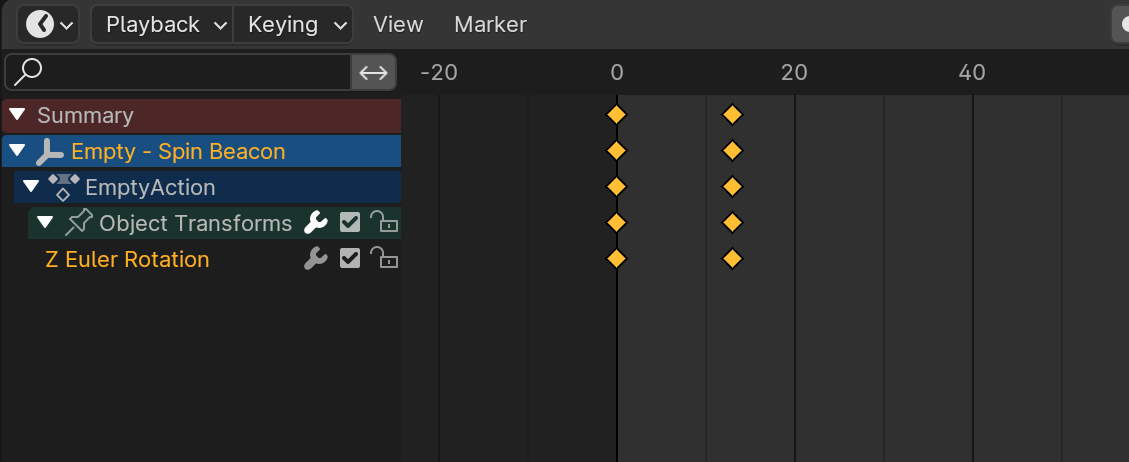
In the animation tab, have the empty spin 360 deg in 13 frames.
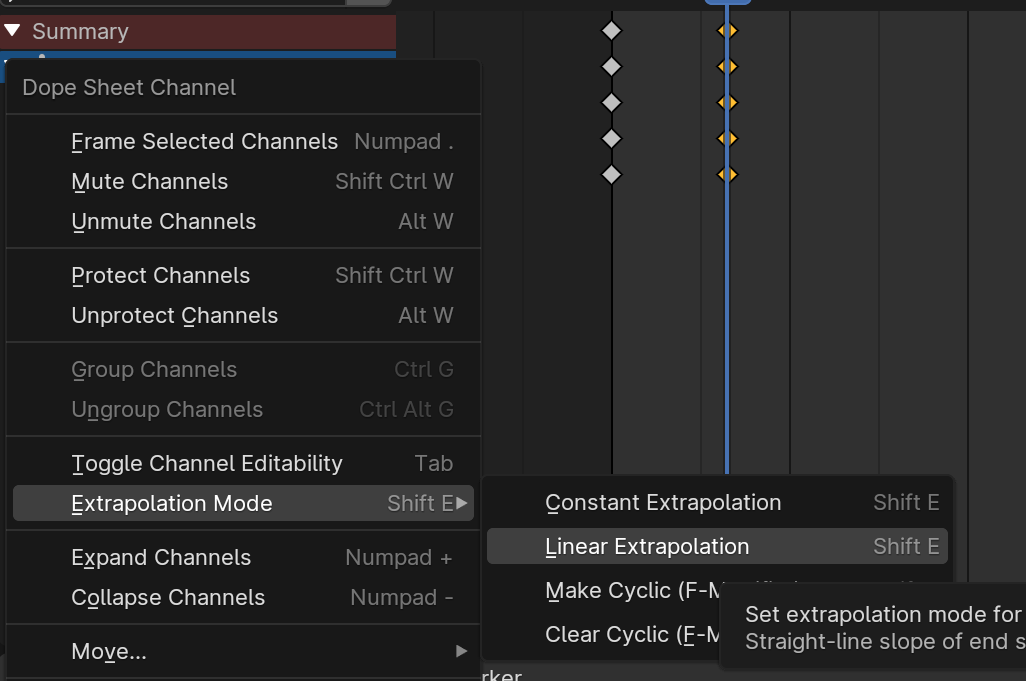
To “auto-repeat” the rotation, set the extrapolation mode to Linear extrapolation.
That’s it.
I used the same approach to have the fan spin too.
Hope this helps.
Cheers,
Ray
3 Likes
Wow thanks so much for sharing! Exactly what I was looking for 
2 Likes